Gift Wrapping Station: 15 Genius DIY Setups That End the Christmas Wrapping Mess
A gift wrapping station is the cheapest way to make Christmas feel calm instead of chaotic. Every year the same thing happens. The paper rolls fall over, the tape vanishes, and the scissors end up in the junk drawer at midnight on Christmas Eve. One family turned a plain ironing board into a wrapping table and the idea took off online with hundreds of thousands of reactions, because everyone knows that mess. The good news is that you do not need a craft room or a big budget. A cart, a crate, a hanger or a bare corner can become a spot where everything has a home. These setups use things you probably already own, plus a little paint and a few dowels. Pick one, set it up this weekend, and wrap with a smile..
Gift Wrapping Station on a Rolling Cart
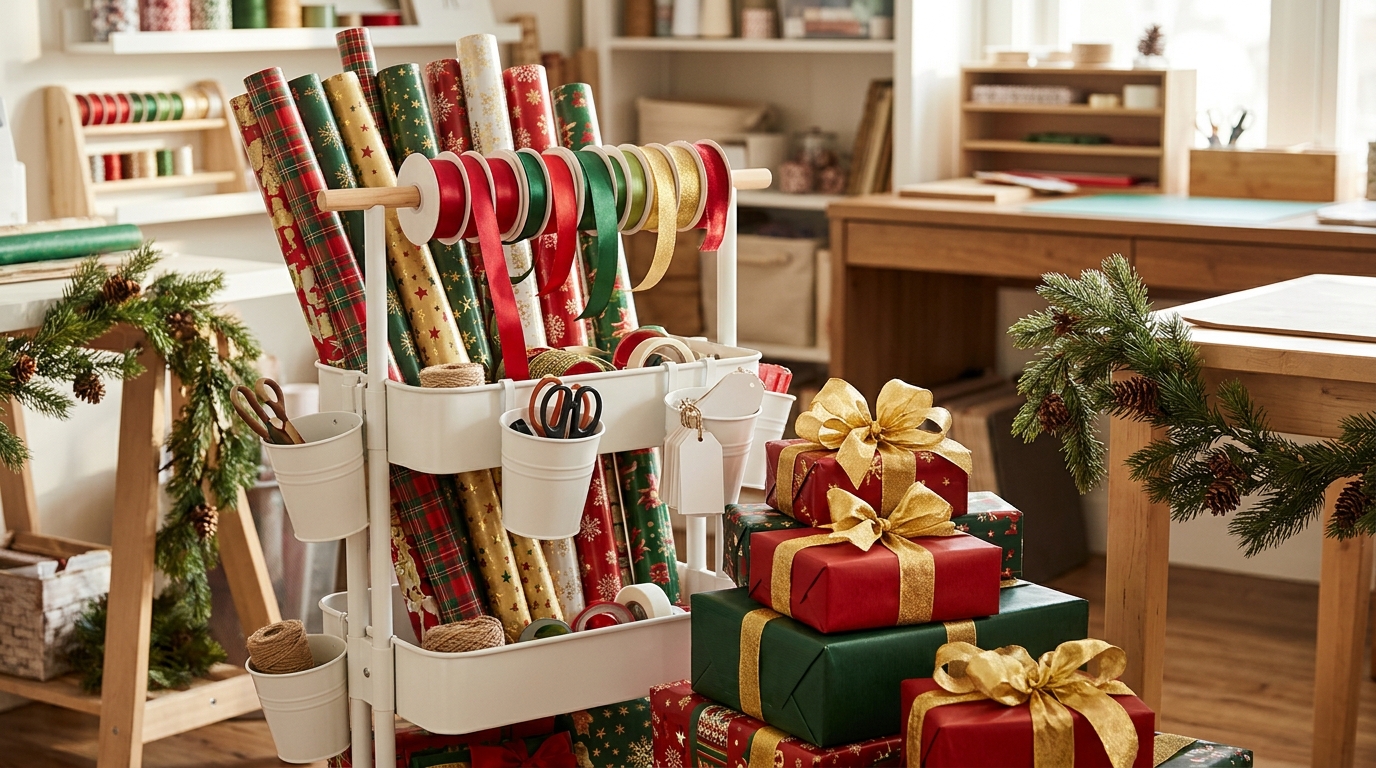
Picture the moment you need to wrap a gift and every single thing is already waiting in one spot. That is the magic of a rolling cart. It holds your rolls upright, keeps ribbon on a rail, and tucks into a closet when the guests arrive. On wrapping night you just roll it to the sofa. If you love a cart for parties too, you will see the same trick in these cozy hot cocoa stations. Start here, and the rest of this list will feel easy..
You will need: a three tier rolling cart, a tall basket or bucket, one wooden dowel, two small cup hooks, scissors, clear tape.
How to make it: 1. Set the tall basket on the bottom tier for rolls. 2. Attach two cup hooks to the top rim and rest the dowel on them, then slide your ribbon spools on. 3. Hang scissors and tape in little cups on the sides so nothing rolls away.
Ironing Board Wrap Table
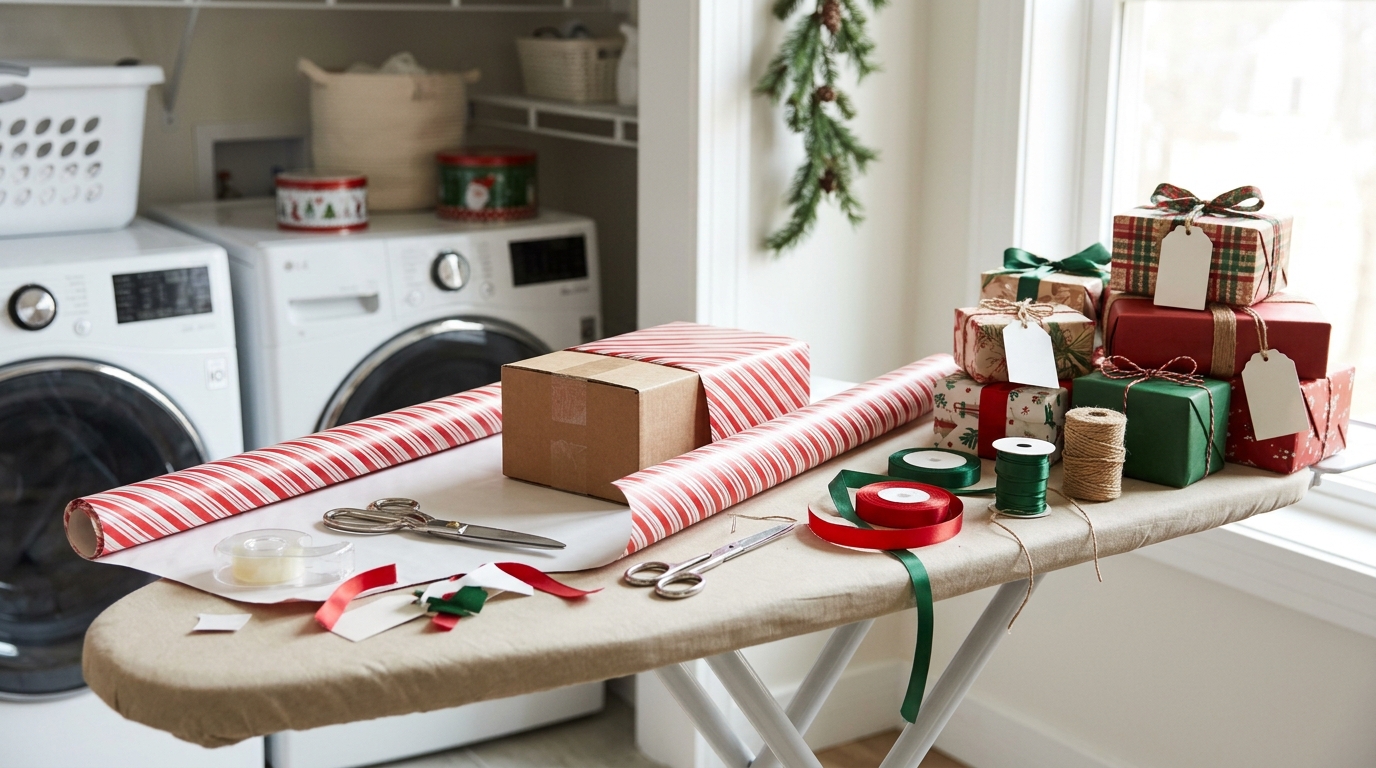
This is the idea that went wild online, and it is a fresh twist on the old tradition of wrapping presents in paper. A mom set up her ironing board, rolled out the paper, and suddenly she was wrapping standing up with no sore back. The board adjusts to your height, it is long enough for big boxes, and it folds flat when you are done. Leave the iron in the cupboard and use the board only as a table. For more tricks on the wrap itself, try these clever gift wrapping tricks.
You will need: an ironing board, a clean old sheet or towel, two binder clips, a small basket, scissors, tape.
How to make it: 1. Set the board to a comfortable standing height. 2. Clip a clean sheet over the cover so paper slides smoothly. 3. Put scissors, tape and ribbon in a small basket at the wide end and wrap on the narrow end.
Barstool Gift Wrapping Station
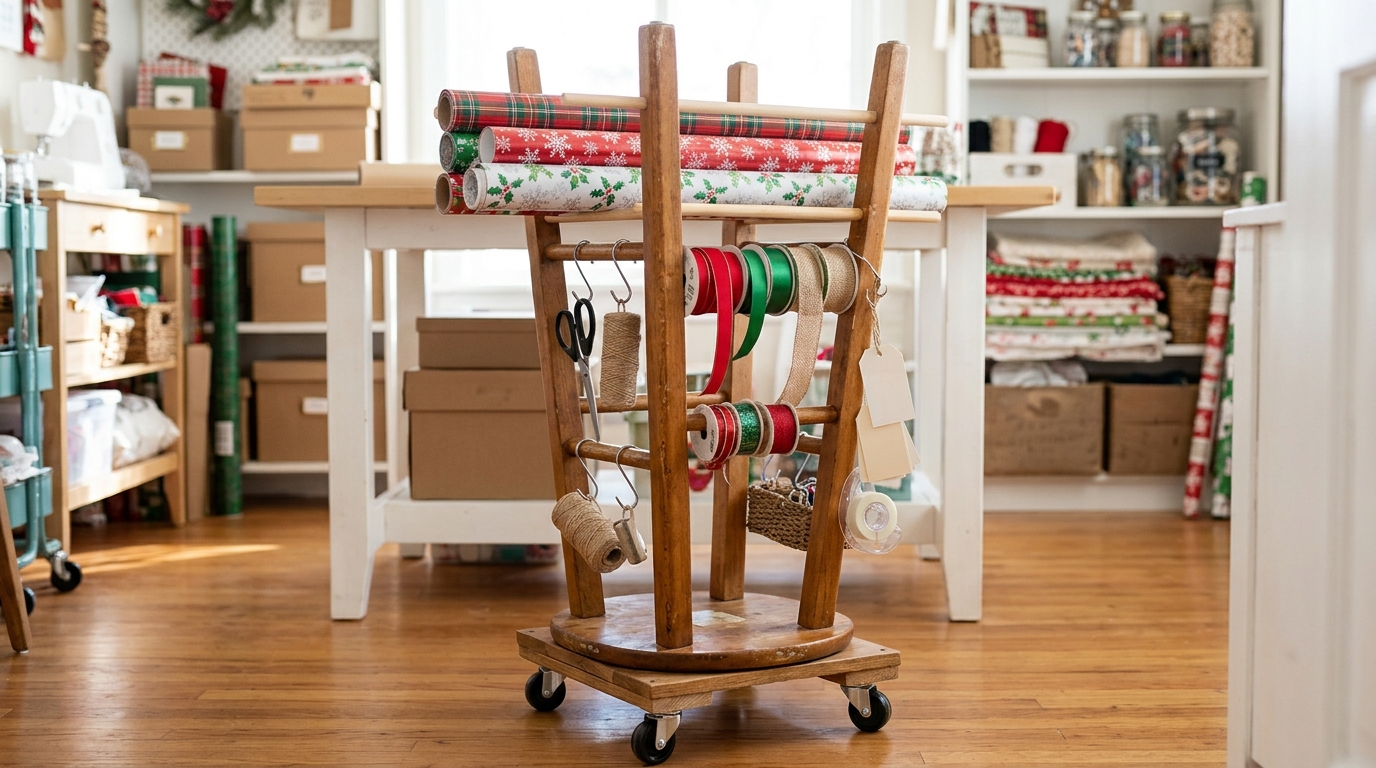
One couple flipped an old barstool upside down and turned it into a rolling paper tower, and people loved it. The legs become posts, dowels run between them, and each roll spins freely so you can pull and cut with one hand. Add caster wheels and it glides from closet to living room. It is the kind of thrift flip that makes guests ask where you bought it. Find more clever thrift flips in these upcycled storage ideas.
You will need: a wooden barstool, a square scrap of plywood, four caster wheels, three wooden dowels, a craft drill, wood glue.
How to make it: 1. Attach the casters to the plywood and glue the stool seat to it upside down. 2. With adult help, drill small openings through two facing legs at three heights. 3. Slide dowels through the openings and load each with a roll of paper or a few ribbon spools.
Slim Shelf Wrap Tower
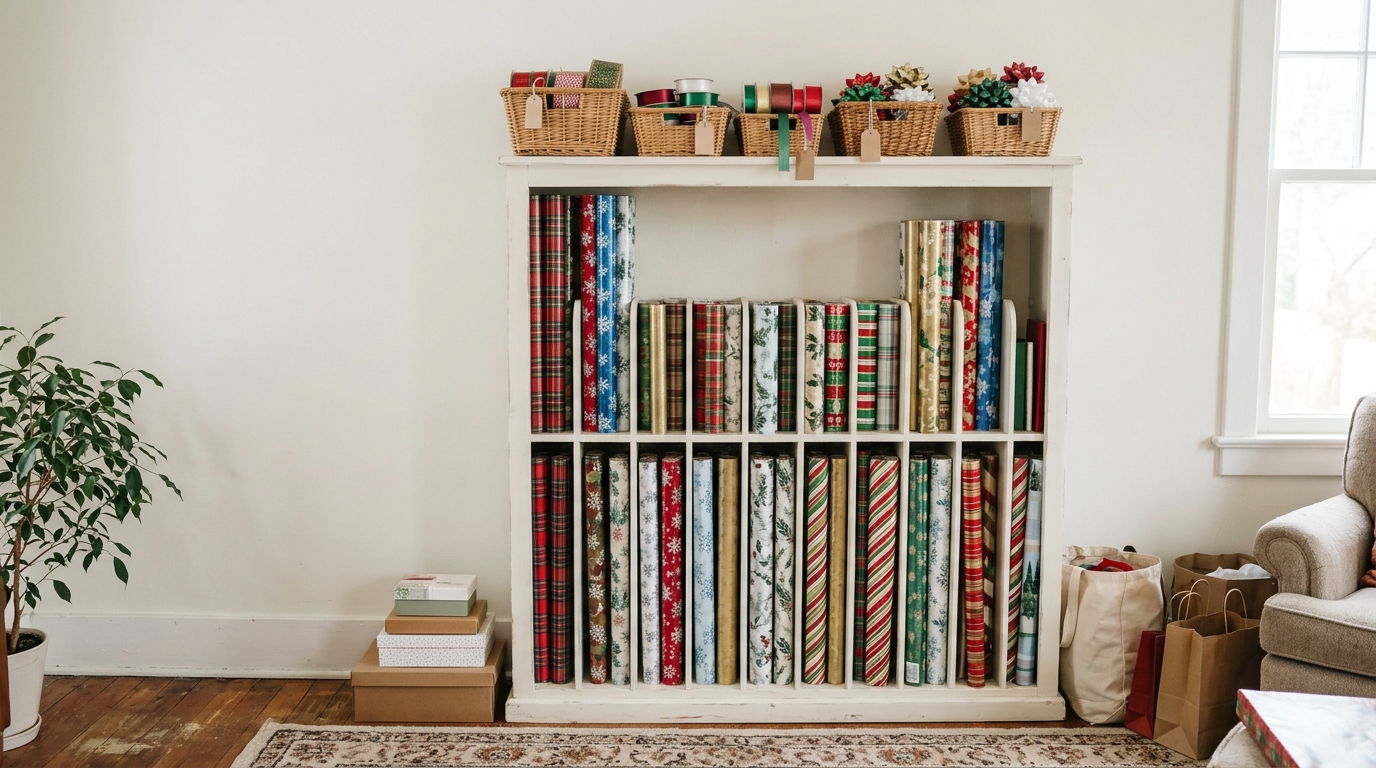
An old narrow media shelf is the perfect size for wrapping paper. Each slim slot holds a few rolls standing up, so you can see every pattern at a glance. A coat of soft white paint makes it look like it came from a home store. Put small baskets of ribbon and bows on top and you have a full wrapping wall in less than a foot of floor. The idea pairs well with these smart Christmas storage hacks.
You will need: a thrifted narrow shelf, white chalk paint, a paint brush, two small baskets, felt pads.
How to make it: 1. Wipe the shelf clean and paint it two coats of white. 2. Add felt pads under the base so it does not scratch the floor. 3. Stand rolls in the slots by color and set ribbon baskets on the top shelf.
Gift Wrapping Station on a Pegboard Wall
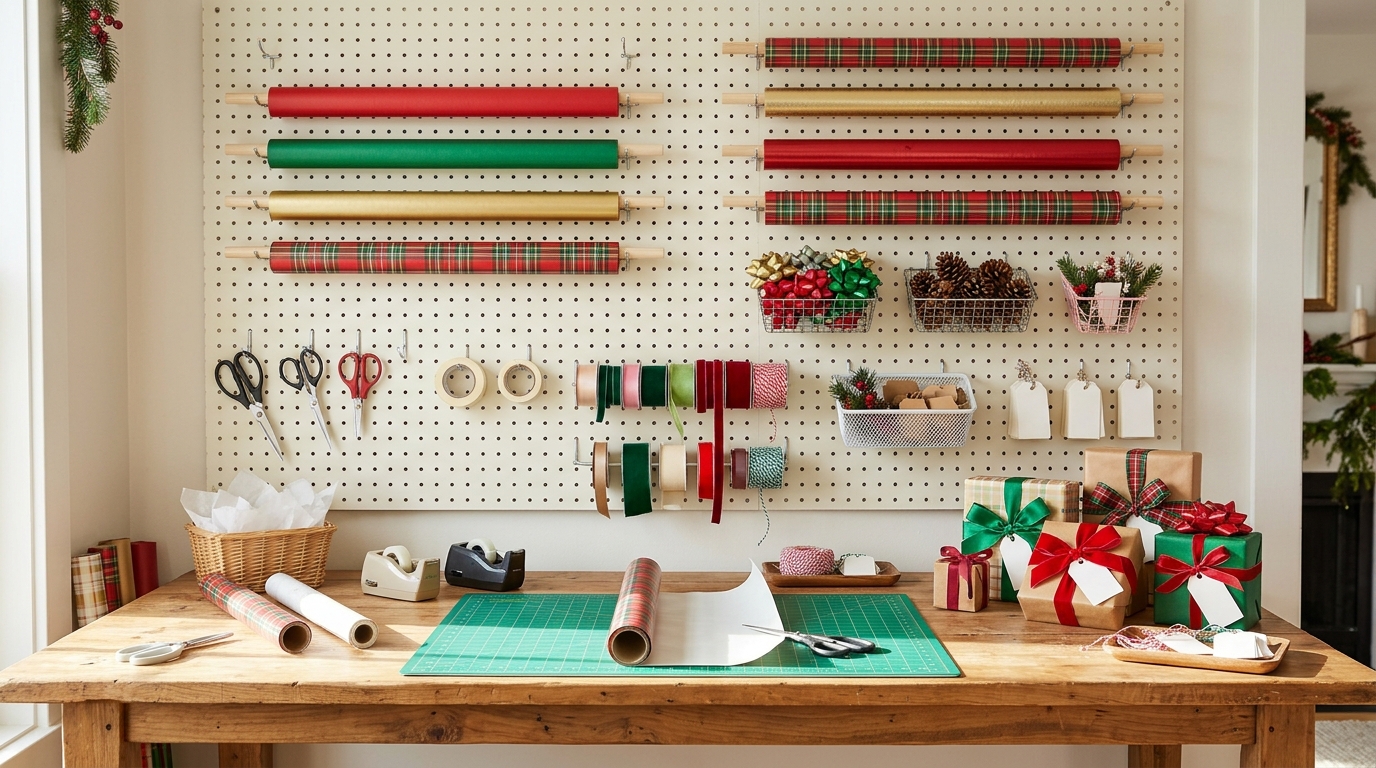
If you have a bit of wall above a table, a pegboard turns it into a pro looking wrapping center. Dowels on brackets hold the paper, hooks hold scissors and tape, and small pegs carry ribbon. Nothing hides in a drawer, so you never buy duplicates. It stays useful all year for birthdays and baby showers too. For more pegboard ideas, look at this craft room organization guide.
You will need: one pegboard panel, pegboard hooks, two dowels with brackets, small hanging baskets, wall anchors.
How to make it: 1. With adult help, mount the pegboard over a table using anchors and spacers. 2. Fix two dowel brackets near the top for rolls. 3. Add hooks for scissors and tape and hang small baskets for bows.
Paper Towel Holder Ribbon Spool
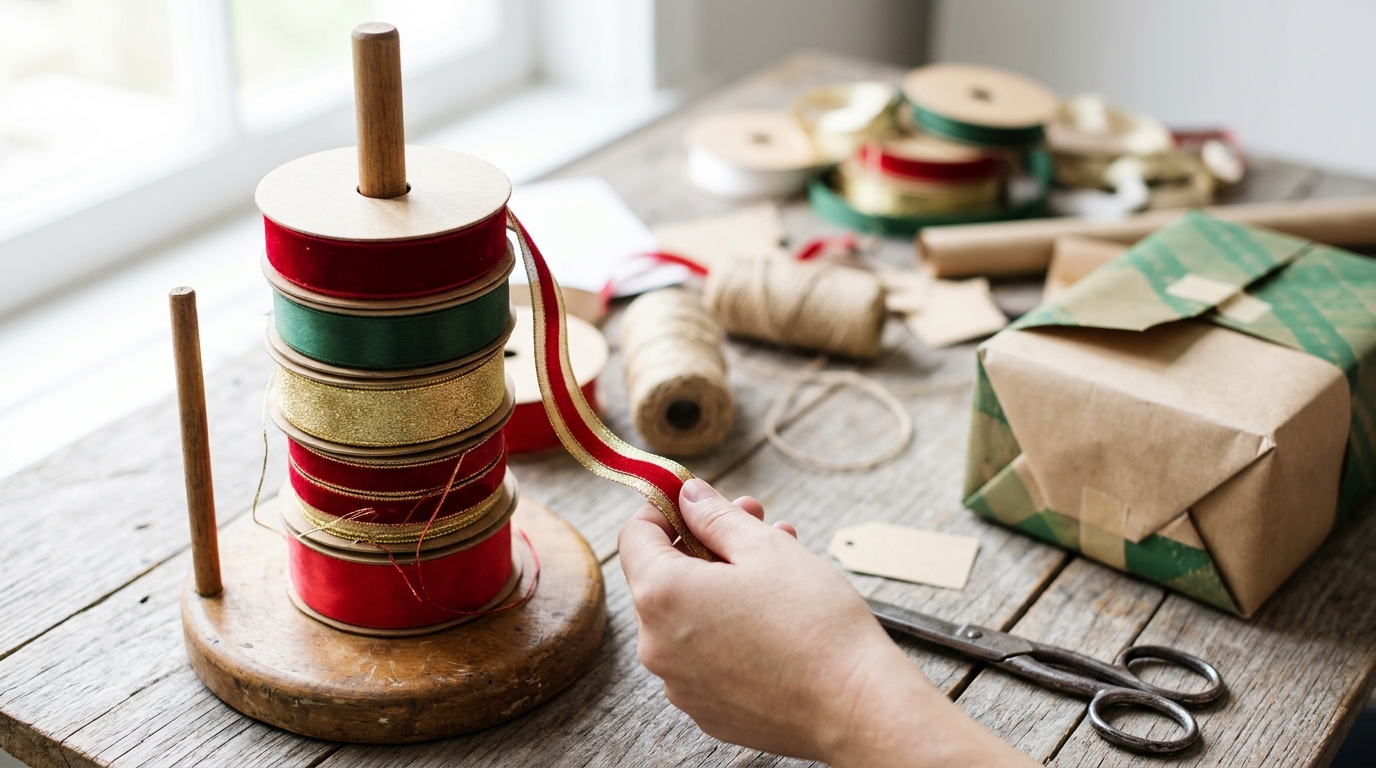
Here is a five minute fix that saves your sanity. Stack ribbon spools on an upright paper towel holder and the ribbon pulls off smooth with no tangles. You can see every color at once, and it sits right next to your gift so you can measure and snip. Use a second holder for twine and washi tape. It is a small step that makes your space feel organized, just like these simple desk organizers.
You will need: an upright paper towel holder, ribbon spools, twine, small scissors.
How to make it: 1. Slide the widest spools on first so the stack stays steady. 2. Put the colors you use most on top. 3. Keep small scissors right beside it for quick snips.
Wooden Crate Wrapping Caddy
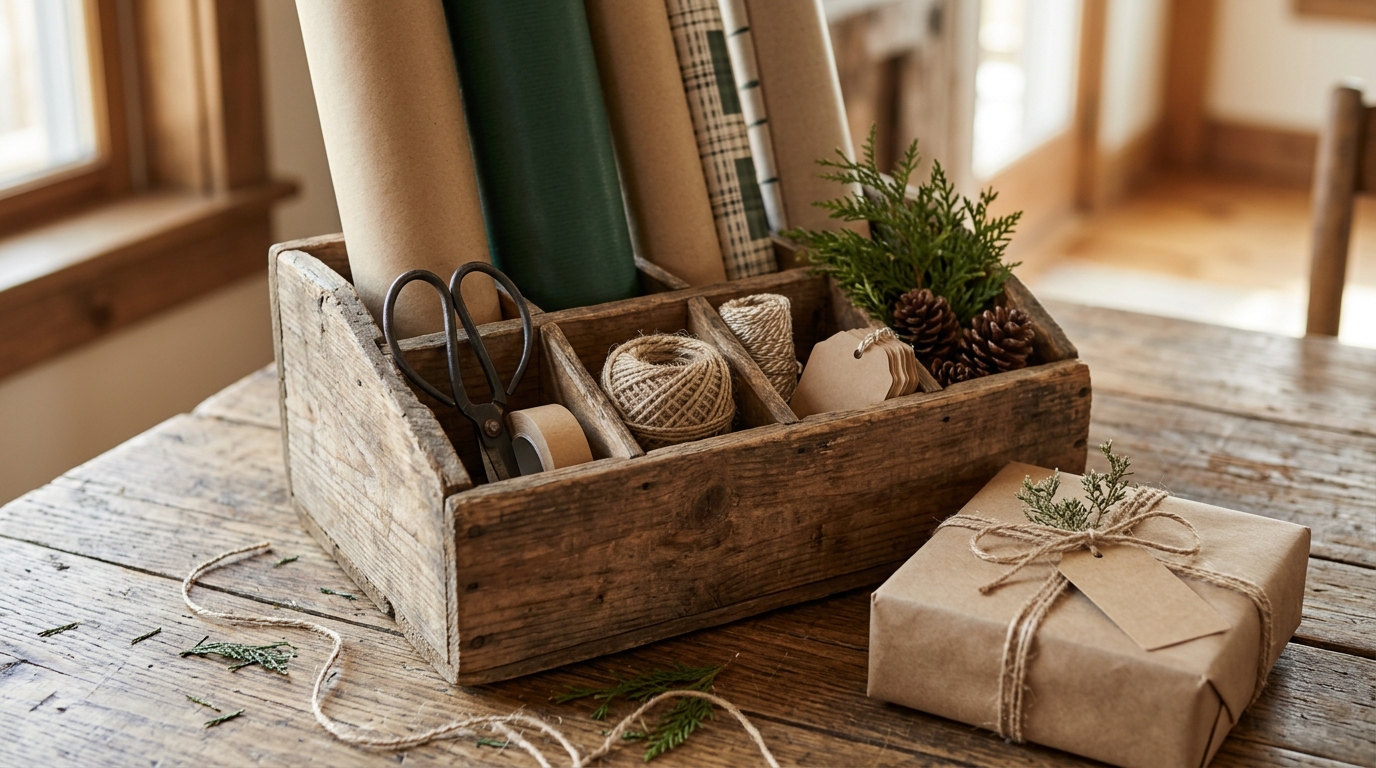
Not everyone has room for a full station, and that is fine. A small wooden crate with a handle becomes a caddy you can carry to the kitchen table. Rolls stand in the back, while twine, tape, scissors and blank tags sit in little sections up front. When you are done, it slides onto a shelf. Rustic kraft wrap looks lovely with it, and so do these handmade gift tags.
You will need: a small wooden crate with a handle, thin wood strips for dividers, wood glue, twine, blank kraft tags.
How to make it: 1. Glue two thin wood strips inside the crate to make three sections. 2. Stand short rolls in the deepest section. 3. Fill the front sections with tape, twine, scissors and tags.
Cabinet Door Tissue Paper Dispenser
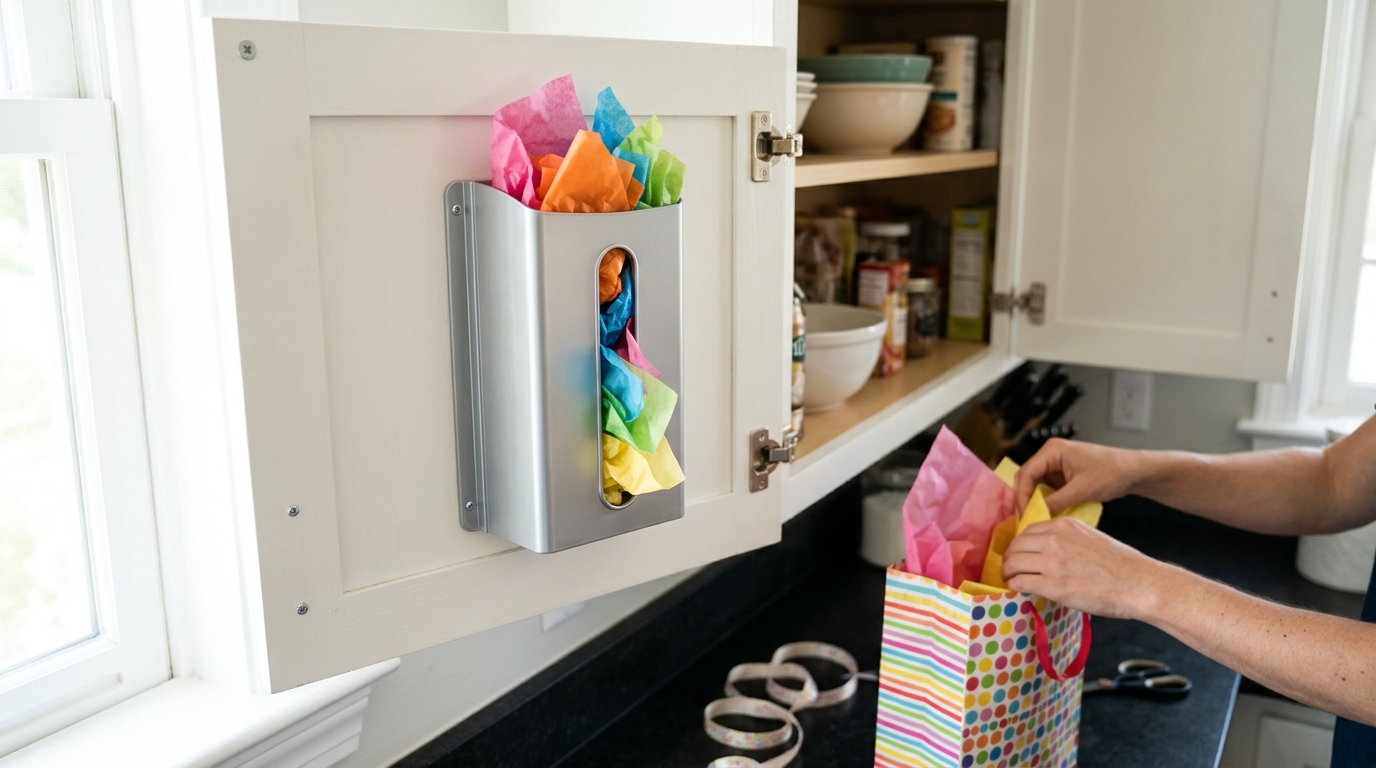
Tissue paper always ends up crumpled in the bottom of a bag. Stuff the loose sheets into a plain bag holder inside a cabinet door and pull one at a time, just like a tissue box. The sheets stay flat enough to use, and the colors look cheerful every time you open the door. Your gift bags will look full and fluffy in seconds. Reuse those bags too with these elegant gift wrap ideas.
You will need: a wall mount bag holder, adhesive strips, tissue paper in several colors.
How to make it: 1. Stick the holder inside a cabinet door with strong adhesive strips. 2. Fold each tissue sheet loosely and push it in from the top. 3. Pull sheets from the bottom opening as you fill each bag.
Over the Door Caddy for Tape and Scissors
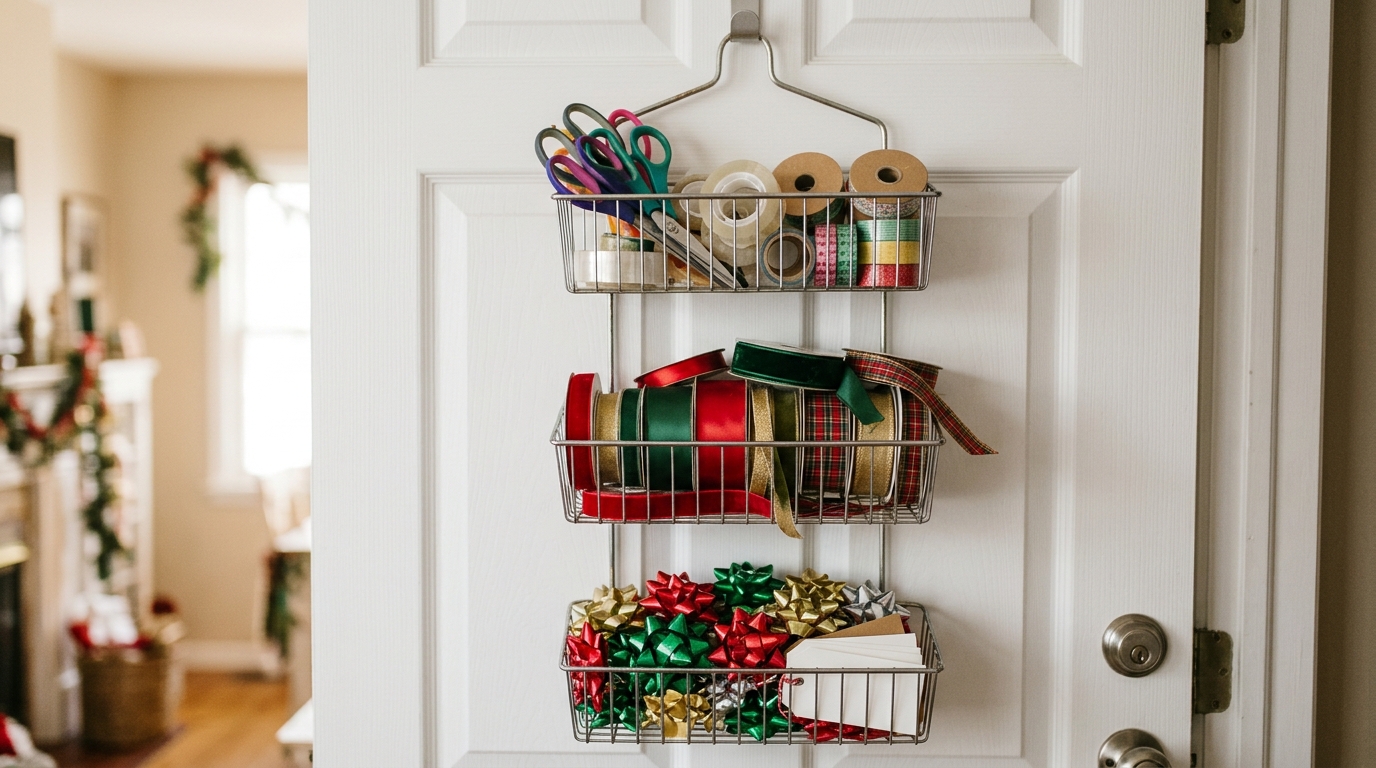
The back of a door is wasted space most of the year. Hang a wire shower caddy there and it becomes a home for scissors, tape, ribbon and bows. Everything is at eye level, and kids can grab tape without digging through drawers. When December ends, it goes back to the bathroom or holds craft supplies. It works the same way as these closet organization hacks.
You will need: a hanging wire shower caddy, an over the door hook, small cups or jars, ribbon spools, bows.
How to make it: 1. Hang the caddy on a sturdy over the door hook. 2. Put scissors and tape in small cups in the top basket. 3. Fill the lower baskets with ribbon spools and bows.
Wine Crate Paper Roll Rack
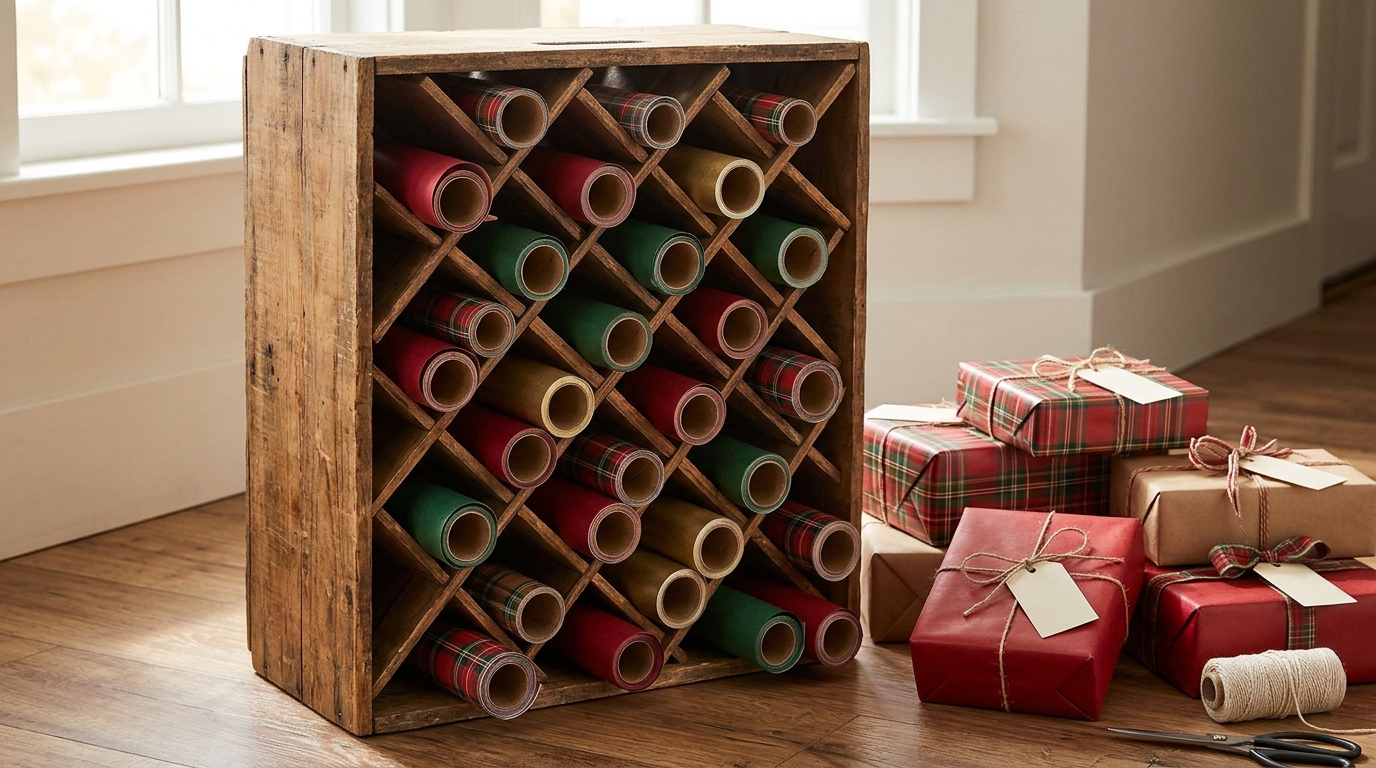
A thrifted wine crate with crisscross slots is made for wrapping paper. Stand it on end and every roll slides into its own diamond, so nothing falls over and nothing gets crushed. It looks warm and rustic sitting next to a stack of presents. Short rolls and leftover pieces fit too. If you like this look, you will enjoy these tension rod storage tricks.
You will need: a wooden wine crate with dividers, sandpaper, clear furniture wax, felt pads.
How to make it: 1. Sand any rough edges and wipe the crate clean. 2. Rub on a thin coat of clear wax for a soft glow. 3. Stand it on end and slide one roll into each slot.
Fold Down Wall Desk Wrapping Nook
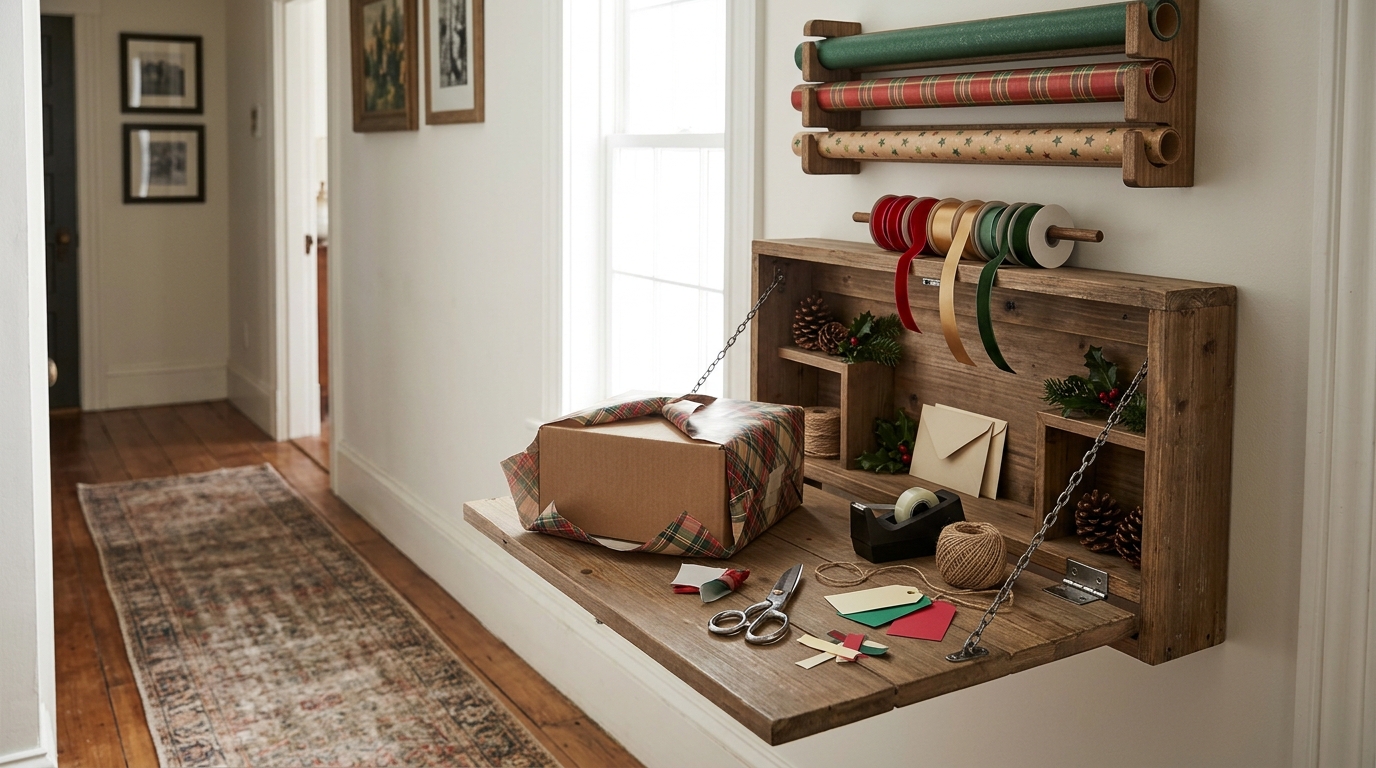
In a small home, a fold down wall desk is a hidden wrapping room. Open it up and you have a flat surface with paper rolls above and ribbon on a little rod. Close it and the hallway looks tidy again. It is perfect for apartments, and it doubles as a card writing spot. For more small space thinking, try these brilliant organizing ideas.
You will need: a wall mounted fold down desk, a short curtain rod, two dowel brackets, small hooks.
How to make it: 1. With adult help, mount the desk at counter height into wall studs. 2. Fix the dowel brackets above it for rolls. 3. Add a short rod for ribbon and hooks for scissors.
Under Stairs Gift Wrapping Station
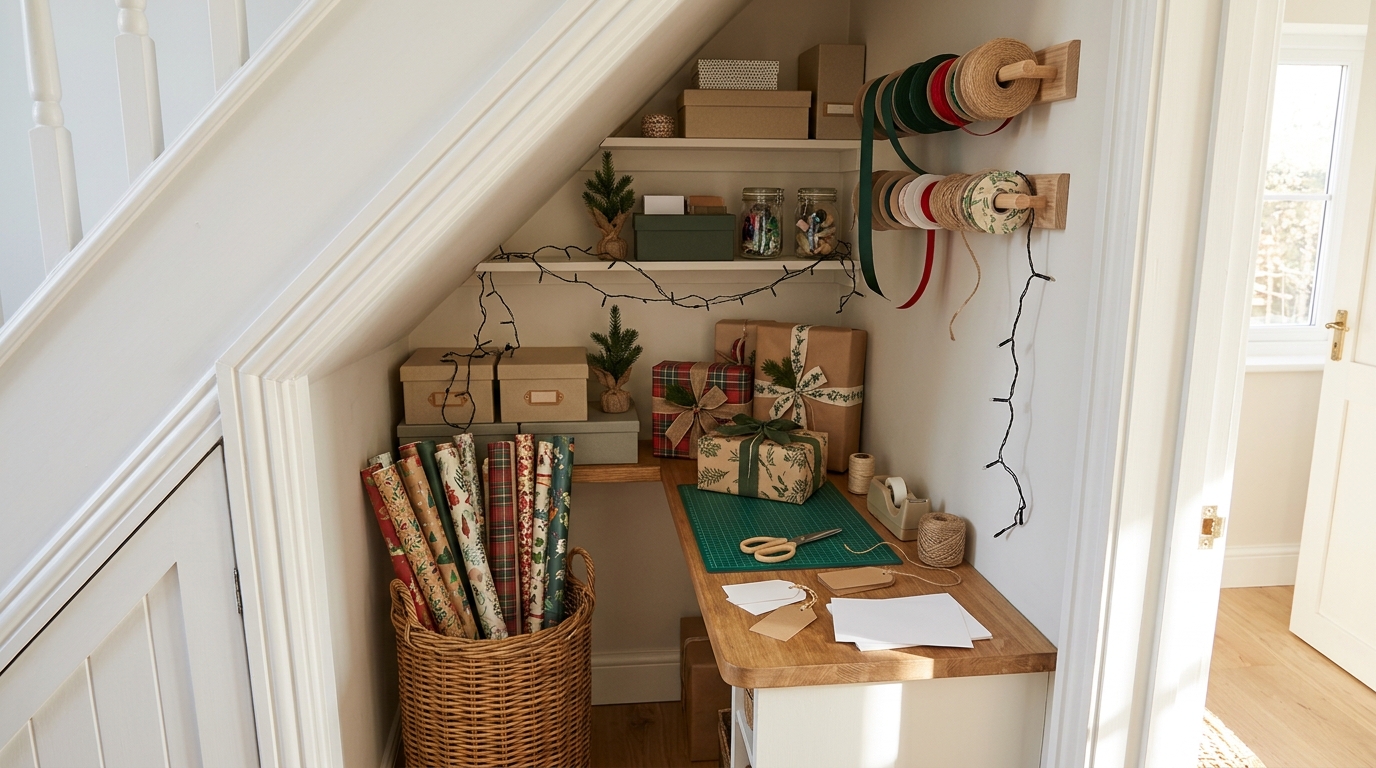
That awkward closet under the stairs can become the coziest corner of the house. Add a narrow shelf for a counter, stand rolls in a tall basket, and run ribbon on a short rail. A string of battery fairy lights makes it feel special without any heat. Close the door and every surprise stays hidden. Pair it with these garage organization ideas.
You will need: a narrow shelf board and brackets, a tall basket, a short rail or rod, battery fairy lights, a small stool.
How to make it: 1. With adult help, mount the shelf at desk height. 2. Stand rolls in the basket under the shelf. 3. Add the ribbon rail and drape battery fairy lights along the top.
Coat Hanger Gift Bag Organizer
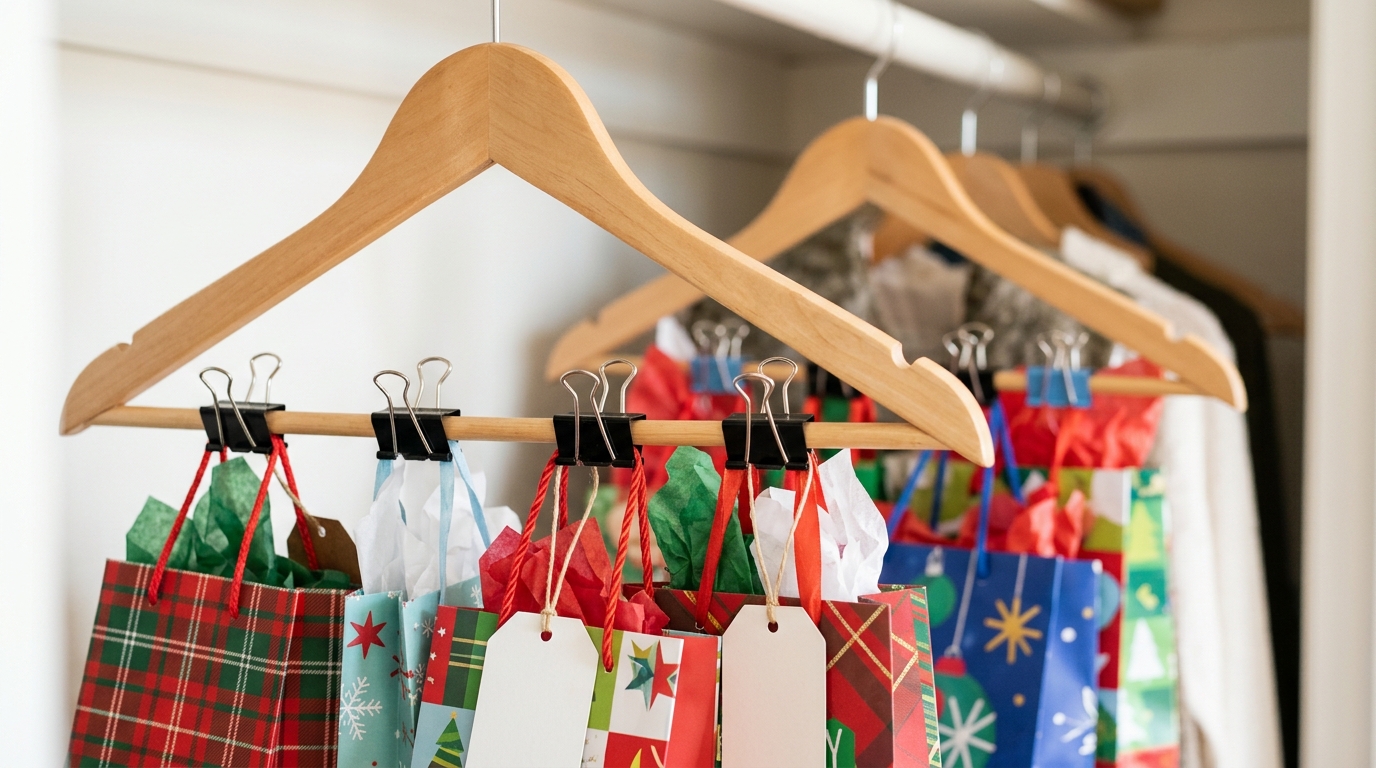
Gift bags get bent and wrinkled when you stuff them in a box. Clip them to a coat hanger with binder clips and hang them in the closet instead. They stay flat, you can see every size, and grabbing the right one takes two seconds. It is a smart tip you will use all year. Make bags of your own with these reusable fabric gift bags.
You will need: wooden coat hangers, binder clips, gift bags, a closet rod.
How to make it: 1. Clip three or four bags along the bottom bar of each hanger. 2. Group small, medium and large bags on separate hangers. 3. Hang them at the end of the closet rod.
Gift Wrapping Station in a Thrifted Dresser
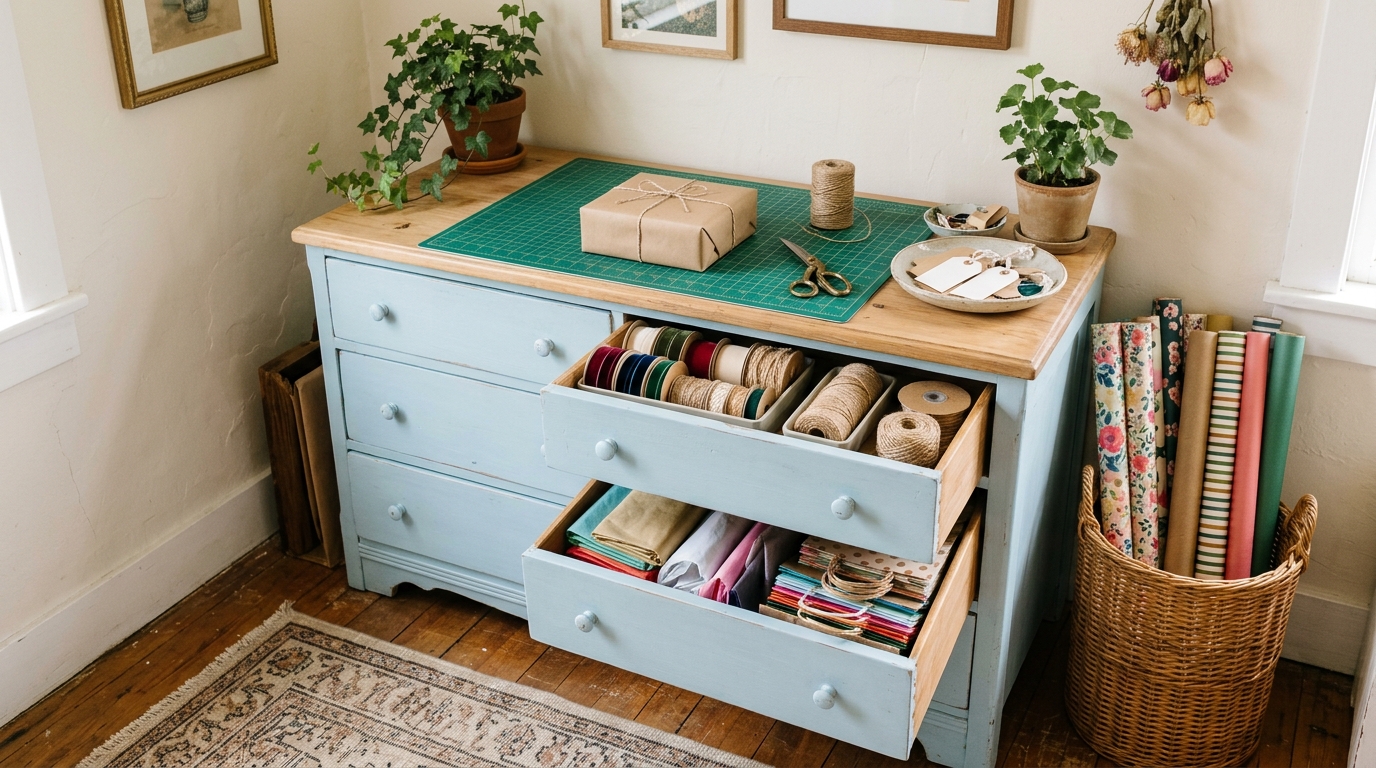
A thrifted dresser is a gift wrapping station with drawers already built in. Paint it a soft color and give each drawer a job: ribbon in one, tissue in another, gift bags at the bottom. The top becomes your work table, and a basket of rolls stands beside it. It looks like a pretty piece of furniture the rest of the year. Find more ideas like this in these dollar store storage hacks.
You will need: a thrifted dresser, chalk paint, new knobs, drawer dividers, a tall basket, a cutting mat.
How to make it: 1. Clean, paint and add new knobs to the dresser. 2. Put dividers in the top drawer for ribbon and tape. 3. Fill lower drawers with tissue and bags and set rolls in a basket beside it.
Blanket Ladder Gift Wrapping Station
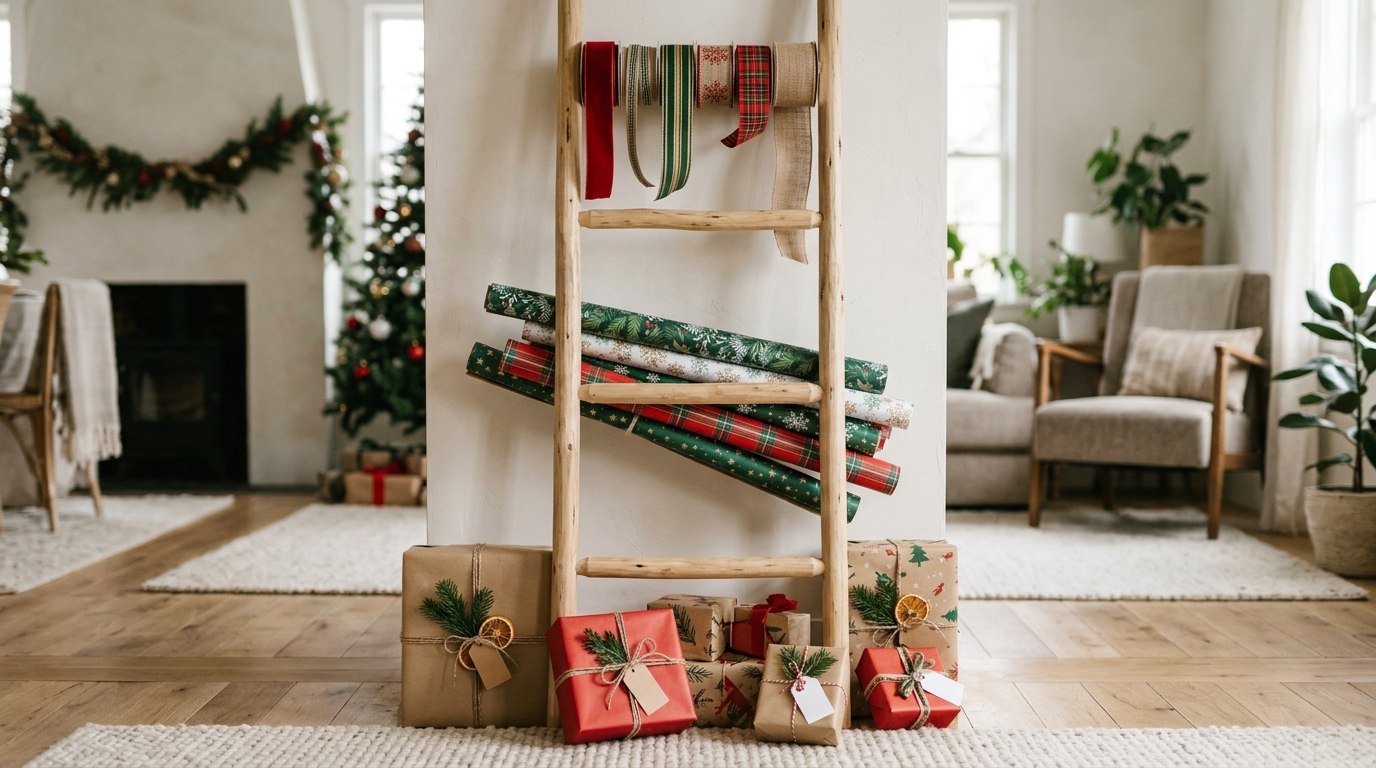
A blanket ladder is already in many living rooms, and in December it can hold your wrapping paper. Rest the rolls across the rungs, thread ribbon spools on the top bar, and stack gifts at the base. It looks festive enough to leave out, almost like decor. When the last gift is wrapped, the blankets go back on. Finish the look with these pretty Christmas bow ideas.
You will need: a wooden blanket ladder, ribbon spools, a short dowel, wrapping paper rolls.
How to make it: 1. Lean the ladder against a wall and check it is steady. 2. Slide ribbon spools onto a dowel and rest it on the top rung. 3. Lay paper rolls across the lower rungs.