Christmas Storage Hacks: 16 Clever Tricks That End Tangled Lights and Broken Ornaments
Christmas storage hacks can save you from the yearly moment we all dread: opening a box and finding one giant knot of lights and a pile of broken glass. Right now families everywhere are hauling bins down from the attic and out of the garage, and the mess inside tells you exactly how they were packed last January. The good news is that the best fixes cost almost nothing. Clothes hangers, egg cartons, plastic cups and a few zip bags can keep every bulb, bauble and bow safe for next year. We gathered the smartest tricks people are sharing this season, the ones that make decorating faster and taking it all down a lot less painful. Read through now, pick a few to try as you unpack, and future you will be so grateful when December rolls around again..
Christmas Storage Hacks Start With a Clothes Hanger
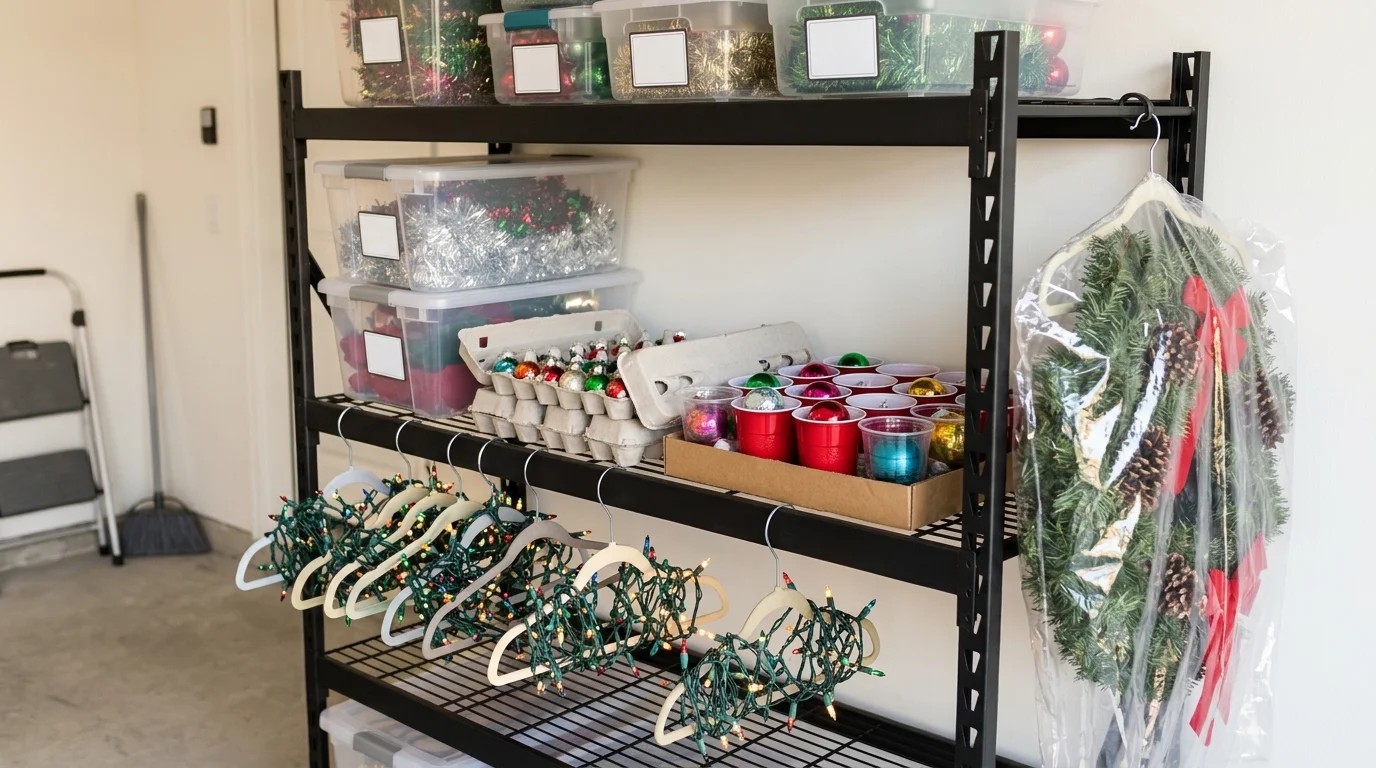
This is the trick that has people saying, why did I not think of that. Wrap each strand of lights around a plain clothes hanger, plug end first, and hang it up or lay it flat in a bin. No knots, no snapped wires, and you can see the whole strand at a glance. A short video of this simple hack from Liz and Jeff drew about 158,000 reactions and 27,000 shares. Check each strand for damage before you wrap it, and set aside any broken ones. Ready to never untangle lights again..
You will need: Plastic or wire clothes hangers, a strip of tape or a twist tie, a marker, a bin or closet rod.
How to make it: 1. Tape the plug end to the hook of the hanger. 2. Wind the lights back and forth around the hanger shoulders without pulling them tight. 3. Tie off the end, label the hanger with the room or tree it belongs to and hang it up.
A Cardboard Light Winder
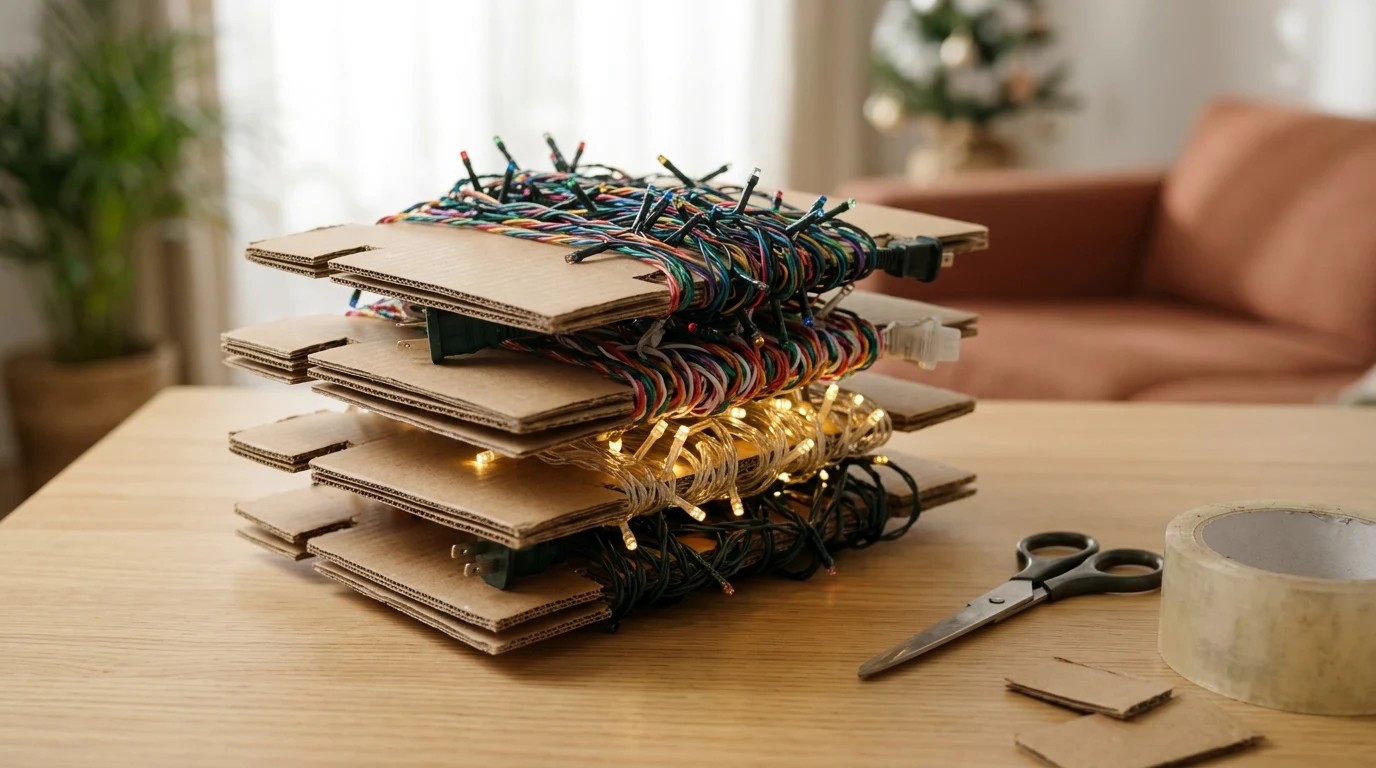
No spare hangers? A square of sturdy cardboard works just as well. Cut a notch on one side to hold the plug, then wrap the lights around and around like thread on a spool. Write the length and color on the cardboard so you know which strand goes where. Shipping boxes from holiday orders are perfect for this. It is one of those Christmas storage hacks that turns trash into something truly useful. How many strands are hiding in your attic?
You will need: Sturdy cardboard from a shipping box, scissors, a marker, tape.
How to make it: 1. Cut a rectangle about 8 by 12 inches and snip a small slit on one side. 2. Slide the plug into the slit and wrap the lights around the cardboard. 3. Tuck the end into a second slit and label the color and length.
Christmas Storage Hacks Using Egg Cartons
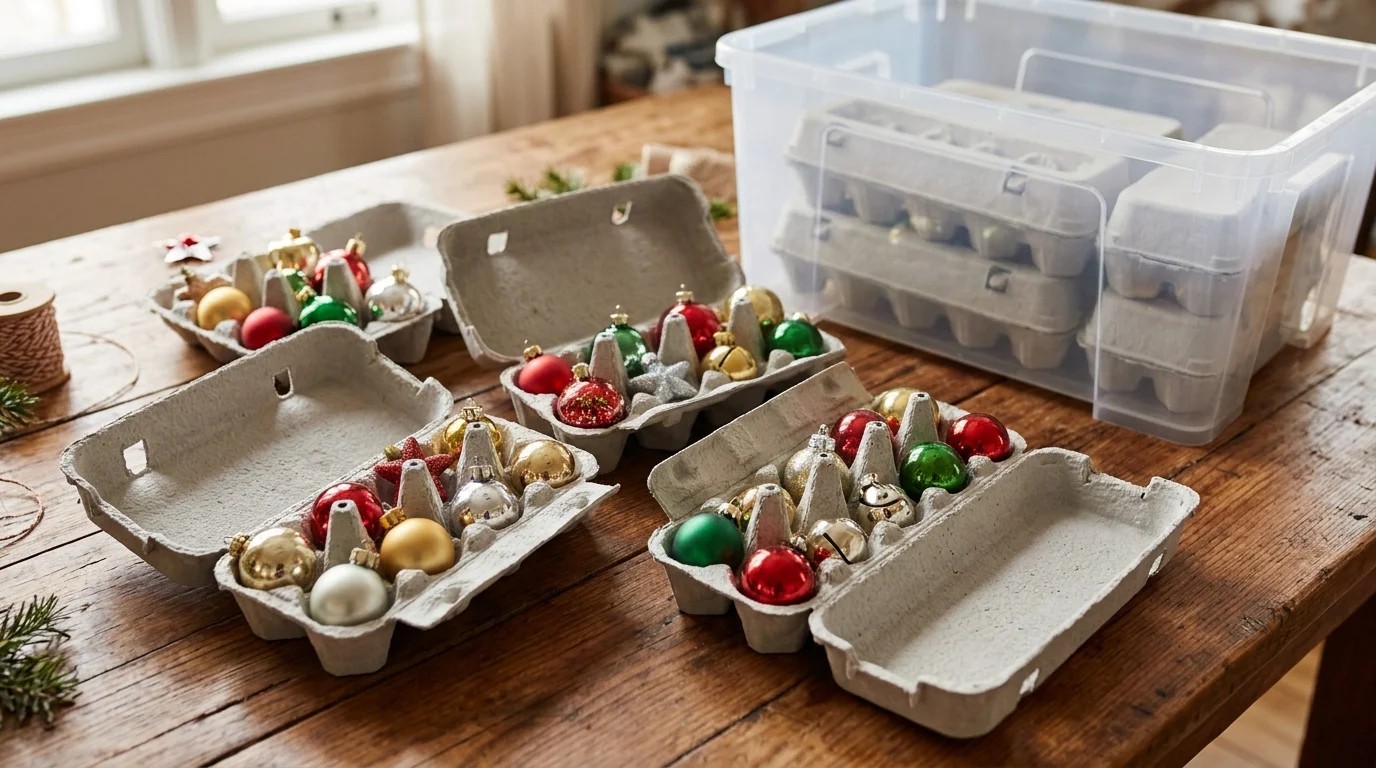
Egg cartons were made for tiny ornaments. Each little cup cradles one small bauble, so nothing rolls around and nothing breaks. Paper cartons are soft and gentle, and you can stack them in a bin once they are closed. Start saving them now, and by the time the tree comes down you will have plenty. Write the type of ornament on the lid so unpacking next year is quick. Which of your ornaments deserves its own little nest?
You will need: Clean paper egg cartons, a marker, a storage bin.
How to make it: 1. Wipe the cartons and let them dry. 2. Place one small ornament in each cup, hook side up. 3. Close the lid, label it and stack the cartons in a bin.
Plastic Cups Glued in a Tray
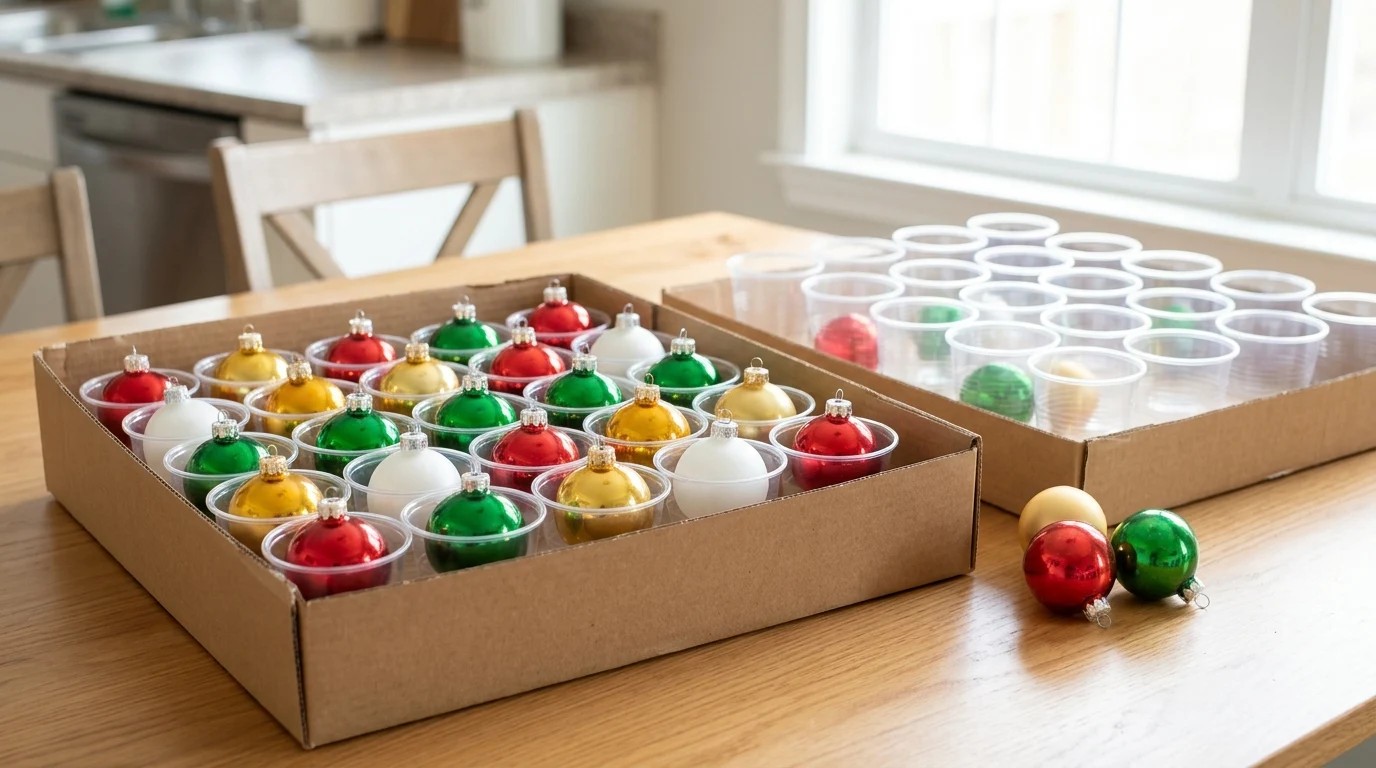
For medium ornaments, plastic cups glued into a shallow box make a custom holder that costs a few dollars. Set the cups in rows on cardboard, glue them down, and each ornament gets its own spot. Make a few layers and stack them with a sheet of cardboard in between. It is a great fix for glass balls that are too big for egg cartons. This is one of the Christmas storage hacks that feels a little like building your own fancy organizer. Would you make one layer or five?
You will need: Plastic party cups, a shallow box or cardboard sheet, glue (hot glue with adult help), a storage bin.
How to make it: 1. Arrange the cups in tight rows on the cardboard and glue each one down. 2. Let it set, then place one ornament in each cup. 3. Stack layers in the bin with a flat sheet of cardboard between them.
Divided Boxes From the Store
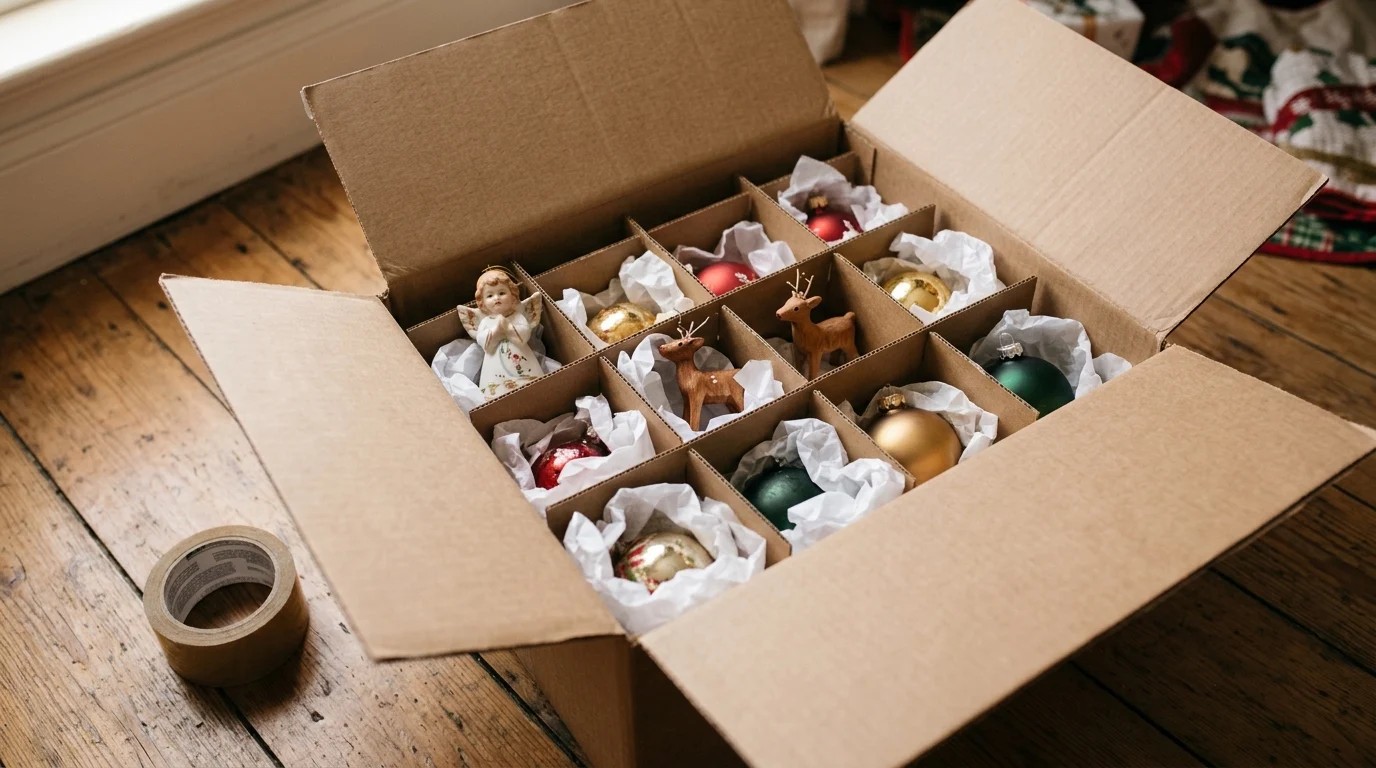
Ask at the grocery or liquor store for empty boxes that come with cardboard dividers inside. They are free, strong and already split into perfect little squares for ornaments, small figures and glass pieces. Wrap anything delicate in tissue first, then drop it into a square. Label the outside so you know exactly what is inside. Free and sturdy, these boxes are hard to beat. How many could you collect this week?
You will need: Empty divided boxes, tissue paper, a marker, packing tape.
How to make it: 1. Tape the bottom of the box so it is strong. 2. Wrap each delicate piece in tissue and set it into a square. 3. Fill any gaps with more tissue, close the box and label it.
A Wreath on a Hanger in a Garment Bag
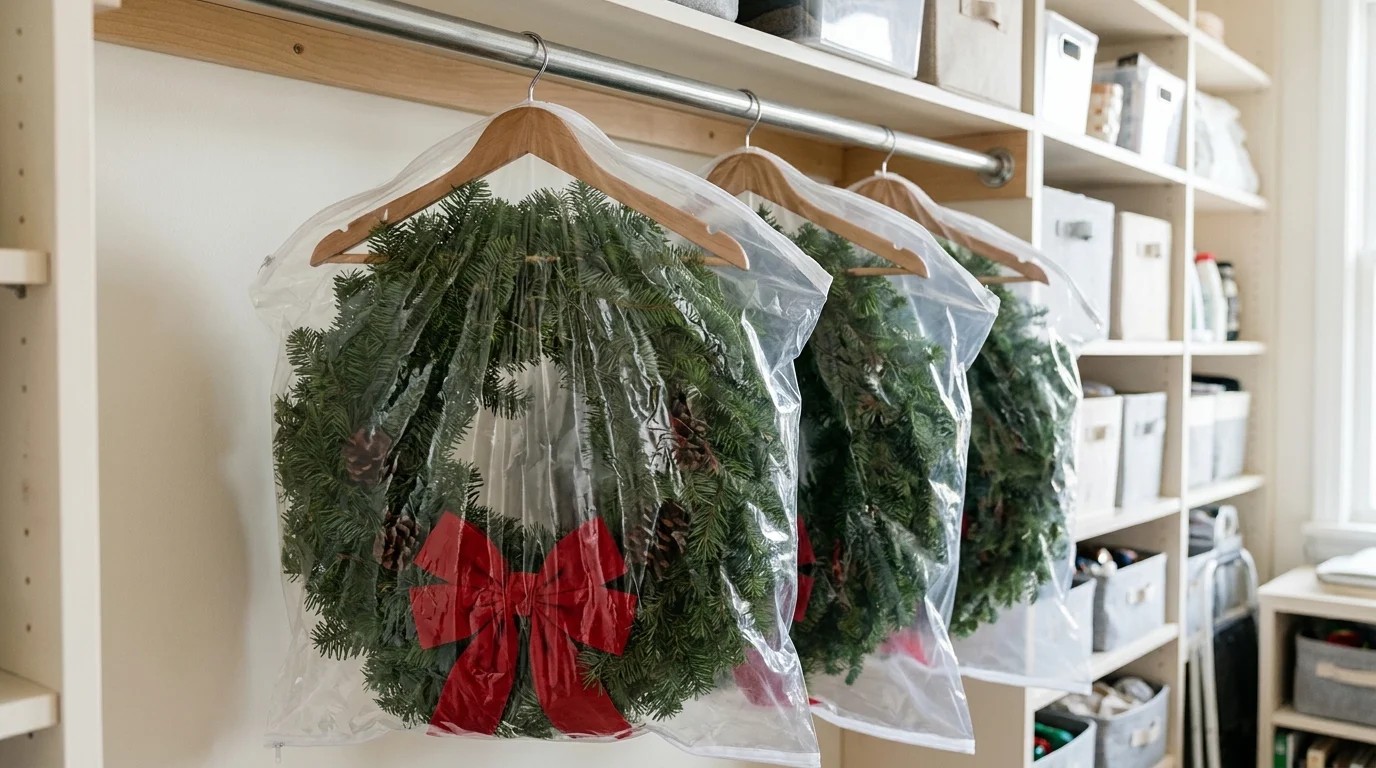
Wreaths get crushed when they are stacked in a box. Instead, hang each one on a sturdy hanger, slip an old garment bag over it, and hang it in a closet. The greens stay full, the bows stay fluffy, and dust stays off. It also frees up a lot of floor space in the garage. These Christmas storage hacks work for swags and door hangers too. Where would you hang yours?
You will need: A sturdy hanger, an old garment bag or a large clean trash bag, a zip tie or ribbon.
How to make it: 1. Fluff the wreath and loop a zip tie or ribbon through the frame. 2. Hook it onto the hanger. 3. Slide the garment bag over it, zip it closed and hang it in a closet.
A Pool Noodle Ribbon Roller
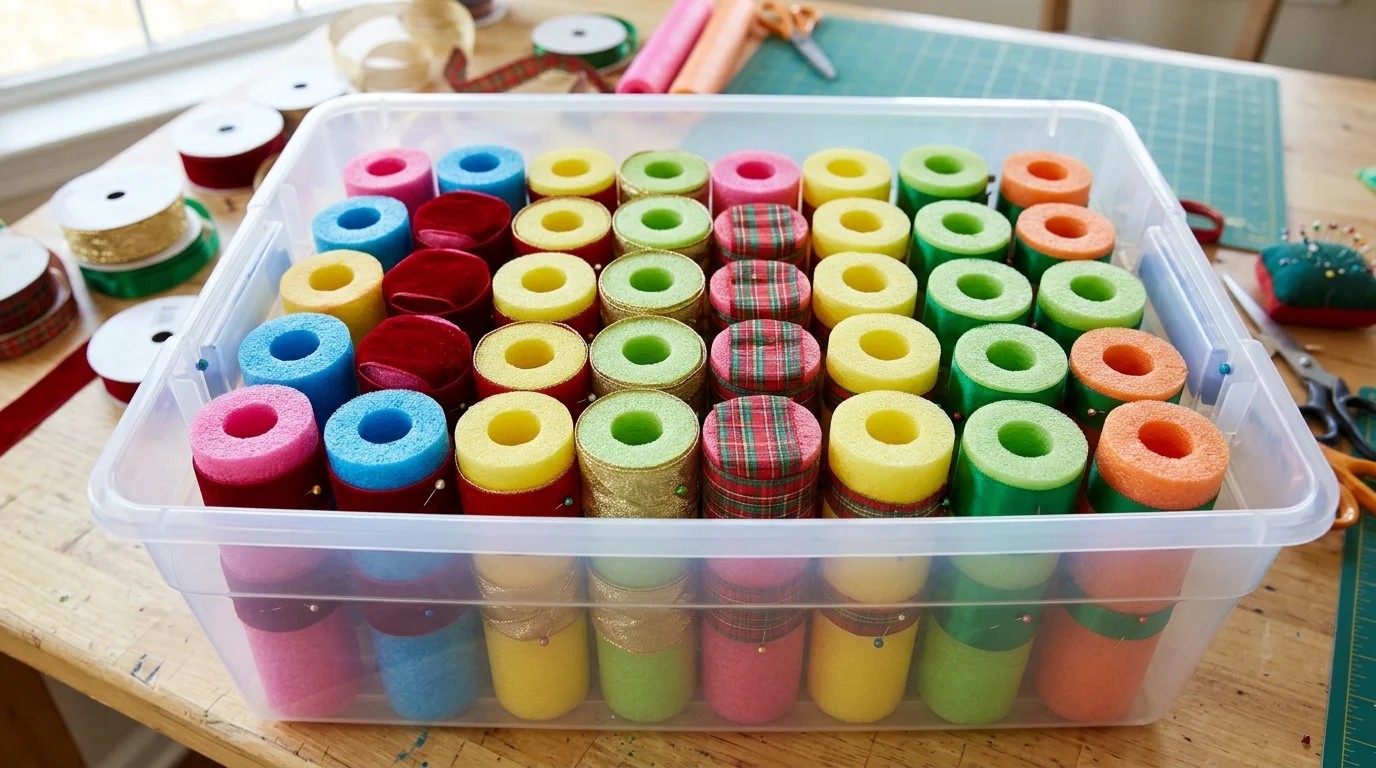
Ribbon gets creased and flat when it is shoved in a bag. Wrap it around a short piece of pool noodle instead and it stays smooth and ready for next year’s bows. The soft foam keeps velvet and wired ribbon from crushing. Pin the end down with a straight pin and line the rolls up in a bin. You can see every color at once, which makes gift wrapping so much easier. Do you have a stash of ribbon waiting for this?
You will need: A pool noodle, a serrated knife (adult only), straight pins, a storage bin.
How to make it: 1. Have an adult cut the pool noodle into pieces about 6 inches long. 2. Wrap each ribbon smoothly around one piece. 3. Pin the end in place and stand the rolls up in a bin.
Christmas Storage Hacks for Garland: Use a Bucket
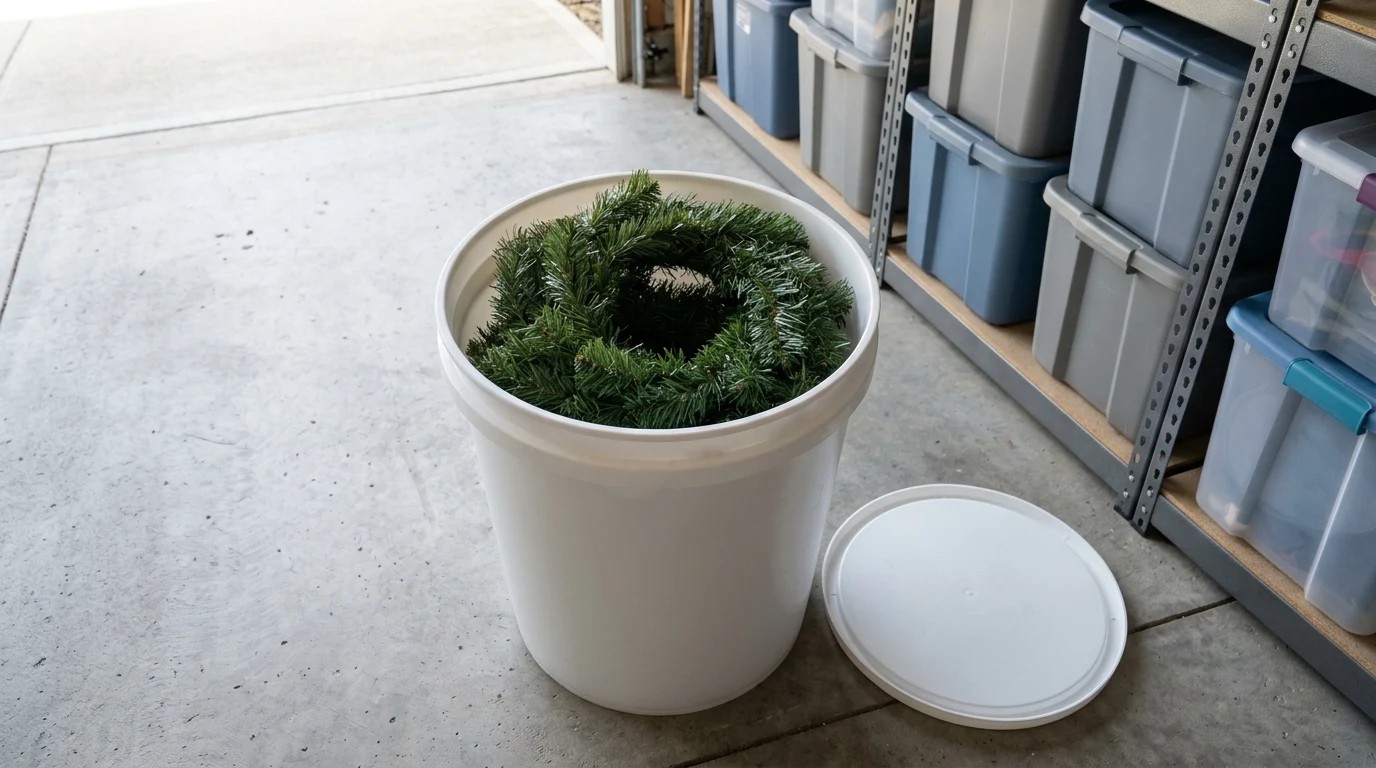
Long garlands are the hardest thing to store. Coil them around the inside of a clean bucket, starting at the bottom and working up, and they come out untangled and full. A big bucket with a lid works best, and you can store several garlands in one. Mark the lid with the length of each garland. Simple Christmas storage hacks like this save so much time on decorating day. Will you try it on your longest garland first?
You will need: A large bucket with a lid, twist ties, a marker.
How to make it: 1. Tie the garland end with a twist tie so it does not unravel. 2. Coil it around the inside of the bucket in loose circles. 3. Close the lid and write the length and room on top.
A Hanging Shoe Organizer for Small Decor
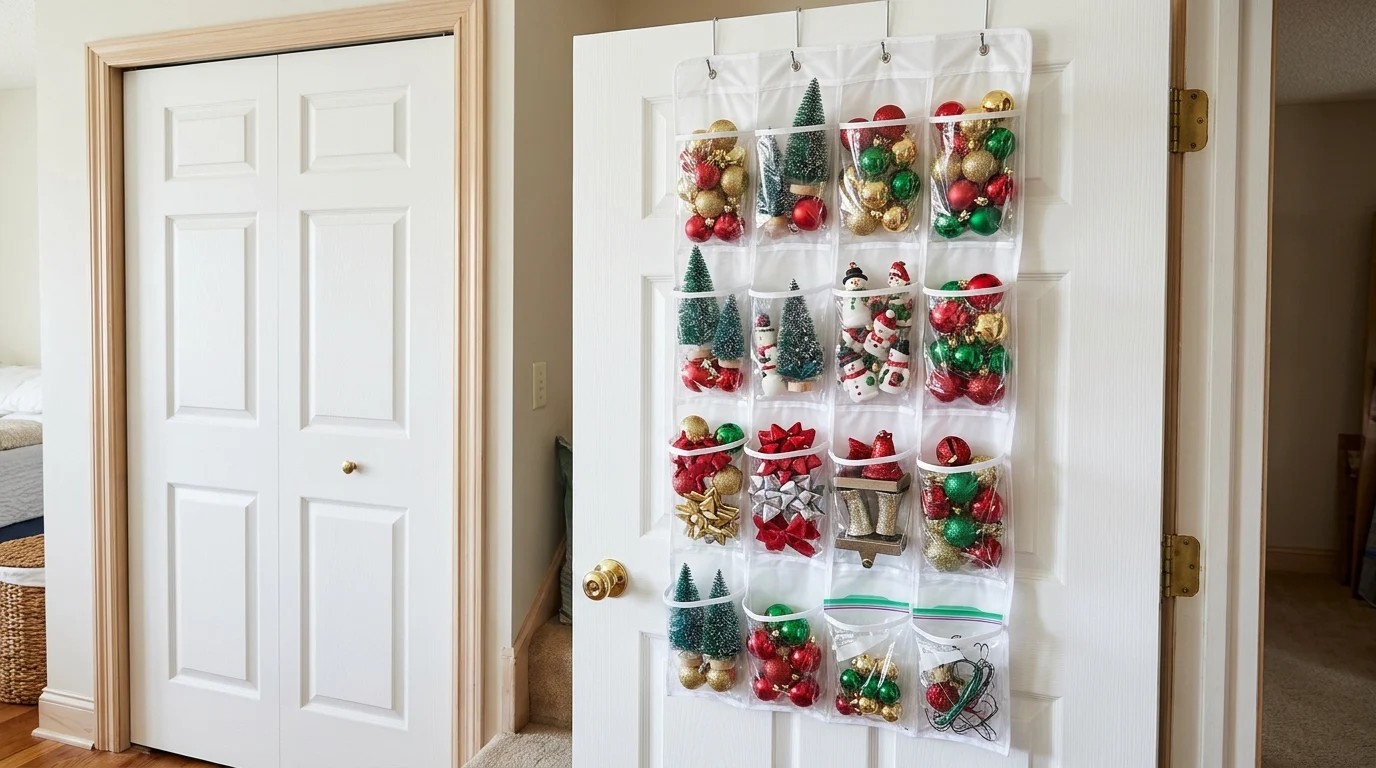
A clear over the door shoe organizer is a treasure for small holiday pieces. Each pocket can hold ornaments, tree clips, mini figurines, bows or stocking holders. Because it is clear, you can see everything without opening a single box. Hang it on the back of a closet door and it takes up no floor space at all. If you love clever organizing, our dollar store storage ideas pair well with this one. What will go in your first pocket?
You will need: A clear over the door shoe organizer, small zip bags, a marker.
How to make it: 1. Hang the organizer on the back of a closet door. 2. Put small items in zip bags and tuck them into the pockets. 3. Label the bags so each pocket has its own job.
Christmas Storage Hacks With Photo Labels
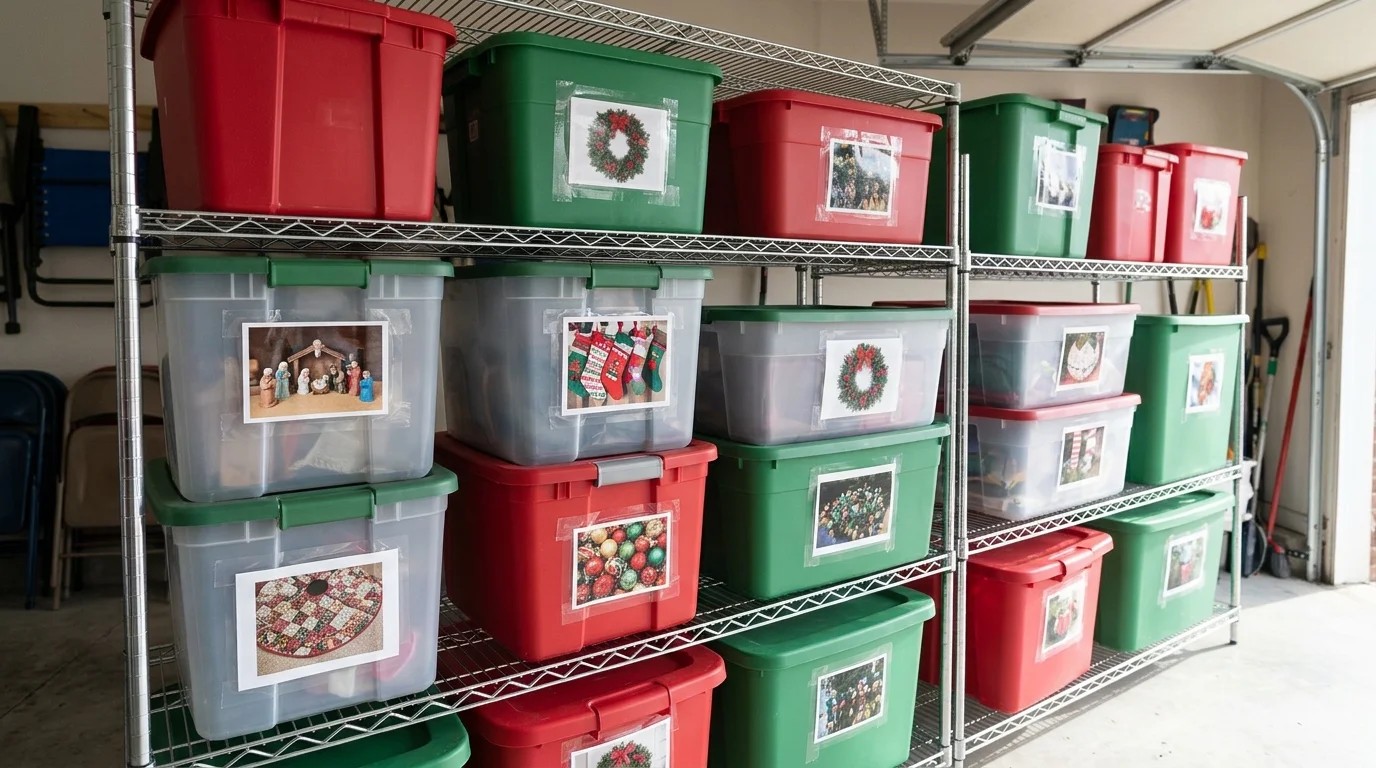
Words on a bin are good, but a photo is even better. Snap a picture of what is inside, print it, and tape it to the outside of the box. Anyone in the family can find the nativity set or the stockings without opening ten bins. Clear tape over the photo keeps it from peeling in a damp garage. Among all the Christmas storage hacks here, this one saves the most arguments. Who in your house always asks where things are?
You will need: Your phone camera, a printer and paper, clear packing tape, storage bins.
How to make it: 1. Take a quick photo of each bin’s contents before you close it. 2. Print the photos small. 3. Tape one to the side and lid of each bin, covering it fully with clear tape.
Wrapping Paper in an Under Bed Box
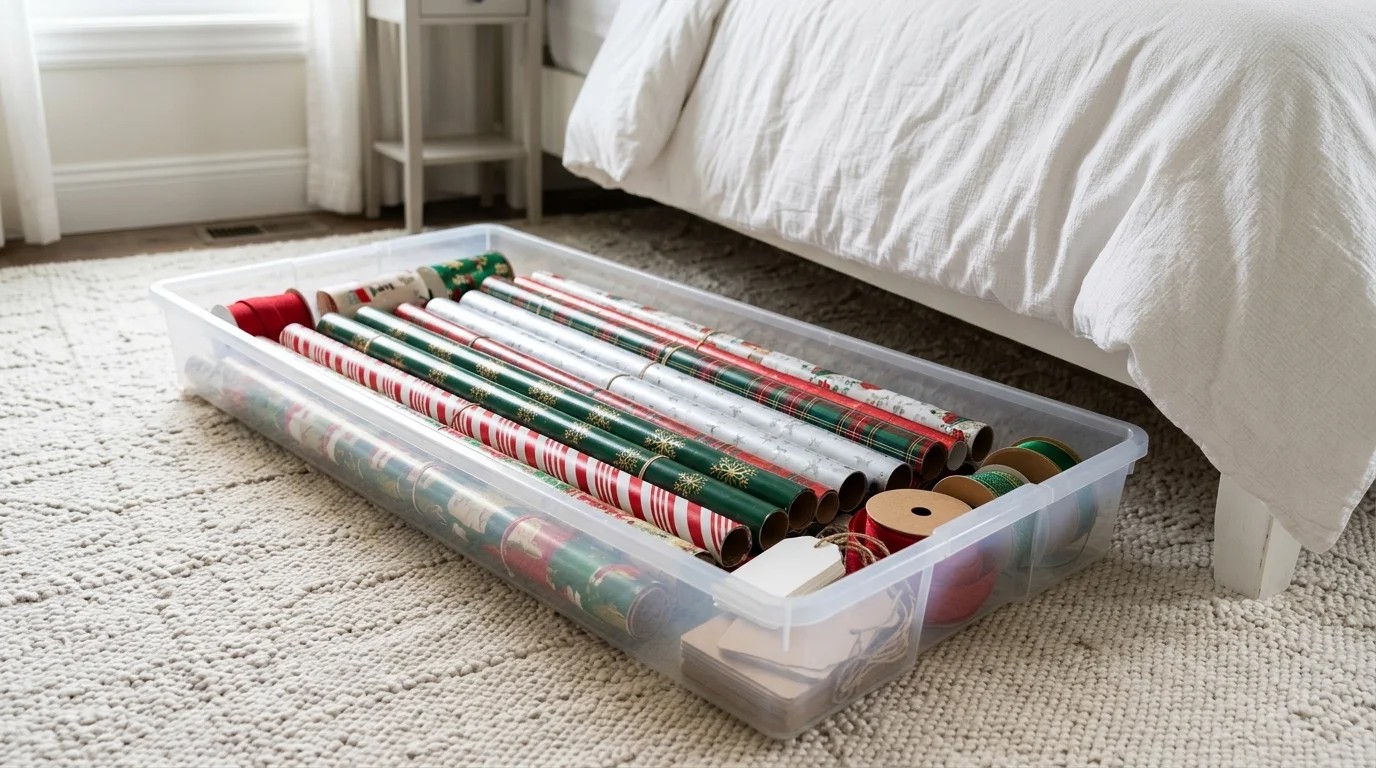
Wrapping paper rolls always get crushed in the closet. A long, flat under bed box keeps them straight and safe, and you can tuck in tape, tags and scissors too. Slide it under the guest bed and it is out of sight until the next birthday or holiday. Put a rubber band around each roll so the paper does not unroll. It is so nice to wrap gifts with paper that is not torn at the ends. Is your wrapping paper in the closet right now?
You will need: A long under bed storage box, rubber bands or paper sleeves, tape, gift tags, scissors.
How to make it: 1. Slip a rubber band or a cut paper sleeve around each roll. 2. Lay the rolls side by side in the box. 3. Add tape, tags and scissors along one side and slide the box under a bed.
A Pants Hanger for Ribbon Spools
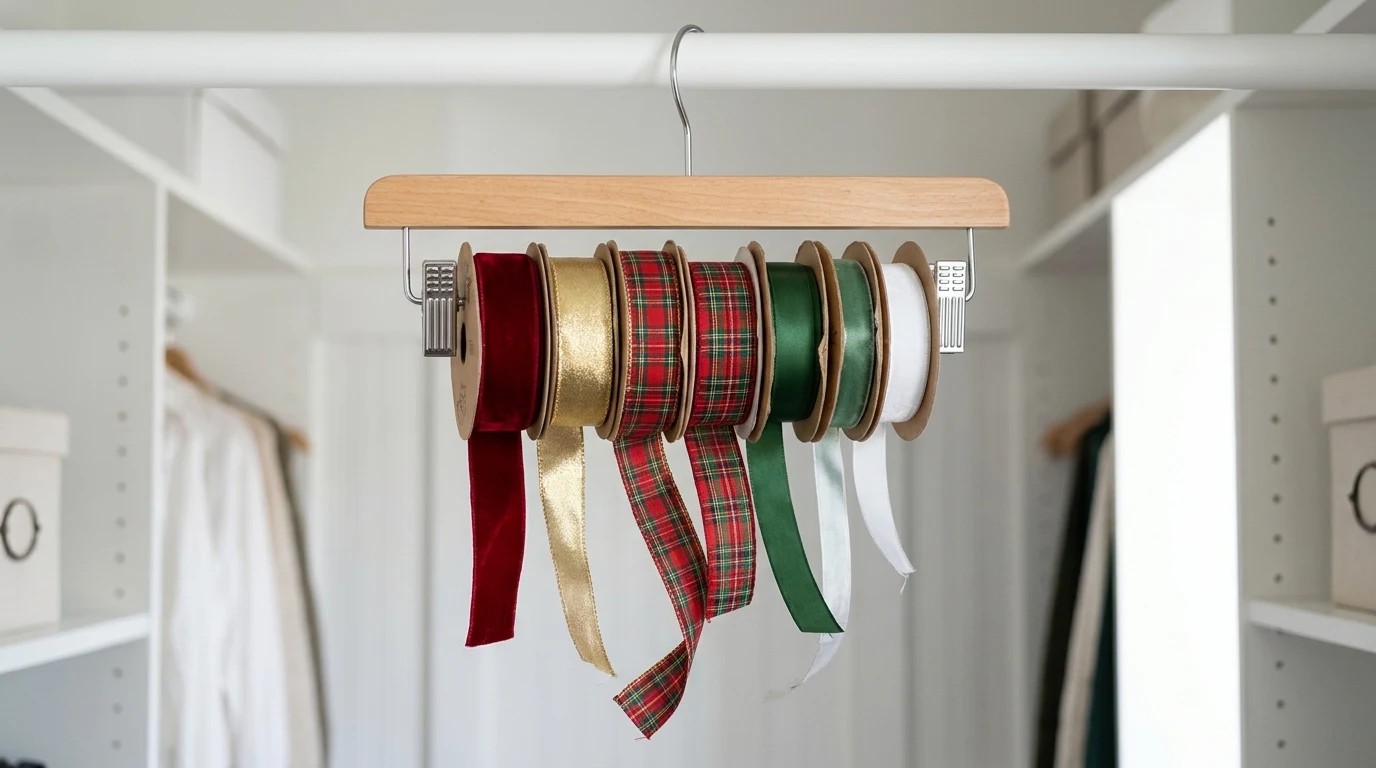
Here is a neat trick for ribbon on spools. Slide the spools onto the bar of a clip style pants hanger and hang it in the closet. You can pull off just the length you need and every color stays in view. It works for twine and baker’s string too. This is one of those Christmas storage hacks that makes your wrapping station feel like a little shop. How many spools can one hanger hold?
You will need: A pants hanger with a removable bar or clips, ribbon spools, a closet rod.
How to make it: 1. Open the hanger bar or clip. 2. Slide the ribbon spools on side by side. 3. Close it and hang it where you wrap gifts.
Zip Bags for Hooks and Spare Bulbs
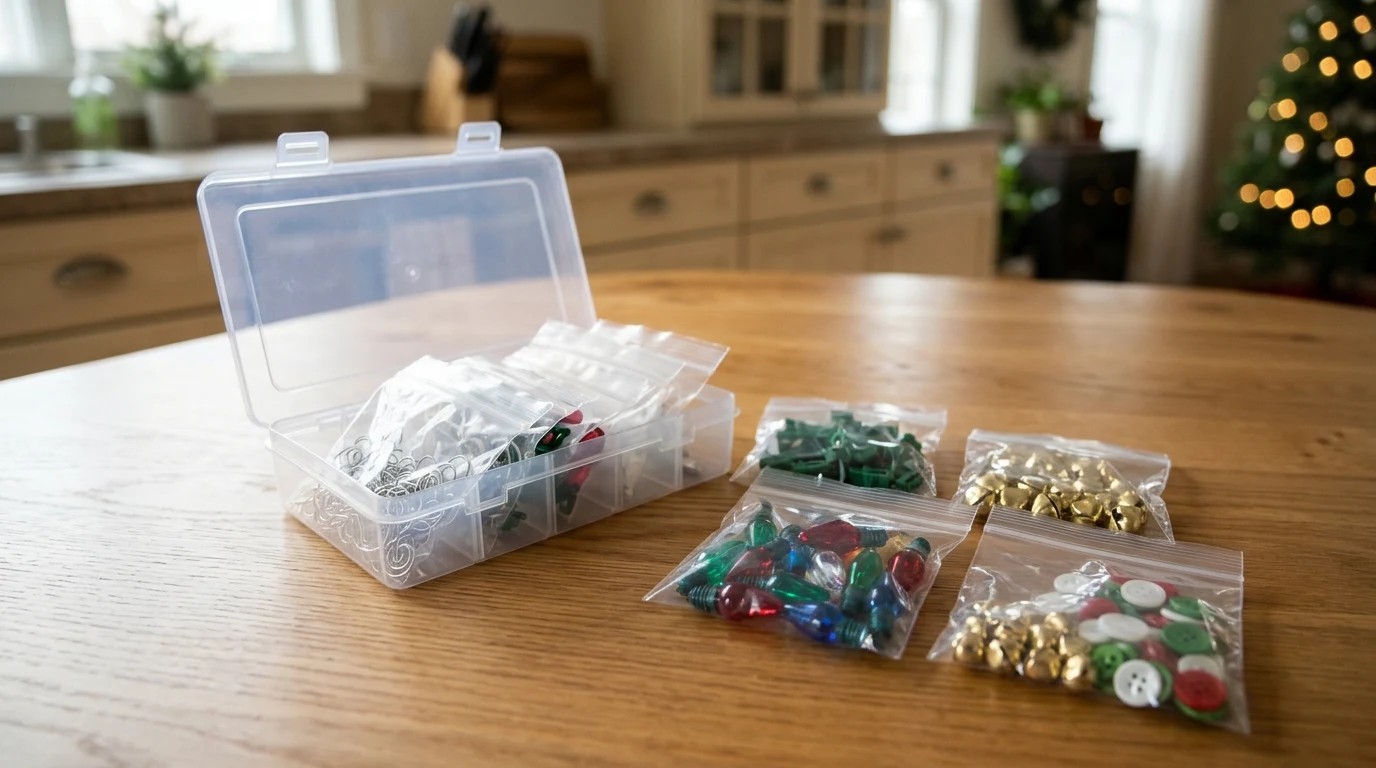
Ornament hooks, spare bulbs, fuses and tree clips always disappear. Put each set in its own zip bag, label it, and keep all the bags together in one small box. Next year you will open one container and have everything you need. Toss in the extra buttons from the tree skirt or the spare bells from a garland too. Little Christmas storage hacks like this stop that last minute trip to the store. What always goes missing at your house?
You will need: Small zip bags, a marker, a small plastic box with a lid.
How to make it: 1. Sort hooks, bulbs, clips and spare parts into piles. 2. Put each pile in its own zip bag and label it. 3. Store all the bags in one small box placed on top of your ornament bins.
Christmas Storage Hacks With Color Coded Bins
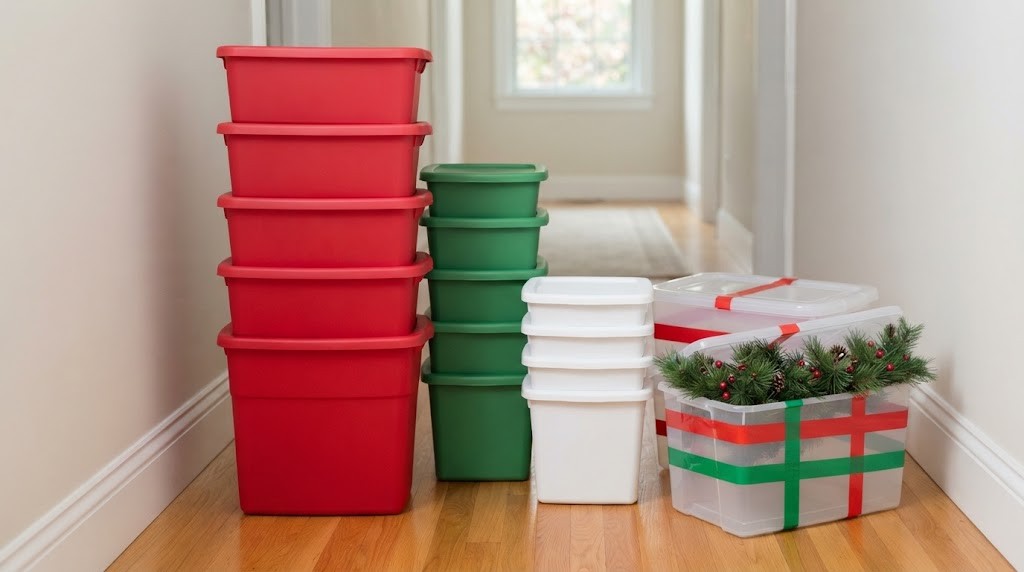
Give each room its own color. Red bins for the living room, green for the kitchen, white for the bedrooms. When the boxes come out, everyone carries the right bin to the right room without asking. Colored tape on plain bins works just as well as buying new ones. It turns decorating into a family relay and makes clean up even faster. Which color would your living room get?
You will need: Storage bins, colored duct tape or colored labels, a marker.
How to make it: 1. Pick one color for each room. 2. Put a strip of colored tape on the side and lid of each bin. 3. Pack each room’s decor in its color and write the room name on the tape.
A Pillowcase for Delicate Garland

Beaded garlands and paper chains tangle and tear easily. Slide them gently into an old pillowcase, loosely folded, and tie the end. The soft cotton protects them and keeps the strands from catching on other things in the bin. You can even write the name of the garland on the pillowcase with a fabric marker. It is a sweet way to give old pillowcases a new job, and one of the gentlest Christmas storage hacks around. Do you have a spare one in the linen closet?
You will need: An old pillowcase, a ribbon or rubber band, a fabric marker.
How to make it: 1. Fold the garland loosely in long loops. 2. Slide it into the pillowcase without twisting. 3. Tie the end closed and label it.
A Tree Bag With Handles
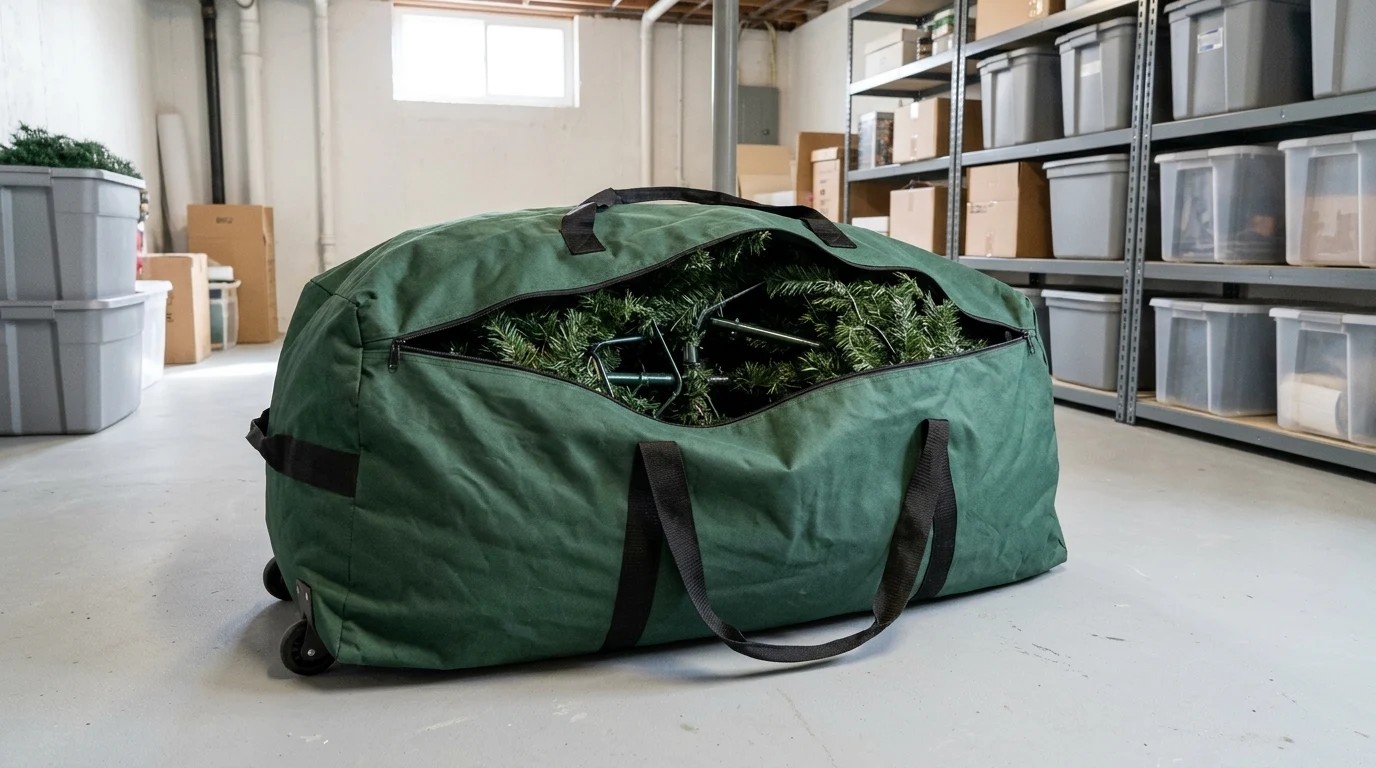
If you have an artificial tree, a big zip up tree bag with handles is worth every penny. It keeps dust off the branches, stops bent tips, and makes it easy for two people to carry. Some come with wheels, which helps if your tree lives in the attic. Fluff the branches down before zipping so they fit without crushing. Ending with this one is perfect, because the tree is always the last thing to go back in storage. Will your tree get its own bag this year?
You will need: A tree storage bag with handles, a few large zip ties, a helper.
How to make it: 1. Take the tree apart in sections and fold the branches down. 2. Lay the sections in the bag, largest at the bottom. 3. Zip it closed and carry it with a helper to its storage spot.