Shoe Box Crafts: 14 Genius Ways to Turn Empty Boxes Into Christmas Gifts and Decor
Shoe box crafts are the cheapest little secret of the holiday season, because almost every home is about to fill up with empty boxes. Boots for winter, sneakers for the kids, slippers for grandma: the shoes go on, and the sturdy boxes with their neat lids get tossed in the recycling. Hold on to them. With a bit of paint, fabric, paper and glue, a plain shoe box turns into a snowy village house, a gift box that looks like it came from a boutique, an ornament keeper or a puppet theater that keeps kids busy all of Christmas break. Most of these ideas cost nothing but leftovers from your craft drawer, and many make lovely handmade gifts. Pick a favorite, grab a stack of boxes and enjoy a cozy evening of making..
Shoe Box Crafts for a Snowy Christmas Village
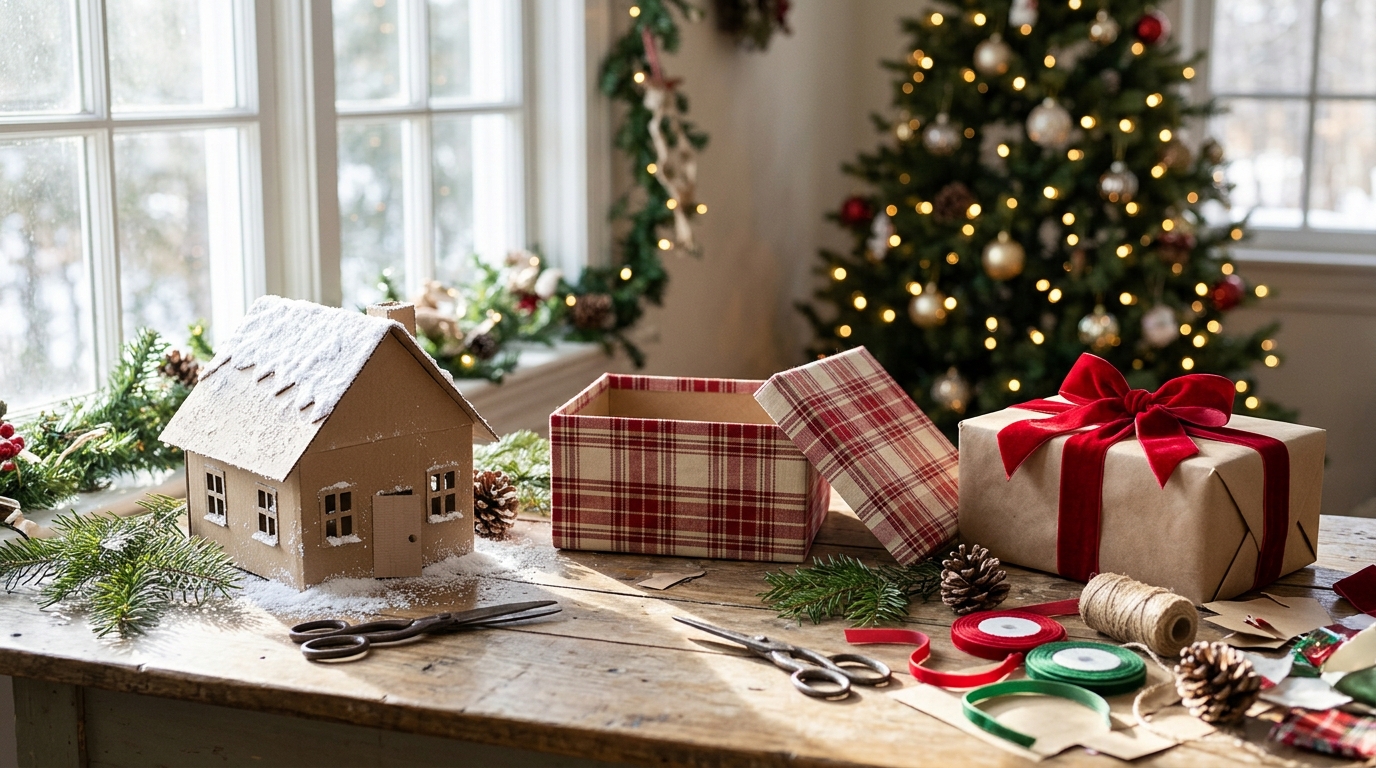
Shoe box crafts can look surprisingly grand, and this little snowy house proves it. The box becomes the walls, the lid is cut and folded into a pitched roof, and tiny windows and a door are cut out with an adult’s help. A dusting of fake snow on the roof and a few pine sprigs around the base make it look like a scene from a Christmas card. Make three or four in different sizes and you have a whole village for the mantel or a side table. Which room will get your little village this year..
You will need: 1 shoe box with lid, a craft knife and cutting mat (adult only), white craft glue, fake snow or white glitter, kraft or white paint, a paintbrush, small pine sprigs
How to make it: 1. Ask an adult to cut a door and two or three small windows in one long side of the box. 2. Cut the lid in half the long way and glue the halves together into a pointed roof. 3. Paint the house and let it dry. 4. Glue the roof on top, brush glue along the edges and sprinkle on the snow.
A Fabric Covered Box That Looks Boutique
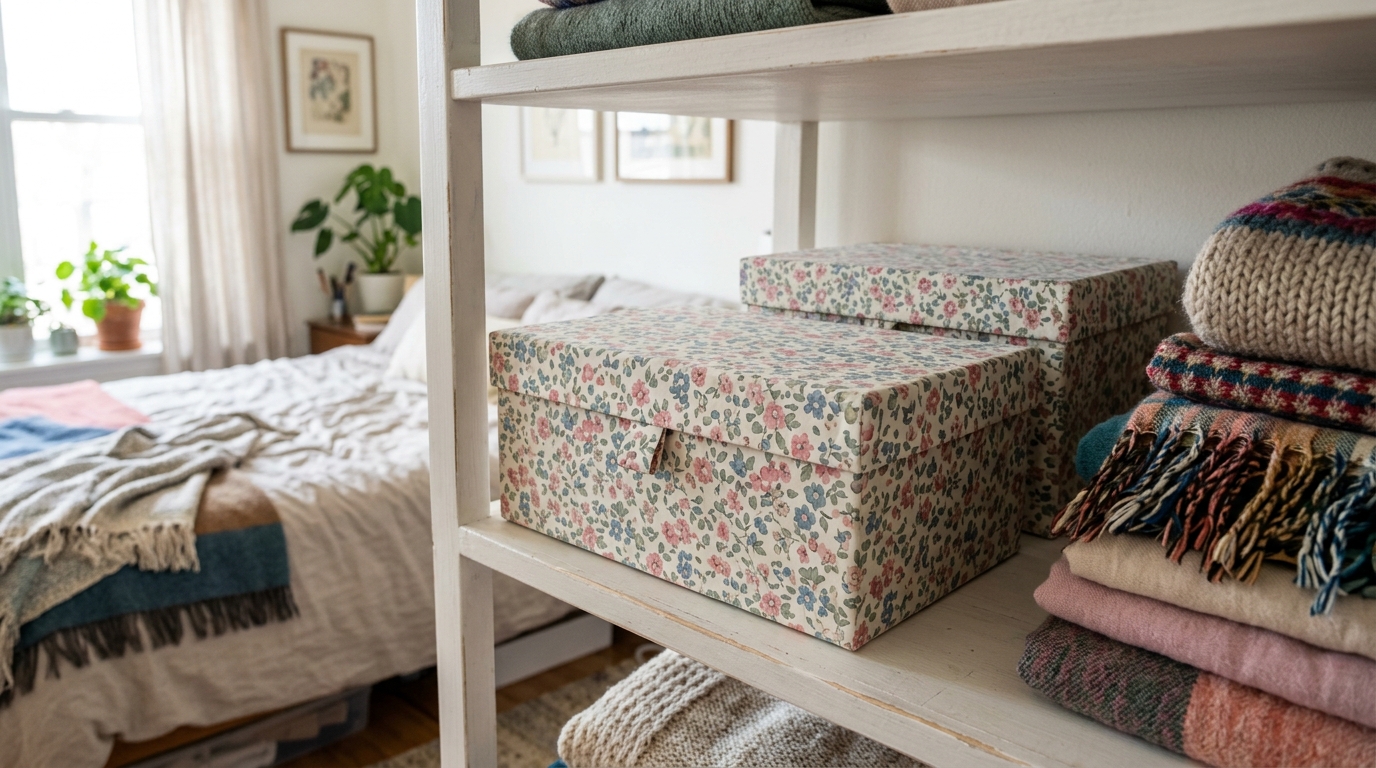
A plain cardboard box suddenly looks like something from a pricey home store once it is wrapped in pretty cotton fabric. Floral prints feel soft and cottage style, while plaid looks perfect for winter. Cover the lid separately so it still lifts off easily, then add a little fabric pull tab to the front. Stack two or three on a bedroom shelf for scarves, hats and gloves and the whole corner looks calm and tidy. It is also a sweet gift filled with a few small treats. What pattern would you pick for yours?
You will need: 1 shoe box with lid, about half a yard of cotton fabric, spray adhesive or decoupage glue, scissors, a ruler, a small strip of fabric or ribbon for the tab
How to make it: 1. Lay the box on the fabric and cut a piece big enough to wrap the sides with 2 inches extra. 2. Brush glue on one side at a time and smooth the fabric over it. 3. Fold the extra fabric inside the box and glue it down. 4. Cover the lid the same way and glue a folded fabric tab to the front edge.
Shoe Box Crafts for Gifts: A Window Lid Box
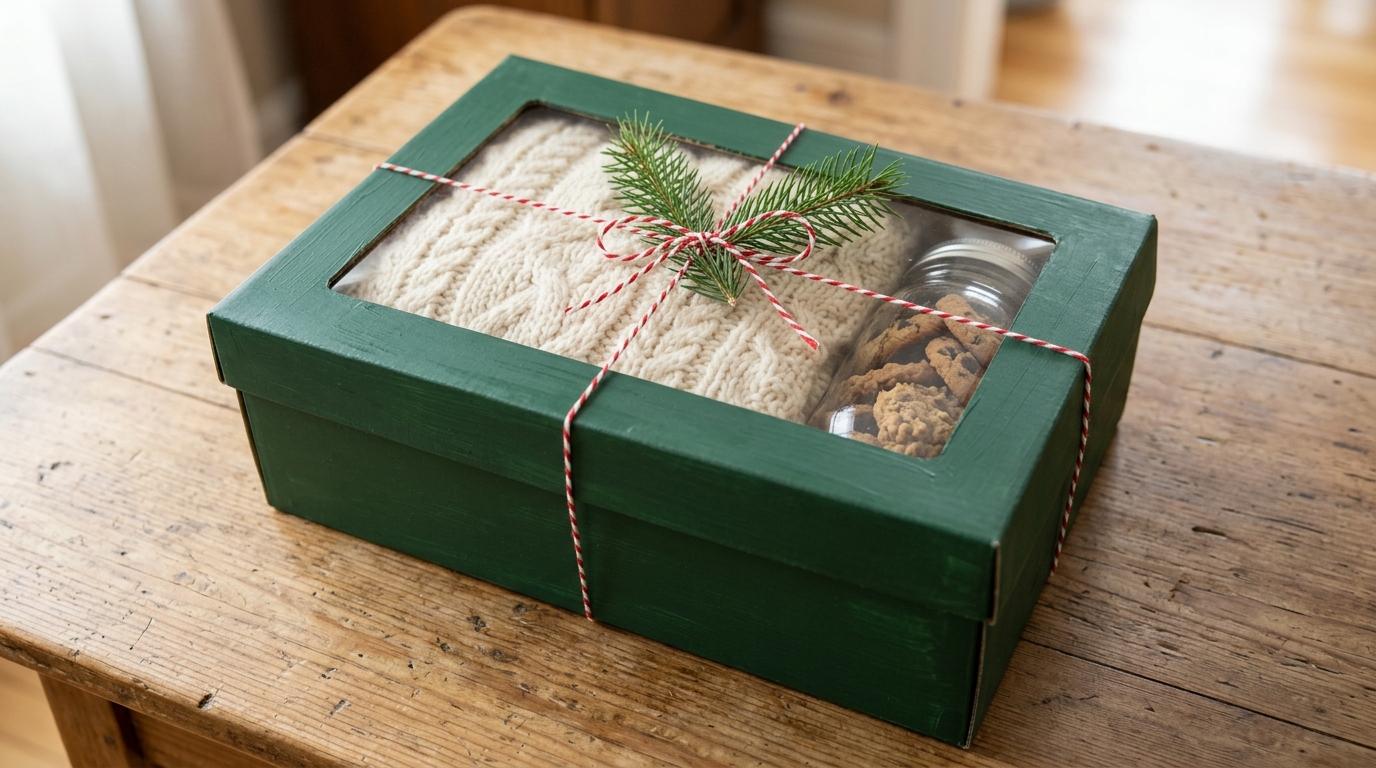
A gift box with a clear window in the lid makes any homemade present feel special, because the peek inside builds the excitement. Paint the box a deep holiday green, cut a rectangle from the lid and tape clear plastic from old packaging behind it. A hand knit sweater, a jar of cookies or a stack of cozy socks looks wonderful framed this way. Tie it with red and white baker’s twine and tuck in a pine sprig. Shoe box crafts like this one cost almost nothing but look like they came from a gift shop. Who on your list would love one?
You will need: 1 shoe box with lid, acrylic paint in deep green, a paintbrush, clear plastic from old packaging, clear tape, a craft knife (adult only), baker’s twine, a pine sprig
How to make it: 1. Paint the box and lid and let them dry fully. 2. Ask an adult to cut a rectangle from the center of the lid, leaving a 1 inch border. 3. Tape the clear plastic inside the lid over the opening. 4. Fill the box, close it and tie it with twine and a sprig of pine.
Ornament Storage With Paper Cup Dividers
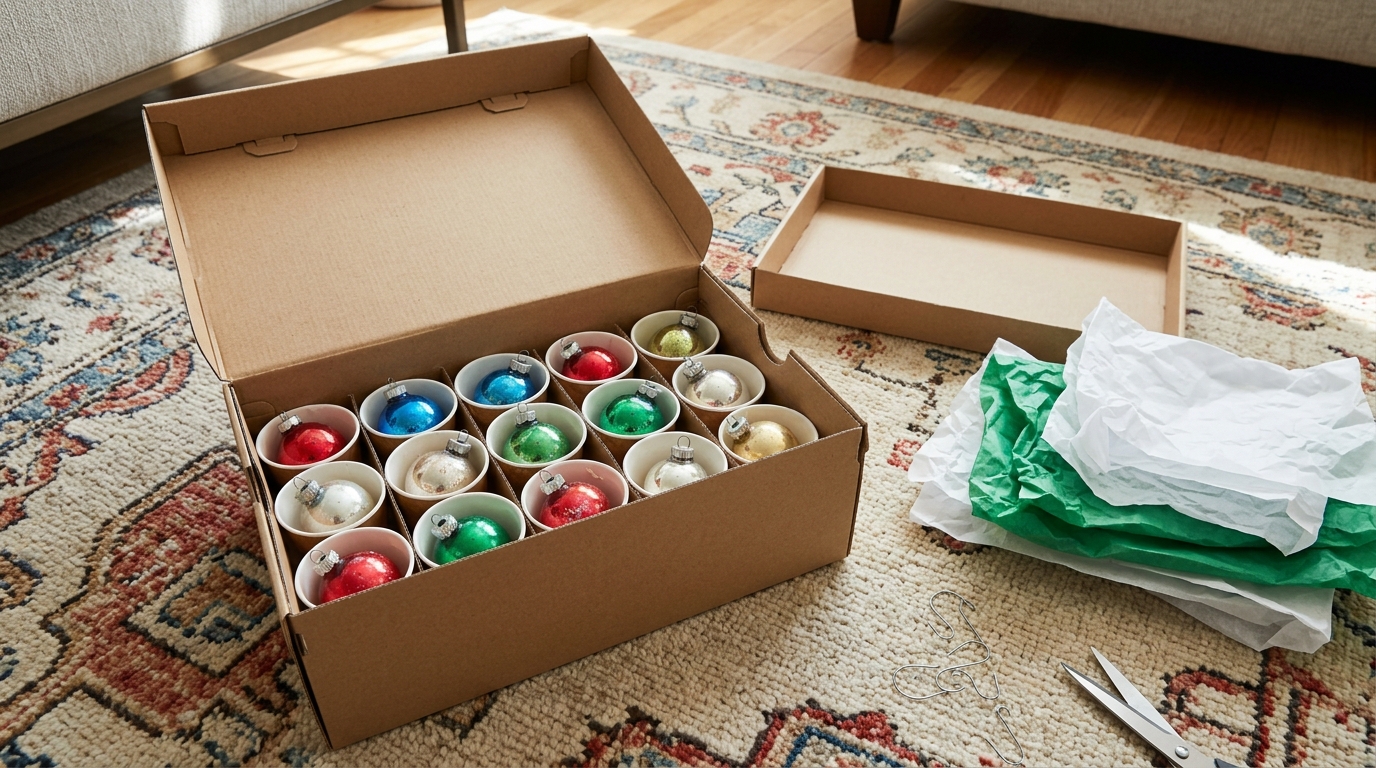
Every January the same thing happens: the pretty glass ornaments go back into a jumble and one or two break. This easy fix keeps them safe all year. Glue paper cups or cut sections of an egg carton inside a sturdy box so each ornament sits in its own little nest. Add a sheet of tissue on top before closing the lid. It takes about 15 minutes and you will thank yourself next December when everything comes out shiny and whole. How many boxes would it take to hold your whole collection?
You will need: 1 or 2 sturdy shoe boxes, 12 to 18 small paper cups or egg carton sections, white craft glue, tissue paper, a marker for the lid
How to make it: 1. Arrange the paper cups in rows inside the box until it is snugly filled. 2. Glue each cup to the bottom and let it dry. 3. Set one ornament in each cup. 4. Lay tissue paper on top, close the lid and note what is inside.
A Ribbon Dispenser for Wrapping Night
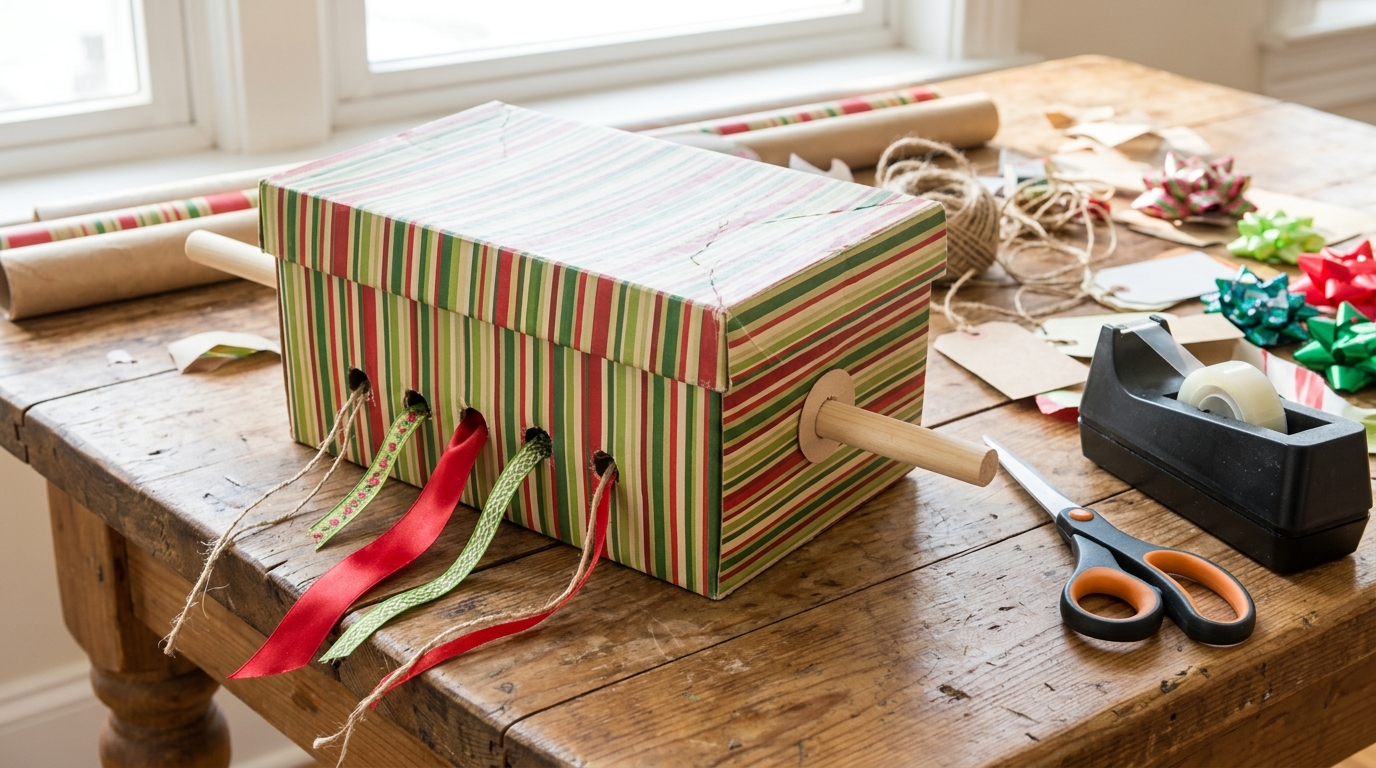
If your ribbon spools roll under the sofa every time you wrap a present, this clever little box solves it. Slide a wooden dowel through both short ends of a box, thread your spools onto it, then poke a small hole in the front for each ribbon to feed through. Now you just pull, cut and tie. Cover the box in leftover striped wrapping paper so it looks festive sitting on the table all season. It makes wrapping night feel organized and fun. Which colors of ribbon do you always run out of first?
You will need: 1 shoe box with lid, a wooden dowel a little longer than the box, 4 to 6 ribbon spools, wrapping paper, tape, a sharp pencil or awl (adult help)
How to make it: 1. Wrap the box and lid in wrapping paper. 2. With adult help, poke a hole in the center of each short end and push the dowel through, adding spools as you go. 3. Poke one small hole in the front for each spool. 4. Pull each ribbon end through its hole and close the lid.
Shoe Box Crafts for Kids: A Winter Diorama
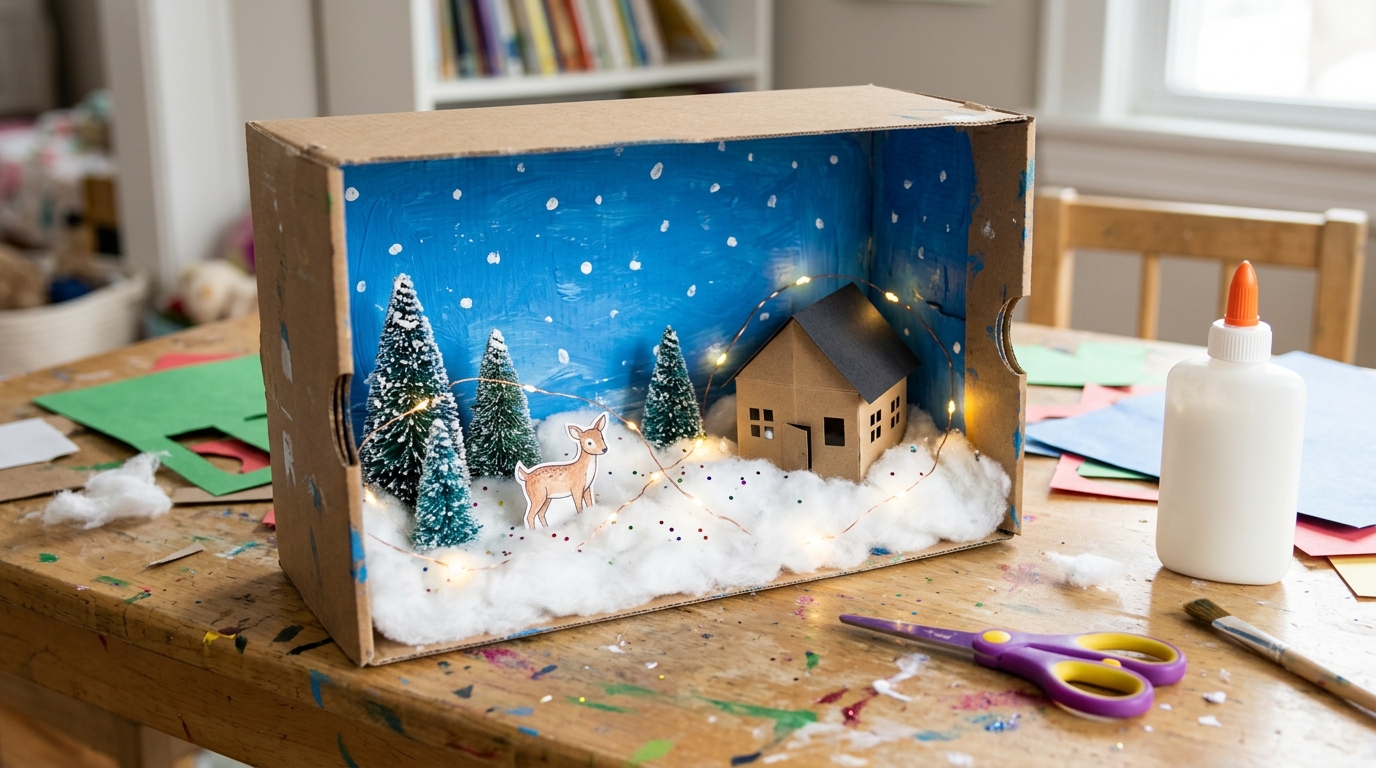
Turn a box on its side and it becomes a tiny stage for a snowy winter scene. Paint the inside a deep blue sky with little white dots for snowflakes, then fill the floor with cotton snow, tiny bottle brush trees, a paper cabin and a paper deer. A strand of battery fairy lights makes it glow at night. Kids love planning their own scene, and it makes a sweet keepsake for the mantel. This is one of those shoe box crafts that keeps little hands busy for a whole afternoon. What would your kids put in their winter world?
You will need: 1 shoe box, blue and white acrylic paint, cotton balls or batting, small bottle brush trees, card stock, scissors, white craft glue, battery fairy lights
How to make it: 1. Stand the box on its long side and paint the inside blue, then dot on white snowflakes. 2. Glue cotton across the floor for snow. 3. Draw and cut a cabin and deer from card stock with a folded tab at the bottom, then glue them in place with the trees. 4. Tuck a strand of battery fairy lights along the top edge.
A Polka Dot Cookie Box for Neighbors
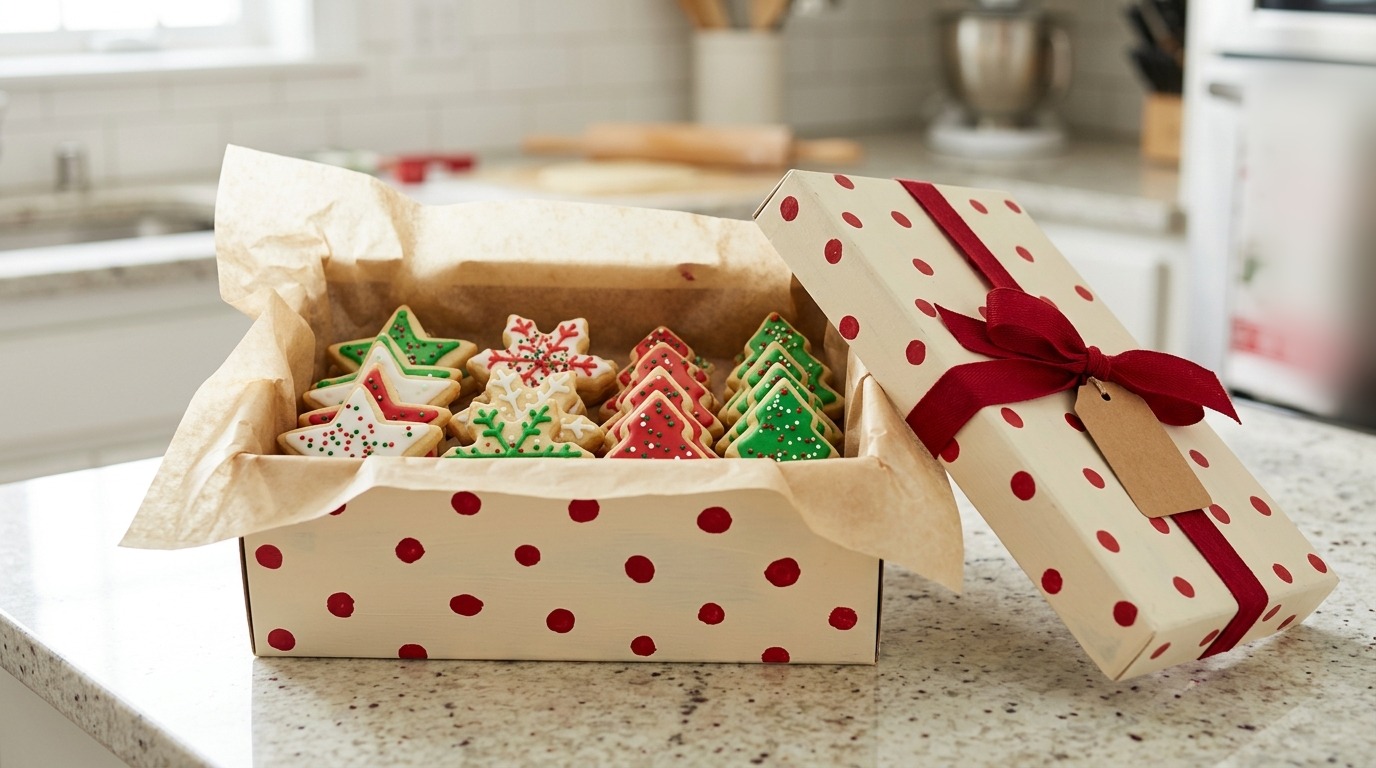
Homemade cookies deserve a pretty box, and shoe box crafts make that easy with any clean box from the closet. Paint it cream, then dot on red circles with the round end of a pencil eraser or a foam dauber. Line it with parchment paper, pack in rows of iced sugar cookies and tie the lid with a red ribbon and a kraft tag. Neighbors, teachers and the mail carrier will feel so loved. A handy tip: make several boxes in one evening and keep them ready for surprise visitors. Who is first on your cookie list this year?
You will need: 1 clean shoe box with lid, cream and red acrylic paint, a pencil with an eraser or a round foam dauber, parchment paper, red ribbon, a kraft paper tag
How to make it: 1. Paint the box and lid cream and let them dry. 2. Dip the pencil eraser in red paint and stamp dots all over. 3. Line the box with parchment paper and fill with cookies. 4. Close the lid and tie it with ribbon and a tag.
Shoe Box Crafts for the Wall: Cubby Shelves
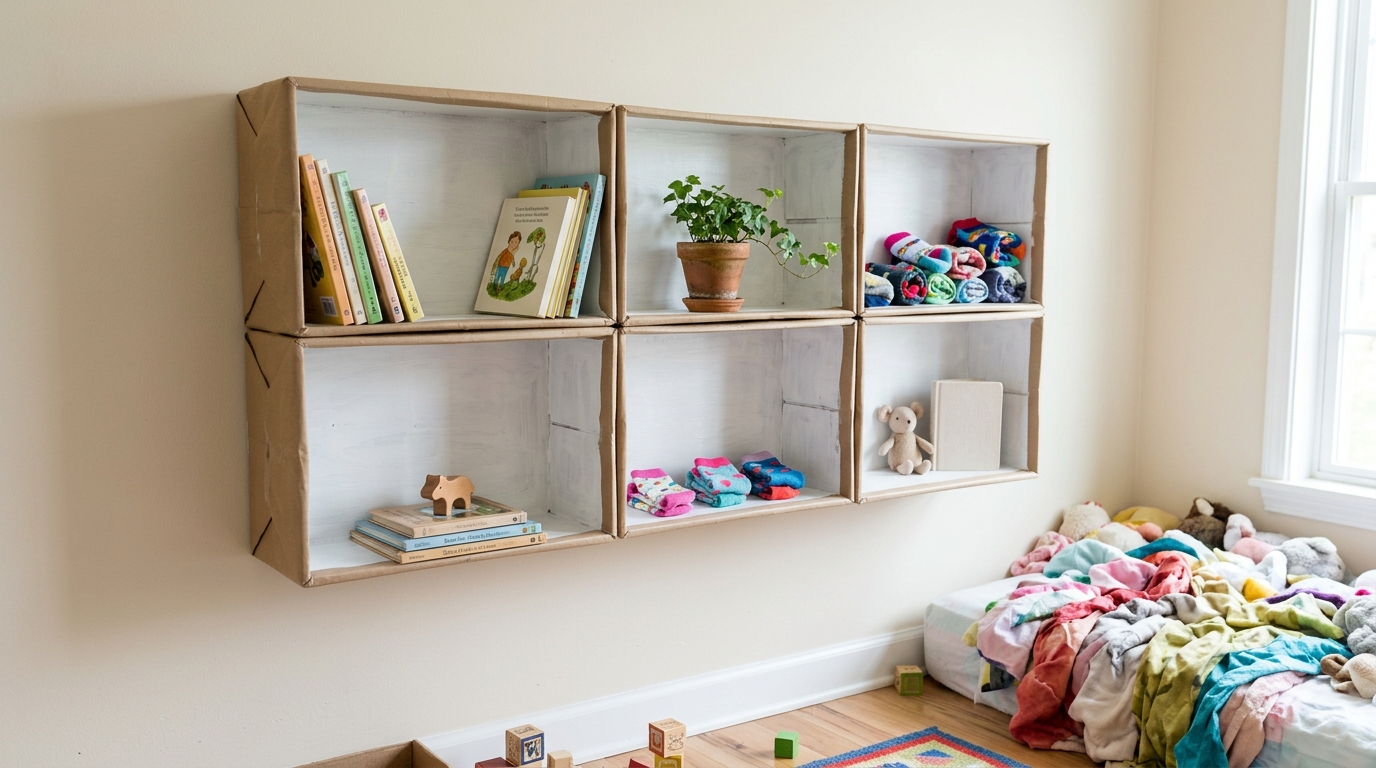
Glue a few boxes together on their sides and you get cute cubby shelves for a kids room. Cover the outside with kraft paper and paint the inside white so books, plants and small toys pop. Mount them on the wall with removable strips or set them on a dresser. Shoe box crafts like these are light, free and easy to rearrange as kids grow. Keep the heavy items on a real shelf and use the cubbies for socks, little books and treasures. Where in your home could a row of cubbies help?
You will need: 4 to 6 sturdy shoe boxes without lids, kraft paper, white paint, a paintbrush, white craft glue or a hot glue gun (adult help), clothespins, removable mounting strips
How to make it: 1. Paint the inside of each box white and let it dry. 2. Cover the outside with kraft paper. 3. With adult help, glue the boxes side by side and hold them with clothespins until dry. 4. Mount with removable strips rated for the weight and fill with light items.
A Family Memory Box for Holiday Cards
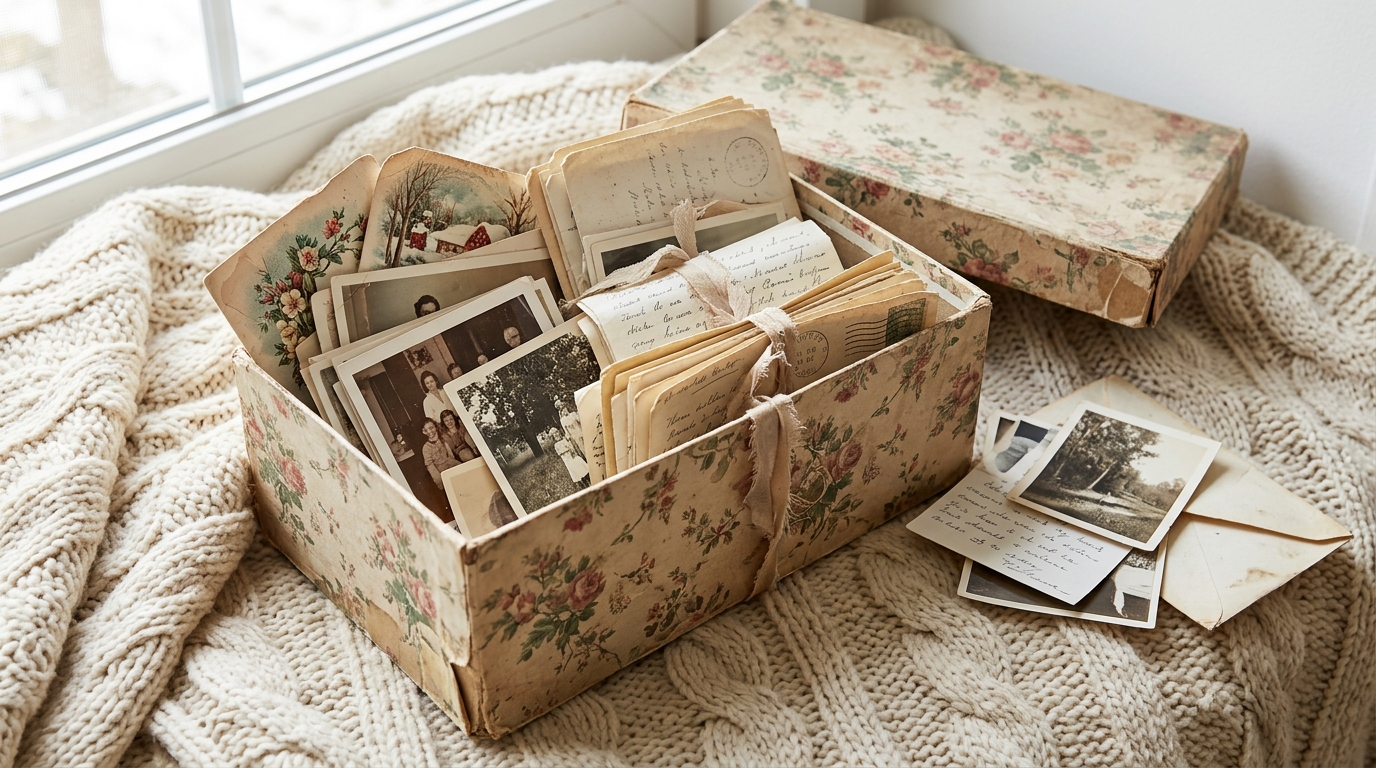
Holiday cards, old photos and handwritten letters are too precious to sit in a drawer. Cover a box in vintage style floral paper and it becomes a family memory box you will open every December. Tie bundles of letters with ribbon, sort photos by year, and tuck in this year’s cards before the new ones arrive. It is a lovely gift for a grandparent too, filled with copies of family pictures. Want more ideas for keepsakes? Our cardboard box crafts are full of them. Whose letters would you save first?
You will need: 1 shoe box with lid, vintage style floral paper or wrapping paper, decoupage glue, a foam brush, ribbon, old photos and cards
How to make it: 1. Brush decoupage glue on one side of the box and smooth the paper over it. 2. Repeat on every side and the lid, folding edges inside. 3. Brush a thin coat of glue over the top to seal it. 4. Fill with photos, cards and letters tied with ribbon.
A Cozy Doll Bed Kids Will Adore
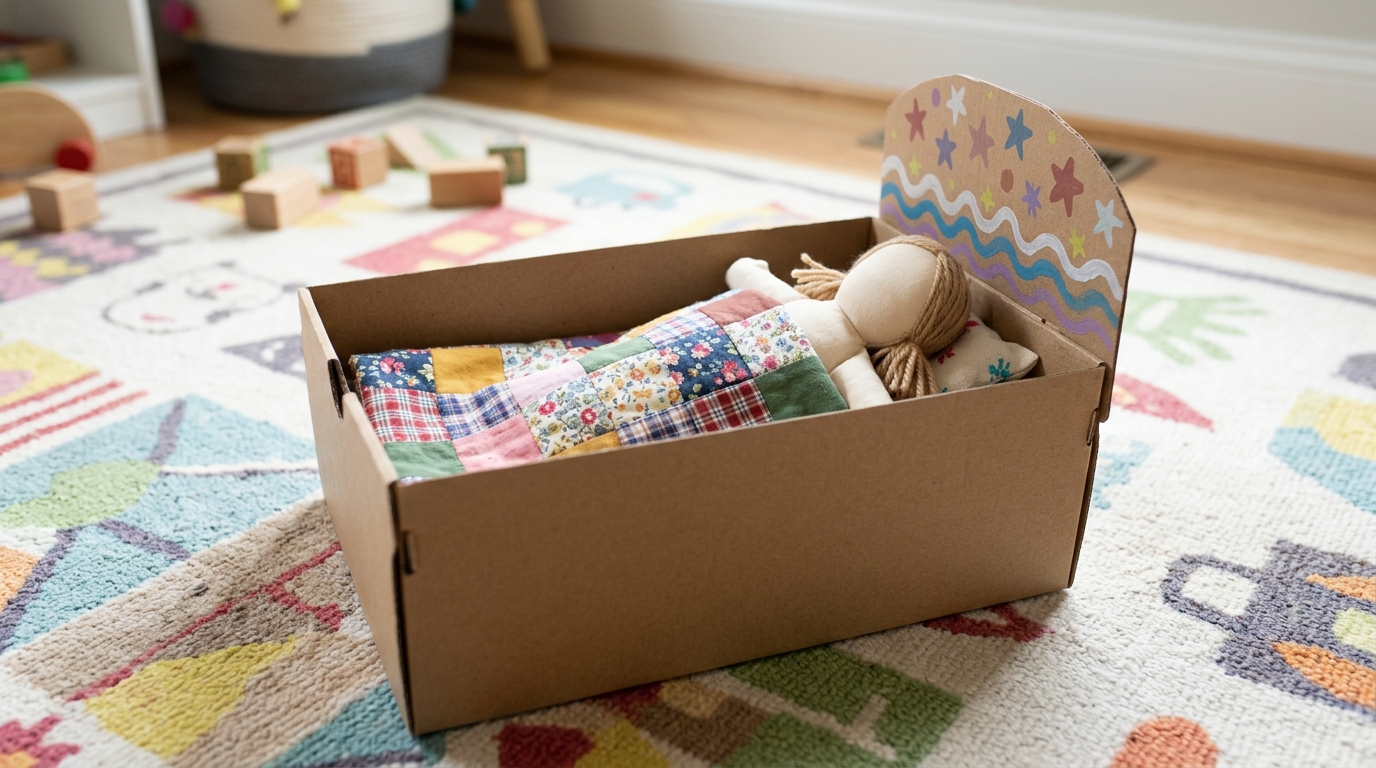
Little ones love tucking a favorite doll or stuffed animal into bed, and a box makes a perfect doll bed. Cut a headboard shape from the lid, paint it with stars or rainbows, and glue it to one end. A scrap of patchwork fabric makes the quilt and a folded sock stuffed with cotton becomes the pillow. It is a sweet handmade gift to tuck under the tree beside a new doll. Best of all, kids can help decorate it. What colors would your little one choose?
You will need: 1 shoe box with lid, acrylic paint, a paintbrush, fabric scraps for a quilt, an old sock and cotton stuffing, scissors, white craft glue
How to make it: 1. Cut a curved headboard from the lid and paint it. 2. Glue the headboard to one short end of the box. 3. Fill a sock with stuffing and tie it off for a pillow. 4. Fold a fabric scrap into a small quilt and tuck in the doll.
Shoe Box Crafts Advent Calendar With Little Drawers
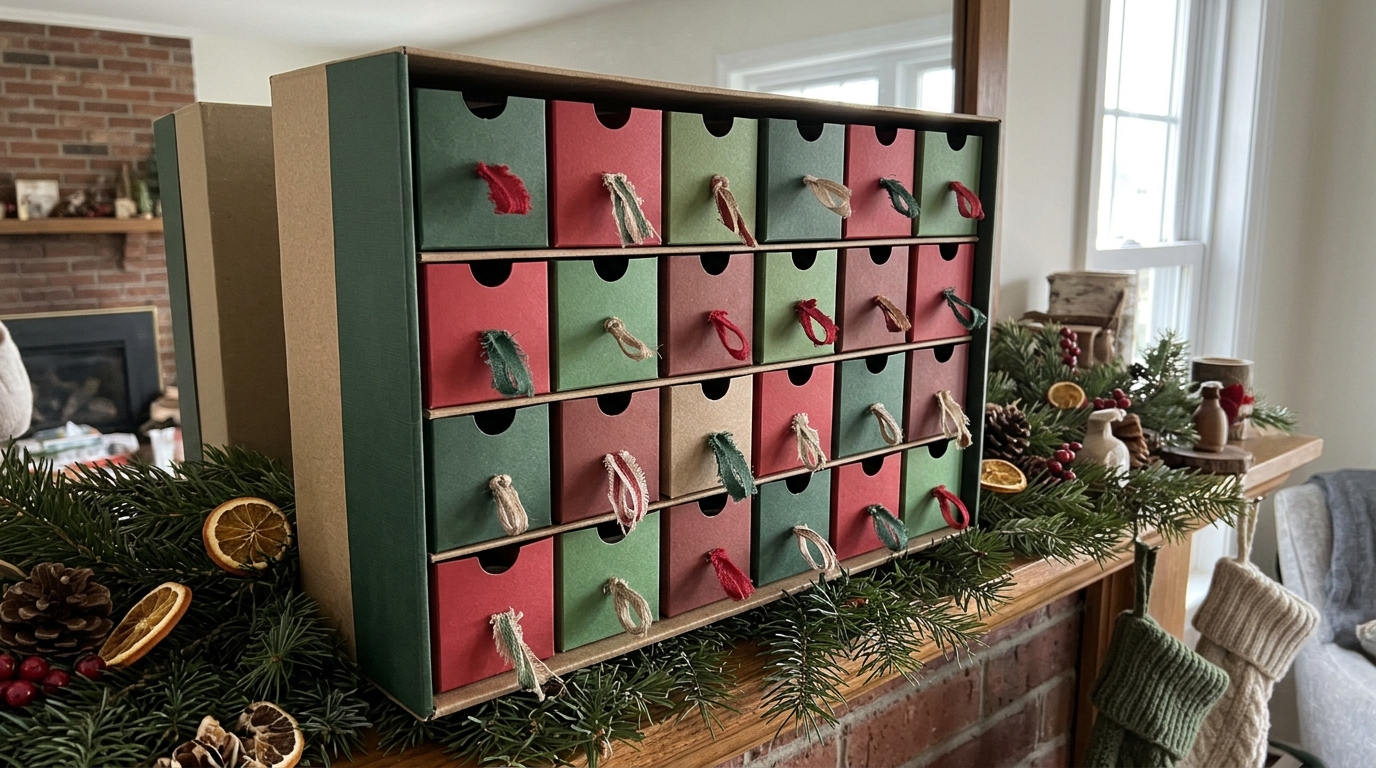
This advent calendar is a show stopper on the mantel and it starts with one large boot box. Fill it with small paper drawers made from matchbox sized boxes or folded card stock, stacked in neat rows. Give each drawer a red or green paper front and a little twine pull, then tuck a treat or a tiny note inside every one. Shoe box crafts like this become a family tradition the kids look forward to every morning. You can add numbers with stickers if you like. What would you hide in the drawers?
You will need: 1 large boot box without a lid, 24 small matchbox style boxes or folded card stock drawers, red and green paper, twine, white craft glue, small treats or notes
How to make it: 1. Stand the boot box on its side and paint or paper the inside. 2. Cover the front of each small drawer with red or green paper. 3. Glue a small loop of twine to each drawer for a pull. 4. Stack the drawers in rows inside the box and fill each one.
A Cat Hideaway Made From a Box

Every cat owner knows the truth: the box is better than the toy. Give your cat a cozy hideaway by cutting a round doorway in one side of a sturdy box and lining the bottom with a soft folded fleece. Leave the lid on for a cave feel or cover it in fabric to match your room. It is the cheapest cat bed you will ever make, and most cats claim it within minutes. Skip glitter, loose ribbon and tape inside so it stays safe. Is your cat a box lover too?
You will need: 1 sturdy boot or shoe box with lid, a craft knife (adult only), a small fleece blanket, fabric or paper for the outside (optional), white craft glue
How to make it: 1. Ask an adult to cut a round doorway about 6 inches wide in one short end. 2. Fold the fleece to fit the bottom of the box. 3. Cover the outside with fabric or paper if you like and let the glue dry fully. 4. Put the lid on and set it in a quiet, warm corner.
A Christmas Card Mailbox for the Hall
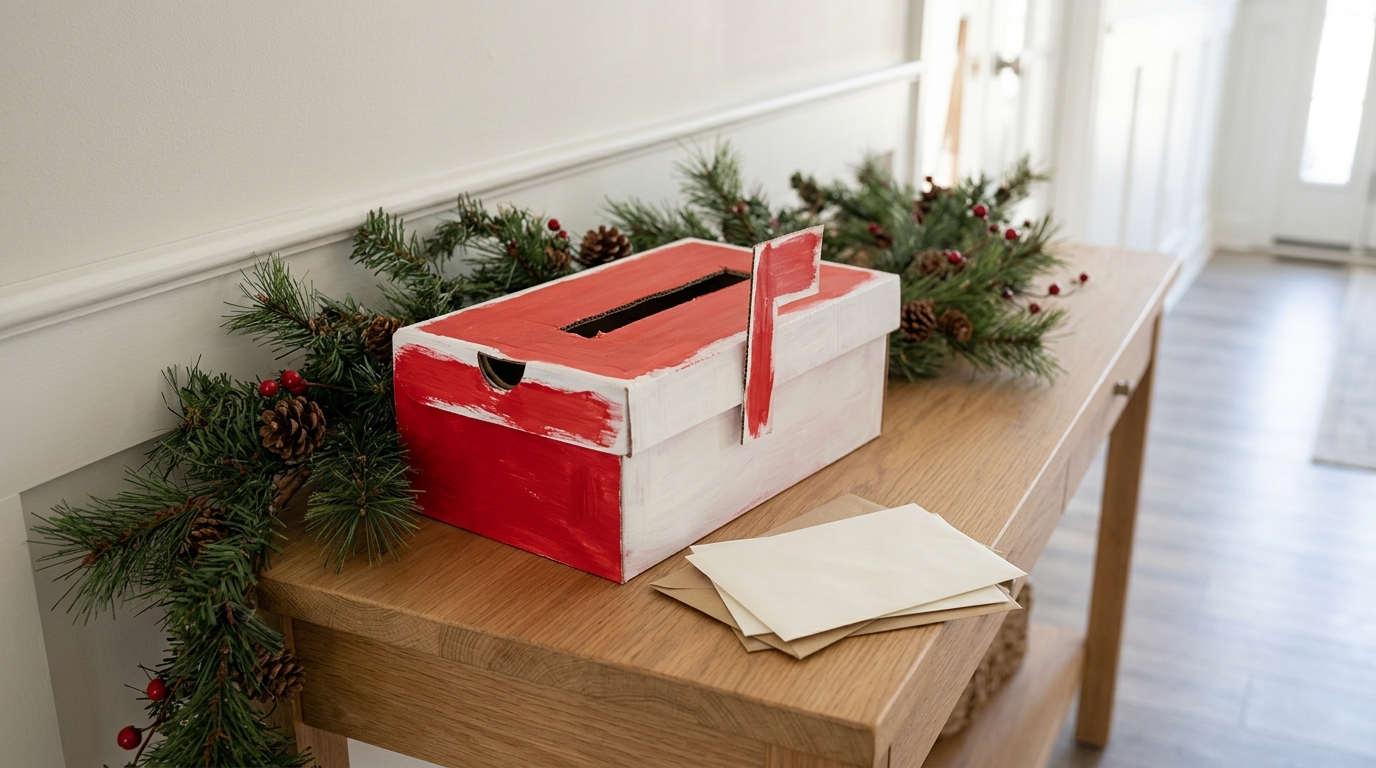
Give holiday cards a happy landing spot with a little mailbox made from a shoe box. Paint it red and white, cut a slot in the lid and add a small flag cut from card stock. Set it on the hallway table and let everyone drop in the cards that arrive each day, then open them together on a cozy evening. Kids can also use it to post letters and wish lists. Camelia DIY shared a clever shoe box makeover that racked up millions of views. Who sends the first card in your family?
You will need: 1 shoe box with lid, red and white acrylic paint, a paintbrush, a craft knife (adult only), card stock, white craft glue, a brass fastener for the flag
How to make it: 1. Paint the box red and the lid white, or the other way around, and let them dry. 2. Ask an adult to cut a slot in the lid wide enough for cards. 3. Cut a small flag from card stock and attach it to the side with a brass fastener. 4. Set it out with a pine sprig beside it.
Shoe Box Crafts Puppet Theater for Christmas Break
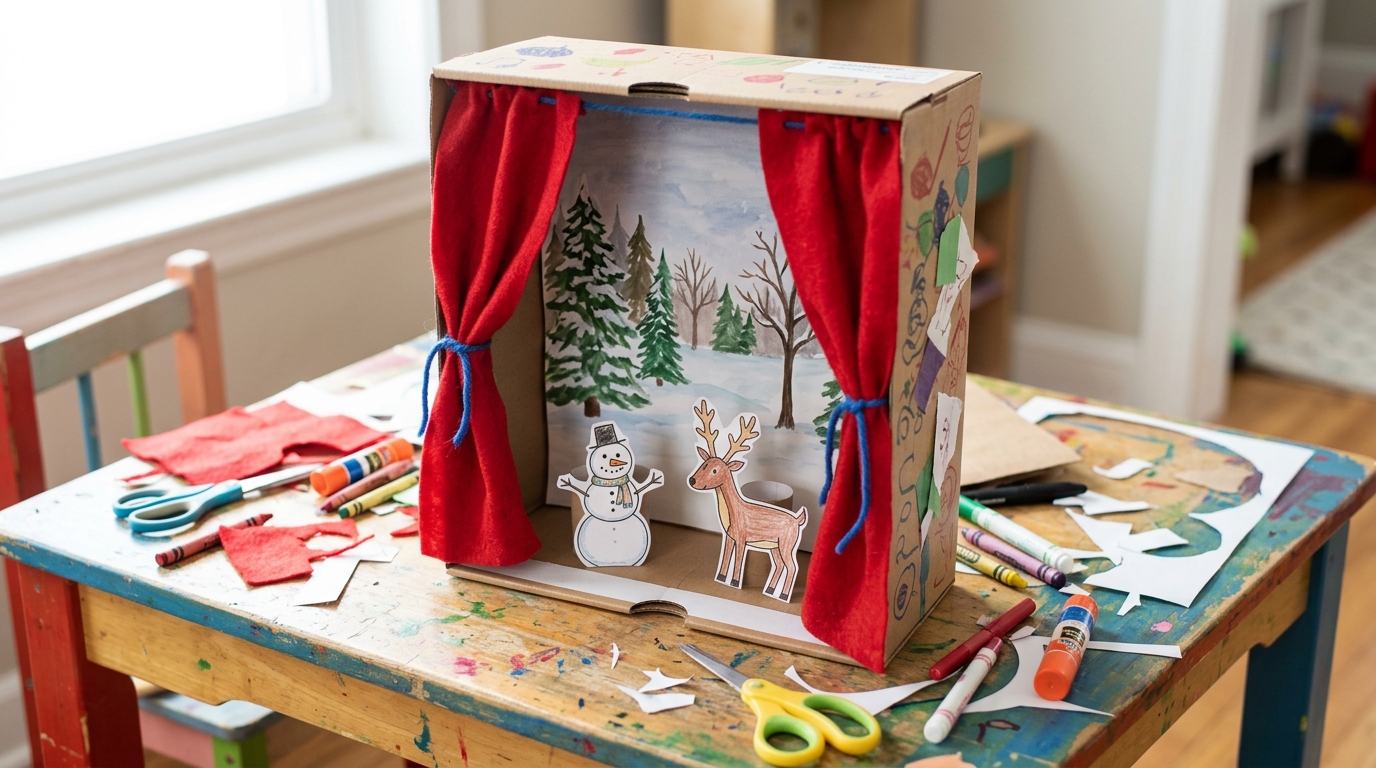
Stand a box on its end, cut out the front and you have a puppet theater ready for a holiday show. Red felt curtains tied back with yarn, a painted winter forest backdrop and paper finger puppets of a snowman and a reindeer make it feel magical. Kids can write their own little plays and perform them for grandparents after dinner. Shoe box crafts like this one keep children creative for days during Christmas break, and it costs next to nothing. What story will your family act out first?
You will need: 1 shoe box, a craft knife (adult only), red felt, yarn, card stock, markers or crayons, white craft glue, wooden craft sticks
How to make it: 1. Stand the box on its end and ask an adult to cut a window in the bottom panel to make the stage. 2. Draw and color a winter backdrop and glue it inside the back. 3. Glue two felt curtains to the top and tie them back with yarn. 4. Draw puppets on card stock, cut them out and glue them to craft sticks.