DIY Desk Organizers: 17 Clever Builds From Boxes, Cans and Scraps
DIY desk organizers are having a huge moment, and the reason is simple: a messy desk drains your energy, but fixing it does not have to cost a thing. A short video of a cardboard organizer with a secret drawer pulled 6.4 million views in just five days this month, and a cute stationery organizer reached 6.2 million views in about a week. People are digging out cereal boxes, paper rolls, tin cans and wood scraps and turning them into pretty, useful desk helpers. These builds are perfect for a home office, a homework corner or a craft table before the new year. Here are 17 clever ideas that look sweet, work hard and use things you already have..
Why DIY Desk Organizers Are Taking Over
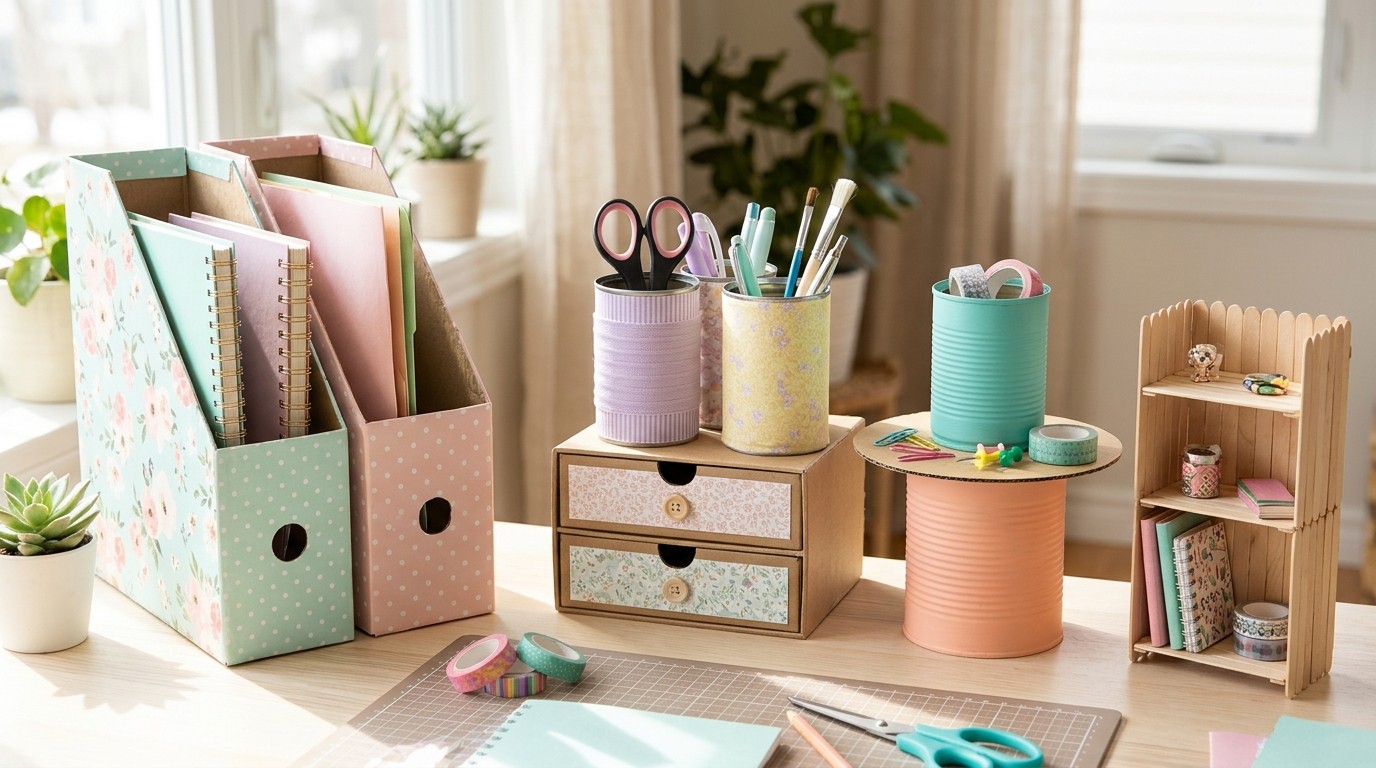
Look at a desk like this and you can feel your shoulders relax. Every pen has a cup, every file has a holder and nothing is lost under a pile. That calm feeling is why DIY desk organizers keep going viral, with a stationery organizer short reaching 6.2 million views in about eight days. The best part is that most of these pieces start as trash: a cereal box, a soup can, a paper roll. Pick one corner of your desk and start there. Which mess bothers you the most..
You will need: Clean cardboard boxes, paper rolls, empty tin cans with smooth edges, pretty paper or fabric, white glue and scissors.
How to make it: 1. Clear your desk completely and sort what you use every day. 2. Choose one organizer for each group of items. 3. Cover your boxes and cans in matching paper so the desk looks tidy and calm.
The Viral Secret Drawer Box
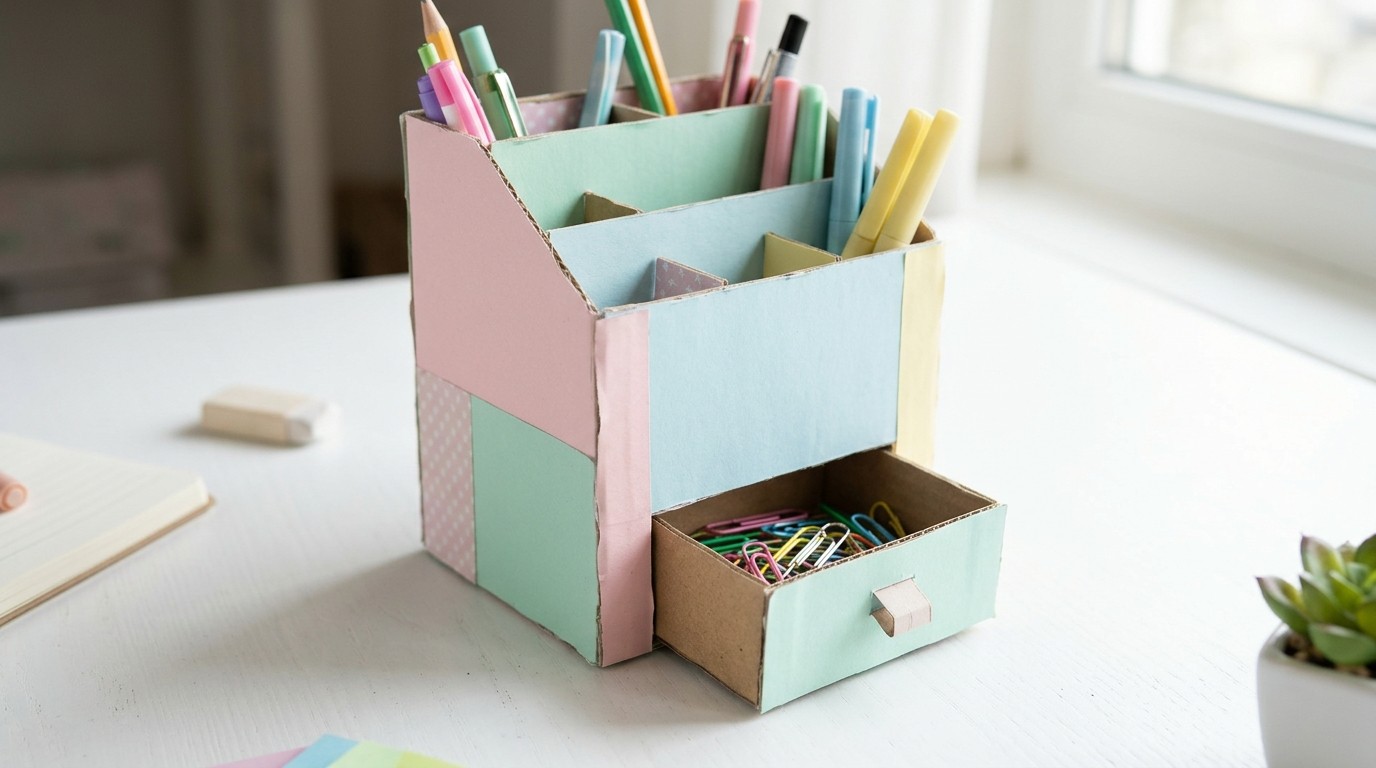
This is the build that started the buzz for DIY desk organizers. A cardboard box gets pen slots on top and a little drawer hidden in the base, so the clutter disappears with a gentle push. You can watch the idea in this cardboard secret organizer short, which passed 6.4 million views in five days. Kids love the surprise drawer for stickers and erasers, and grown ups love hiding the charging cables. It takes about an hour with a shoebox and some glue. What would you hide in yours?
You will need: A sturdy shoebox, extra cardboard, a ruler, a craft knife for an adult, white glue and patterned paper.
How to make it: 1. Build a small drawer from cardboard that slides into the bottom of the box. 2. Glue cardboard tubes or strips on top as pen slots. 3. Cover everything with patterned paper and add a bead as a drawer pull.
DIY Desk Organizers From Cereal Boxes
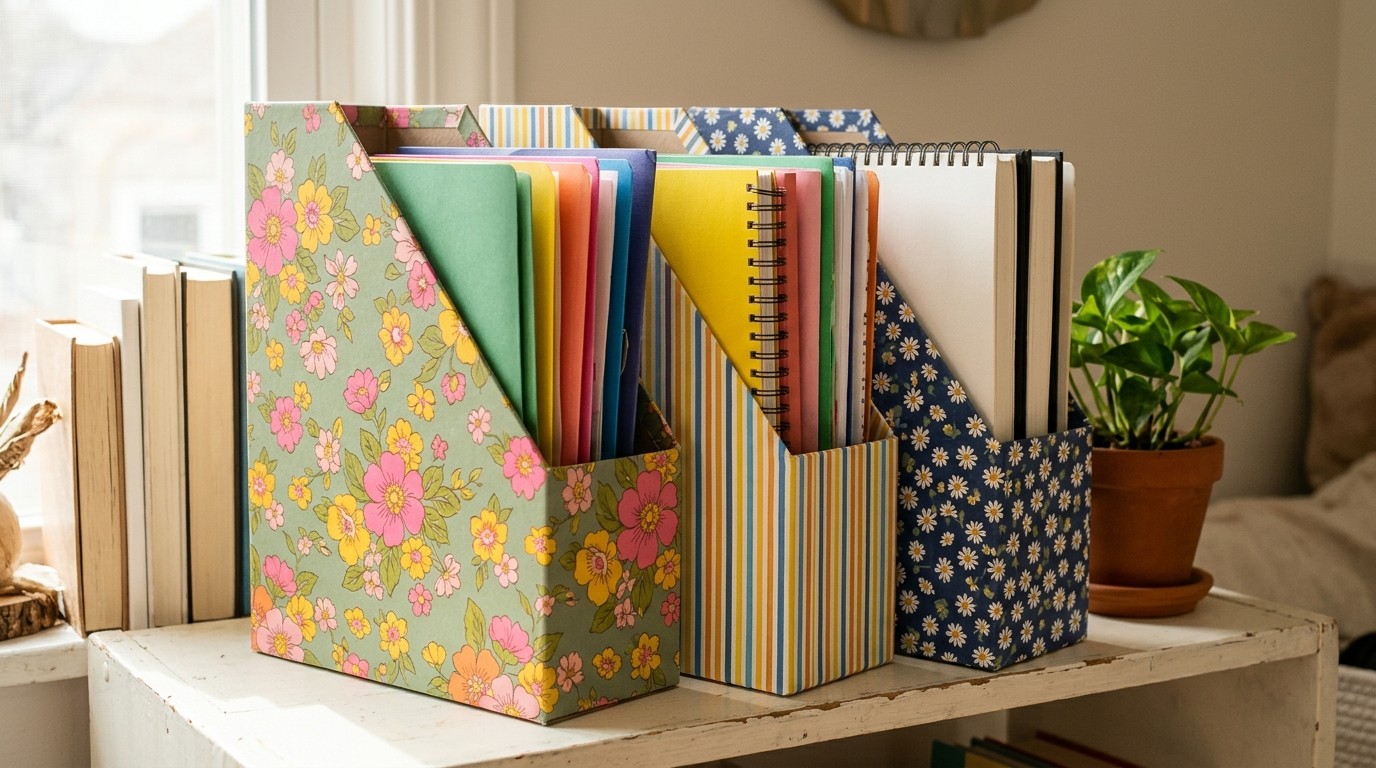
Cereal boxes are the perfect shape for magazine and file holders. Cut each box at an angle, cover it in pretty paper and line them up on a shelf. Use the same paper on all of them, or mix florals and stripes for a playful look. They hold notebooks, school folders and bills, and they cost nothing. This is one of the easiest DIY desk organizers to start with. How many boxes are in your recycling bin right now?
You will need: Empty cereal boxes, a ruler, a pencil, scissors, patterned paper or wrapping paper and a glue stick.
How to make it: 1. Draw a slanted line from the top back corner to halfway down the front. 2. Cut along the line on both sides and across the front. 3. Wrap the box in paper and glue the edges inside.
Fabric Wrapped Pen Cups From Paper Rolls
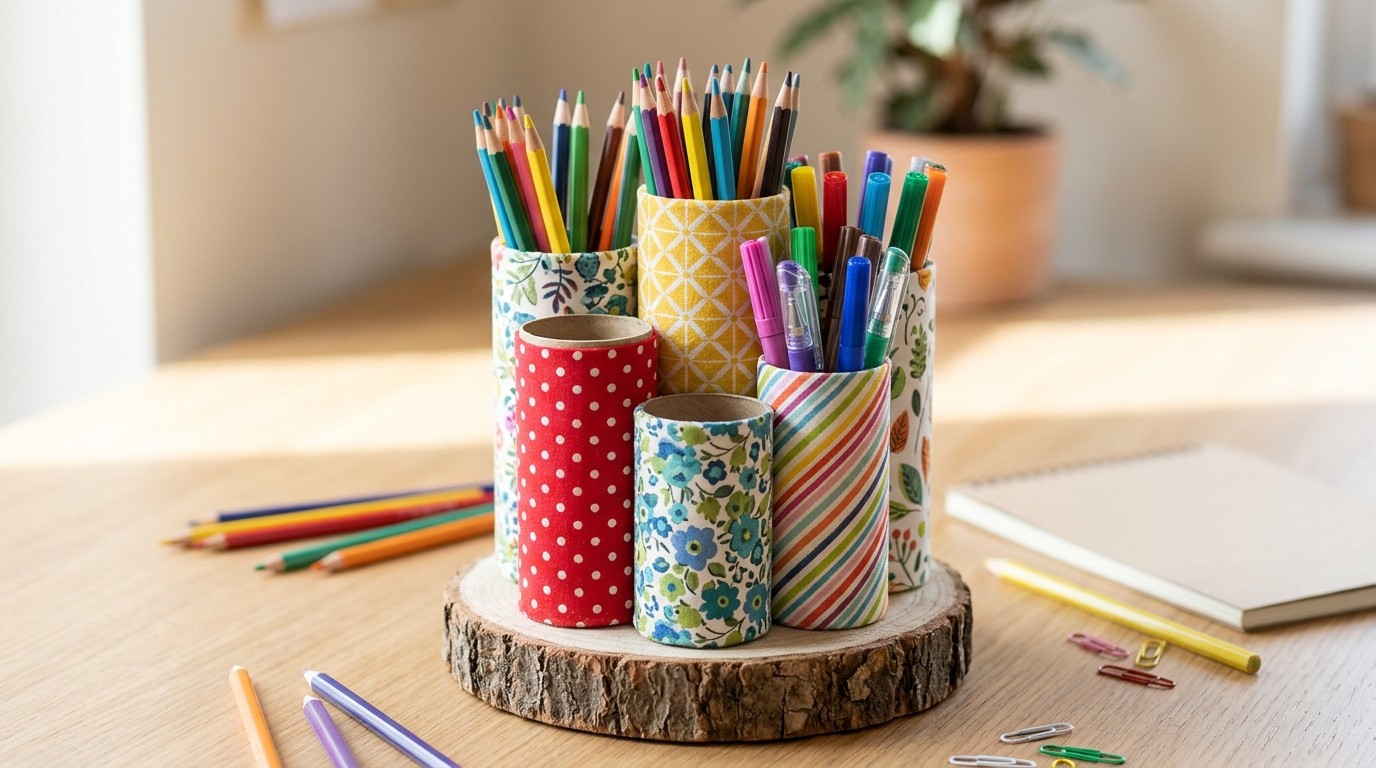
For DIY desk organizers on a zero budget, paper towel and toilet paper rolls make a cute cluster of pen cups when you cut them to different heights and glue them to a round base. Wrap each tube in a scrap of fabric for a soft, cozy look. Taller tubes hold rulers and scissors, short ones hold erasers and clips. This is a sweet project to make with kids on a rainy afternoon, and it uses up fabric scraps too. Which fabric would you pick?
You will need: Cardboard rolls, fabric scraps, a cardboard or wooden circle base, fabric glue or white glue and scissors.
How to make it: 1. Cut the rolls to three or four different heights. 2. Wrap each one in fabric and glue the ends inside. 3. Glue them standing up on the round base.
DIY Desk Organizers From Tin Cans: A Tiered Tray
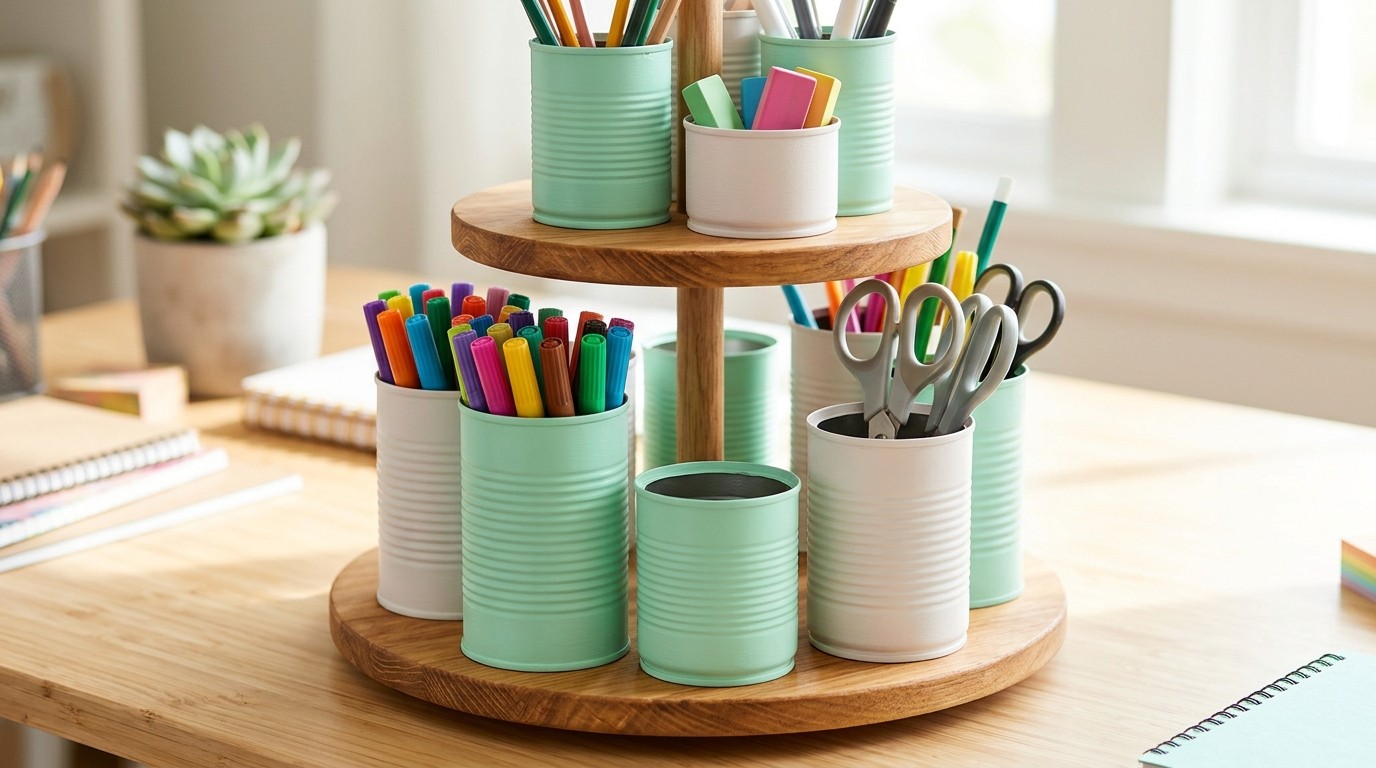
Clean tin cans make sturdy, cute holders for markers and scissors. Paint them in two soft colors and glue them onto a round wooden board at different levels to make a tiered tray. Choose cans opened with a smooth edge opener, or cover the rim with tape, so no one gets scratched. A grown up should check every edge first. The result looks like something from a fancy shop. Would you paint yours mint or blush?
You will need: Clean tin cans with smooth edges, spray or acrylic paint, a round wooden board, strong craft glue and a small block of wood for height.
How to make it: 1. Have an adult check the rims and tape any rough spots. 2. Paint the cans and let them dry fully. 3. Glue them on the board, raising one or two on a wood block.
Cardboard Drawer Dividers
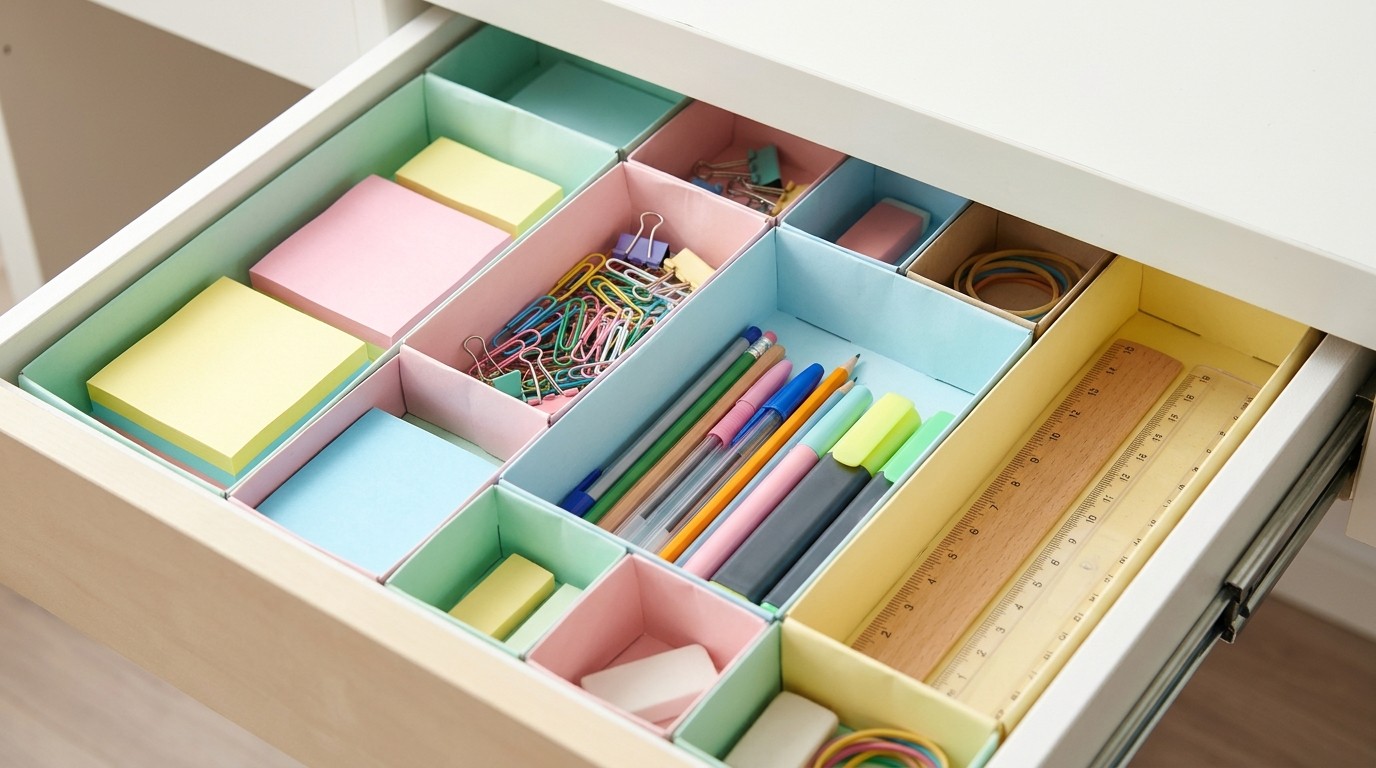
A messy drawer slows you down every single day. Cardboard dividers fix it in an afternoon. Measure your drawer, cut strips of cardboard and slot them together like a grid. Cover them in pastel paper so the drawer looks pretty every time you open it. Now sticky notes, clips and pens each have a spot. Of all the DIY desk organizers here, this might save you the most time. Which drawer needs it most?
You will need: Thin cardboard, a ruler, a pencil, scissors, pastel paper and a glue stick.
How to make it: 1. Measure the inside of the drawer. 2. Cut cardboard strips to fit and cut half slots so they lock together. 3. Cover with paper and slide the grid into the drawer.
DIY Desk Organizers for Cables: A Shoebox Charging Station
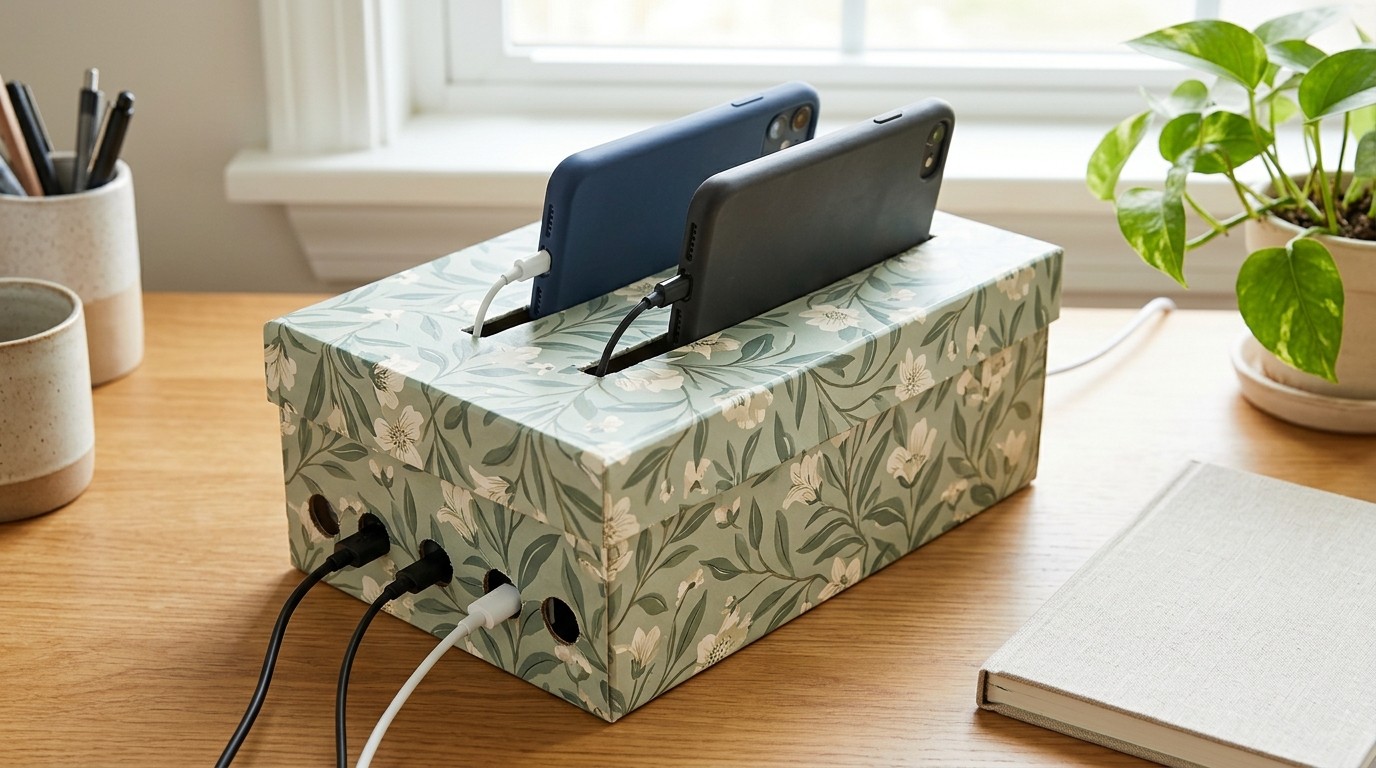
Phone cables tangled across the desk? A shoebox charging station hides them neatly. Cut slots in the lid so phones can stand up and punch holes in the back so the cables can come in from a power strip that stays outside, behind the desk. Cover the box in pretty paper and the cords simply vanish. Only the cables go inside, never the plugs or power strip. How many devices live at your house?
You will need: A sturdy shoebox, a craft knife for an adult, decorative paper, glue and your usual phone cables.
How to make it: 1. Have an adult cut two phone slots in the lid and holes at the back. 2. Cover the box in paper. 3. Feed the cables in from the back and up through the slots, keeping plugs outside.
A Wooden Sticky Note Holder
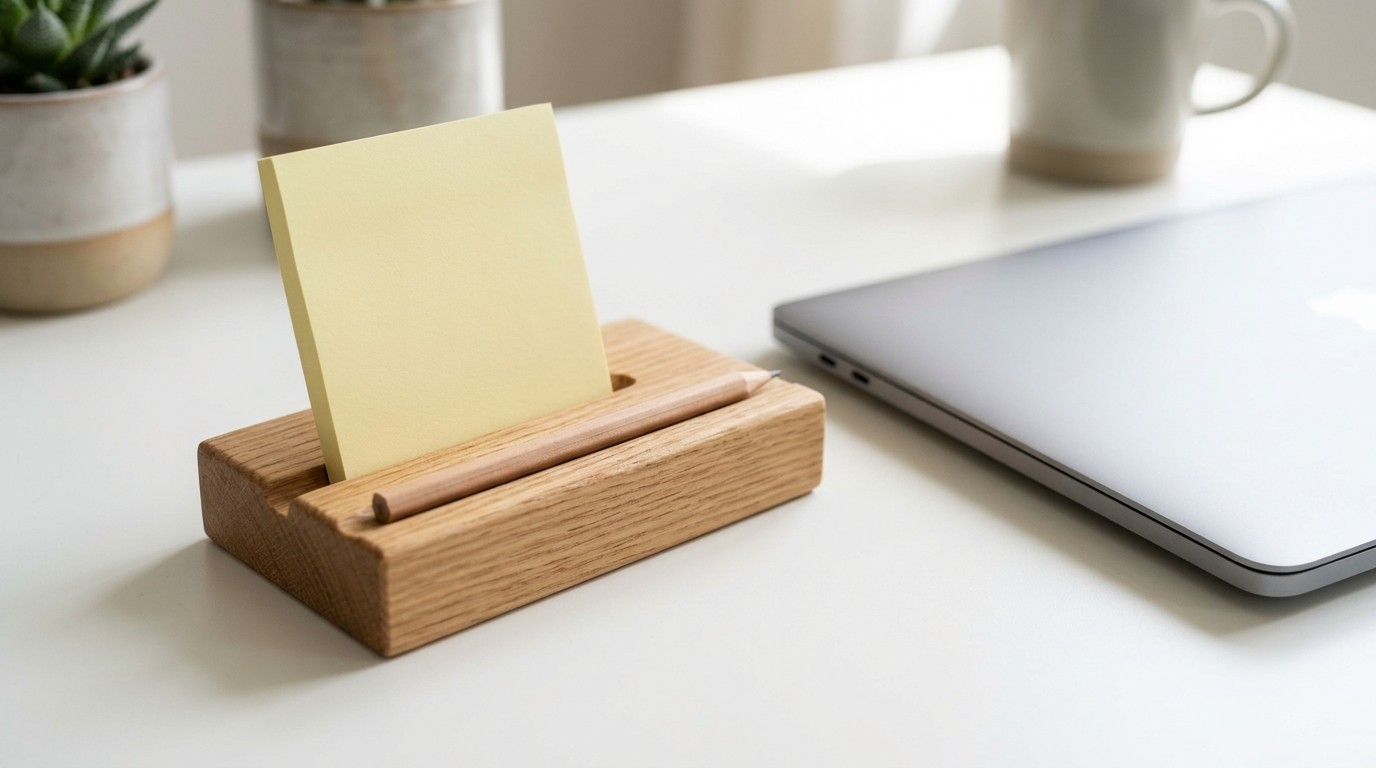
A smooth wooden block with a groove cut into it keeps sticky notes and a pencil right where you need them. It is a lovely beginner woodworking project for an adult, and a great gift for a teacher or a coworker. Sand it silky smooth, rub in a little oil and it will last for years. You can also skip the groove and just glue on a small wooden peg for the pencil. Who on your list needs one?
You will need: A small block of wood, a saw and sandpaper for an adult, wood oil or wax and a pad of sticky notes.
How to make it: 1. Have an adult cut a shallow groove along the top for a pencil. 2. Sand all the edges smooth. 3. Rub in oil, let it dry and set a sticky pad in front of the groove.
A Spinning Desk Carousel
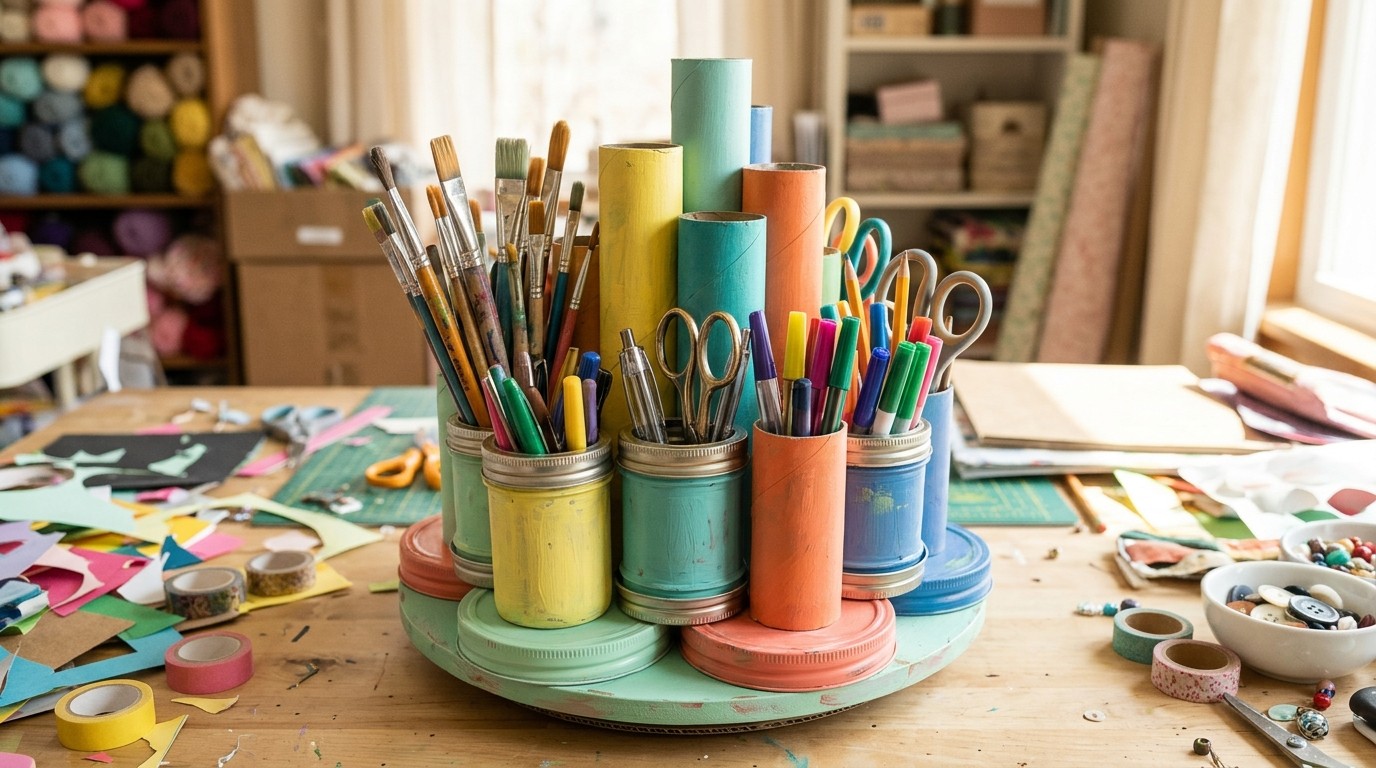
Among DIY desk organizers, a spinning one means everything is one little turn away. Stack painted jar lids and cardboard tubes around a center tube, then set it on a large lid that turns on a small lazy susan or a smooth plate. Kids love spinning it to find the right marker. It holds a surprising amount for its size and looks cheerful on a craft desk. What would you keep on the top level?
You will need: Large and small jar lids, cardboard tubes, paint, strong glue and a small lazy susan or smooth plate.
How to make it: 1. Paint the lids and tubes in matching colors. 2. Glue tubes in a circle around a tall center tube on the big lid. 3. Set the whole piece on the lazy susan.
A Painted Cork Board Pegboard
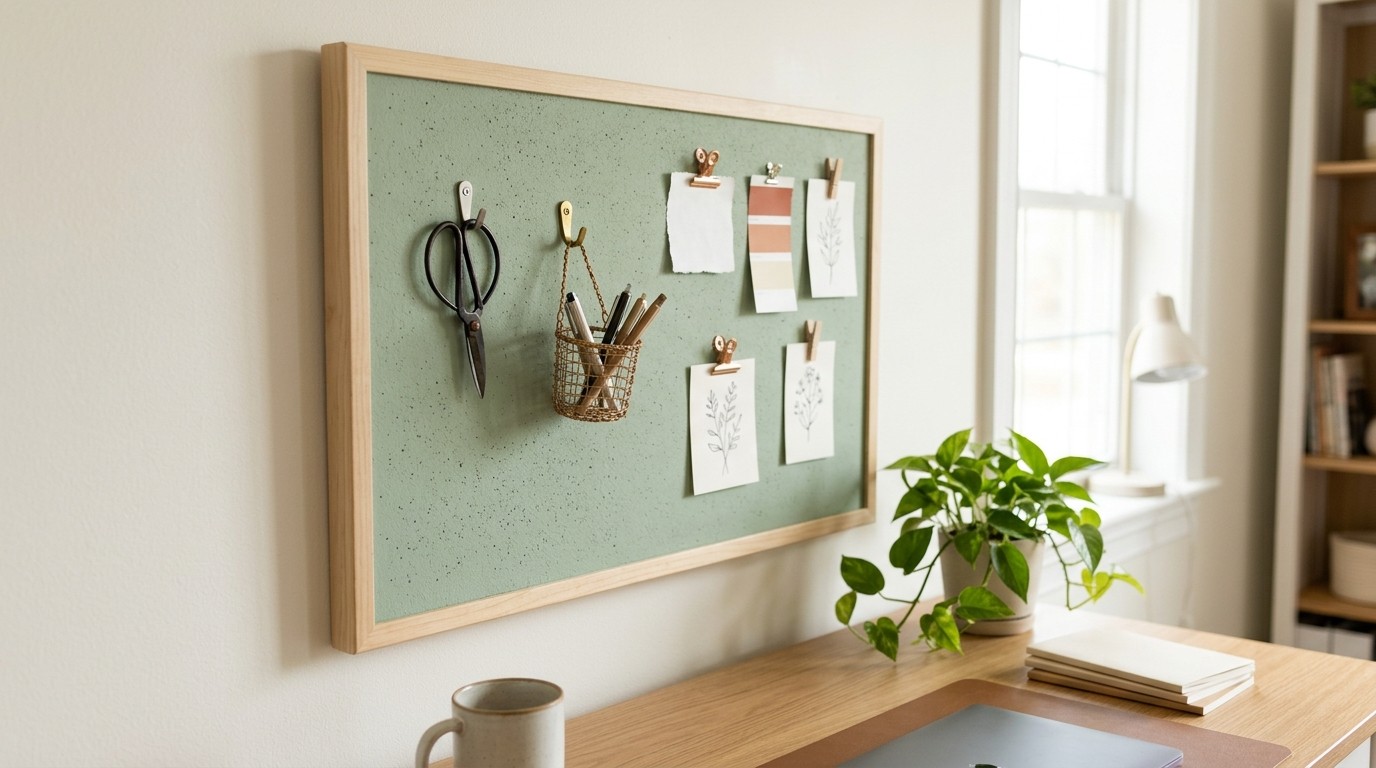
A plain cork board gets a fresh look with a coat of soft paint. Add a few small hooks and a mini basket, and it becomes a pegboard style station that holds scissors, notes and pens right above your desk. It keeps the desk surface clear, which makes the whole space feel bigger. Pin your to do list in the center so you see it every morning. What color would match your room?
You will need: A cork board, chalk paint or acrylic paint, a wide brush, small screw in hooks and a small wire basket.
How to make it: 1. Paint the cork board frame and surface and let it dry. 2. Twist small hooks into the cork along the bottom. 3. Hang scissors, a basket of pens and your notes.
Tiny DIY Desk Organizers: A Craft Stick Bookshelf
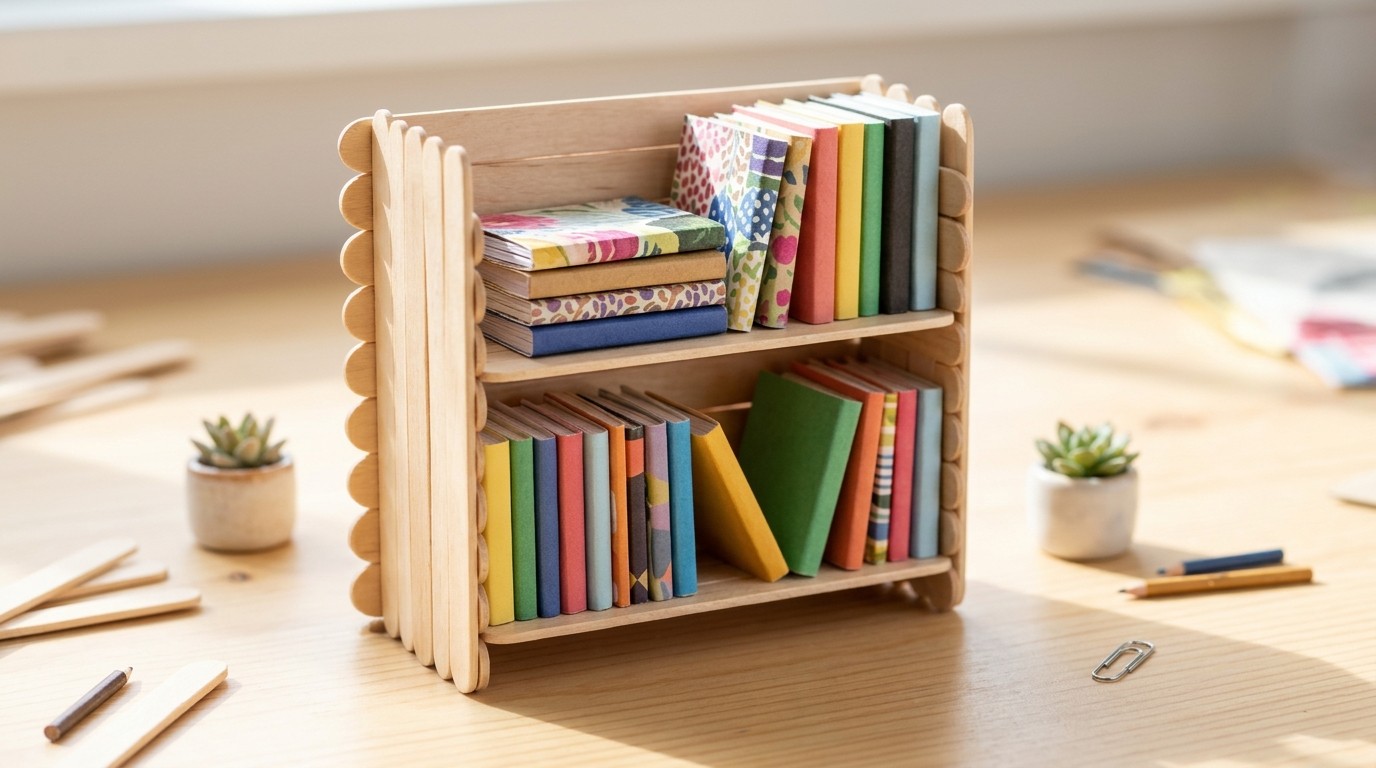
This tiny bookshelf made from craft sticks holds notebooks, planners and a few paperbacks right on the desk. Kids can help glue the sticks into panels, and an adult can help with the final assembly. It is sweet, light and surprisingly strong when you layer the sticks two thick. Paint it or leave it natural. It is one of the cutest DIY desk organizers for a small corner. What would you keep on the shelves?
You will need: A box of wooden craft sticks, wood glue, a ruler, small clamps or clothespins and paint if you like.
How to make it: 1. Glue sticks side by side to make five flat panels, two layers thick. 2. Let them dry, then glue them into a box with one shelf in the middle. 3. Paint and let it dry overnight.
A Washi Tape Dispenser
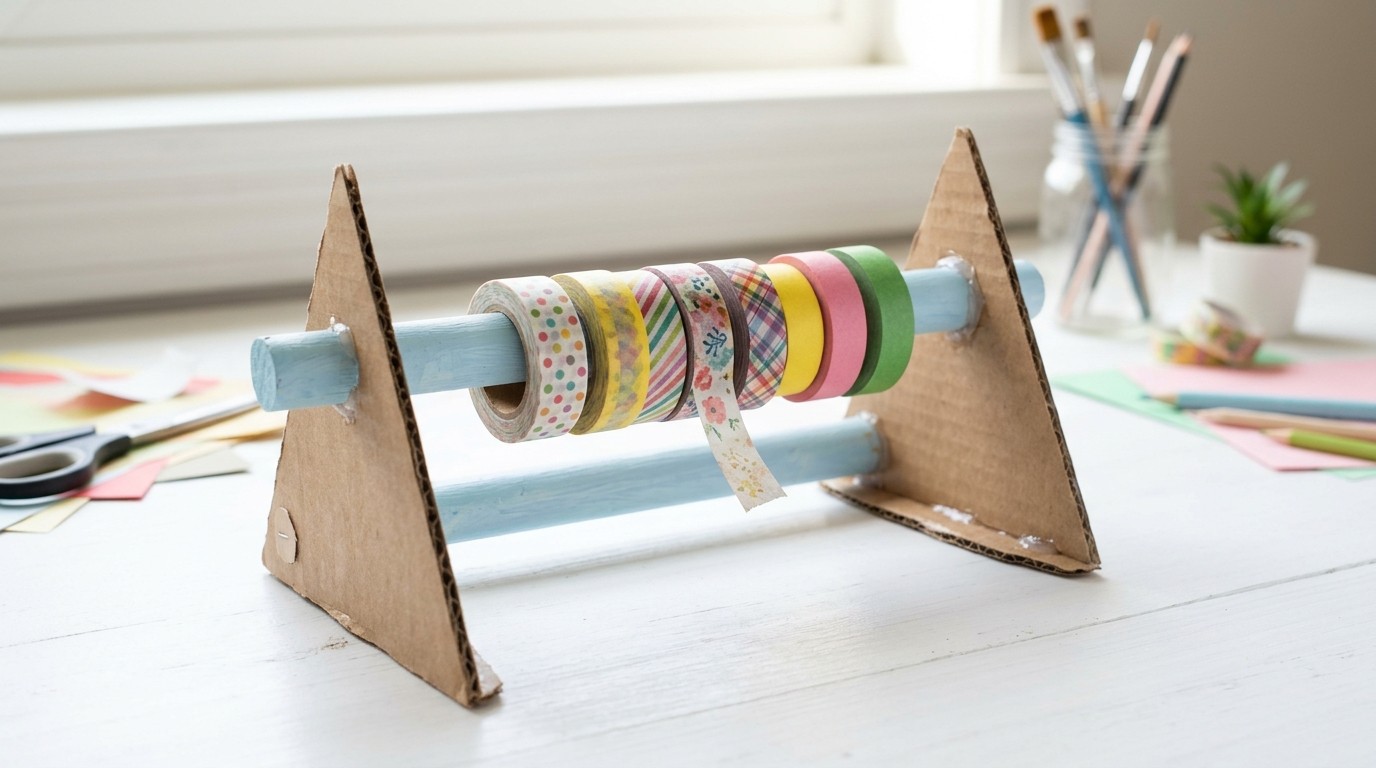
If you love washi tape, you know the rolls end up everywhere. A simple dispenser made from a painted wooden dowel on a cardboard stand keeps them all in a row. Slide the rolls on, pull out what you need and snip it with small scissors. It is quick, cute and great for crafters. How many rolls are hiding in your drawer?
You will need: A wooden dowel, sturdy cardboard or a small wooden board, paint, strong glue and your washi tape rolls.
How to make it: 1. Cut two side supports from cardboard and cover them in paper. 2. Push the dowel through holes in each side. 3. Glue the sides to a base and slide on the tape rolls.
Painted Jar Lid Trays
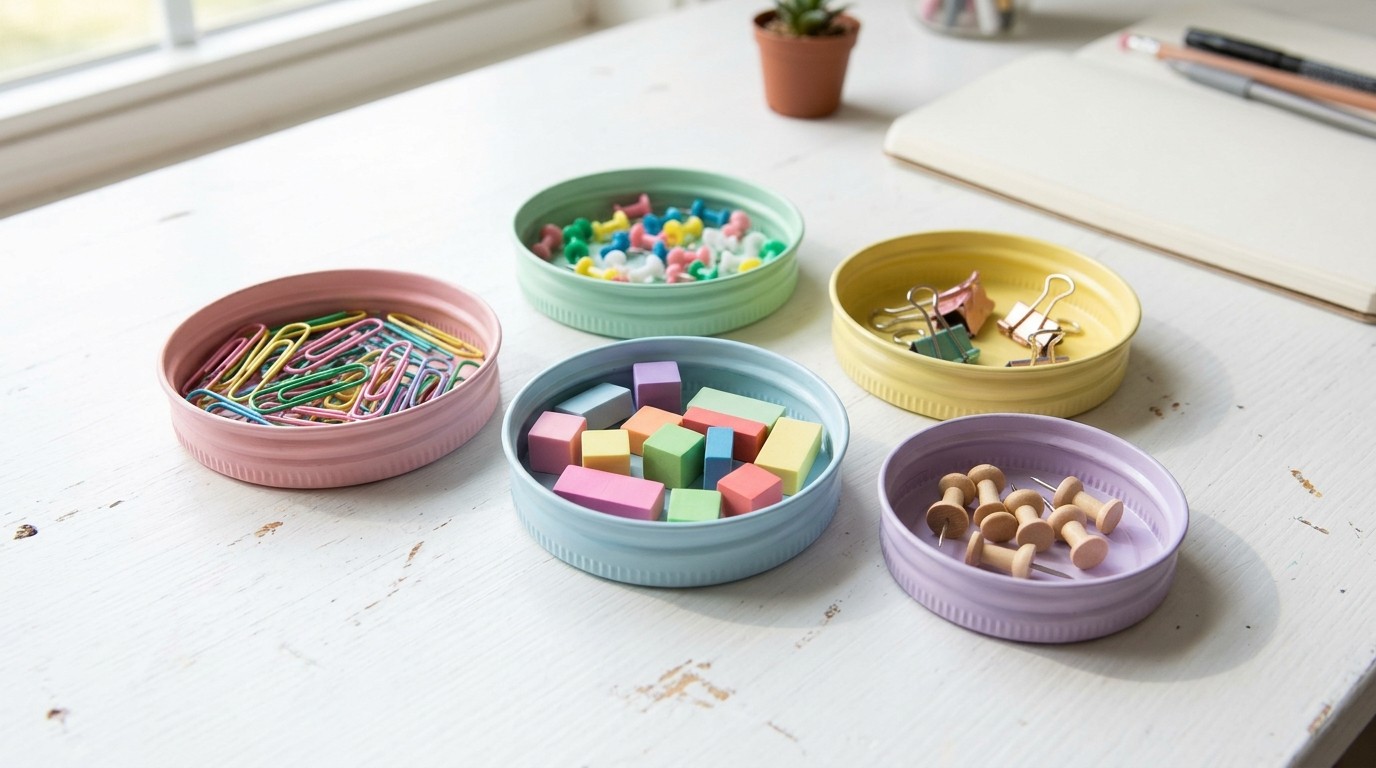
Jar lids are just the right size for small things that love to roll away, like paper clips, push pins and erasers. Paint them in soft pastel colors and line them up on the desk. Each lid becomes a tiny tray. They are free, they take five minutes and they look surprisingly sweet. If the inside is shiny, rough it up with sandpaper first so the paint sticks. How many lids are in your kitchen drawer?
You will need: Clean metal jar lids, fine sandpaper, acrylic or spray paint and small felt dots for the bottom.
How to make it: 1. Wash and dry the lids and lightly sand them. 2. Paint inside and out in pastel colors. 3. Stick felt dots underneath so they do not scratch the desk.
Bigger DIY Desk Organizers: A Scrap Wood Monitor Shelf
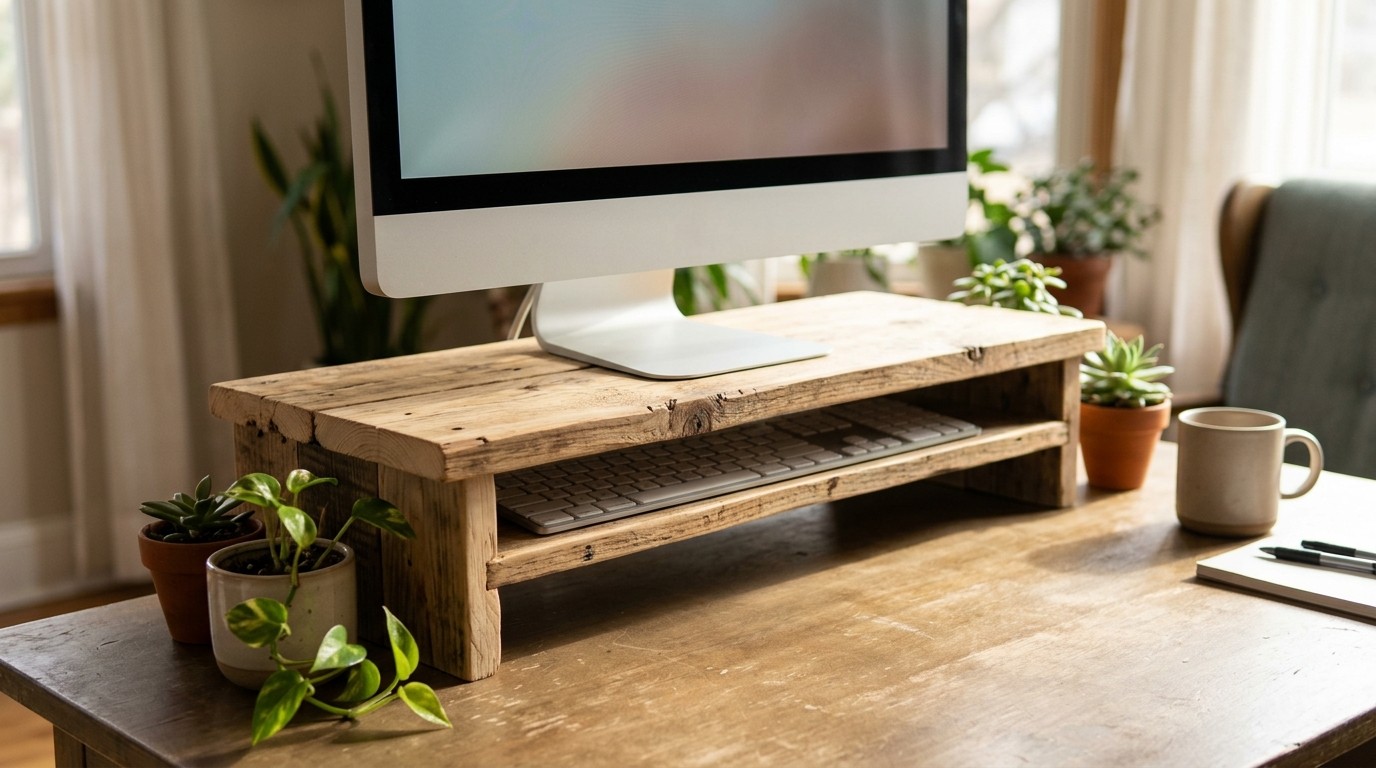
A simple monitor shelf lifts the screen to a more comfortable height and frees up space underneath for a keyboard or notebooks. It is just one board on two short legs, sanded and finished. An adult can build it in under an hour with scrap wood. Add small plants on each side and the whole desk feels more like a calm workspace. It is one of the most useful DIY desk organizers you can make. Is your screen too low right now?
You will need: A pine board, two short wood blocks for legs, wood screws, sandpaper, wood stain and a drill for an adult.
How to make it: 1. Have an adult cut the board slightly wider than the monitor base. 2. Screw the legs on from the top and sand all edges. 3. Stain or paint and let it dry fully before use.
Binder Clip Cable Holders
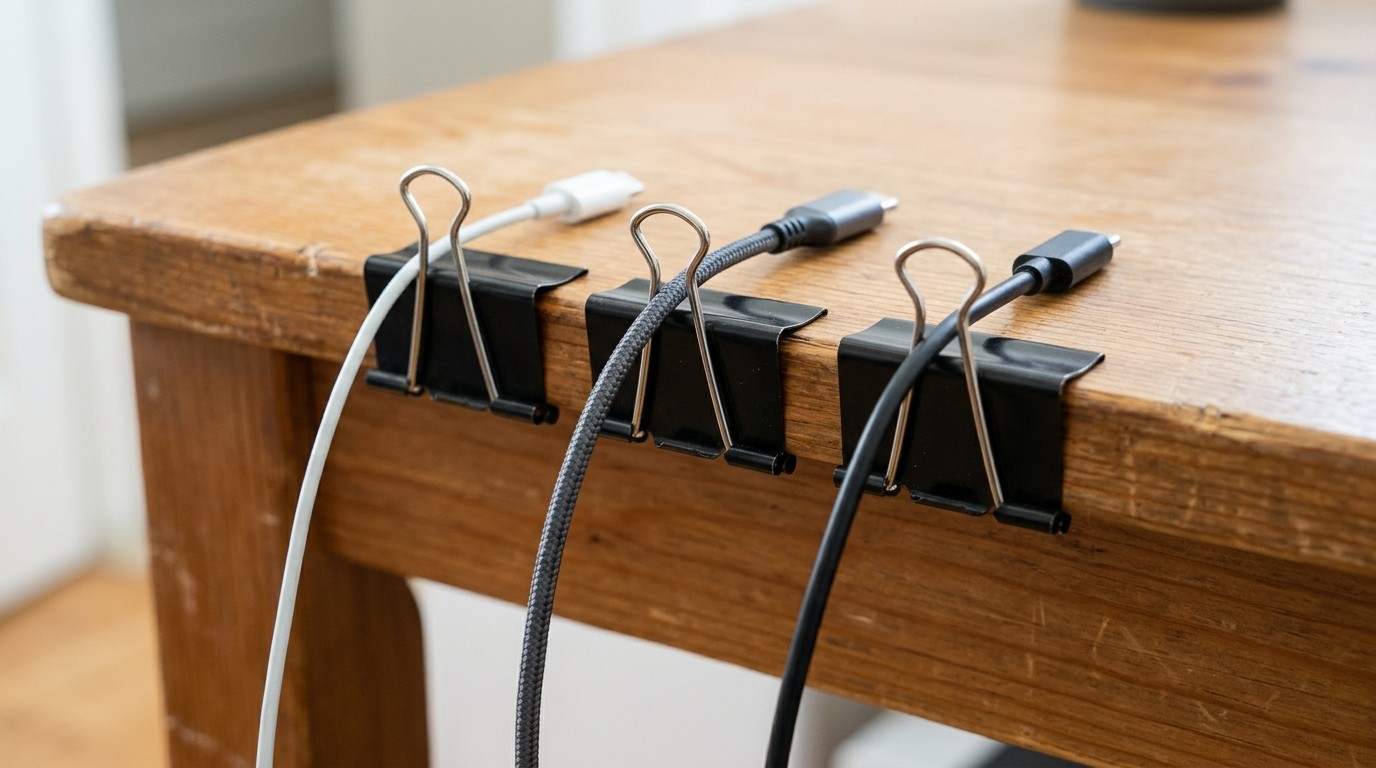
This is the fastest of all the DIY desk organizers on the list. Clip a few binder clips to the edge of your desk and thread each charging cable through a metal handle. No more cables sliding off the back of the desk every night. You can paint the clips or wrap the handles with washi tape to match your setup. It takes two minutes and costs almost nothing. How many cables do you lose behind your desk?
You will need: Medium binder clips, washi tape or paint if you like and your charging cables.
How to make it: 1. Clip the binder clips along the back edge of the desk. 2. Thread each cable through one handle. 3. Fold the handles down so the cables stay put.
A Hidden Under Desk Drawer
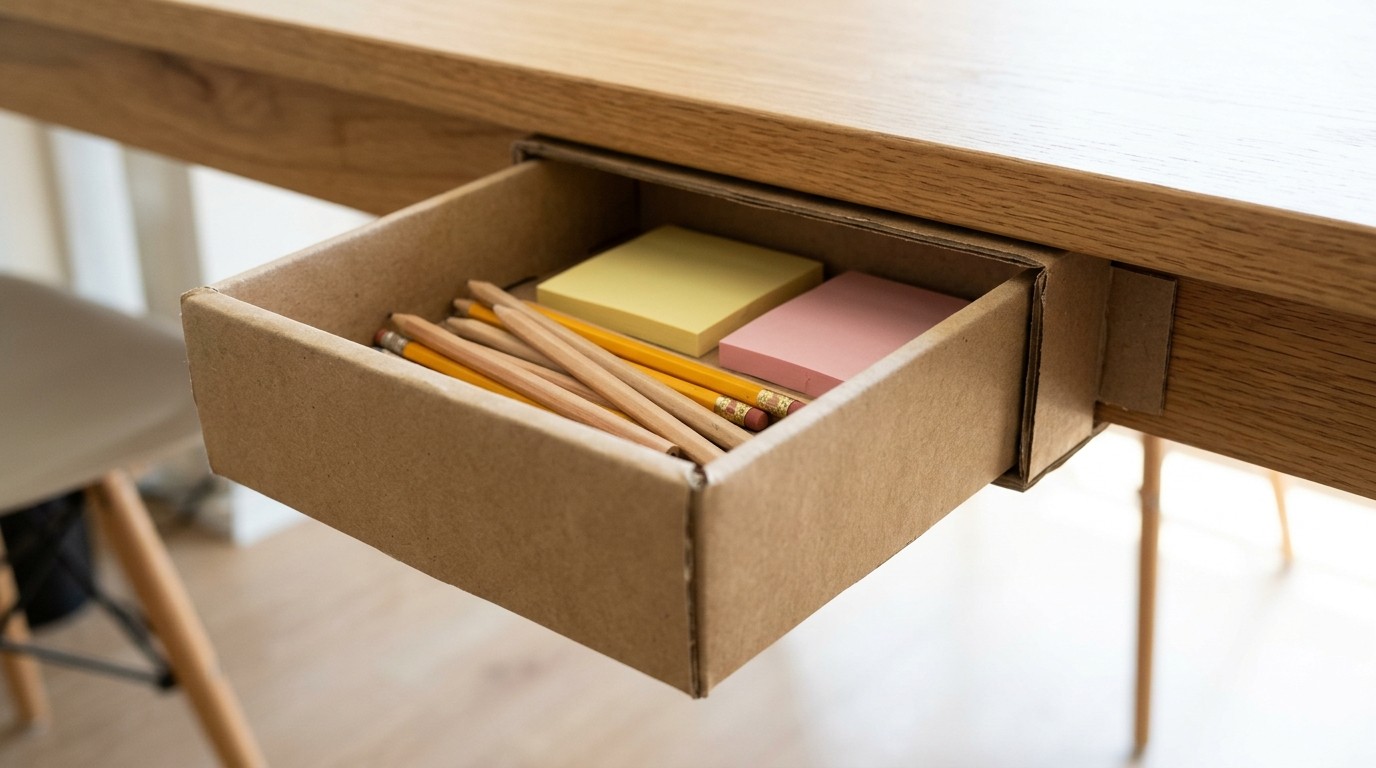
Short on desk space? Add a hidden drawer underneath. A sturdy cardboard box covered in kraft paper slides into a simple sleeve stuck under the desk with strong mounting strips. It holds pencils, sticky notes and small items you want close but out of sight. For more ways to turn boxes into useful things, see our cardboard box crafts. It is a smart trick for small desks and kids homework spots. What would you tuck away in it?
You will need: Two nesting cardboard boxes, kraft paper, glue and heavy duty mounting strips.
How to make it: 1. Cut the larger box into an open sleeve and cover both in kraft paper. 2. Stick the sleeve under the desk with mounting strips. 3. Slide the smaller box in as the drawer.
A Color Coded Dot System
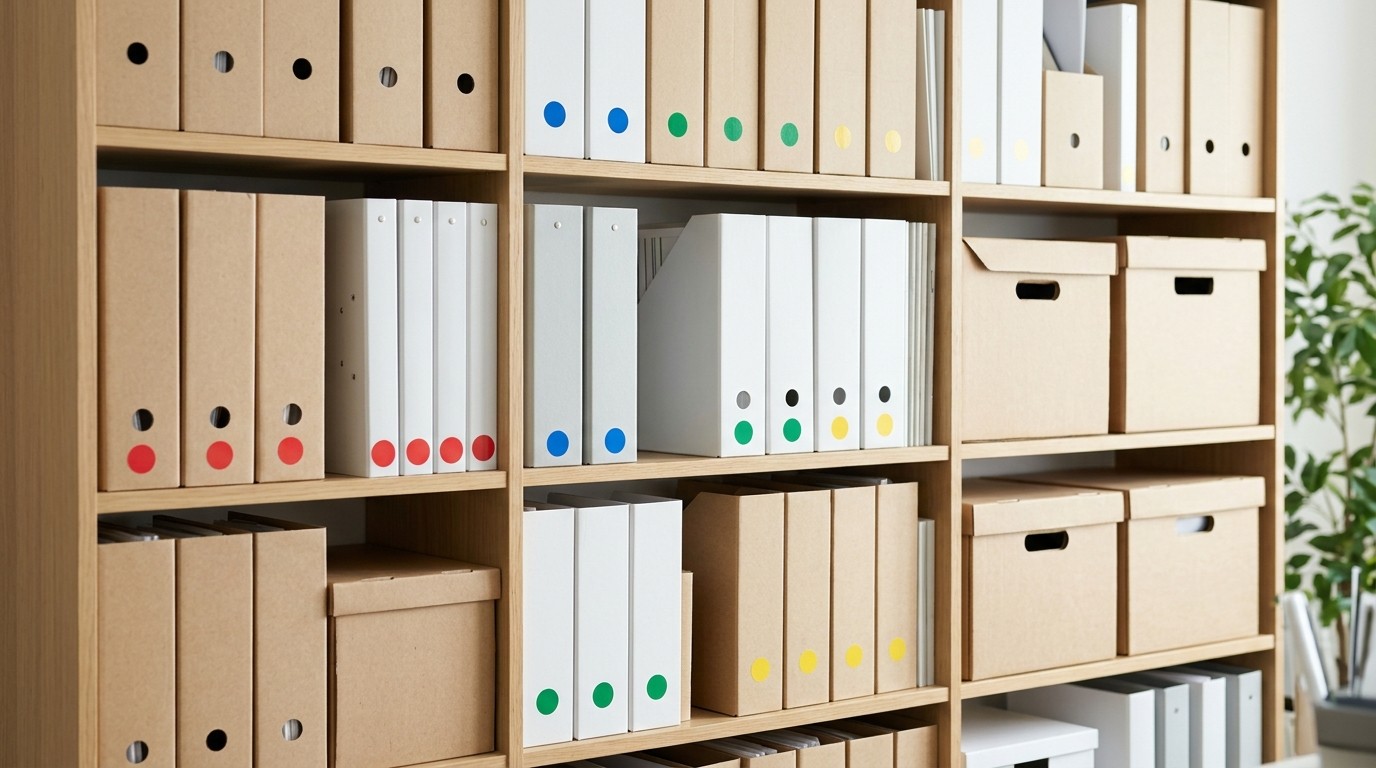
The last step makes everything else work: a color code. Pick one color for each person or each subject, like red for bills, blue for school and green for crafts. Put a matching dot sticker on every box, folder and drawer. Now everyone knows where things go, even little ones who cannot read yet. It is the simple secret behind tidy DIY desk organizers that actually stay tidy. Which colors would you choose?
You will need: Round dot stickers in four colors and the organizers you made.
How to make it: 1. Give each person or subject one color. 2. Add a dot to every matching box, folder and drawer. 3. Put a small color key on the wall above the desk.