Paper Bag Crafts: 16 Christmas Ideas That Look Expensive, Honoring Bag Inventor Margaret Knight
Paper bag crafts might be the cheapest way to make your home look like a holiday magazine. Every brown bag under your sink has a clever story: its flat bottom shape comes from Margaret E. Knight, an inventor who built a machine to fold and glue them around 1870 and went on to receive dozens of patents. She has been called the most famous woman inventor of the 19th century. Today that humble bag can become giant window stars, glowing gingerbread houses, rosette wreaths and boutique gift bags. Below are sixteen cozy Christmas projects that cost almost nothing, use battery lights instead of candles, and look far more expensive than they are. Grab a stack of bags and let us get folding..
Paper Bag Crafts for a Cozy Craft Night
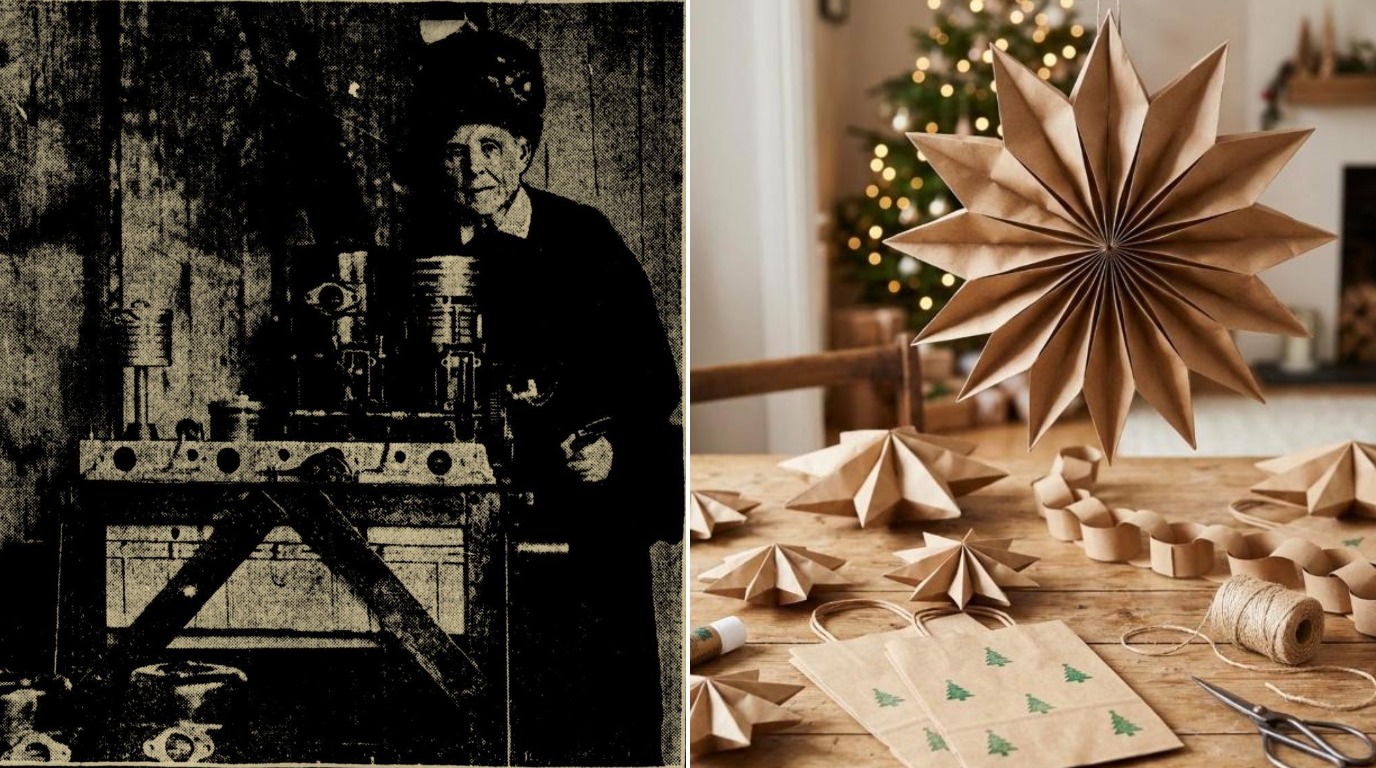
Pour a mug of cocoa, put on a Christmas movie and spread out a stack of brown paper bags, a glue stick and some twine. In one evening you can fold a giant star, stamp a few gift bags and link a simple paper chain, and the whole table looks like a page from a Scandinavian design shop. Margaret Knight would love that her clever flat bottom bag became the cheapest craft supply in the house. Invite a friend, split the bags and see who makes the prettiest star. Ready to clear the kitchen table..
You will need: A stack of brown paper lunch bags, a glue stick, scissors, jute twine, a small rubber stamp and green ink.
How to make it: 1. Sort the bags by size and flatten them. 2. Set up one station for stars, one for stamping and one for garlands. 3. Work through the projects below and hang each finished piece as you go.
Giant Paper Bag Star for the Window
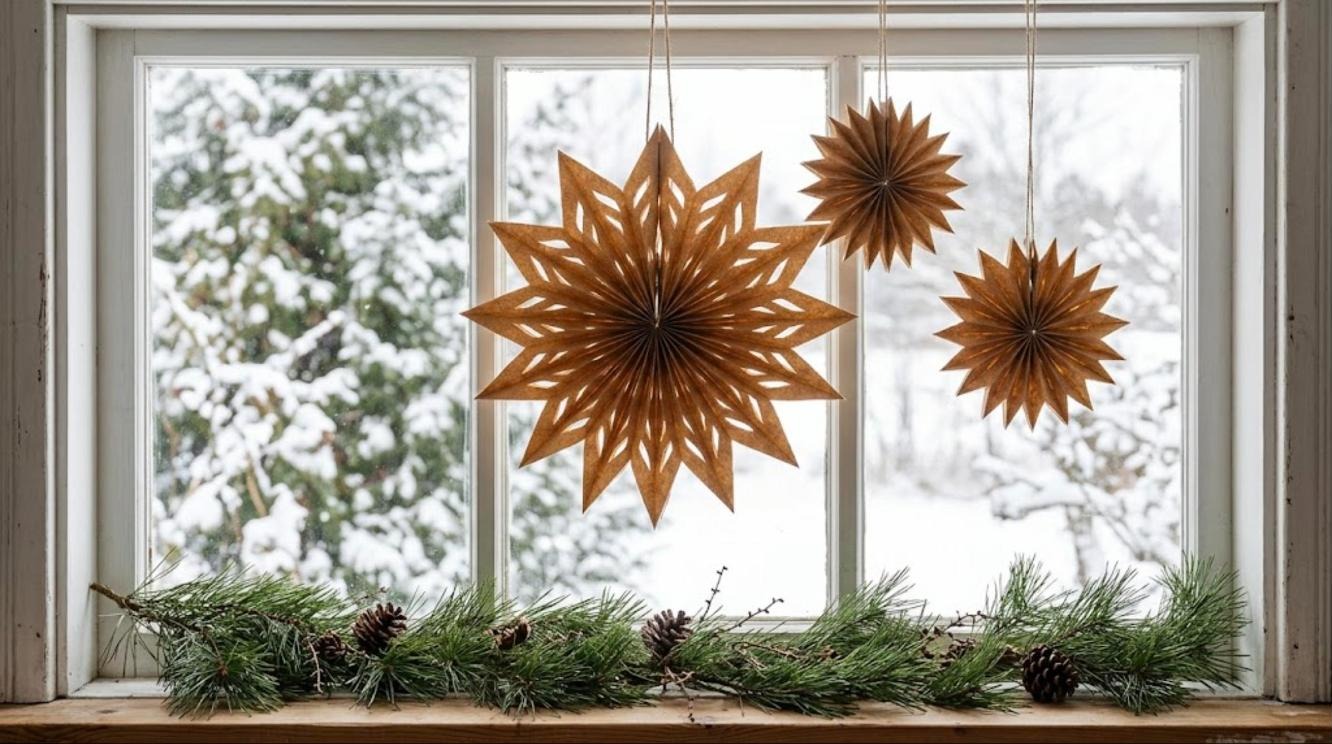
Of all paper bag crafts, this is the one that took over social media, with one big paper star video passing eight million views. You glue a stack of lunch bags together in alternating stripes, cut a point into the top, then fan it open and suddenly you have a huge star that looks like a designer lantern. Cut little diamonds into the sides before you open it and the window light shines straight through. Hang three in different sizes and the whole room feels like a Nordic cabin. Which window in your house would show it off best?
You will need: Ten to thirteen brown paper lunch bags, a strong glue stick, sharp scissors, a pencil and twine for hanging.
How to make it: 1. Glue a line down the bottom of the first bag and a T shape on the next, alternating as you stack all the bags. 2. Cut a point or curve into the top of the stack and snip small shapes into the sides. 3. Let it dry, open the stack into a star, glue the last bag to the first and hang it with twine.
Mini Folded Star Ornaments for the Tree

Once you know the big star, the mini version takes ten minutes. Cut sandwich bags or the bottoms of lunch bags into small squares, fold them into simple 3D stars and loop red and white baker twine through the top. A dozen of them on a green tree look calm, warm and expensive, especially next to a wooden bead garland and warm white lights. They weigh nothing, so even small branches hold them. Kids can fold them too while you handle the scissors. How many can your family make before dinner?
You will need: Small brown paper bags or squares cut from lunch bags, glue stick, a ruler, scissors and baker twine.
How to make it: 1. Cut the paper into five equal squares per star and fold each square in half corner to corner. 2. Glue the folded pieces together edge to edge into a five point star. 3. Poke a small hole in one point and tie on a twine loop.
Paper Bag Crafts for Frosty Windows: Snowflakes
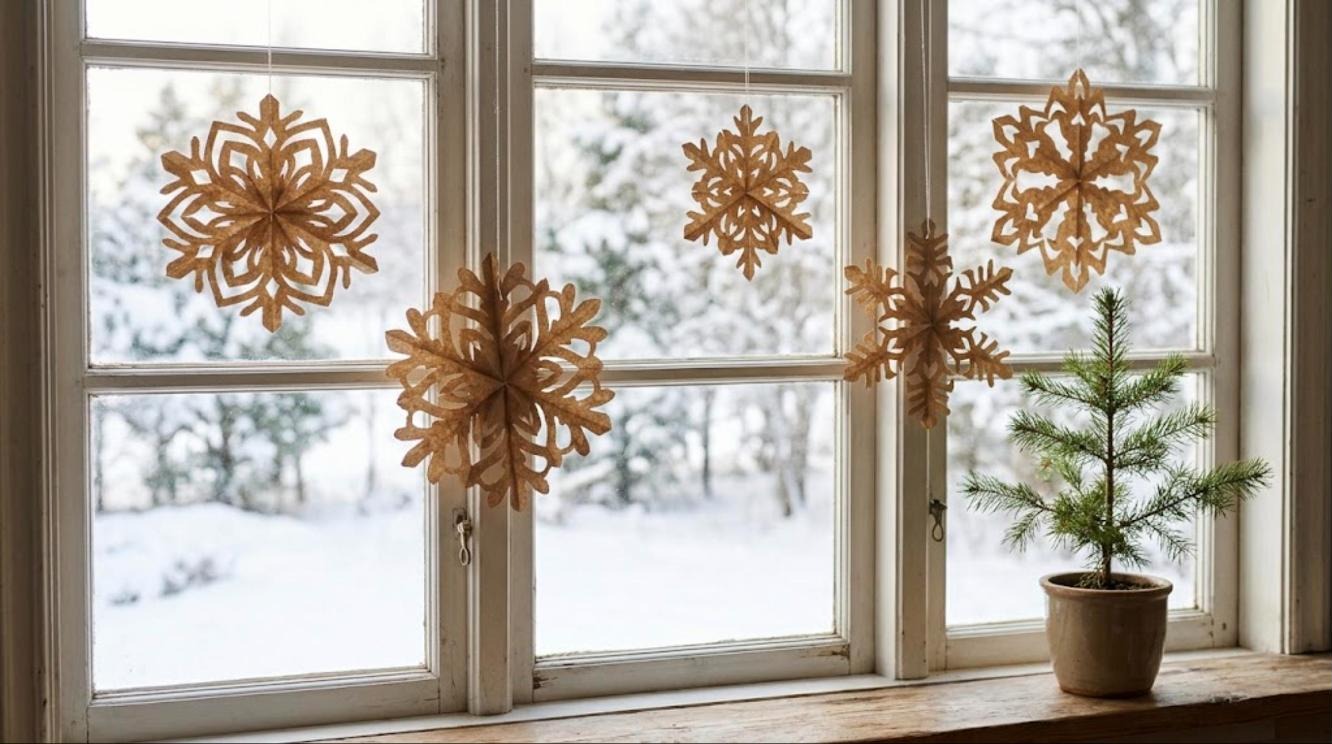
Remember cutting paper snowflakes at school? Brown paper bags make them look grown up. The kraft color glows gold when daylight comes through the window, and the paper is thick enough to hold crisp, lacy shapes. Glue two or three snowflakes together at the center and fan them out for a 3D version that turns gently when the heat comes on. Hang them at different heights with clear thread and you get a winter window that looks good from the street too. Will you go simple or super lacy?
You will need: Brown paper bags cut open and flattened, sharp scissors or a craft knife with adult help, a pencil and clear fishing line.
How to make it: 1. Cut a square of bag paper and fold it in half three times into a narrow wedge. 2. Draw small shapes along both edges and cut them out carefully. 3. Unfold, press flat under a book overnight and hang in the window.
Stamped Kraft Gift Bags With Little Trees
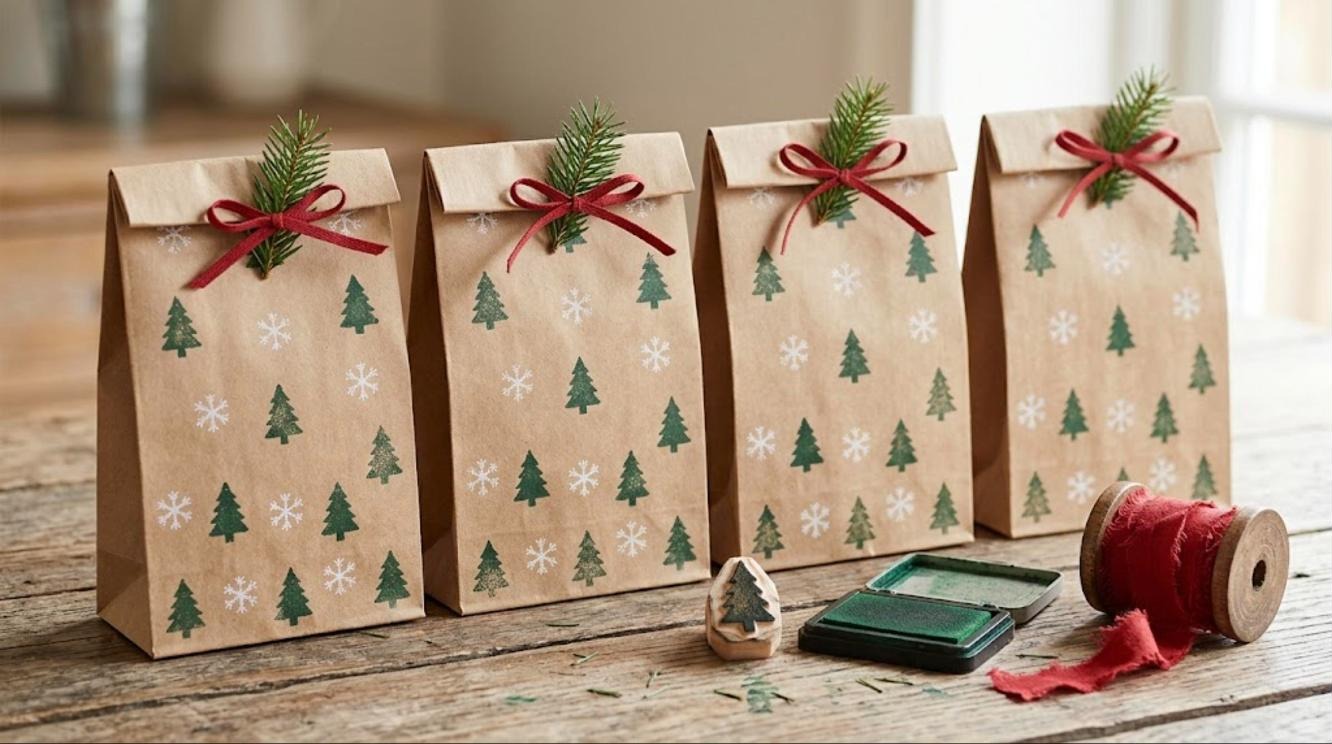
Paper bag crafts do not get easier than this: plain bags turn into boutique gift bags with nothing more than a rubber stamp. Carve a tiny tree from an eraser, or use any small stamp you own, and press it all over the bag in green ink. Add white snowflakes with a second stamp or a white paint pen. Fold the top over, punch two holes and tie it with red ribbon and a pine sprig. Fill them with cookies, cocoa mix for the neighbors or small gifts for coworkers. Who on your list gets the first one?
You will need: Brown paper lunch bags, a small tree stamp or a pencil eraser, green and white ink pads, red ribbon, a hole punch and pine sprigs.
How to make it: 1. Lay the flat bag on scrap paper and stamp trees in a loose pattern. 2. Add white snowflakes between them and let the ink dry. 3. Fill the bag, fold the top over twice, punch two holes and tie the ribbon with a sprig of pine.
Advent Pouches Clipped on Twine
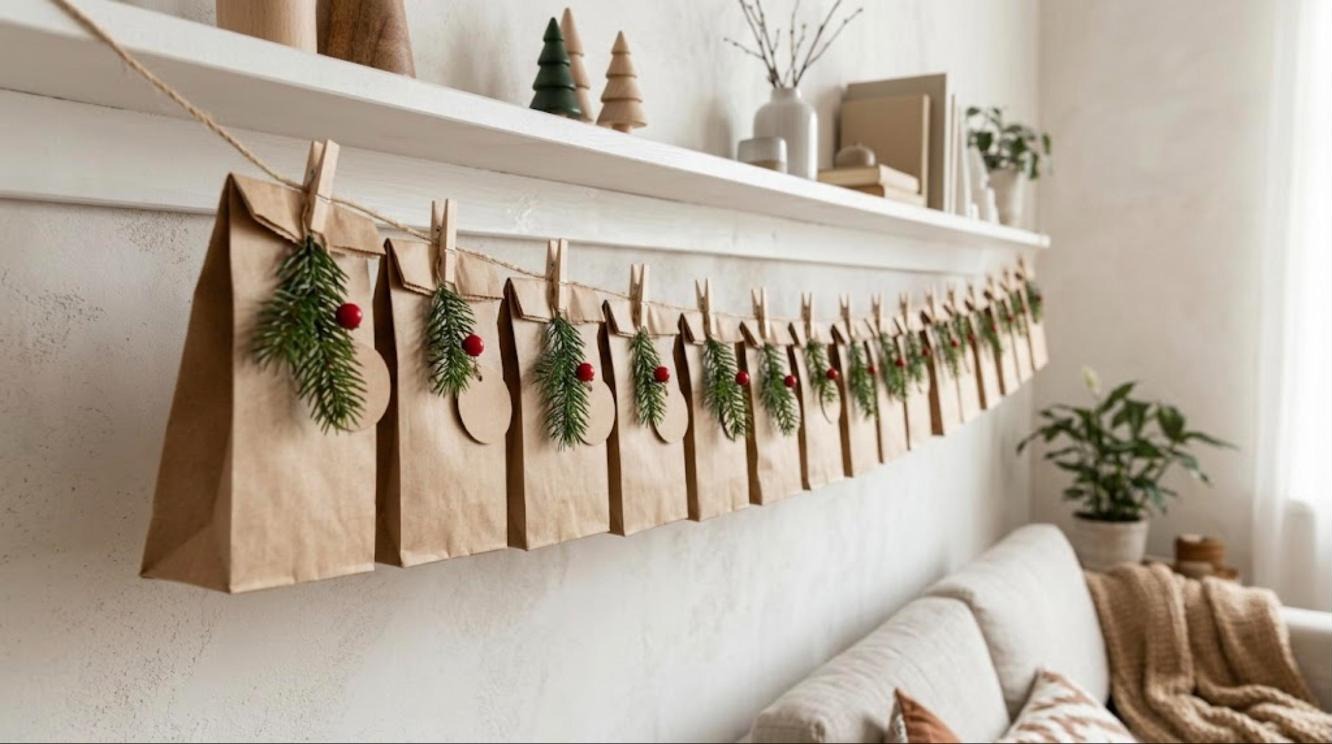
An advent calendar does not need to cost forty dollars. Twenty four small paper bags, a long piece of twine and a bag of mini clothespins make one that looks like it came from a farmhouse shop. Tuck a treat, a tiny toy or a note with a kind family activity into each bag, fold the top, and clip it to the line. Decorate each pouch with a pine sprig and a red berry, and add numbers with a white paint pen if you like. Kids love opening one every morning. What will go in day one?
You will need: Twenty four small brown paper bags, jute twine, mini wooden clothespins, faux pine sprigs, red berry picks and small treats.
How to make it: 1. Fill each bag and fold the top over twice. 2. Hot glue a pine sprig and berry to each bag with adult help. 3. Hang the twine under a shelf or across a wall and clip the bags on in order.
Gingerbread House Luminaries: Paper Bag Crafts That Glow

These little houses are the showstopper of the whole list. Fold the top of a lunch bag into a pointed roof, cut tiny windows and a door, then pipe on icing details with white paint. When you slip a small string of battery LED lights inside, every window glows warm gold, like a tiny village in the snow. Line them up on a windowsill, a mantel shelf or down the center of the table. Never use real candles inside paper; battery lights are safe and last all evening. Doesn’t it look like a storybook?
You will need: Brown paper lunch bags, a craft knife with adult help, a white paint pen, a glue stick and small battery LED fairy light strings.
How to make it: 1. Stand a bag upright, fold the top into a roof peak and glue it closed. 2. Draw and cut small windows and an arched door on the front. 3. Add icing lines with the white paint pen, slide in a coiled battery light string and switch on.
Brown Paper Christmas Tree Garland
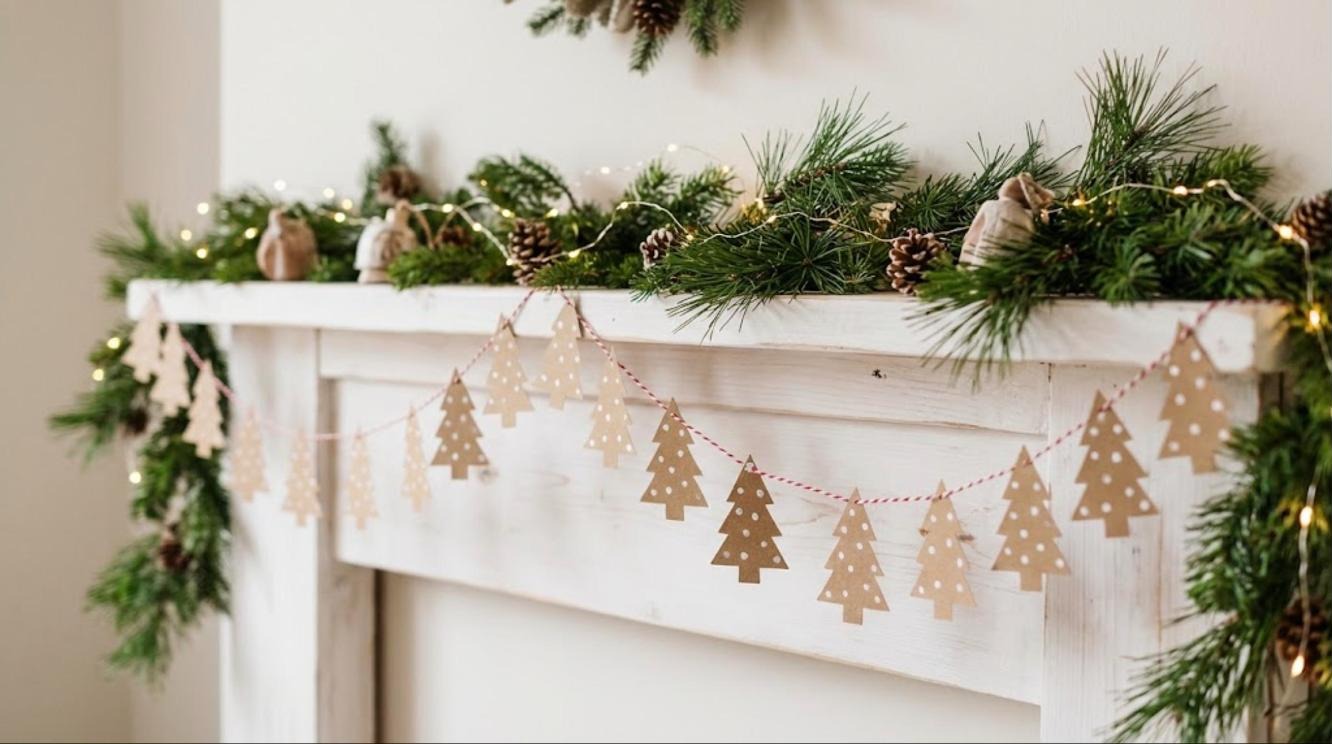
A garland of little paper trees is cheerful, quick and almost free. Trace a simple tree shape onto flattened bags, cut out twenty or so, and add white dots with the end of a paintbrush for falling snow. Punch two small holes near the top of each tree and thread them onto red and white baker twine. Drape it across a shelf, a doorway or a kitchen window with a little greenery behind it. It looks just as sweet in January, so you can leave it up all winter. Where would yours hang?
You will need: Two or three brown paper bags, a tree template drawn on card, scissors, white acrylic paint, a hole punch and baker twine.
How to make it: 1. Trace and cut out the trees from flattened bags. 2. Dot on white paint and let it dry. 3. Punch two holes at the top of each tree, thread them onto twine and space them evenly.
Rolled Rosette Wreath, the Prettiest of All Paper Bag Crafts
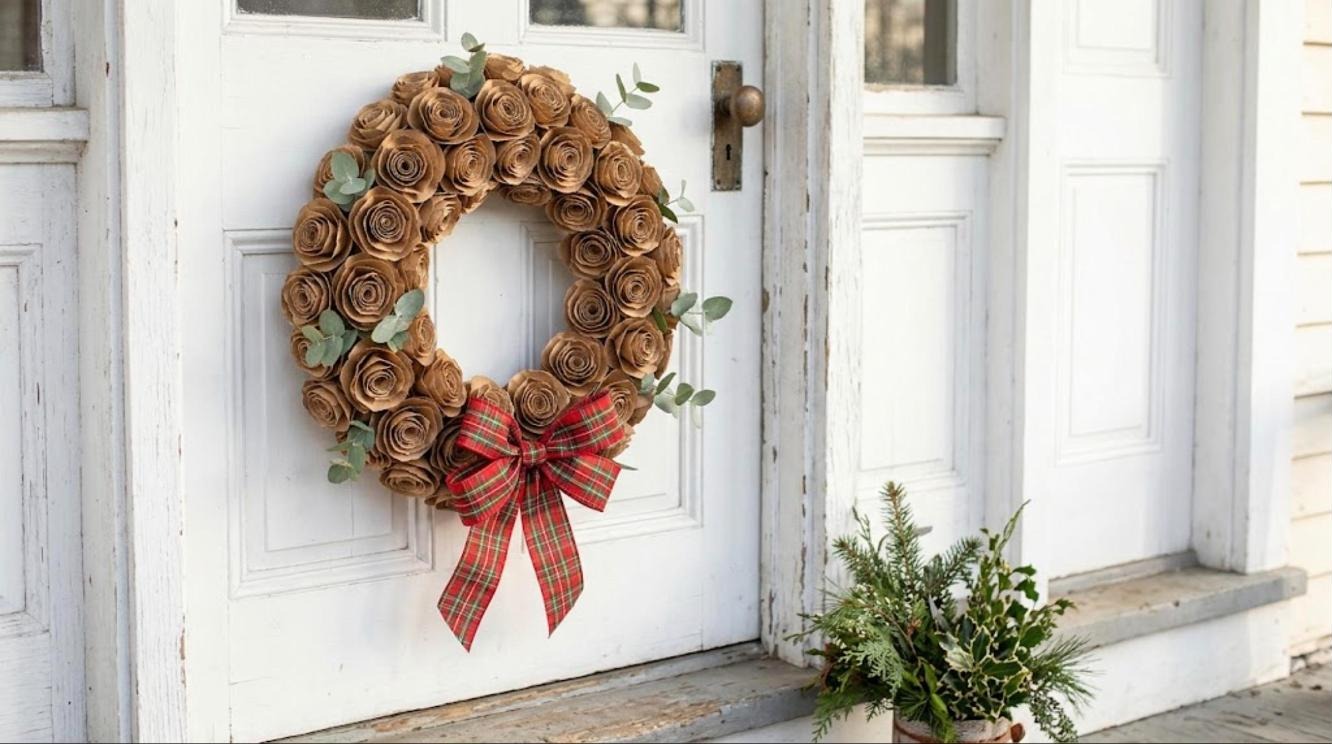
People will be sure this wreath came from an expensive boutique. Each rosette is just a spiral cut from a paper bag circle and rolled up tight, then glued onto a foam or cardboard ring until no gaps show. The brown paper looks like soft leather roses, and a few sprigs of eucalyptus plus a plaid bow make it festive. Hang it on the front door, above a mirror or on a kitchen cabinet. Make the rosettes during a movie and the wreath comes together fast. Will you add a bow or keep it simple?
You will need: Several brown paper bags, scissors, a foam or cardboard wreath ring, hot glue with adult help, eucalyptus sprigs and plaid ribbon.
How to make it: 1. Cut circles about four inches wide and cut each into a spiral. 2. Roll each spiral from the outside in and glue the base. 3. Glue rosettes tightly onto the ring, tuck in eucalyptus and tie on the bow.
Handmade Gift Tags in Cute Shapes
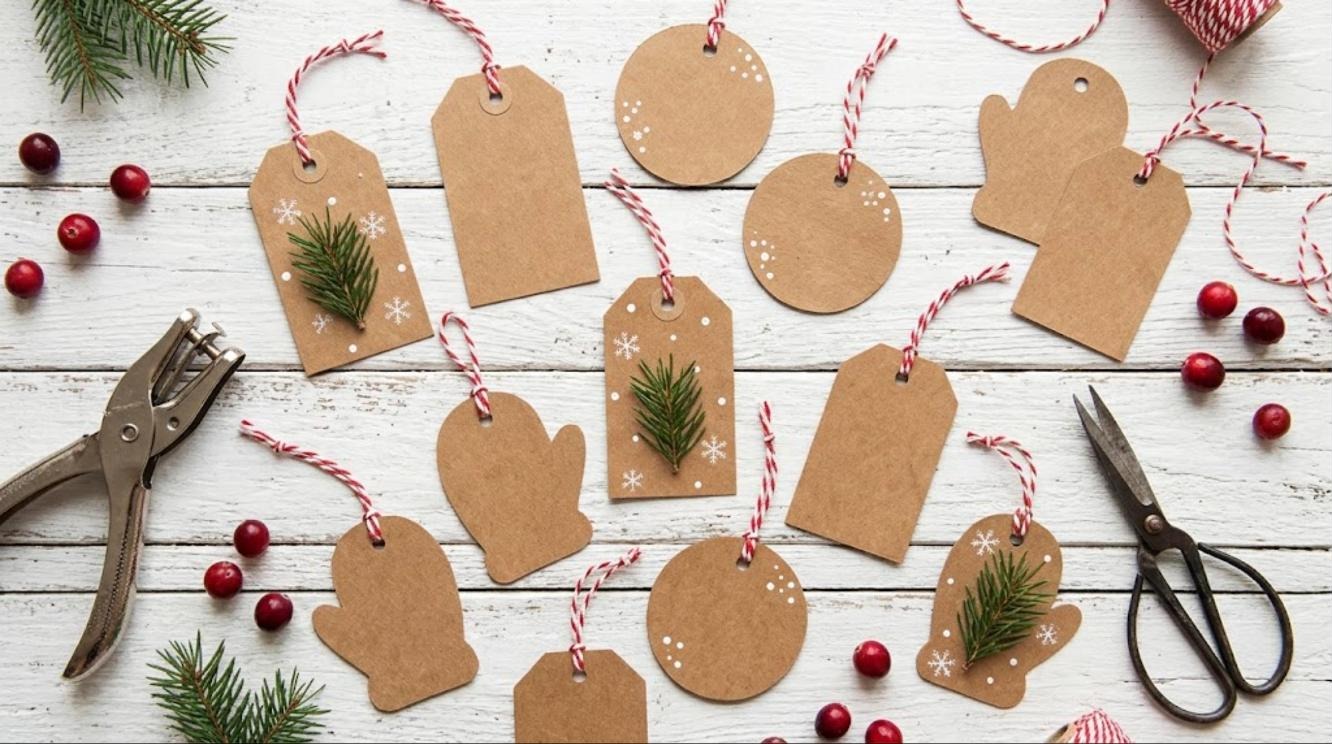
Store bought gift tags add up fast, so this is one of the most useful paper bag crafts: the bags under your sink give you dozens for free. Cut classic tag shapes, circles and little mittens, punch a hole and loop baker twine through it. Glue on a tiny pine sprig, stamp a snowflake or dot on white paint to make them festive. Write each name in black or white pen and you have tags that match every kraft wrapped gift under the tree. Make a big batch now and keep them in a jar for the whole season. Which shape is your favorite?
You will need: Brown paper bags, a tag template, scissors, a hole punch, baker twine, small pine sprigs, glue and a white paint pen.
How to make it: 1. Flatten the bags and glue two layers together for sturdier tags. 2. Trace and cut the shapes, then punch a hole in each. 3. Decorate, add a twine loop and write the names last.
Crumpled Ornaments That Look Like Leather
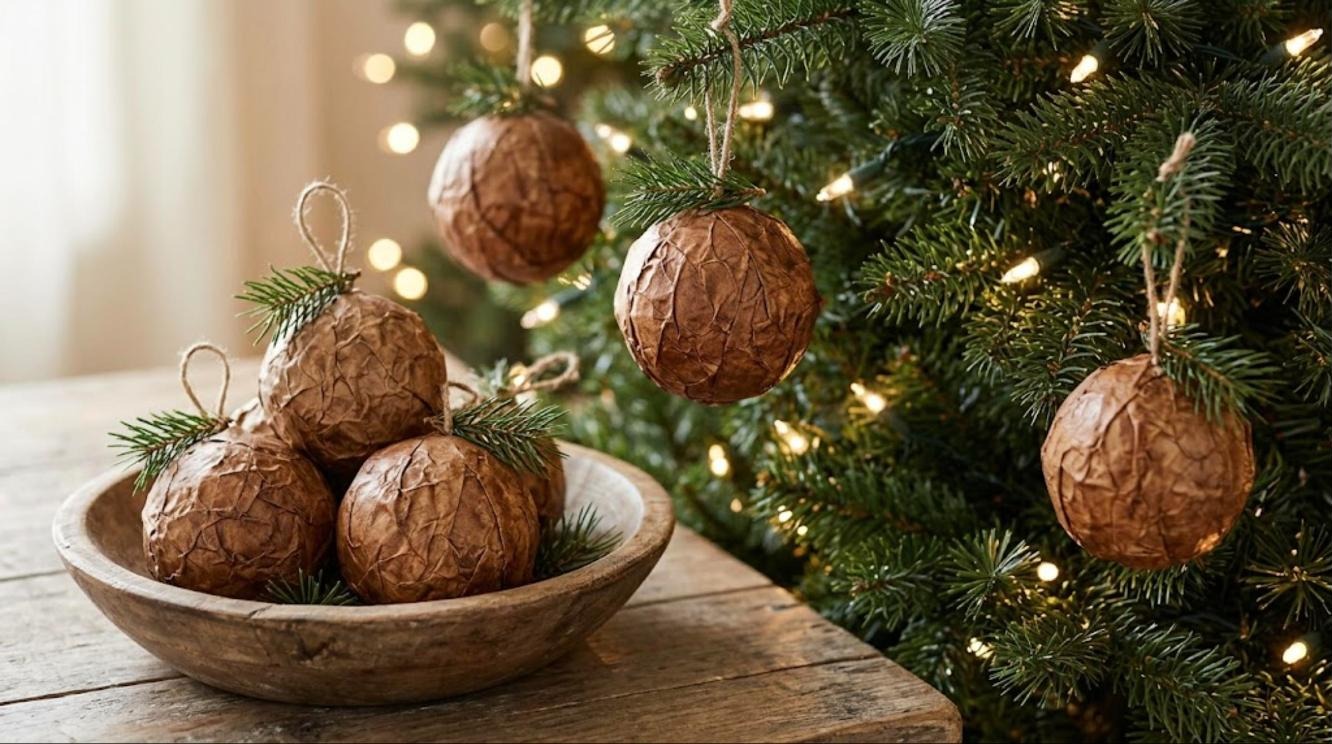
Here is a clever trick for paper bag crafts: crumple a paper bag, flatten it, crumple it again, and the paper starts to look and feel like soft old leather. Tear it into pieces, glue them over old shatterproof ornaments or foam balls, and rub a little brown wax or shoe polish over the top. The result looks like rustic leather ornaments from a mountain lodge. They are a great way to give tired ornaments a second life. Hang them with jute loops and a pine sprig. Would anyone guess they started as a grocery bag?
You will need: Brown paper bags, old shatterproof ornaments or foam balls, decoupage glue, a foam brush, brown wax or paste, and jute twine.
How to make it: 1. Crumple and flatten the bag pieces several times until soft. 2. Brush glue over the ball and press on torn pieces, overlapping the edges. 3. When dry, rub on a little wax, buff it and add a twine hanger.
Paper Bag Crafts for the Table: A Painted Runner
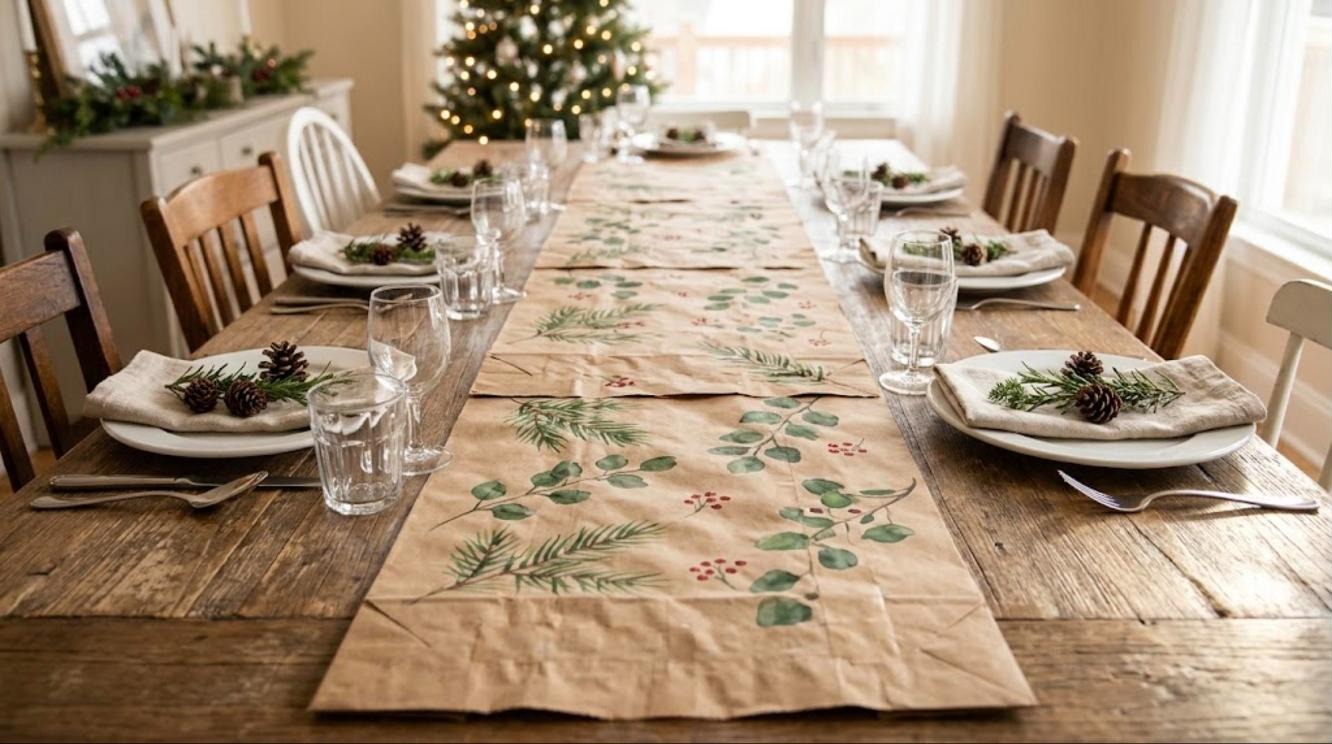
Cut open a few large grocery bags, tape them into one long strip and you have a table runner that costs nothing and looks like hand painted art. Paint loose pine branches, eucalyptus leaves and red berries down the length with simple brush strokes; it does not need to be perfect to look beautiful. The kraft color makes white plates and green napkins pop. After dinner, roll it up and use it as wrapping paper for leftovers or toss it in the recycling. Who in your family would love to paint it?
You will need: Three or four large paper grocery bags without logos, clear tape, green, white and red acrylic paint and a couple of brushes.
How to make it: 1. Cut the bags open, remove the bottoms and tape the panels into a long strip on the back. 2. Paint branches and leaves along the runner and add red berry dots. 3. Let it dry flat, then lay it down the center of the table.
Woven Basket for Christmas Cookies
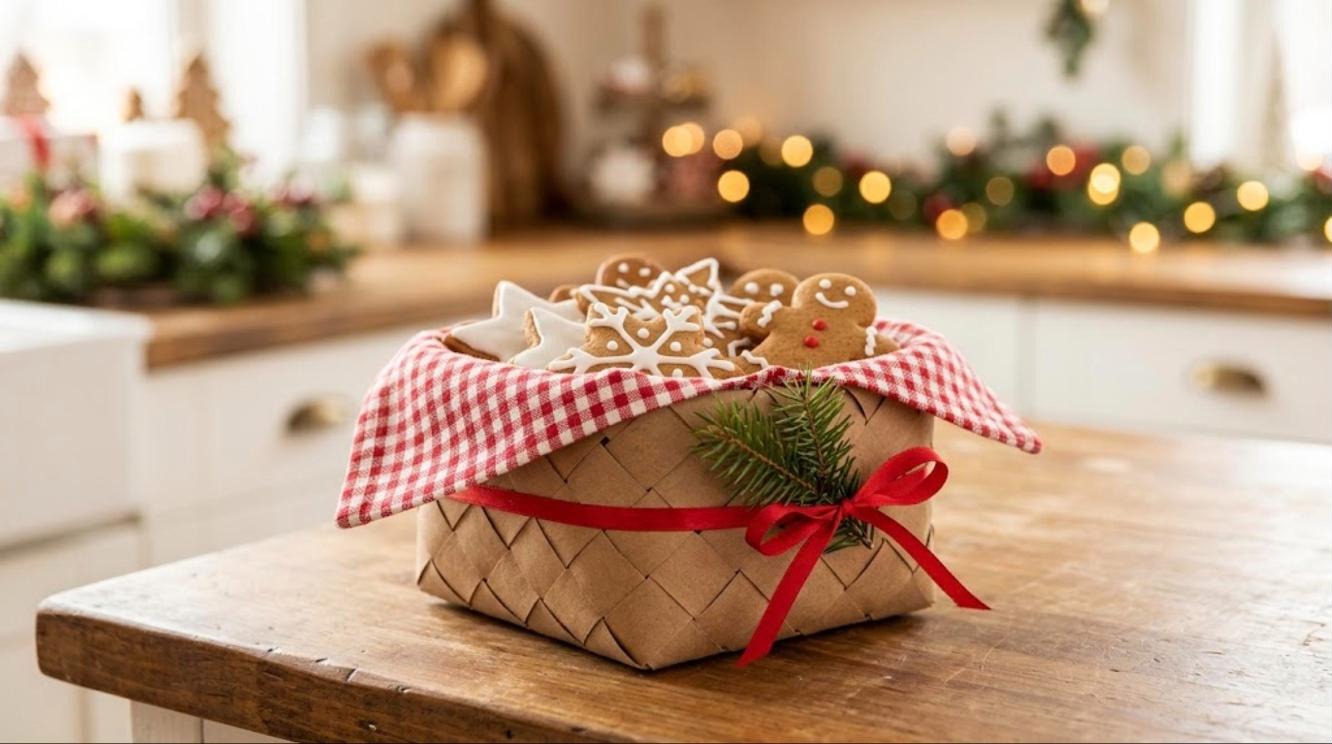
Want a cookie gift that looks like it came from a bakery? Try one of the sturdiest paper bag crafts there is. Weave a small basket from paper bag strips. Folded strips become surprisingly strong, and the woven pattern looks like expensive natural rattan. Line it with a gingham napkin, fill it with gingerbread people and iced stars, and tie it with a red ribbon and a sprig of pine. It is the perfect gift for a teacher, a neighbor or the mail carrier. Better still, the basket gets reused long after the cookies are gone. Who gets your first basket?
You will need: Two large paper bags, a ruler, scissors, a glue stick, clothespins as clamps, a gingham napkin and red ribbon.
How to make it: 1. Cut the bags into long strips, fold each into a narrow flat band and glue it closed. 2. Weave a square base, then bend the strips up and weave the sides, clipping as you go. 3. Glue the top edge, trim, and fill with cookies.
Paper Bag Crafts in Miniature: Fringed Trees

These little trees look like something from a pricey home store, and they are made from paper bag strips and a cardboard cone. Cut long strips, snip a fringe along one edge and wrap them around the cone from the bottom up, each layer overlapping the one below. Top each tree with a small wooden star. Make three in different heights and group them on a shelf, a mantel or a side table with a few pine cones and fairy lights. For more easy ideas, see our toilet paper roll Christmas decorations. Which height will you make first?
You will need: Brown paper bags, card stock for cones, scissors, a glue stick or hot glue with adult help, and small wooden stars.
How to make it: 1. Roll card stock into cones of three heights and glue them closed. 2. Cut strips about two inches wide and fringe one long edge. 3. Glue the strips around each cone from bottom to top and add a star.
Big Fluffy Bow Toppers
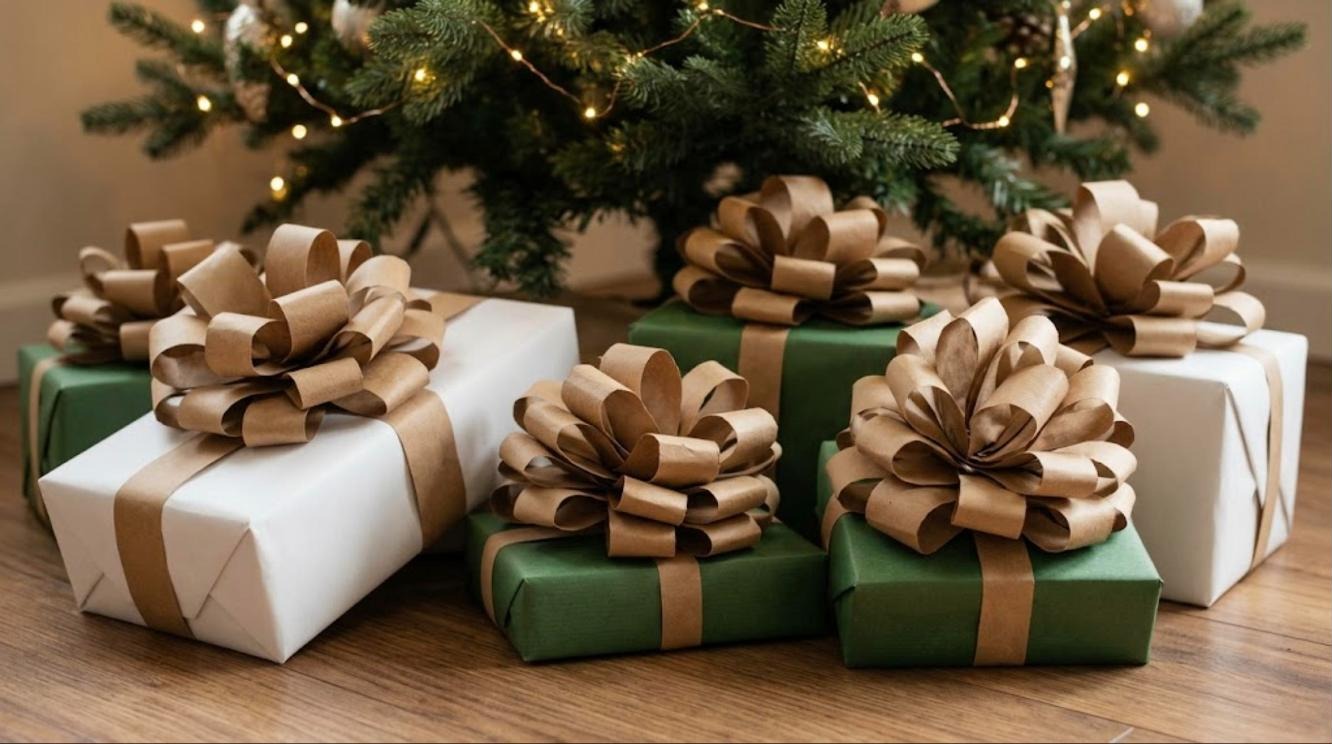
Big fluffy bows make any gift look special, and you can make them from the same bags. Cut long strips, fold them into figure eights, stack the loops at angles and staple or glue the centers together, finishing with a small curl in the middle. The result looks like the pull bows from a gift shop, but in warm natural brown. Put them on white, green or red paper for a bold, modern look under the tree. One lunch bag makes about two bows. How many gifts are waiting for a bow at your place?
You will need: Brown paper lunch bags, a ruler, scissors, a stapler or glue dots and double sided tape.
How to make it: 1. Cut strips about one inch wide and fold the ends to the middle to make loops of three sizes. 2. Stack the loops in a star pattern, largest at the bottom, and staple through the center. 3. Add a small loop on top and stick the bow on the gift.
Paper Bag Crafts as Wrapping Paper
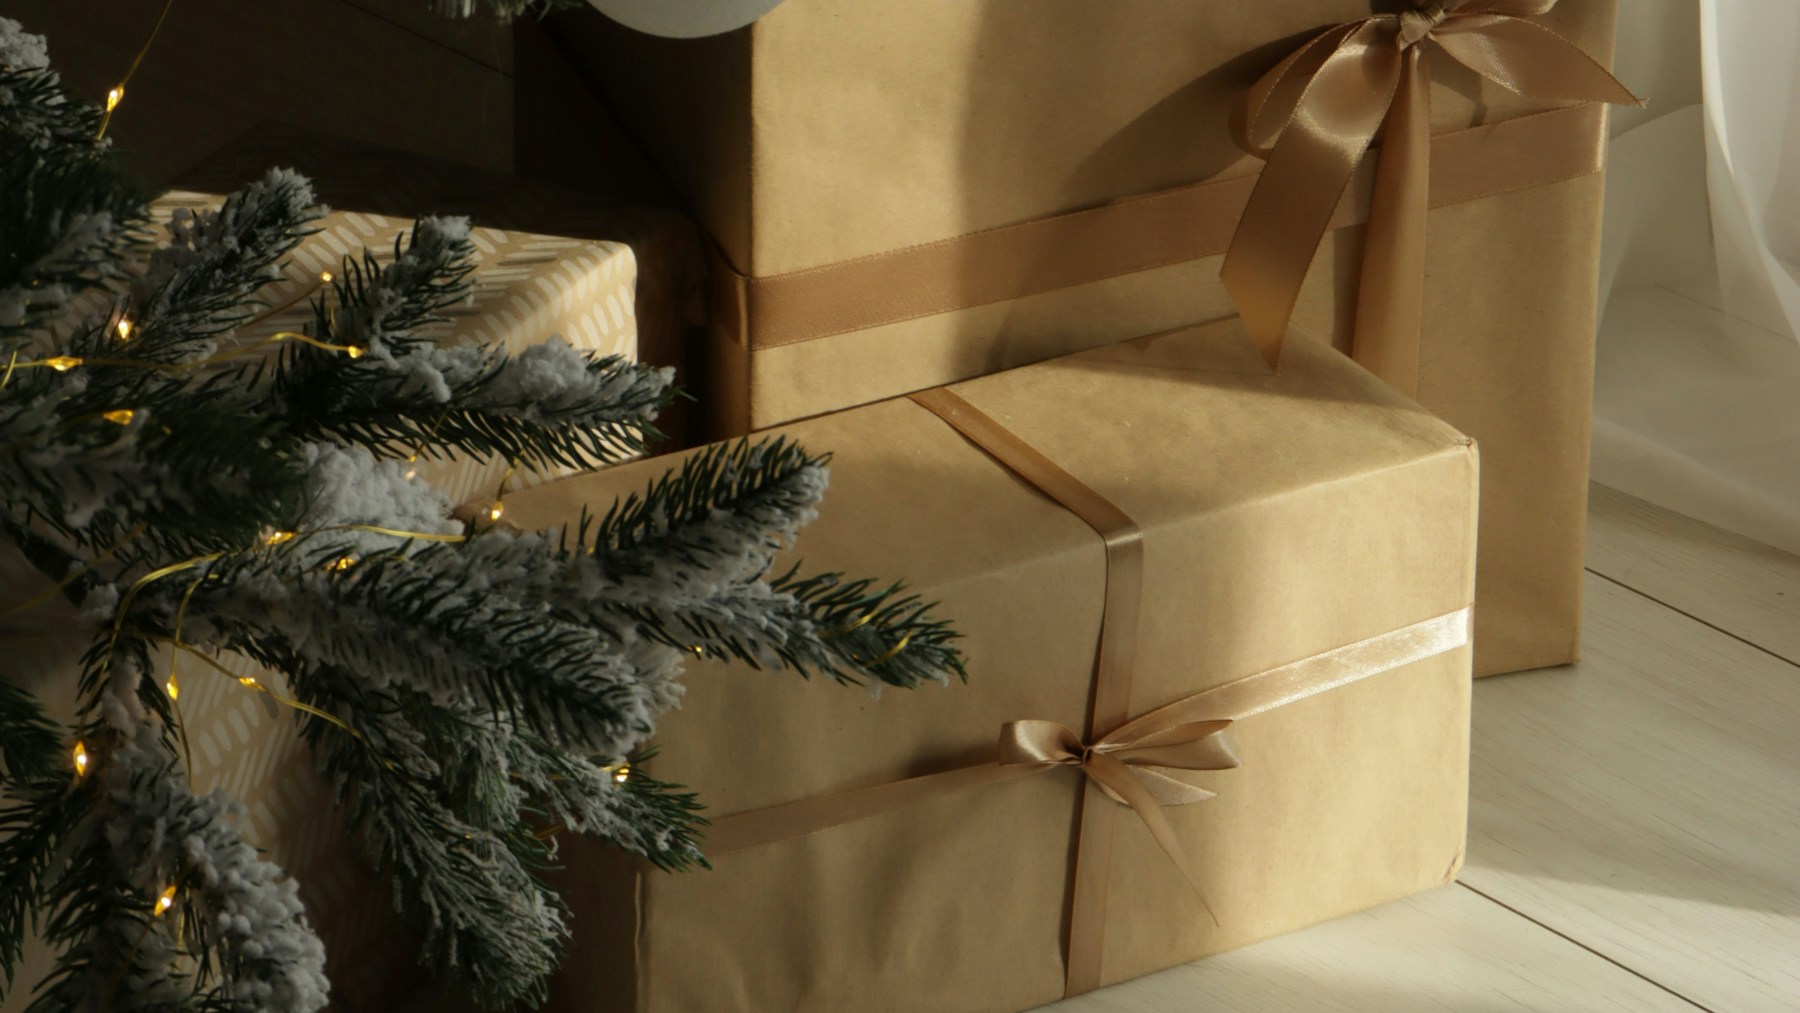
The simplest of all paper bag crafts may be the one you use most. Cut open a large paper bag, turn the printed side inward and wrap a gift with the plain brown side out. Add a satin ribbon, a paper tag and a sprig of greenery, and the gifts under your tree look calm, natural and expensive. Margaret Knight, who built the machine that made flat bottom bags and started her own paper bag company in 1870, would surely approve of all this reuse. Ready to raid the recycling bin?
You will need: Large paper grocery bags, scissors, tape, satin or cotton ribbon, handmade tags and small greenery sprigs.
How to make it: 1. Cut the bag along a seam and remove the bottom so it lies flat. 2. Wrap the gift with any printing on the inside and tape the seams neatly. 3. Tie the ribbon, add a tag and tuck a sprig under the bow.