Hide Kitchen Eyesores: 14 Clever Tricks That Make Ugly Clutter Vanish in Plain Sight
Want to hide kitchen eyesores without a big remodel or a big bill? You are not alone. Every home has those spots we stop seeing until a guest walks in: the tangle of cords by the toaster, the plain trash can, the router blinking on the shelf, the gray panel in the hallway. The good news is that most of them can disappear in an afternoon with things you already own or can grab for a few dollars. A cutting board, a basket, a scrap of fabric or a picture frame can do more than you think. These 14 clever ideas keep everything easy to reach and safe to use. They just stop it from stealing the show. Pick one for this weekend and watch how much calmer the whole room feels..
Cutting Boards That Hide Kitchen Eyesores Like Outlets and Cords
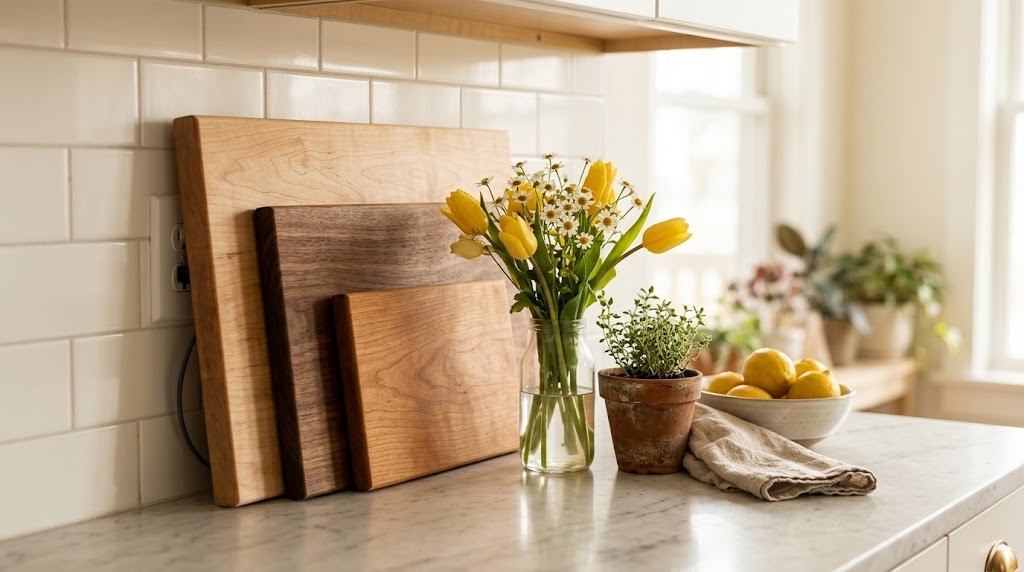
This is the trick that started it all. A clever homeowner on Hometalk showed how three cutting boards can hide kitchen eyesores like a busy outlet and a nest of charging cords, and people could not stop sharing it. Lean a few boards in different sizes and wood tones against the backsplash, then set a vase or a plant in front. The outlet still works and the cords are still there, you just do not see them. It costs almost nothing if you already own the boards. Try it on the messiest corner of your counter tonight..
You will need: 2 or 3 wooden cutting boards in different sizes, a vase or small plant, a soft cloth
How to make it: 1. Pick the outlet or cord spot you want to cover. 2. Lean the largest board at the back and the smaller ones in front, slightly overlapping. 3. Leave a gap at the side so plugs and cords stay easy to reach. 4. Add a vase of flowers or a potted herb in front to finish the look.
A Book Box for the Wi-Fi Router
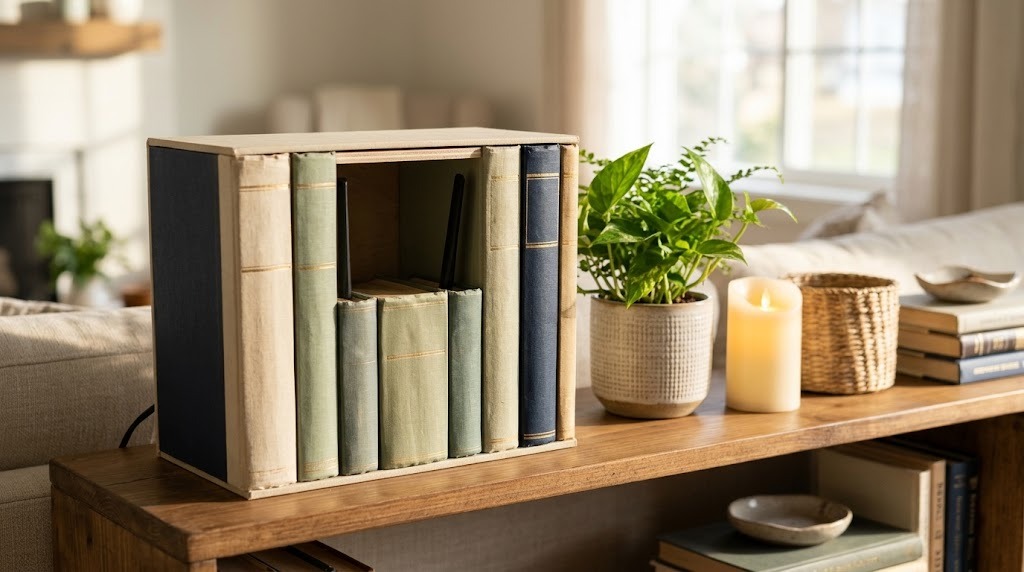
The internet router is useful, but it is rarely pretty. A hollow box made from old book spines hides it on a shelf and looks like part of your home library. The secret is to leave the back and top open so the router can breathe and the signal stays strong. Thrift stores sell old hardcovers for pennies, and the spines alone are enough. Guests will think you just love reading. Do you have a stack of old books waiting for a new job?
You will need: 5 or 6 old hardcover books, a craft knife (adult only), a thin wooden or cardboard box a little bigger than the router, strong glue
How to make it: 1. Measure your router and pick a box a little bigger than it. 2. An adult cuts the spines off the books with a craft knife. 3. Glue the spines along the front and sides of the box. 4. Leave the back and top open for air, then slide the router inside.
A Lidded Basket to Hide Kitchen Eyesores Like the Trash Can
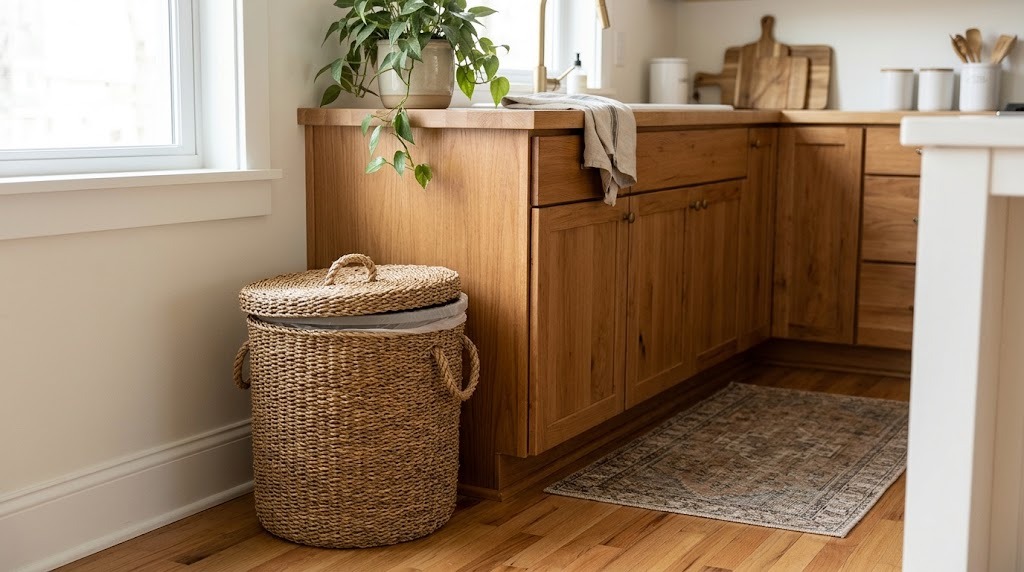
A plain plastic trash can can make a whole kitchen look tired. Drop it inside a tall lidded basket and it suddenly looks like a cozy storage piece. This is one of the easiest ways to hide kitchen eyesores because there is nothing to build. Seagrass, rattan and water hyacinth baskets all work, and rope handles make it easy to lift the can out on trash day. Measure your can first so the lid closes. Will you look for one at your next thrift stop?
You will need: A tall lidded woven basket, your current trash can, a tape measure, liner bags
How to make it: 1. Measure the height and width of your trash can. 2. Choose a basket at least 2 inches wider and taller. 3. Set the can inside and fold the bag edges over the rim. 4. Close the lid and place it where it is easy to reach.
A Curtain Under an Open Sink
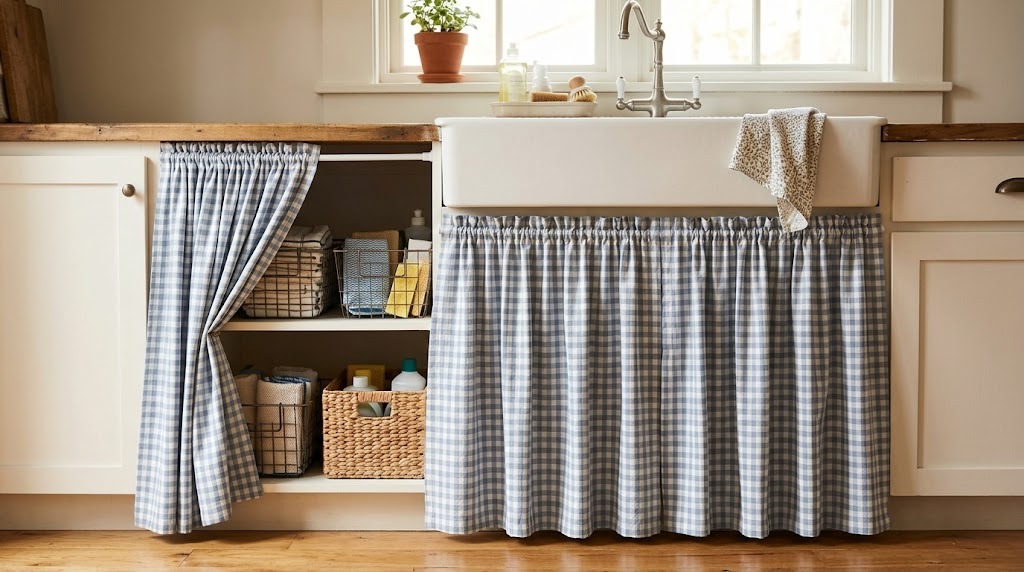
Open shelves under a sink are handy, but they also show every sponge, bottle and bucket. A simple gathered curtain on a tension rod hides it all in about ten minutes. Gingham, linen and floral prints all give a sweet farmhouse feel, and you can swap the fabric with the seasons. No drilling is needed, so it is perfect for renters too. Slide it open when you need something and let it fall closed again. Which fabric would you pick for your kitchen?
You will need: A tension rod, a fabric panel or old tablecloth, clip rings or a needle and thread, scissors
How to make it: 1. Measure the opening under the sink. 2. Cut fabric about one and a half times the width so it gathers nicely. 3. Sew a pocket at the top or add clip rings. 4. Thread it onto the tension rod and twist the rod into place.
A Shadow Box Frame Over the Thermostat
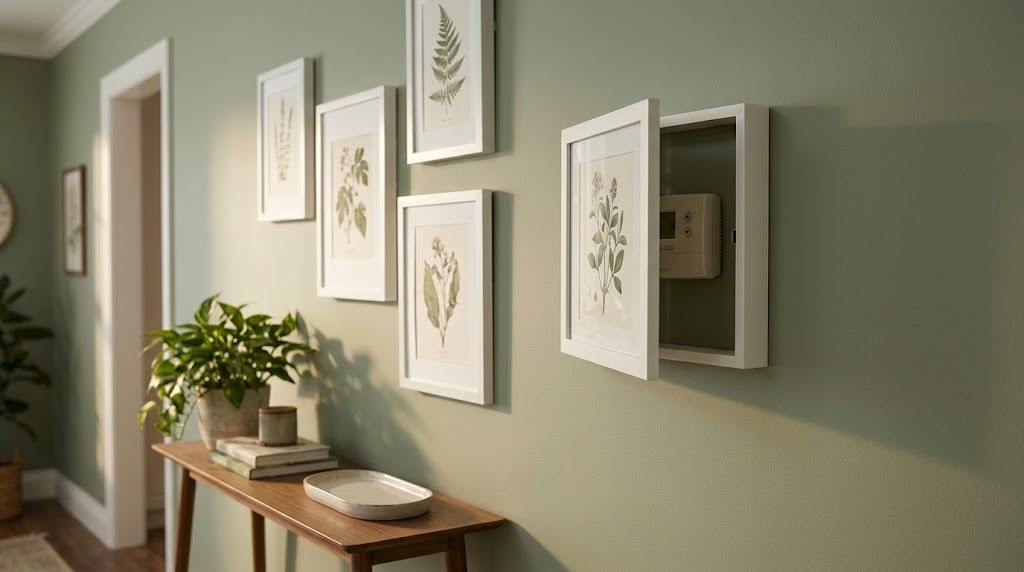
Thermostats are small, but that beige box can stick out on a pretty wall. Build a little gallery around it and give it a frame of its own. An open-back shadow box with a hinged front makes the thermostat look like part of the art, and you can still reach the buttons in a second. Keep the sides open so it reads the room temperature correctly. It is a sweet way to hide kitchen eyesores and hallway ones too. Would anyone even notice it now?
You will need: A deep shadow box frame, 2 small hinges, a few matching frames with prints, wall hooks
How to make it: 1. Remove the back of the shadow box so it fits over the thermostat. 2. Attach the front glass or frame with small hinges so it swings open. 3. Hang it over the thermostat with space around the sides for air. 4. Add two or three matching prints nearby to make a mini gallery.
Peel-and-Stick Tile Over a Tired Backsplash
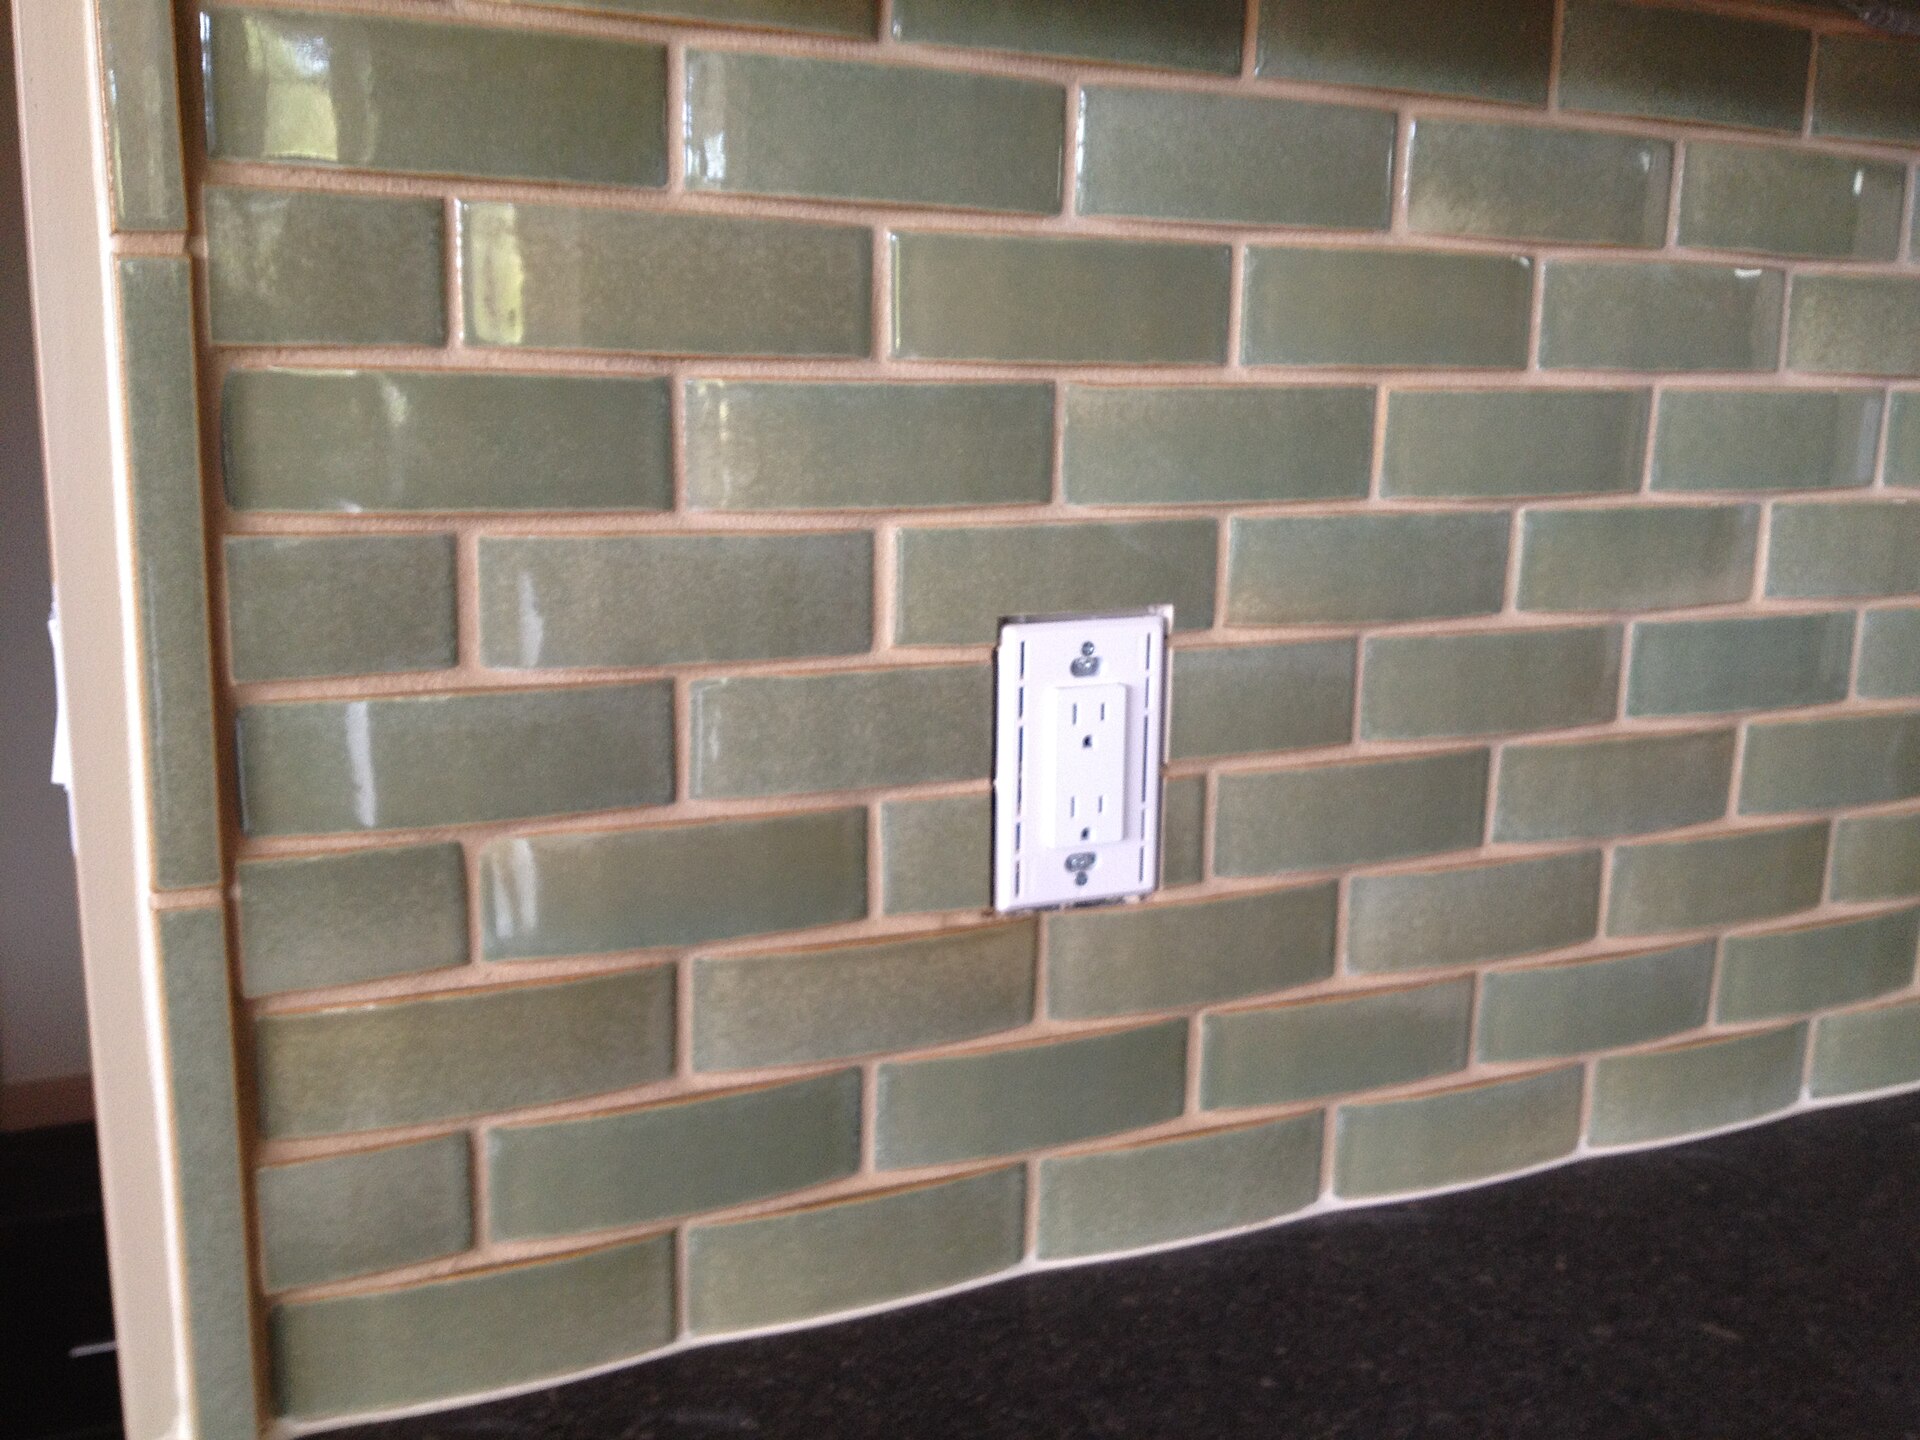
Sometimes the eyesore is the wall itself. Stained grout, dated tiles or bare paint behind the stove can make a kitchen feel old. Peel-and-stick tile goes right over a clean, flat surface and gives you a fresh subway tile look in one afternoon. Cut neat openings for outlets and let the cover plates hide the edges. It is a great weekend job for renters because it comes off later. Could this be your easiest kitchen refresh yet?
You will need: Peel-and-stick tile sheets, a utility knife (adult only), a ruler, a level, mild soap and a cloth
How to make it: 1. Remove the outlet cover plates and clean the wall. 2. Let the wall dry fully. 3. Start at the bottom center and press each sheet firmly, keeping it level. 4. Trim around the outlets and screw the cover plates back on.
Faux Plants That Hide Kitchen Eyesores Like Cords
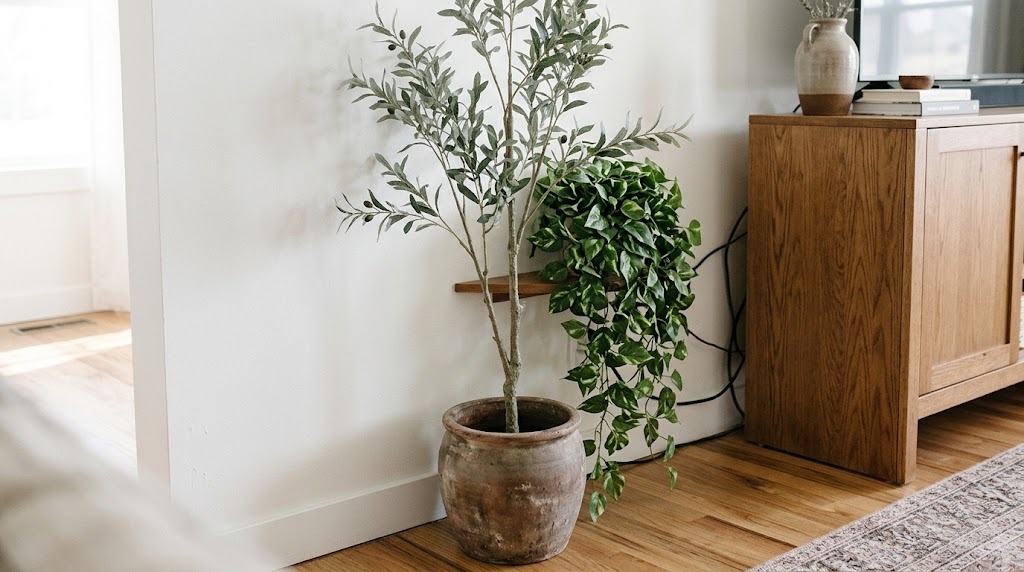
Every TV, lamp and charger comes with a cord, and they love to hang down the wall in a messy bundle. A tall faux tree and a trailing faux plant can hide them in a way that looks totally on purpose. Gather the cords together with soft ties first, then let the leaves do the rest. Faux plants never need water, so there is no spill risk near the plugs. Which corner of your home has the worst cord jungle?
You will need: A tall faux plant in a pot, a trailing faux vine, soft cable ties, a slim wall shelf
How to make it: 1. Bundle the cords together with soft ties. 2. Run them down the wall behind where the plant will stand. 3. Place the tall plant in front of the bundle. 4. Add a slim shelf with a trailing vine to cover the top part of the cords.
A Bread Box Charging Station to Hide Kitchen Eyesores
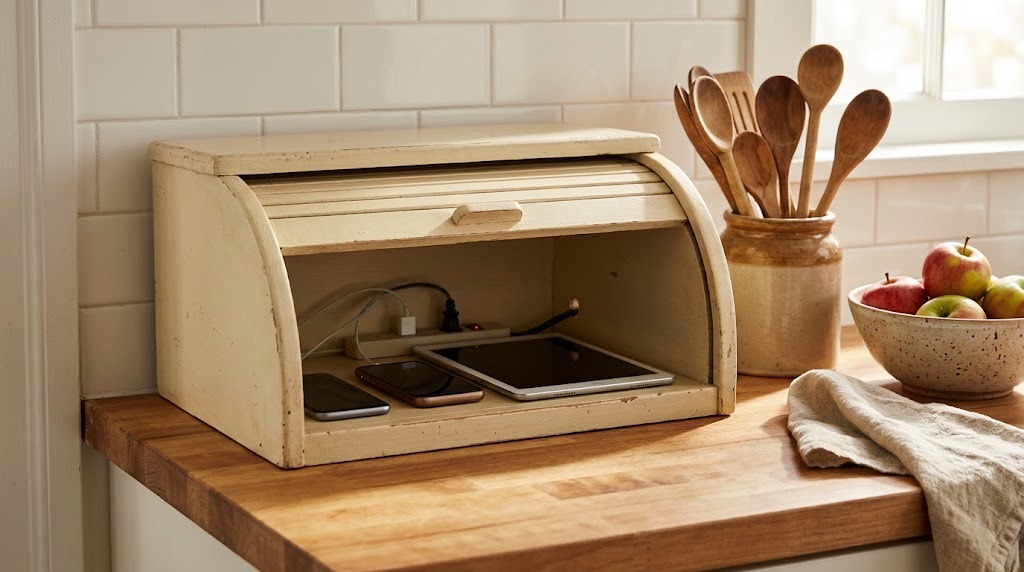
Phones, tablets and chargers can take over a counter fast. An old bread box gives them a home with a door, which is a smart way to hide kitchen eyesores that move around all day. A small hole in the back lets the cord out, and a power strip inside keeps everything tidy. Keep the lid open while devices charge so warm air can escape, then close it when you are done. Would this end the morning hunt for chargers in your house?
You will need: A wooden bread box, a small surge protector power strip, a drill (adult only), a cord grommet
How to make it: 1. An adult drills a hole in the back of the bread box near the bottom. 2. Thread the power strip cord out through the hole and add the grommet. 3. Line the inside with a small tray or cloth. 4. Plug in the chargers and leave the lid open while devices charge.
Hinged Art Over the Electrical Panel
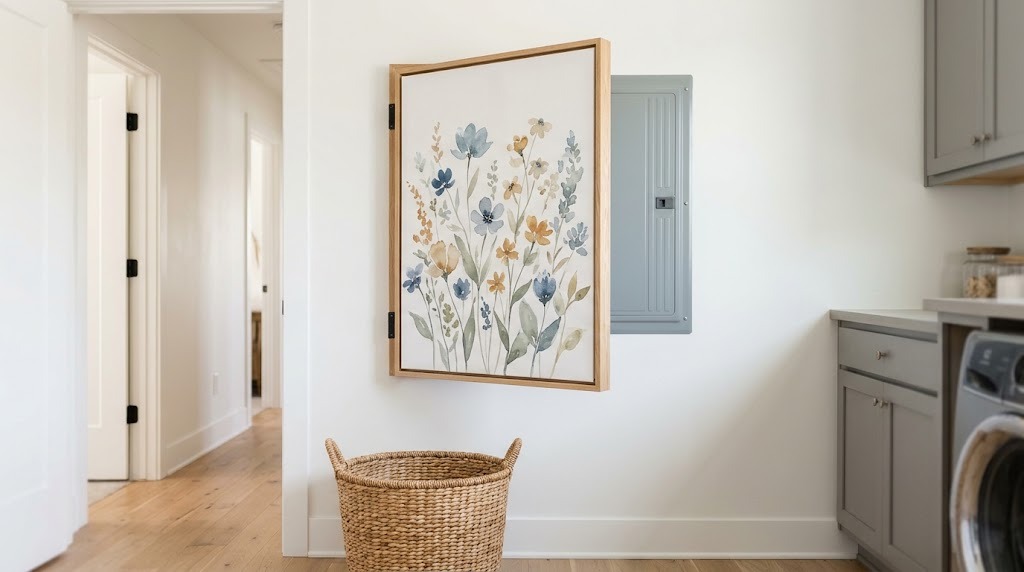
The gray breaker panel is one of the biggest eyesores in a hallway or laundry room. A canvas print on simple side hinges covers it like a pretty cabinet door. The key is that it swings open with one pull, so you can always reach the breakers fast. Never screw anything into the panel itself and never lock or block it. Fix the hinges to the wall next to it instead. Isn’t it nice when safety and style get along?
You will need: A lightweight framed canvas a little larger than the panel, 2 flat hinges, a small knob, wall anchors, a drill (adult only)
How to make it: 1. Measure the panel and choose a canvas that covers it with space to spare. 2. Attach two hinges to one side of the frame. 3. An adult screws the hinges into the wall beside the panel, never into the panel. 4. Add a small knob so it opens with one easy pull.
A Radiator Cover That Doubles as a Shelf
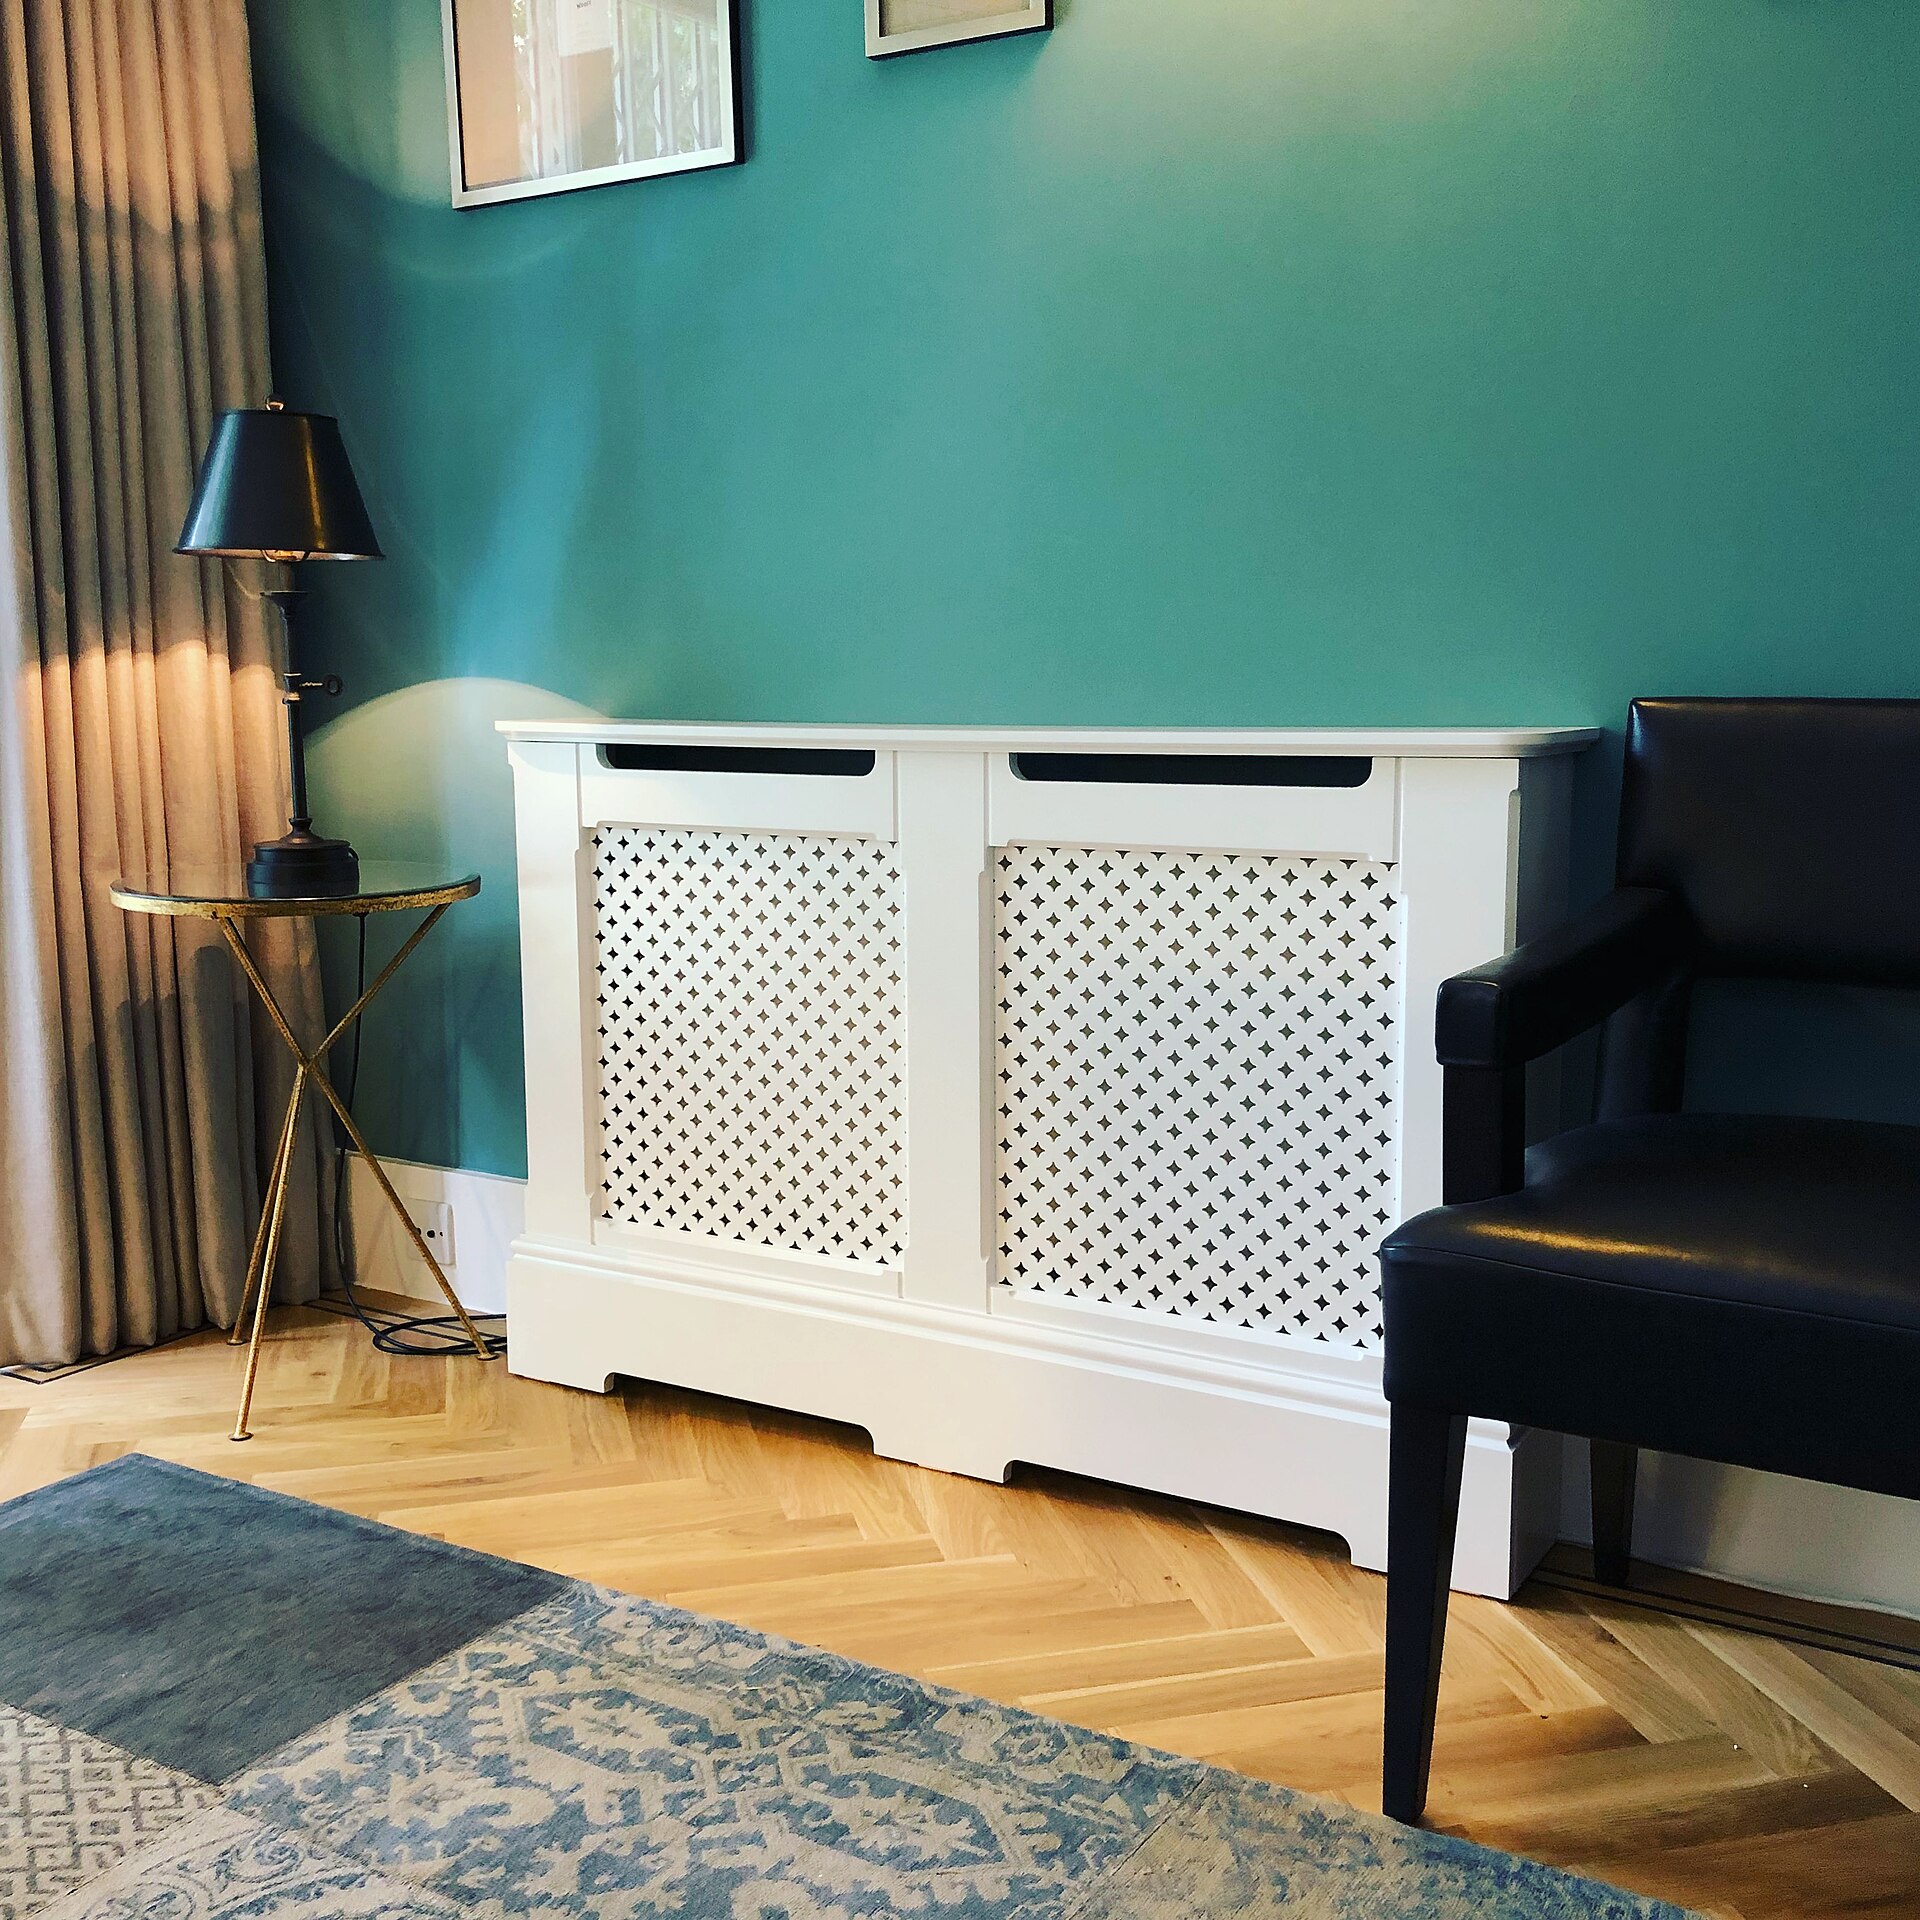
Old radiators keep you warm, but they are rarely pretty. A lattice cover turns them into a sleek piece of furniture, and the flat top becomes a handy shelf for plants, books or keys. Choose a design with open sides and a front grille so heat can still flow into the room. Paint it the same color as the wall to make it melt away. Would you style the top with plants or a little photo display?
You will need: A ready-made or simple DIY radiator cover with a lattice front, paint, a sanding block, a tape measure
How to make it: 1. Measure the radiator height, width and depth, then add an inch on each side. 2. Choose or build a cover with an open grille front. 3. Sand and paint it to match your wall. 4. Slide it into place and keep the top for light decor only.
Pretty Jars Instead of Loud Packaging

Sometimes the eyesore is a crowd of bright boxes and bags on an open shelf. Pour rice, pasta, oats and beans into clear glass jars and the whole kitchen feels calmer in minutes. You can see what you have, the food stays fresh and the shelf looks like a little shop. Save old sauce and jam jars to keep it free. Snip the cooking directions from the box and tape them under the jar. Which shelf will you clear first?
You will need: Clean glass jars with lids, a funnel, labels or a paint pen, scissors, tape
How to make it: 1. Wash and dry the jars well. 2. Use a funnel to pour in dry foods. 3. Label each jar or let the food show. 4. Tape cooking directions to the bottom and line the jars up by height.
A Counter Tray to Hide Kitchen Eyesores Fast
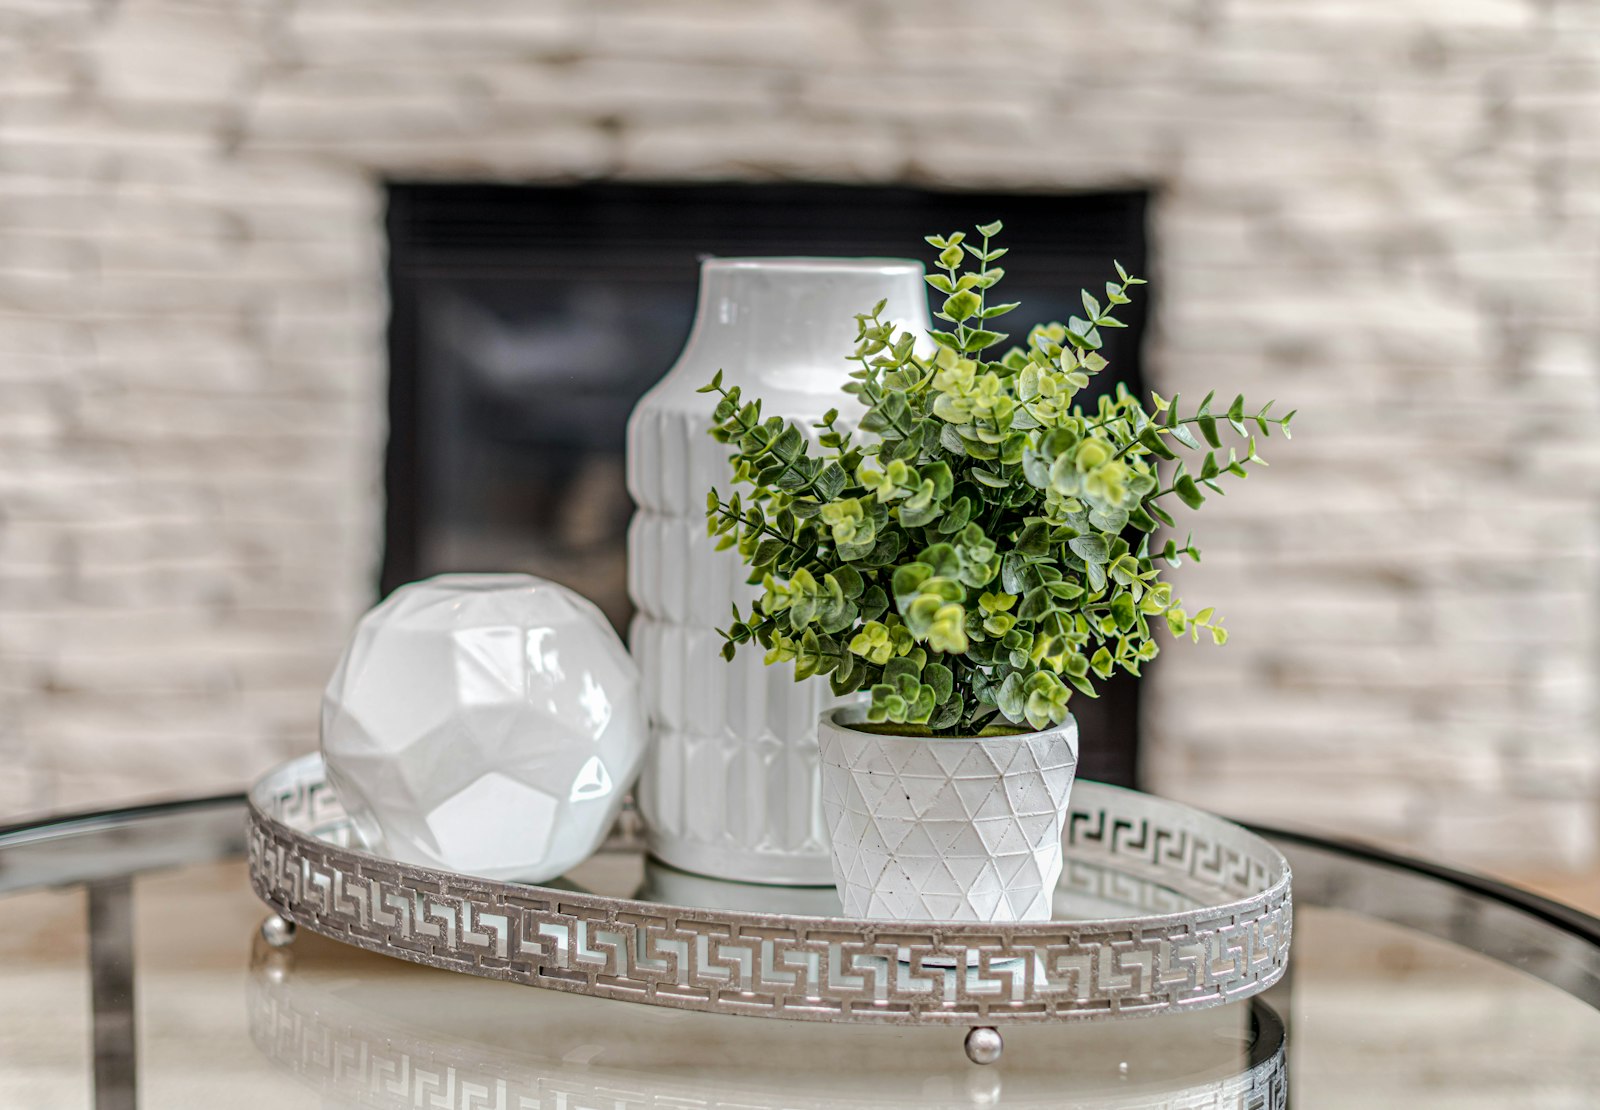
Oil bottles, salt, a sponge and the dish soap look messy when they are scattered. Put them on one pretty tray and suddenly they look styled. A tray also makes wiping the counter faster because you lift everything at once. Marble, wood and ceramic all work, and a small plant softens the look. If you love cheap upgrades like this, our dollar store decor ideas are full of finds that look high end. Why not try this one before dinner?
You will need: A round or rectangle tray, a small plant or vase, the items you use every day
How to make it: 1. Pick the spot where clutter collects most. 2. Choose a tray that fits the space with room to spare. 3. Group your daily items on it with tall ones at the back. 4. Add one pretty piece, like a plant, to finish.
Baskets That Hide Small Stuff on Open Shelves

Open shelves look amazing in photos, then real life fills them with odds and ends. Matching baskets are the fix. Drop in snacks, tea bags, cleaning cloths or kids’ cups and the shelf looks neat from across the room. Stick with one color or one material so it feels calm, and add a small tag to each basket so the family knows where things go. It is a simple, renter friendly way to hide kitchen eyesores for good. What would you tuck away in yours?
You will need: Matching woven baskets, small tags or clip labels, a tape measure
How to make it: 1. Measure the depth and height of each shelf. 2. Buy or thrift baskets that fit with a little space on top. 3. Sort items by type and fill one basket per group. 4. Add tags so everyone puts things back.
A Crate Cover for the Litter Box
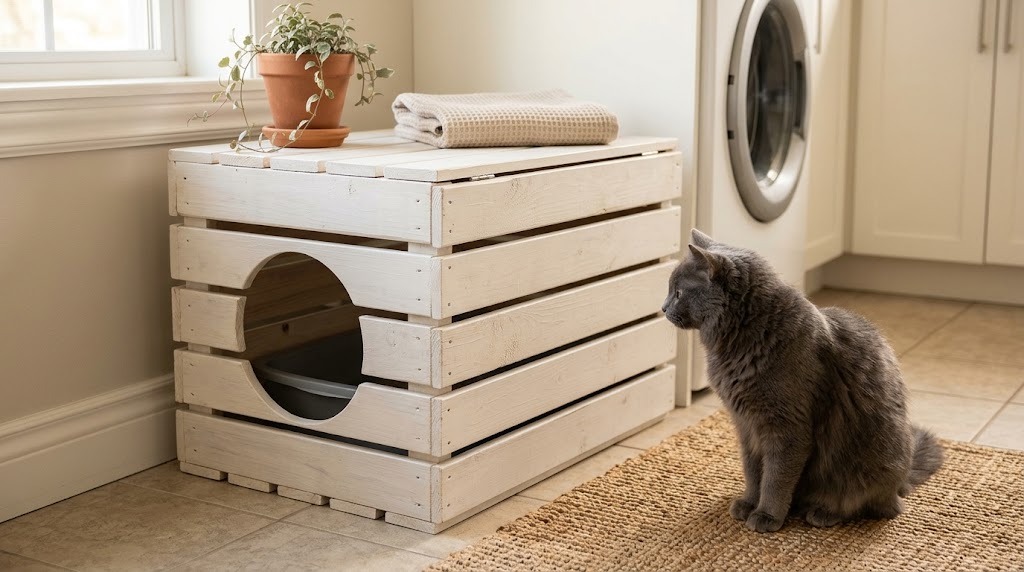
Pet owners know the litter box is the hardest thing to hide. A painted wooden crate cabinet with a round door turns it into a sweet side table. Leave the back open or add holes so air can flow, and make the door big enough for your cat to come and go easily. A towel, a plant or a basket on top makes it look like real furniture. Of all the ways to hide kitchen eyesores and home ones, this might be the one your cat loves most. Which spot would your cat approve of?
You will need: 1 or 2 large wooden crates or a small cabinet, a jigsaw (adult only), sandpaper, pet-safe paint, a round template
How to make it: 1. Choose a crate that fits the litter box with space around it. 2. An adult cuts a round opening in one side. 3. Sand all edges smooth and paint with pet-safe paint. 4. Let it dry fully, then slide in the litter box and add decor on top.