Nancy Reagan Christmas: 16 Old Fashioned White House Tree Ideas You Can Copy for Pennies
Nancy Reagan Christmas trees were some of the most charming the White House ever showed, and almost every idea on them can be copied at a craft table for pennies. From 1981 to 1988, the official Blue Room tree changed its theme each year: folk art, foil cones, old toys, natural ornaments, card ornaments, Mother Goose, music and a timeless heirloom tree. None of it needed pricey store decor. It was paint, paper, felt, ribbon and patience. If you love first lady holiday traditions, this Nancy Reagan Christmas gallery turns each of those trees into a simple project you can make this weekend, with supplies and easy steps for every slide. Here is how to bring that old fashioned look home..
Nancy Reagan Christmas Started With a Folk Art Tree
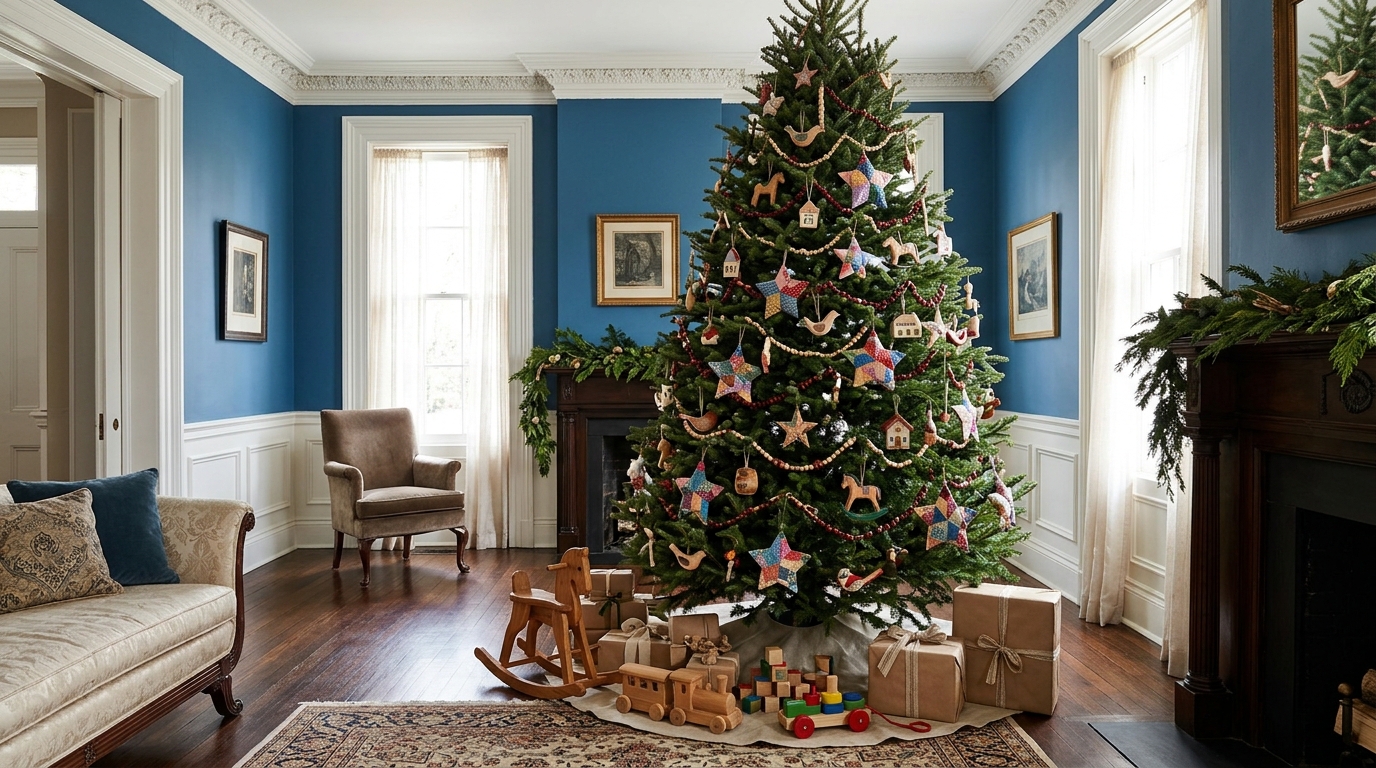
In 1981, her first holiday as first lady, the Blue Room tree was hung with folk art ornaments lent by the Museum of American Folk Art, as the White House Christmas tree history notes. A Nancy Reagan Christmas look starts right there: painted hearts, birds, stars and little houses in red, cream and soft blue. Plain wooden cutouts from the craft store cost very little, and a few folk dots make them look like they came from a museum shop. Pair them with folk art painting ideas and your tree will feel old fashioned and warm..
You will need: Small wooden cutouts (hearts, birds, stars, houses), acrylic craft paint, fine brushes, decoupage medium, twine.
How to make it: 1. Paint each wooden shape in red, cream or blue and let it dry. 2. Add dots, tiny flowers and simple stripes with a fine brush. 3. Seal with a thin coat of decoupage medium and tie on a twine loop.
Mix Handmade Ornaments Up Close
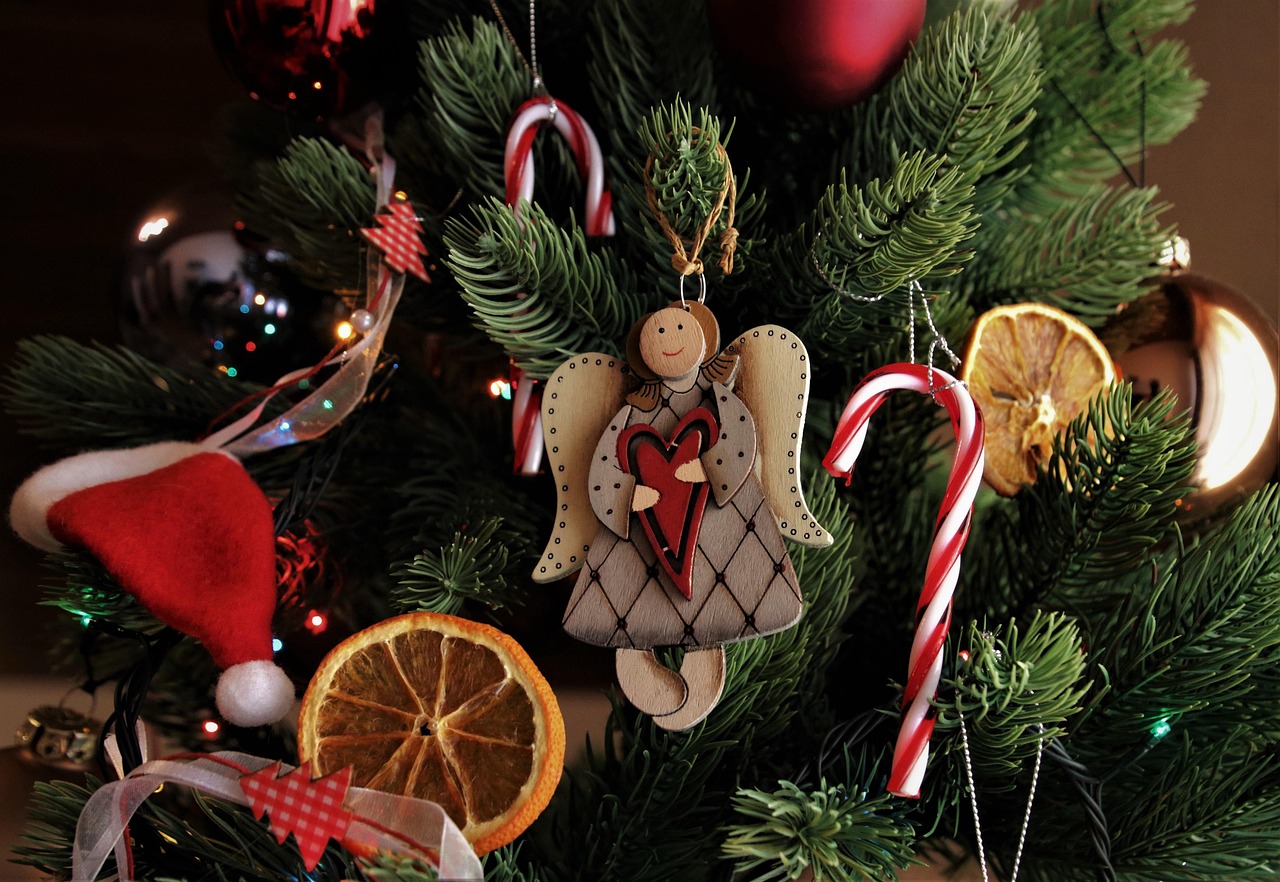
Folk art trees look best when no two ornaments match. Look closely at a tree like this and you see a felt angel, a dried orange slice and a striped candy cane sharing one branch. That mix is what makes a tree feel collected over many years instead of bought in one trip. Make a few new pieces each weekend and hang them next to older family favorites. Our roundup of easy handmade ornaments has plenty of quick ideas to fill the gaps.
You will need: Felt sheets, embroidery floss, a needle, dried orange slices, ribbon, a hot glue gun.
How to make it: 1. Cut a simple angel shape from two layers of felt and sew around the edge. 2. Thread ribbon through dried orange slices. 3. Hang the handmade pieces in small groups so the mix reads clearly.
Nancy Reagan Christmas Foil Paper Cones

The 1982 tree swapped wood for shine, with foil paper cones and metallic touches catching the light. For a Nancy Reagan Christmas cone, roll a quarter circle of foil paper into a point, glue the seam and fill it with wrapped candies. Old fashioned trees often held treats like this for children to pick on Christmas morning. Thin red ribbon handles finish the look. If you like ornaments with a surprise inside, try these fillable ornament ideas next.
You will need: Gold and silver foil paper or foil gift wrap, card stock, glue stick, thin red ribbon, wrapped hard candies.
How to make it: 1. Glue foil paper to card stock and cut a quarter circle about 6 inches wide. 2. Roll it into a cone and glue the seam. 3. Glue a ribbon handle inside the rim and fill with candies.
Silver Ornament Bowl for the Side Table

Not every shiny idea has to go on the tree. A low bowl filled with silver and white round ornaments repeats a metallic tree from across the room and costs almost nothing if you use spare ornaments from the storage tote. Mix matte, shiny and frosted finishes so the bowl has depth. Set it on a side table, a mantel or the center of the dining table. For more ideas in this color story, see our silver holiday decor gallery.
You will need: A wide shallow bowl, silver and white round ornaments in mixed sizes, a few sprigs of evergreen.
How to make it: 1. Place the largest ornaments in the bowl first. 2. Fill the gaps with small ornaments in different finishes. 3. Tuck in two or three short evergreen sprigs for color.
Nancy Reagan Christmas Wooden Toy Ornaments

In 1983 the tree was dressed in old fashioned toys lent by the Margaret Woodbury Strong Museum. A Nancy Reagan Christmas toy tree is easy to copy with tiny wooden soldiers, rocking horses, trains and spinning tops. Unfinished wooden toy shapes and wooden beads are cheap at craft stores. Paint them in bright red, green and cream, then add small details like gold belts and black boots. Fans of nutcracker style decor will love how cheerful this tree looks.
You will need: Small wooden toy shapes, wooden beads, wooden spools, acrylic paint, fine brushes, small eye hooks or glue on hangers, red string.
How to make it: 1. Paint the wooden shapes and beads in red, green and cream. 2. Add faces, belts and stripes with a fine brush. 3. Attach a hanger to the top of each toy and tie on red string.
A Carved Rocking Horse Beside the Tree

A toy themed tree feels complete when one larger toy sits on the floor nearby. A painted or carved rocking horse is a timeless choice and is easy to find at thrift stores and yard sales. Give a tired one a fresh coat of paint, add a new yarn mane and tie a plaid bow around its neck. It becomes a sweet spot for family photos, too. For more cozy toy styling, browse our teddy bear holiday decor ideas.
You will need: A thrifted rocking horse, sandpaper, acrylic or chalk paint, yarn, a wide plaid ribbon.
How to make it: 1. Sand the rocking horse lightly and wipe it clean. 2. Paint it in cream and red, then let it dry. 3. Glue on a yarn mane and tie a plaid bow at the neck.
Natural Ornaments From Seed Pods and Hydrangeas
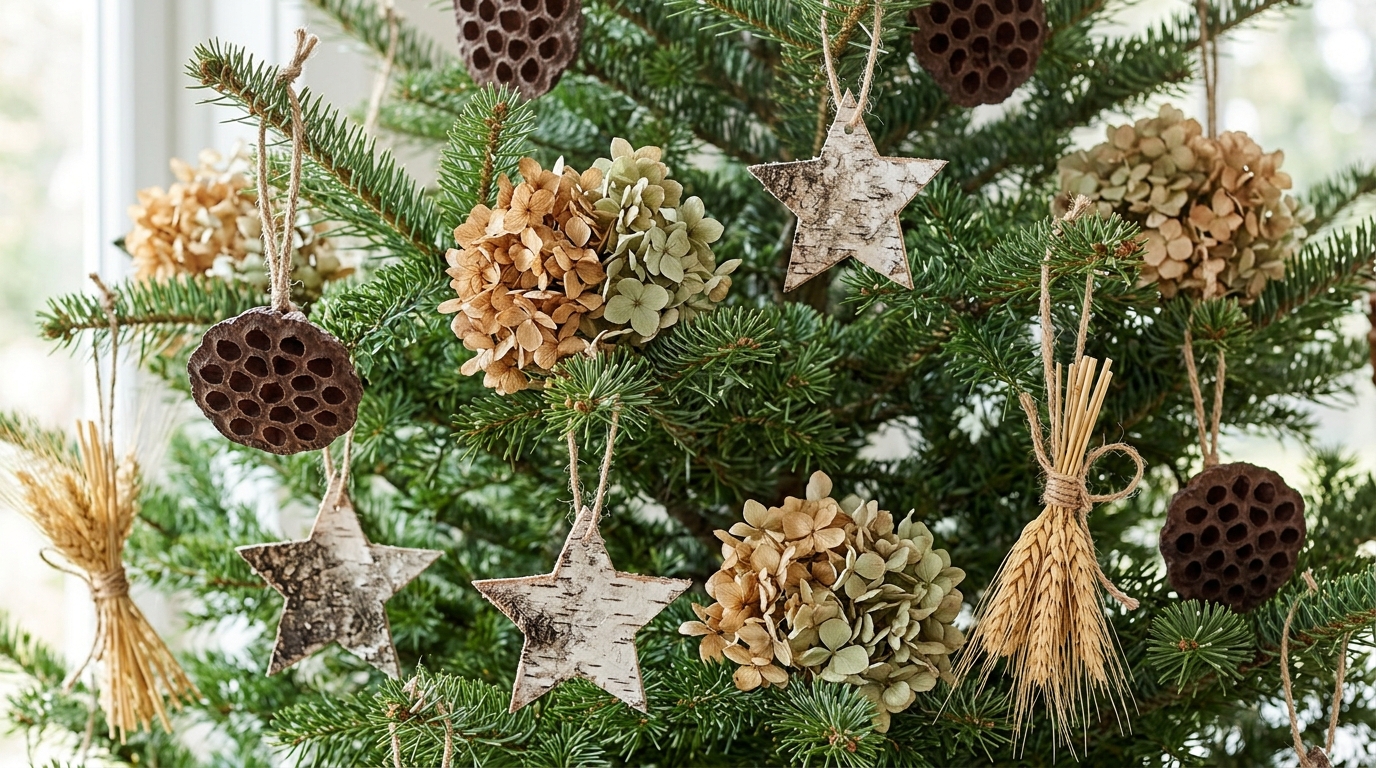
The 1984 tree used ornaments made from plant material and natural handcrafts. You can gather most of these supplies on a walk or from your own garden. Dried hydrangea heads, lotus seed pods, wheat bundles and birch bark stars all hang beautifully with simple twine. Muted creams and browns look calm and elegant against green branches. This is one of the cheapest trees in the full collection, and you can find more ideas in our woodland holiday decor roundup.
You will need: Dried hydrangea heads, lotus seed pods, wheat stalks, birch bark or brown kraft paper, twine, a hot glue gun.
How to make it: 1. Cut birch bark or kraft paper into stars. 2. Tie wheat stalks into small bundles with twine. 3. Glue twine loops to the hydrangea heads, pods and stars and hang them evenly.
Dried Orange Slices and Pine Cones

Dried orange slices are one of the oldest natural ornaments and still one of the prettiest. They glow amber when light comes through them, and they smell lovely for weeks. Pine cones make easy partners. Bake thin slices low and slow, then string them into garlands or tie them on one by one. Kids can help with the stringing. Our full guide to drying orange slices walks through oven times and storage tips.
You will need: Oranges, a sharp knife, a baking sheet, parchment paper, small pine cones, twine.
How to make it: 1. Slice oranges about a quarter inch thick and pat them dry. 2. Bake at a low heat for three to four hours, turning a few times. 3. Thread the slices and pine cones onto twine for a garland.
Nancy Reagan Christmas Card Ornaments
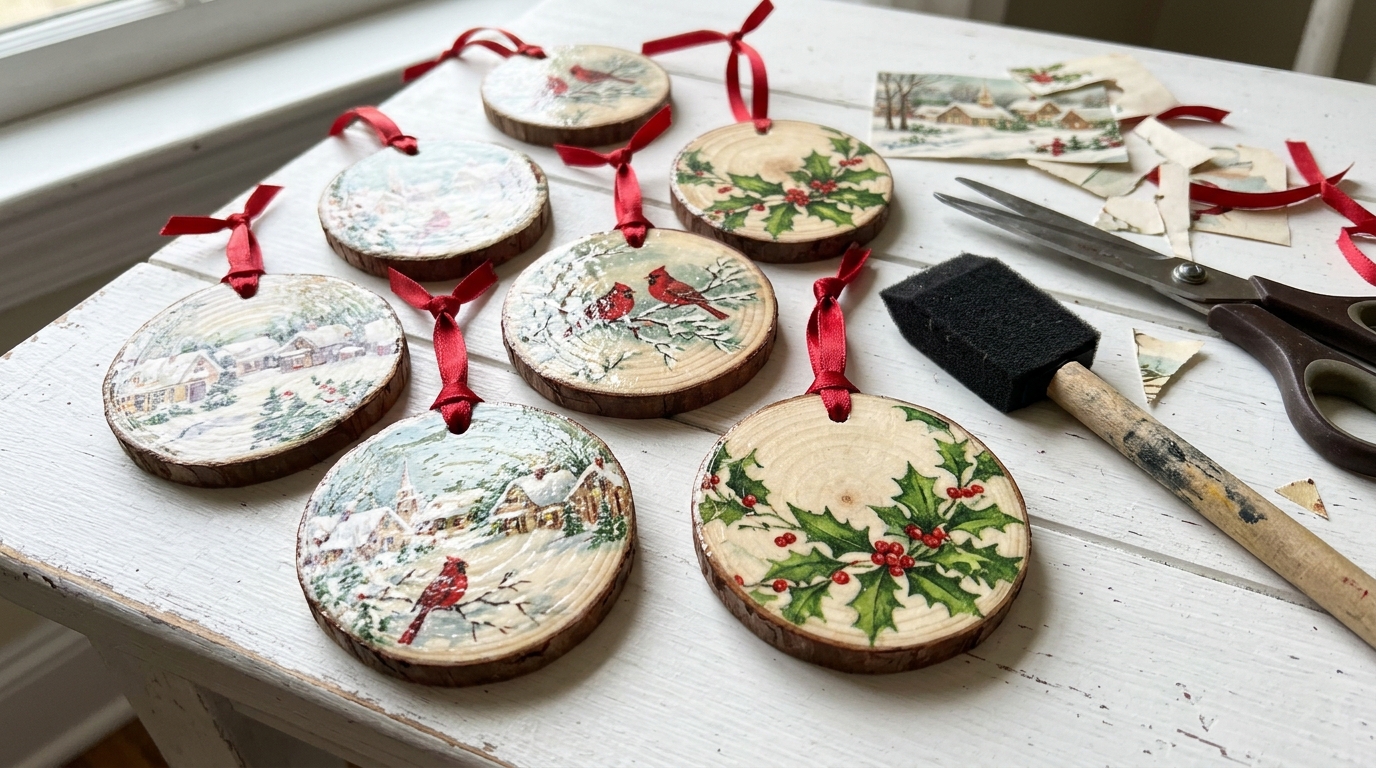
In 1985 the tree held ornaments made from Christmas cards the Reagans had received the year before. For a Nancy Reagan Christmas card ornament, cut favorite scenes from last year’s cards and decoupage them onto round wood slices. Snowy villages, cardinals and holly work best. A glossy coat makes them look like little painted plaques. It is a lovely way to keep cards from friends and family instead of throwing them out. See how Victorian holiday cards inspired some of the earliest card art.
You will need: Old greeting cards, wood slices, scissors, decoupage medium, a foam brush, red ribbon, small eye hooks.
How to make it: 1. Cut a circle of card art slightly smaller than the wood slice. 2. Brush decoupage medium on the wood, press the card art down and smooth it. 3. Add two top coats, let dry and add a ribbon hanger.
Save Hand Painted Card Fronts All Year
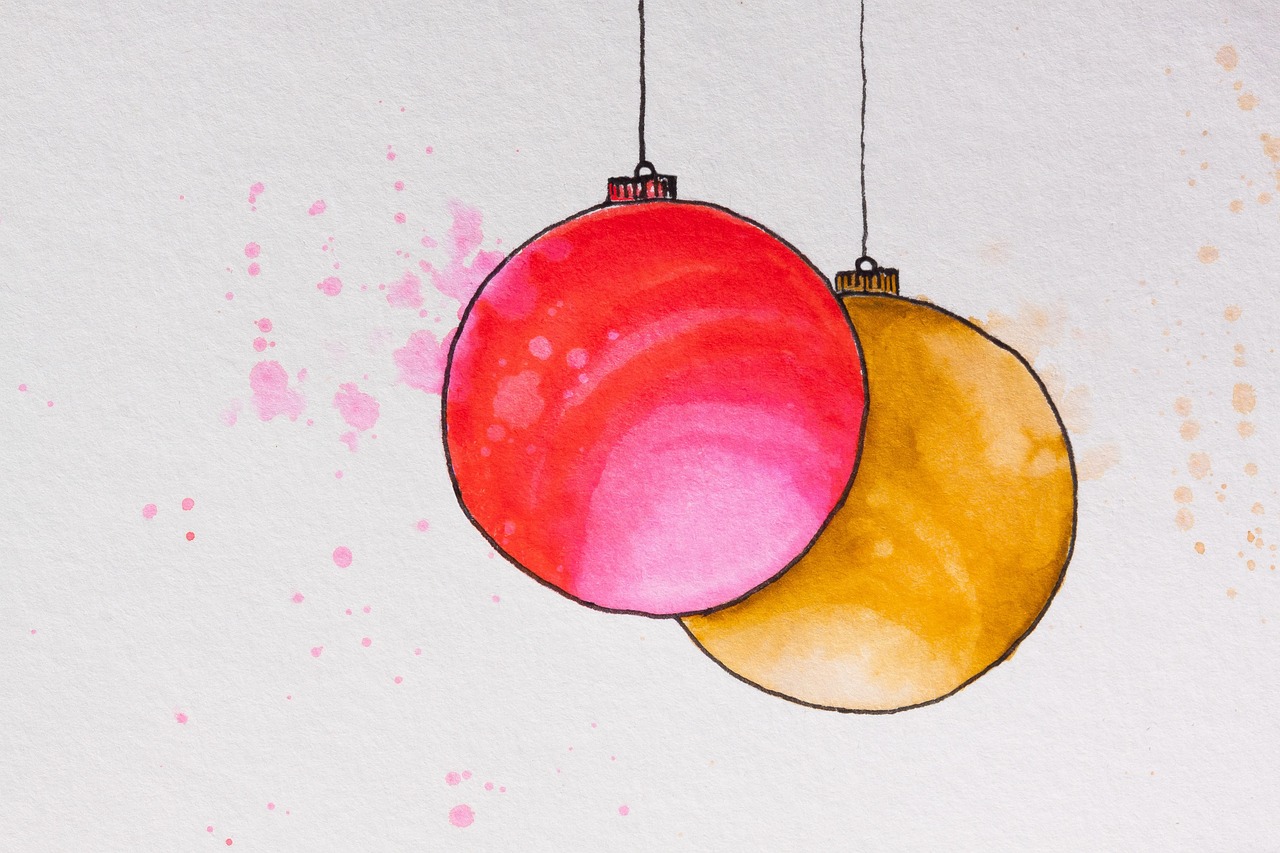
Card ornaments start long before December. Keep a small box near the mail and drop in every card with a pretty front. Hand painted and watercolor cards like this one make the nicest ornaments because the colors stay soft and bright. You can also paint your own simple ornament shapes on card stock for gift tags. By next fall you will have a full stack ready to cut. Our easy watercolor card ideas show how simple painted cards can be.
You will need: A small storage box, card stock, watercolor paints, a round brush, a black fine liner.
How to make it: 1. Keep a box for saved cards near your mail spot. 2. Paint simple round ornament shapes on card stock. 3. Outline them with a fine liner once dry and file them with your saved cards.
Nancy Reagan Christmas Mother Goose Felt Geese
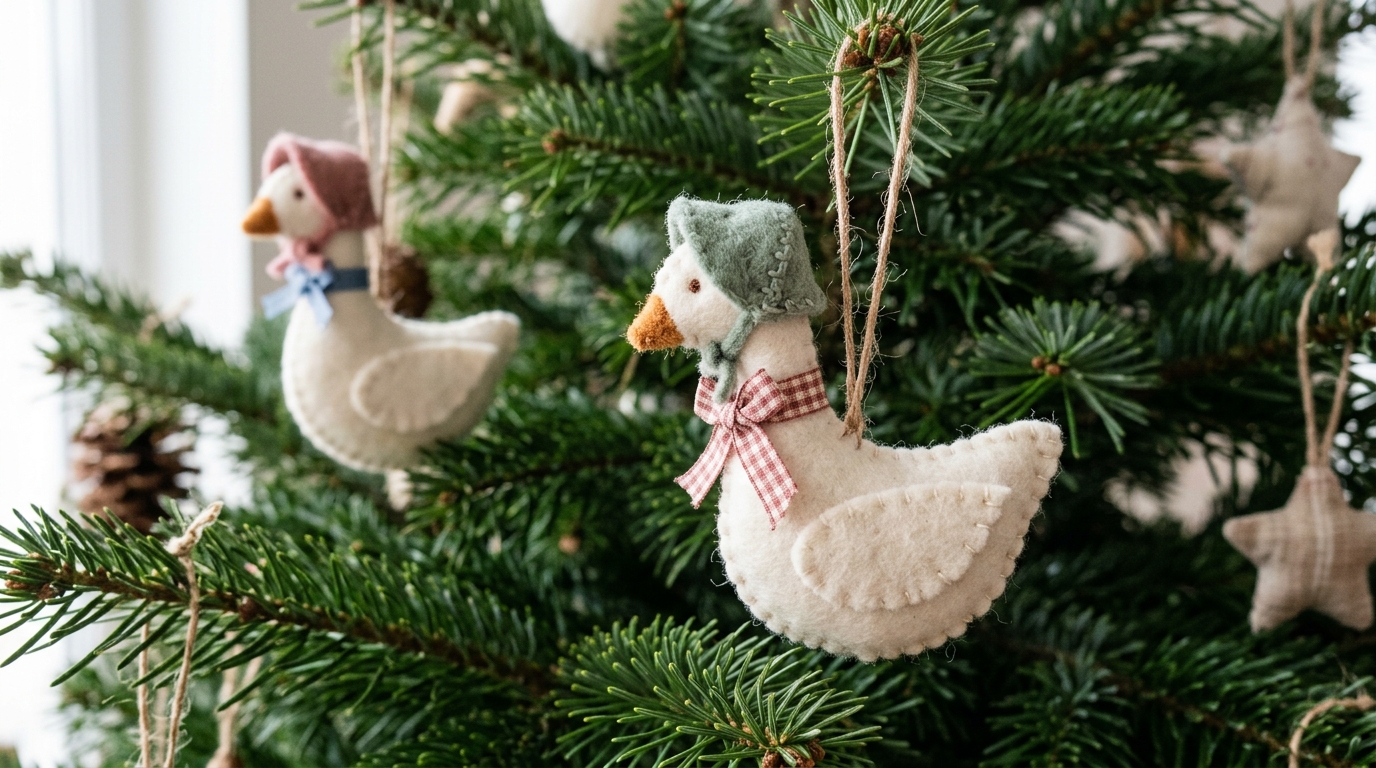
The 1986 tree followed a Mother Goose theme, full of nursery rhyme charm. A Nancy Reagan Christmas goose ornament is a sweet beginner sewing project. Cut two goose shapes from white felt, sew around the edges, stuff lightly and add a gingham ribbon collar and a tiny felt bonnet. Orange felt beaks and black bead eyes finish them. Hang a little flock on the tree or along a mantel garland. Our simple felt crafts gallery has more patterns to try.
You will need: White and orange felt, a small bit of colored felt for bonnets, embroidery floss, a needle, polyester stuffing, gingham ribbon, black beads.
How to make it: 1. Cut two goose shapes and a beak from felt. 2. Sew the edges, leaving a gap, then stuff lightly and close. 3. Sew on bead eyes, a ribbon collar and a small felt bonnet.
Sheet Music Behind the Branches

The 1987 tree had a musical theme, and sheet music is one of the easiest ways to bring that idea home. Old songbooks from thrift stores cost very little. Roll pages into scrolls tied with red ribbon, fold them into fans or simply tuck a page behind a branch with a red ornament. The cream paper and black notes look timeless with any color scheme. You can also try sheet music on our decoupage holiday plates for a matching set.
You will need: Thrifted sheet music or songbook pages, thin red ribbon, red ornaments, a glue stick.
How to make it: 1. Roll pages into tight scrolls and tie each one with red ribbon. 2. Fold a few pages into fans and glue the bottoms. 3. Tuck scrolls and fans between branches near red ornaments.
Tiny Musical Instrument Ornaments
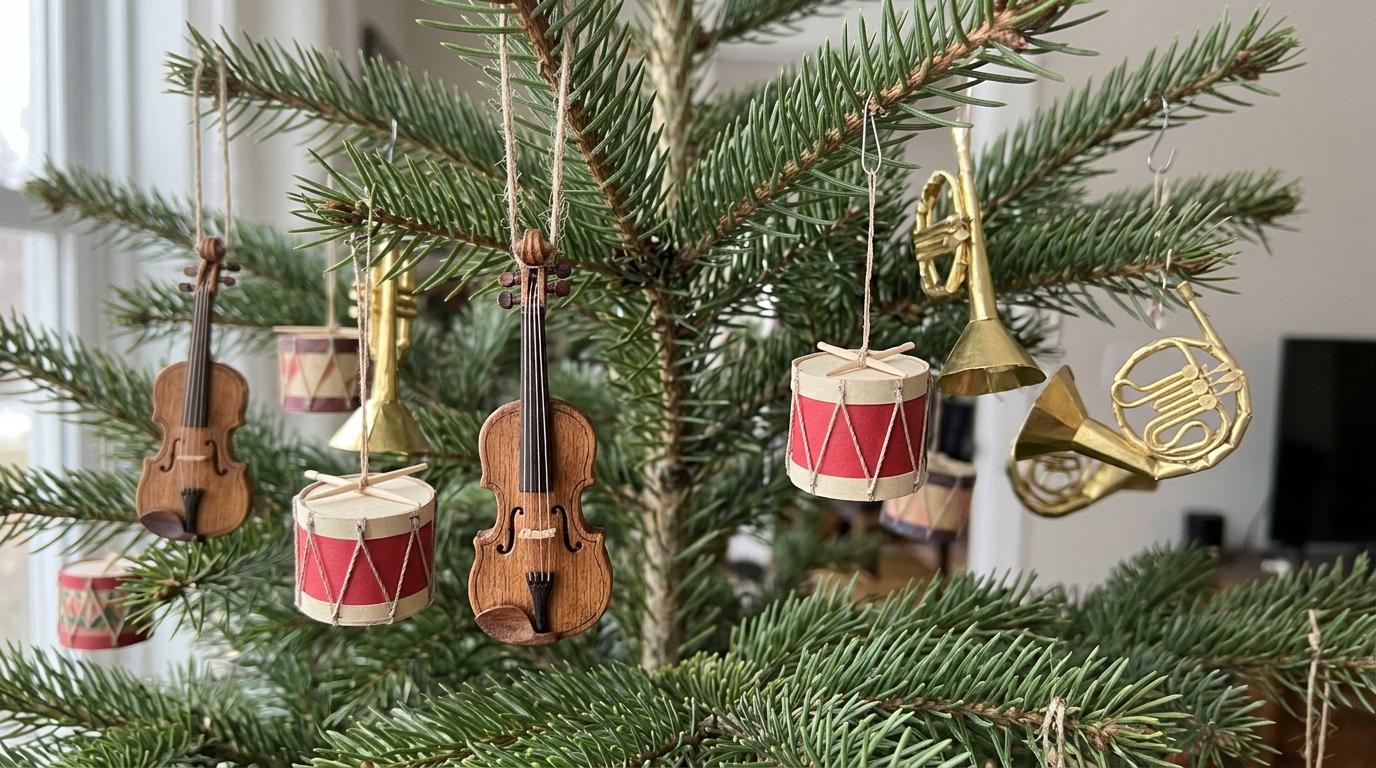
Mini instruments are the sweetest part of a musical tree. Little wooden violins, gold paper horns and small drums made from paper tubes look charming in a row on the branches. For a Nancy Reagan Christmas musical tree, mix three or four instrument types and repeat them around the tree so it feels planned. Paper drums are the cheapest: wrap a short cardboard tube in red paper, add gold trim and cross two toothpicks on top. Our hand painted ornament ideas help with small details.
You will need: Small cardboard tubes, red and white paper, gold trim, toothpicks, mini wooden violins or horns from a craft store, gold paint, string.
How to make it: 1. Cut tubes into short drums and wrap them in red paper. 2. Glue gold trim around the top and bottom and add two crossed toothpicks. 3. Paint any wooden instruments gold or brown and add string loops.
Bring Out Grandma’s Vintage Ornaments

The 1988 tree was a timeless one that reused hand blown ornaments from the Eisenhower years. That idea fits any home: bring out the old ornaments from a parent or grandparent and give them pride of place. Sort them by color, set them in a vintage tray and hang the prettiest ones at eye level. Mix in a few new pieces in the same shades. Our guide to vintage ornament ideas has tips for finding and caring for old pieces.
You will need: Family heirloom or thrifted vintage ornaments, a wooden tray, a red checked cloth, soft tissue paper.
How to make it: 1. Unwrap the vintage ornaments and sort them by color. 2. Line a tray with a checked cloth and fill it with spare pieces. 3. Hang the best ornaments at eye level where they are safe.
Nancy Reagan Christmas Keepsake Ornament Box
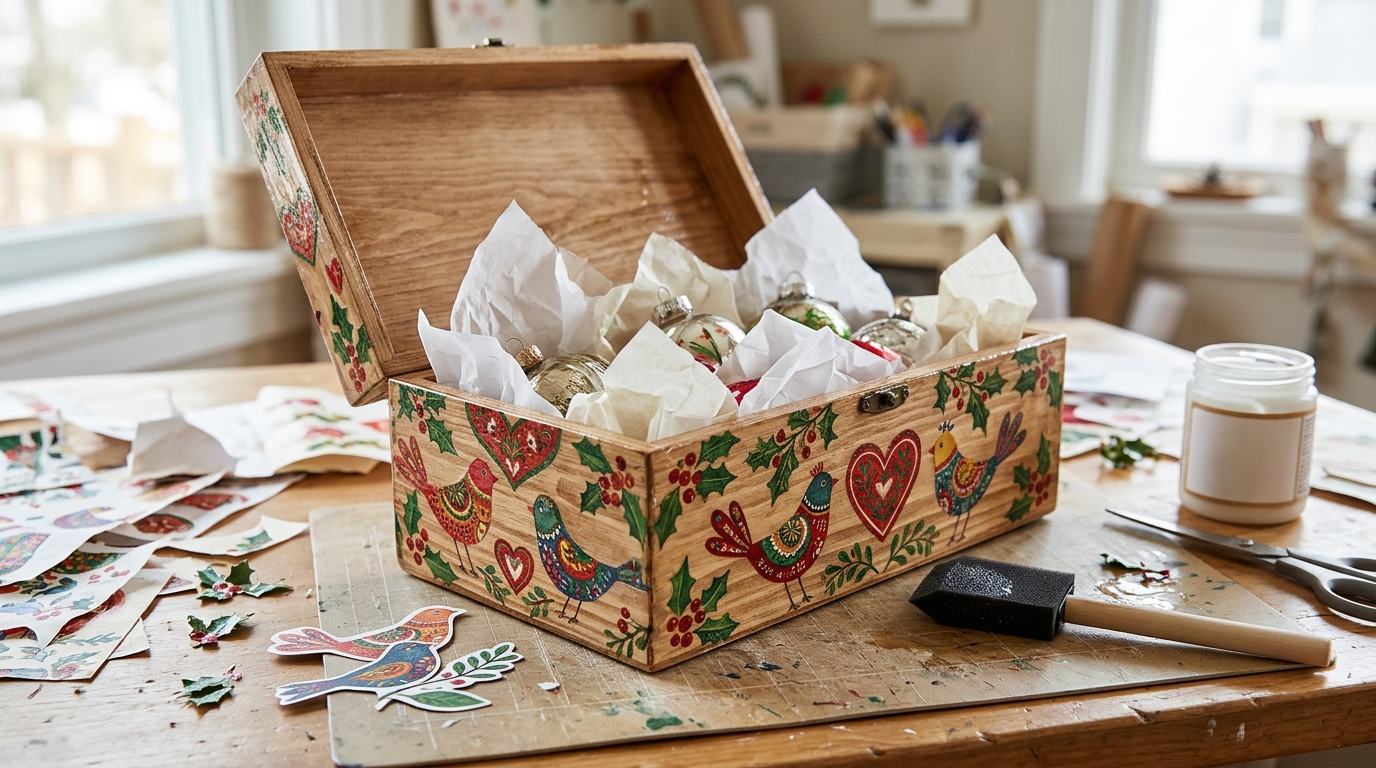
Special ornaments deserve a special home. Turn a plain wooden box into a Nancy Reagan Christmas keepsake box with decoupaged folk art birds, hearts and holly cut from cards or printed paper napkins. Seal it well so it lasts for years. Line the inside with tissue and give each heirloom ornament its own little nest. It also makes a lovely gift for a new family. For more ways to keep decorations neat, see our holiday storage hacks.
You will need: A plain wooden box with a lid, card art or printed paper napkins, scissors, decoupage medium, a foam brush, tissue paper.
How to make it: 1. Cut folk art motifs from cards or napkins. 2. Brush decoupage medium on the box, lay the motifs down and smooth them out. 3. Add two top coats, let dry and line the box with tissue.
Put the Tree in Front of Your Biggest Window
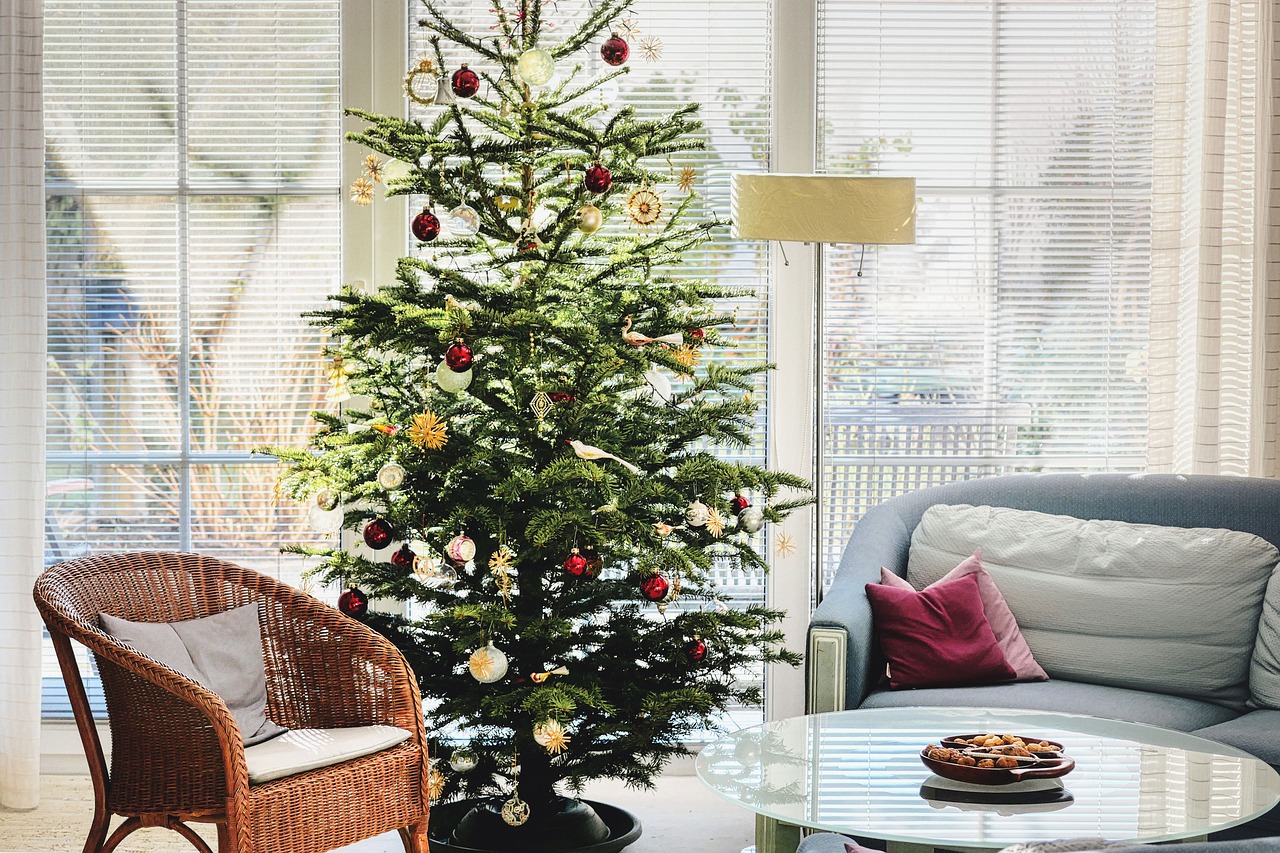
The Blue Room tree always stood in front of tall windows, which gave it bright, even light all day. Copy that at home by placing your tree near your largest window. Daylight makes handmade ornaments look their best and shows off every painted detail. In the evening, the tree is just as pretty from outside. Keep the room around it simple so the ornaments stay the star. Our holiday window ideas show how to dress the window around it, too.
You will need: A real or faux tree, a strong tree stand, a tree skirt, your handmade ornaments.
How to make it: 1. Pick the largest window in your main room and clear the space. 2. Set the tree in its stand a short step from the window. 3. Hang the handmade ornaments facing into the room and the window.