Safety Pin Crafts: 15 Beaded Christmas Gifts From an Invention Walter Hunt Sold for $400
Safety pin crafts are the cheapest sparkle you can make this Christmas, and they come with a story most people have never heard. In 1849 a New York mechanic named Walter Hunt twisted a piece of wire into a coil, added a little clasp to cover the sharp point, and patented the safety pin. He sold the patent for $400, partly to pay off a $15 debt to a draftsman, and others went on to make millions from his clever idea. Walter Hunt never got rich, but he was named to the National Inventors Hall of Fame in 2006. Today a box of pins and a jar of seed beads cost just a few dollars, and grandmas have turned them into brooches, ornaments and bracelets for generations. Here are 15 easy beaded gifts to make, give or sell..
Safety Pin Crafts Start With Beaded Snowflake Ornaments
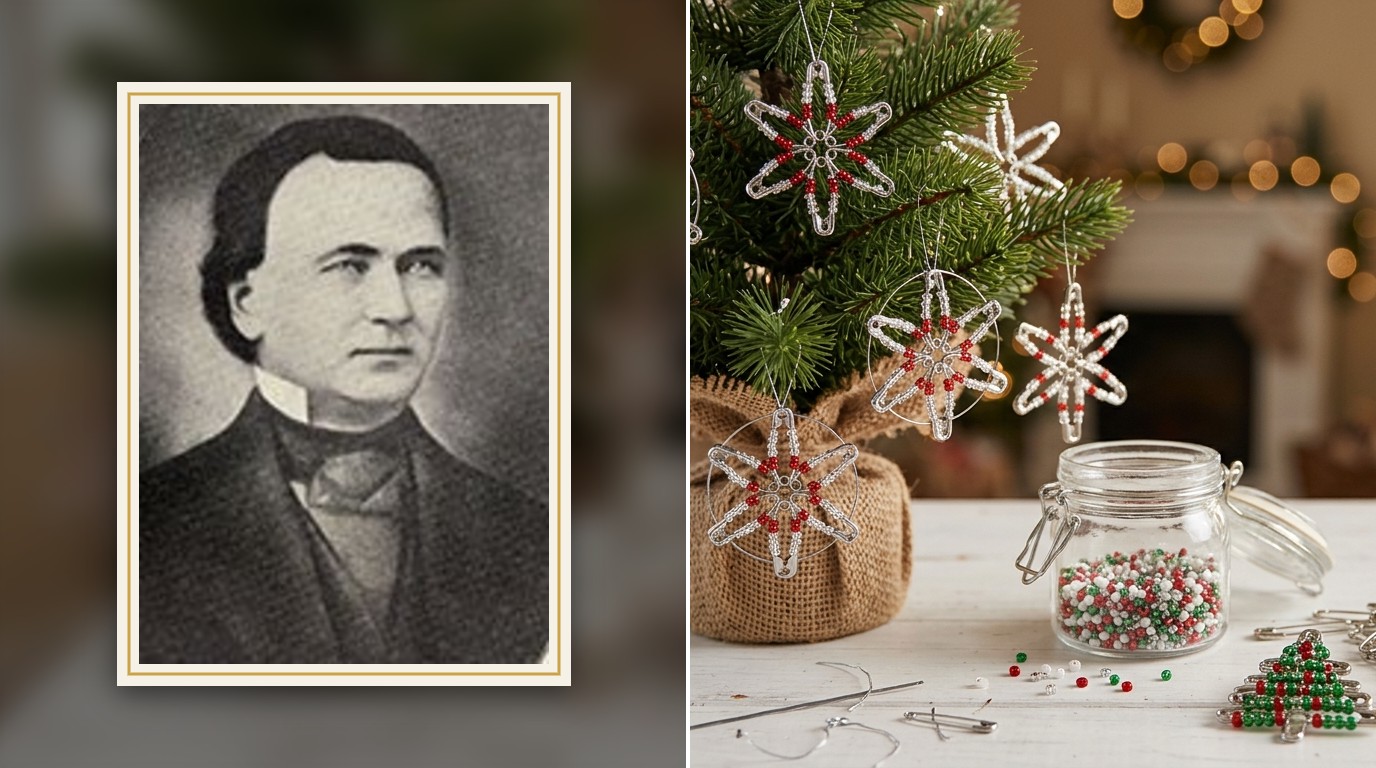
Safety pin crafts do not get prettier than these snowflakes. Each one is just six or eight pins threaded with tiny clear, red and white beads, then strung through their heads onto a small wire ring so they fan out into a star. Hang them on a tabletop tree, tie them on presents or tuck one into a Christmas card. They catch the light like real frost and cost only pennies each to make. Once you make one you will want a whole tree full. Which colors would your first snowflake be..
You will need: small silver safety pins, seed beads in clear, red and white, a thin wire ring or craft wire, needle nose pliers, fishing line or ribbon for hanging.
How to make it: 1. Open each pin and thread on seed beads in a simple pattern, then close the pin. 2. Slide the loop end of every pin onto the wire ring and twist the wire closed with pliers. 3. Space the pins evenly into a star and tie a loop of fishing line at the top for hanging.
A Beaded Christmas Tree Brooch
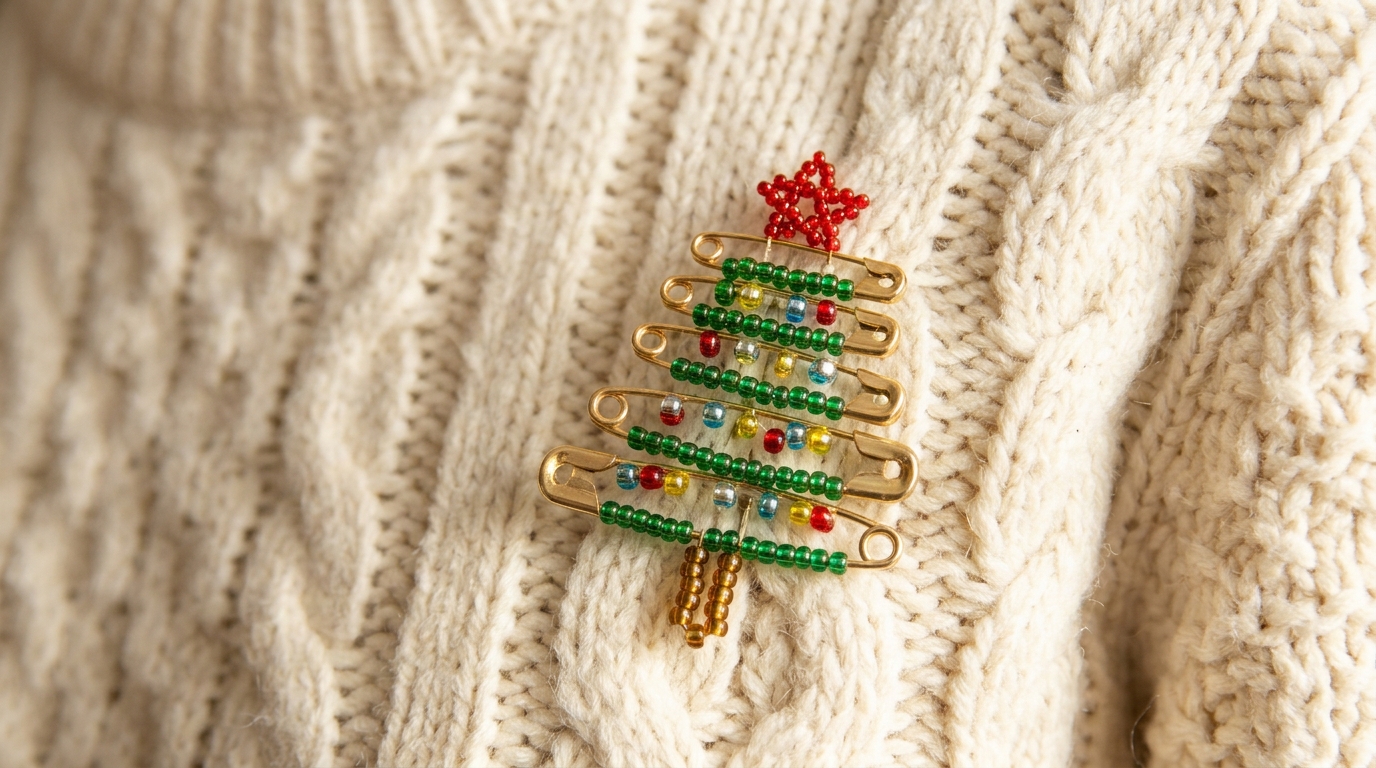
This little tree brooch is the classic beaded pin that grandmas wore on their winter coats. Rows of gold pins filled with green beads get shorter toward the top, a red bead star sits on the peak and a few colored beads look like tiny ornaments. Pin it to a sweater, a scarf or a gift bag and it instantly says Christmas. It also makes a sweet teacher or neighbor gift tucked into a card. Would you wear yours on a coat or a sweater?
You will need: gold safety pins in two or three sizes, green seed beads, a few red, gold and blue beads, one larger safety pin for the back, beading wire.
How to make it: 1. Thread green beads on each small pin, adding a colored bead here and there for ornaments. 2. String the pins from longest to shortest onto beading wire so they stack into a tree shape. 3. Attach the wire to a larger pin for the back and add a red bead star at the top.
Safety Pin Crafts Bracelet in Christmas Colors
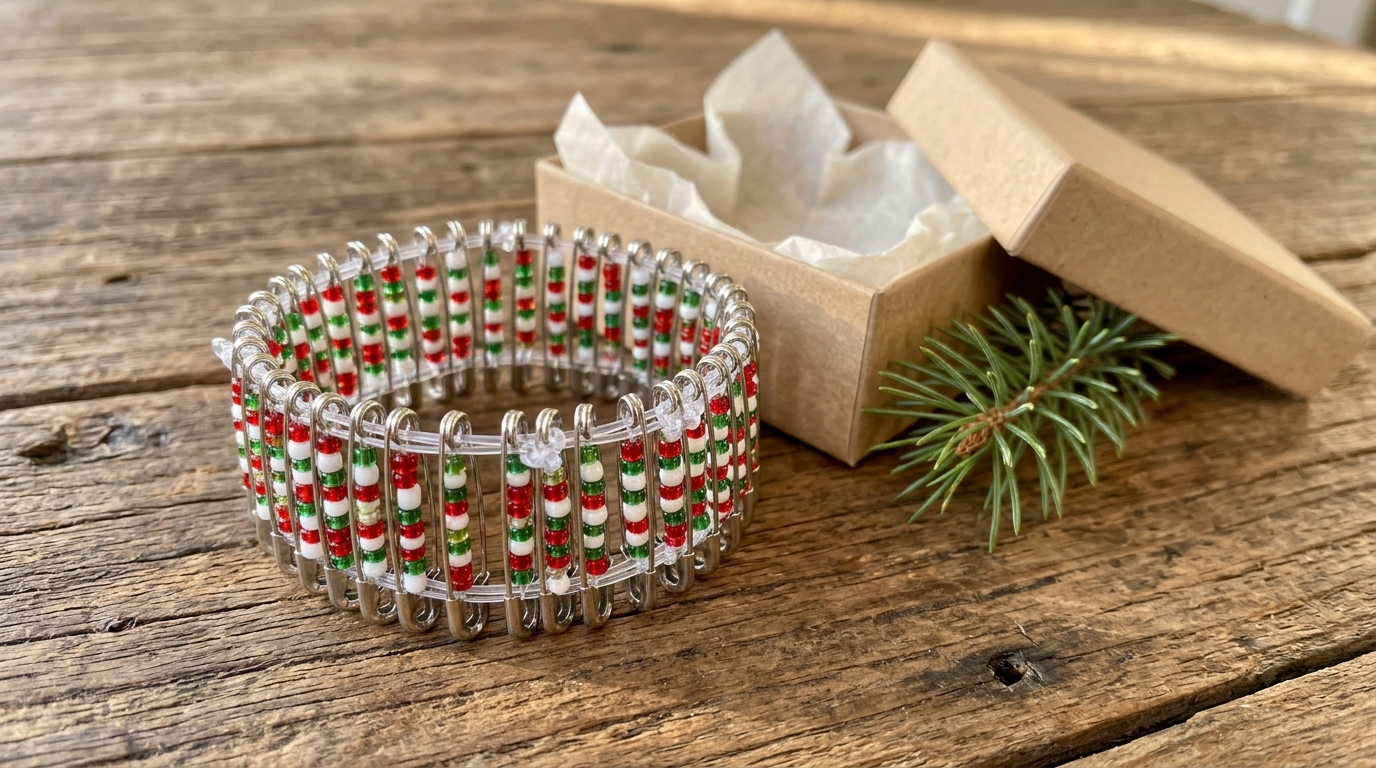
This stretch bracelet is one of the most loved safety pin crafts from the seventies, and it is back. Dozens of small pins filled with red, white and green beads line up side by side on two rows of elastic, so the bracelet slips on and off easily. It looks like a shiny striped cuff, and it makes a lovely stocking stuffer for a teen or a friend. Make a few in different color mixes and keep one for yourself. Who on your list would love a sparkly cuff?
You will need: about 40 small silver safety pins, red, white and green seed beads, clear stretch cord, scissors, a bead mat or dish.
How to make it: 1. Fill every pin with beads in the same pattern so the stripes line up. 2. Thread one piece of stretch cord through all the pin heads and a second piece through all the pin bottoms. 3. Tie both cords tightly in a double knot, dab with glue and tuck the knots inside a pin.
Candy Cane Pins
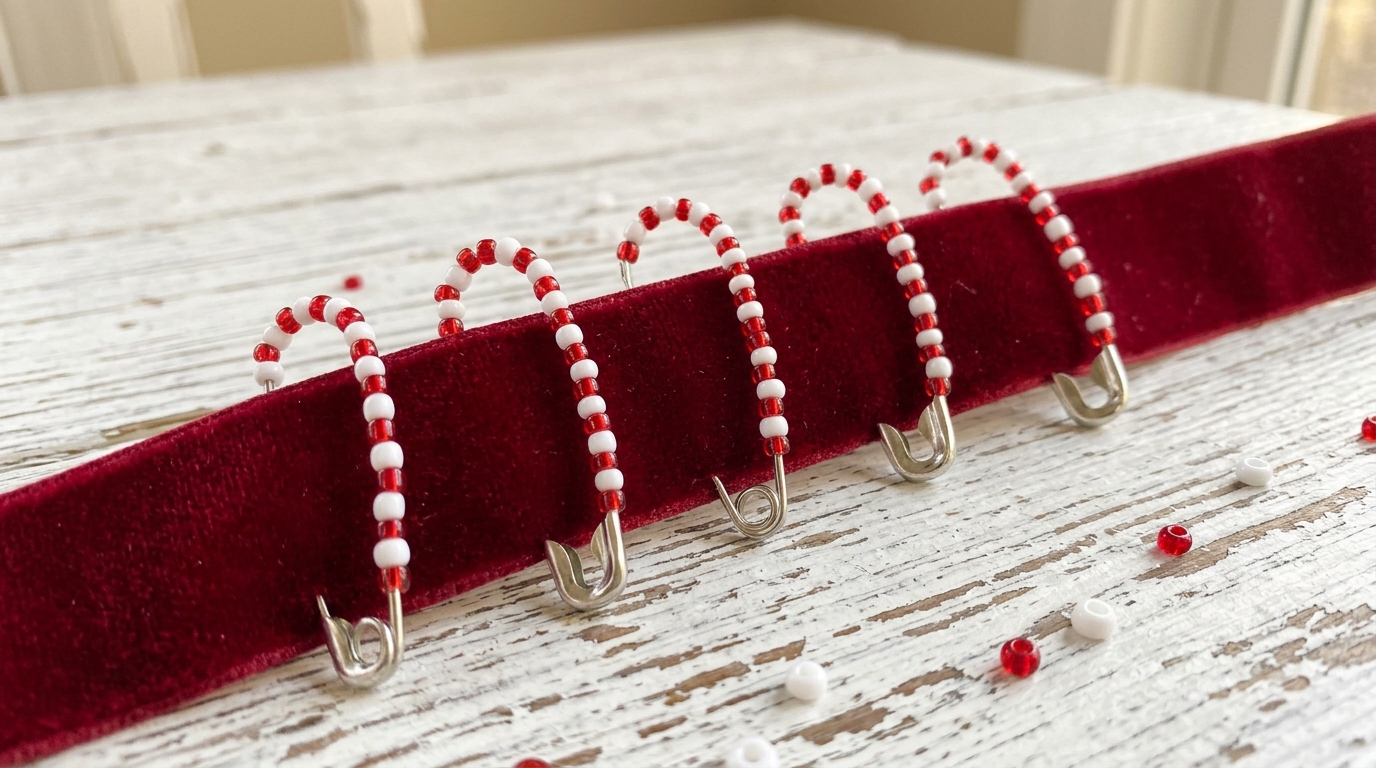
Red and white beads on a silver pin look exactly like a tiny candy cane, especially when you gently bend the top into a hook. These are quick enough to make by the dozen, which is why they are perfect for class parties, coworkers or the gift table at a church bazaar. Pin a row of them along a velvet ribbon and they look like a little candy shop window. An adult should do the bending with pliers so the pin closes safely. How many could you make in one movie night?
You will need: silver safety pins, red and white seed beads, round nose pliers, a red velvet ribbon for display.
How to make it: 1. Thread beads onto each pin, alternating red and white. 2. Close the pin, then have an adult gently curve the top section into a hook with round nose pliers. 3. Fasten the finished canes along a velvet ribbon to store or display them.
Mini Wreath Pins for Coats and Bags
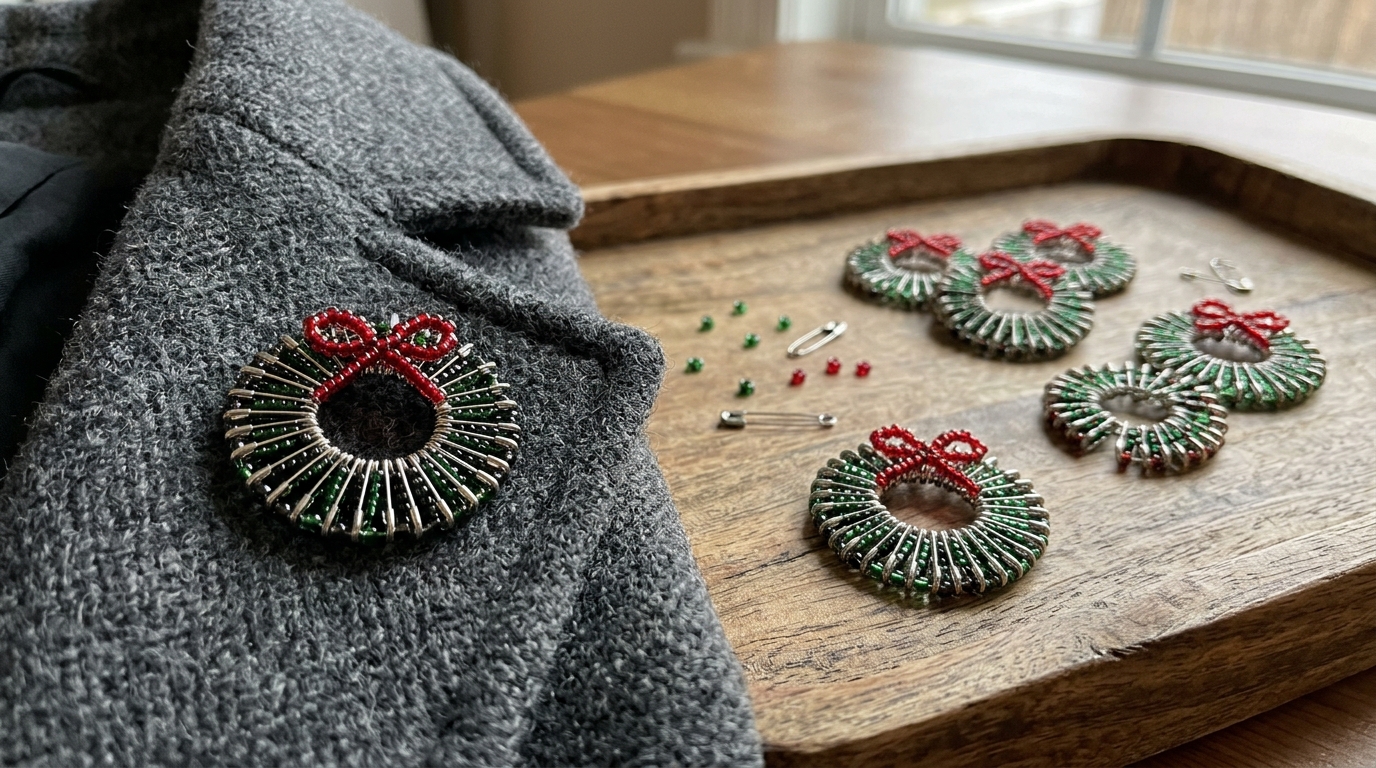
A tiny beaded wreath is a cheerful touch on a wool coat lapel all winter long. Small pins threaded with green beads are joined in a circle so their beaded sides face out, and a little red bead bow finishes the look. Make a tray of them and you have a ready supply of small gifts for friends, the mail carrier or the ladies at book club. They take about fifteen minutes each once you get going. Would a red or a gold bow suit your coat best? Pair it with our tiny villa mini bricks for a full set.
You will need: small safety pins, green seed beads, red seed beads, beading wire, a larger pin for the back, a small tray for finished pins.
How to make it: 1. Fill each small pin with green beads and close it. 2. Thread beading wire through the top and bottom of the pins and pull it into a circle. 3. Twist on a small bow made from red beads on wire and attach a larger pin to the back.
Jingle Bell Charms for Stockings and Zippers
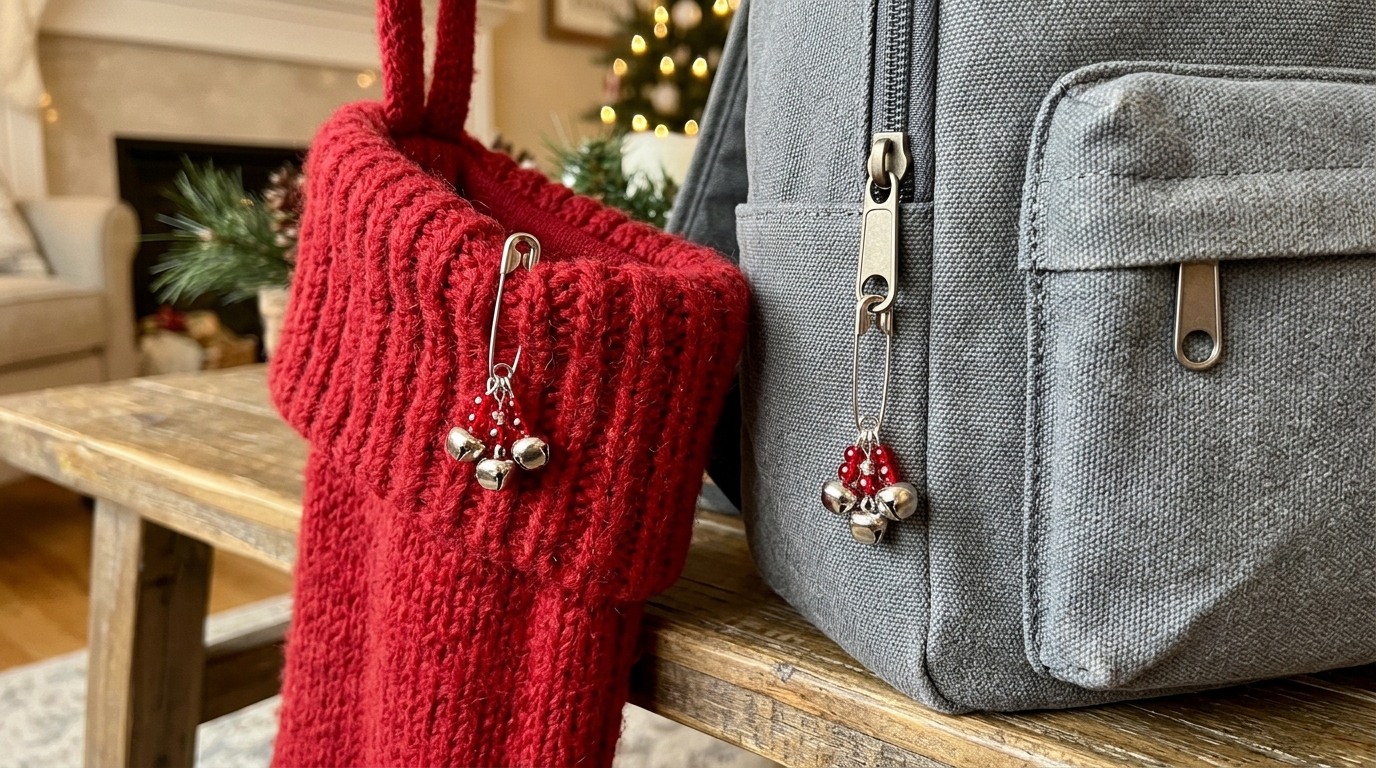
Here is a fun little project with a happy sound. Clip a tiny silver jingle bell and a few red beads onto a small pin and fasten it to a stocking cuff, a backpack zipper or a coat pocket. Every step comes with a little jingle that makes kids grin. They are so cheap you can make one for every stocking in the family and a few extras to give away. Keep small beads and bells away from babies and little ones. Where would you hang your first jingle charm?
You will need: small safety pins, tiny silver jingle bells, red and gold beads, jump rings, flat nose pliers.
How to make it: 1. Open a jump ring with pliers, add a bell and close it. 2. Thread a few beads onto the pin and slide the bell ring on last. 3. Close the pin and fasten it to a stocking cuff or zipper pull.
Safety Pin Crafts as Gift Toppers

Instead of a paper tag that goes in the trash, fasten a beaded pin through the ribbon on each present. A snowflake for one gift, a beaded heart for another, and the topper turns into a second little gift your friend can wear or hang on the tree. These safety pin crafts make even plain kraft paper wrapping look special, and you can match the bead colors to your ribbon. It is a small detail people remember. Which gift under your tree needs a sparkly topper?
You will need: beaded snowflake or heart pins from this list, kraft paper, red gingham ribbon, scissors, tape.
How to make it: 1. Wrap your gift in kraft paper and tie it with ribbon. 2. Slide the beaded pin through the knot of the ribbon and close it. 3. Fluff the bow so the pin sits in the center like a brooch.
A Beaded Angel Ornament
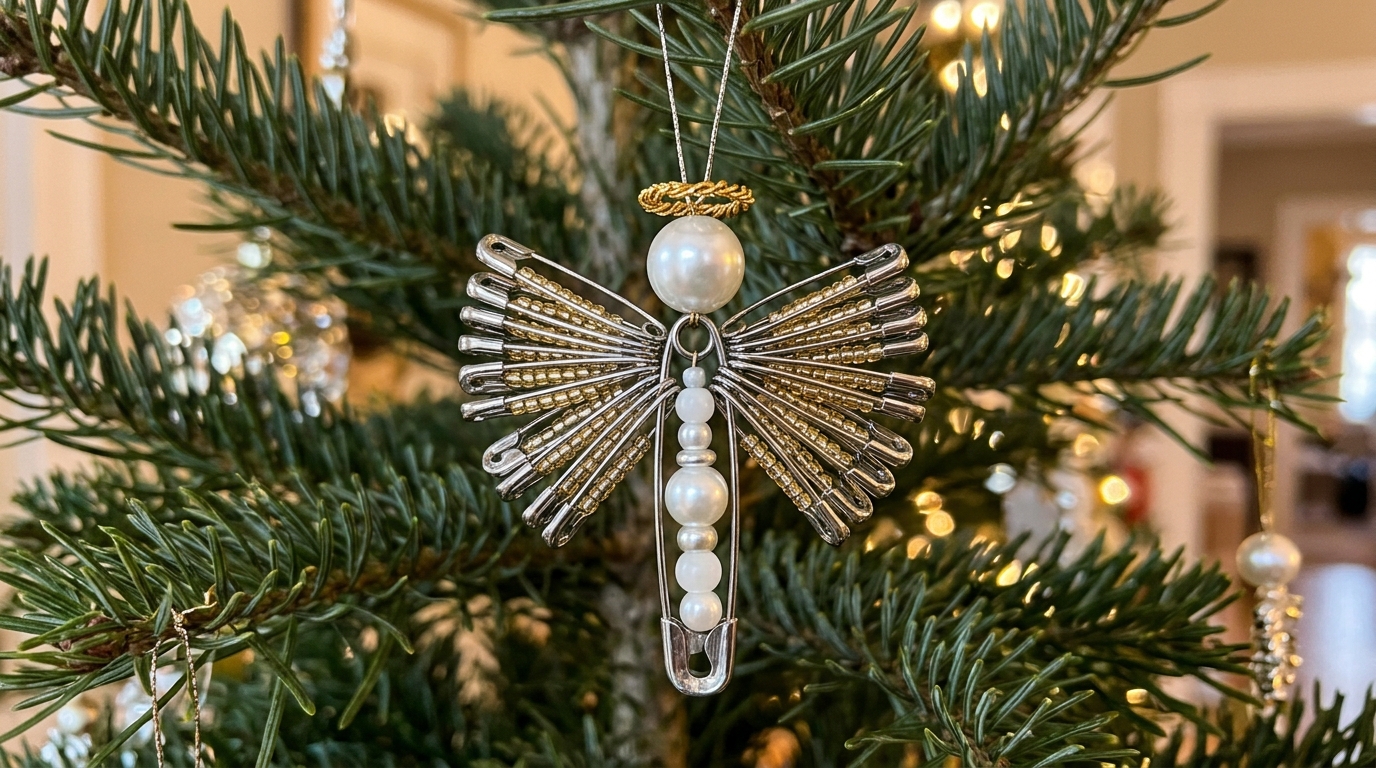
This angel is a favorite at grandma’s house. One large pin threaded with white and pearl beads makes the body, smaller pins with gold beads fan out on each side as wings, and a round pearl bead sits on top for the head with a tiny wire halo. Hang a few on the tree or tie one to a gift for someone who needs a little comfort this year. They look delicate but hold up for years when packed carefully. Who would you give your first angel to?
You will need: one large safety pin, eight to ten small safety pins, white, pearl and gold beads, a large round pearl bead, gold craft wire, pliers.
How to make it: 1. Fill the large pin with white and pearl beads for the body. 2. Fill the small pins with gold beads, then wire them in two fans to each side of the body for wings. 3. Thread the round pearl on wire for the head, twist a small loop above it for a halo and add a hanging loop.
Beaded Pin Napkin Rings for the Holiday Table
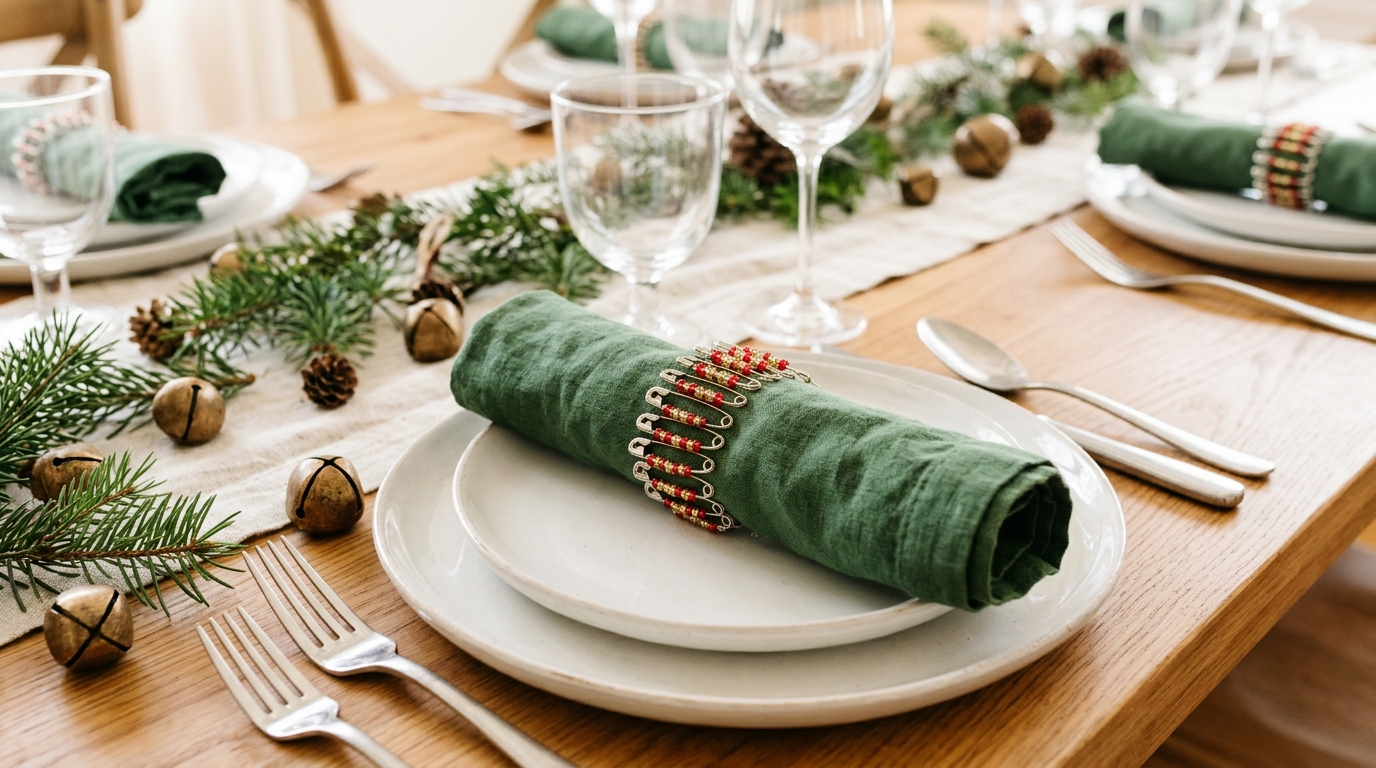
Beaded napkin rings give a Christmas table a little sparkle for almost no money. Pins filled with red and gold beads are joined into a circle, just like the bracelet, but sized to hold a rolled linen napkin. Make a set of eight in an afternoon and use them every December, or tie a set with ribbon as a hostess gift. Guests always pick them up for a closer look. If you love beaded table touches, these beaded Christmas trees are a gorgeous match. Would you choose red and gold or silver and white?
You will need: about 25 small safety pins per ring, red and gold seed beads, stretch cord, scissors, linen napkins.
How to make it: 1. Fill each pin with red and gold beads in the same pattern. 2. Thread stretch cord through the tops and bottoms of the pins and tie them into a ring. 3. Roll a napkin and slide it through the beaded ring.
Safety Pin Crafts for Sneaker Laces
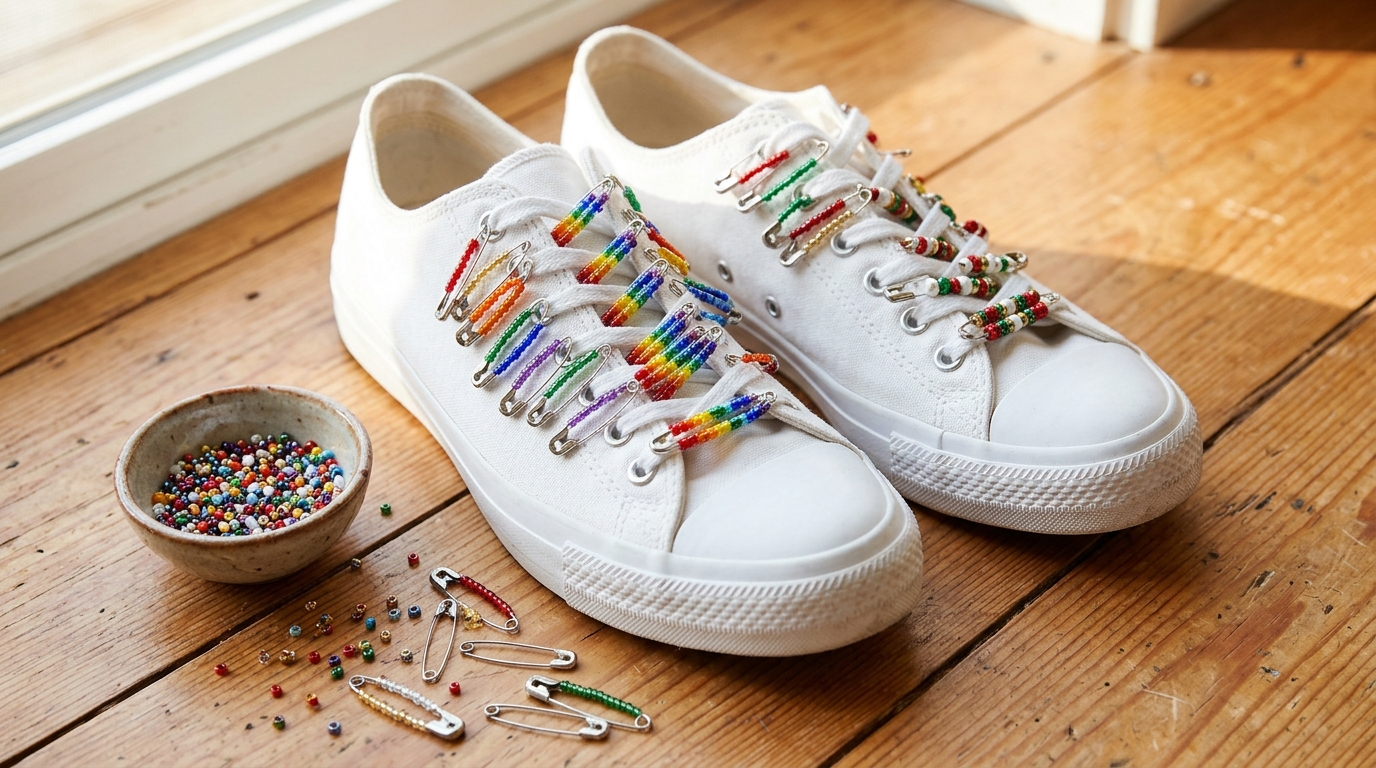
Kids and teens love these shoelace pins. Thread colorful beads onto small pins in rainbow stripes or Christmas colors and fasten them across the laces of plain white sneakers. They are bright, fun to swap with friends and a great project for a sleepover or a snowy afternoon. Safety pin crafts like these were a huge playground trend years ago, and they still make kids grin today. Help younger crafters open and close the pins, and keep beads away from toddlers. What colors would you pick for your laces?
You will need: small safety pins, colorful seed or pony beads, plain sneakers, a small bowl for beads.
How to make it: 1. Thread beads onto each pin in a pattern you like. 2. Close the pins firmly so the beads stay on. 3. Fasten the pins across the laces between the eyelets of each shoe.
A Beaded Trinket Basket
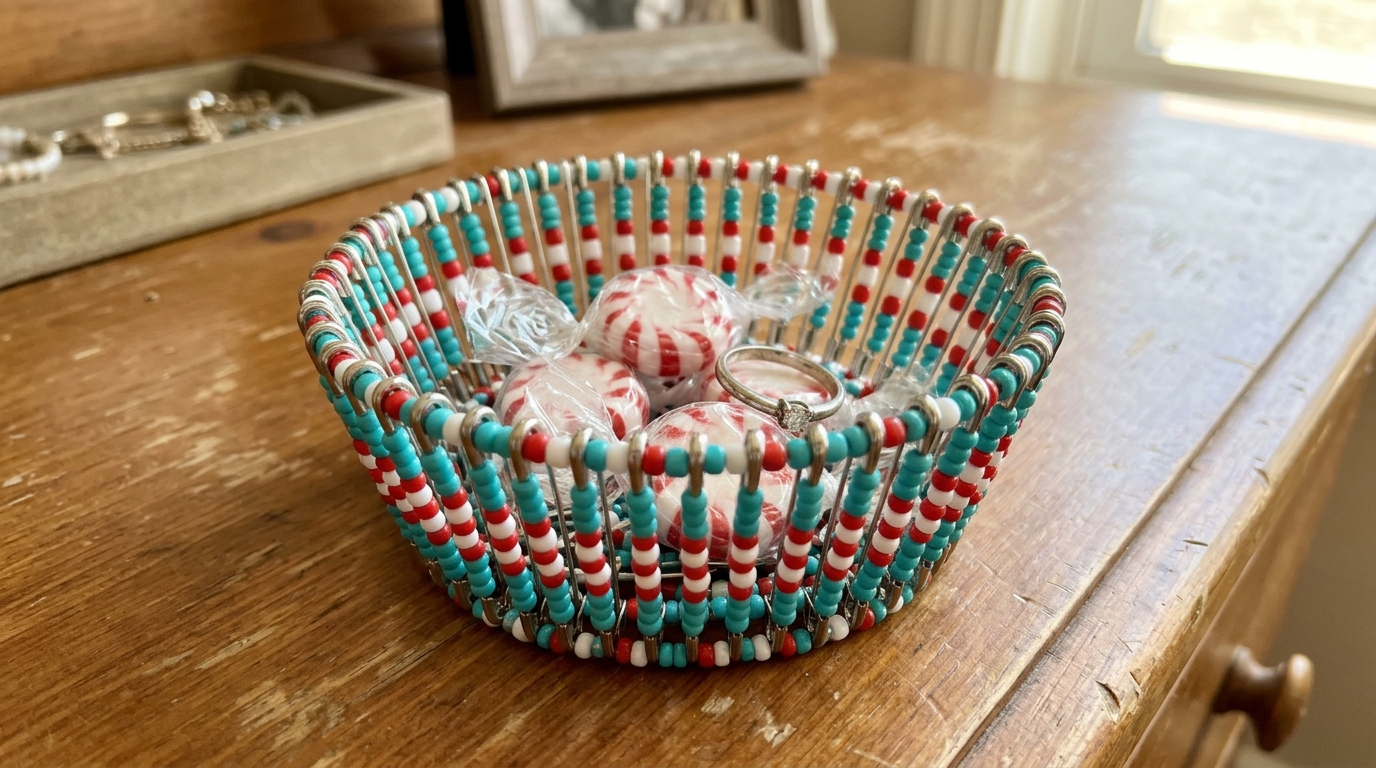
This little basket is a showstopper on a craft table. Pins filled with turquoise, red and white beads are strung in rings that get bigger as they go up, so they form a small bowl. Use it on a dresser for rings and earrings, fill it with peppermints for a guest room, or tuck a small gift inside. It takes patience, but it is the kind of handmade piece people keep for years. Would you keep it or give it away? Pair it with our small room tricks for a full set.
You will need: about 150 small safety pins, turquoise, red and white seed beads, stretch cord or beading wire, a small bowl to shape it on.
How to make it: 1. Fill all the pins with beads in a repeating color pattern. 2. String a small ring of pins for the base, then add larger rings above it, joining each ring with cord. 3. Shape the basket over a small bowl as you go and knot the cord securely at the end.
A Beaded Ribbon Garland for the Tree
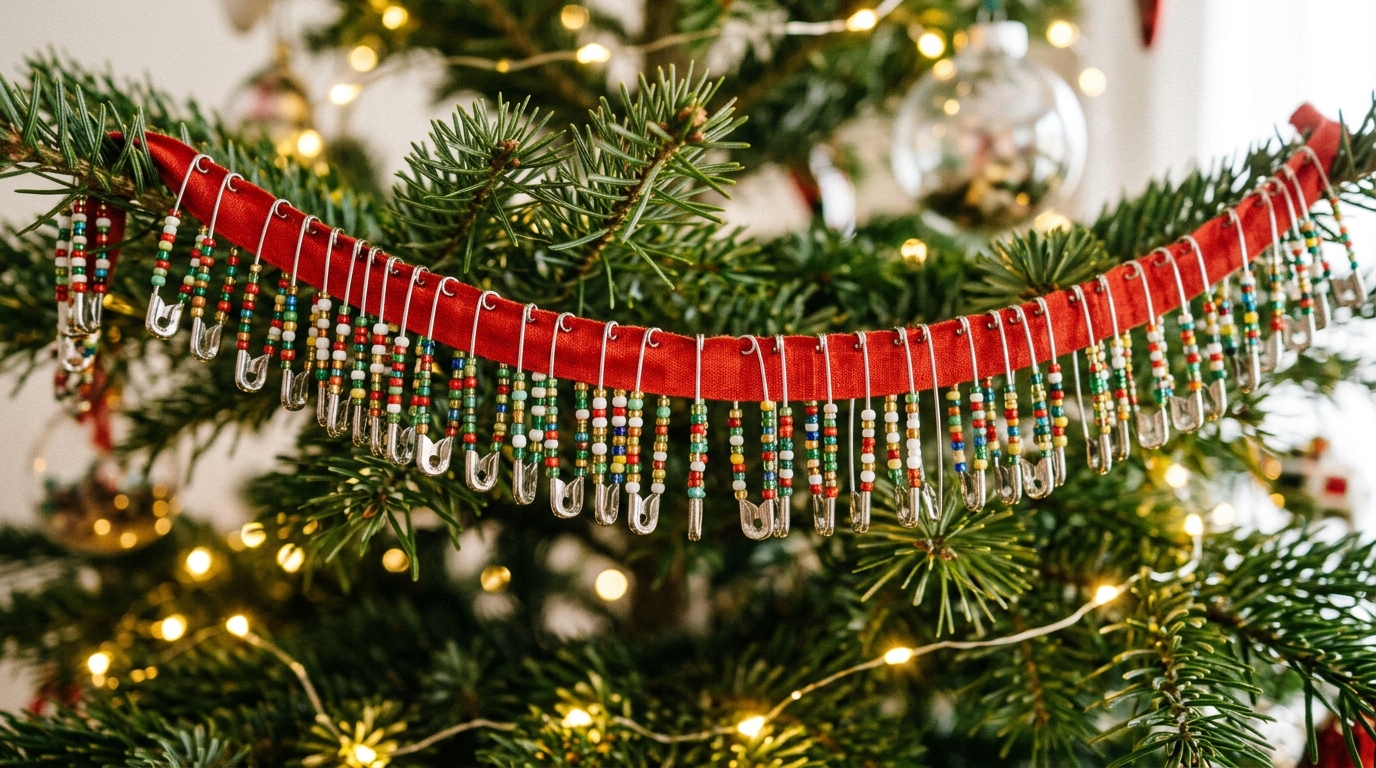
A long ribbon lined with beaded pins makes a garland that shimmers under the tree lights. Simply fasten pins full of colorful beads along a red ribbon, a few inches apart, and drape it across the branches. It is a wonderful way to use up leftover beads from all your other projects, and kids can help fill the pins. Swap the ribbon color each year for a fresh look. Pack it rolled on a paper towel tube so it never tangles. Would you go colorful or keep it all red and silver? Want more like this? Try our ribbon christmas tree ideas.
You will need: a long red ribbon, many safety pins, mixed seed beads, a cardboard tube for storage.
How to make it: 1. Fill the pins with beads in any colors you like. 2. Fasten the pins along the ribbon a few inches apart, all facing the same way. 3. Drape the garland across the tree branches from top to bottom.
Safety Pin Crafts Gift Jar With a Pincushion Lid
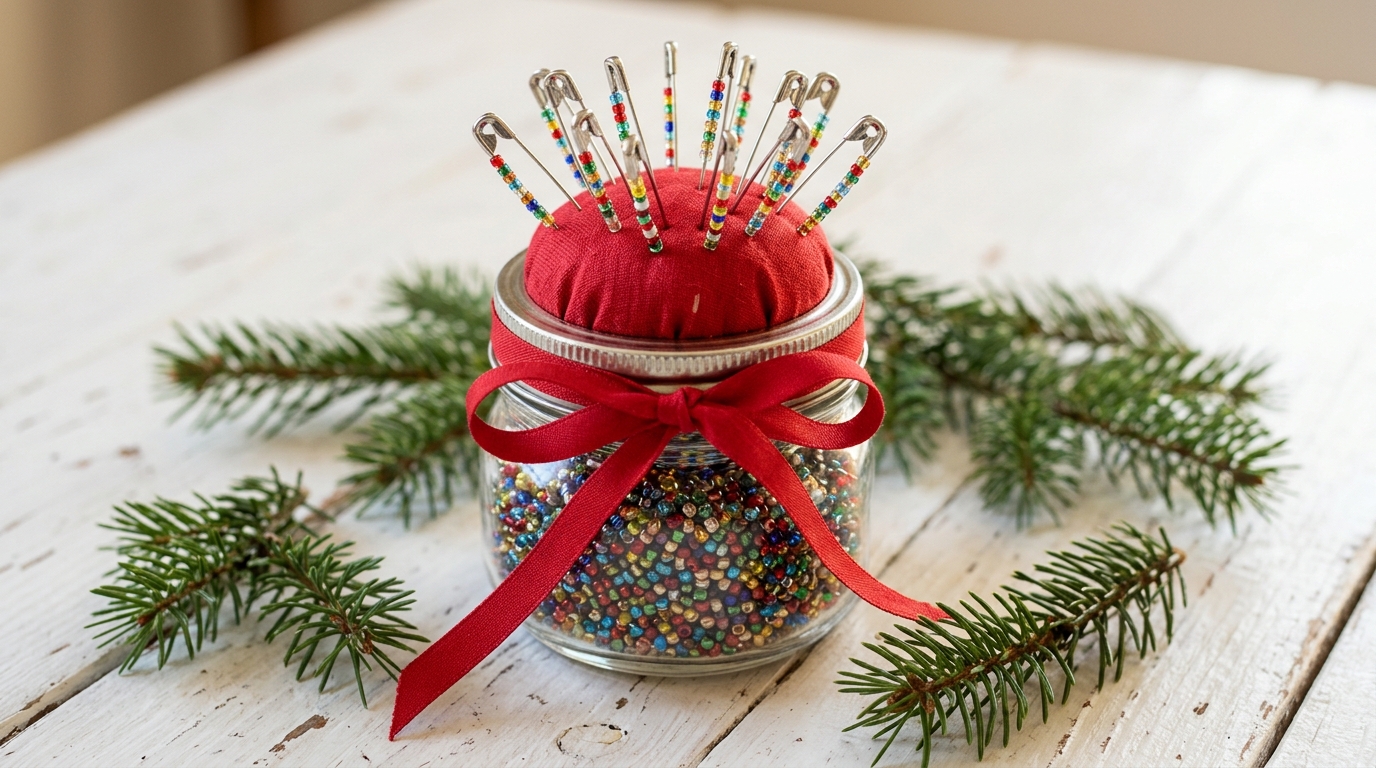
This gift jar is perfect for a crafty friend. Fill a small glass jar with colorful seed beads, glue a soft fabric pincushion on top of the lid and stick a dozen finished beaded pins into it. Tie a red ribbon around the neck and you have a ready to go kit for more safety pin crafts. It costs only a few dollars to put together but looks like a boutique gift. Add a few plain pins so they can start right away. Who on your list loves to make things? You can mix it with our things to never throw away ideas for extra charm.
You will need: a small glass jar with a metal lid, red fabric, a little stuffing, a cardboard circle, hot glue used by an adult, seed beads, beaded and plain safety pins, ribbon.
How to make it: 1. Fill the jar with seed beads. 2. An adult glues a padded fabric circle onto the lid to make a pincushion. 3. Stick finished beaded pins and a few plain pins into the cushion and tie a ribbon around the jar.
A Starburst Ornament That Shines
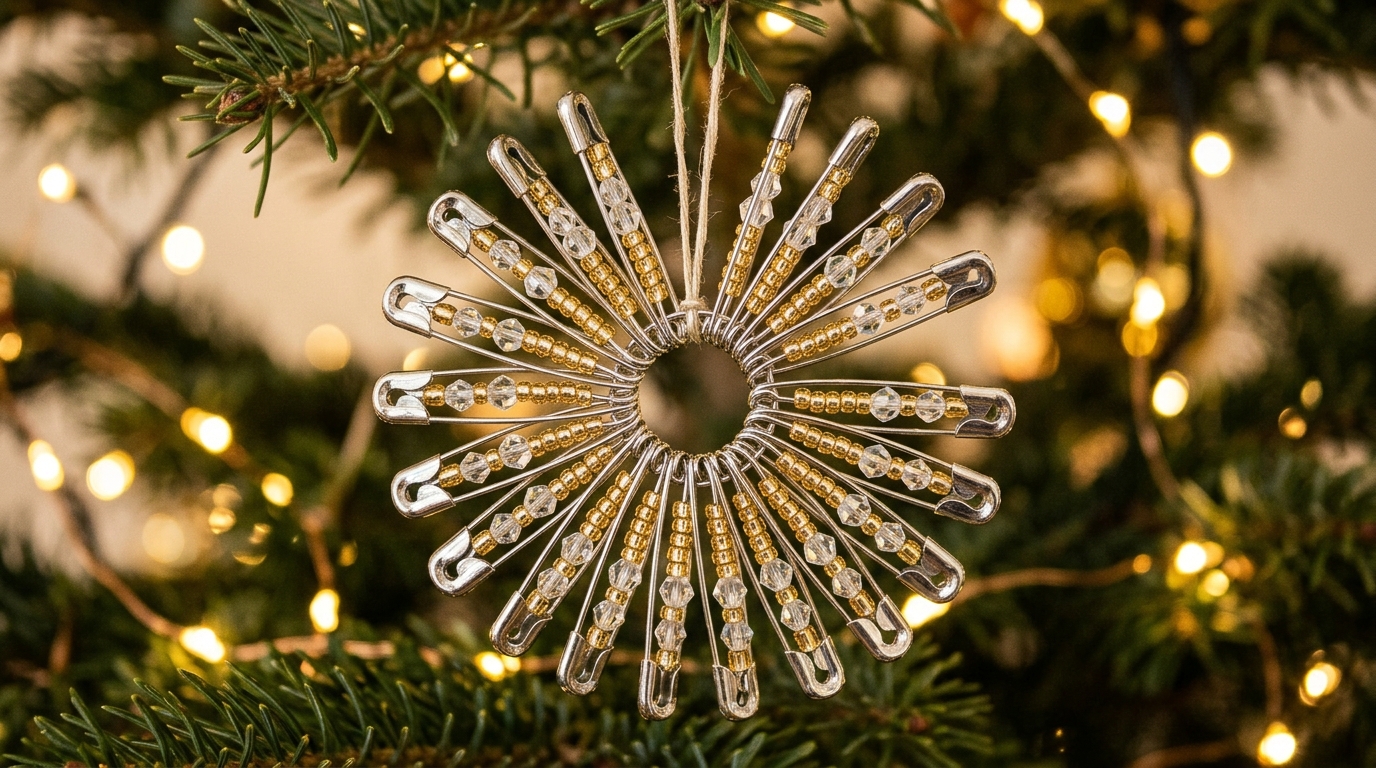
This starburst ornament looks like it came from a fancy department store, but it is just twenty pins with gold and clear crystal beads. Arrange them around a center ring so they point outward like rays, and hang it where the tree lights can hit the crystals. It glitters every time someone walks by. Make one as a tree topper style piece for a small tree or a set of three for the window. For more sparkle on a budget, see these Christmas crafts to sell too. Where would your starburst shine brightest?
You will need: 20 silver safety pins, gold and clear crystal beads, a small metal ring, craft wire, pliers, ribbon for hanging.
How to make it: 1. Fill each pin with gold and clear beads in the same order. 2. Thread the pin loops onto craft wire around the metal ring so they point outward. 3. Tighten the wire, check the rays are even and add a ribbon loop for hanging.
Safety Pin Crafts to Sell at a Holiday Market
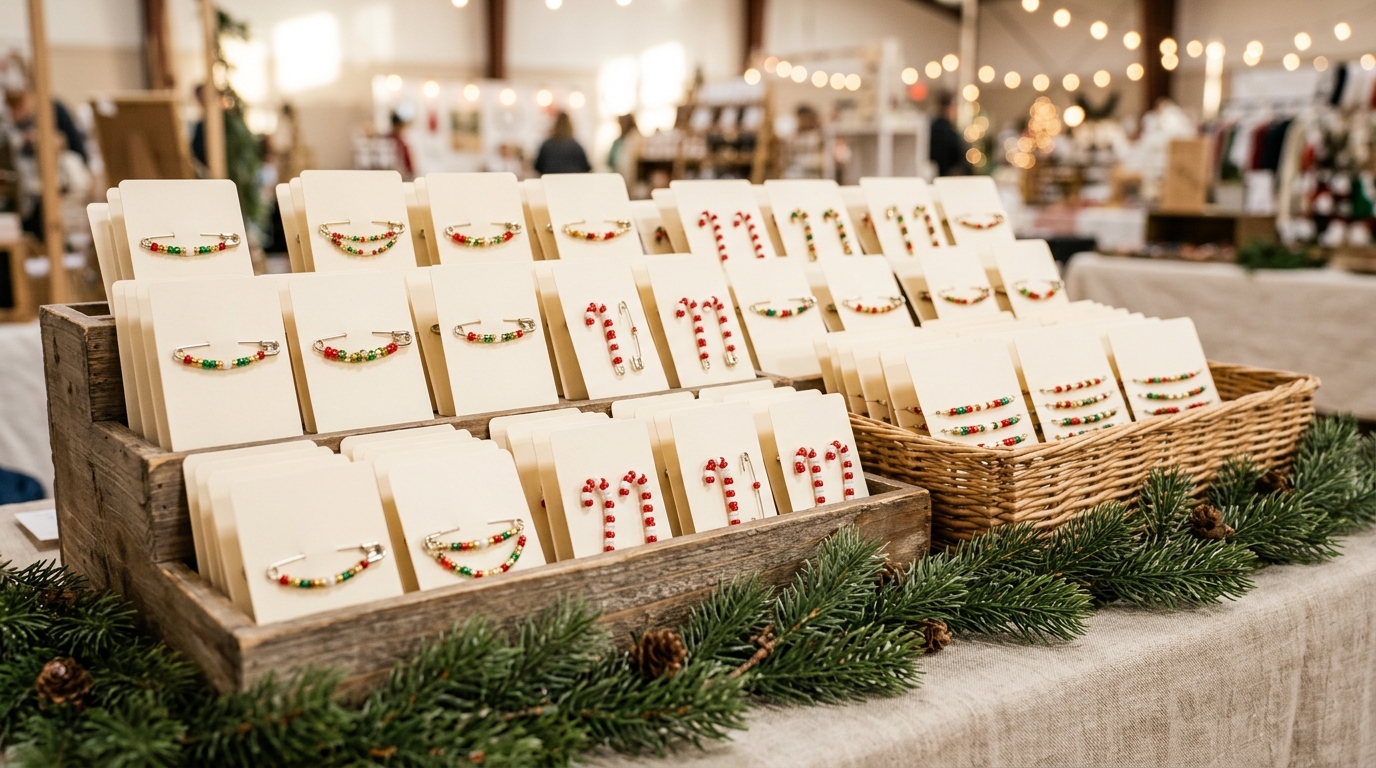
If you are making a pile of these anyway, why not sell a few? Pin brooches, candy canes and bracelets onto small blank cards, line them up in a wooden crate and they look like a real boutique display. Safety pin crafts cost very little to make, so a few dollars per card leaves a nice profit at a church bazaar or school craft fair. Bundle three small pins together as a stocking stuffer set to sell even faster. Which design would be your best seller?
You will need: finished beaded pins and bracelets, small cream cardstock cards, a hole punch, a wooden crate or basket, pine garland for the table.
How to make it: 1. Punch two small holes in each card and fasten one pin or a small set through them. 2. Sort the cards by style and stand them in rows in the crate. 3. Add a little pine garland around the display and keep extra stock in a box under the table.