Louis Prang Christmas Cards: 14 Handmade Victorian Designs That Look Like Pricey Antiques
Louis Prang Christmas Cards are the reason so many of us still feel a little thrill when a real envelope lands in the mailbox in December. Long before texts and emojis, a printer in Boston made holiday greetings that families saved for years. You can bring that same glow into your home this season with paper, glue, a few pressed leaves and an hour at the kitchen table. These handmade ideas look like pricey antiques, cost very little, and give neighbors, grandparents and old friends something they will want to keep on the mantel. Pour a cup of cocoa, put on soft carols and pick the cards that make you smile. Each one comes with a short list of supplies and simple steps, so even a total beginner can finish a stack before the weekend is over..
Louis Prang Christmas Cards Start With a Victorian Watercolor Look
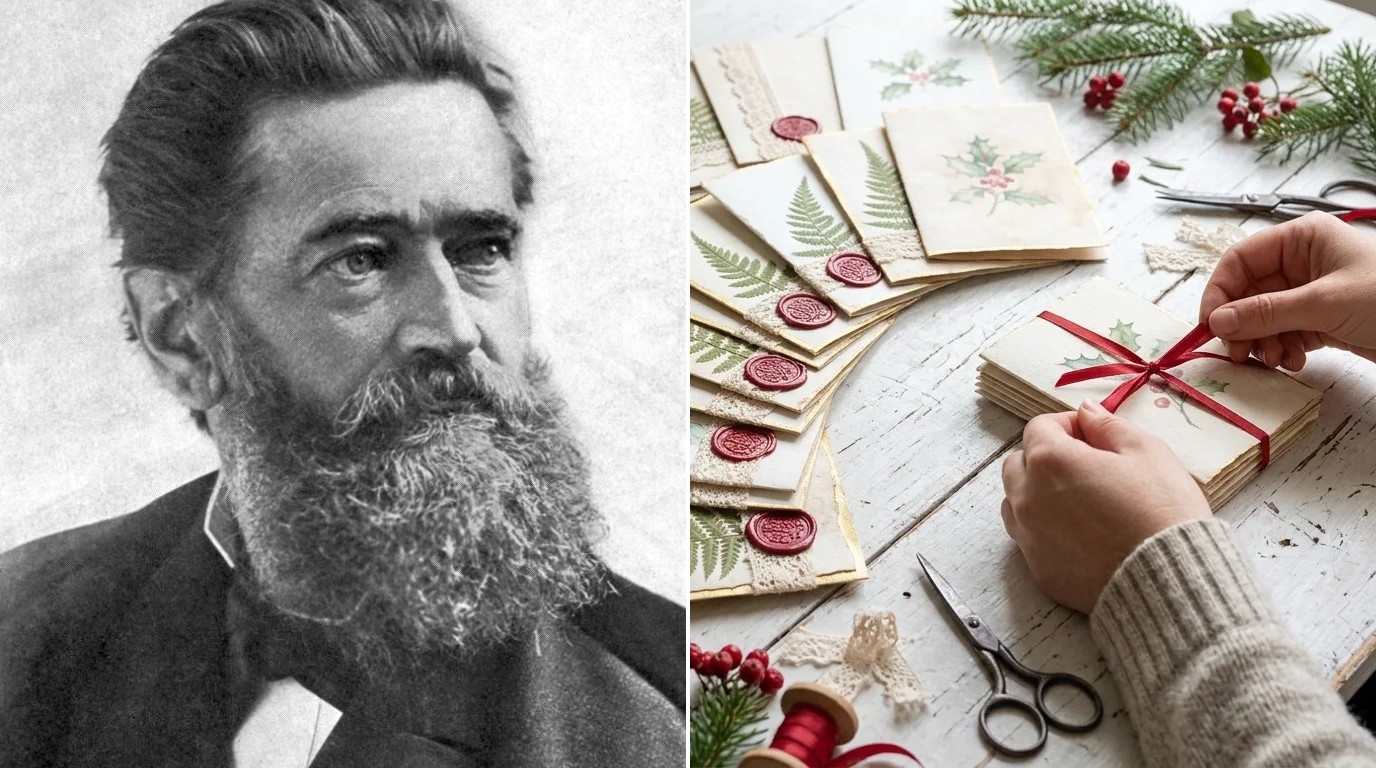
Louis Prang was born in Breslau in 1824 and moved to Boston in 1850, where he built a printing business known for rich, many colored prints. At Christmas 1873 he began making greeting cards for the English market, and in 1874 he started selling Christmas cards in America, which is why Wikipedia notes he is sometimes called the father of the American Christmas card. His look was soft color, flowers, holly and lots of tiny detail. You can copy that feeling with watercolor washes, gold paint and a ribbon tie. Which of his old fashioned colors would you start with..
You will need: Heavy cream cardstock, watercolor paints, a fine brush, gold paint pen, thin red ribbon, glue stick.
How to make it: 1. Paint a pale wash of green and cream on the card front and let it dry. 2. Add holly leaves, berries and a small floral wreath with a fine brush. 3. Trace a gold line around the edge, then tie three finished cards together with a red ribbon as a gift set.
Pressed Fern and Holly Card
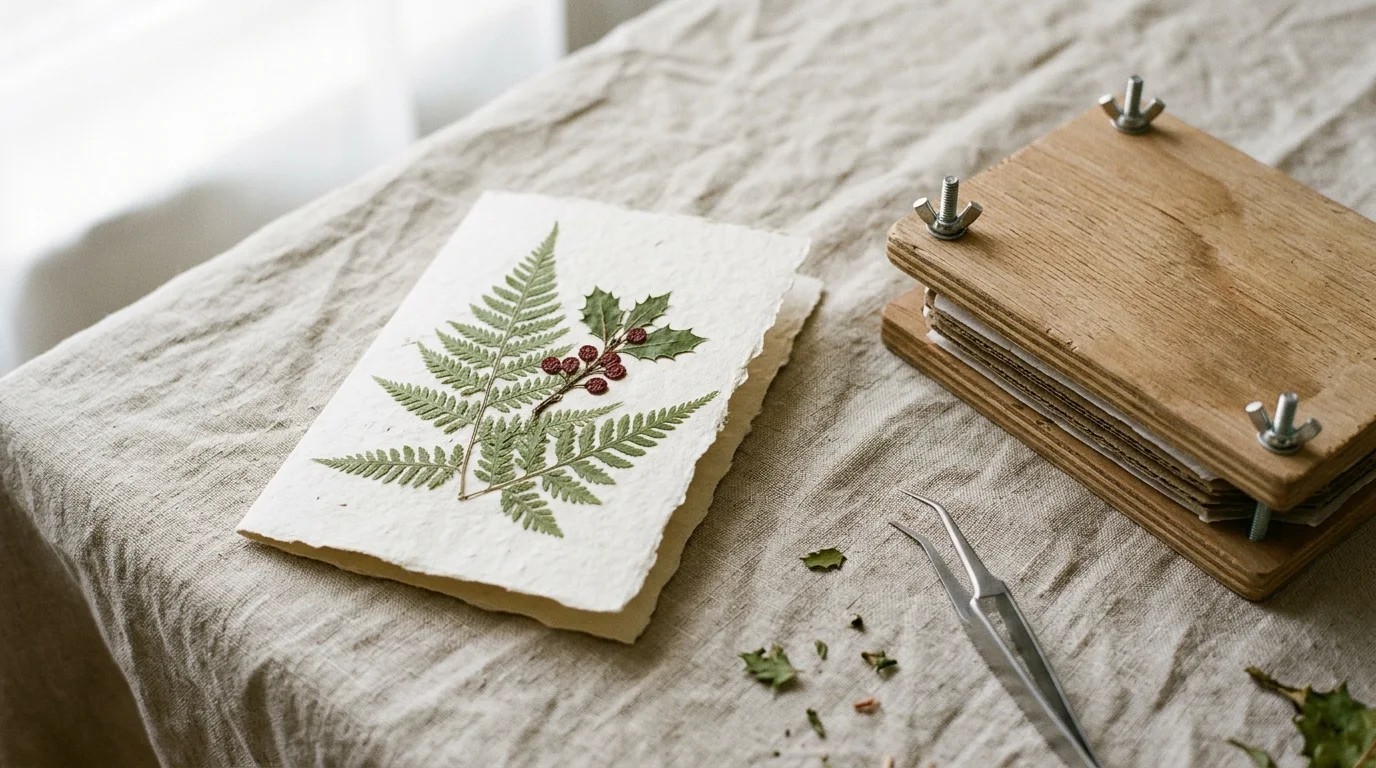
The Victorians were wild about ferns. They pressed them in books, framed them and tucked them into holiday letters. Pressed greenery shows up again and again on Louis Prang Christmas Cards, and a pressed fern card feels just as special today, and the leaves cost nothing if you gather them on a walk. Press fronds and a small sprig of holly between paper towels inside a heavy book for about a week, or use a flower press if you have one. Once flat, they glue down beautifully and keep a soft green color for years. Do you have a fern or two growing near the porch right now?
You will need: Cream card blanks, pressed fern fronds, pressed holly sprig, clear drying craft glue, tweezers, a small brush.
How to make it: 1. Lay the pressed leaves on the card and move them around with tweezers until the design looks balanced. 2. Brush a thin layer of glue on the back of each leaf and press it down. 3. Lay a sheet of wax paper on top and leave it under a book for an hour to dry flat.
Embossed Paper Snowflake Card
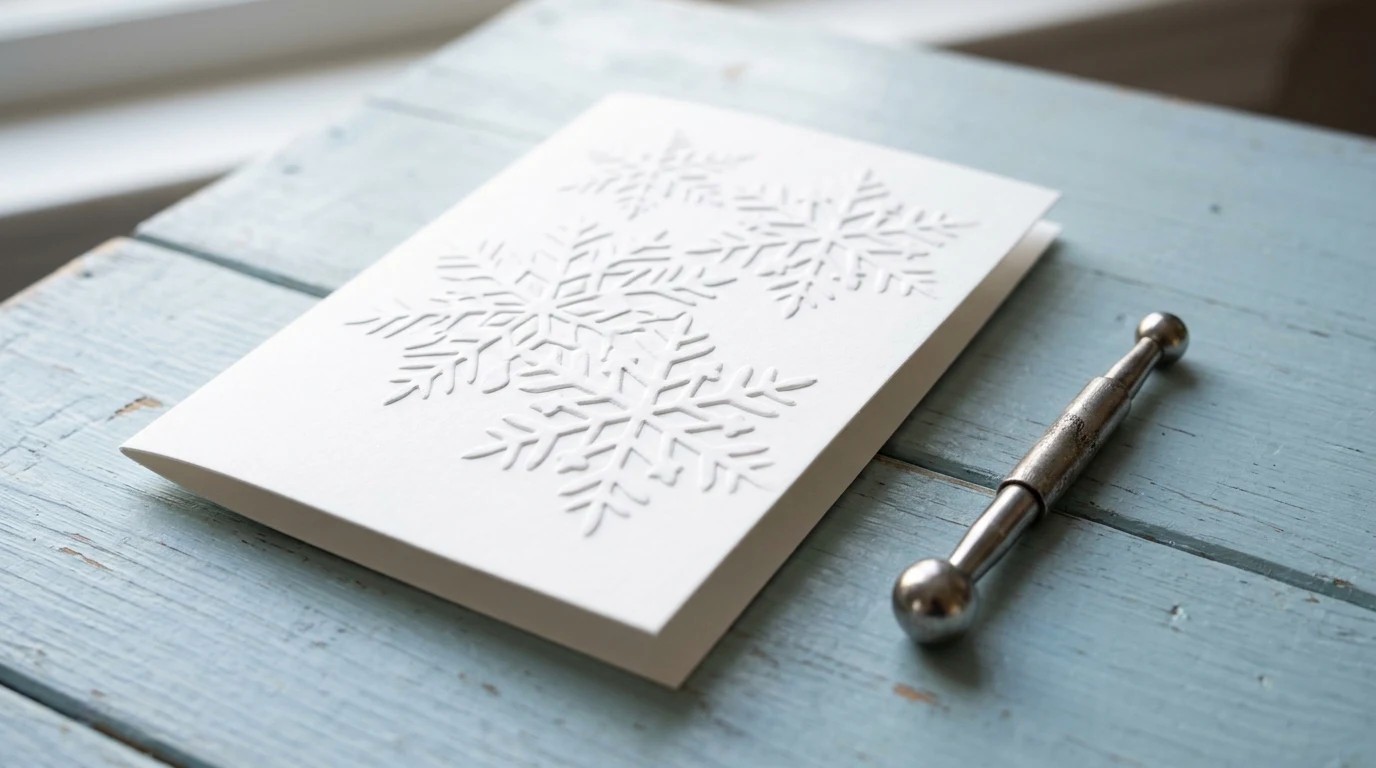
Embossing is the quiet magic trick of card making. With nothing more than a stylus and a stencil, flat white paper turns into raised snowflakes that catch the light like frost on a window. Old printers loved this effect because it looked expensive without a single drop of ink. You can do it at the kitchen table with a brass stencil or even a snowflake cut from a cereal box. The finished card is all white and very elegant, perfect for a minimalist friend. Would you add a touch of silver or keep it pure white?
You will need: White cardstock, snowflake stencil, embossing stylus or a dried out ballpoint pen, a mouse pad or soft towel, painter’s tape.
How to make it: 1. Tape the stencil to the front of the card and flip it over onto the mouse pad. 2. Trace inside the stencil lines with the stylus, pressing firmly. 3. Remove the stencil and gently rub the raised snowflakes with your finger to sharpen the shape.
Vintage Postcard Collage Card Inspired by Louis Prang Christmas Cards
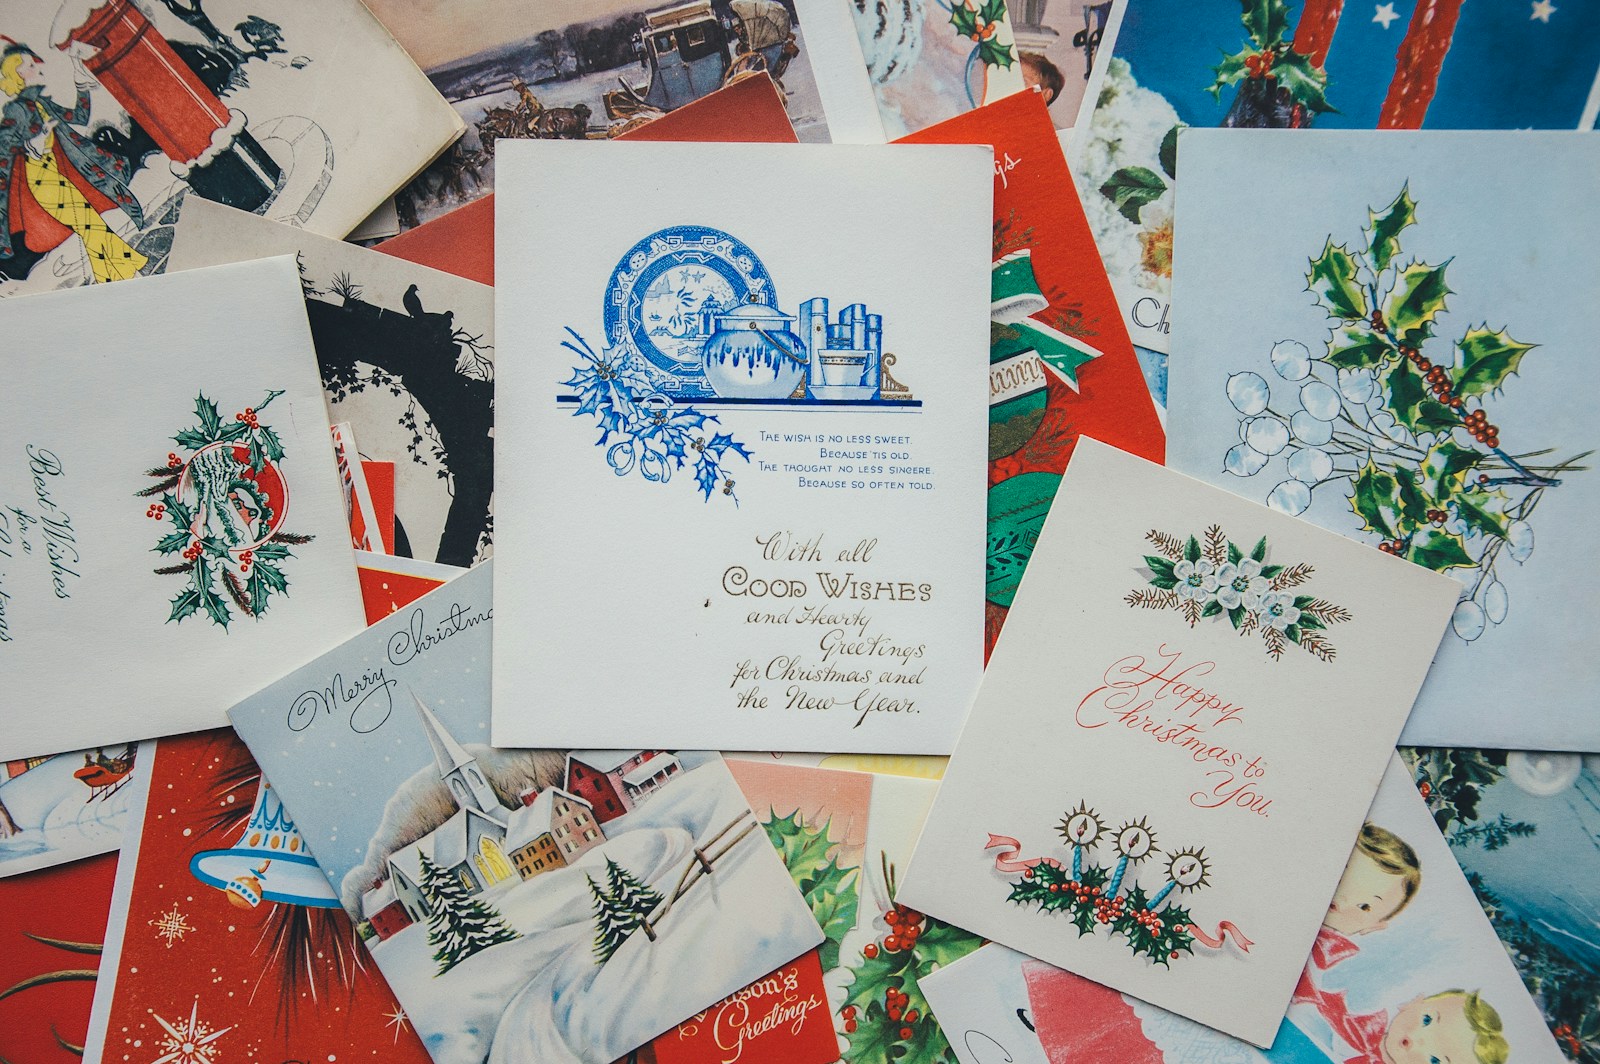
Many families have a shoebox of old holiday cards in the closet. Instead of tossing them, cut out the best bits: a robin, a sprig of mistletoe, a snowy cottage, a pretty border. Layer them on a fresh card for a collage that looks like a page from a Victorian scrapbook. Prang himself sold small album cards that people collected and glued into scrapbooks, so this idea is very true to his story. Thrift stores and estate sales often sell old cards for pennies too. Whose old cards are hiding in your closet?
You will need: Old greeting cards or vintage postcards, plain card blank, small scissors, glue stick, tea bag for aging, fine black pen.
How to make it: 1. Cut out favorite pictures and borders from the old cards. 2. Rub a damp tea bag over the new card front to give it a soft aged look and let it dry. 3. Layer and glue the cut outs, starting with the biggest piece, then add a short handwritten greeting inside.
Gold Leaf Edged Card
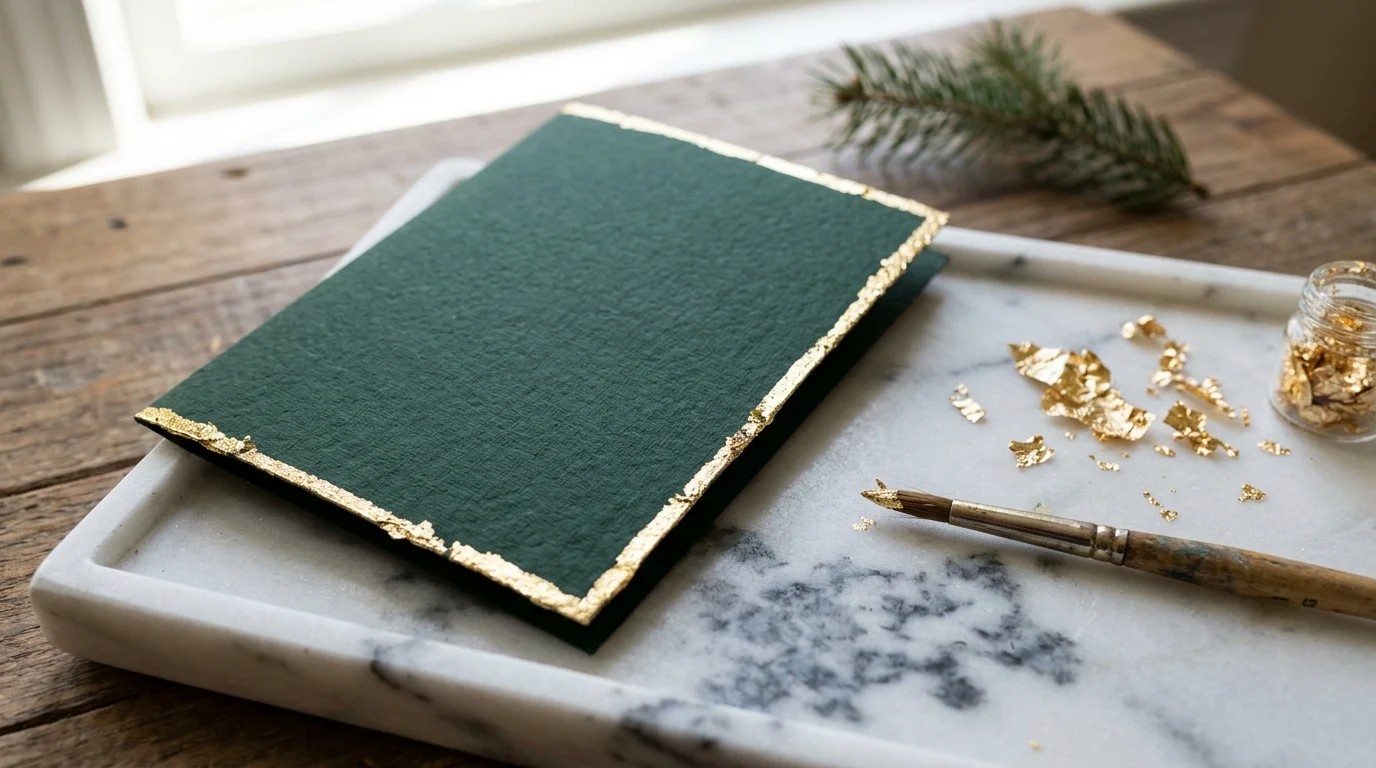
Nothing says luxury like a flash of gold along the edge of a card. Fancy stationery shops charge a lot for gilded edges, but a small pack of imitation gold leaf costs a few dollars and covers dozens of cards. Deep green or navy paper makes the gold glow even more. Hold the card up in the light and it looks like something from an old store in Boston, just the kind of finish that made Louis Prang Christmas Cards feel precious. Would you send one of these to the person who has everything?
You will need: Dark green or navy cardstock, imitation gold leaf, gilding glue or a glue pen, soft brush, small scissors.
How to make it: 1. Run a thin line of gilding glue along all four edges of the card front and wait until it turns clear and tacky. 2. Lay small pieces of gold leaf over the glue and press with a dry brush. 3. Brush away the loose flakes and save them in a jar for your next card.
Lace Doily Card
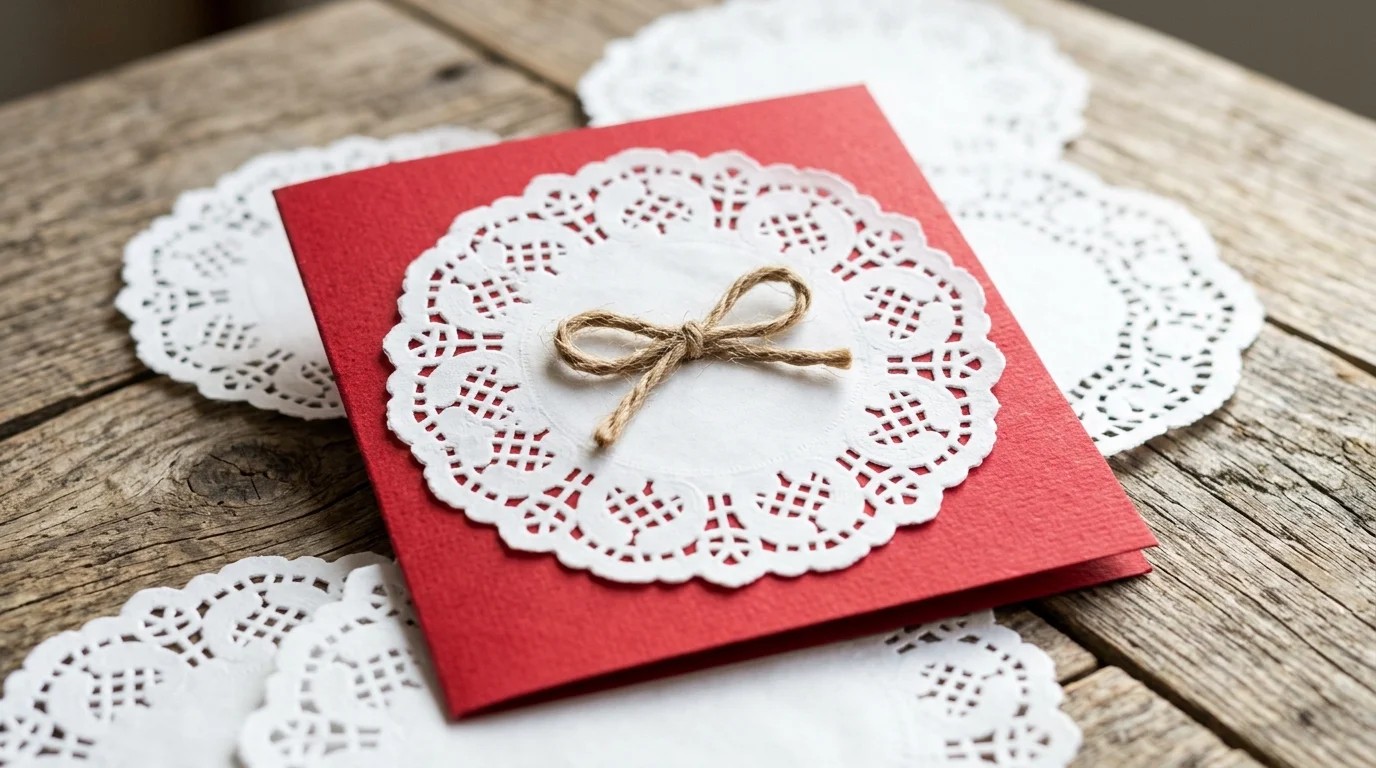
Paper doilies were a favorite of Victorian card makers because they look like fine lace for almost no money. Lace and soft flowers were a big part of Louis Prang Christmas Cards too. One round doily on a red card instantly gives a soft, romantic look, and a small twine bow makes it feel homemade in the best way. Packs of paper doilies are at the dollar store, and a whole set of cards takes about twenty minutes. Grandmothers especially love this one because it reminds them of tea parties and lace tablecloths. Who on your list would smile at a lace card?
You will need: Red cardstock, white paper lace doilies, glue stick, thin jute twine, small gold sticker or button.
How to make it: 1. Fold the red cardstock in half and press the crease flat. 2. Glue a doily on the front, trimming the edge if it hangs over. 3. Tie a small twine bow and glue it in the center, then add a button or sticker on top.
Potato Stamp Pine Card in the Spirit of Louis Prang Christmas Cards
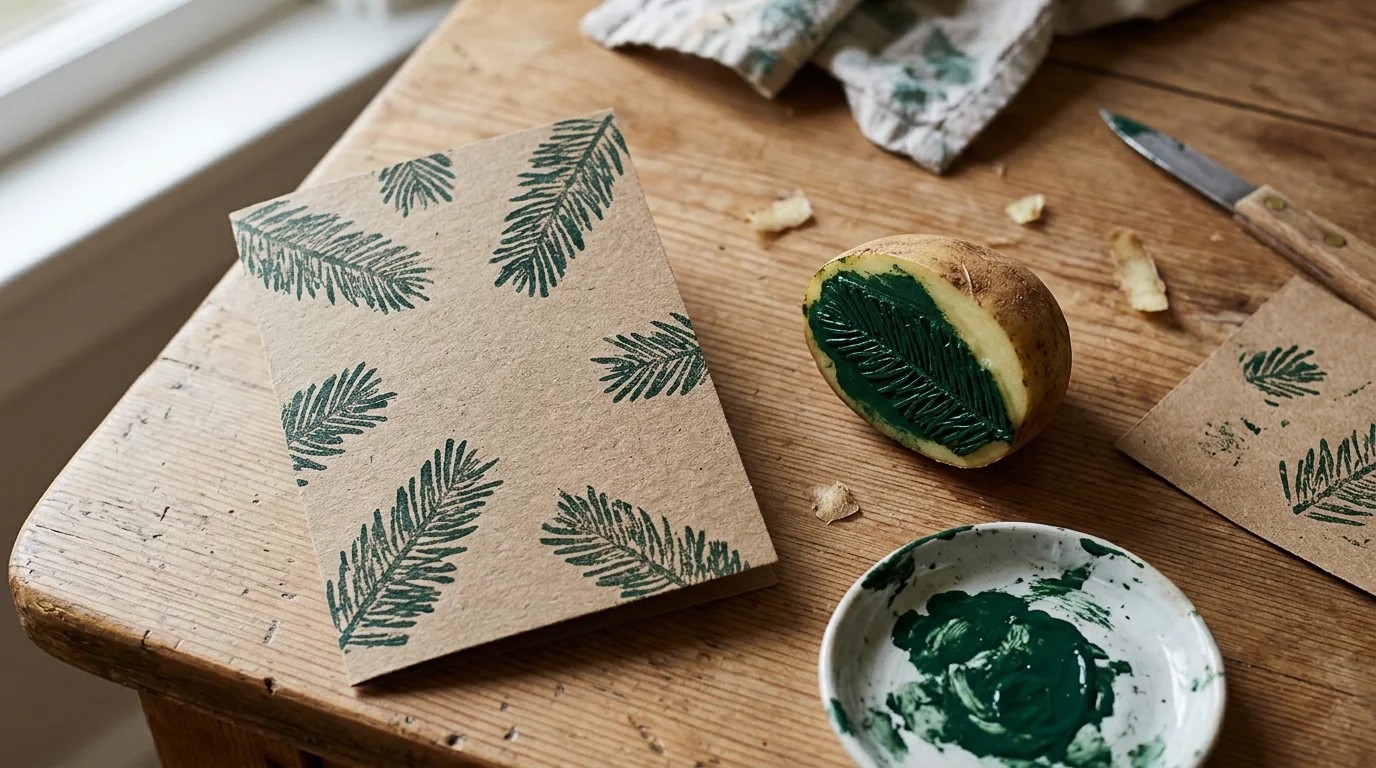
Prang built his success by printing color one layer at a time, using many separate stones for a single picture. A potato stamp is the kitchen version of that idea, and it is a lot of fun. Cut a simple pine branch shape into half a potato, dip it in green paint and press it onto kraft paper. Every print comes out a little different, which gives the cards a hand printed charm. Ask an adult to do the carving with a small knife. Will you try one color or layer two shades of green?
You will need: A large potato, small paring knife (adult help), green acrylic or poster paint, a sponge, kraft card blanks, paper towels.
How to make it: 1. Cut the potato in half and pat the cut side dry with a paper towel. 2. With adult help, carve away the area around a simple pine branch shape so the branch stands up. 3. Dab paint on the stamp with a sponge and press it firmly onto the card, adding a second lighter green layer once dry.
Watercolor Robin Card
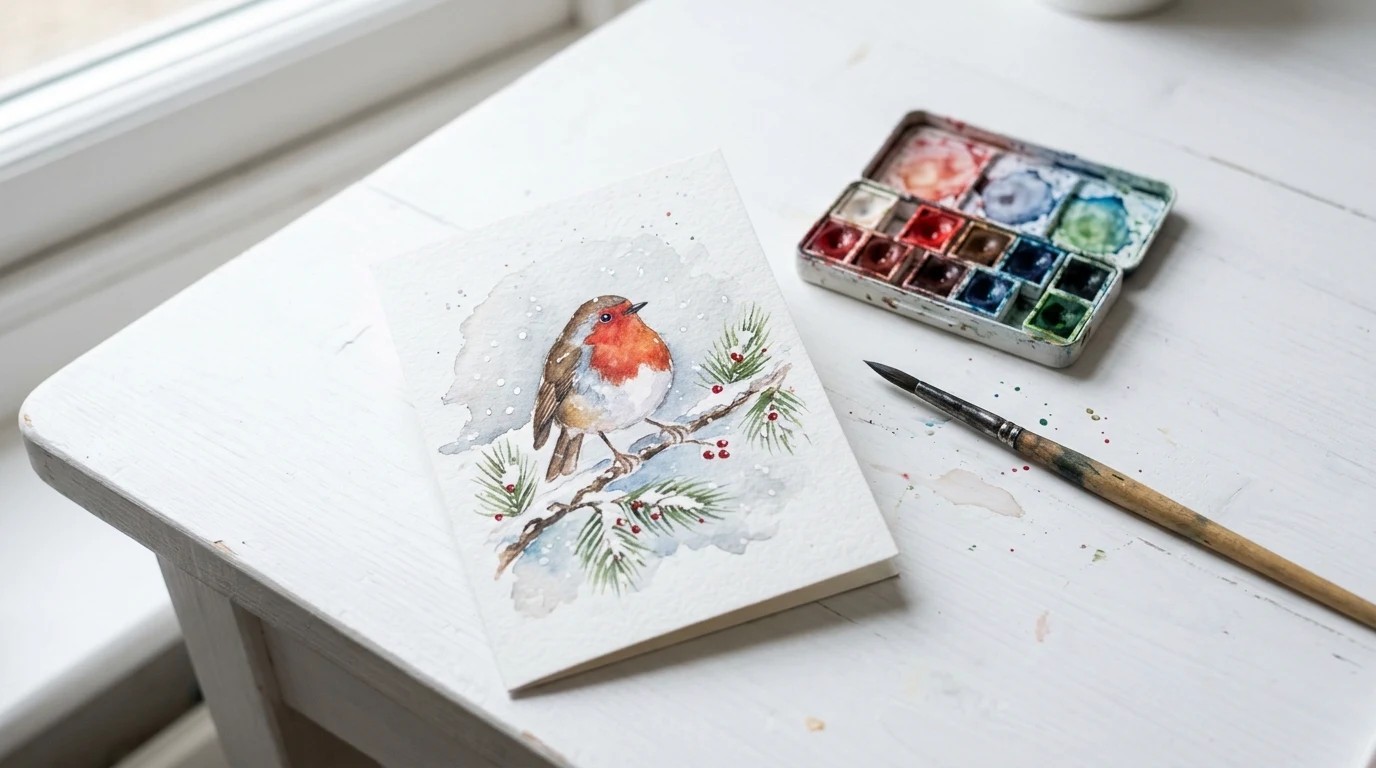
Robins were everywhere on old Christmas cards, perched on holly, peeking through windows or sitting on snowy branches. This antique card is a lovely guide for your own painted version. Start with a plump round body, a red breast and a tiny beak, then add holly and a soft snowy branch. Watercolor is forgiving, so a little blur only makes the bird look softer and more old fashioned. You do not need to be an artist; simple shapes work best. Which pose would you paint, a robin on a branch or two at a window?
You will need: Watercolor paper cut to card size, watercolor paints, a round brush, pencil, white gel pen, fine black pen.
How to make it: 1. Lightly draw an oval body, a small round head and a branch in pencil. 2. Paint the red breast, then brown wings and back, and let each color dry. 3. Add holly leaves, a black dot for the eye and white gel pen dots for falling snow.
Die Cut Window Card With a Tiny Tree
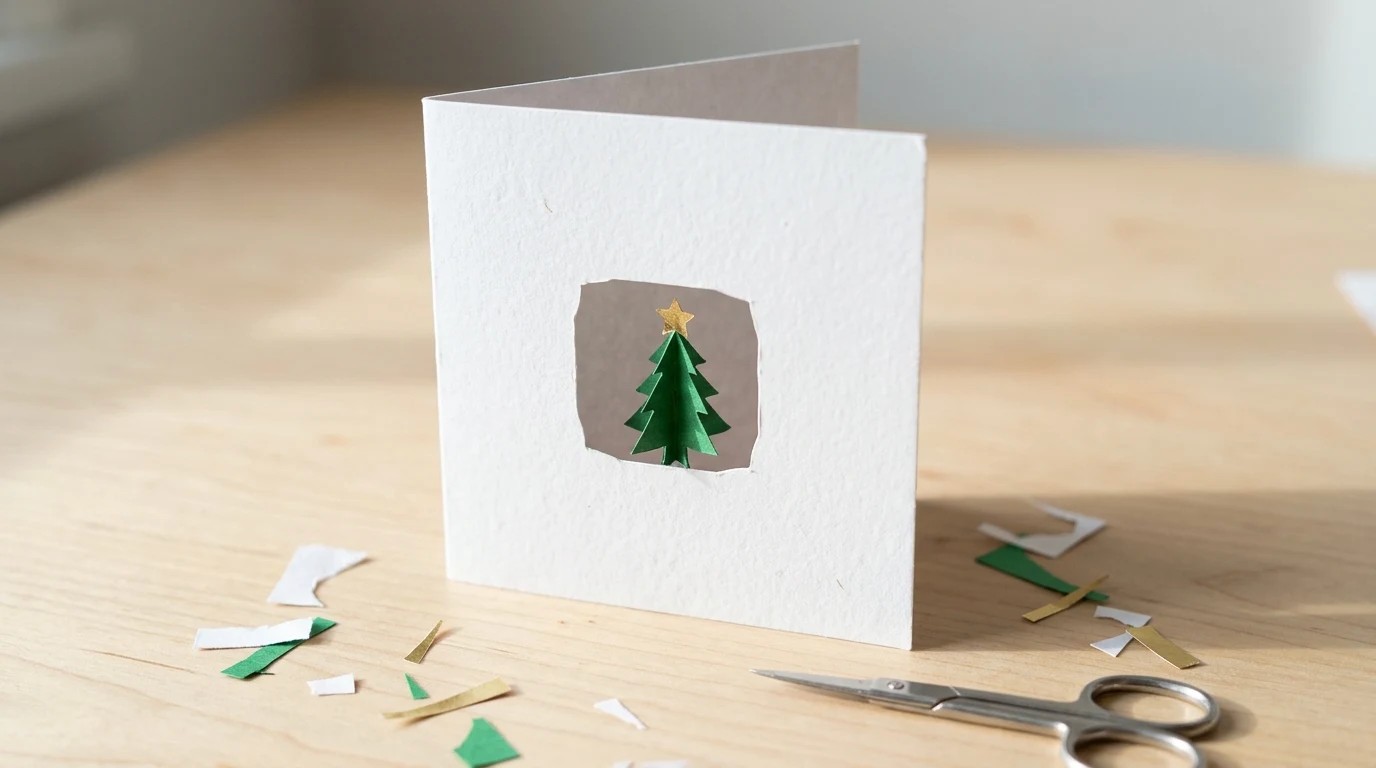
A little window on the front of a card makes people want to look inside. Prang also published shaped, die cut books for children, and this card has that same sense of surprise. Cut a square or arched window in the front, then glue a tiny paper tree on the inside page so it peeks through. You can use a craft punch, a die cutting machine or just a sharp craft knife with adult help. It looks like a shop window on a snowy street. What would you put inside your window, a tree, a star or a little house?
You will need: White cardstock, green and yellow paper scraps, craft knife or punch (adult help), cutting mat, ruler, glue.
How to make it: 1. Mark a small window on the card front and cut it out carefully on a cutting mat. 2. Close the card and lightly trace the window shape onto the inside page. 3. Cut a tiny tree and star from paper and glue them inside the traced area so they show through the window.
Louis Prang Christmas Cards Meet Old Sheet Music

Old sheet music has the soft cream color and graceful black notes that fit right in with Louis Prang Christmas Cards. Thrift stores and used bookshops sell worn hymn books and song sheets for a dollar or two, and one book can make dozens of cards. Cut the pages into a tree, a star or a simple heart and glue them on red or green card. A friend who sings in a choir or plays piano will love it. Do you have an old songbook that nobody plays anymore?
You will need: Old sheet music pages, red or green cardstock, pencil, scissors, glue stick, small red ribbon bow.
How to make it: 1. Draw a tree or star shape on the back of a music page and cut it out. 2. Glue it in the center of the card front and press it flat. 3. Add a tiny ribbon bow at the top and write a line from a favorite carol inside.
Felt Mitten Card
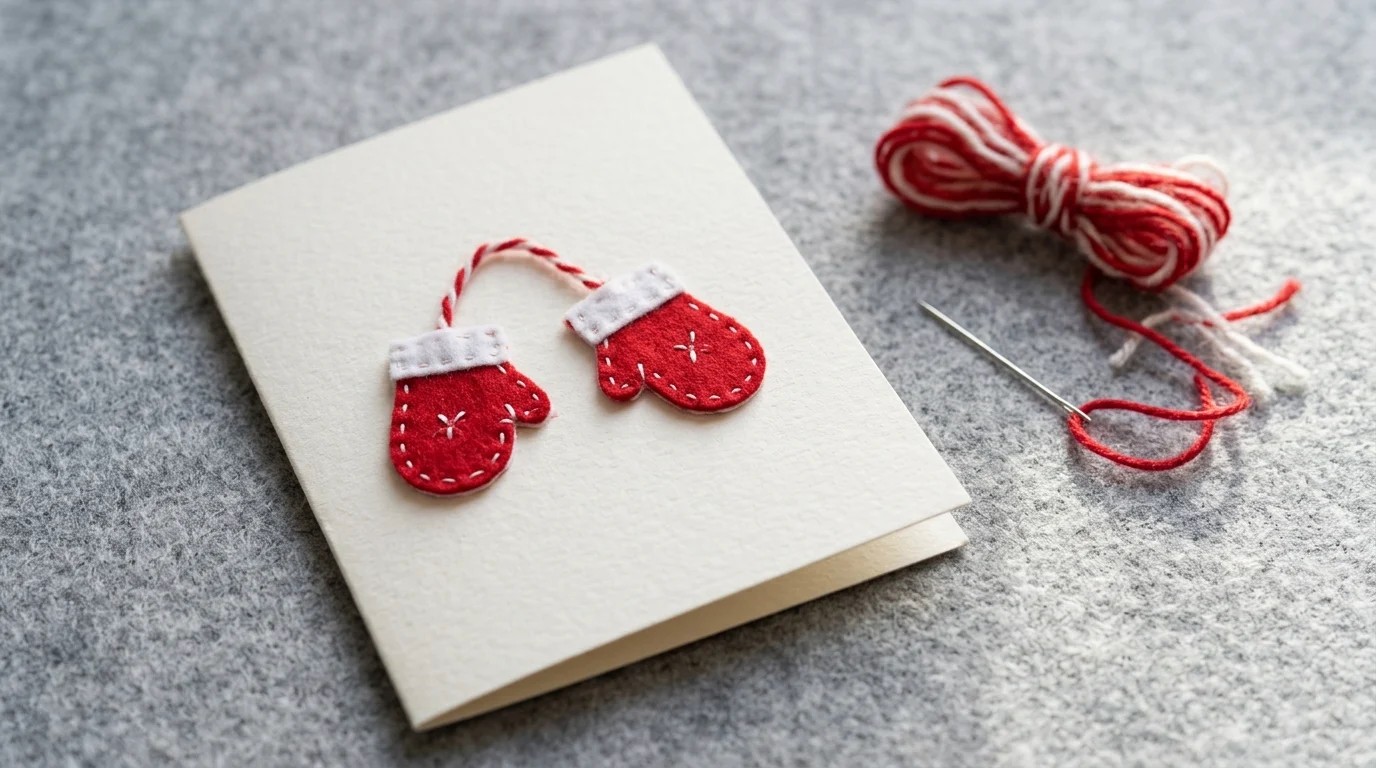
Two tiny mittens joined by a piece of yarn is one of the coziest pictures of winter. Cut them from felt scraps, add a simple running stitch around the edge, and hang them from a loop of yarn on the front of the card. The soft texture makes people want to touch the card, and children love finding it in the mail too. This is a great project to make while watching a holiday movie. Which colors would match your family: classic red, snowy white or soft blue?
You will need: Felt scraps in two colors, embroidery thread, needle, short piece of yarn, fabric glue, plain card blank.
How to make it: 1. Draw a mitten shape on paper, cut it out and use it to cut two felt mittens. 2. Stitch a simple cuff and a few running stitches around each mitten. 3. Glue the yarn across the card in a curve and glue one mitten at each end.
Fold Out Accordion Card
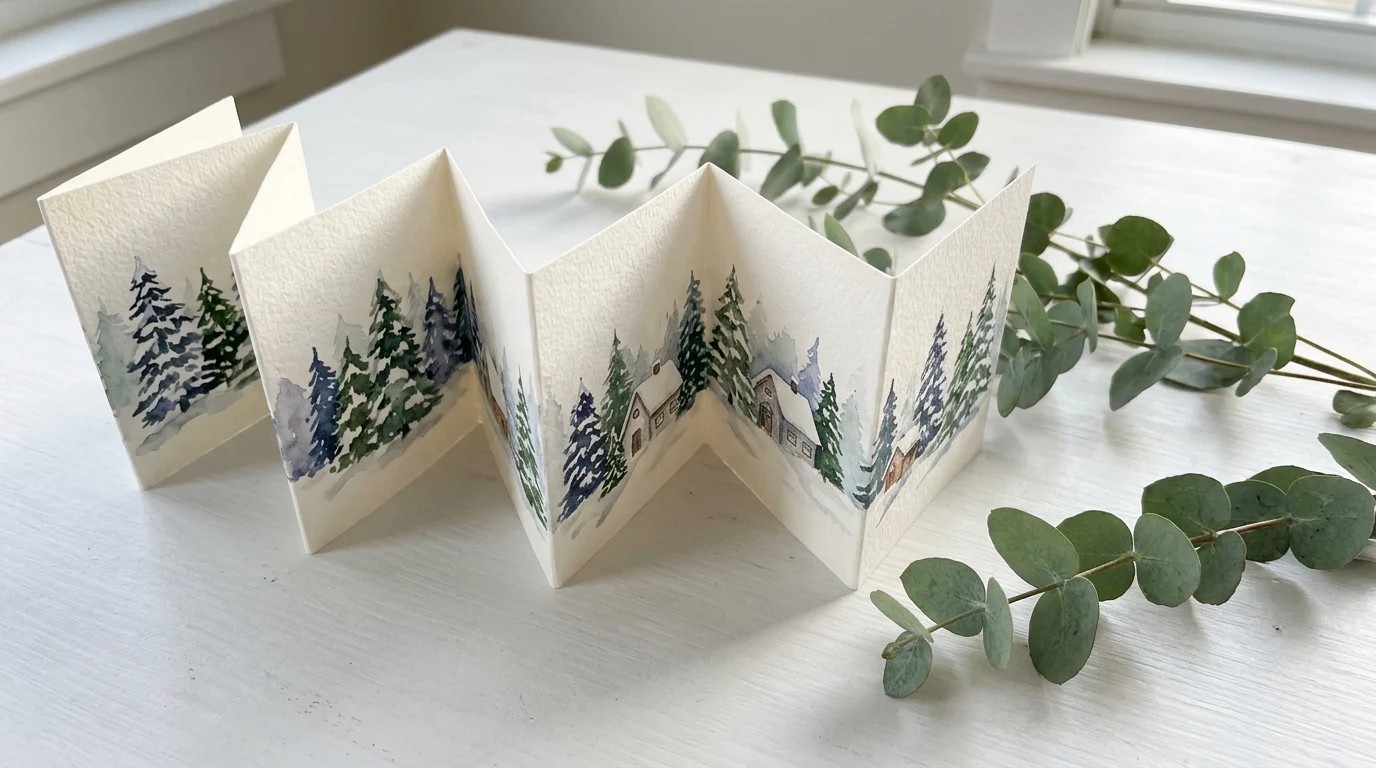
An accordion card stretches out across the table like a little winter village. Each panel holds part of a scene, so when your friend opens it, the snowy hills and pine trees keep going and going. It stands up by itself on a shelf, which makes it a card that becomes decoration. Paint it in watercolor or use cut paper trees for a quicker version. Ask everyone in the family to paint one panel for a card full of different hands. How many panels would your village need?
You will need: A long strip of watercolor paper, ruler, bone folder or spoon, watercolor paints, brush, white gel pen.
How to make it: 1. Measure and fold the strip back and forth into four to six equal panels. 2. Paint a soft blue sky and white hills across all the panels while the card is open. 3. Add pine trees, small houses and white snow dots, then fold it flat to mail.
Seal Your Louis Prang Christmas Cards With Wax
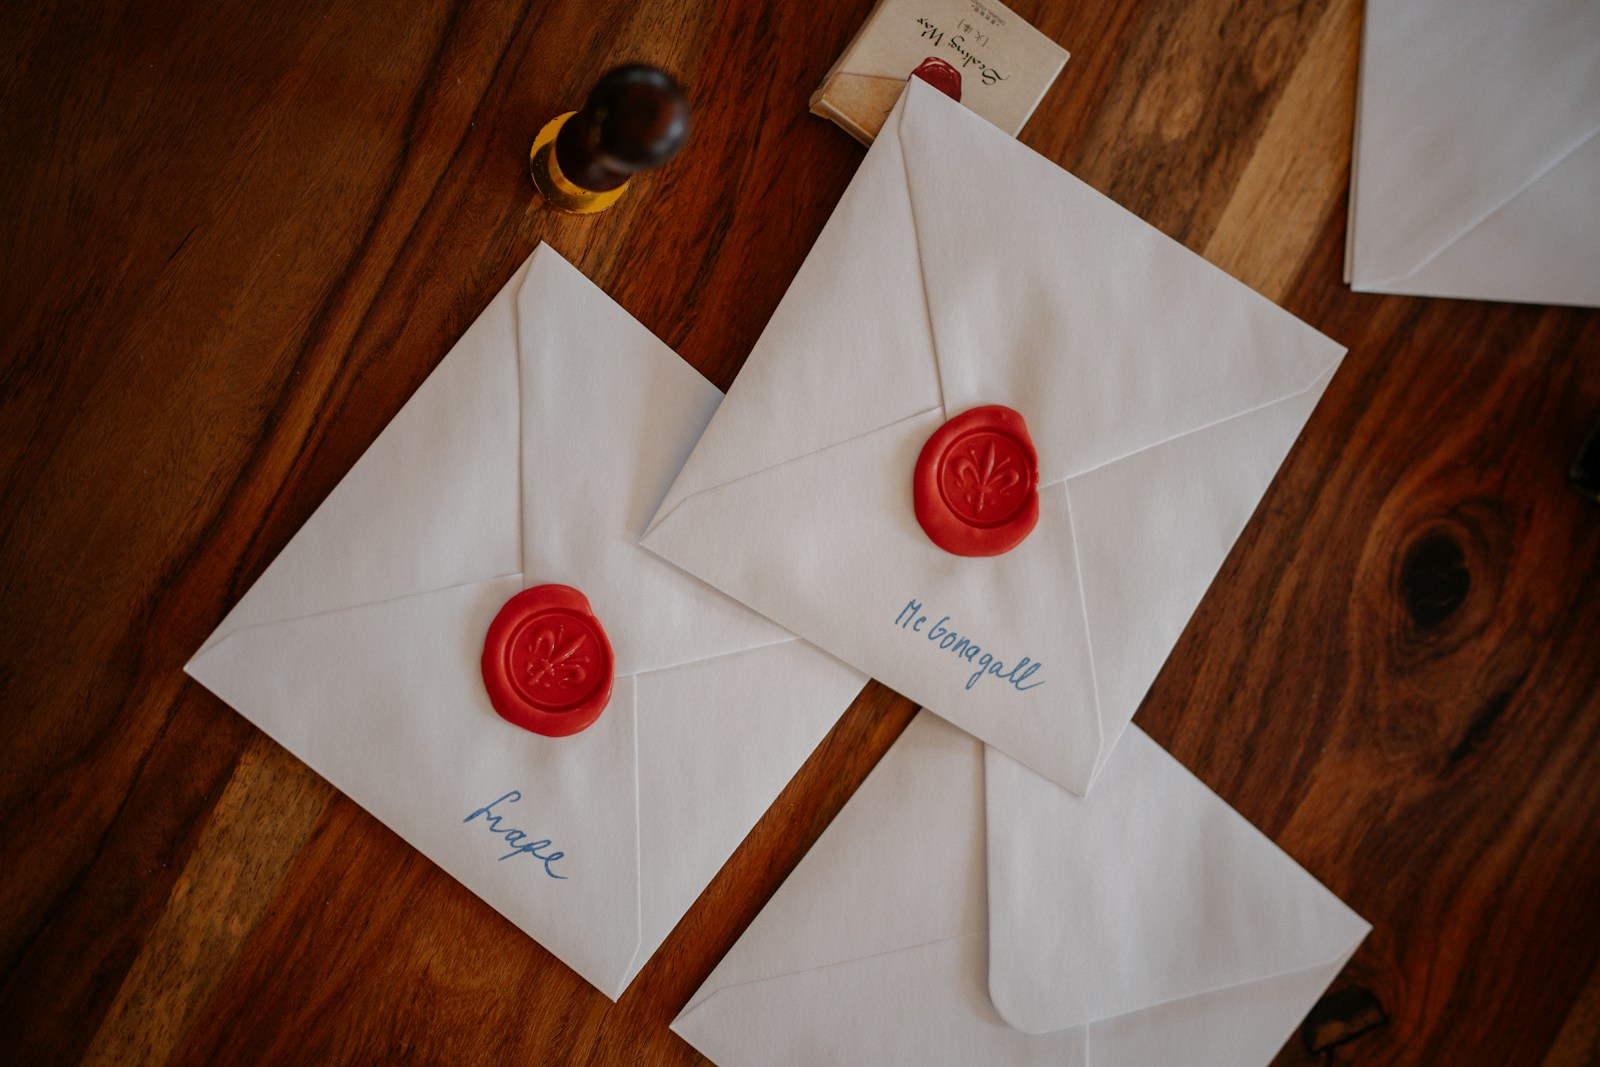
The envelope is the first thing people see, so make it count. A red wax seal turns a plain white envelope into something that feels like a letter from another century, a perfect match for Louis Prang Christmas Cards. Wax seal kits with a brass stamp are easy to find, and glue gun wax sticks make it even simpler. Ask an adult to handle the hot wax. Add a handwritten name in your best script and the mail carrier might bring it to the door with extra care. Would you choose red, gold or deep green wax?
You will need: White or cream envelopes, wax sticks, wax seal stamp, a small spoon or low temperature glue gun (adult help), fine pen.
How to make it: 1. With adult help, melt a small pool of wax onto the closed envelope flap. 2. Wait a few seconds, then press the stamp straight down and hold it for about ten seconds. 3. Lift the stamp gently and let the seal cool before stacking the envelopes.
Show Off Louis Prang Christmas Cards on a Garland

Once the cards arrive, give them a place to shine. A simple garland of twine and tiny wooden clothespins turns the cards you send and receive into a cozy wall display. Hang it across a mantel, a window or a bare wall above the sofa and add a little greenery and battery string lights. Since 1988 the greeting card industry has given awards called the Louies in honor of Prang, and this garland is your own little award wall. For a matching paper project, see our pop up card ideas. Which card would hang in the center?
You will need: Jute twine, mini wooden clothespins, removable wall hooks, faux greenery, battery string lights.
How to make it: 1. Fix two removable hooks on the wall and tie the twine between them with a little drape. 2. Clip the cards along the twine, spacing them evenly. 3. Weave greenery and battery lights along the line for a soft glow.