One Stroke Painting: 14 Easy Flowers Anyone Can Paint With a Single Brush
One stroke painting is the happiest little art trend online right now, and it is easier than it looks. You load one flat brush with two colors, press, turn and lift, and a whole petal appears with its shading already built in. On October 10, a short video of one simple blue flower painted this way passed 409,000 reactions and 10,000 shares, and the same artist’s pink flower video has around 3 million reactions. People watch it over and over because it feels like magic. The best part is that you only need a few bottles of acrylic paint, one brush and some paper. With Christmas cards and gift tags coming up, there has never been a better time to learn. Here are 14 easy flowers to paint this week..
One Stroke Painting Starts With a Double Loaded Brush
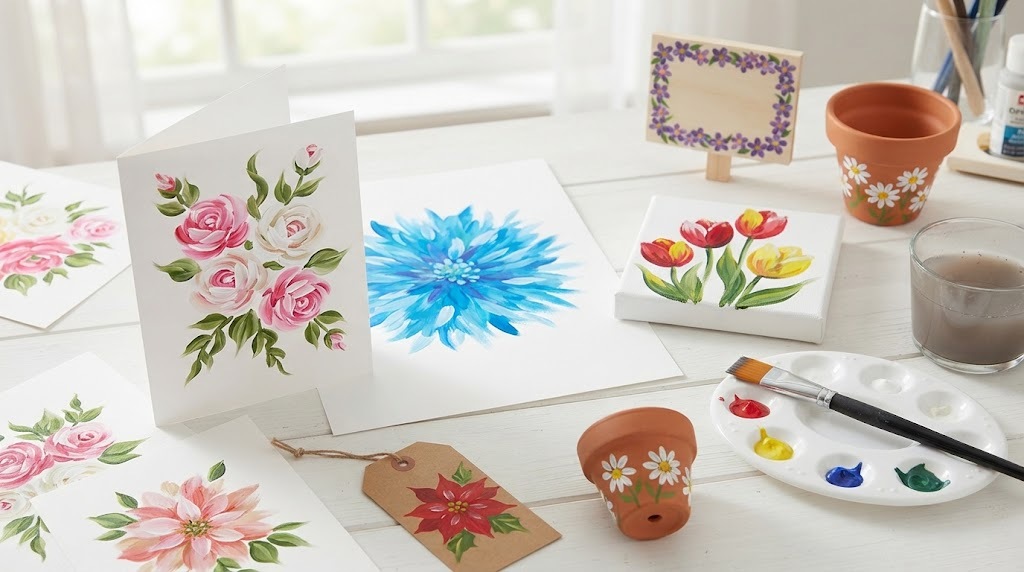
Every flower in this list begins the same way. Dip one corner of a flat brush in a dark color and the other corner in a light color, then stroke it back and forth on your palette until the colors blend softly in the middle. That is called double loading, and it is the secret behind every one stroke painting you have seen online. Each stroke now paints a light edge and a dark edge at the same time, so your petals look rounded without any extra work. Practice a few strokes on scrap paper first and you will be amazed. Ready to pick up your brush..
You will need: A flat brush about 3/4 inch wide, acrylic craft paints, a paper plate or palette, a cup of water, paper towels, scrap paper.
How to make it: 1. Dip one corner of the brush in the dark color and the other corner in the light color. 2. Stroke it back and forth on the palette in one spot until the colors blend in the middle. 3. Paint a few practice strokes, reloading often.
The Classic One Stroke Rose
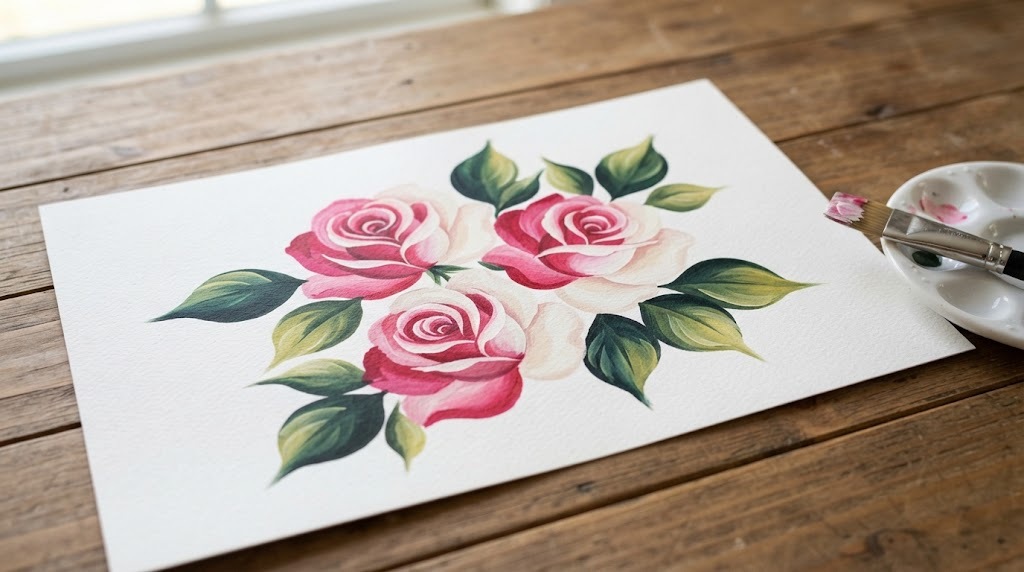
The rose is the flower most people want to learn first, and it is easier than it looks. With pink on one corner and white on the other, you paint a small C shape for the center, then wrap bigger C shaped strokes around it, always keeping the dark side of the brush to the inside. In a few minutes you have a rose with soft shading that looks like it took an hour. Add two green leaves and you have the perfect front for a birthday card. Which color rose will you paint first?
You will need: Flat brush, pink or red and white acrylic paint, green paint for leaves, white paper or card stock.
How to make it: 1. Double load the brush with pink and white. 2. Paint a tight C shape for the bud, then wrap larger C strokes around it, dark edge toward the center. 3. Finish with two twisted green leaves.
One Stroke Painting That Went Viral: The Blue Burst Flower
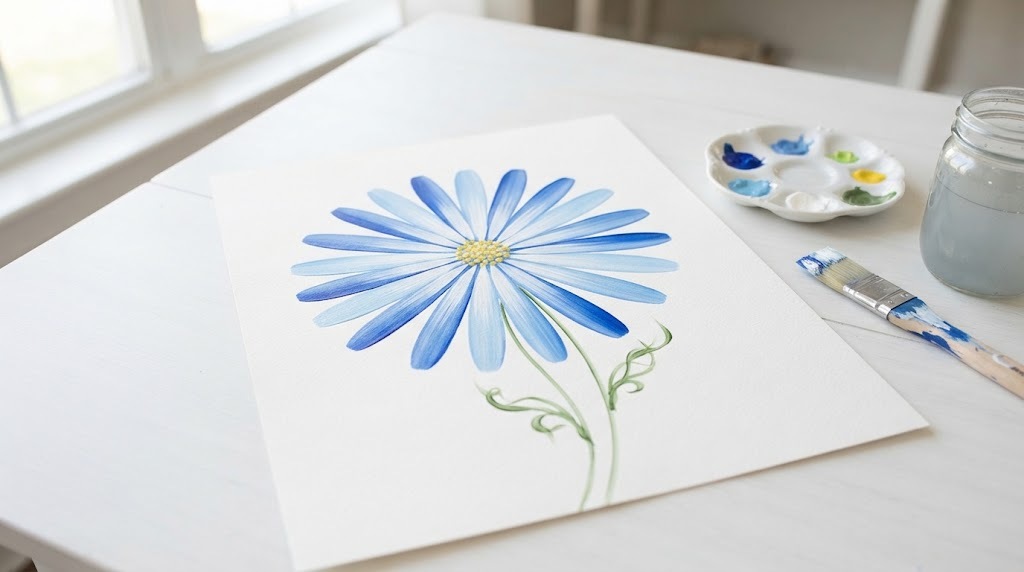
This is the flower that took over Facebook this month. A short reel of a simple blue burst flower from the one stroke artist Zaaris passed 409,000 reactions after it was posted on October 10. Each petal is just one long pull stroke from the center outward, with blue on one corner and white on the other, so the whole flower blends from deep blue to almost white. Add a dotted yellow center and two thin stems. It is a perfect first one stroke painting for kids and grown ups. How many petals will yours have?
You will need: Flat brush, dark blue and white acrylic paint, a little yellow and green, white paper.
How to make it: 1. Double load the brush with blue and white. 2. Pull long, slim strokes outward from one center point, turning the paper as you go. 3. Dot a yellow center with the brush handle and add thin green stems.
Tulips in Just Three Strokes
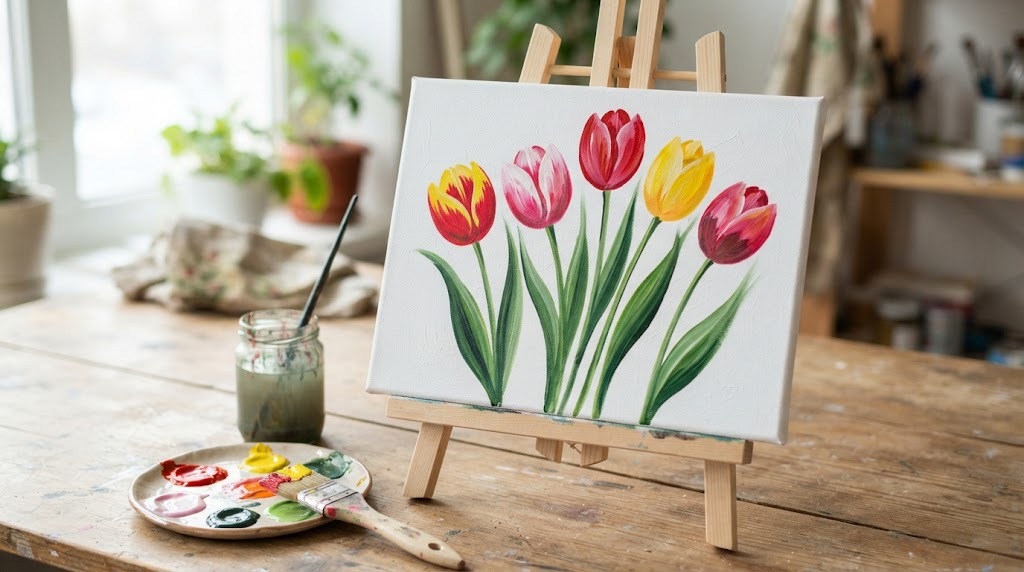
Tulips are one of the fastest flowers you can paint. Each tulip cup is three strokes: one in the middle and one on each side that curves up and in. Load red and yellow, or pink and white, and every tulip comes out with a glow. Add a long green stem and one or two leaves that sweep up from the bottom. Paint five in a row on a small canvas and you have a spring picture that brightens any room, even in winter. Which colors will you mix?
You will need: Flat brush, red, yellow, pink and white acrylic paint, green paint, a small canvas or card.
How to make it: 1. Paint one upward stroke for the middle petal. 2. Add a curved stroke on each side, leaning in toward the middle. 3. Pull a long stem down and add two long leaves.
Simple Daisy Petals
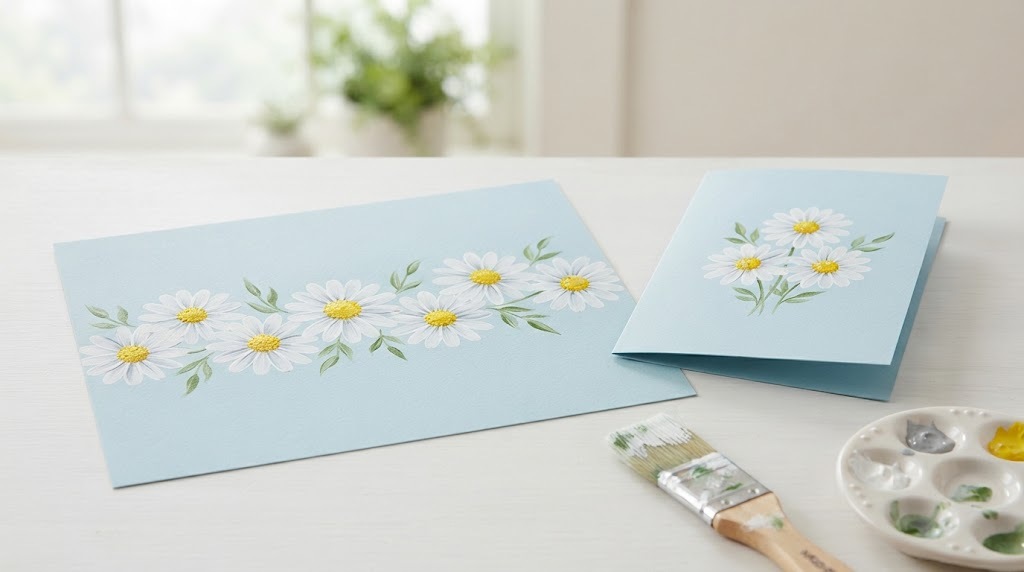
Daisies are pure joy and perfect for beginners. Load white with a tiny touch of grey, then pull short strokes from the outside toward the center, all the way around. The grey edge gives each petal a little shadow so it looks real. Finish with a bright yellow center made from small dots, and a few small green leaves. A row of daisies across the front of a blue card is one of the sweetest gifts you can make. Who would you send a daisy card to?
You will need: Flat brush, white, grey, yellow and green acrylic paint, light blue card stock.
How to make it: 1. Lightly mark a small circle for each center. 2. Pull short white strokes from the outside in, all the way around the circle. 3. Dot the center in yellow and add small leaves.
One Stroke Painting Leaves With a Twist
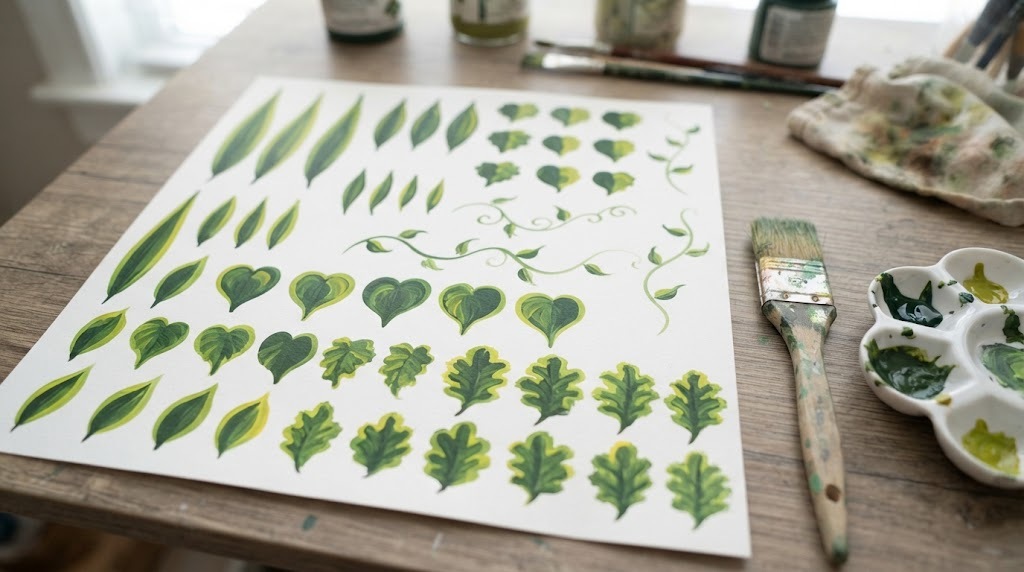
Leaves are what make one stroke painting look so finished, and they take only seconds. Load dark green and yellow green, press the brush down, wiggle it a little as you slide, then lift and turn to a point. Try long slim leaves, round heart shaped leaves and ruffled leaves, and add thin curling vines with the corner of the brush. Fill a whole practice sheet like this and your flowers will look twice as pretty. Which leaf shape do you like best?
You will need: Flat brush, dark green and yellow green acrylic paint, practice paper.
How to make it: 1. Double load with dark green and yellow green. 2. Press, wiggle and slide, then lift up to a point while turning the brush. 3. Practice a full sheet of leaves and vines.
Graceful Calla Lilies
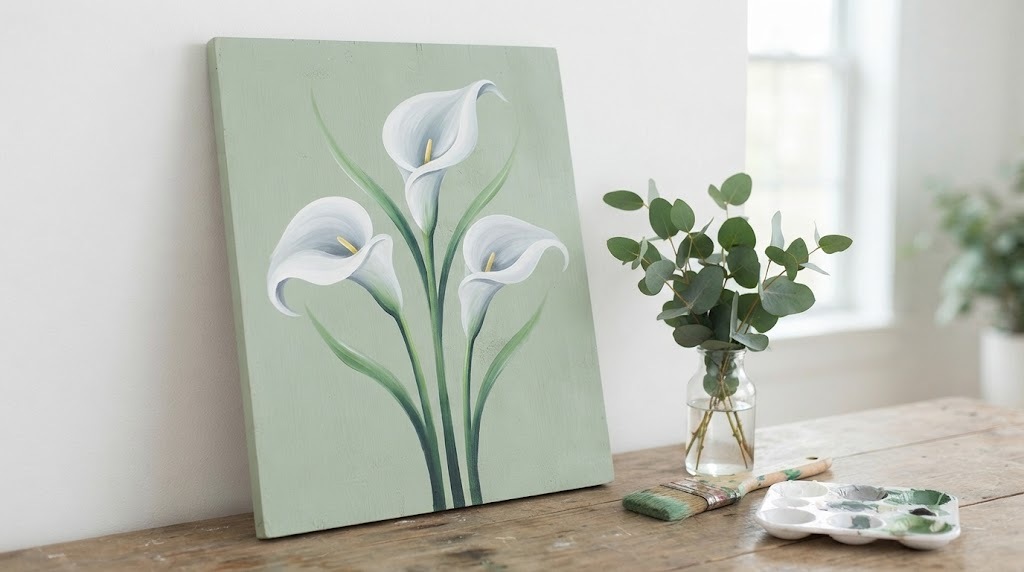
Calla lilies look elegant and grown up, yet each flower is just one curving stroke. Load white and a little grey, press the brush down and swing it in a soft curve like the opening of a trumpet. A thin line of yellow in the middle and a long green stem finish it. Paint three on a sage green board and you have a calm, modern piece of wall art. It looks lovely in a bathroom or a guest room. Where would you hang yours?
You will need: Flat brush, white, grey, yellow and green acrylic paint, a small wooden board painted sage green.
How to make it: 1. Paint the board sage green and let it dry. 2. Swing one curved white stroke for each lily and add a thin yellow center. 3. Pull long green stems down to the bottom.
Sunflowers With Dotted Centers
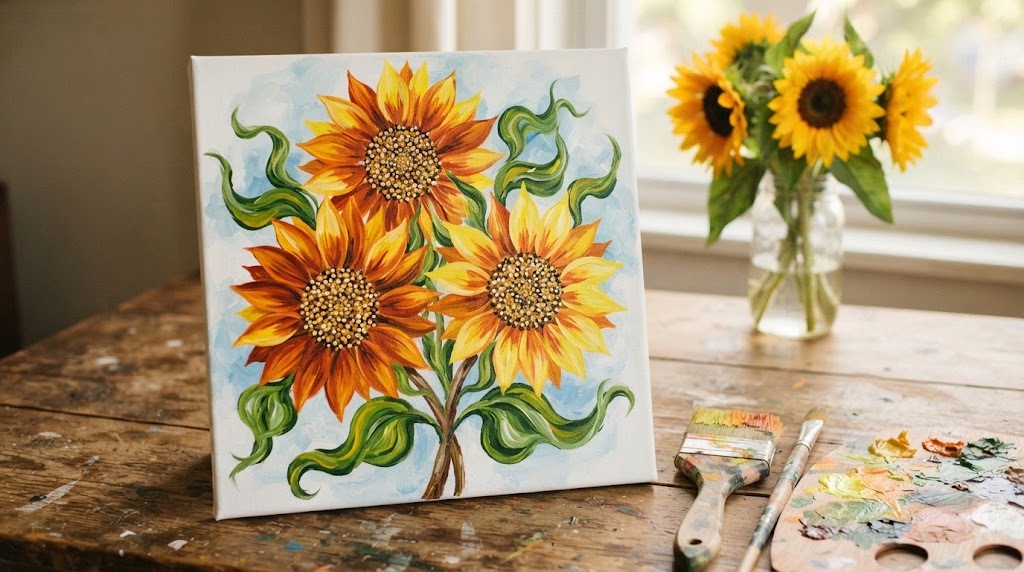
Sunflowers bring summer back on the coldest day. Load orange and bright yellow, then pull petals outward from a round center, all the way around. For the center, dab tiny dots of brown, black and gold with the end of a brush handle or a cotton swab. Add a few big twisted leaves and your one stroke painting is done. Three big sunflowers on a square canvas make a cheerful kitchen picture. Would you paint one, two or three?
You will need: Flat brush, orange, yellow, brown, black, gold and green acrylic paint, a square canvas.
How to make it: 1. Paint a round brown center for each sunflower. 2. Pull orange and yellow petals outward all the way around. 3. Dot the centers with dark and gold paint and add leaves.
Little Lavender Sprigs
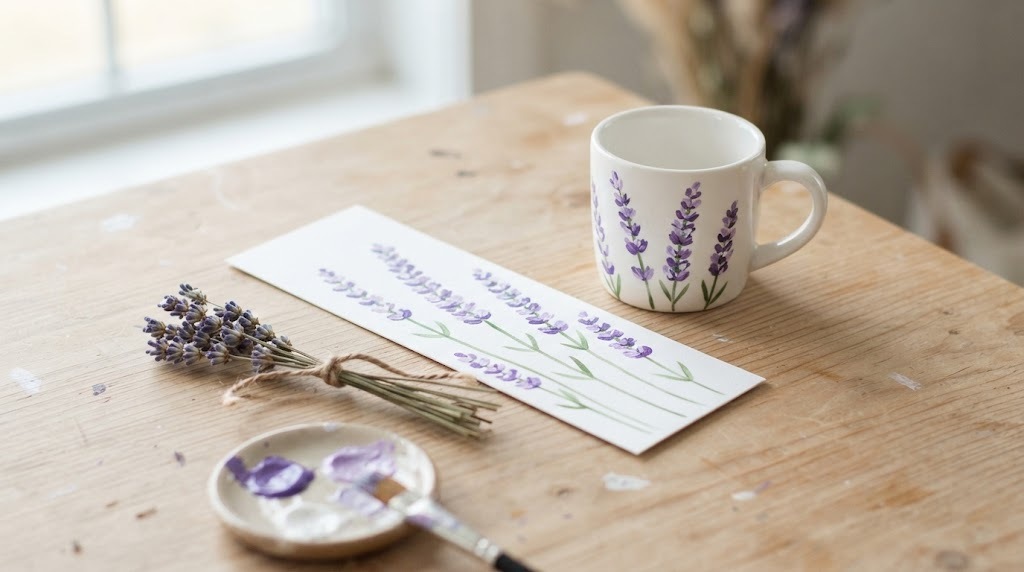
Lavender is one of the easiest flowers of all. Paint a thin green stem, then use just the corner of a small flat brush loaded with purple and white to dab tiny strokes up each side of the stem. Make them smaller near the top so the sprig comes to a point. Lavender looks beautiful on a bookmark, a mug or a set of matching tea towels. It is the kind of calm, simple design that makes a gift feel extra thoughtful. Who in your life loves lavender?
You will need: Small flat brush, purple, white and green acrylic paint, a white bookmark card or a plain mug (use paint made for ceramics on mugs).
How to make it: 1. Paint thin green stems. 2. Dab small purple and white strokes up each side of each stem. 3. Make the dabs smaller near the top to finish each sprig.
One Stroke Painting for Thanksgiving: Fall Leaves
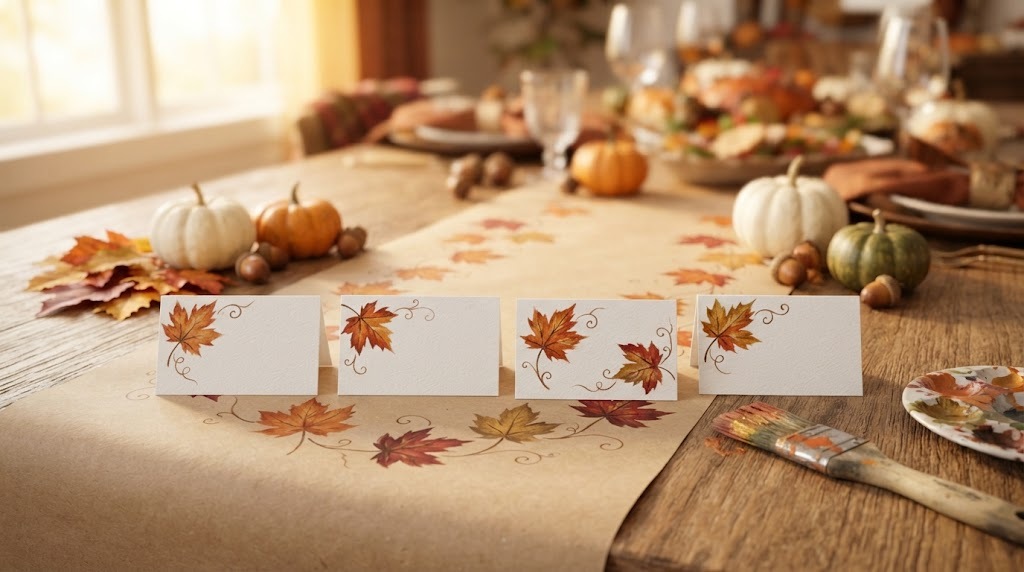
Thanksgiving is only a few weeks away, and painted fall leaves make the sweetest table decor. Load two autumn colors at once, like orange and gold or rust and deep red, and paint leaves with a wiggle stroke. Thin brown stems and little vines tie them together. Paint them on plain place cards and a strip of kraft paper for a table runner. Your guests will love that every leaf was made by hand. One stroke painting turns a simple table into something special. Who sits at your table this year?
You will need: Flat brush, orange, gold, rust, red and brown acrylic paint, white place cards, a roll of kraft paper.
How to make it: 1. Roll out the kraft paper and cut it to the length of your table. 2. Paint clusters of fall leaves along both edges and on each place card. 3. Add thin brown stems and vines and let it dry.
Poinsettias for Handmade Christmas Cards
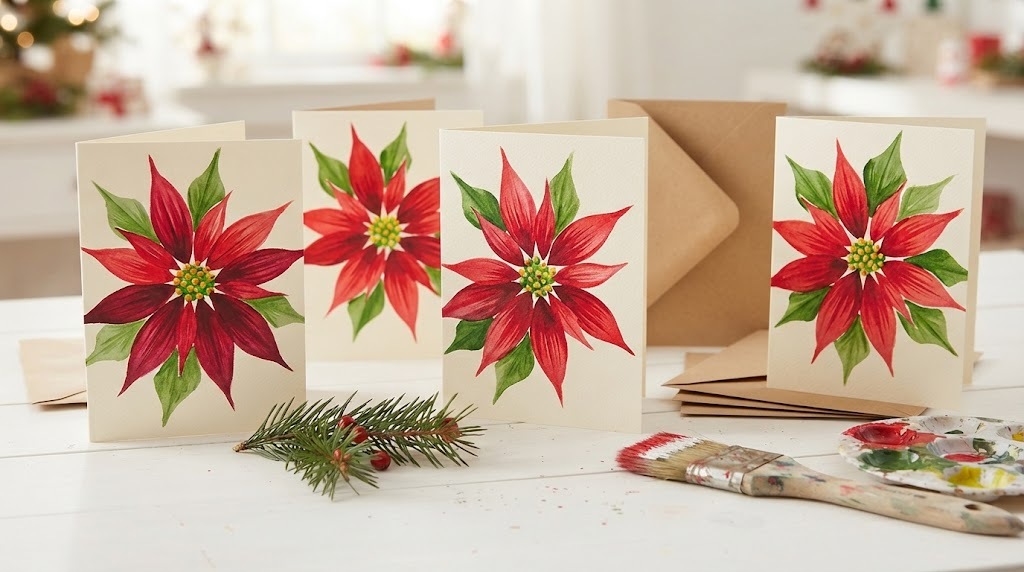
A bright red poinsettia is the most cheerful thing you can paint for Christmas cards. Load deep crimson and bright red, then paint long pointed petals outward from the center in a star shape. Tuck a few green leaves behind the red, and finish with a tight cluster of tiny yellow and green dots in the middle. Once you paint one, you will want to paint ten, and every card will be a little different. Handmade cards like these are often kept for years. Who is first on your card list?
You will need: Flat brush, crimson, red, white, green and yellow acrylic paint, blank folded cards and envelopes.
How to make it: 1. Paint six to eight long red petals in a star shape. 2. Add a few green leaves between and behind the petals. 3. Dot the center with yellow and green.
One Stroke Painting on Holly Gift Tags
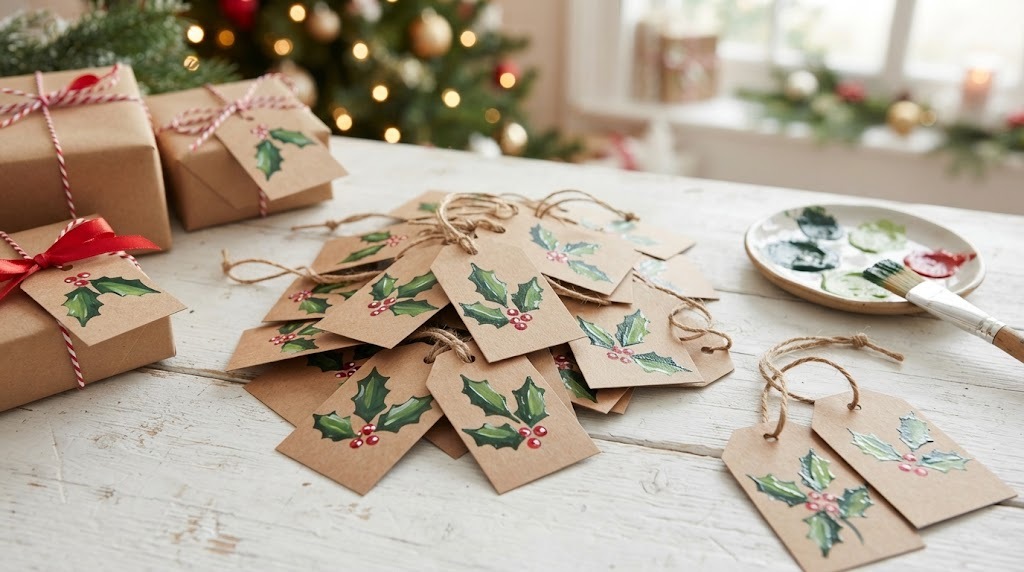
Painted gift tags make even plain brown paper look special under the tree. Load dark and light green and paint two or three holly leaves with pointed, wavy edges, then add a cluster of round red berries. A tiny white dot on each berry makes it shine. Cut tags from kraft card, punch a hole and add twine. Paint a whole stack in one evening while you watch a holiday movie. It is one stroke painting at its most useful. How many gifts will you tag this year?
You will need: Flat brush, dark green, light green, red and white acrylic paint, kraft card stock, a hole punch, twine.
How to make it: 1. Cut tags from kraft card and punch a hole at the top. 2. Paint two or three holly leaves on each tag. 3. Add red berries with a white highlight dot and tie on twine.
Flowers on a Painted Flower Pot
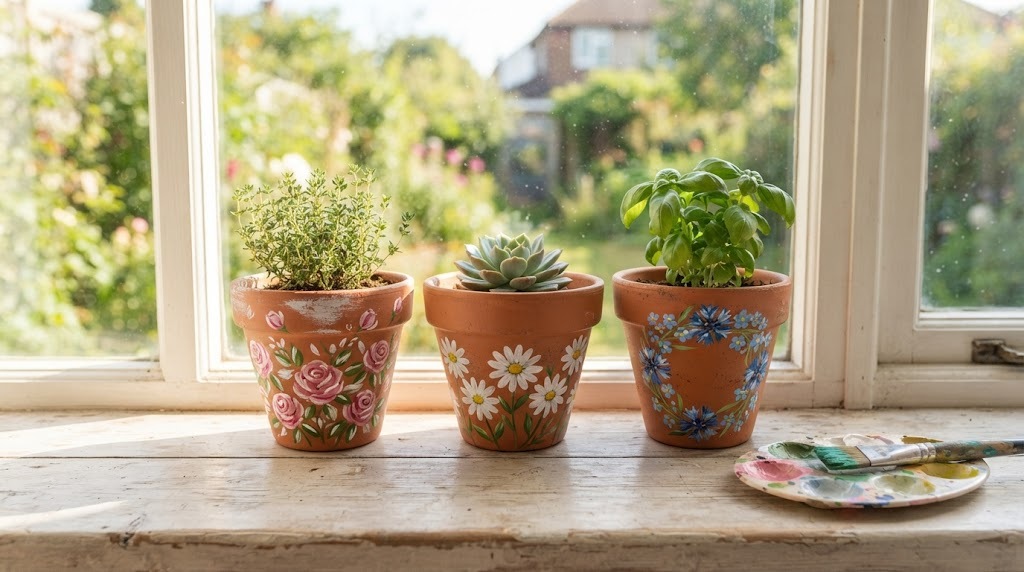
Terracotta pots are a perfect canvas for one stroke flowers. Wipe the pot clean, give it a coat of sealer if you like, then paint roses, daisies or a ring of blue blossoms around the rim. Seal it again when dry so the paint lasts. Fill it with a little herb or succulent and it becomes a gift anyone would love. For another fun painting idea, see our painted Christmas mugs. Which plant would you put in yours?
You will need: Terracotta pots, acrylic paint, a flat brush, clear outdoor sealer (adult help), a small plant.
How to make it: 1. Clean the pot and let it dry. 2. Paint your flowers around the sides or rim. 3. Seal it when dry and add a small plant.
A Flower Border on a Wooden Sign
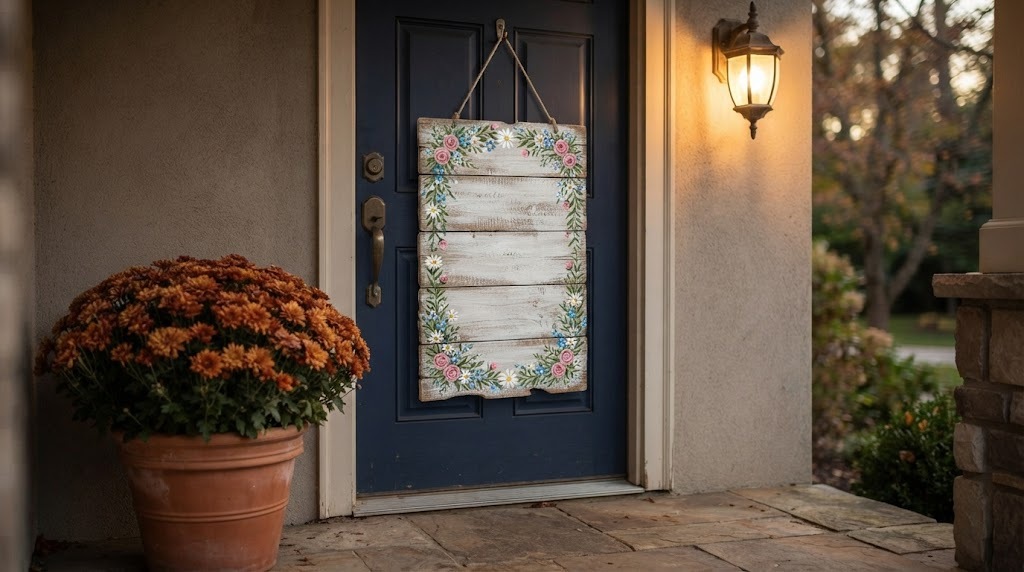
To end our list, put all your new skills together on one piece. A simple wooden plank sign looks charming with a border of one stroke flowers all the way around: roses, daisies, small blue blossoms and twisting vines. Leave the middle plain, or add your family name in your own handwriting. Hang it on the front door, in the kitchen or over a bed. It is a project you will be proud of, and it shows how far one brush can take you. Where will your sign go?
You will need: A small wooden plank sign, white chalk style paint, acrylic paints, a flat brush, sandpaper, a hanging wire.
How to make it: 1. Sand the sign lightly and paint it white. 2. Paint vines around the edge first, then add flowers along the vines. 3. Fill in with leaves and small dots and add a hanging wire.