Cotton Swab Painting: 13 Easy Christmas Art Projects for Adults Who Think They Cannot Paint
Cotton swab painting is the cozy holiday hobby for anyone who has ever said, I cannot paint. Instead of a brush, you use a simple cotton swab to press little dots of paint onto a canvas, a rock, a mug or a wood slice. One dot at a time, a snowy village or a red poinsettia appears, and it looks far more skilled than it really is. Dot painting videos are huge right now, with one cotton swab flower reel passing a quarter of a million likes. It is relaxing, cheap and very forgiving, because a wobbly dot still looks like a snowflake. All you need is a pack of swabs, a few bottles of acrylic paint and a small canvas. Pour a cup of cocoa, put on some music and try one of these thirteen easy Christmas projects tonight..
Cotton Swab Painting: Dotting Snow on a Night Sky
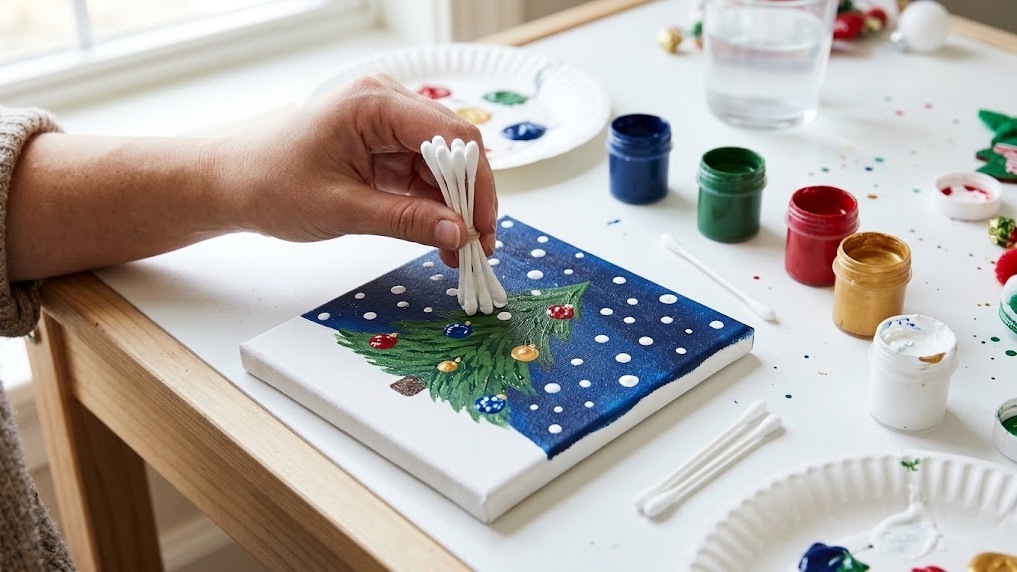
This is the perfect first cotton swab painting, and it is almost impossible to get wrong. Paint a small canvas dark blue with a regular brush and let it dry. Dot a simple green pine tree in the middle, then press white dots all over for falling snow. Bundle a few swabs together with a rubber band to make lots of dots at once. In about thirty minutes you have a little winter scene to hang on the wall or give as a gift. Beginners are always surprised by how good it looks. Are you ready to make your first dot?..
You will need: A small canvas (6 by 6 or 8 by 8 inches), dark blue, green and white acrylic paint, a wide brush, cotton swabs, a rubber band, a paper plate for paint.
How to make it: 1. Paint the canvas dark blue and let it dry for 20 minutes. 2. Dip a single swab in green and dot a triangle tree shape in the center. 3. Bundle five swabs with a rubber band, dip them in white and dot snow across the whole canvas. 4. Add a few bigger white dots on the ground and let it dry flat.
Gather Your Cotton Swab Painting Supplies

The best thing about cotton swab painting is how little you need. A big pack of cotton swabs costs a couple of dollars, and a starter set of acrylic paints covers every project here. Add a few small canvases, wood slices or smooth rocks, and you are set for a whole season of cozy evenings. Keep the swabs in a glass so they are easy to grab, and use a paper plate as your palette. A small cup of water and a paper towel help you switch colors quickly. What will you paint on first?
You will need: Cotton swabs, acrylic paints in white, red, green, blue, yellow and black, small canvases, wood slices or rocks, paper plates, a cup of water, paper towels.
How to make it: 1. Set up on a covered table with good light. 2. Squeeze small puddles of paint onto a paper plate. 3. Use a fresh swab for each color so the colors stay clean. 4. Practice rows of dots on scrap paper first to learn how much pressure to use.
A Dotted Snowfall Night Village
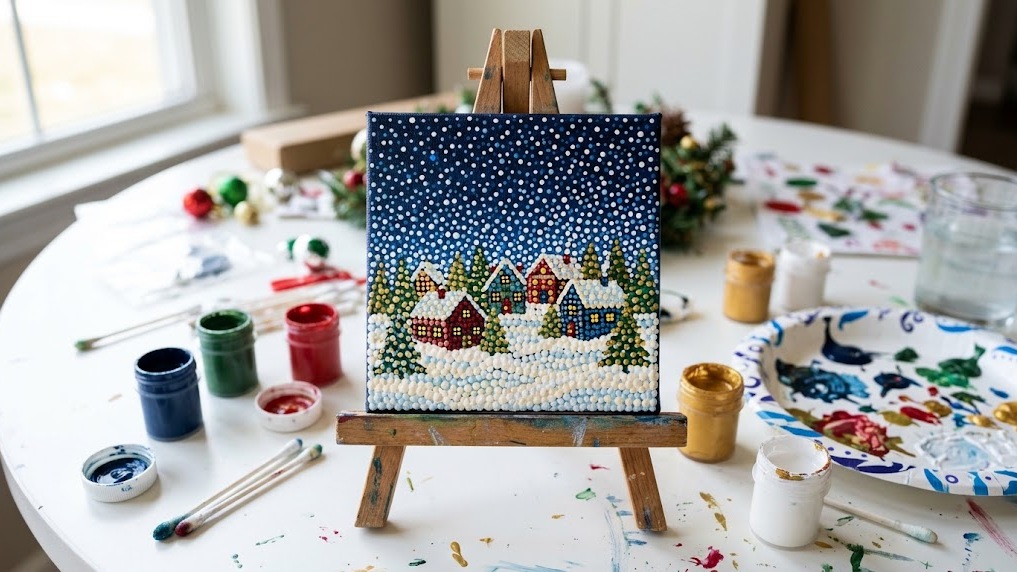
A whole village made of dots looks like magic, but it is built from simple shapes. Draw little house outlines with a pencil, then fill each roof and wall with dots of a different color. Add yellow dots for glowing windows and white dots for snow on the roofs. Finish with a sky full of falling snow. It takes patience rather than talent, which is why so many people find it relaxing. This cotton swab painting looks wonderful framed on a mantel. How many houses will your village have?
You will need: A canvas painted dark blue, a pencil, cotton swabs, acrylic paint in red, brown, white, yellow and gray.
How to make it: 1. Lightly draw three to five simple house shapes along the bottom of the canvas. 2. Fill the walls with dots in red or brown and the roofs in white. 3. Add yellow dots for windows. 4. Finish with white snowflakes across the sky and a white dotted ground.
Cotton Swab Painting Christmas Tree on Canvas
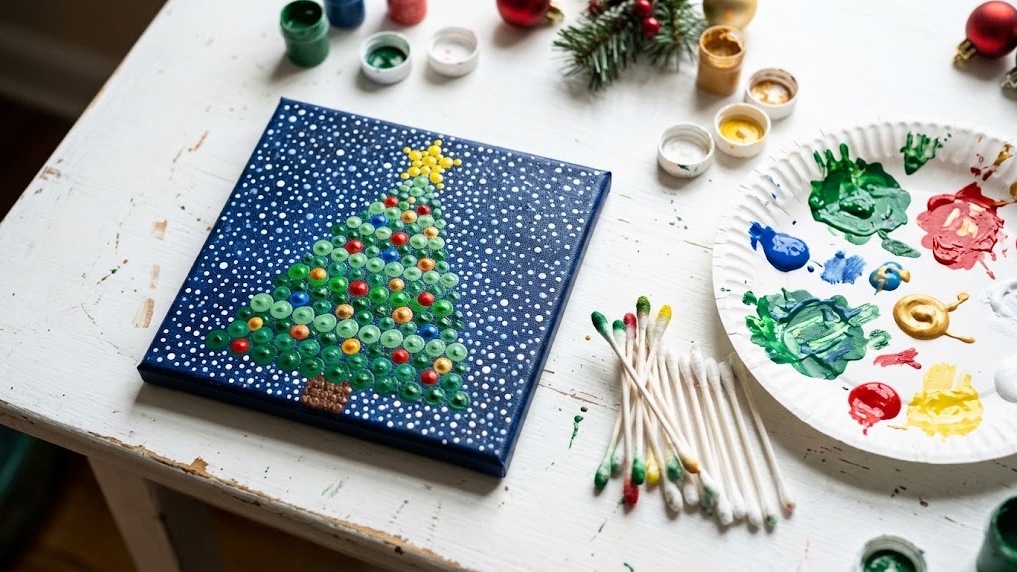
A dotted Christmas tree is the classic cotton swab painting project, and it makes a lovely handmade gift. Paint rows of green dots in a triangle shape, starting wide at the bottom and getting narrower at the top. Then add colorful dots as ornaments and a big yellow dot star on top. You can use a light background for a modern look or a dark one so the colors pop. Make several on small canvases and give them to friends and family. Which colors will you use for the ornaments?
You will need: A small canvas, a pencil, cotton swabs, acrylic paint in green, red, blue, yellow, white and brown.
How to make it: 1. Lightly draw a tall triangle in pencil. 2. Fill it with rows of green dots, slightly overlapping. 3. Add a brown dotted trunk and colorful dot ornaments. 4. Finish with a cluster of yellow dots as the star.
A Poinsettia From Bundled Swabs
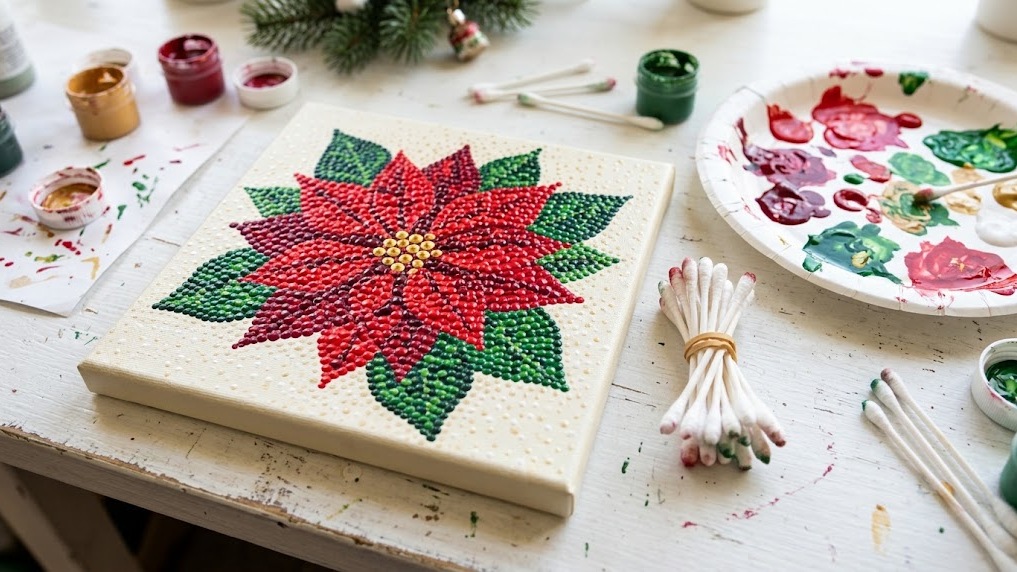
Bundling cotton swabs together is the trick behind those viral flower paintings online. Hold ten or more swabs together with a rubber band, dip them in red and press them down in petal shapes. Each press makes a little cluster of dots, so the petals fill up fast. Add darker red at the center of each petal and yellow dots in the middle of the flower. The result looks like a detailed painting, but it takes less than an hour. A poinsettia like this makes a beautiful holiday card or framed print. Will you paint one bloom or a whole bunch?
You will need: A canvas or thick paper, 10 to 15 cotton swabs, a rubber band, acrylic paint in red, dark red, green and yellow.
How to make it: 1. Lightly draw five or six long petal shapes radiating from a center point. 2. Bundle the swabs, dip them in red and press to fill each petal. 3. Add dark red dots near the center and green dotted leaves underneath. 4. Finish with a cluster of yellow dots in the middle.
Cotton Swab Painting Mandala Ornaments on Wood Slices
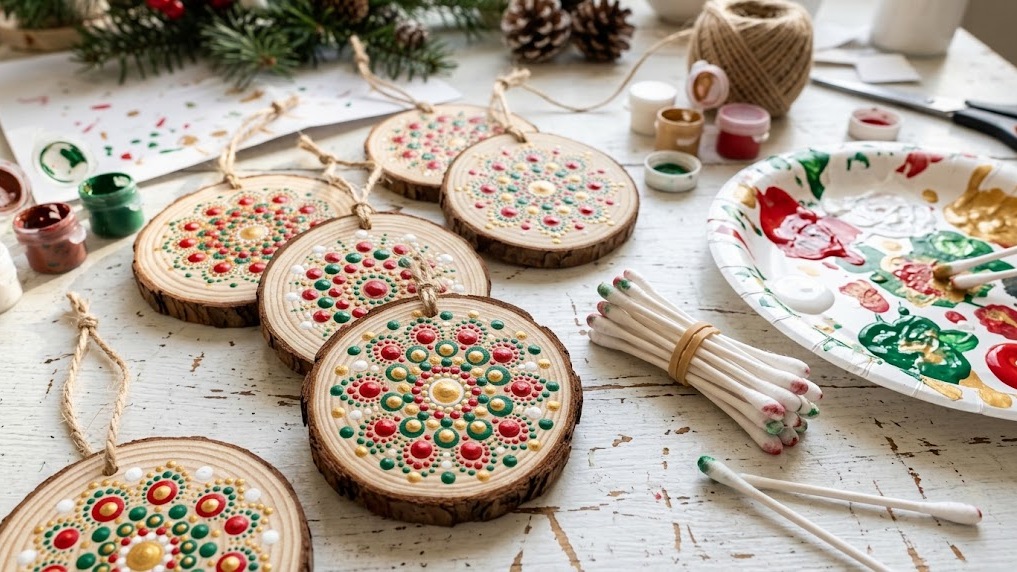
Dot mandalas are circles of dots that grow from the center out, and they look amazing on wood slice ornaments. Start with one big dot in the middle, then add rings of smaller dots around it, changing colors as you go. Red, white, green and gold give a classic Christmas feel. This cotton swab painting project is very soothing, and each ornament takes about twenty minutes. Make a set for your tree or tie them onto gifts. Craft stores sell bags of wood slices with holes already drilled. Which colors will be in your first mandala?
You will need: Wood slice ornaments with holes, cotton swabs, the back end of a pencil for bigger dots, acrylic paint in red, white, green and gold, twine, clear varnish.
How to make it: 1. Make a big dot in the center with the pencil end. 2. Surround it with a ring of smaller dots using a swab. 3. Keep adding rings, changing colors and dot sizes. 4. Let it dry, seal with varnish and add a twine loop.
Snowy Birch Trees
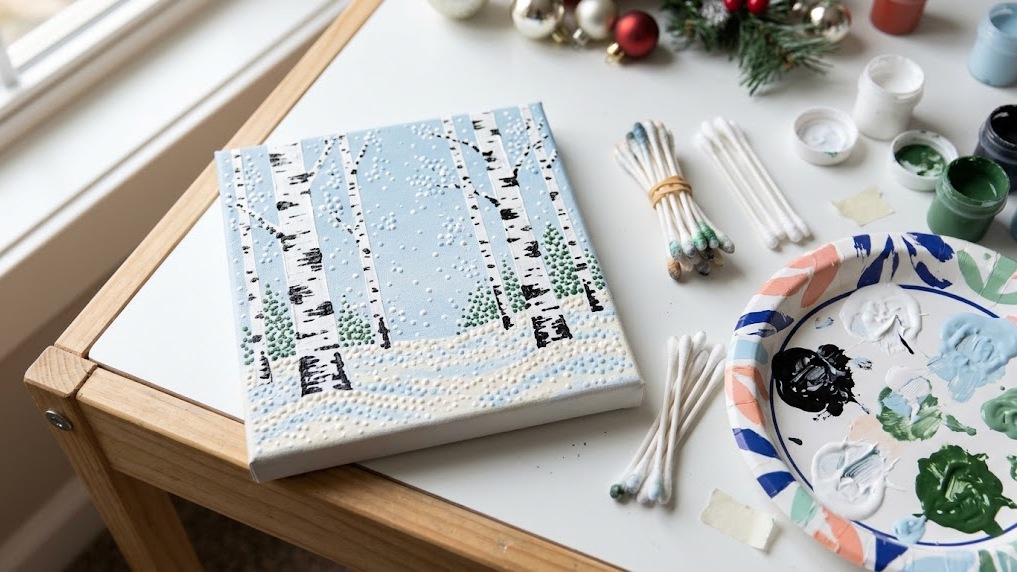
Birch trees are one of the easiest winter scenes to paint, even for total beginners. Put strips of painter’s tape on the canvas for the trunks, paint the background pale blue and peel the tape away to reveal clean white trees. Then use a cotton swab to add the little black marks on the bark and lots of falling snow. The tape does the hard part for you, so the trees always look straight. It is a calm, elegant piece that stays up all winter. Would you paint three trees or five?
You will need: A canvas, painter’s tape, pale blue and white acrylic paint, black paint, a wide brush, cotton swabs.
How to make it: 1. Stick strips of tape on the canvas from top to bottom for trunks. 2. Paint the background pale blue and let it dry. 3. Peel off the tape and dab small black marks on the white trunks with a swab. 4. Dot white snow all over the sky and ground.
Cotton Swab Painting Winter Cardinal
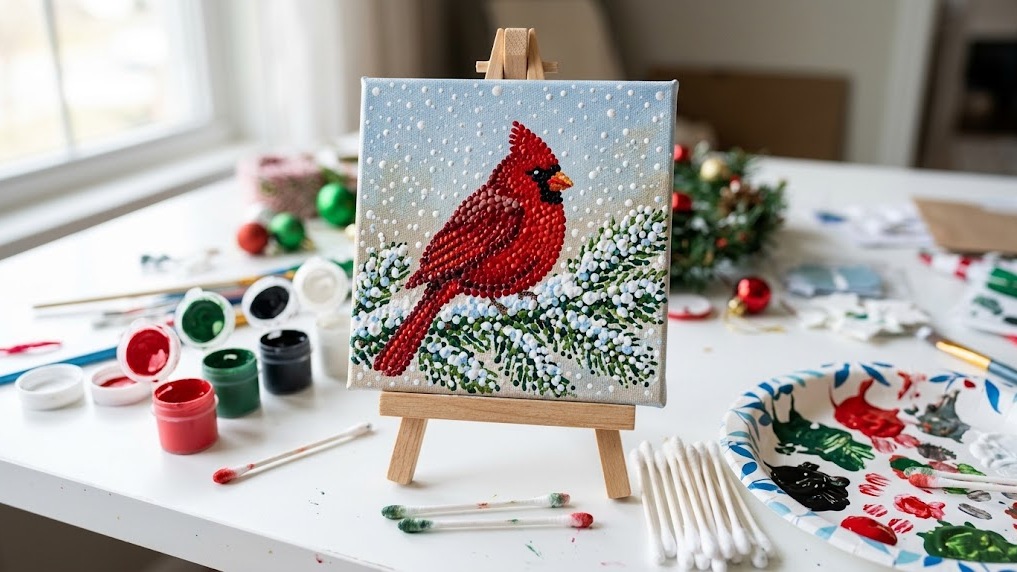
A red cardinal on a snowy branch is one of the most loved winter images, and it is easier than it looks in dots. Draw a simple bird shape like a teardrop with a pointed crest. Fill the body with red dots, add a black dotted mask around the eye area and a small orange beak. Then paint a brown branch and pile white dots on top like fresh snow. Many people see cardinals as a sign of loved ones visiting, so this cotton swab painting makes a meaningful gift. Who would you paint one for?
You will need: A small canvas painted light gray or pale blue, a pencil, cotton swabs, acrylic paint in red, black, orange, brown and white.
How to make it: 1. Lightly draw a branch and a teardrop shaped bird with a crest. 2. Fill the bird with red dots, then add the black mask and orange beak. 3. Dot the branch in brown. 4. Pile white dots along the top of the branch and add falling snow.
A Dotted Christmas Mug Design
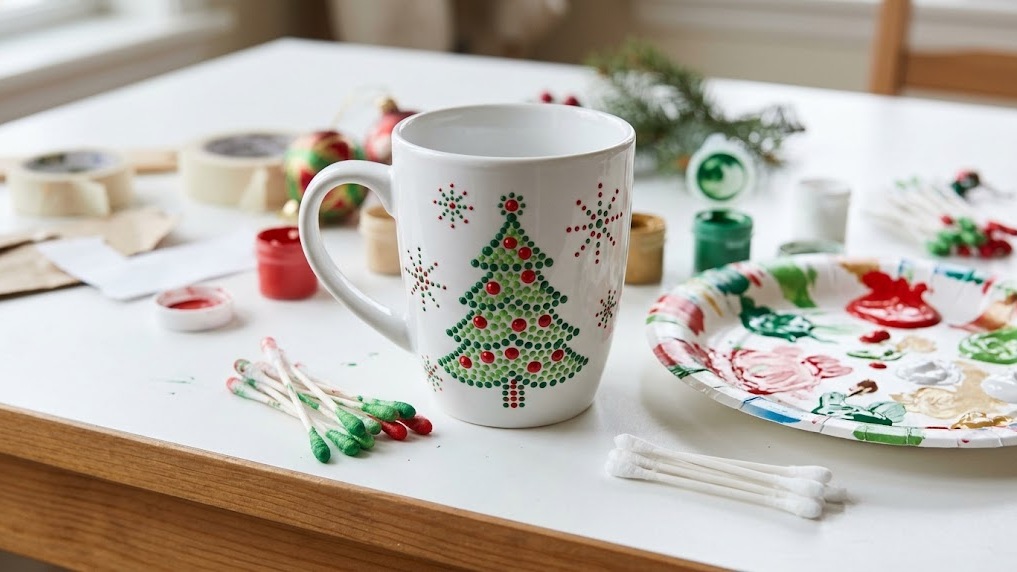
Plain white mugs from the dollar store become personal gifts with a little dotted design. Use ceramic or porcelain paint and a cotton swab to dot a Christmas tree, snowflakes or a name. Most ceramic paints are set by baking the mug in the home oven, so the design lasts through gentle washing. Keep the dots away from the rim where lips touch. Fill the mug with cocoa packets or candy and it is a complete gift for under five dollars. Who on your list loves a cozy mug?
You will need: Plain white ceramic mugs, ceramic or porcelain paint pens or paint, cotton swabs, rubbing alcohol, an oven (adult only).
How to make it: 1. Wipe the mug with rubbing alcohol so the paint sticks. 2. Dot your design, staying at least an inch below the rim. 3. Let it dry for 24 hours. 4. Bake it following the paint instructions, letting it cool inside the oven.
A Wreath of Dot Berries
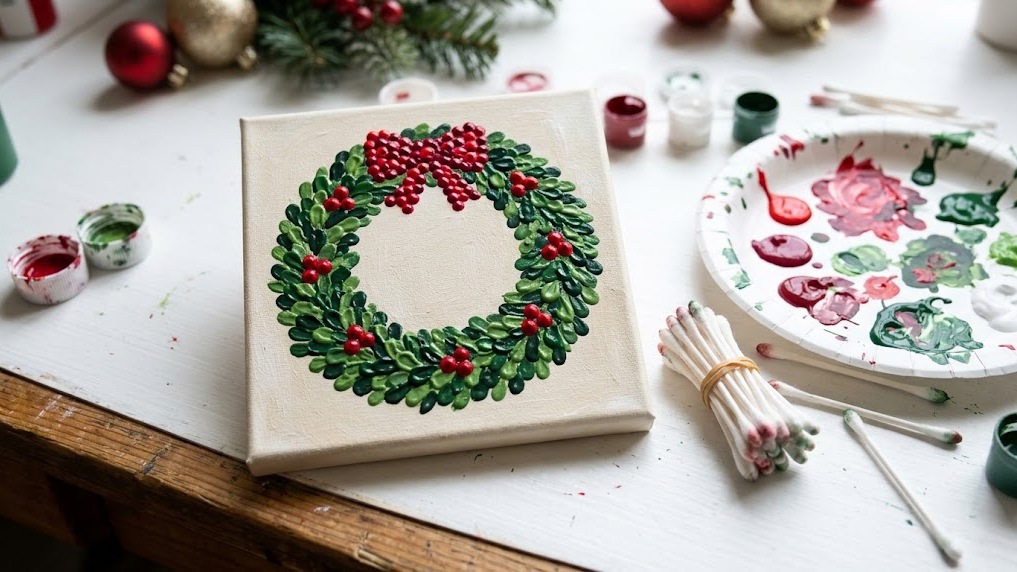
Trace around a small plate to get a perfect circle, and you are halfway to a beautiful wreath. Fill the ring with green dots in two or three shades so it looks full and leafy, then add clusters of red berry dots and a small red bow at the bottom. This cotton swab painting works on canvas, a card or a wood round. It also makes a pretty Christmas card if you paint it on folded card stock. Make one to hang inside your front door. Would you add a name in the middle?
You will need: A canvas or card stock, a small plate for tracing, a pencil, cotton swabs, acrylic paint in two greens, red and white.
How to make it: 1. Trace a circle lightly with the plate. 2. Fill a ring along the line with dark green dots, then add lighter green dots on top. 3. Add red berry clusters around the ring. 4. Paint a small red bow at the bottom and a few white highlight dots.
Cotton Swab Painting Northern Lights Over Pines
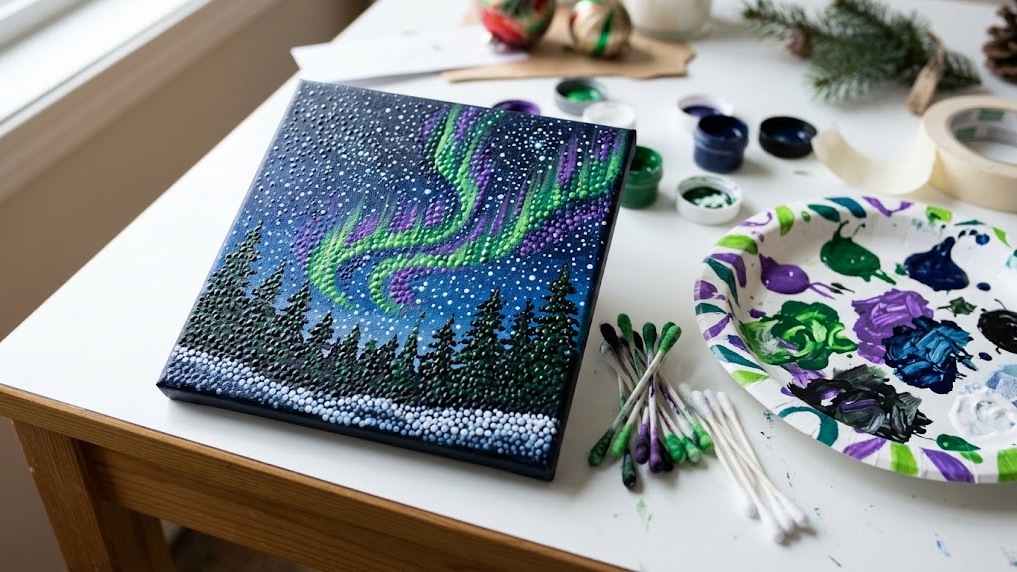
The northern lights look complicated, but in dots they are just soft curved bands of color. Paint the canvas dark navy, then dot wavy bands of green, teal and purple across the sky, letting the colors blend where they meet. Add a row of dark pine trees along the bottom and a sky full of tiny white stars. This cotton swab painting is a great project for a quiet evening when you want something a little more dramatic. It glows on the wall like a window to the far north. Have you ever seen the northern lights?
You will need: A canvas, dark navy, green, teal, purple, black and white acrylic paint, a wide brush, cotton swabs.
How to make it: 1. Paint the canvas navy and let it dry. 2. Dot curved bands of green across the sky, then add teal and purple above and below. 3. Dot a row of black pine tree shapes along the bottom. 4. Finish with tiny white dots for stars.
Dotted Gift Tags
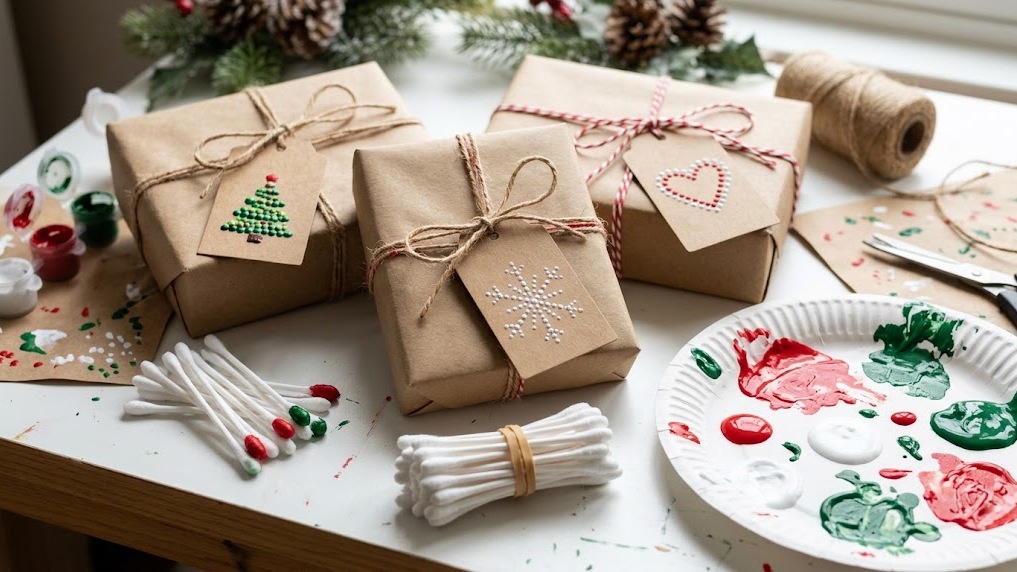
Gift tags are the quickest way to use your new dot skills. Plain kraft paper tags from the craft store look adorable with a few dotted snowflakes, a little tree or a heart. Make a whole stack in one evening and you will be set for the season. White paint on kraft paper looks especially crisp and classic. Kids can join in too, since there is no wrong way to make a dot. These little tags make even plain wrapped gifts look boutique worthy. How many tags will you need this year?
You will need: Kraft paper gift tags, cotton swabs, acrylic paint in white, red and green, twine.
How to make it: 1. Lay the tags flat on a covered table. 2. Dot a simple snowflake, tree or heart on each tag. 3. Let them dry for about 15 minutes. 4. Thread twine through the holes and tie them on your gifts.
A Starry Night Sky Over a Cabin
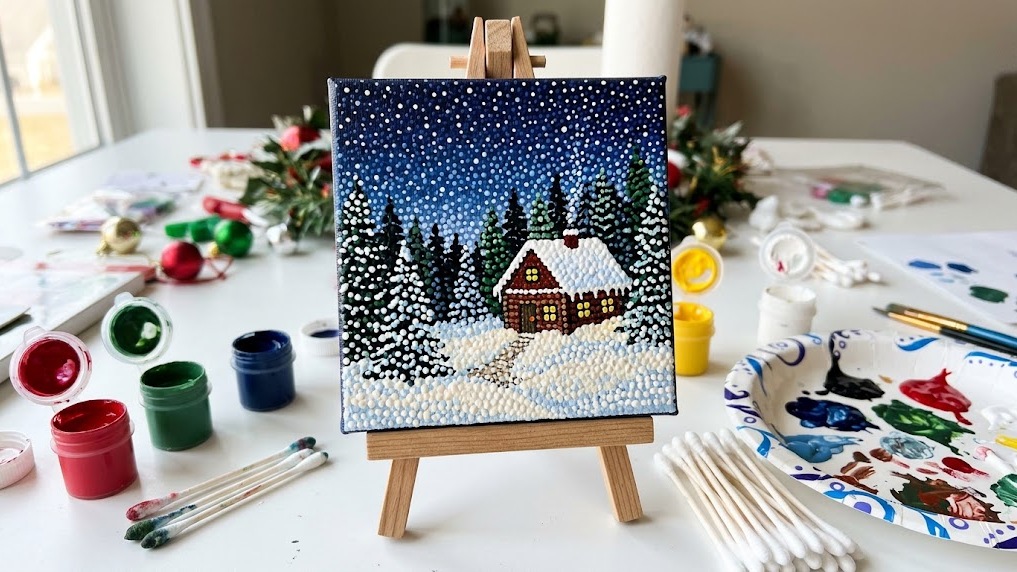
End with the coziest scene of all: a little cabin in the snowy woods under a sky full of stars. Paint a simple cabin shape with a brush, then use a cotton swab to dot yellow windows, a snowy roof and pine trees around it. Fill the sky with white stars in different sizes. This cotton swab painting looks like a holiday card come to life, and it is a lovely project to do with a friend. If you enjoy it, our easy canvas paintings have more beginner ideas. Where would you hang your cabin?
You will need: A canvas painted dark blue, brown, white, yellow, green and black acrylic paint, a small brush, cotton swabs.
How to make it: 1. Paint a small brown cabin near the bottom center. 2. Dot a white snowy roof and yellow windows. 3. Dot dark green pine trees on both sides and a white snowy ground. 4. Fill the sky with white dots in mixed sizes for stars.