Embroidery Hoop Christmas Crafts: 16 No Stitch Ornaments That Look Handmade by Grandma for Pennies
Embroidery Hoop Christmas Crafts are the sweetest way to fill your tree and walls with that cozy, made by grandma feeling, and you never have to thread a needle. A wooden hoop costs about a dollar, and it turns a bit of plaid, a square of felt or an old card into a finished piece in minutes. Every idea in this gallery is no sew: you clamp, glue, wrap and tie. Kids can help with most of them, and everyone in the house can make a set in one evening at the kitchen table. Some are tiny tree ornaments, some are big enough for the front door, and a few make thoughtful little gifts. Grab a stack of hoops, raid your fabric bin and let’s get started..
Embroidery Hoop Christmas Crafts Start With Plaid Mini Ornaments

Picture a table covered with tiny plaid circles, each one tied with a red ribbon, ready to hang. That is the magic of Embroidery Hoop Christmas Crafts, and it starts with a three inch hoop and a fat quarter of fabric. Mix red tartan, green gingham and black and white check so the set looks collected over years, like the cozy plaid Christmas looks grandma kept in her attic. Trim the fabric close at the back and nobody will ever know they took ten minutes each..
You will need: 3 inch wooden hoops, plaid and gingham fabric remnants, sharp scissors, fabric glue, red satin ribbon.
How to make it: 1. Open the hoop and lay the fabric over the inner ring. 2. Press the outer ring down and tighten the knob until the fabric is drum tight. 3. Trim the extra fabric to a half inch and glue it flat inside the back. 4. Tie a ribbon loop at the top for hanging.
A Greenery Swag Wreath on a Bare Wood Ring
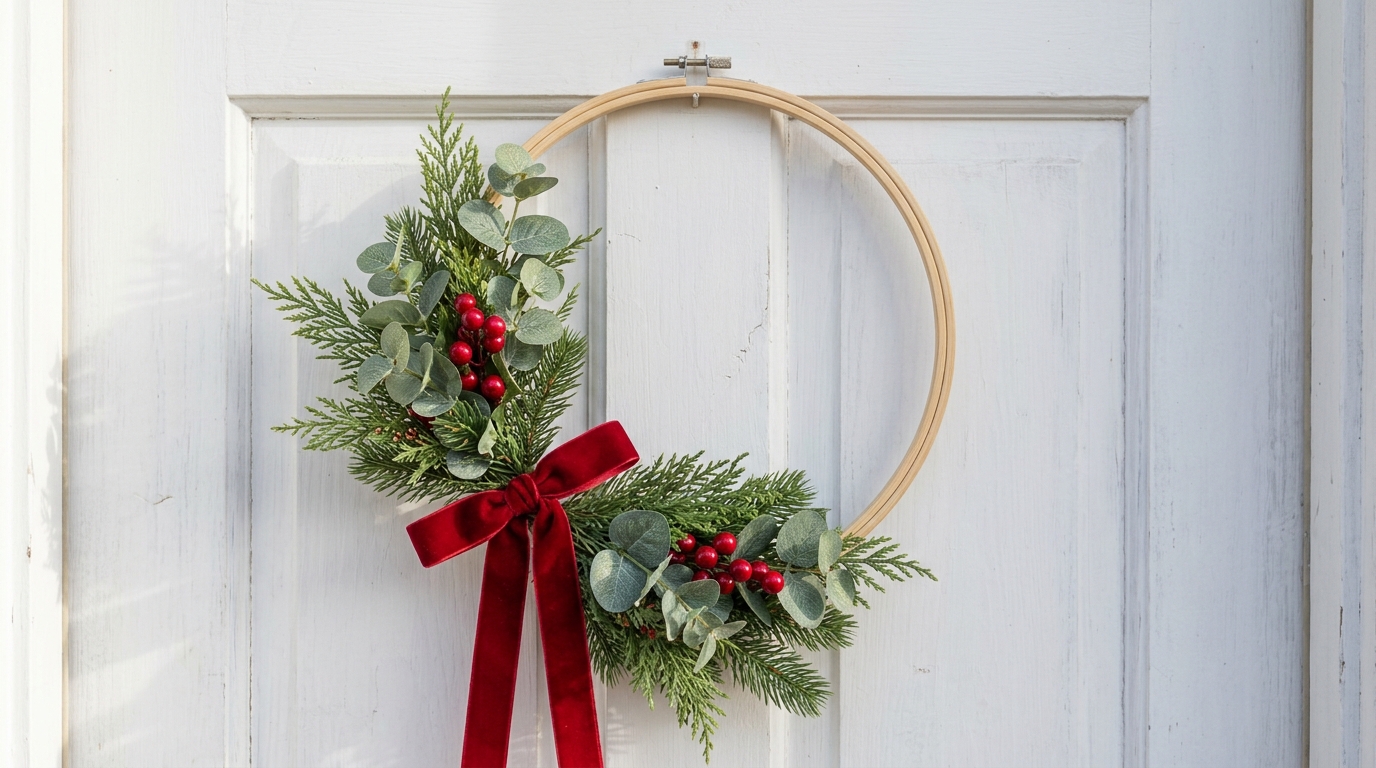
The modern farmhouse wreath you see in boutique windows is just an empty hoop with greenery bunched on one side. Leave most of the wood ring bare so the door color shows through. That open space is what makes it look designer. Use faux stems so it lasts for years, and add a velvet bow where the stems meet. Hoops have been around for centuries as a sewing tool, and you can read about how the classic embroidery hoop works before you give one a brand new job. Pair it with a matching door swag for a full entry.
You will need: One 10 to 12 inch wooden hoop (inner ring only), faux eucalyptus, pine and cedar picks, red berry stems, floral wire, red velvet ribbon.
How to make it: 1. Separate the hoop and keep the inner ring. 2. Lay the stems in a fan along the lower left side. 3. Wrap each stem to the ring with floral wire. 4. Tie a velvet bow over the wire and hang it from a ribbon.
Embroidery Hoop Christmas Crafts for the Door: A Felt Santa Face
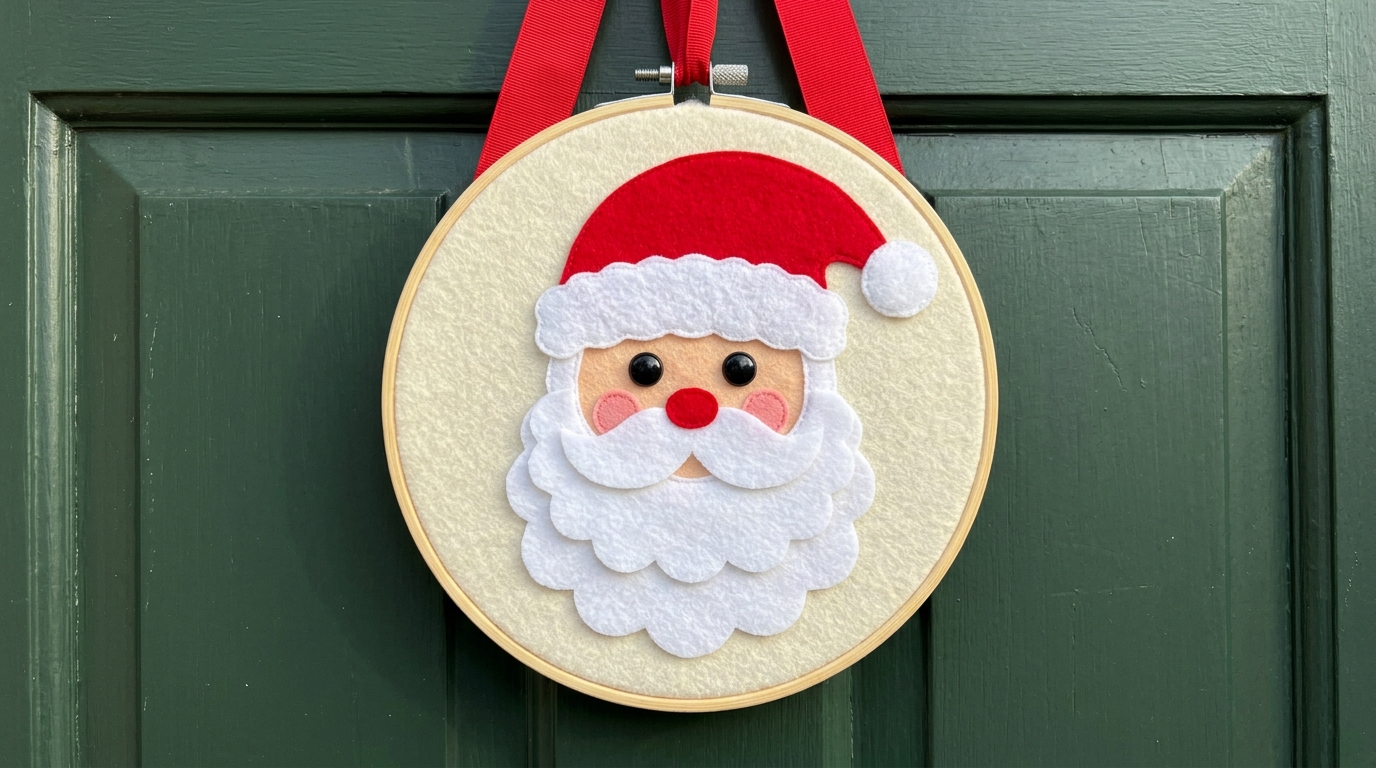
This jolly Santa makes every visitor smile, and it is all glued, not sewn. Cut a red hat, a white brim, a pink face and a big cloud of a beard from felt, then layer them inside a large hoop. Two black buttons become the eyes and a dab of pink paint makes rosy cheeks. If you love felt, you will also enjoy these easy felt Christmas crafts. Kids can cut the beard with safety scissors while an adult handles the hot glue.
You will need: 10 inch wooden hoop, cream felt for the base, red, white and pink felt, two black buttons, pink craft paint, fabric glue or a low temp glue gun.
How to make it: 1. Clamp cream felt in the hoop and trim the back. 2. Cut the hat, brim, face and beard from paper patterns. 3. Glue the pieces in layers from the top down. 4. Add button eyes, dab on cheeks and tie a red hanging ribbon.
A Vintage Christmas Card Framed in a Small Ring
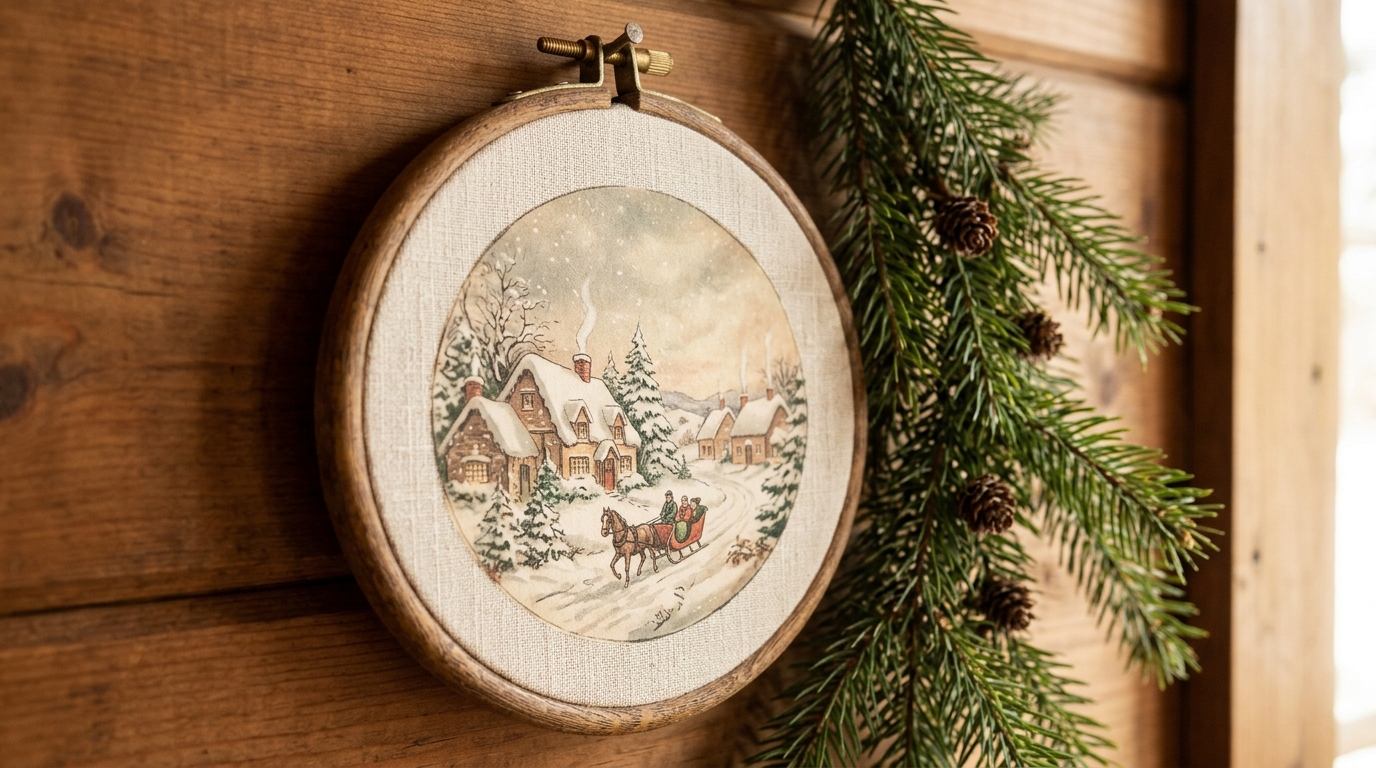
Every family has a shoebox of old holiday cards that are too pretty to toss. A hoop turns the best one into instant wall art. Cut a circle from the card, glue it onto cream fabric, and clamp the fabric in the hoop so a soft border shows around the picture. Snowy villages and sleigh scenes look especially sweet. For more inspiration from the golden age of greeting cards, see these classic card ideas. Make a row of three for the hallway.
You will need: Old holiday cards, a 5 or 6 inch hoop, cream cotton fabric, a circle template, glue stick, twine.
How to make it: 1. Trace a circle slightly smaller than the hoop on the card and cut it out. 2. Glue it to the center of a fabric square. 3. Clamp the fabric in the hoop. 4. Trim the back and hang it with twine.
Embroidery Hoop Christmas Crafts That Look Like a Snow Globe
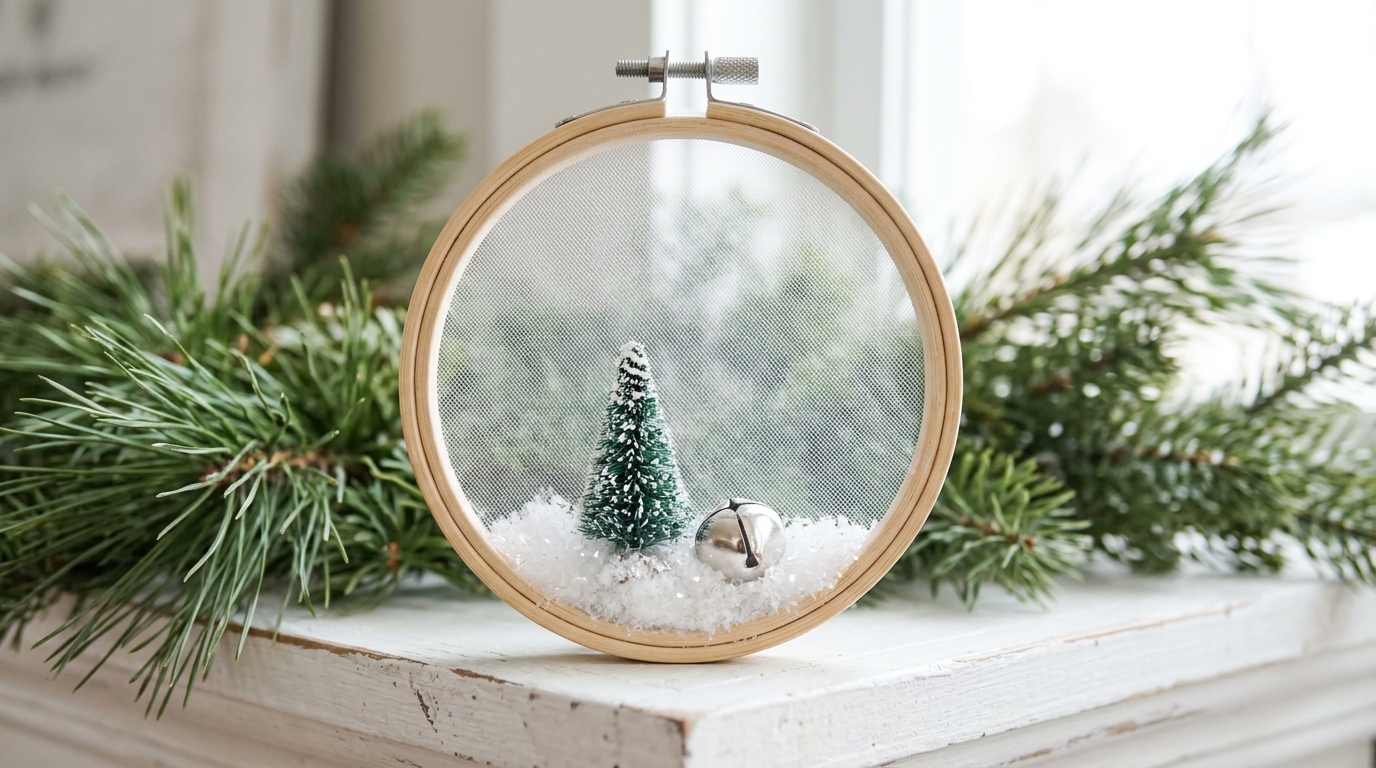
You get all the magic of a snow globe without water or glass. Stretch white tulle across the hoop, glue a tiny bottle brush tree to the bottom edge, and sprinkle a little fake snow around its base. The sheer tulle makes everything look frosty and soft, especially in a window. A small jingle bell at the bottom adds a happy little sound when it moves. If you want a real globe too, try these DIY snow globes for the mantel.
You will need: 6 inch hoop, white tulle, one mini bottle brush tree, fake snow, clear craft glue, a small silver jingle bell.
How to make it: 1. Clamp two layers of tulle in the hoop. 2. Glue the tree upright to the lower inside edge. 3. Dab glue around the base and press on fake snow. 4. Tie the bell to the bottom with thread.
A Plaid Gift Card Holder With a Felt Pocket
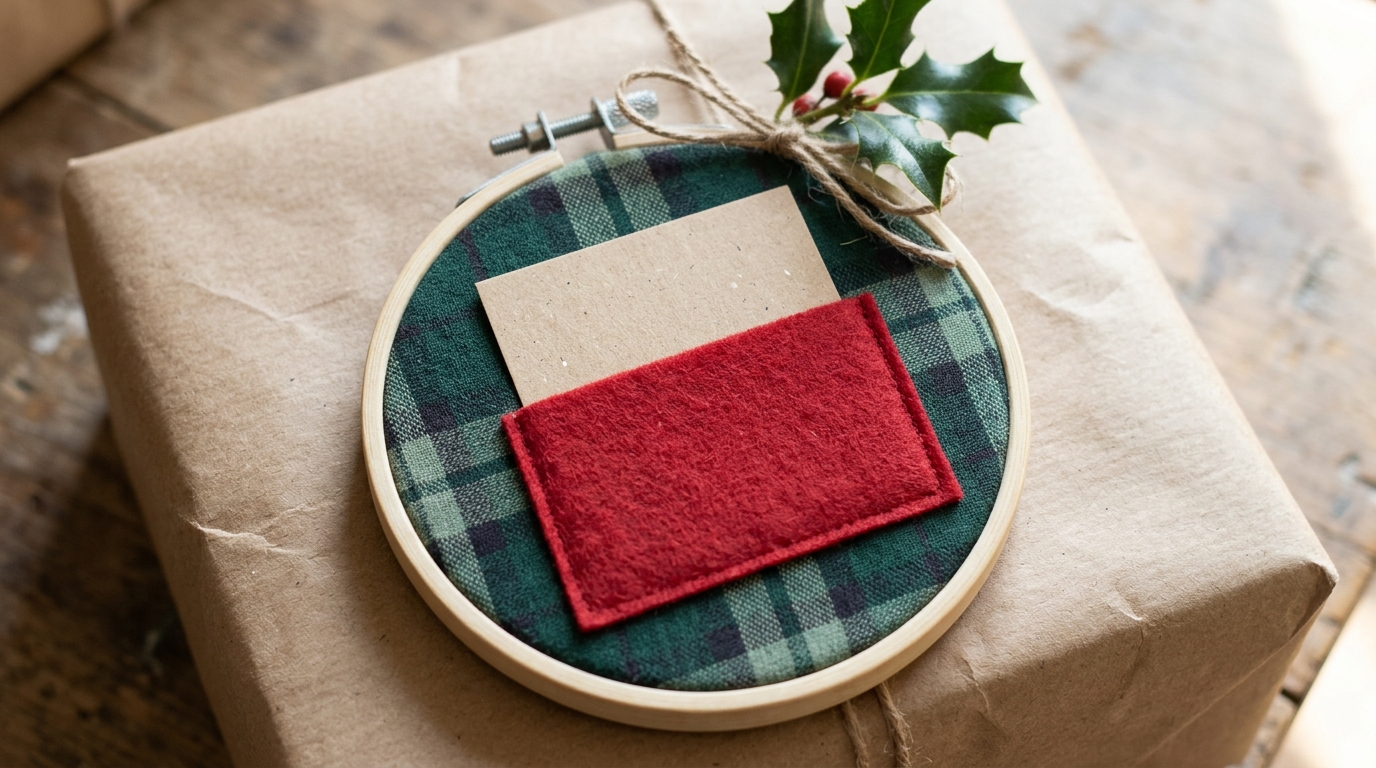
Gift cards are practical, but they can feel a bit plain. Tuck one into a felt pocket glued on a plaid hoop and suddenly it is a keepsake. After the card is used, the hoop goes on the tree as an ornament for years. Teachers, mail carriers and coaches love these. Glue only the sides and bottom of the pocket so the card slides in and out. Looking for more ways to dress up cash or cards? Here are some creative money gift ideas.
You will need: 5 inch hoop, green plaid fabric, a red felt rectangle, fabric glue, twine, a sprig of faux holly.
How to make it: 1. Clamp the plaid fabric in the hoop and trim the back. 2. Glue the felt pocket on three sides. 3. Let it dry flat for an hour. 4. Slip in the gift card and tie on twine and holly.
Embroidery Hoop Christmas Crafts With a Sheet Music Star
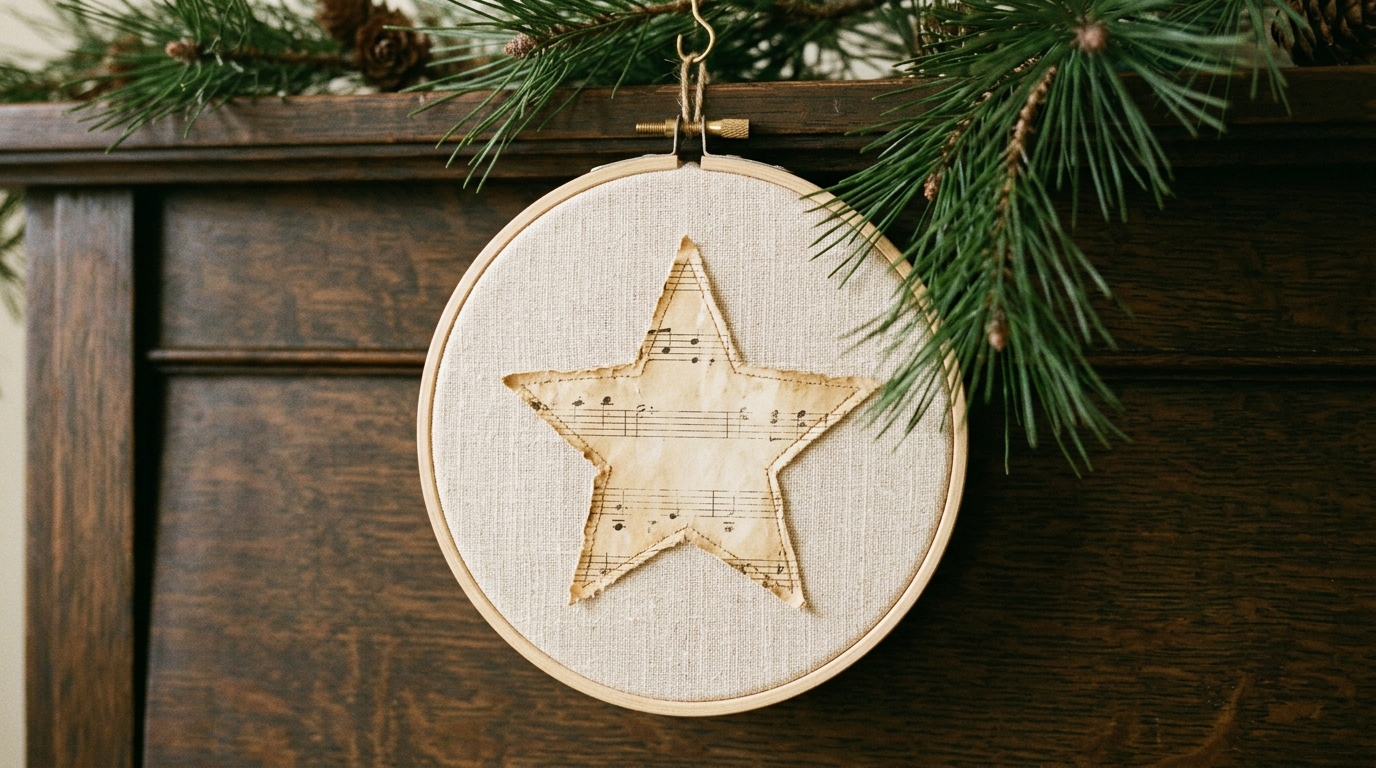
Old sheet music from a thrift store makes some of the prettiest holiday decor around. The yellowed paper and tiny notes feel warm and nostalgic. Cut a five point star, glue it onto cream linen and clamp it in a hoop. A light coat of decoupage medium over the paper keeps it strong. Hang it from the piano or a music stand, and see more Christmas piano decor ideas to finish the corner. Use a copied page if the music is precious to you.
You will need: 6 inch hoop, cream linen, old or copied sheet music, star template, decoupage medium, foam brush, ribbon.
How to make it: 1. Trace and cut the star from the music page. 2. Brush decoupage medium on the back and press it onto the linen. 3. Brush a thin coat on top and let it dry. 4. Clamp the linen in the hoop and add a ribbon.
A Pet Photo Ornament With a Striped Fabric Border

Nothing gets more smiles on the tree than a photo of the family dog in the snow. Print a small round photo, glue it to the center of striped fabric and clamp it in a tiny hoop. The fabric ring frames the picture like a mat. Make one for every pet, grandchild or new baby, and write the year on the back. If you want more photo ideas, try these printed Christmas ornaments. They also make great gifts for grandparents.
You will need: 4 inch hoop, a printed photo, red and white striped fabric, glue stick, small paint pen for the back, red ribbon.
How to make it: 1. Cut the photo into a circle about one inch smaller than the hoop. 2. Glue it to the fabric center. 3. Clamp the fabric in the hoop and trim the back. 4. Write the year on the back and add a ribbon.
Burlap With a Painted Reindeer Silhouette
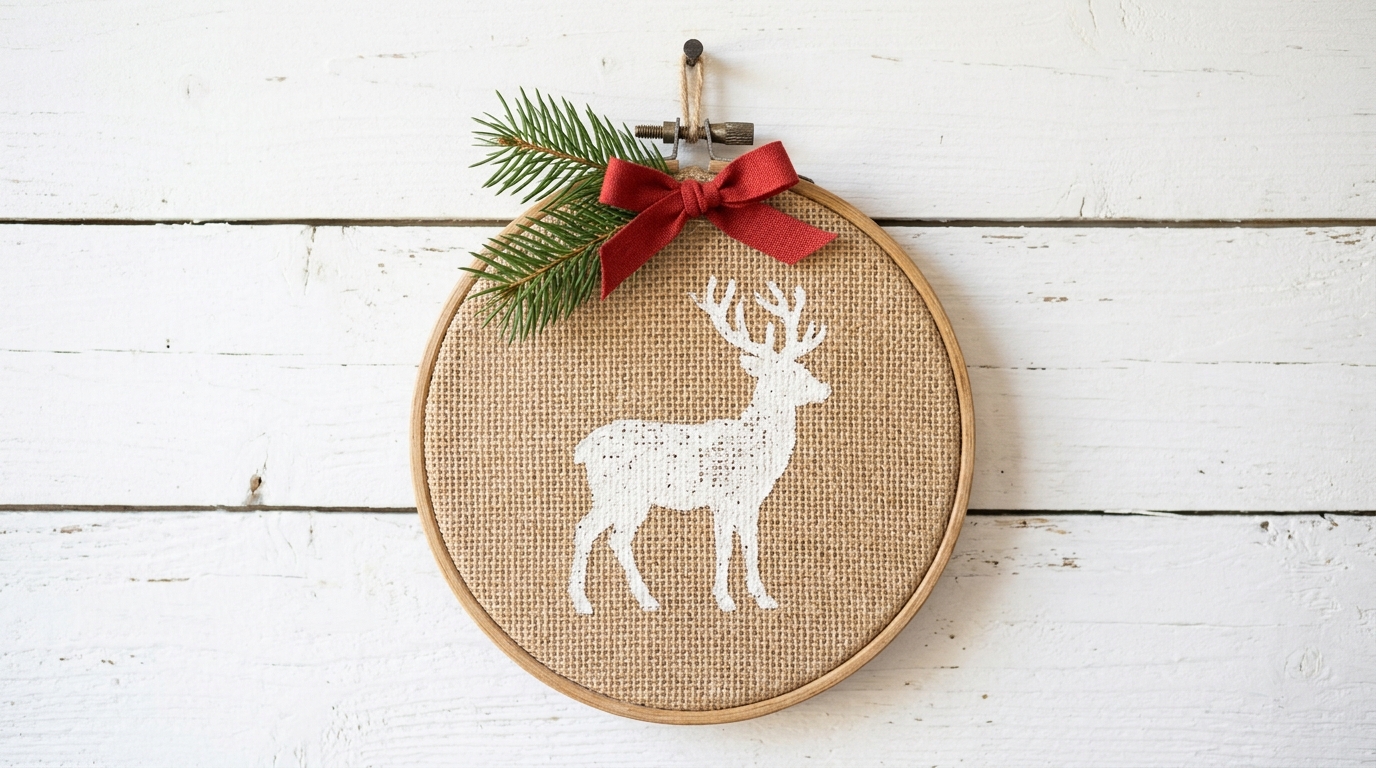
Burlap gives instant farmhouse charm and costs almost nothing. A white reindeer painted with a stencil looks crisp and modern against the rough weave. Dab the paint with a sponge instead of brushing so it does not bleed into the fibers. Add a pine sprig and a little red bow at the clasp to finish it. A steady hand is all you need, and you can practice on these hand painted ornaments first. Make a pair to hang on either side of a window.
You will need: 8 inch hoop, natural burlap, reindeer stencil, white craft paint, round sponge dauber, painter’s tape, faux pine sprig, red ribbon.
How to make it: 1. Clamp burlap in the hoop. 2. Tape the stencil in the center. 3. Dab white paint lightly, then lift the stencil while wet. 4. Let it dry and glue on the pine and bow.
Embroidery Hoop Christmas Crafts as a Ribbon Wrapped Garland
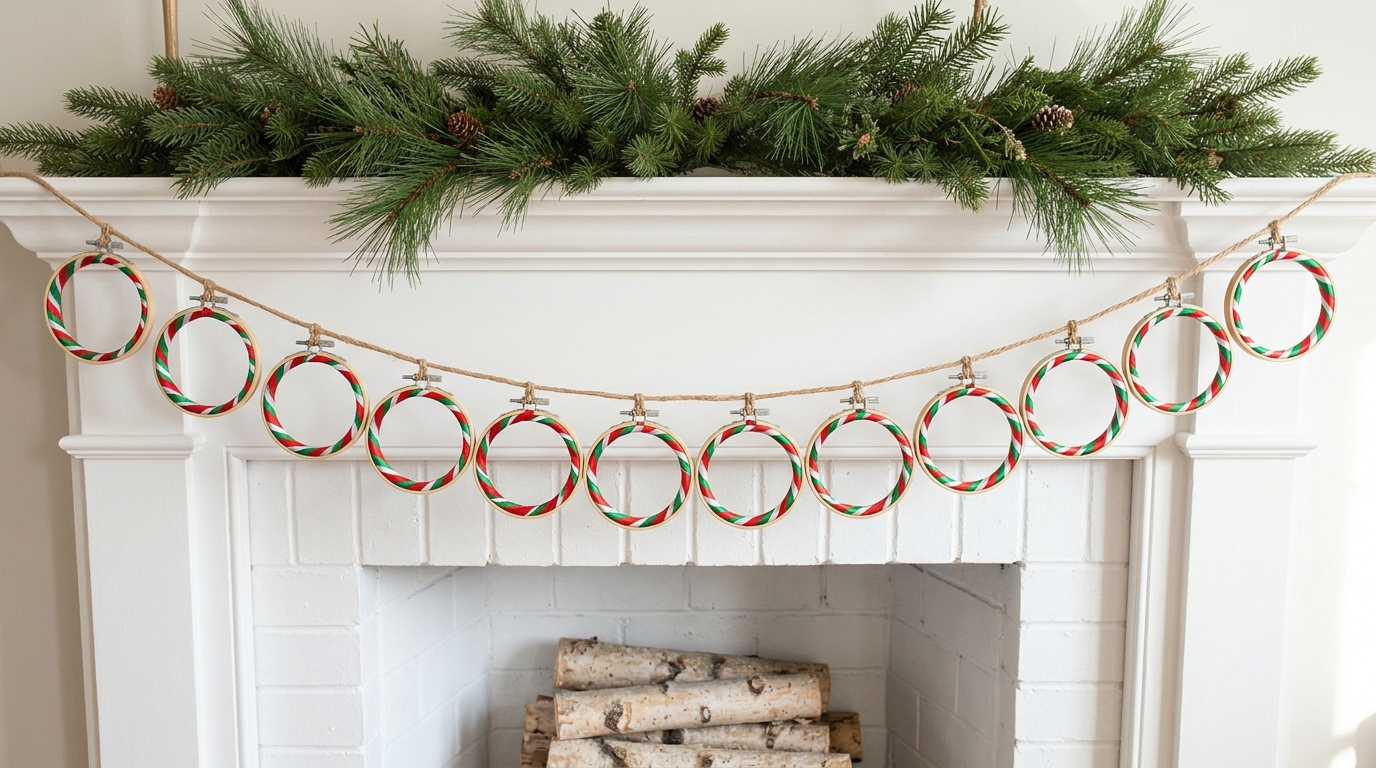
Twelve small hoops wrapped in red, white and green ribbon make a garland that looks like candy across the mantel. Use only the inner rings, so a pack of hoops gives you twice as many pieces. Wrap each ring tight, glue the ribbon end, and string them on jute twine with a small knot between each one so they stay spaced. Of all the Embroidery Hoop Christmas Crafts here, it is the easiest for little hands. For more mantel ideas, browse this DIY Christmas garland roundup.
You will need: Twelve 3 inch hoops, red, white and green satin ribbon, fabric glue, jute twine, scissors.
How to make it: 1. Separate the hoops and keep the inner rings. 2. Dab glue on the ring and wrap ribbon tightly all the way around. 3. Glue the end and let it dry. 4. Knot each ring onto the twine about four inches apart.
Pressed Fern Between Two Layers of Tulle
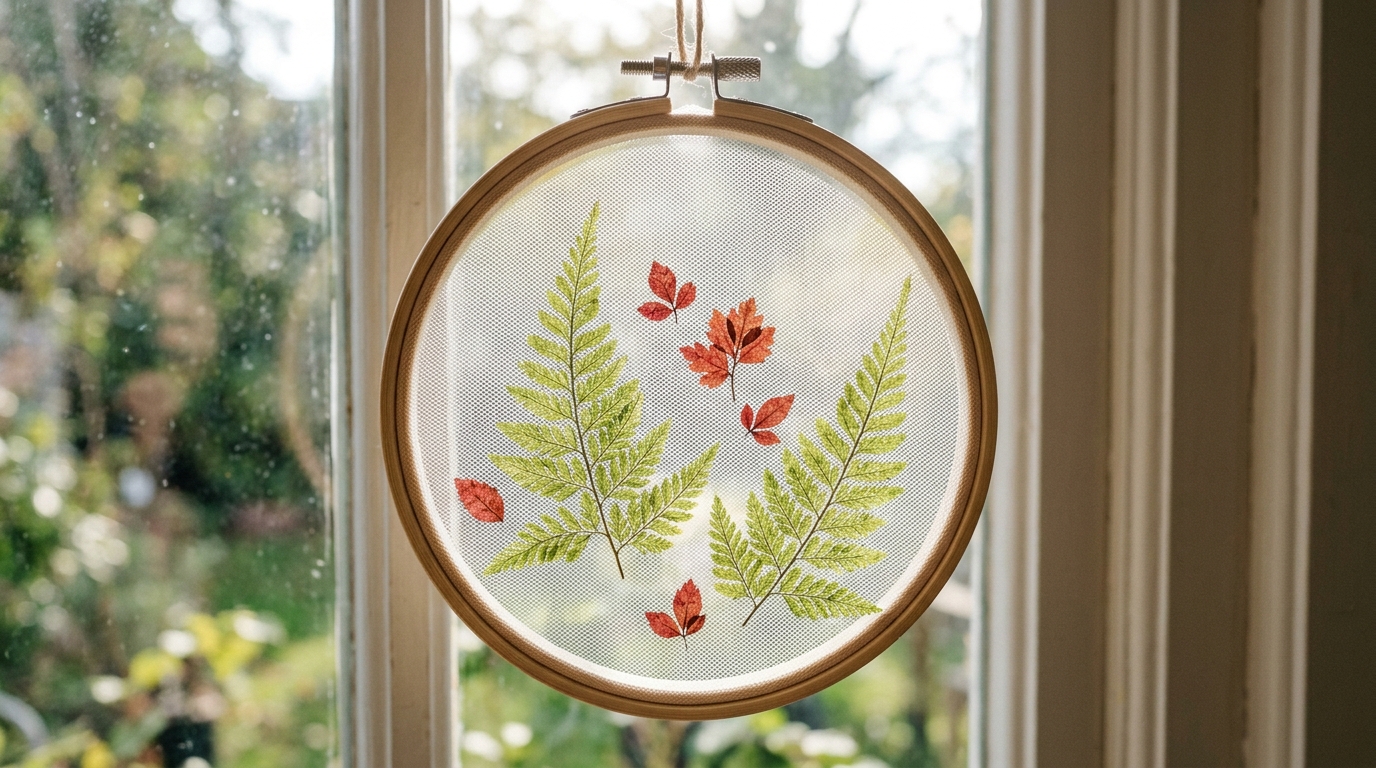
This one feels like a little piece of the winter woods in your window. Sandwich pressed fern fronds and a few tiny red leaves between two layers of sheer tulle, then clamp it all in the hoop. Light shines right through and shows every vein. Press the plants in a heavy book for a week first so they stay flat. If you love nature crafts, you will enjoy these pressed flower crafts too. It works beautifully on a kitchen window over the sink.
You will need: 6 inch hoop, white tulle, pressed fern fronds and small leaves, a heavy book, a tiny dab of clear glue, thread for hanging.
How to make it: 1. Press the fern and leaves for about a week. 2. Lay one tulle layer on the inner ring and arrange the plants. 3. Place the second tulle layer on top. 4. Press the outer ring down, tighten and trim.
A Felt Gingerbread House on Mint Fabric
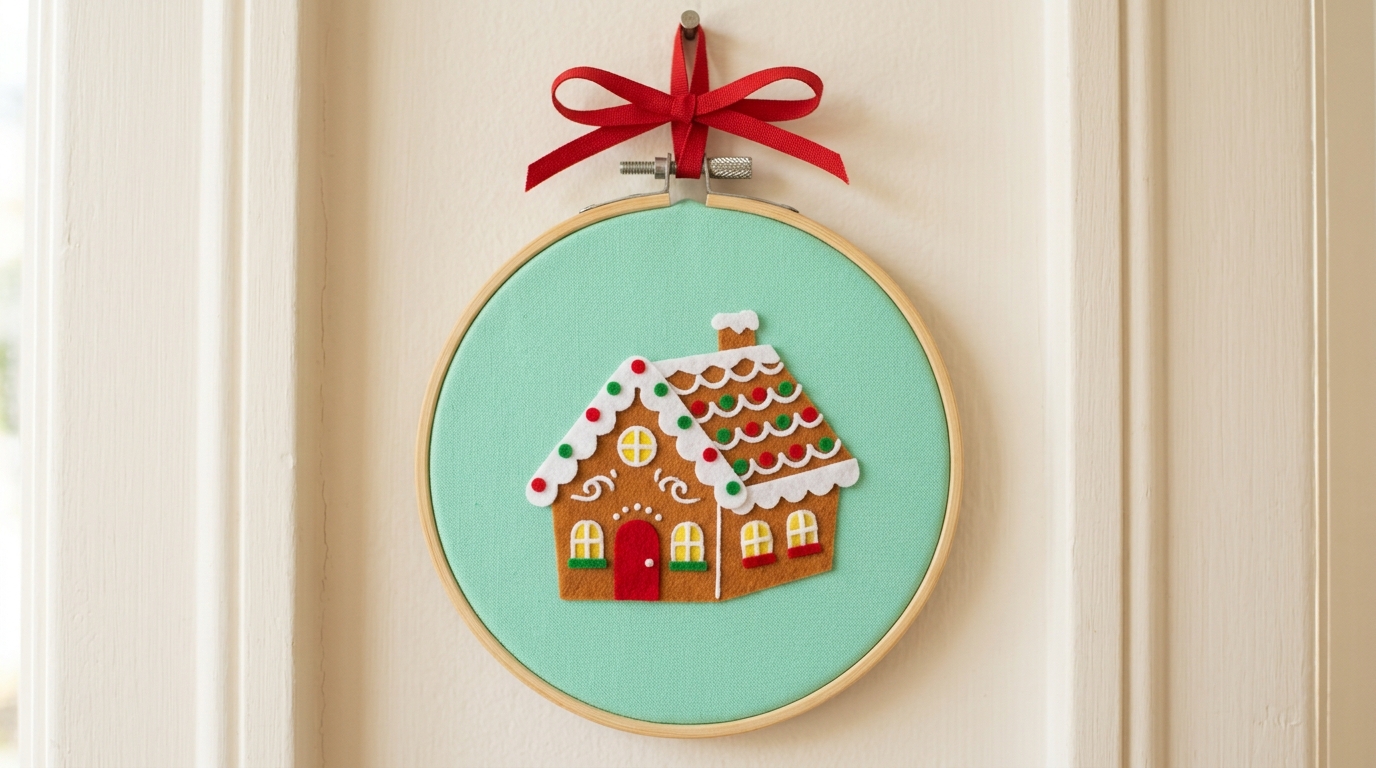
Mint green and gingerbread brown is the sweetest retro color combo. Cut a little house from brown felt, add white felt icing along the roof with wavy scissors, and glue on red and green felt candy dots. No piping bag needed and no crumbs. It is perfect for a kitchen wall or a baker’s tree. For more sweet ideas, take a look at these gingerbread Christmas decor pieces. Kids love designing their own house fronts.
You will need: 6 inch hoop, mint green cotton fabric, brown, white, red and green felt, wavy edge scissors, paper punch for the dots, fabric glue.
How to make it: 1. Clamp the mint fabric in the hoop. 2. Cut the house, roof trim and door from felt. 3. Punch the candy dots from red and green felt. 4. Glue everything in place and add a red ribbon.
Tiny Ornaments on a White Branch Display
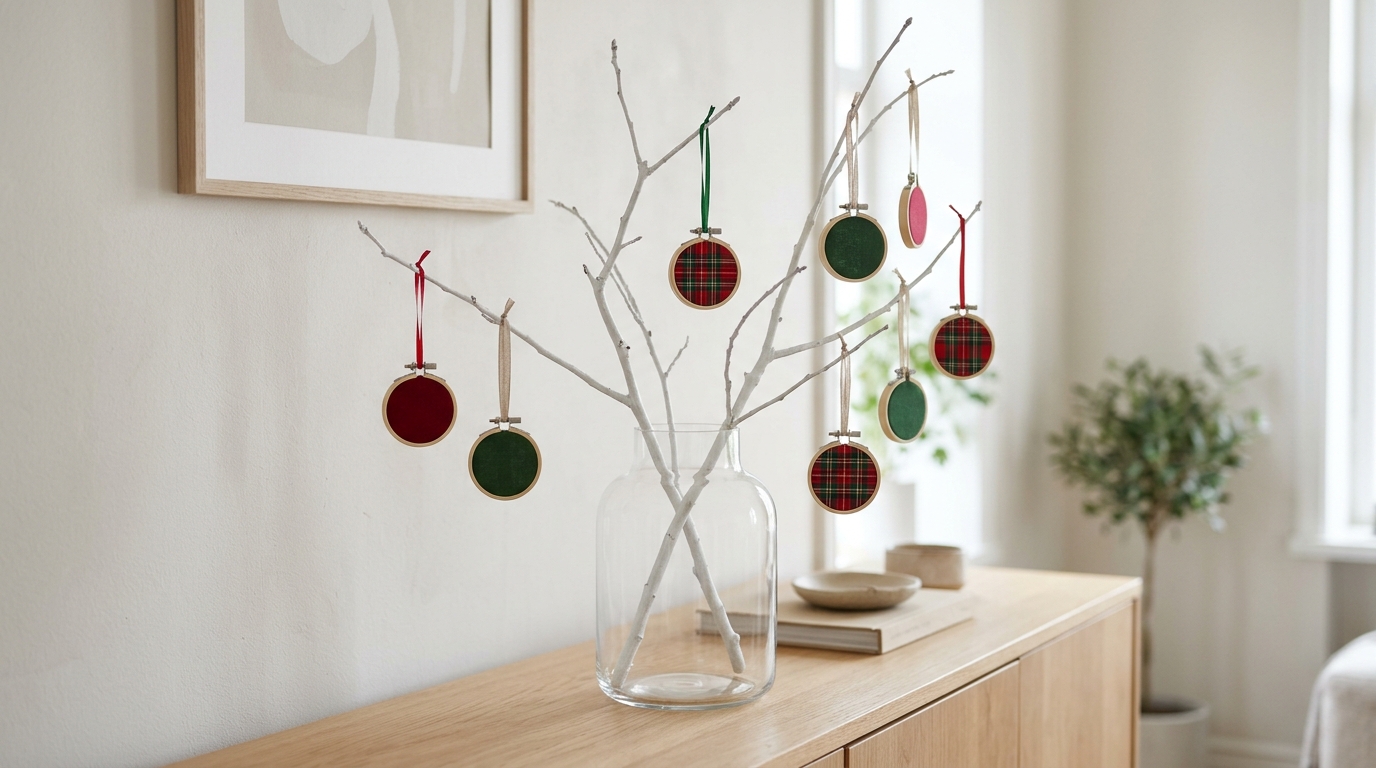
No room for a big tree? A white branch in a vase holds a full collection of tiny ornaments. Paint a fallen branch white, stand it in a clear vase filled with white beans, and hang mini fabric rings from it. It looks Scandinavian, clean and calm. Keep the colors simple, two or three fabrics at most. For more ideas with sticks and twigs, see this branch Christmas decor gallery. It also works on a desk at work.
You will need: A sturdy fallen branch, white spray paint, a clear vase, dried white beans, eight 2 or 3 inch hoops, fabric remnants, thin ribbon.
How to make it: 1. Spray the branch white outdoors and let it dry. 2. Fill the vase with beans and stand the branch in it. 3. Make mini fabric ornaments in the hoops. 4. Hang them on thin ribbons along the branches.
Embroidery Hoop Christmas Crafts With a Felt Poinsettia
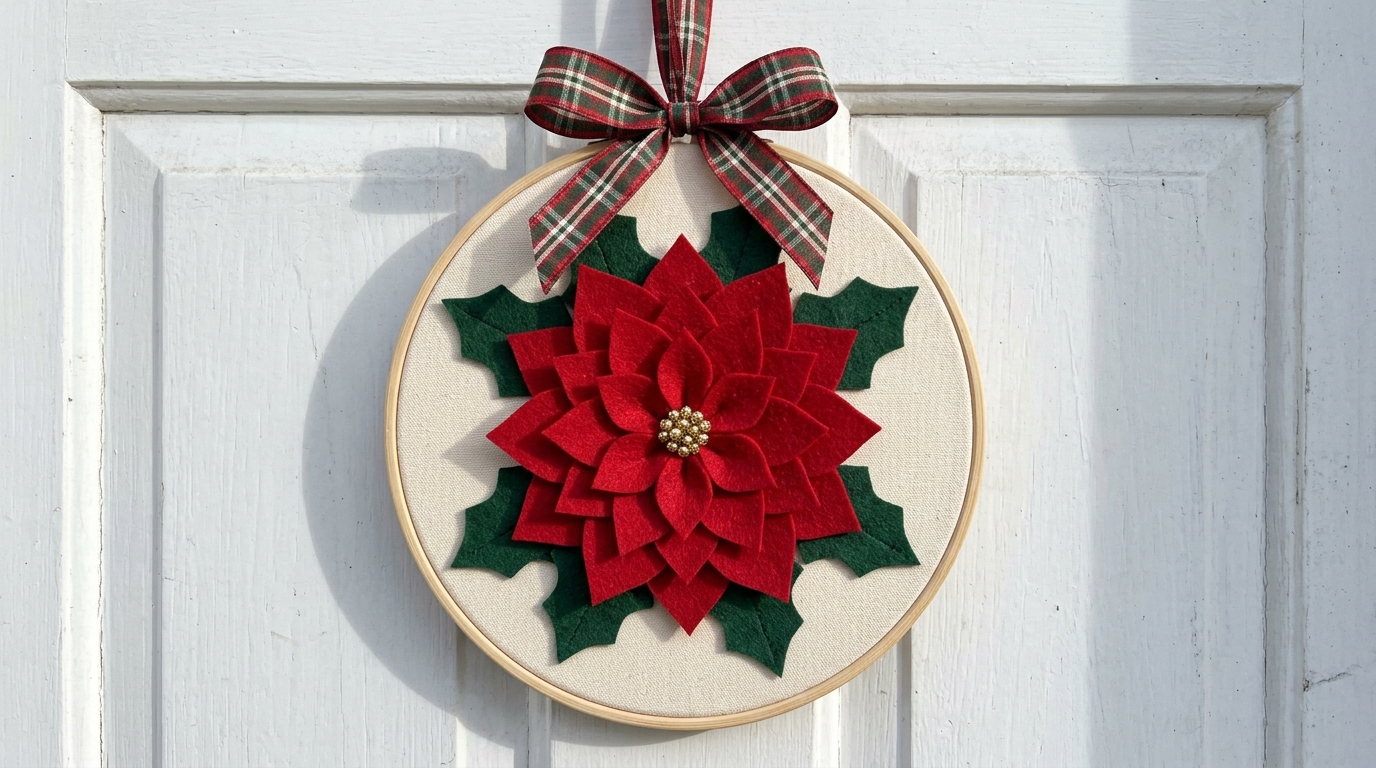
A felt poinsettia never wilts, drops leaves or worries the cat. Cut two layers of red petals, one slightly smaller, then pinch the base of each petal with a dot of glue so it cups and looks real. Stack the layers, add green leaves and finish the center with gold beads. It looks lovely on a white door with a plaid bow. Love this flower? See more poinsettia Christmas decor ideas. Make a smaller one as a napkin ring topper.
You will need: 8 inch hoop, cream fabric, red and dark green felt, petal templates, small gold beads, fabric glue or low temp glue gun, plaid ribbon.
How to make it: 1. Clamp cream fabric in the hoop. 2. Cut eight large and eight small petals plus five leaves. 3. Pinch and glue each petal base, then glue the layers in a circle. 4. Add leaves and glue gold beads in the center.
A Fluffy Rag Wreath From Leftover Fabric
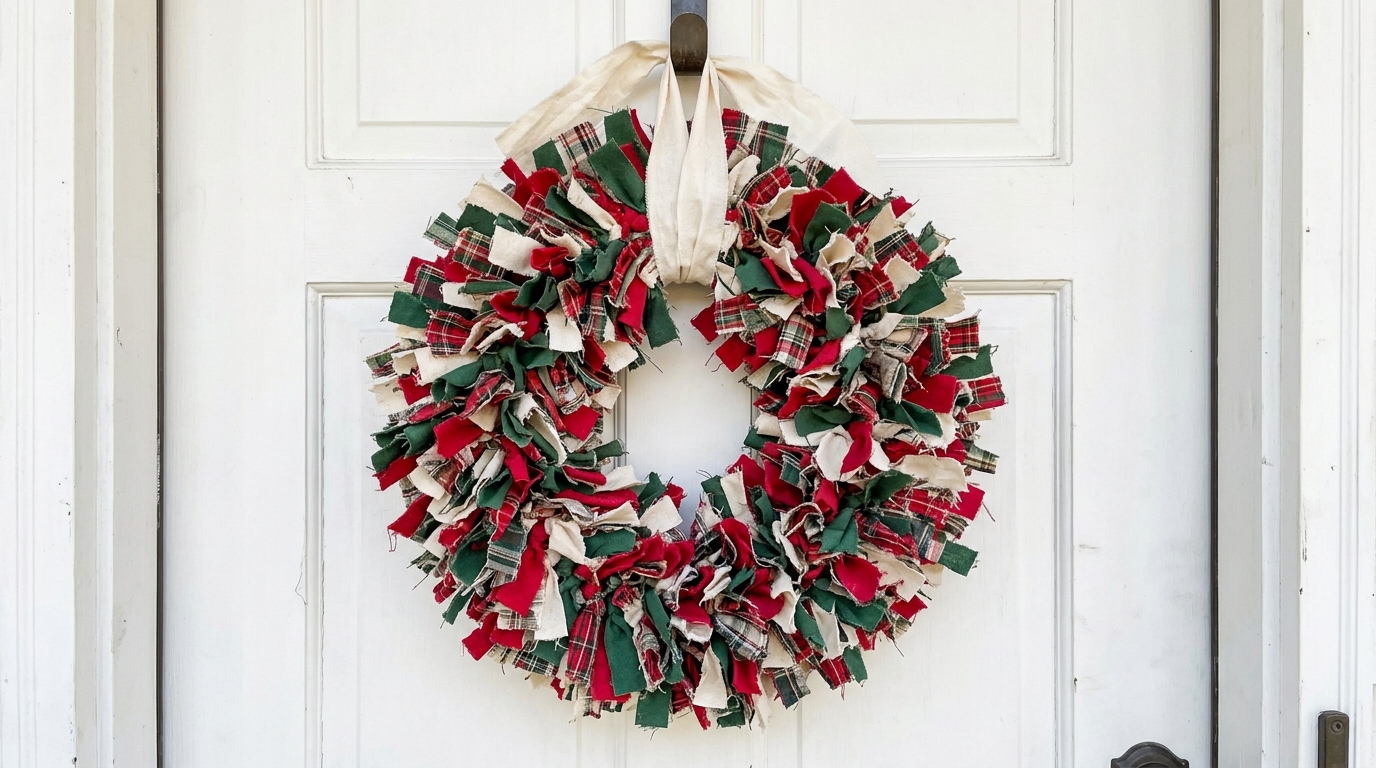
Grandma’s leftover fabric bag is the secret to this fluffy, full rag wreath. Cut fabric into short strips and tie them around a big hoop, pushing each knot tight against the last. Hundreds of little ends puff out and make it look rich and abundant. Mix reds, greens, cream and plaid for a cheerful farmhouse look. It is a perfect movie night project, and you can find more leftover fabric Christmas ideas to use up the rest. No sewing at all, just simple knots.
You will need: One 12 to 14 inch hoop (inner ring), about 1 yard of mixed fabric remnants, sharp scissors or a rotary cutter, cream ribbon for hanging.
How to make it: 1. Cut the fabric into strips about 1 inch wide and 6 inches long. 2. Tie each strip around the ring with a single knot. 3. Push the knots close together as you go. 4. Fluff the ends and add a ribbon hanger.
A Felt Cardinal on Buffalo Check
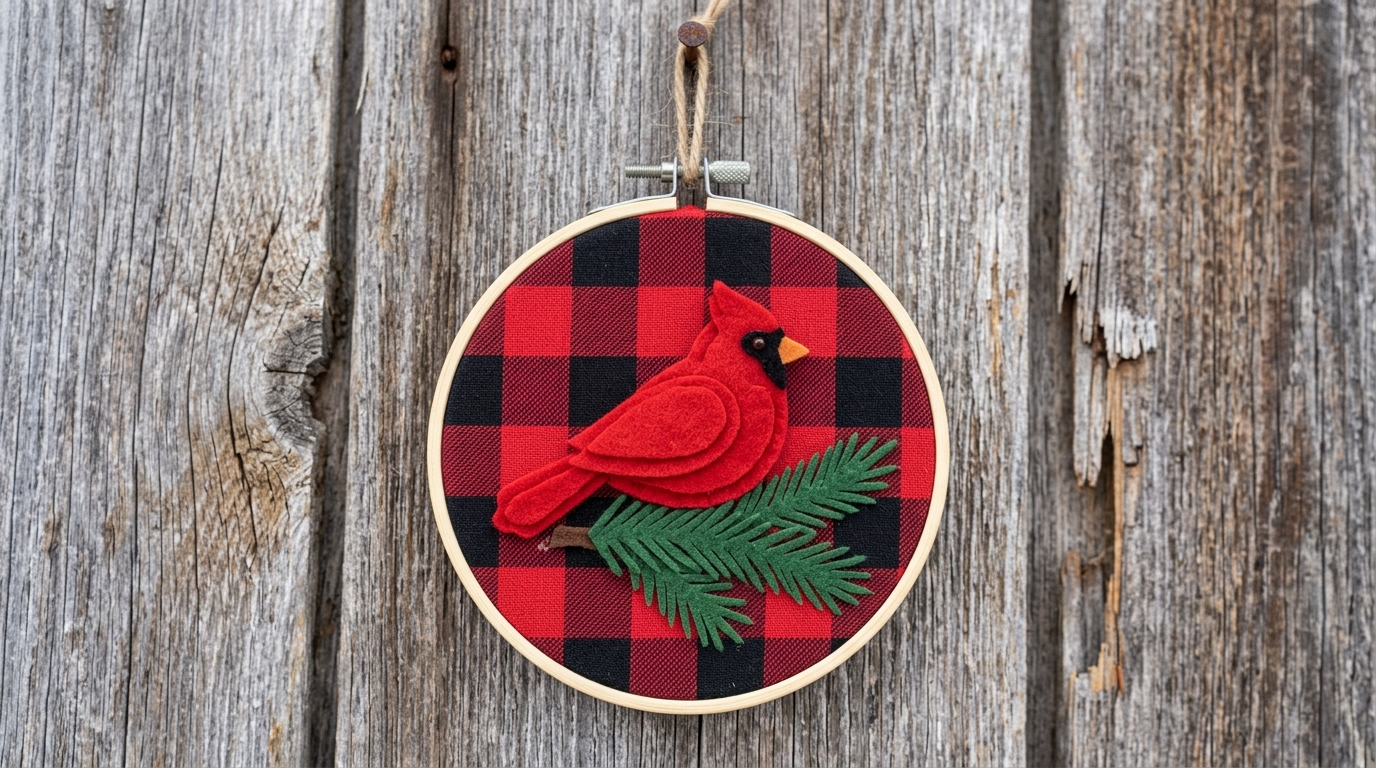
Cardinals are a winter favorite, and many people see one as a sweet reminder of loved ones at Christmas. A plump felt bird on red and black buffalo check looks cozy and heartfelt. Cut the body, wing and crest from red felt, add a small black face patch and an orange beak, and perch it on a felt pine branch. It makes a thoughtful gift for a grieving friend. If you love these birds, help the real ones with these DIY bird feeders this winter.
You will need: 6 inch hoop, red and black buffalo check fabric, red, black, orange and green felt, bird template, fabric glue.
How to make it: 1. Clamp the buffalo check in the hoop. 2. Glue the green felt branch across the lower half. 3. Cut and layer the cardinal pieces, then glue them on the branch. 4. Add a tiny black bead eye and a ribbon.