Red and Gold Christmas Decor: 16 Old Hotel Lobby Ideas That Look Rich for Less
Red and gold Christmas decor is having a big comeback this year, and it is easy to see why. The pairing feels warm, rich and a little bit grand, like walking into an old hotel lobby where the tree reaches the ceiling and every bow is perfect. The best part is that the look comes from paint, ribbon and thrift finds much more than from money. A can of metallic spray paint turns pine cones, branches and old frames into gilded treasures, and a few yards of good red ribbon do the rest. Below you will find 16 projects for the tree, the mantel, the door and the table, each with a supply list and simple steps. Mix and match them, and your home will glow with red and gold Christmas decor that looks far richer than it cost..
Red and Gold Christmas Decor Starts With a Hotel Lobby Tree

Grand hotels have always known the trick: pick two colors and repeat them everywhere. Here a full tree gets long cascades of wide red velvet ribbon running from the top to the bottom branches, with shiny gold and red ornaments filling the spaces between. A big bow on top with long tails finishes the look. Wrap the gifts under the tree to match, and the entire room feels planned, which is the secret of good red and gold Christmas decor. If you love deeper tones, compare this with our rich burgundy holiday look and borrow ideas from both..
You will need: a full artificial tree, 4 rolls of wide red velvet ribbon, 30 gold and red ornaments in mixed sizes, florist wire, wire cutters
How to make it: 1. Start at the top and tuck one end of ribbon into the branches. 2. Let it fall in a loose S curve to the bottom, pinching it into the branches every foot. 3. Repeat with three more ribbons spaced evenly around the tree. 4. Fill the gaps with ornaments, big ones deep inside and small ones on the tips.
Metallic Painted Pine Cones
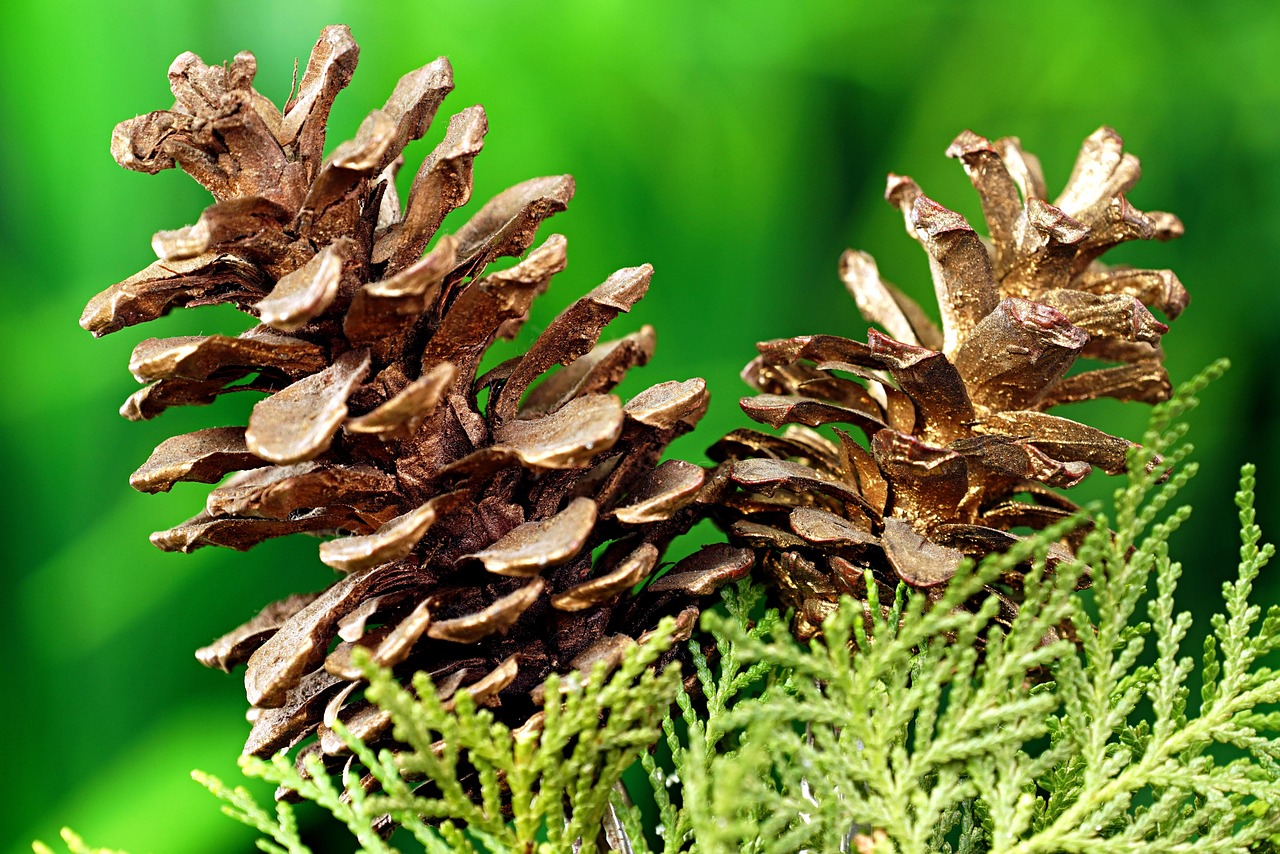
Pine cones are free on almost any walk, and a light coat of metallic paint turns them into little treasures. The trick is to brush the paint only on the tips of the scales, so the natural brown still shows underneath. That two tone finish looks far more natural than a solid spray coat, and it is one of the cheapest ways to start your red and gold Christmas decor. Pile them in a red bowl, tuck them into garland, or tie them to the tree with red ribbon. For more ideas with natural finds, see our cozy woodland holiday ideas.
You will need: dry pine cones, metallic gold craft paint, a small flat brush, a red bowl, newspaper
How to make it: 1. Bake clean pine cones at 200 F for 30 mins to dry them and open the scales. 2. Let them cool, then dry brush gold paint across the tips only. 3. Let them dry for an hour and arrange them in a red bowl or along a mantel.
Gold Leaf Red and Gold Christmas Decor Ornaments

Plain red ornaments from the dollar store can look like heirlooms with a few flakes of imitation gold leaf. Artisans have used this paper thin metal for centuries on frames and furniture, and it is surprisingly easy to handle at home. Brush on a little size glue, press the leaf down, and rub away the extra with a soft brush. The torn, uneven edges are the charm, so do not aim for perfect. A bowl of these is red and gold Christmas decor at its most elegant. This is a sweet twist on our hand painted ornament ideas.
You will need: plain red ornaments, imitation gold leaf sheets, gilding size or leaf glue, a soft dry brush, a small craft brush
How to make it: 1. Brush size glue in bands or random patches and wait until it turns tacky, about 15 mins. 2. Lay a sheet of leaf over the glue and press it down gently. 3. Brush off the loose flakes and seal with a light coat of clear spray if you like.
Metallic Ornaments on a Bed of Faux Snow

A coffee table or sideboard tray looks instantly festive when you build a little snowy scene on it. Spread a layer of faux snow, then set big gold ornaments on top and curl red ribbon around them. Add a few sprigs of evergreen and some sparkly snowflakes to fill it out. This is red and gold Christmas decor you can finish in one afternoon. Everything here is shatterproof, so it is safe for homes with kids and pets. If you want more ideas for this spot, browse our coffee table holiday ideas.
You will need: a large tray, a bag of faux snow, 5 big gold ornaments, red curling ribbon, evergreen sprigs, snowflake picks
How to make it: 1. Spread the faux snow across the tray in an even layer. 2. Nest the big ornaments in the snow in a loose line. 3. Curl lengths of ribbon with a scissor blade and tuck them between the ornaments with the greenery.
Gilded Thrift Frames With Red and Gold Christmas Decor Wreaths
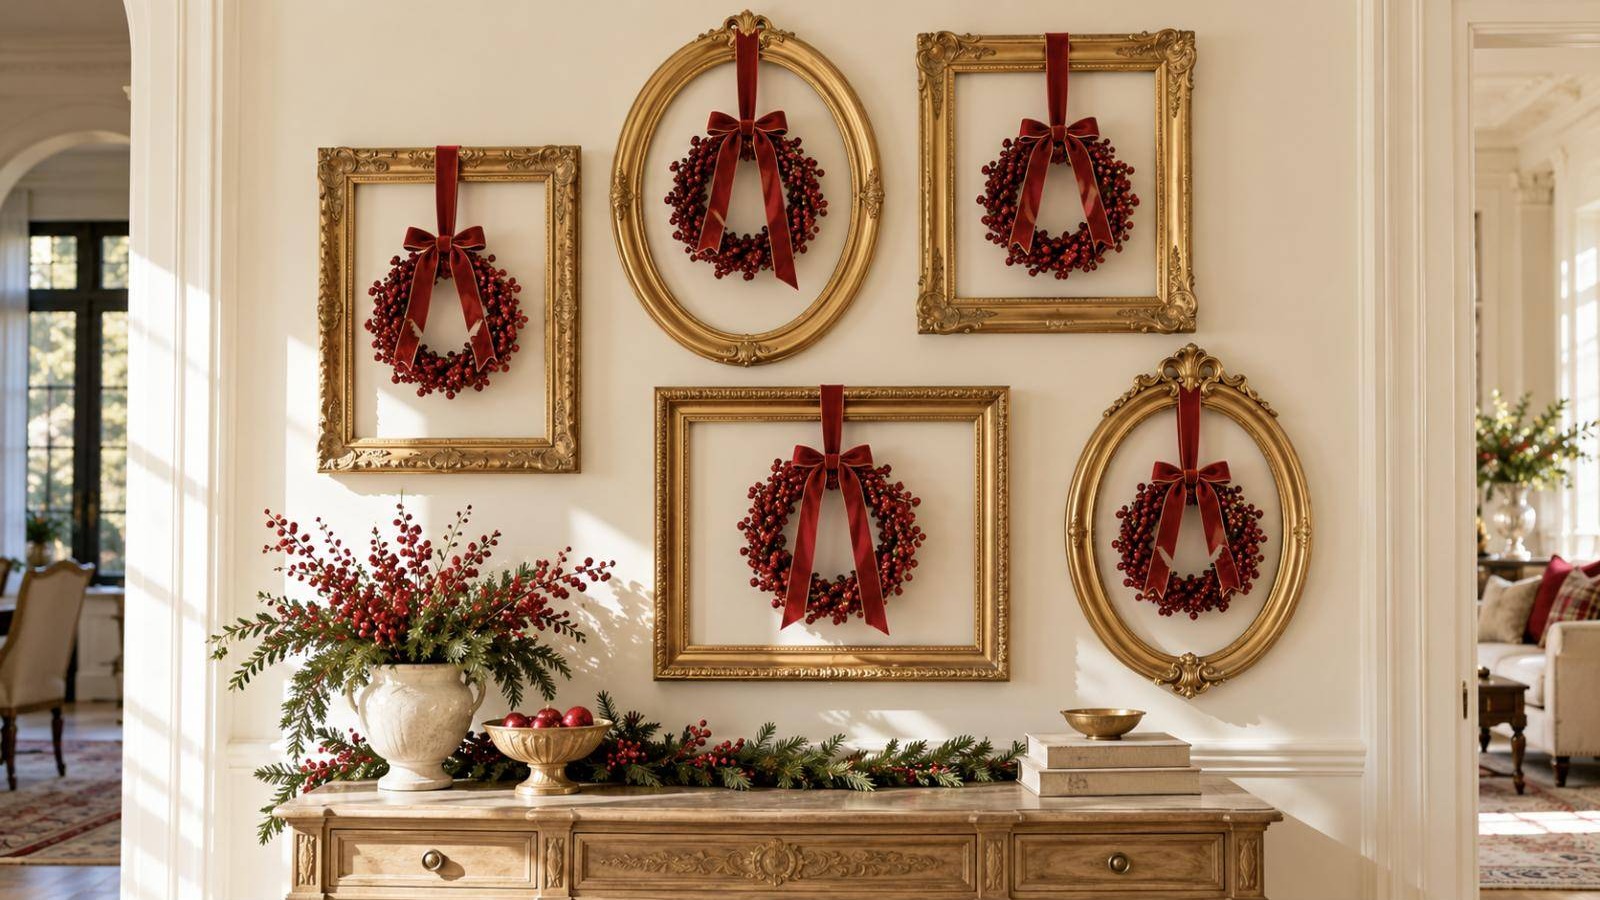
Thrift stores always have a stack of old picture frames for a dollar or two. Pull out the backing, spray the frames with metallic gold paint and hang them on the wall as a gallery. Then hang a small red berry wreath inside each frame. The effect is part museum, part holiday card, and it fills a big empty wall with red and gold Christmas decor for very little money. Find even more ways to use thrifted frames in our picture frame holiday crafts.
You will need: 5 thrifted frames in mixed sizes, metallic gold spray paint, 5 small faux berry wreaths, red ribbon, picture hooks
How to make it: 1. Remove the backs and panes from each frame and spray the frames gold outdoors. 2. Lay them on the floor to plan the layout, then hang them. 3. Tie a red ribbon loop to each wreath and hang it from a small nail centered inside each frame.
A Home Wrapping Station With Handmade Bows

Store bought bows can cost more than the gift inside. A roll of brown kraft paper, red satin ribbon and a pack of metallic bows turn every present into something that looks boutique wrapped. Keep everything in one basket near the tree so you can wrap a gift in a few mins whenever one arrives. Red and gold together read rich even on plain paper. Finish each present with one of our handmade gift tag ideas for a personal touch.
You will need: a roll of kraft paper, red satin ribbon, a spool of red curling ribbon, metallic gold bows, tape, scissors
How to make it: 1. Wrap each box in kraft paper with neat folded ends. 2. Tie red satin ribbon around both directions and knot it on top. 3. Press a gold bow over the knot and curl a few short lengths of ribbon beside it.
Red and Gold Christmas Decor Magnolia Leaf Wreath
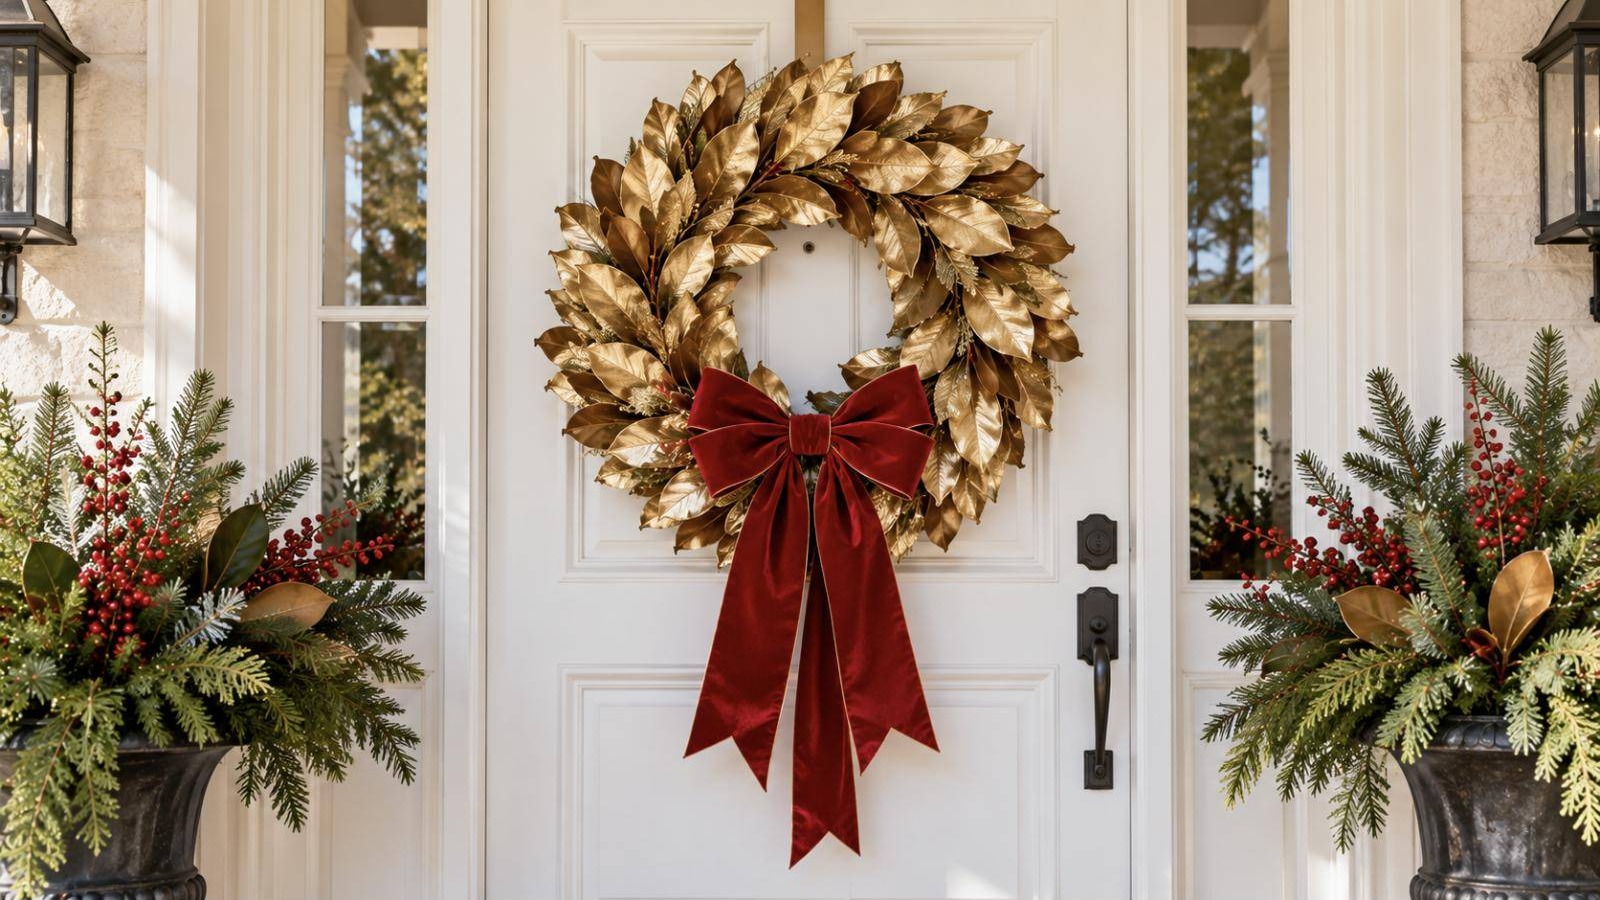
Magnolia leaves have glossy green tops and soft brown backs, and they look stunning with a light coat of metallic paint. Faux leaves work just as well and last for years. Wire them onto a plain wreath form, then finish with a big red velvet bow at the bottom. Hung on a white front door, this red and gold Christmas decor piece looks like it came from a fancy garden shop. For more ways to welcome guests, see our front porch holiday ideas.
You will need: a 20 inch wire or foam wreath form, about 80 faux magnolia leaves, metallic gold spray paint, florist wire, wide red velvet ribbon
How to make it: 1. Spray the leaves gold on one side and let them dry. 2. Wire small bundles of 3 leaves to the form, overlapping each bundle so no wire shows. 3. Tie a big velvet bow and wire it to the bottom of the wreath.
Velvet Ribbon Jingle Bell Hanger

A strip of velvet ribbon and a few jingle bells make a cheerful hanger for a doorknob or a cabinet handle. Every time someone opens the door, it rings a cheerful greeting to the season. Choose bells in two or three sizes and space them down the ribbon so they do not knock into each other. It takes about 10 mins, costs very little and carries the look from room to room. If you love the sound, our easy bell crafts have even more ideas.
You will need: 1 yard of red velvet ribbon, 5 gold jingle bells in mixed sizes, thin gold cord, a needle, a large bow
How to make it: 1. Fold the top of the ribbon into a loop and sew it closed. 2. Sew each bell onto the ribbon with gold cord, spaced about 4 inches apart. 3. Add a bow at the top of the loop and hang it on a knob.
Red and Gold Christmas Decor Branches in a Tall Vase

Bare branches from the yard become a striking display with a coat of metallic spray paint. Stand them in a tall red vase in the entry, and you have a statement piece that reaches almost to the ceiling. Hang a few small red ornaments from the twigs for extra color. It works well in tight spaces where a full tree will not fit, and it brings red and gold Christmas decor right to the front door. For more ideas with natural sticks, see our branch holiday displays.
You will need: 5 to 7 bare branches, metallic gold spray paint, a tall red floor vase, river rocks or sand for weight, small red ornaments
How to make it: 1. Trim the branches to about twice the height of the vase. 2. Spray them gold outdoors on a drop cloth, turning to coat every side. 3. Fill the vase with rocks, push the branches in and hang the ornaments.
Homemade Party Crackers

Crackers are a beloved tradition at British holiday tables, and homemade ones are easy to make with paper towel tubes. Wrap each tube in red paper, twist the ends, and tie them with gold ribbon. Fill them with tiny treats, a paper crown and a joke written on a slip of paper. Set one on every plate for a festive start to dinner and a fun bit of red and gold Christmas decor on the table. Our full guide to homemade party crackers covers the snap strips and fun fillings.
You will need: cardboard tubes, red tissue or wrapping paper, gold ribbon, small wrapped treats, tissue paper crowns, cracker snaps (optional)
How to make it: 1. Cut each tube into three short pieces and line them up end to end. 2. Roll them in red paper and tape the seam. 3. Fill the middle tube, twist the paper between the tubes, slide the end tubes out and tie each twist with gold ribbon.
Red and Gold Christmas Decor Felt Tree Skirt

A tree skirt is the base of the entire tree, and a rich red one with metallic trim looks custom made. Felt or velvet both work, and felt does not fray, so you can cut it and glue it without any sewing. Add wide gold braid around the outer edge for a rich finish. It covers an ugly stand and gives gifts a clean, bright place to sit. Explore more styles in our easy tree skirt ideas.
You will need: 2 yards of red felt, 5 yards of gold braid trim, fabric glue, a string and a pencil, fabric scissors
How to make it: 1. Fold the felt into quarters, tie a pencil to a string and draw a quarter circle of about 26 inches, plus a small 3 inch one at the corner. 2. Cut both curves and one straight slit from the edge to the center. 3. Glue the gold braid around the outer edge and let it dry flat.
Glittered Poinsettias for the Tree

Poinsettias are the flower of the season, and faux ones with a touch of metallic glitter look lovely tucked into the tree. Clip the stems off and wire the blooms right onto the branches, or fill the gaps between ornaments. They add big blocks of color without any extra cost. Brush a little glue on the petal edges and dust them with fine glitter for sparkle. You will find more ways to use the flower in our poinsettia holiday ideas.
You will need: 10 faux red poinsettia stems, fine gold glitter, craft glue, a small brush, wire cutters, florist wire
How to make it: 1. Cut the blooms from the stems, leaving 2 inches of stem. 2. Brush glue along the petal edges and sprinkle glitter over a paper plate. 3. Let them dry, then wire each bloom to a branch.
Metallic Bead Garland on the Mantel

Long strands of gold bead garland add instant shine to a fireplace mantel. Lay down a base of fresh or faux evergreen, then lay the bead strands in soft swoops along it. Weave red satin ribbon through the greenery and tuck in red ornaments here and there. The beads catch the daylight and make the entire mantel glow without any electric lights. Find more styles in our holiday mantel ideas.
You will need: a 6 foot evergreen garland, 4 strands of gold bead garland, red satin ribbon, 12 red ornaments, mantel hooks or putty
How to make it: 1. Lay the evergreen along the mantel and secure the ends with hooks. 2. Hang the bead strands in loose curves of different lengths. 3. Weave ribbon through and tuck the ornaments into the greenery.
A Cozy Reading Corner Next to the Tree
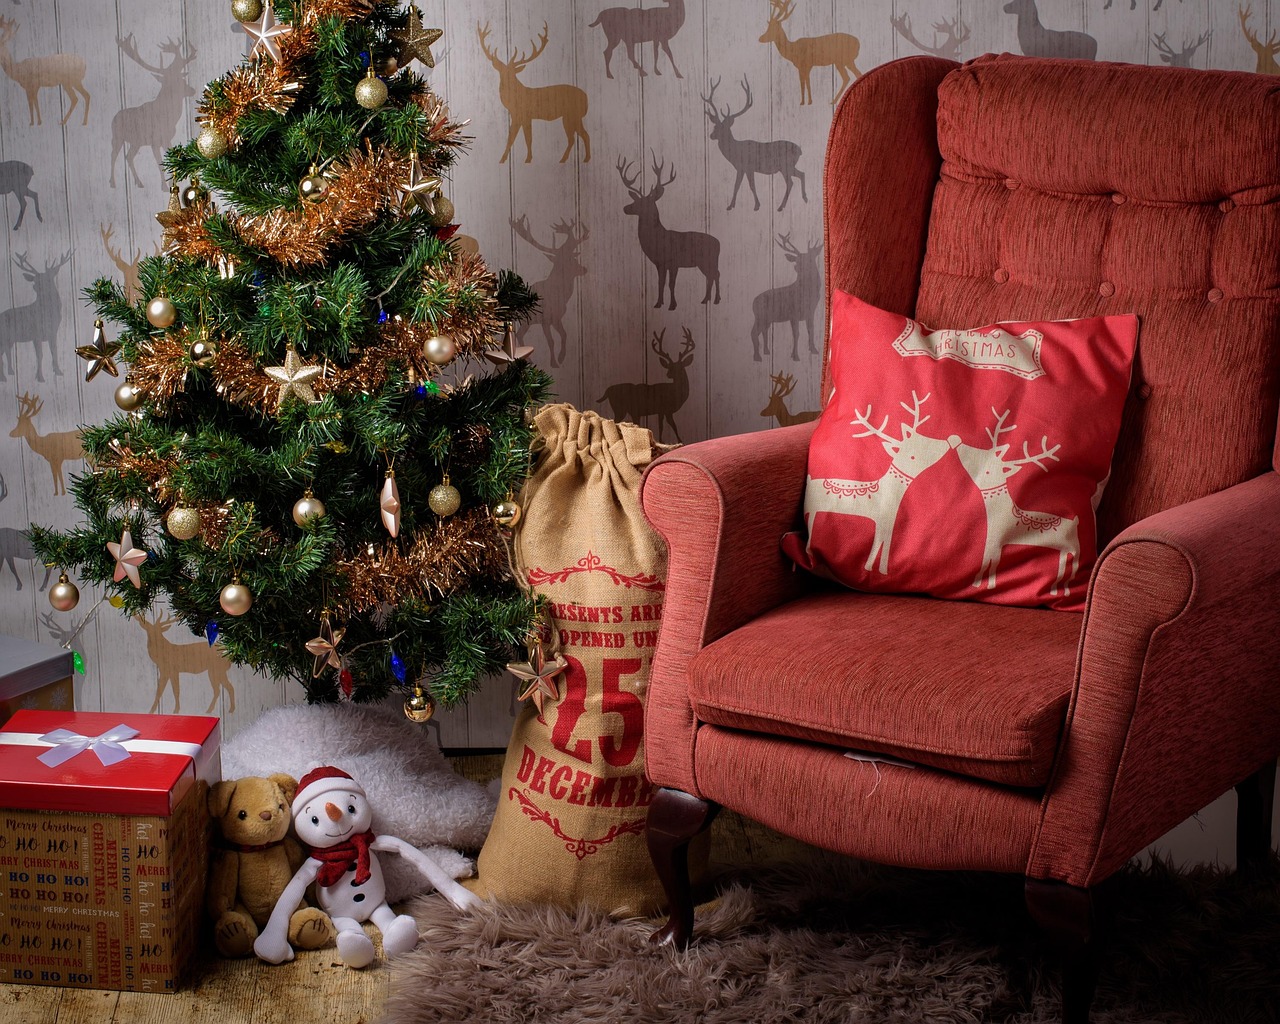
A red armchair next to a tree trimmed in gold creates the coziest corner in the house. Add a soft pillow, a holiday throw and a basket of books, and it becomes the spot everyone fights over on cold afternoons. Gold tinsel on the tree adds shine that bounces off the red fabric. You do not need a big room for this: one chair and a small tree are plenty. Read more space saving tips in our small space holiday ideas.
You will need: a red armchair or slipcover, a small tree, gold tinsel garland, gold and red ornaments, a holiday pillow, a throw blanket
How to make it: 1. Place the chair at an angle next to the tree so it faces the room. 2. Wrap the tree in tinsel and add ornaments. 3. Finish with a pillow, a throw and a basket of books beside the chair.
Big Velvet Bow Tree Topper

A huge bow is one of the easiest toppers to make, and it looks wonderful on a tree in red and gold. Use wired velvet ribbon with gold edges so the loops hold their shape. Make four or six big loops, wire them together at the center, and let two long tails fall down the branches. It looks like the toppers in old department store windows. For more topper styles, see our tree topper ideas.
You will need: 4 yards of wired red velvet ribbon with gold edges, florist wire, wire cutters, a pipe cleaner
How to make it: 1. Make 6 loops of about 10 inches each, pinching them together at the center. 2. Wrap the center tightly with florist wire. 3. Cut two long tails, wire them on the back, and attach the bow to the top with a pipe cleaner.
A Red Backdrop Behind the Tree

A plain wall behind the tree can make even a beautiful tree look small. Hang a length of deep red fabric or a temporary red panel behind it, and the gold ornaments suddenly pop. The backdrop also hides cords and bare walls in a rental. Choose a fabric with a soft sheen, and the corner will look like a grand hotel display. If you love bold color pairings, check out our red and white holiday look for another fun option.
You will need: 4 yards of red fabric or a red curtain panel, a tension rod or removable hooks, a steamer or iron
How to make it: 1. Steam the fabric smooth. 2. Hang it from a tension rod or removable hooks behind the tree. 3. Gather the bottom edge behind the tree so it looks full and tidy.