Pumpkin Carving Ideas: 15 Last Minute Designs That Steal the Show on Halloween Night
Pumpkin carving ideas are on almost everyone’s mind right now, and if your pumpkin is still sitting on the counter with no face yet, you are in good company. Halloween is just two days away, and on October 29, 2026, Pinterest Trends showed searches for carving ideas up more than 10,000 percent over the past month and about 200 percent in the last week alone. There is something sweet about a family gathered around a pile of pumpkins, drawing faces and laughing at the mess. Below are 15 designs that look amazing on a porch, from a classic toothy grin to a witch flying across the moon. A quick note before you start: an adult should do all the cutting, kids can draw the design and scoop out the seeds, and every pumpkin here glows with a battery LED light, never a candle..
Pumpkin Carving Ideas That Light Up the Whole Porch
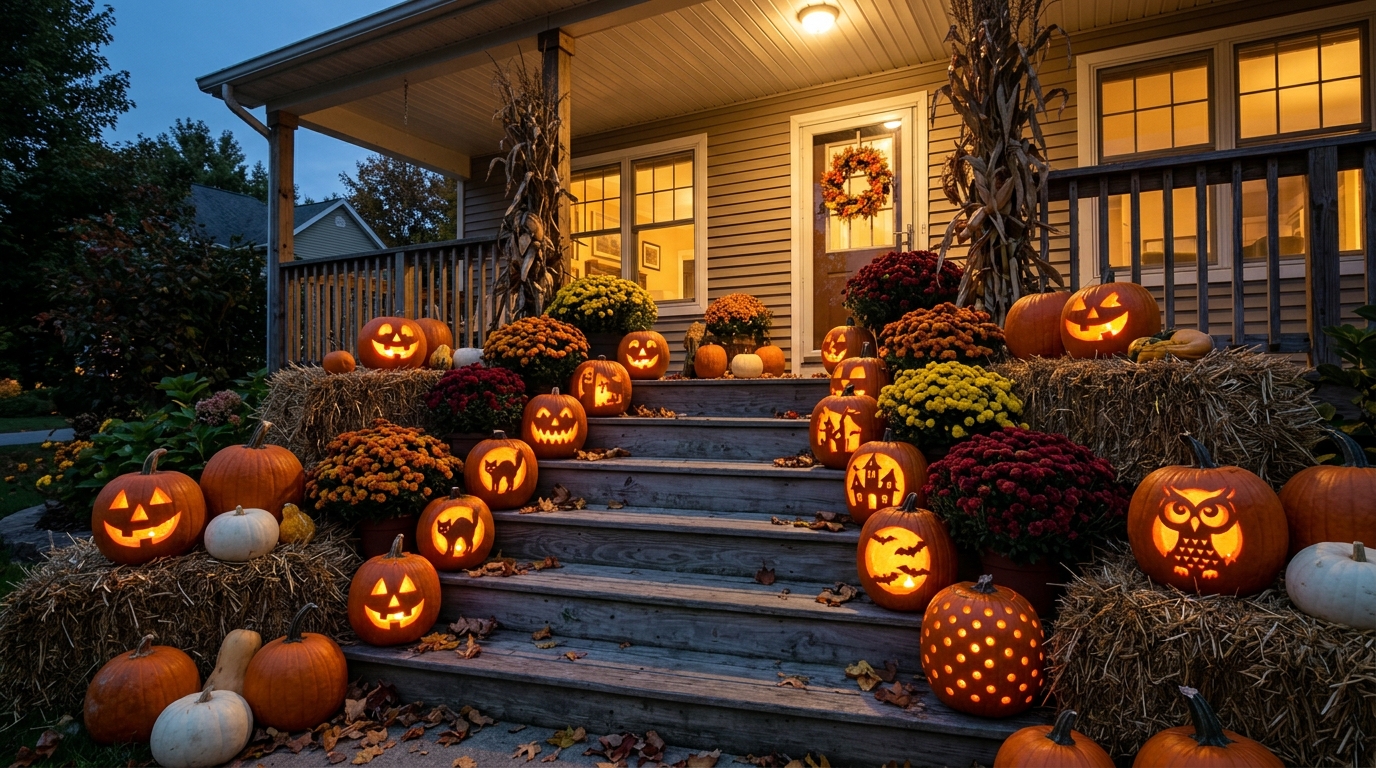
Before you pick one design, picture the finished porch. A group of carved pumpkins, each with its own personality, looks far more magical than a single face by the door. Mix a few big designs with smaller ones, add some mums or a hay bale, and set them on different steps so every glow can be seen from the street. The ideas below were picked to work well together, and the trend is real: Pinterest Trends shows carving searches climbing fast this week. Which step will get your first pumpkin..
You will need: Several fresh pumpkins in different sizes, a pumpkin carving kit (adult use only), a large spoon or scoop, a washable marker, and battery LED lights.
How to make it: 1. Choose four to six designs from this list that mix faces, shapes and patterns. 2. Kids draw each design with a washable marker, then an adult carves them. 3. Place the pumpkins on different steps, add LED lights and step back to see the glow from the sidewalk.
The Classic Toothy Grin Jack O Lantern
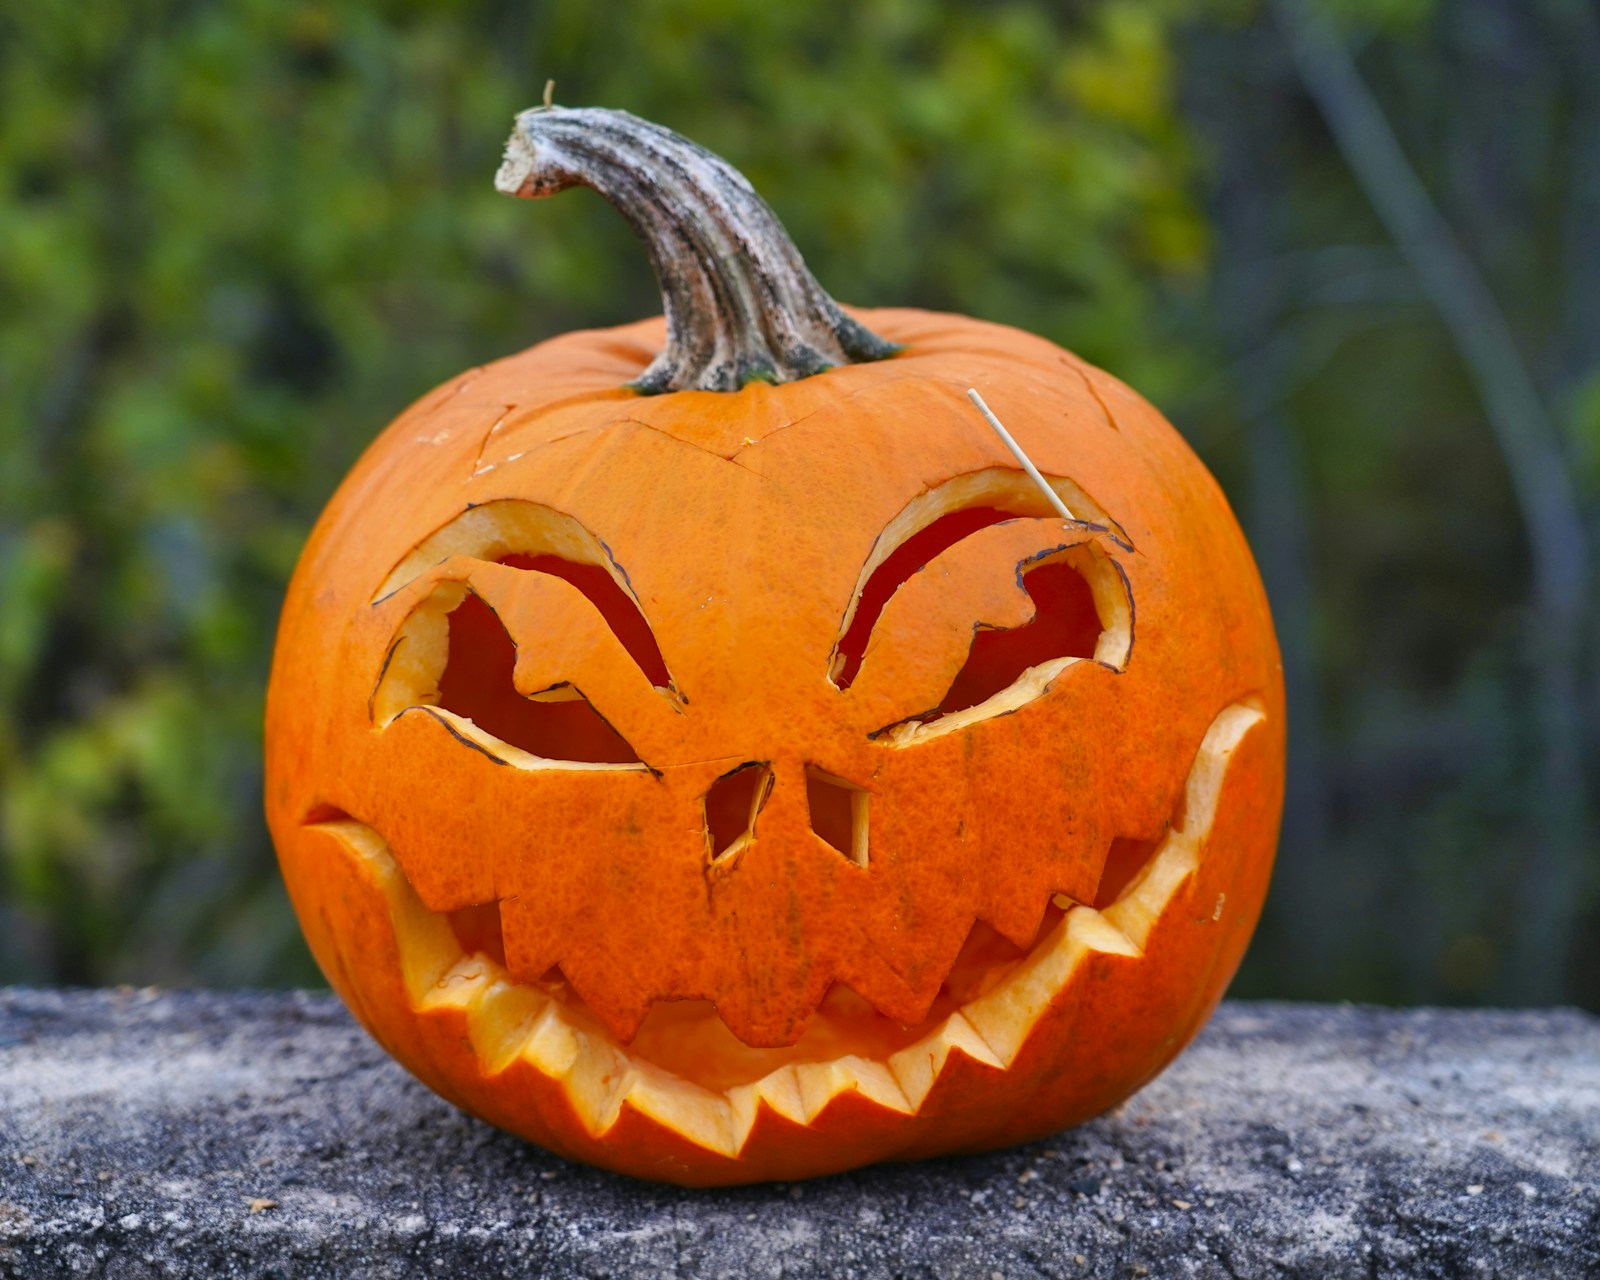
Of all the pumpkin carving ideas out there, some never go out of style, and the toothy grin is the king of them all. Pointed eyes, a little nose and a big smile with square teeth make a pumpkin that every child recognizes in a second. The trick to a clean look is leaving thick teeth, at least half an inch wide, so they do not snap off after a day or two. Draw the smile wide, almost from one side to the other, for maximum charm. Will your grin be friendly or a little bit mischievous?
You will need: A round orange pumpkin, a washable marker, a pumpkin carving kit (adult use only), a scoop and a battery LED light.
How to make it: 1. An adult cuts a lid around the stem, then kids scoop the seeds and scrape the front wall thin. 2. Draw two eyes, a nose and a wide smile with square teeth. 3. An adult carves the shapes slowly, keeping each tooth thick, then add the LED light.
Pumpkin Carving Ideas With a Black Cat Silhouette
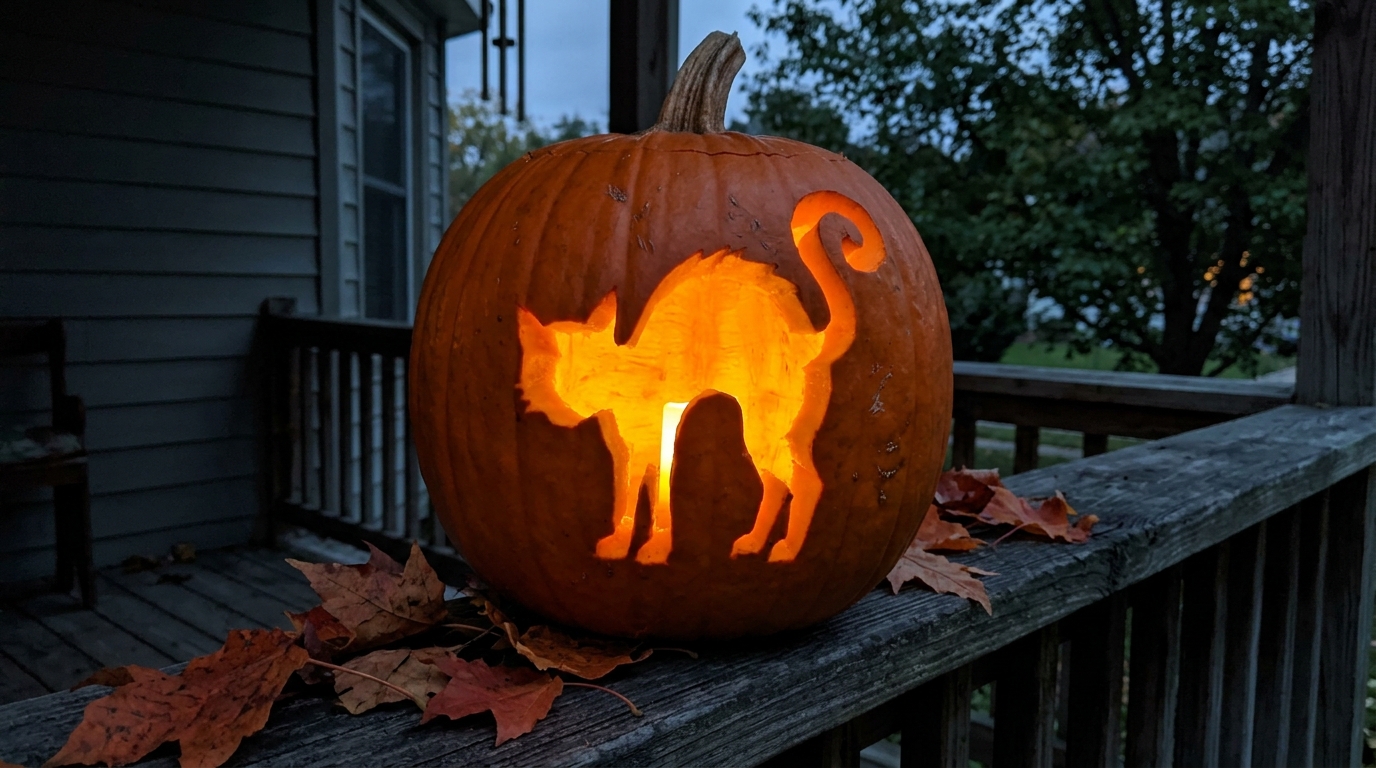
A black cat with an arched back and a curly tail is one of the most loved Halloween shapes, and it looks stunning carved into a pumpkin. Unlike a face, the cat is cut out as one bold shape, so the whole silhouette glows bright orange against the dark skin. Print a simple outline, tape it on and trace it with a pushpin. Keep the tail thick so it holds up well. It looks especially good on a porch rail or a windowsill. Do you have a real cat who might come to inspect it?
You will need: A medium pumpkin, a printed cat outline, tape, a pushpin, a carving kit (adult use only), a scoop and a battery LED light.
How to make it: 1. Scoop the pumpkin and tape the printed cat on the smoothest side. 2. Poke small holes along the outline with a pushpin, then remove the paper. 3. An adult connects the dots with a small carving saw and pushes the cat shape out, then add the light.
A Haunted House Scene That Tells a Story
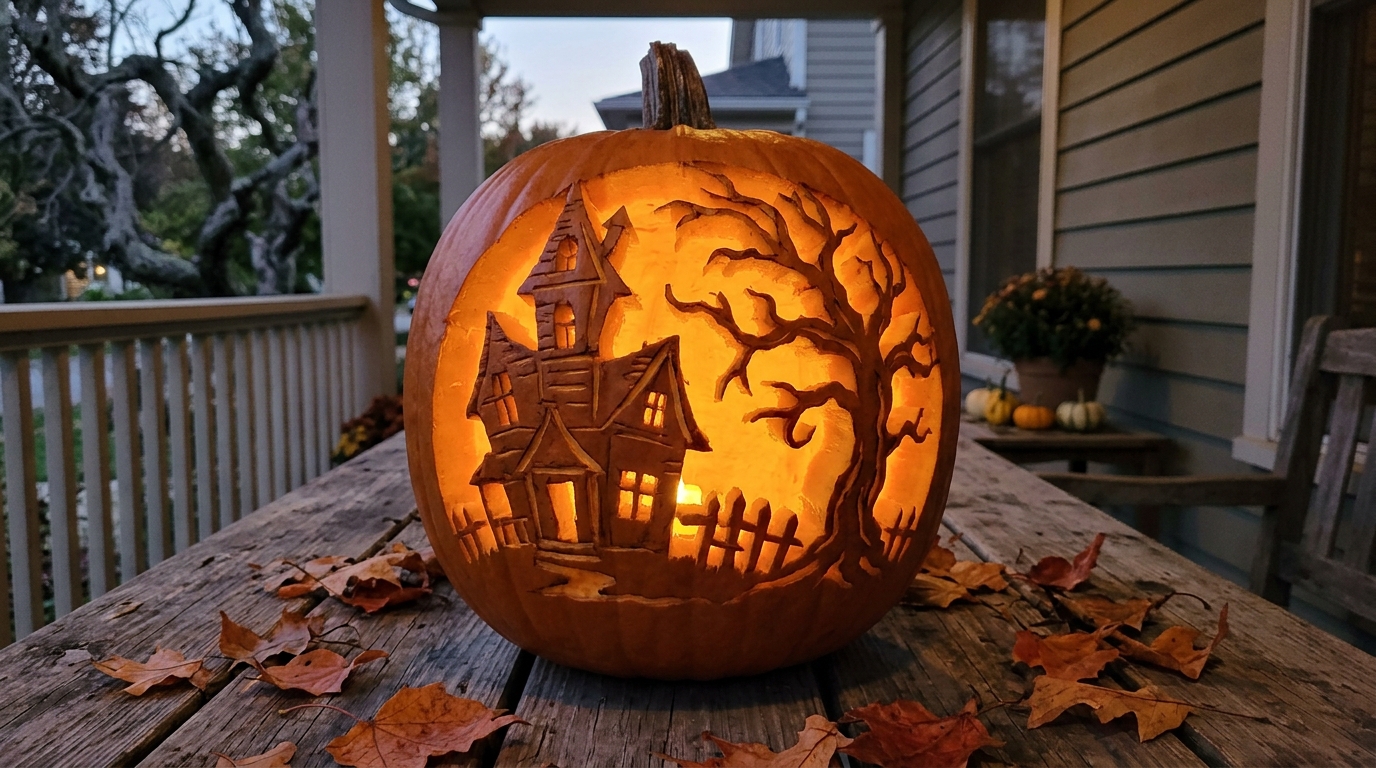
If you want pumpkin carving ideas that make the neighbors stop and look, carve a whole little scene. A crooked haunted house with glowing windows, a bare tree and a small fence turns one pumpkin into a spooky storybook page. Big pumpkins work best because there is more room for detail. Leave the window frames and tree branches as solid pumpkin skin, and cut out only the sky and windows so the light shines through. It takes patience, but the result is worth it. Who in your family has the steadiest hands for this one?
You will need: A large pumpkin, a printed haunted house pattern, tape, a pushpin, a detail carving saw (adult use only), a scoop and a battery LED light.
How to make it: 1. Scoop the pumpkin and scrape the front wall to about one inch thick. 2. Transfer the pattern with pushpin dots and remove the paper. 3. An adult cuts the small windows first, then the larger sky areas, and the light goes in last.
Pumpkin Carving Ideas for a Full Moon and Bats
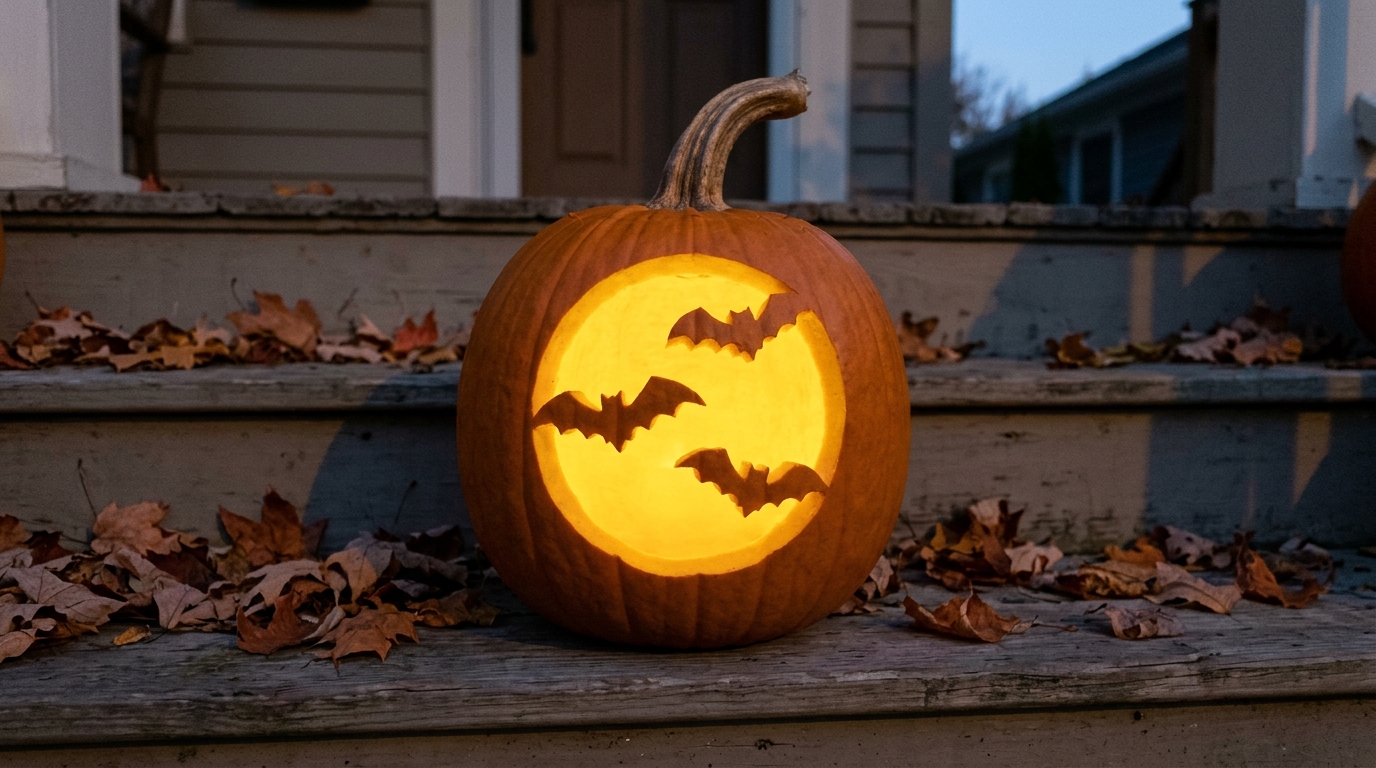
This one looks fancy but is surprisingly simple. You cut one large circle for the moon, and leave three small bat shapes inside it as solid pumpkin. When the light turns on, the bats look like they are flying across a glowing full moon. The key is to draw the bats so their wings touch the edge of the circle, which keeps them attached and strong. A yellow toned LED light makes the moon look warm and golden. How many bats will you squeeze into your moon?
You will need: A round pumpkin, a bowl to trace a circle, a washable marker, a carving kit (adult use only), a scoop and a warm yellow battery LED light.
How to make it: 1. Trace a large circle on the front and draw two or three bats inside it, wings touching the edge. 2. An adult carefully cuts away the moon around the bats. 3. Place the warm LED light inside and set it where the moon can be seen from the street.
A Hungry Pumpkin Eating Its Little Friend
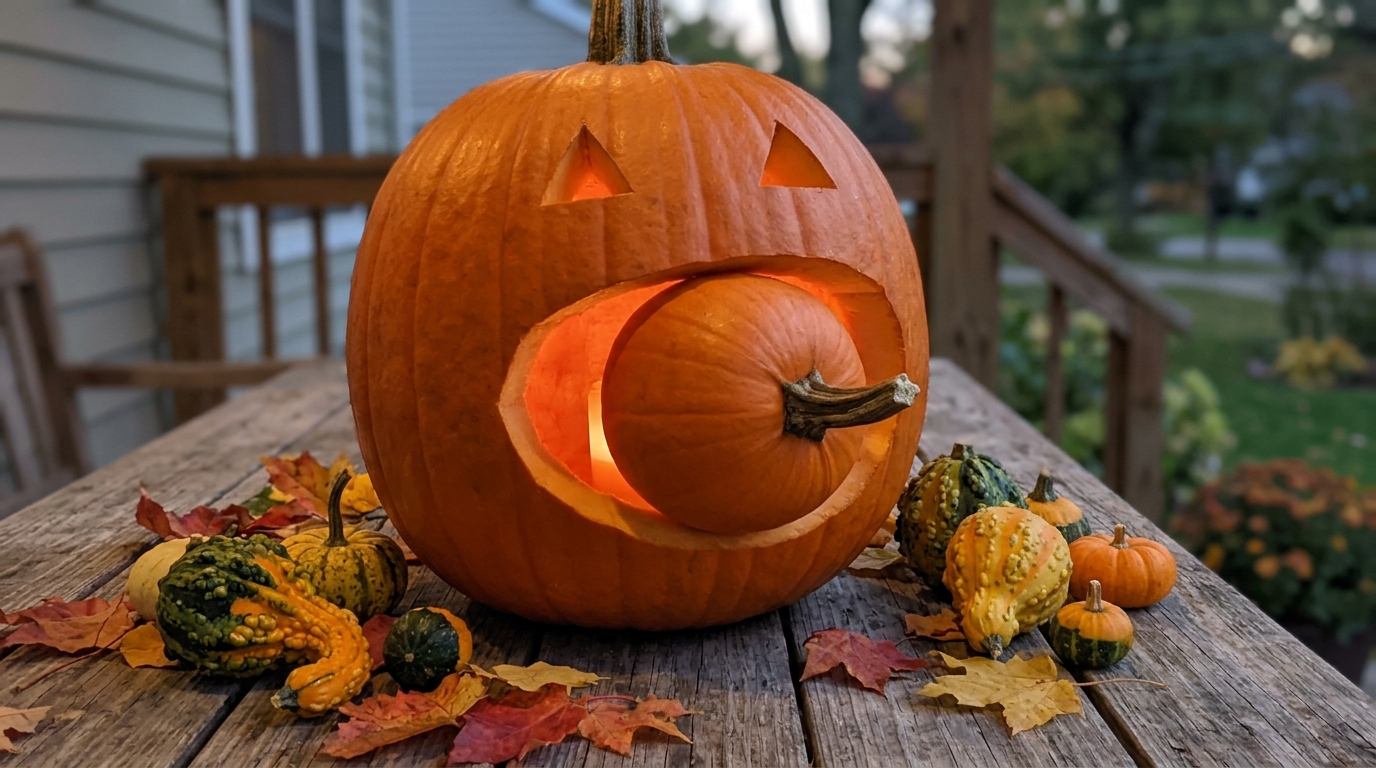
This is one of those funny pumpkin carving ideas that always gets a laugh. A big pumpkin with a wide open mouth looks like it is chomping down on a smaller pumpkin or gourd. Carve the large mouth first, then tuck a little pumpkin halfway inside so it looks mid bite. You can even give the small pumpkin a surprised face. It is silly rather than scary, so it is perfect for homes with little kids. The best part is that the small pumpkin needs no carving at all if you keep it simple. Which pumpkin will be the hungry one at your house?
You will need: One large pumpkin, one small pumpkin or gourd, a washable marker, a carving kit (adult use only), a scoop and a battery LED light.
How to make it: 1. An adult carves two eyes and an extra wide mouth on the big pumpkin, sized to fit the small one. 2. Scoop it clean and place the LED light behind the mouth. 3. Push the small pumpkin halfway into the mouth so it looks like a big bite.
Drilled Polka Dot Pumpkins With No Face at All
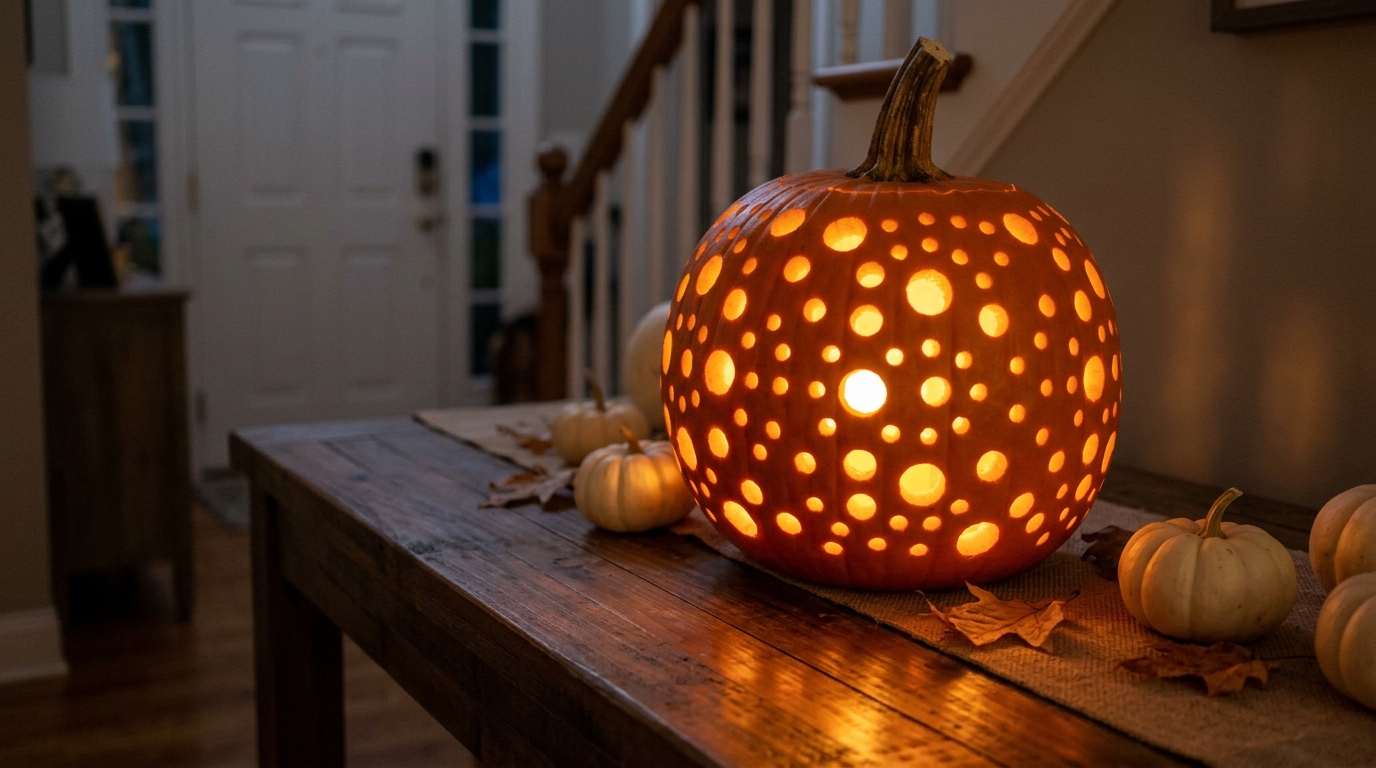
Not every pumpkin needs a face. A pattern of round holes in neat rows or a playful scatter looks modern and glows like a starry sky. A power drill with a few different bit sizes makes quick work of it, and an adult should handle the drill every time. Mix big and small dots, or arrange them in a spiral around the stem. These pumpkin carving ideas look great in a group of three on a table or by the front door. Will you go neat and tidy, or random and fun?
You will need: A pumpkin, a washable marker, a power drill with several bit sizes (adult use only), a scoop and a battery LED light.
How to make it: 1. Scoop the pumpkin and mark dots in your chosen pattern with a marker. 2. An adult drills each dot straight in, starting with small bits and moving up to larger ones. 3. Wipe off the marker, add the LED light and enjoy the dotted glow.
Pumpkin Carving Ideas With an Etched Leaf Design
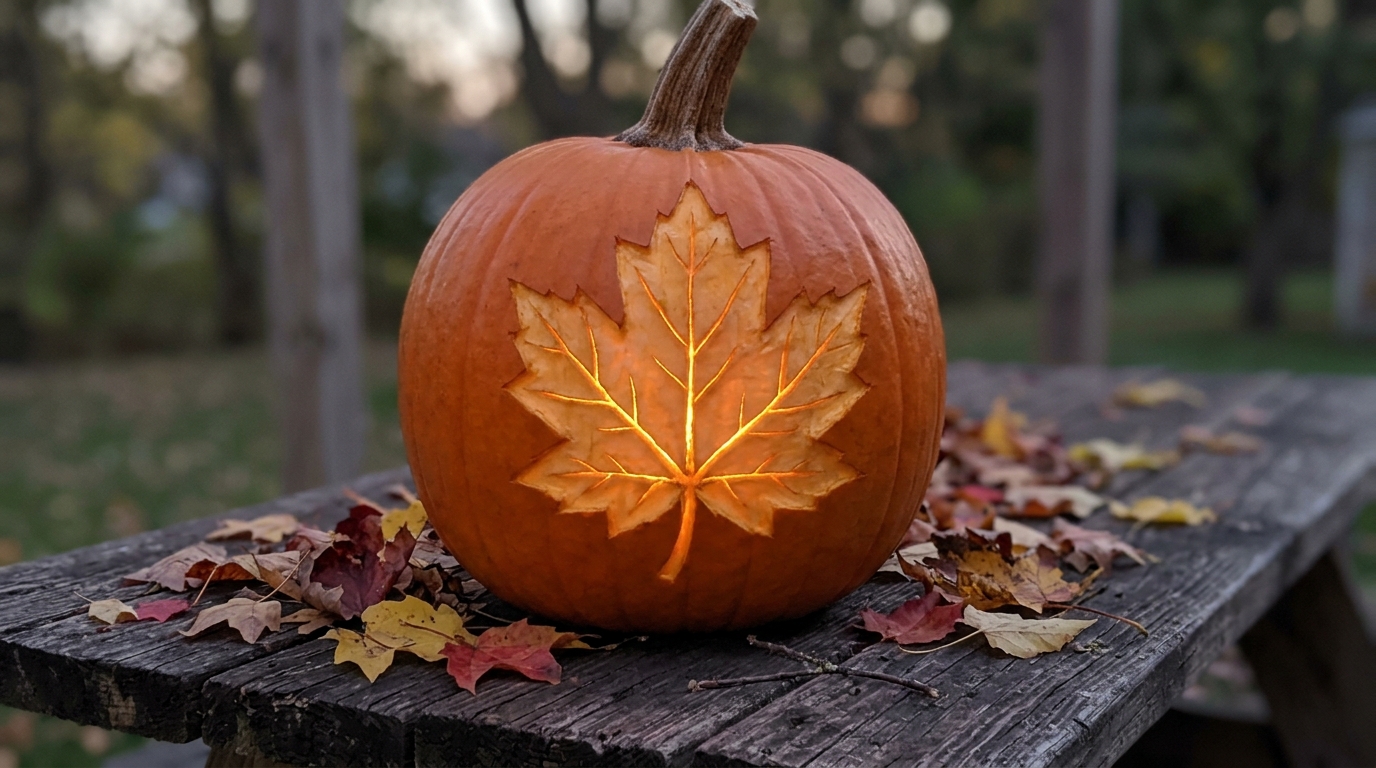
Etching is a gentle technique where you shave away only the outer skin instead of cutting all the way through. The light then glows softly through the thinner flesh, giving a golden, almost glassy look. A simple maple or oak leaf design is perfect for a first try, and it fits the season beautifully. The pumpkin also lasts longer because the wall stays whole. A clay loop tool or a vegetable peeler works well, used by an adult. Would you like to try a single leaf or a whole pile?
You will need: A pumpkin with smooth skin, a printed leaf outline, a washable marker, a clay loop tool or peeler (adult use only), a scoop and a battery LED light.
How to make it: 1. Scoop the pumpkin and scrape the inside of the front wall thin. 2. Trace the leaf with a marker. 3. An adult shaves the skin away inside the lines, going a little deeper on the veins for extra glow, then add the light.
A Wise Owl Face for Fall Nights
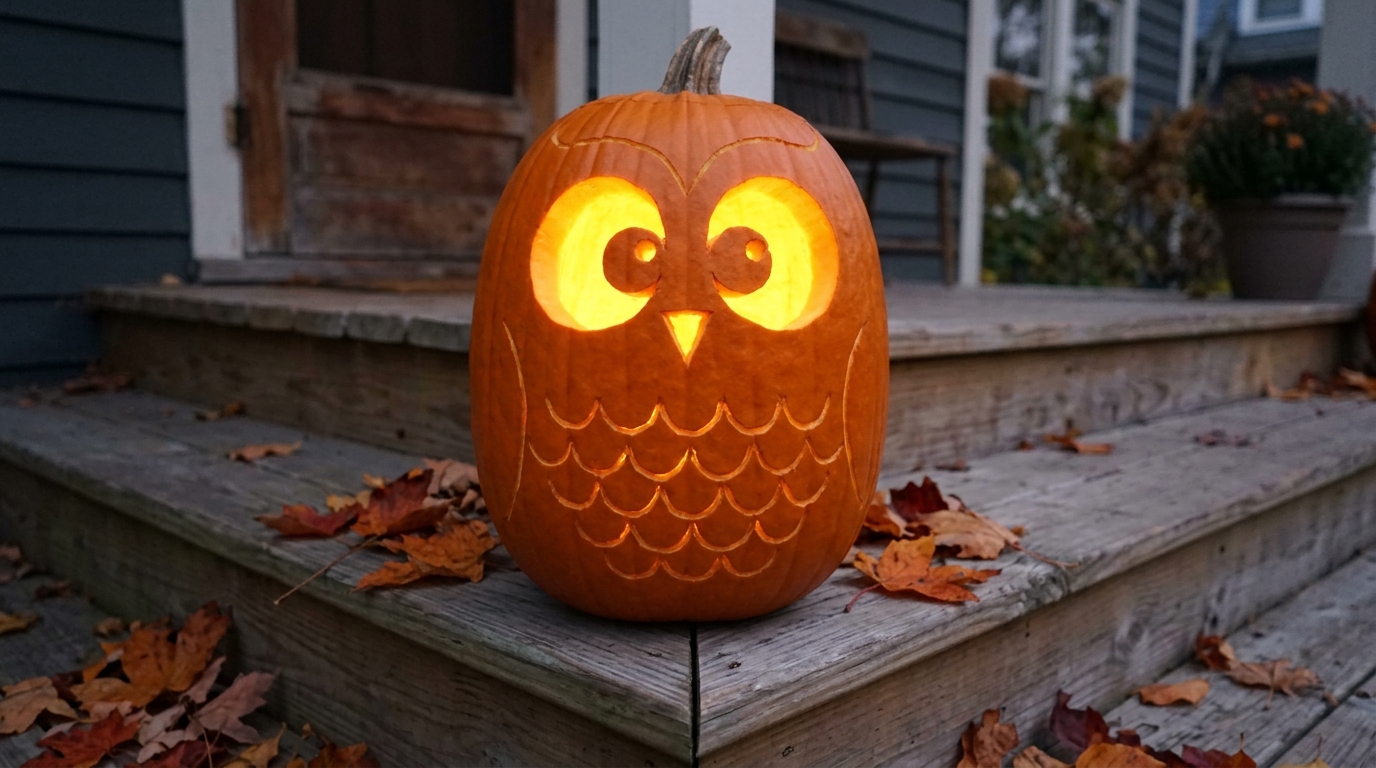
Among fall pumpkin carving ideas, an owl is a perfect choice if you want something seasonal that is not too spooky. Two huge round eyes, a pointy beak and a few rows of feathers make a design that looks great from October right through Thanksgiving. Carve the eyes all the way through, then etch the feathers lightly so they glow softer than the eyes. Tall, oval pumpkins make the best owl bodies. Kids love drawing the feathers in little scallop shapes. Where in your yard would a watchful owl look best?
You will need: A tall oval pumpkin, a washable marker, a carving kit and an etching tool (adult use only), a scoop and a battery LED light.
How to make it: 1. Draw two large round eyes, a triangle beak and rows of scallop feathers. 2. An adult cuts the eyes and beak all the way through, then lightly etches the feathers. 3. Add the LED light and place your owl on a step or a fence post.
Spider Web Etching That Glows in Fine Lines
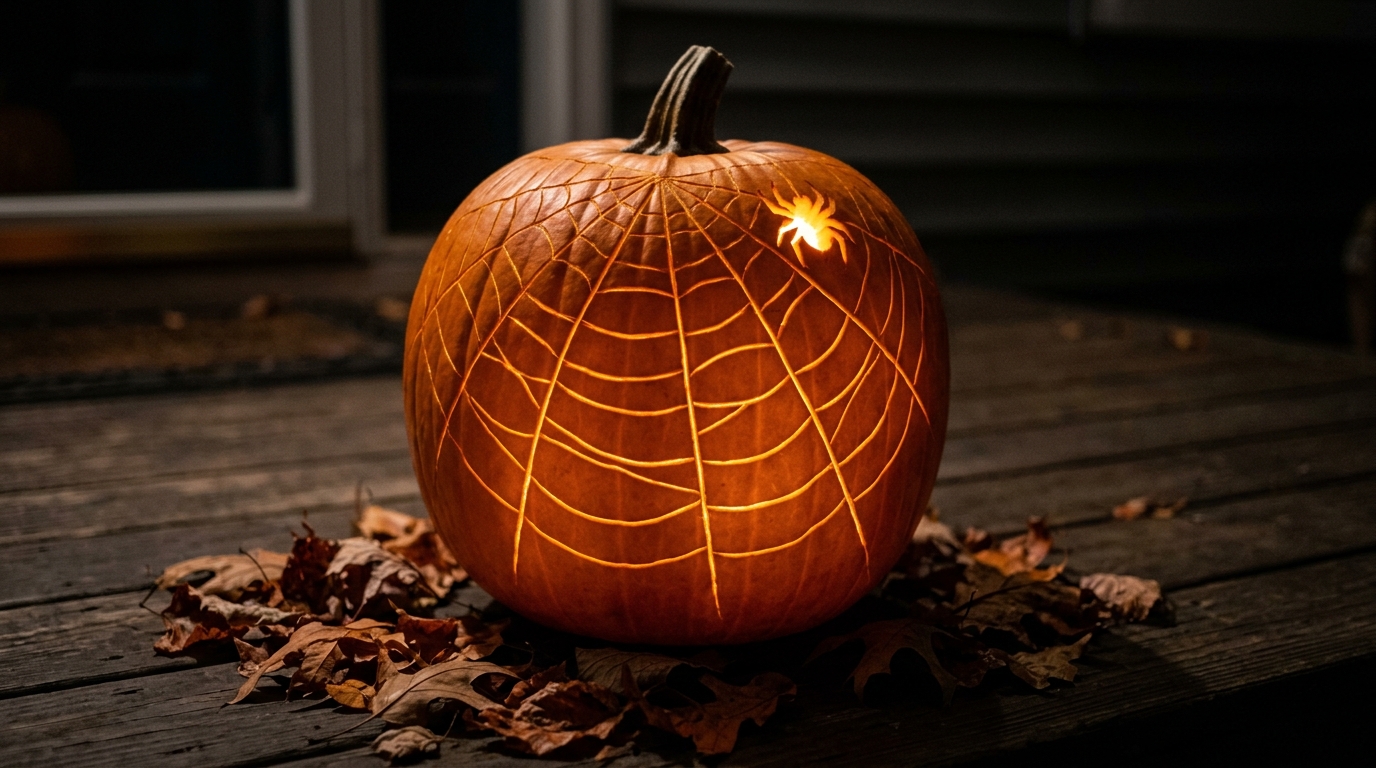
A spider web is one of the easiest etched designs, because it is just straight lines and gentle curves. Draw a few lines out from the stem like spokes on a wheel, then connect them with curved rows. When an adult shaves along those lines, the web glows in delicate threads of light. Add a small spider carved all the way through for a fun surprise. It looks beautiful on its own or next to a classic jack o lantern. Will your spider be big and bold or tiny and sneaky?
You will need: A pumpkin, a washable marker, a ruler, an etching or linoleum cutting tool (adult use only), a scoop and a battery LED light.
How to make it: 1. Draw six to eight straight lines from the stem down the sides, then curved rows between them. 2. An adult etches along each line, keeping the cuts shallow. 3. Carve a tiny spider near the top, add the light and see the web glow.
Lace Patterns for an Elegant White Pumpkin
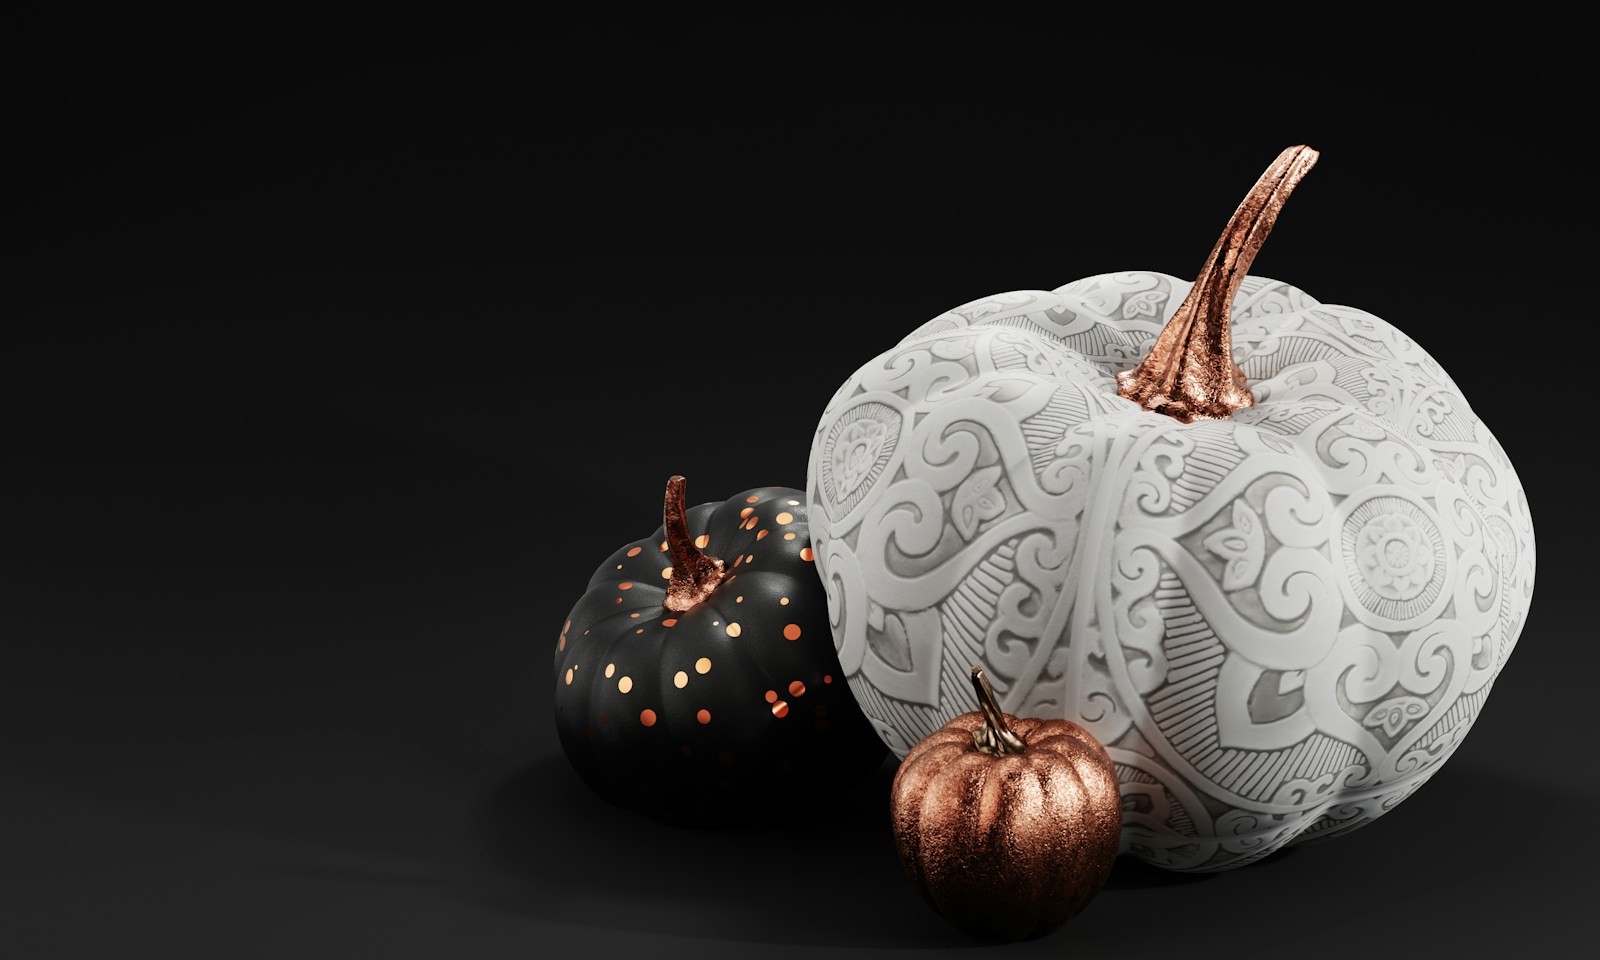
If you prefer a softer look, lace patterns are a lovely choice, and they work on white pumpkins as well as orange ones. You can paint the design with a stencil and white paint, or an adult can etch the pattern lightly for a glowing version. Lace swirls, flowers and scallops look like a vintage tablecloth wrapped around the pumpkin. Pair it with a small black pumpkin covered in tiny dots for contrast. For more no carve inspiration, our faux pumpkin makeovers are full of fresh ideas. Would you paint yours or etch it?
You will need: A white or orange pumpkin, a lace stencil or a paper doily, white or cream acrylic paint, a stencil brush, and an etching tool (adult use only) if you want it to glow.
How to make it: 1. Wipe the pumpkin clean and tape the stencil or doily firmly in place. 2. Dab paint through the holes with a nearly dry brush, then peel the stencil off. 3. For a glowing version, an adult lightly etches along the painted lines instead and adds an LED light.
Pumpkin Carving Ideas That Simply Say BOO
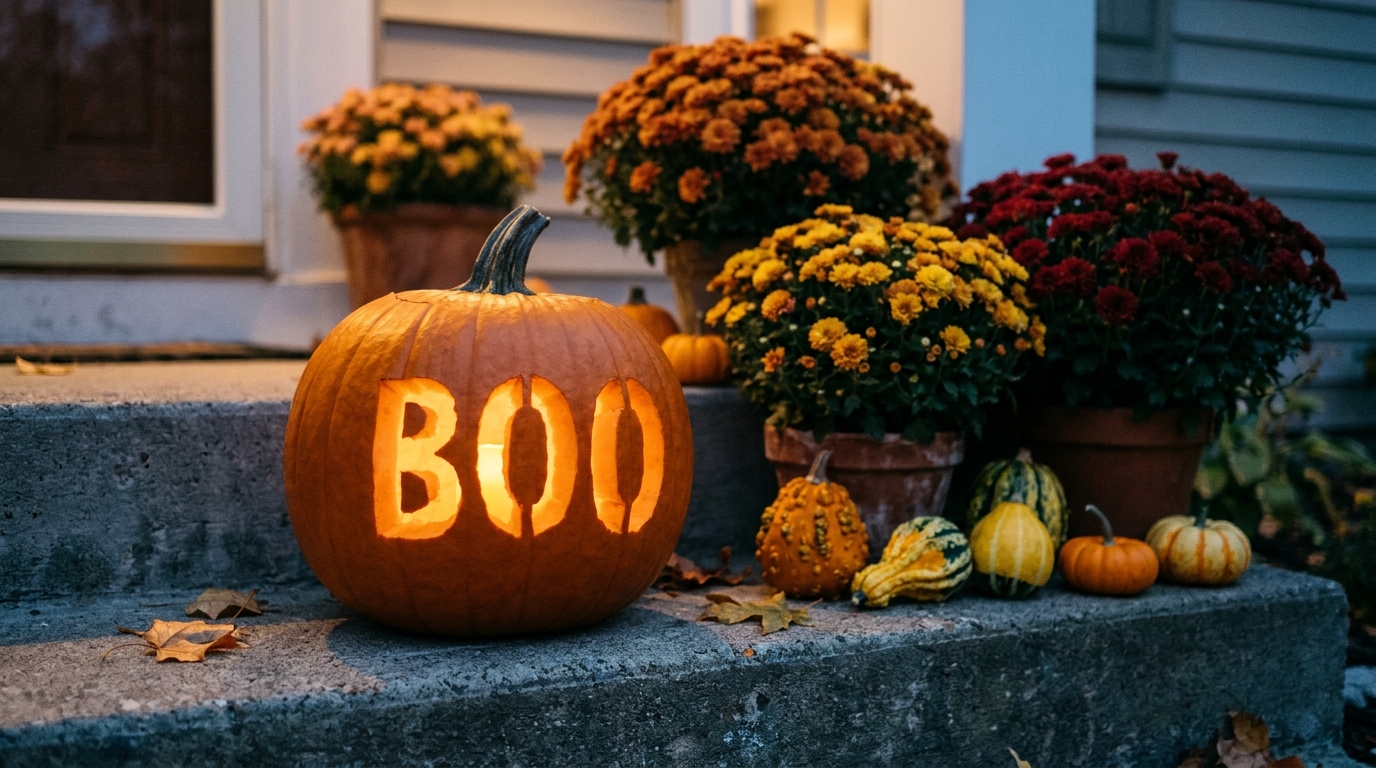
Sometimes three letters say everything. A big, bold BOO carved into a pumpkin is cheerful, easy to read from the street and fun for kids to help design. Use chunky block letters so the middle of each O stays attached, or carve each letter on its own small pumpkin and line them up on the steps. A row of three pumpkins spelling BOO looks especially sweet. It is one of the best pumpkin carving ideas for beginners, since letters are easier to cut than faces. Will you carve one pumpkin or three?
You will need: One wide pumpkin or three small ones, a printed letter stencil, tape, a pushpin, a carving kit (adult use only), a scoop and battery LED lights.
How to make it: 1. Scoop the pumpkin and tape the BOO stencil on the front. 2. Transfer the letters with pushpin dots, leaving a small bridge in each O so the centers stay in place. 3. An adult carves the letters, then add the lights and place it by the door.
A Friendly Ghost Trio Floating Across One Pumpkin
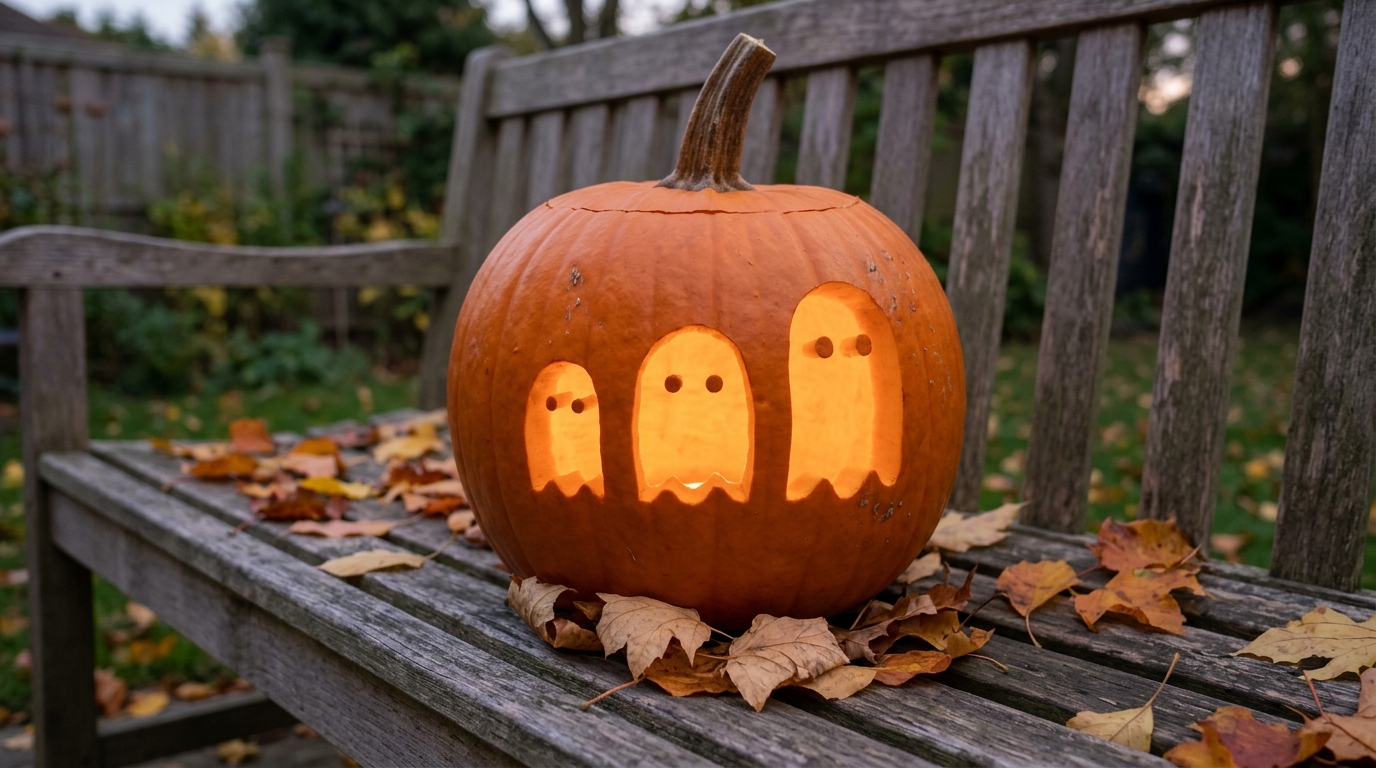
Three little ghosts in a row are spooky in the cutest possible way. Each ghost is a simple rounded shape with a wavy bottom, and you can give them tiny dot eyes or leave them as plain silhouettes. Making them different sizes, like a mom, a dad and a baby, adds a sweet story kids love. Like most simple pumpkin carving ideas, this design is quick to carve and works well on a smaller pumpkin, too. Set it on a bench or a windowsill where the soft glow can be seen. What names would you give your ghost family?
You will need: A medium pumpkin, a washable marker, a carving kit (adult use only), a scoop and a battery LED light.
How to make it: 1. Scoop the pumpkin and draw three ghost shapes in different sizes across the front. 2. An adult cuts out each ghost shape slowly, leaving small eyes as solid pumpkin. 3. Place the LED light inside and set your ghost trio somewhere cozy.
A Sunflower Pattern That Works All Autumn
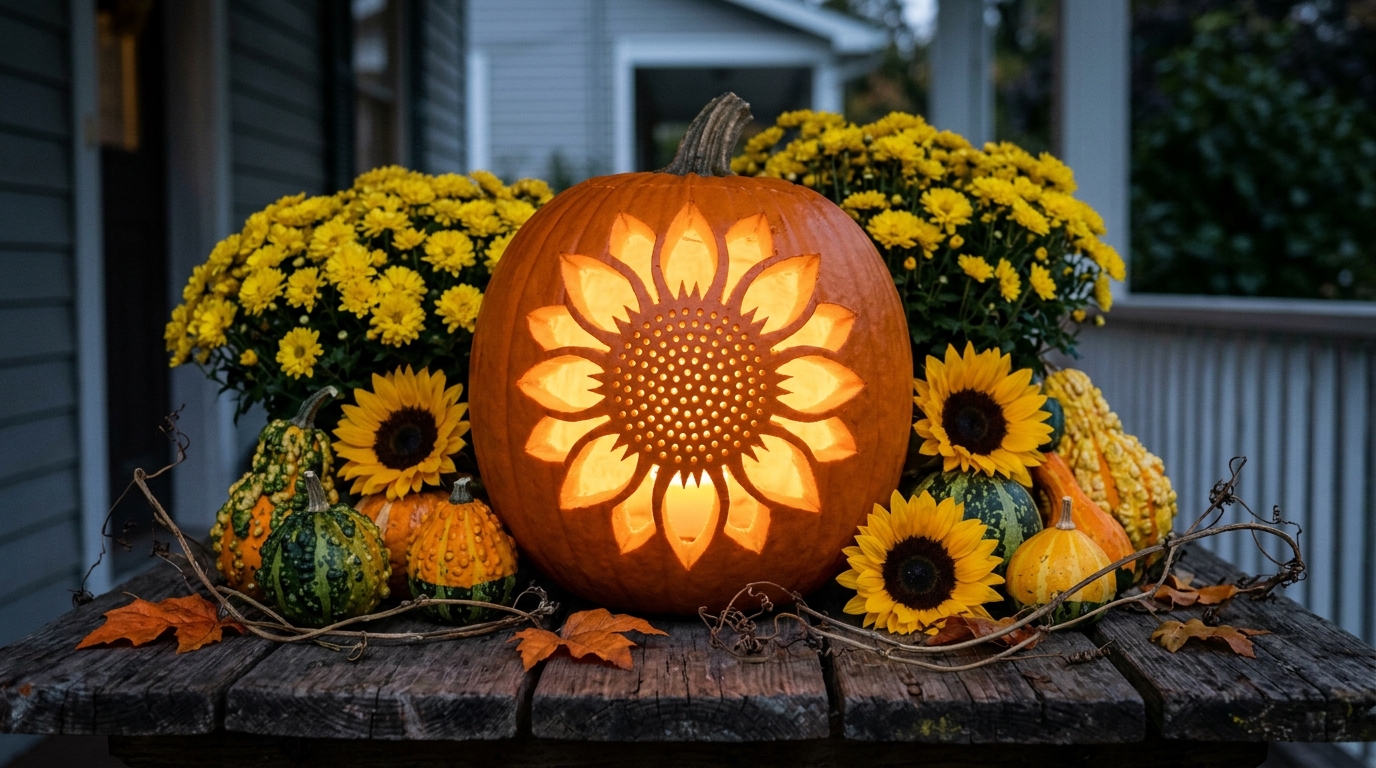
Want a pumpkin you can enjoy well past Halloween? A carved sunflower is cheerful, pretty and fits right in with fall flowers and gourds. Cut the petals all the way through, and drill or etch the center in a dotted pattern to mimic the seeds. During the day it looks like a lovely fall decoration, and at night it glows like a little sun. It also makes a sweet centerpiece next to a vase of real sunflowers. Which room or table in your home could use a little sunshine?
You will need: A round pumpkin, a printed sunflower outline, a washable marker, a carving kit and a small drill (adult use only), a scoop and a battery LED light.
How to make it: 1. Scoop the pumpkin and trace the sunflower on the front. 2. An adult carves each petal and then drills small holes in the center circle. 3. Add the LED light and surround the pumpkin with gourds or fall flowers.
A Witch on a Broom to Finish the Night
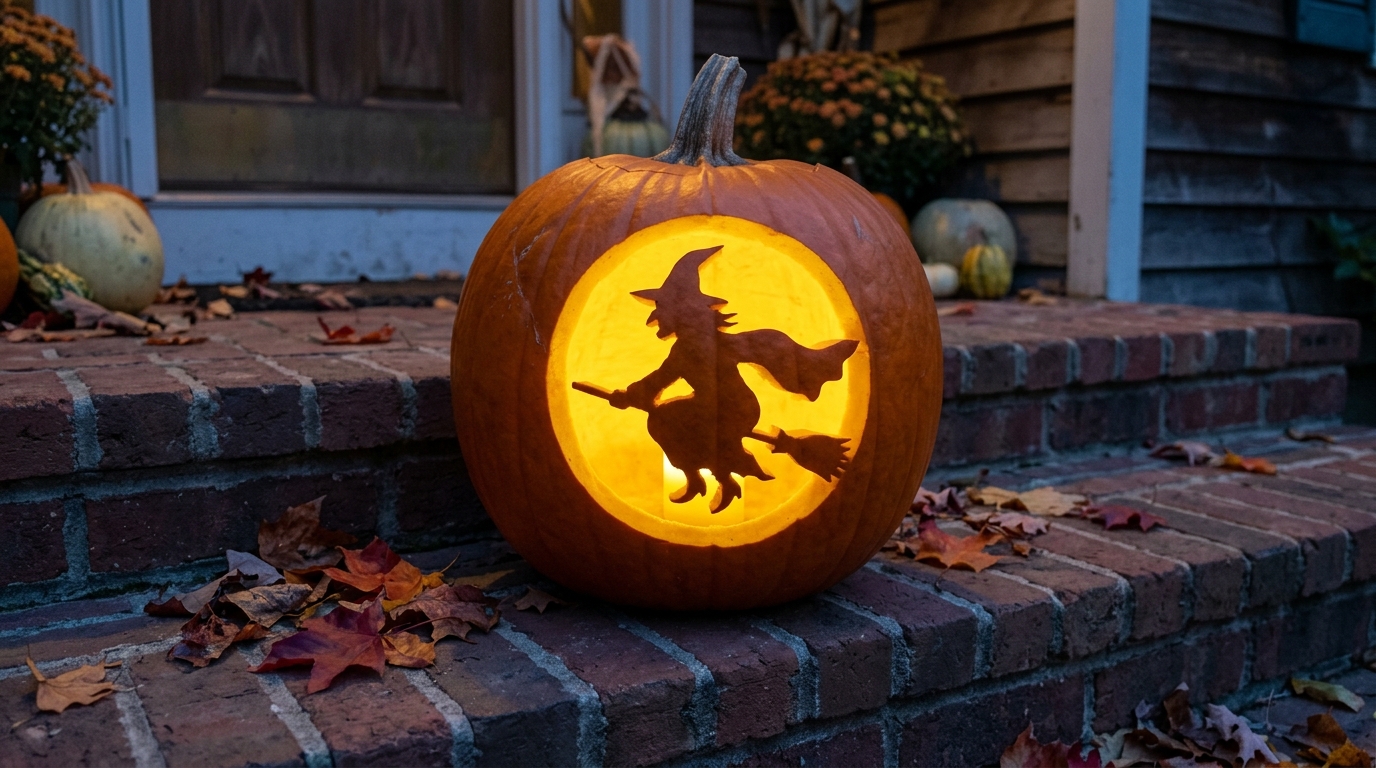
End your lineup of pumpkin carving ideas with a little magic. A witch in a pointed hat flying on her broom across a big round moon is a classic Halloween image, and it makes a stunning finale on the top step. Like the moon and bats design, you cut out the moon and leave the witch as solid pumpkin, so she shows up as a dark silhouette against the glow. Keep the broom and hat thick enough to stay attached. It is the perfect pumpkin to take a photo with on Halloween night. Ready to send her flying?
You will need: A large round pumpkin, a printed witch and moon pattern, tape, a pushpin, a detail carving saw (adult use only), a scoop and a battery LED light.
How to make it: 1. Scoop the pumpkin and transfer the pattern with pushpin dots. 2. An adult cuts away the moon around the witch, keeping her hat and broom connected to the edge. 3. Add a warm LED light and place her where everyone can see.