Resin Christmas Ornaments: 16 Glossy Handmade Designs That Look Expensive and Sell Fast
Resin Christmas ornaments have a glassy shine that makes people stop and look twice at your tree. They catch the light like candy, they never shatter like glass, and they can hold almost anything you love, from dried flowers to gold flakes to a tiny drift of glitter snow. They are also one of the most popular handmade items at holiday craft fairs, because buyers can tell they took care and time. You do not need a studio to make them. A few silicone molds, a small kit of clear craft resin, gloves and a well aired table are enough to start. Below are 16 glossy designs to keep, give or sell, each with a short supply list and simple steps. Start with the sweet little candy that took over YouTube, and keep swiping for the rest..
Resin Christmas Ornaments Start With a Peppermint Candy
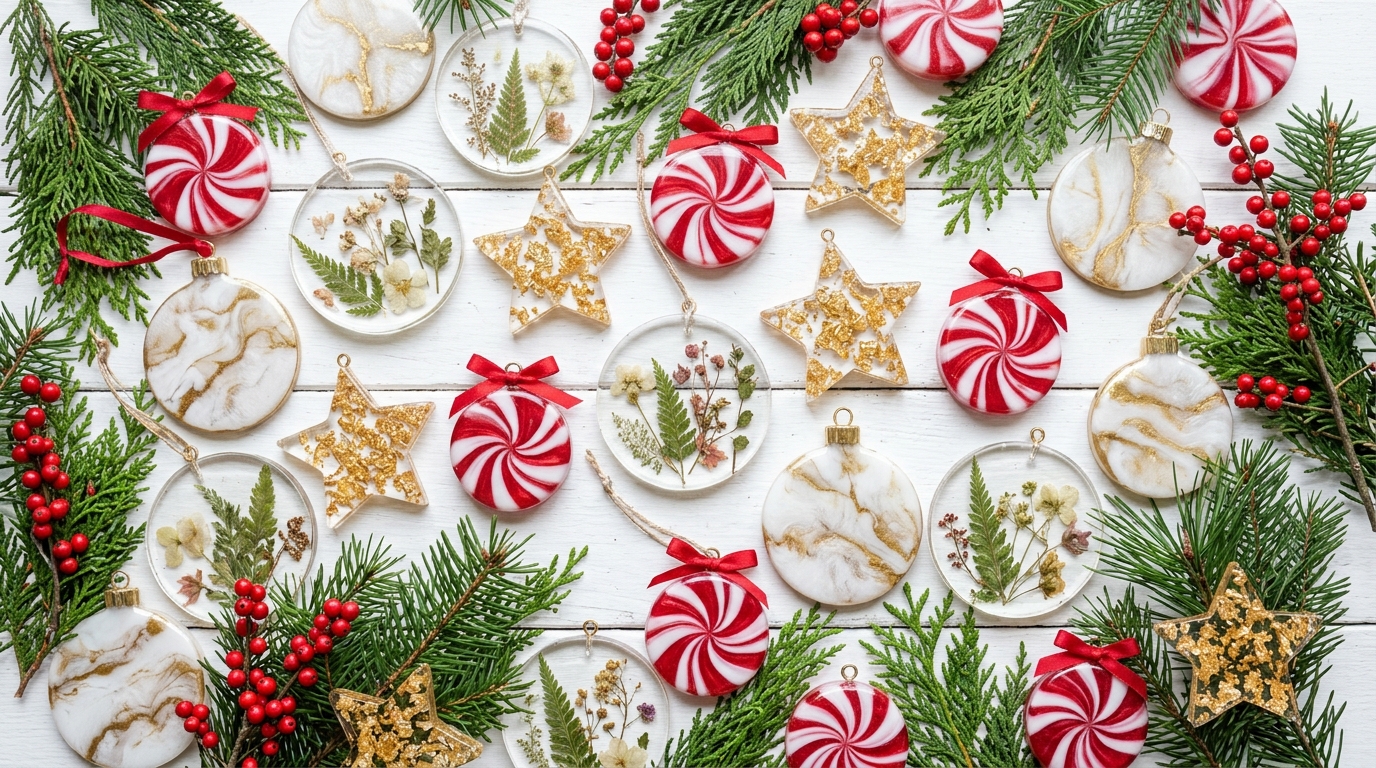
One small candy changed everything for Crafted by Lilu. In a short video, the creator swirls red and white resin into a round candy mold, lets it cure, pops out a shiny peppermint and finishes it with a red ribbon bow. The same piece works as a tree ornament or a keychain, and viewers loved that two in one idea. The peppermint candy video has more than 15.8 million views. It sits right next to our favorite candy cane crafts..
You will need: Round silicone candy mold, clear two part craft resin, white and red resin pigment, mixing cups, stir sticks, gloves, red satin ribbon, small metal bails, strong craft glue.
How to make it: 1. Mix the resin exactly as the kit says and split it into two cups. 2. Tint one cup white and one cup red. 3. Pour white into the mold, then add red in thin spokes and drag a stick through for the swirl. 4. Let it cure fully, unmold and glue a bail on top. 5. Tie on a ribbon bow. Wear gloves and keep fresh air moving.
A Pressed Flower Ornament From a Wedding Bouquet
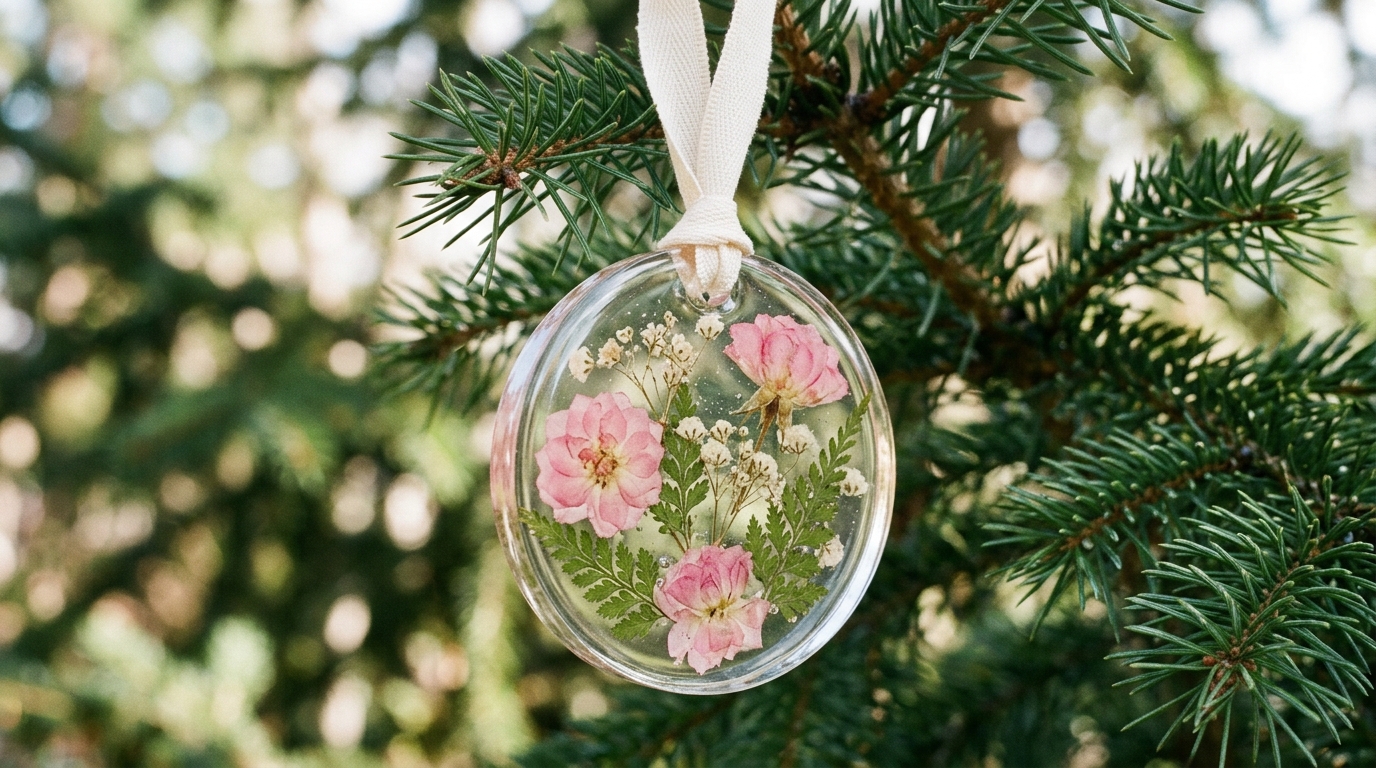
Wedding flowers usually fade in a vase within a week. Pressed and sealed in clear resin, they turn into a keepsake that comes out every December. Brides love this as a first Christmas gift, and moms love it for anniversaries. Press the petals flat for two weeks between book pages first, because any moisture left inside can turn brown. Choose thin flowers like baby’s breath, small roses and fern leaves. If you enjoy this, our pressed flower crafts have more ways to save a bouquet.
You will need: Pressed flowers, round flat silicone ornament mold, clear craft resin, tweezers, gloves, ribbon, bail and glue.
How to make it: 1. Pour a thin first layer of resin and let it set until tacky. 2. Place the flowers face down with tweezers. 3. Pour a second layer to cover them. 4. Pop any bubbles with a toothpick. 5. Cure, unmold, add the bail and ribbon. Wear gloves and keep fresh air moving.
Glitter Snowflake Disc Ornaments
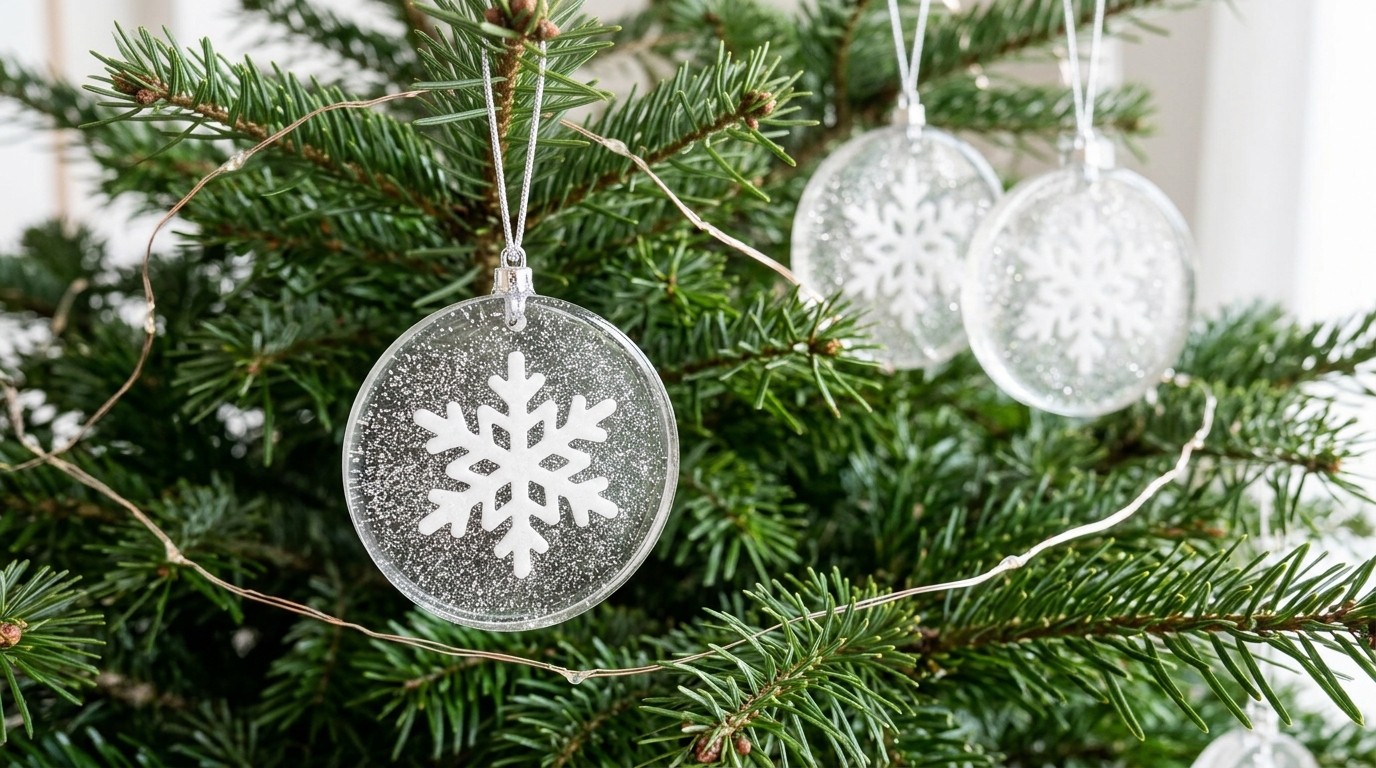
These discs look like a frosty window on a cold morning. A little fine silver glitter swirls through clear resin, and a white snowflake sits right in the middle. Of all the resin Christmas ornaments here, they are among the quickest to make, and one small kit can turn out a dozen for a classroom gift swap or a craft fair table. Keep the glitter light so the snowflake still shows through. For the snowflake shapes, use punched paper sealed with glue, or plastic confetti snowflakes. Love snowy designs? Try these paper snowflake ideas too.
You will need: Round disc mold, clear craft resin, fine silver glitter, white snowflake confetti or sealed paper snowflakes, gloves, bails, white ribbon.
How to make it: 1. Mix resin and stir in a pinch of glitter. 2. Pour half into the mold. 3. Set the snowflake in the center. 4. Top up with the rest of the resin. 5. Cure, unmold and add a bail and ribbon. Wear gloves and keep fresh air moving.
Resin Christmas Ornaments With Gold Leaf and White Marble
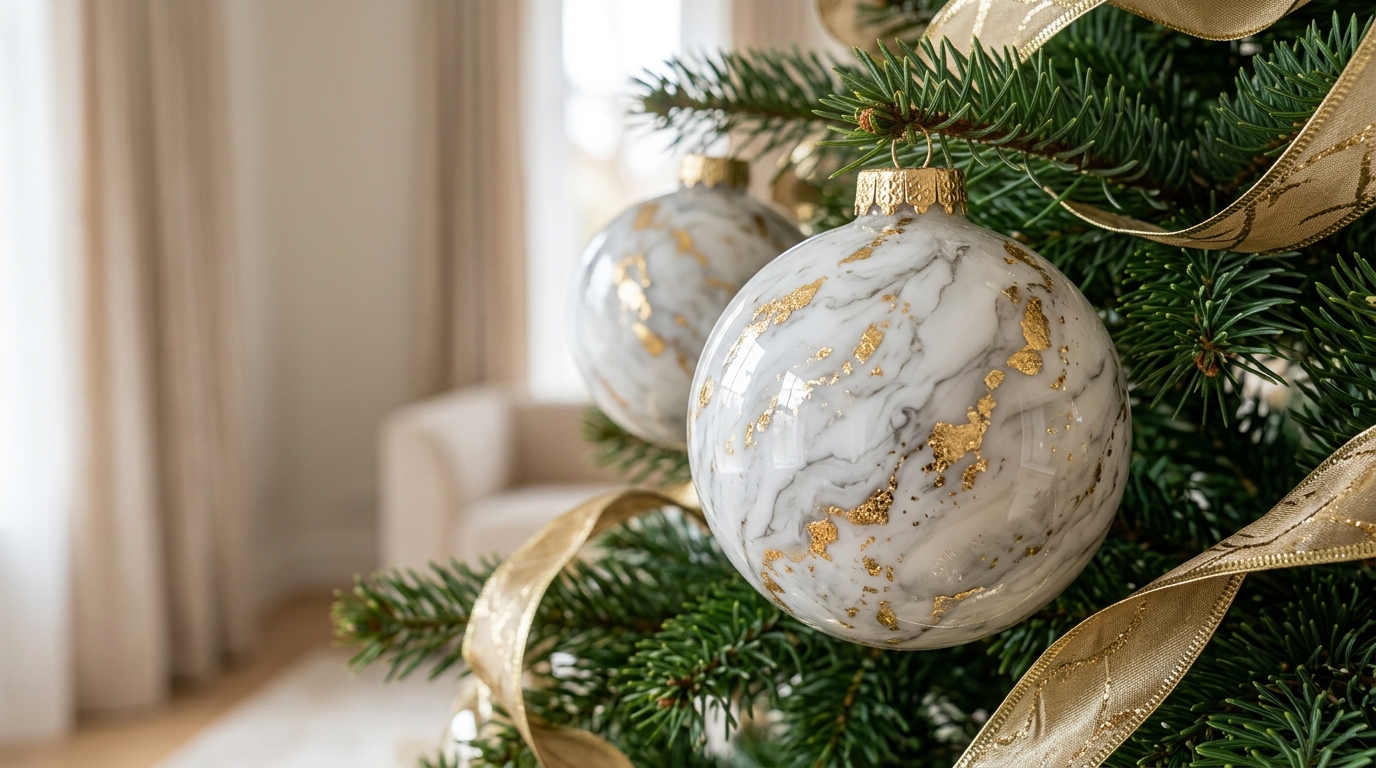
White marble with veins of gold looks like something from a luxury hotel lobby. These resin Christmas ornaments copy that look for a few dollars each. The trick is a thin swirl of gray pigment dragged through white resin, then tiny bits of gold leaf pressed in before it sets. Every one comes out a little different, which makes each one feel special. Hang a cluster of them on a green tree for an elegant, modern look, or mix them with hand painted ornaments for a softer feel.
You will need: Ball or round mold, clear craft resin, white and gray pigment, imitation gold leaf, soft brush, gloves, gold bails, gold ribbon.
How to make it: 1. Tint the resin white. 2. Add two drops of gray and drag a stick through it once or twice. 3. Pour into the mold. 4. Press small gold leaf pieces on the surface with a dry brush. 5. Cure, unmold and add the bail. Wear gloves and keep fresh air moving.
A Resin Initial Ornament as a Gift Tag
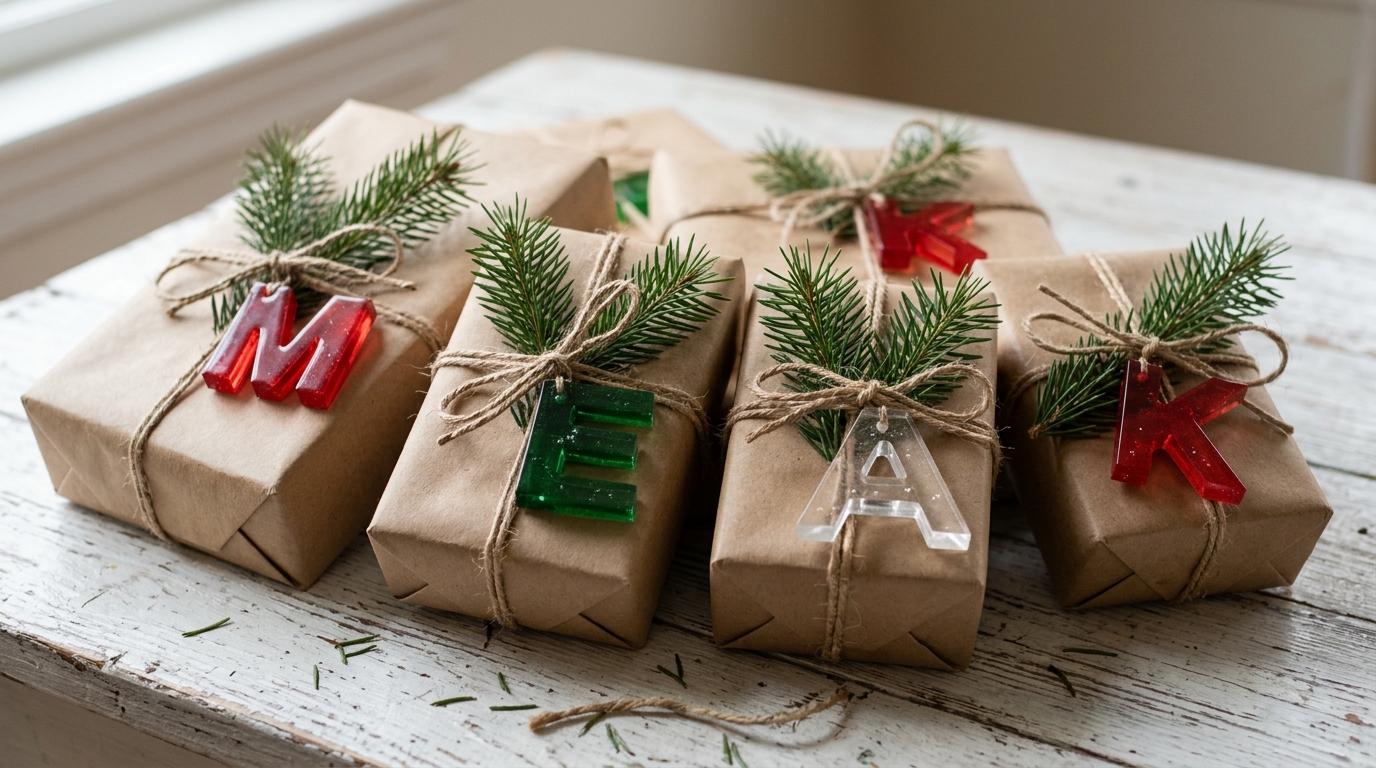
Why write a name on a paper tag when the tag can be the gift too? A resin initial tied onto a present tells everyone whose box it is, then goes straight onto their tree. Letter molds are cheap and come in many fonts. Fill each letter with a different color or a pinch of dried greenery, so the set looks bright under the tree on Christmas morning. These pair nicely with our DIY Christmas gift tags for a fully handmade wrap.
You will need: Letter silicone molds, clear craft resin, pigment or dried greenery, gloves, small bails, glue, twine.
How to make it: 1. Mix resin and tint each cup a different color. 2. Pour into the letter molds. 3. Cure, then unmold and sand any sharp edge. 4. Glue a bail on top. 5. Tie each letter onto a gift with twine. Wear gloves and keep fresh air moving.
Dried Orange Slice Ornaments
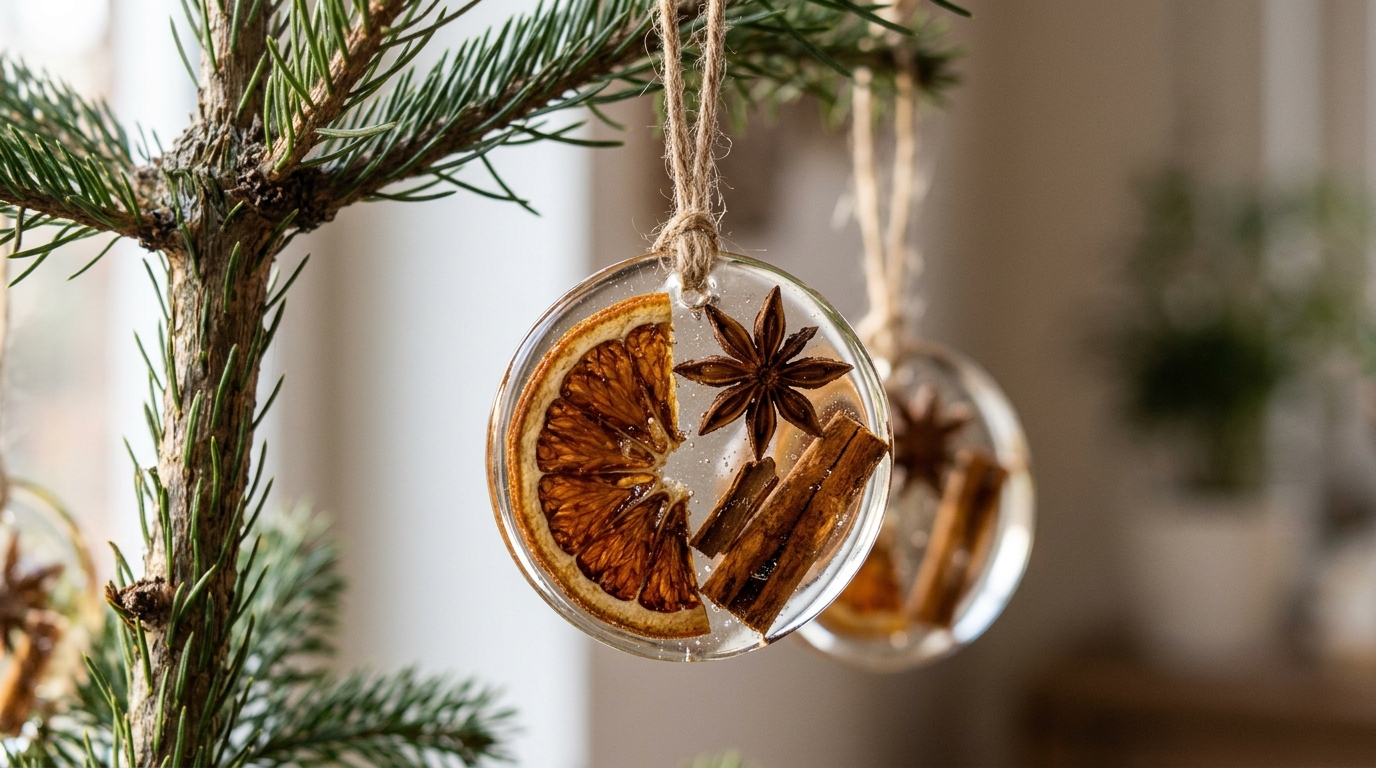
Dried oranges are a classic Christmas decoration, but they can curl and fade after one season. Sealed in clear resin, the slices keep their warm color and glow when the tree lights hit them. Choose thin, fully dried slices, because damp fruit can spoil inside the resin. A small piece of cinnamon stick or a star anise beside the orange makes it look even cozier. Our guide to drying orange slices shows how to dry them in the oven first.
You will need: Fully dried orange slices, round mold slightly bigger than the slices, clear craft resin, star anise or cinnamon pieces, gloves, bails, jute twine.
How to make it: 1. Pour a thin layer of resin into the mold. 2. Lay the orange slice flat on it. 3. Add the spice pieces around it. 4. Cover with more resin and pop bubbles. 5. Cure, unmold and hang with twine. Wear gloves and keep fresh air moving.
Resin Christmas Ornaments for Baby’s First Christmas

Tiny feet grow fast, and this ornament keeps that first December forever. Press the baby’s foot onto paper with washable paint, let it dry, cut it out and seal it inside a resin disc. Add the year with a small sticker under the resin. Grandparents treasure these more than almost any store gift. Make two at once: one for the family tree and one to mail far away. For more keepsake ideas, browse our handprint and footprint crafts.
You will need: Washable paint, cardstock, scissors, clear sealing glue, round disc mold, clear craft resin, pale pigment, gloves, bail, satin ribbon.
How to make it: 1. Make the footprint and let it dry overnight. 2. Coat the paper in sealing glue so resin will not soak in. 3. Pour a tinted base layer and let it set. 4. Lay the print on it and cover with clear resin. 5. Cure, unmold and add a ribbon. Adults do every resin step.
A Pine Needle and Berry Nature Ornament
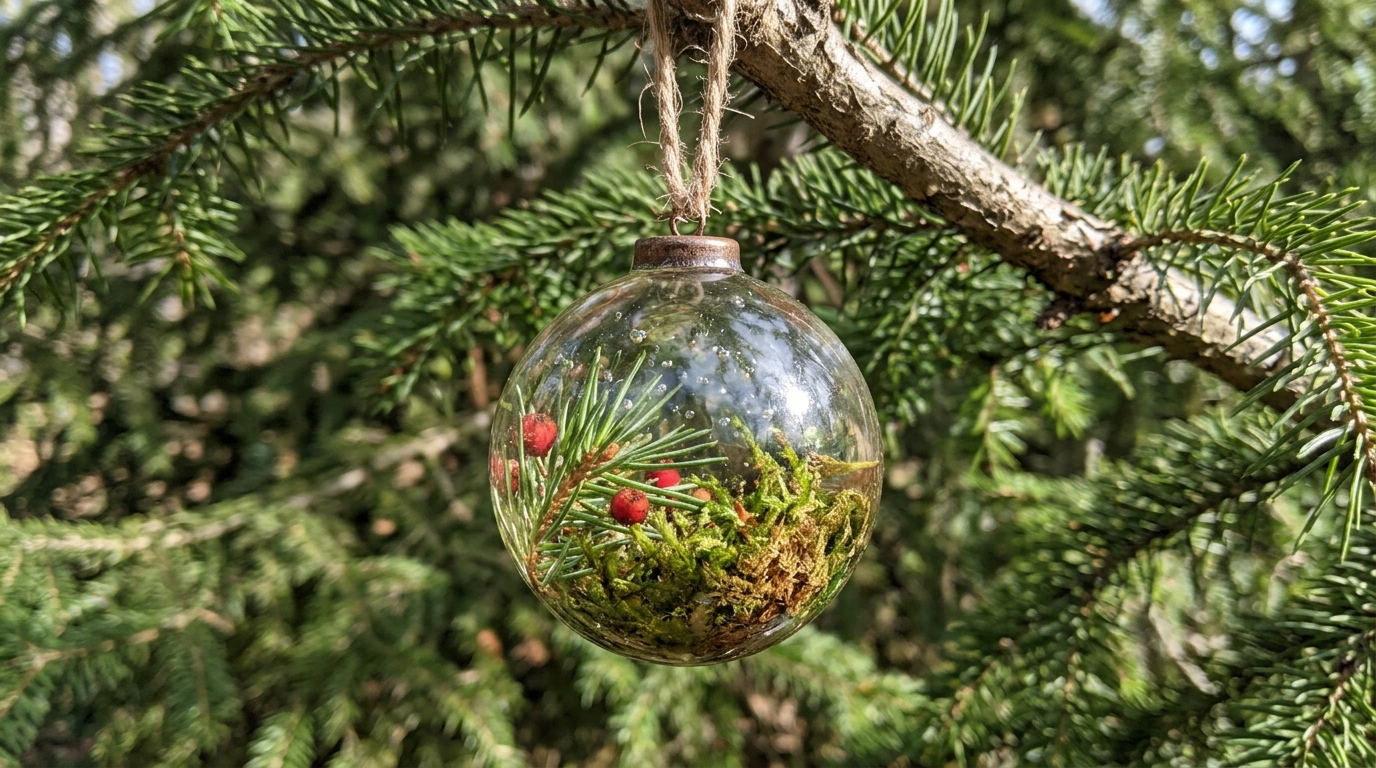
A walk in the yard can fill this ornament for free. Short pine tips, a few tiny faux berries and a pinch of moss look like a little forest frozen in glass. It is one of the easiest resin Christmas ornaments for families. Kids love gathering the bits, and grown ups love how natural it looks on a rustic tree. Dry real greenery for a few days first so it does not brown. If you love natural decor, our pine cone Christmas crafts are a great next project.
You will need: Dried pine tips, faux red berries, dried moss, round or ball mold, clear craft resin, tweezers, gloves, bail, jute twine.
How to make it: 1. Pour a little resin into the mold. 2. Arrange the greenery and berries with tweezers. 3. Fill the mold slowly so pieces stay put. 4. Pop bubbles. 5. Cure, unmold and hang with twine. Wear gloves and keep fresh air moving.
An Ocean Wave Ornament for Beach Lovers
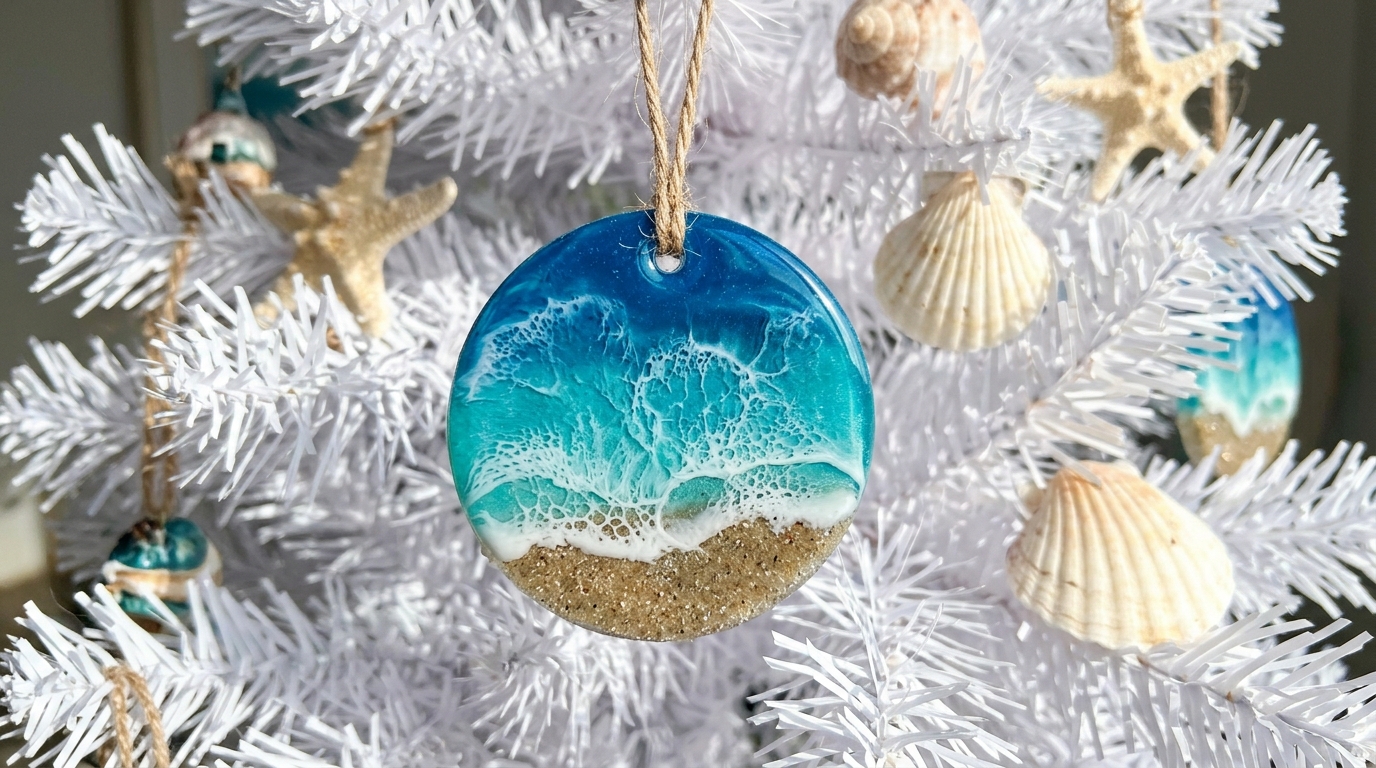
Not everyone dreams of snow. For beach lovers, an ocean wave ornament brings the shore to the tree. Layers of deep blue and turquoise resin sit under a frothy white edge that looks just like sea foam. A sprinkle of real sand at the bottom finishes the beach. Hang a few of these resin Christmas ornaments on a white tree with rope garland for a coastal Christmas. Pair them with these sea glass Christmas crafts for a full seaside theme.
You will need: Round disc mold, clear craft resin, blue, turquoise and white pigment, a spoon of clean sand, toothpicks, gloves, bail, thin rope.
How to make it: 1. Sprinkle sand into one side of the mold. 2. Pour turquoise, then deep blue in layers. 3. Drip white along the line between sand and water. 4. Drag it gently with a toothpick for foam. 5. Cure, unmold and hang. Wear gloves and keep fresh air moving.
Resin Christmas Ornaments Shaped Like Gold Flake Stars

Stars are one of the oldest Christmas symbols, and this one shines without any lights at all. Clear resin with floating gold flakes looks like a winter sky full of tiny sparks. Make a big star for the top of a small tabletop tree, or a set of little ones for the branches. Resin Christmas ornaments like these also make sweet gifts for teachers and neighbors. Want more star projects? See these paper Christmas stars next.
You will need: Star silicone molds in two sizes, clear craft resin, imitation gold flakes, gloves, gold bails, glue, gold thread.
How to make it: 1. Mix resin and stir in a pinch of gold flakes. 2. Pour slowly into the star molds. 3. Add a few extra flakes on top. 4. Cure, unmold and sand the back if needed. 5. Glue on a bail and add thread. Wear gloves and keep fresh air moving.
Resin Christmas Ornaments With a Snow Globe Dome
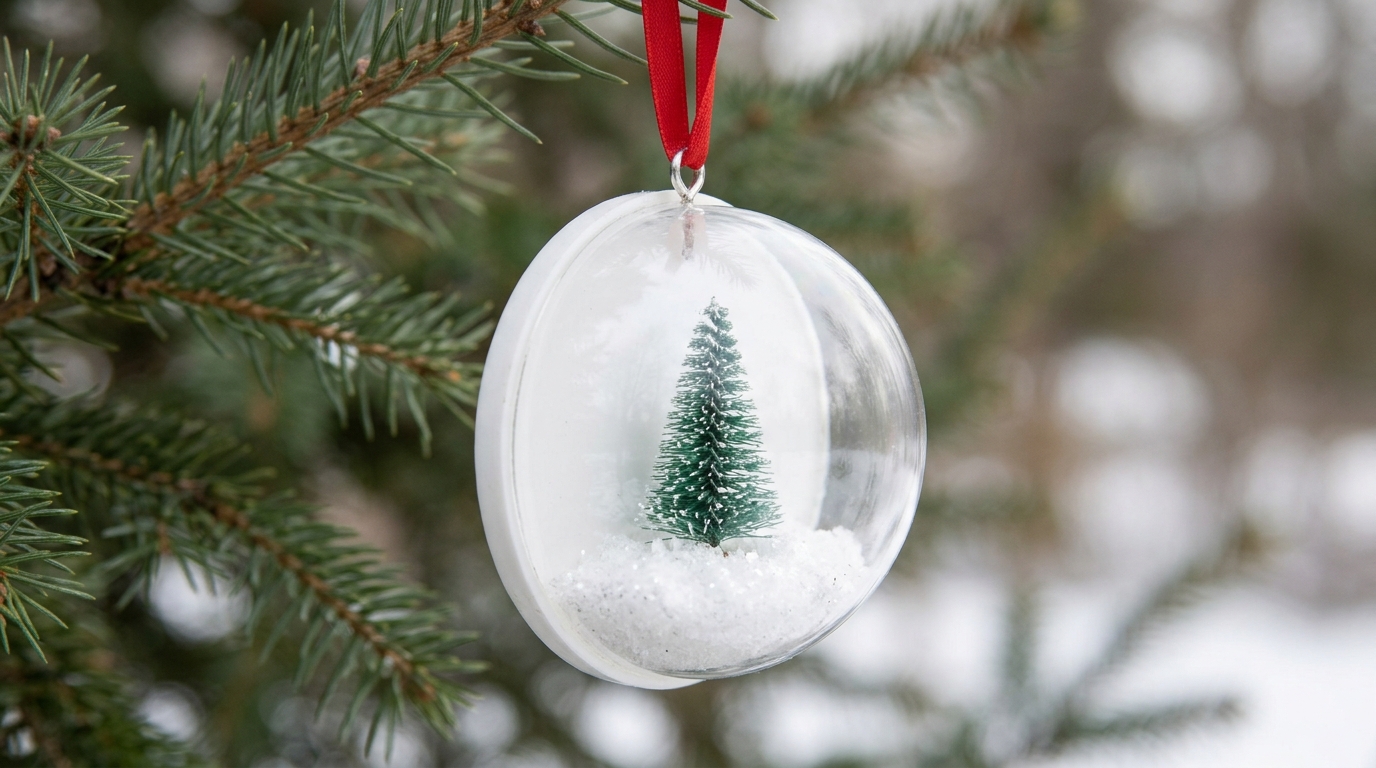
This design looks like a snow globe, but nothing leaks and nothing breaks. A tiny bottle brush tree and a pinch of fake snow sit on a flat base, and a clear resin dome seals them in. Hold it up to the light and it looks like a winter scene trapped under ice. These resin Christmas ornaments are a big seller at craft fairs, because they look hard to make. If you love little winter scenes, try our DIY snow globes too.
You will need: Half sphere dome mold, flat round mold for the base, clear craft resin, mini bottle brush tree, fake snow, glue, gloves, bail, ribbon.
How to make it: 1. Cast a thin white base disc and let it cure. 2. Glue the tiny tree and snow on top. 3. Fill the dome mold with clear resin. 4. Press the base in, scene facing down. 5. Cure, unmold and add a ribbon. Wear gloves and keep fresh air moving.
A Pet Paw Print Memorial Ornament
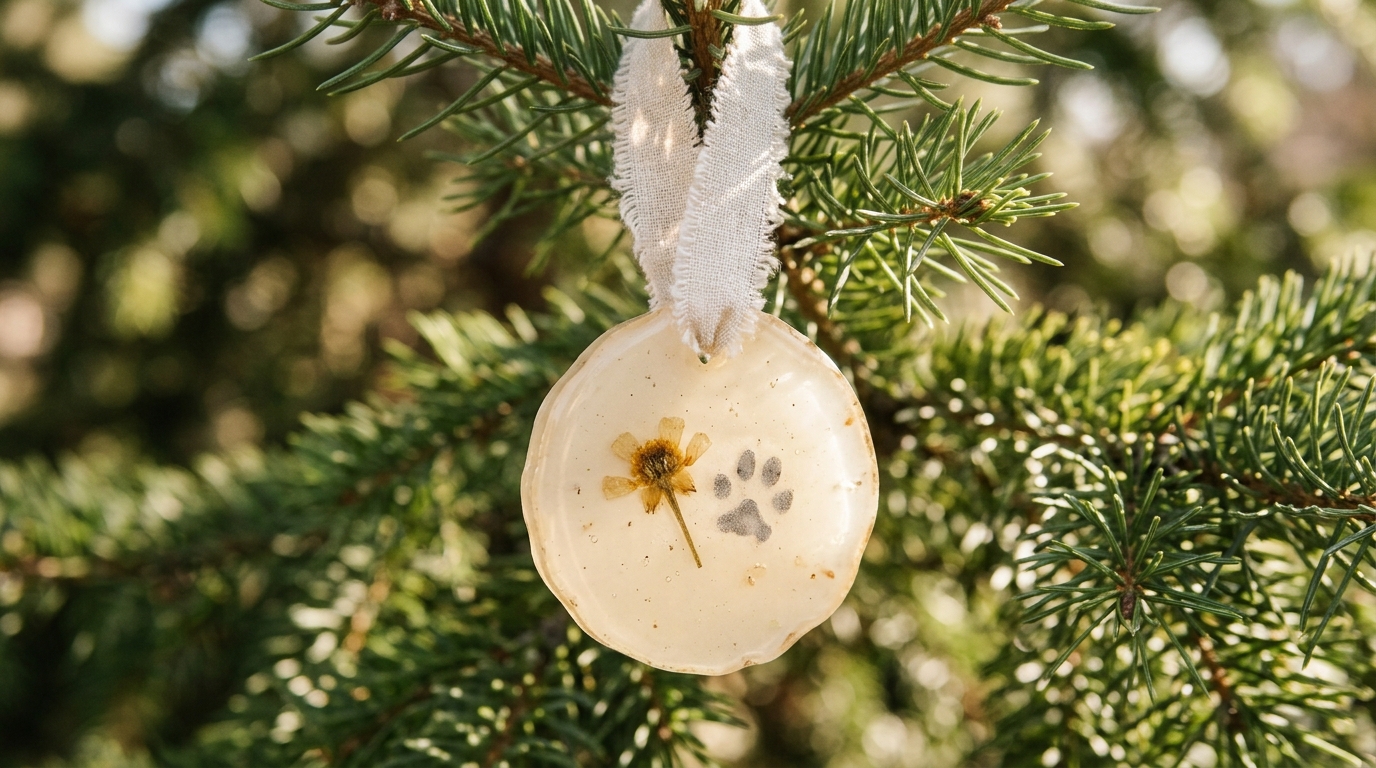
Losing a pet is hard, and the holidays can make the empty spot feel bigger. A paw print ornament keeps that sweet friend on the tree every year. Use a clay paw print, a pet safe paint print on paper, or a small tuft of saved fur. Add one dried flower beside it for a soft, loving touch. This makes a kind gift for a friend who just said goodbye to a pet. For happier pet ideas, see our pet Christmas DIY gallery.
You will need: Paw print on sealed paper or clay, dried flower, round disc mold, clear craft resin, cream pigment, gloves, bail, soft ribbon.
How to make it: 1. Pour a cream base layer and let it set until tacky. 2. Place the paw print and flower on it. 3. Cover with clear resin. 4. Pop bubbles with a toothpick. 5. Cure, unmold and add a ribbon. Wear gloves and keep fresh air moving.
A Christmas Tree Shape With Mini Ornaments Inside
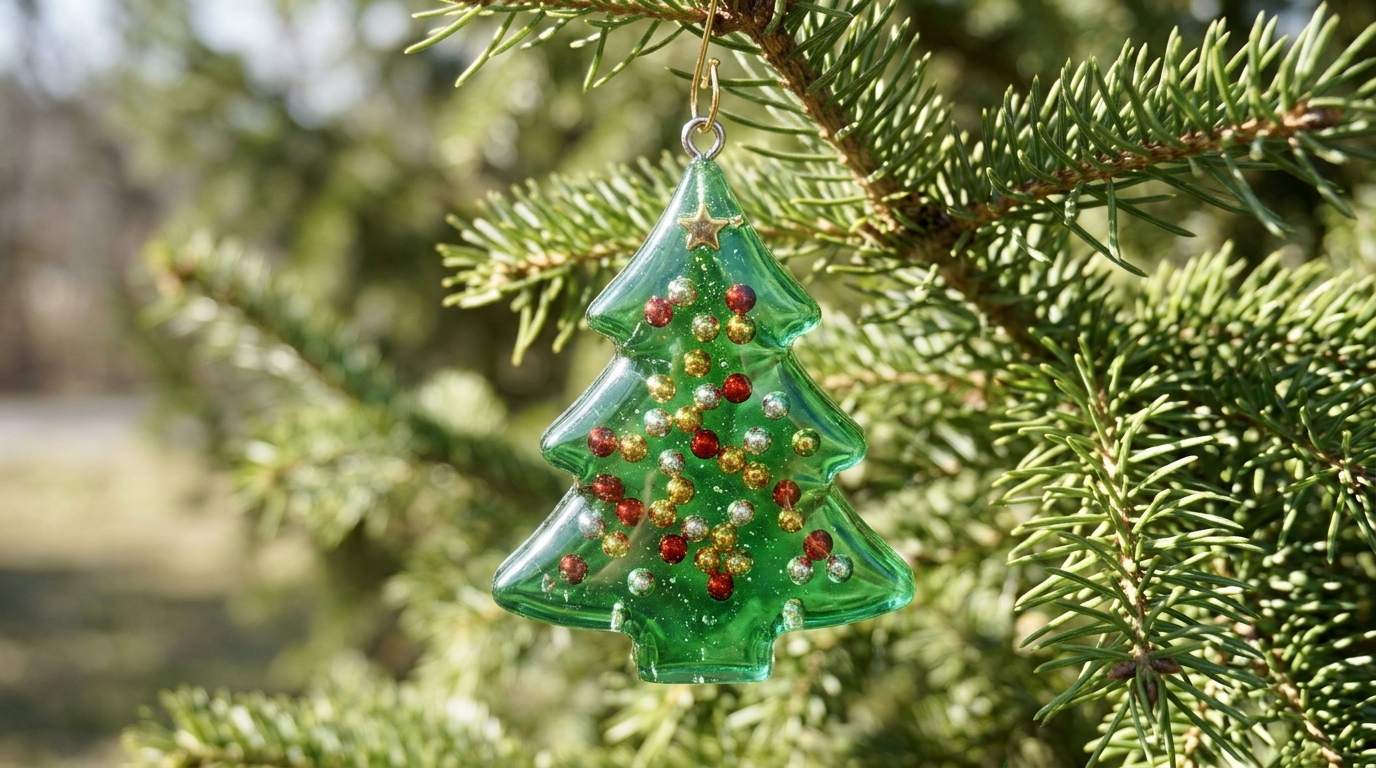
This one is a tiny tree you can hang on a bigger tree. Green tinted resin fills a tree shaped mold, and little round beads in red, gold and silver sit inside like baubles. A gold star bead on top finishes it. Children love counting the tiny ornaments inside. They look darling on a skinny tree or tied to a wreath. For more tree on tree fun, browse our ornament tree ideas.
You will need: Christmas tree silicone mold, clear craft resin, green transparent pigment, tiny round beads, a star bead, tweezers, gloves, bail, ribbon.
How to make it: 1. Pour a thin layer of green resin into the mold. 2. Drop in the beads with tweezers. 3. Fill the mold to the top. 4. Press the star bead in at the tip. 5. Cure, unmold and add a ribbon. Wear gloves and keep fresh air moving.
A Matching Resin Coaster and Ornament Gift Set
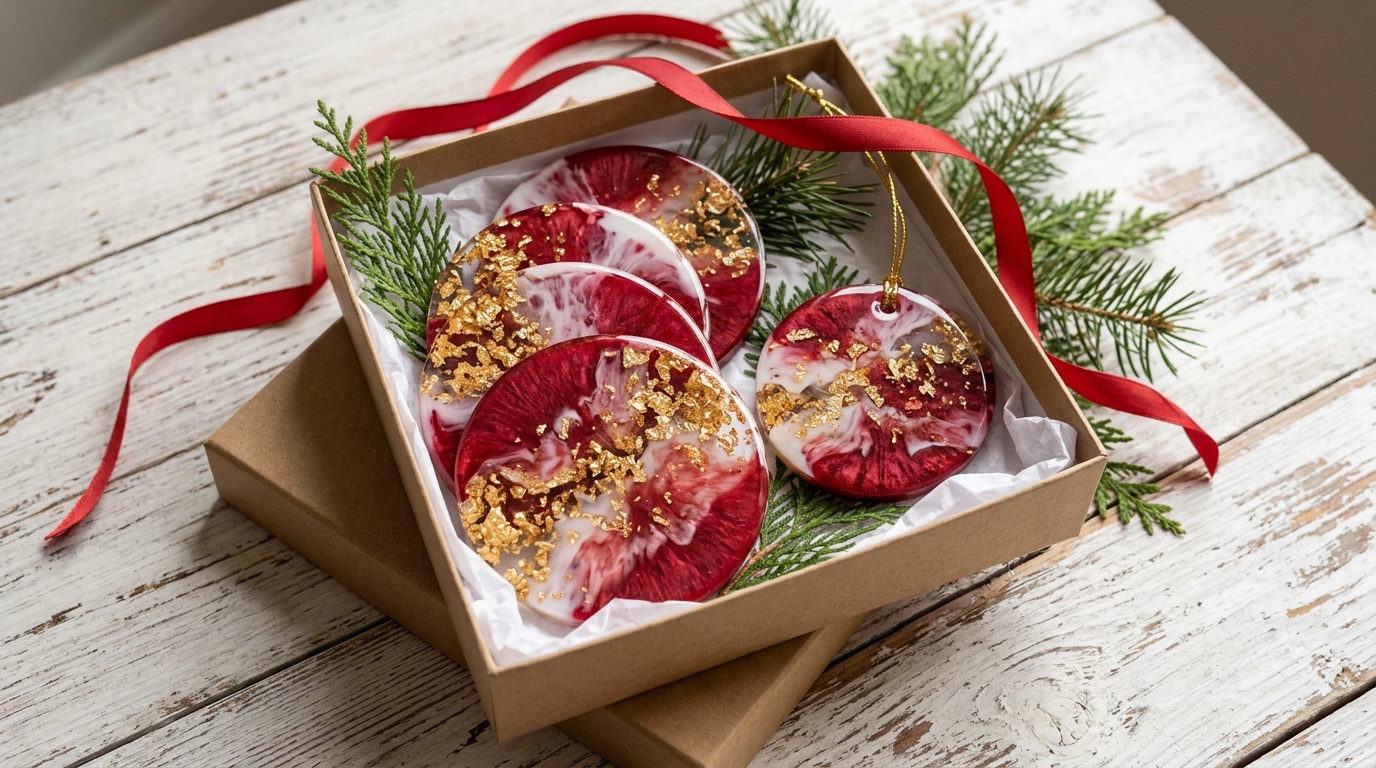
Gift sets always look more expensive than single pieces. Pour four coasters and one ornament from the same batch, with the same colors and the same gold flakes. Tied together with ribbon in a small box, they look like something from a fancy boutique. Resin Christmas ornaments sold as a set do well because buyers get a gift that works all year. Our DIY Christmas coasters gallery has more color ideas.
You will need: Square or round coaster molds, ornament mold, clear craft resin, red and white pigment, gold flakes, cork dots, gloves, gift box, ribbon.
How to make it: 1. Mix one large batch and tint it. 2. Pour the coasters and the ornament at the same time. 3. Add gold flakes to each. 4. Cure, unmold and stick cork dots under the coasters. 5. Box them with tissue and tie with ribbon. Wear gloves and keep fresh air moving.
A Resin Keychain for Stocking Stuffers
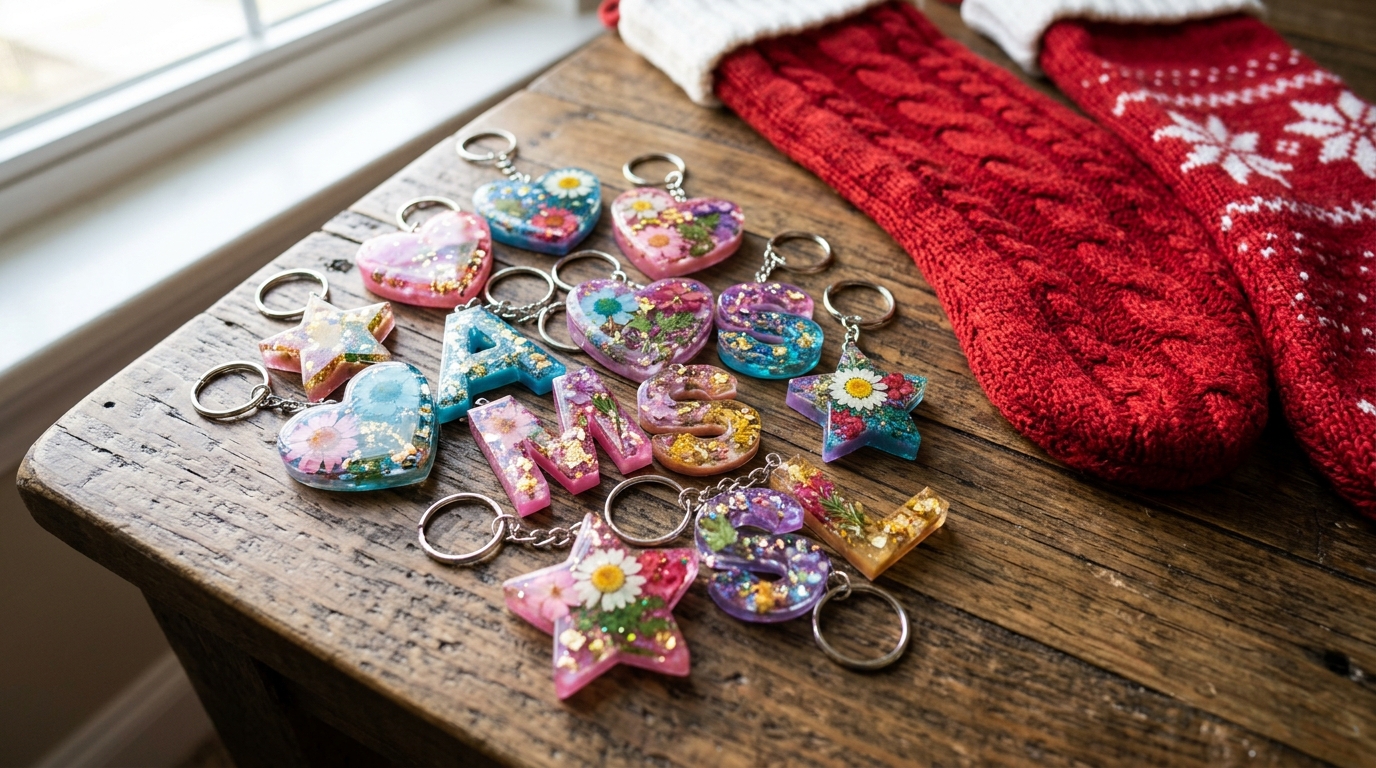
Like the peppermint candy that started this list, many ornaments can become keychains with one small change. Swap the ribbon for a metal key ring and you have a stocking stuffer for teens, teachers and coworkers. Small shapes like hearts, stars and letters work best because they fit in a pocket. Make a dozen in one afternoon and keep a few for last minute gifts. Find more small gifts in our DIY stocking stuffers.
You will need: Small shape molds, clear craft resin, glitter or dried flowers, gloves, small bails, key rings, glue, small pliers.
How to make it: 1. Mix resin and fill the small molds. 2. Add glitter or flowers. 3. Cure fully and unmold. 4. Glue a bail on top. 5. Open the key ring with pliers and slide it through the bail. Wear gloves and keep fresh air moving.
Resin Christmas Ornaments Shaped Like a Shimmer Pearl Snowman
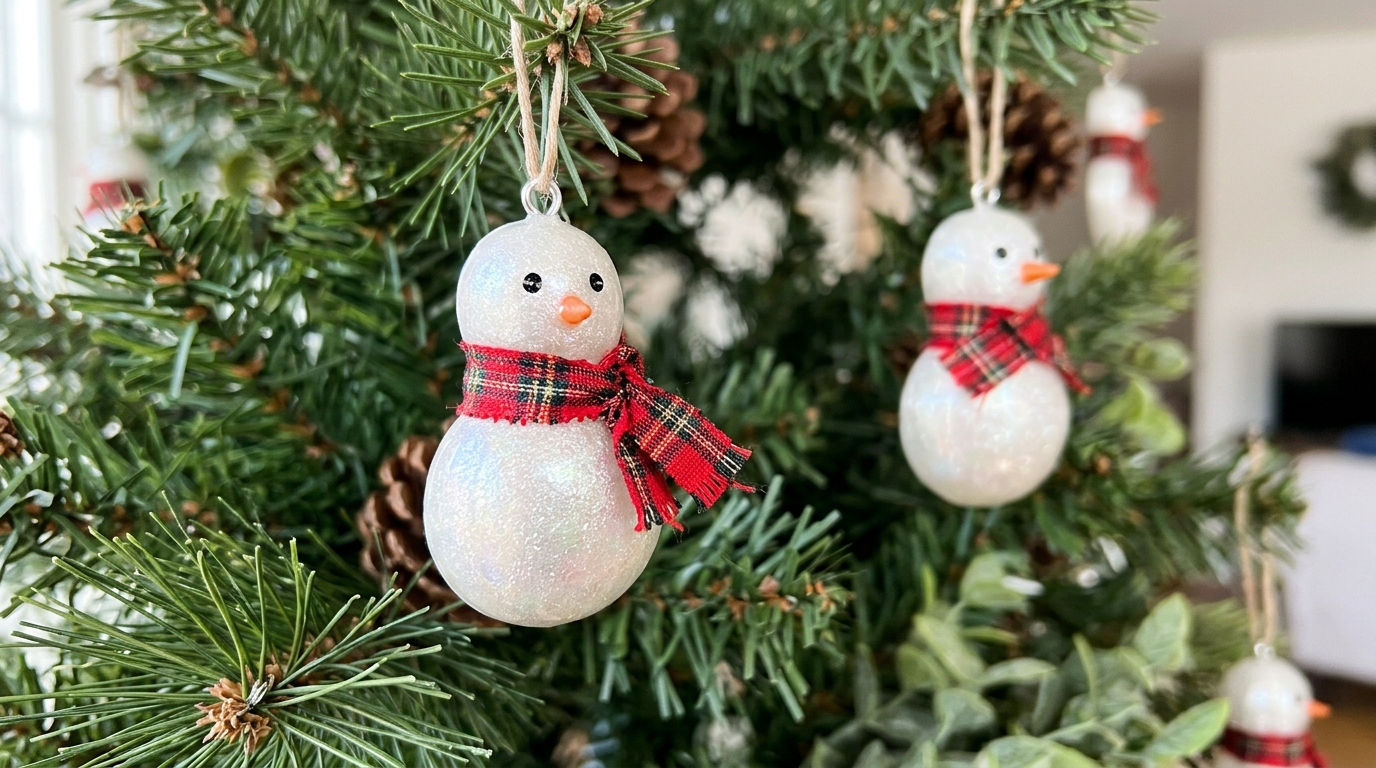
End the list with a little winter friend. Pearl white pigment gives these snowmen a soft, shimmery glow, like fresh snow under moonlight. Paint on tiny dot eyes, an orange nose and a plaid fabric scarf, and each snowman has its own face. These resin Christmas ornaments are a favorite with kids, who can help with the painting once the resin is fully cured. For more shimmer, see our iridescent Christmas decor.
You will need: Snowman silicone mold, clear craft resin, pearl white mica powder, black and orange acrylic paint, fine brush, small fabric strips, gloves, bail, ribbon.
How to make it: 1. Stir pearl powder into the resin. 2. Pour into the snowman mold and cure. 3. Unmold and paint dot eyes, a smile and an orange nose. 4. Tie a fabric strip around the neck. 5. Glue on a bail and add ribbon. Wear gloves and keep fresh air moving.