Thomas Kinkade Christmas: 15 Cozy Cottage Decor Ideas That Feel Like Grandma’s House
A Thomas Kinkade Christmas look is all about snowy cottages, golden windows and that warm feeling of coming home after a long, cold day. For years his cozy cottage prints hung in living rooms all over America, and many of us still picture Christmas exactly that way: a little house in the snow, a path to the door, and a light on inside. The good news is you do not need a fortune to bring that nostalgic glow into your own home. With wood scraps, a little paint, fake snow and a few strands of battery lights, you can build a cottage village, dress a window, paint your own snowy scene and turn your porch into a storybook welcome. These 15 easy projects are made for grown ups who love a slow, cozy evening of crafting..
Thomas Kinkade Christmas Cottage Village on the Mantel

Thomas Kinkade (1958 to 2012) was an American painter known for glowing cottages, quiet villages and snowy country lanes. According to his company, one in every 20 American homes once owned a copy of one of his paintings, as his Wikipedia biography notes. This mantel village captures that same Thomas Kinkade Christmas mood with your own handmade houses. Line up five little cottages, tuck bottle brush trees between them, and let warm fairy lights do the glowing. Which house would you put in the middle..
You will need: 5 small wooden or papier mache houses, white and pastel craft paint, fake snow, bottle brush trees, battery fairy lights, evergreen garland.
How to make it: 1. Paint the houses in soft cream, sage and blue, then add white snow to each roof. 2. Lay a strip of fake snow along the mantel and set the houses on top. 3. Weave battery fairy lights behind the houses and hang the garland below.
Painted Wood Block Village Houses
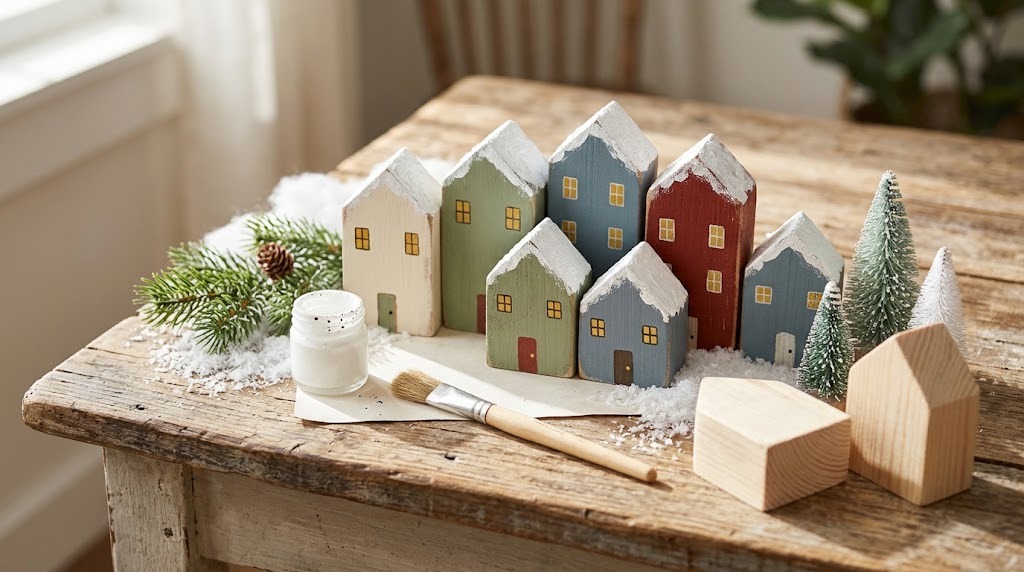
A pile of scrap wood blocks can turn into the sweetest little Christmas town in one evening. Cut a pointed roof on each block, paint them in soft old fashioned colors and dab on tiny yellow windows that look lit from inside. They cost almost nothing, they never break, and they look lovely on a shelf, a tray or a windowsill. Grandkids love rearranging the streets too. How many houses will your village have?
You will need: Scrap 2×4 or 2×2 blocks, a hand saw or miter box, sandpaper, craft paint, a fine brush, white paint for snow.
How to make it: 1. With adult help, cut each block and trim two corners to make a roof point. 2. Sand smooth and paint each house a different soft color. 3. Paint white roofs, yellow windows and a small door on each one.
Paint a Glowing Thomas Kinkade Christmas Window Scene on Canvas
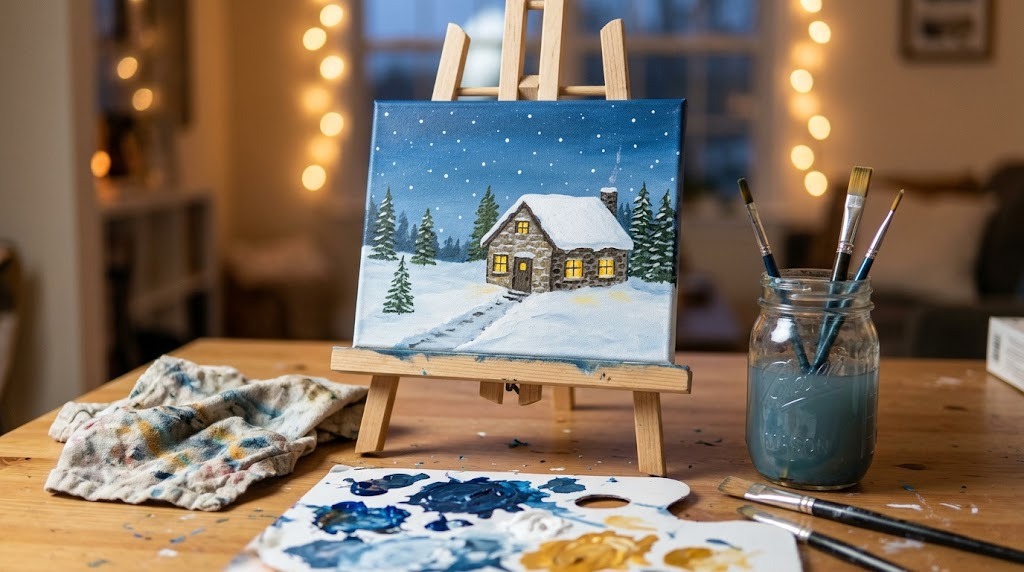
You do not need to be a trained artist to paint a Thomas Kinkade Christmas style scene of your own. Start with a dark blue sky, a simple house shape and a snowy path, then add the magic last: little squares of golden yellow in every window. That warm contrast between cold blue and glowing gold is what makes these scenes feel so welcoming. Make it a cozy craft night with a friend and a mug of cocoa. Ready to pick up a brush?
You will need: A small canvas, acrylic paints in navy, white, brown and golden yellow, flat and round brushes, a palette, a cup of water.
How to make it: 1. Paint the sky dark blue at the top, fading lighter near the snowy ground. 2. Block in a simple cottage, a roof and a curving path. 3. Add yellow windows last, then flick white dots for falling snow.
Snowy Cottage Window With Battery Lights
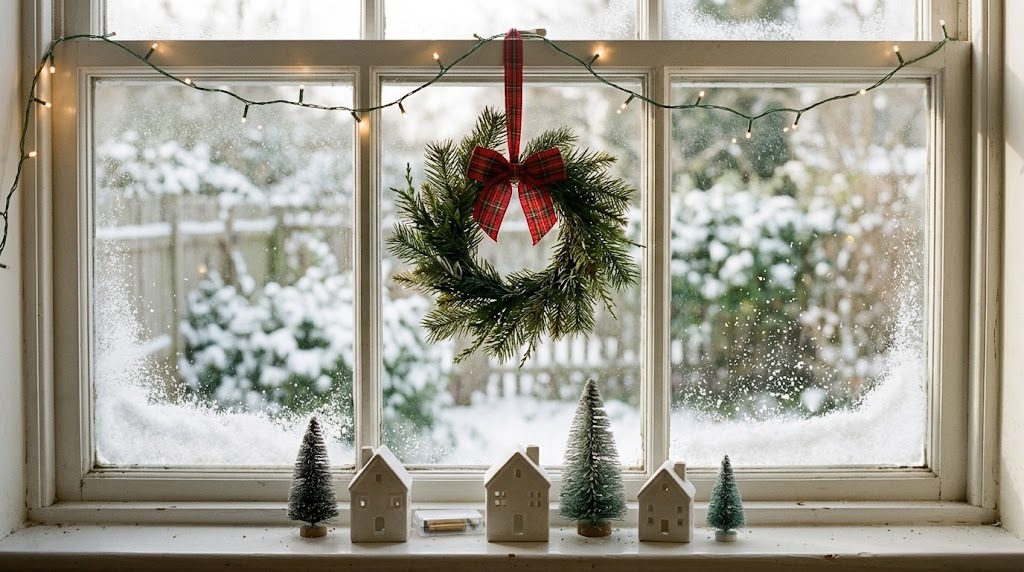
The window is the heart of every cozy cottage picture, so start there. Frost the corners of the glass with faux snow, drape a strand of battery fairy lights across the top and hang a small wreath in the middle. Line the sill with little white houses and tiny trees. From the street it glows like a postcard, and from your armchair it feels like a snow day all season. Which window in your home gets the most love?
You will need: Window spray snow or a stencil and white chalk marker, battery fairy lights, removable hooks, a small wreath with ribbon, ceramic houses.
How to make it: 1. Clean the glass, then spray soft drifts of faux snow into the lower corners. 2. Hang the lights across the top with removable hooks. 3. Add the wreath on a ribbon and style the sill.
Lantern Style Porch With Greenery
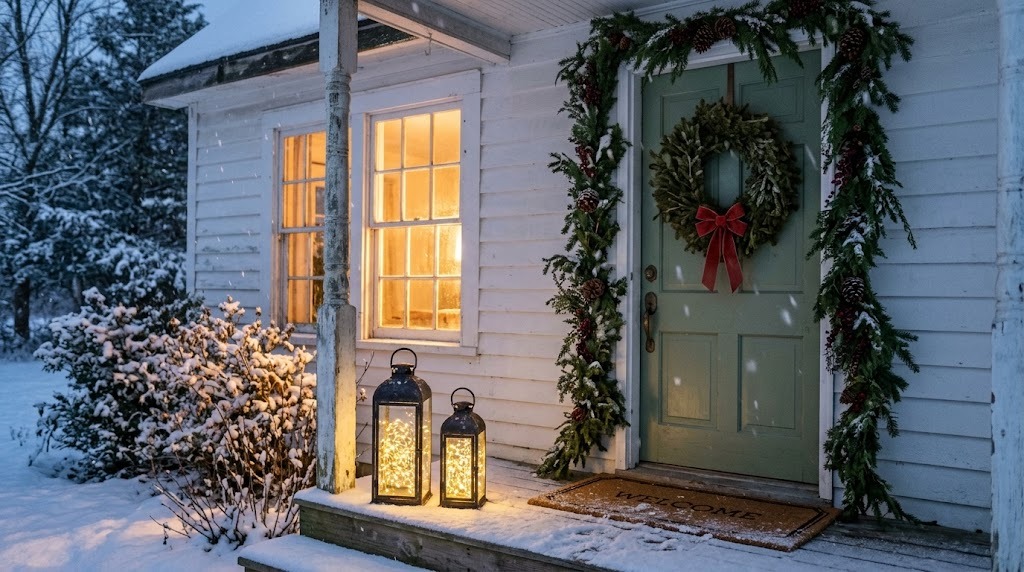
A Thomas Kinkade Christmas porch feels like the house is waving hello. Set two lanterns on the steps and fill them with warm battery light clusters instead of real flames, so they are safe to leave glowing all evening. Frame the door with evergreen garland, pine cones and berries, then hang a big wreath with a velvet bow. When neighbors walk by at dusk, they will slow down to look. Would you go classic red or soft sage on your door?
You will need: 2 lanterns, battery LED fairy light clusters with timers, evergreen garland, pine cones, faux berry picks, a wreath, a velvet ribbon.
How to make it: 1. Coil a battery light cluster inside each lantern and set the timer. 2. Hang garland around the door frame and tuck in cones and berries. 3. Tie a big velvet bow and hang the wreath at eye level.
Warm String Lights Around a Cottage Door
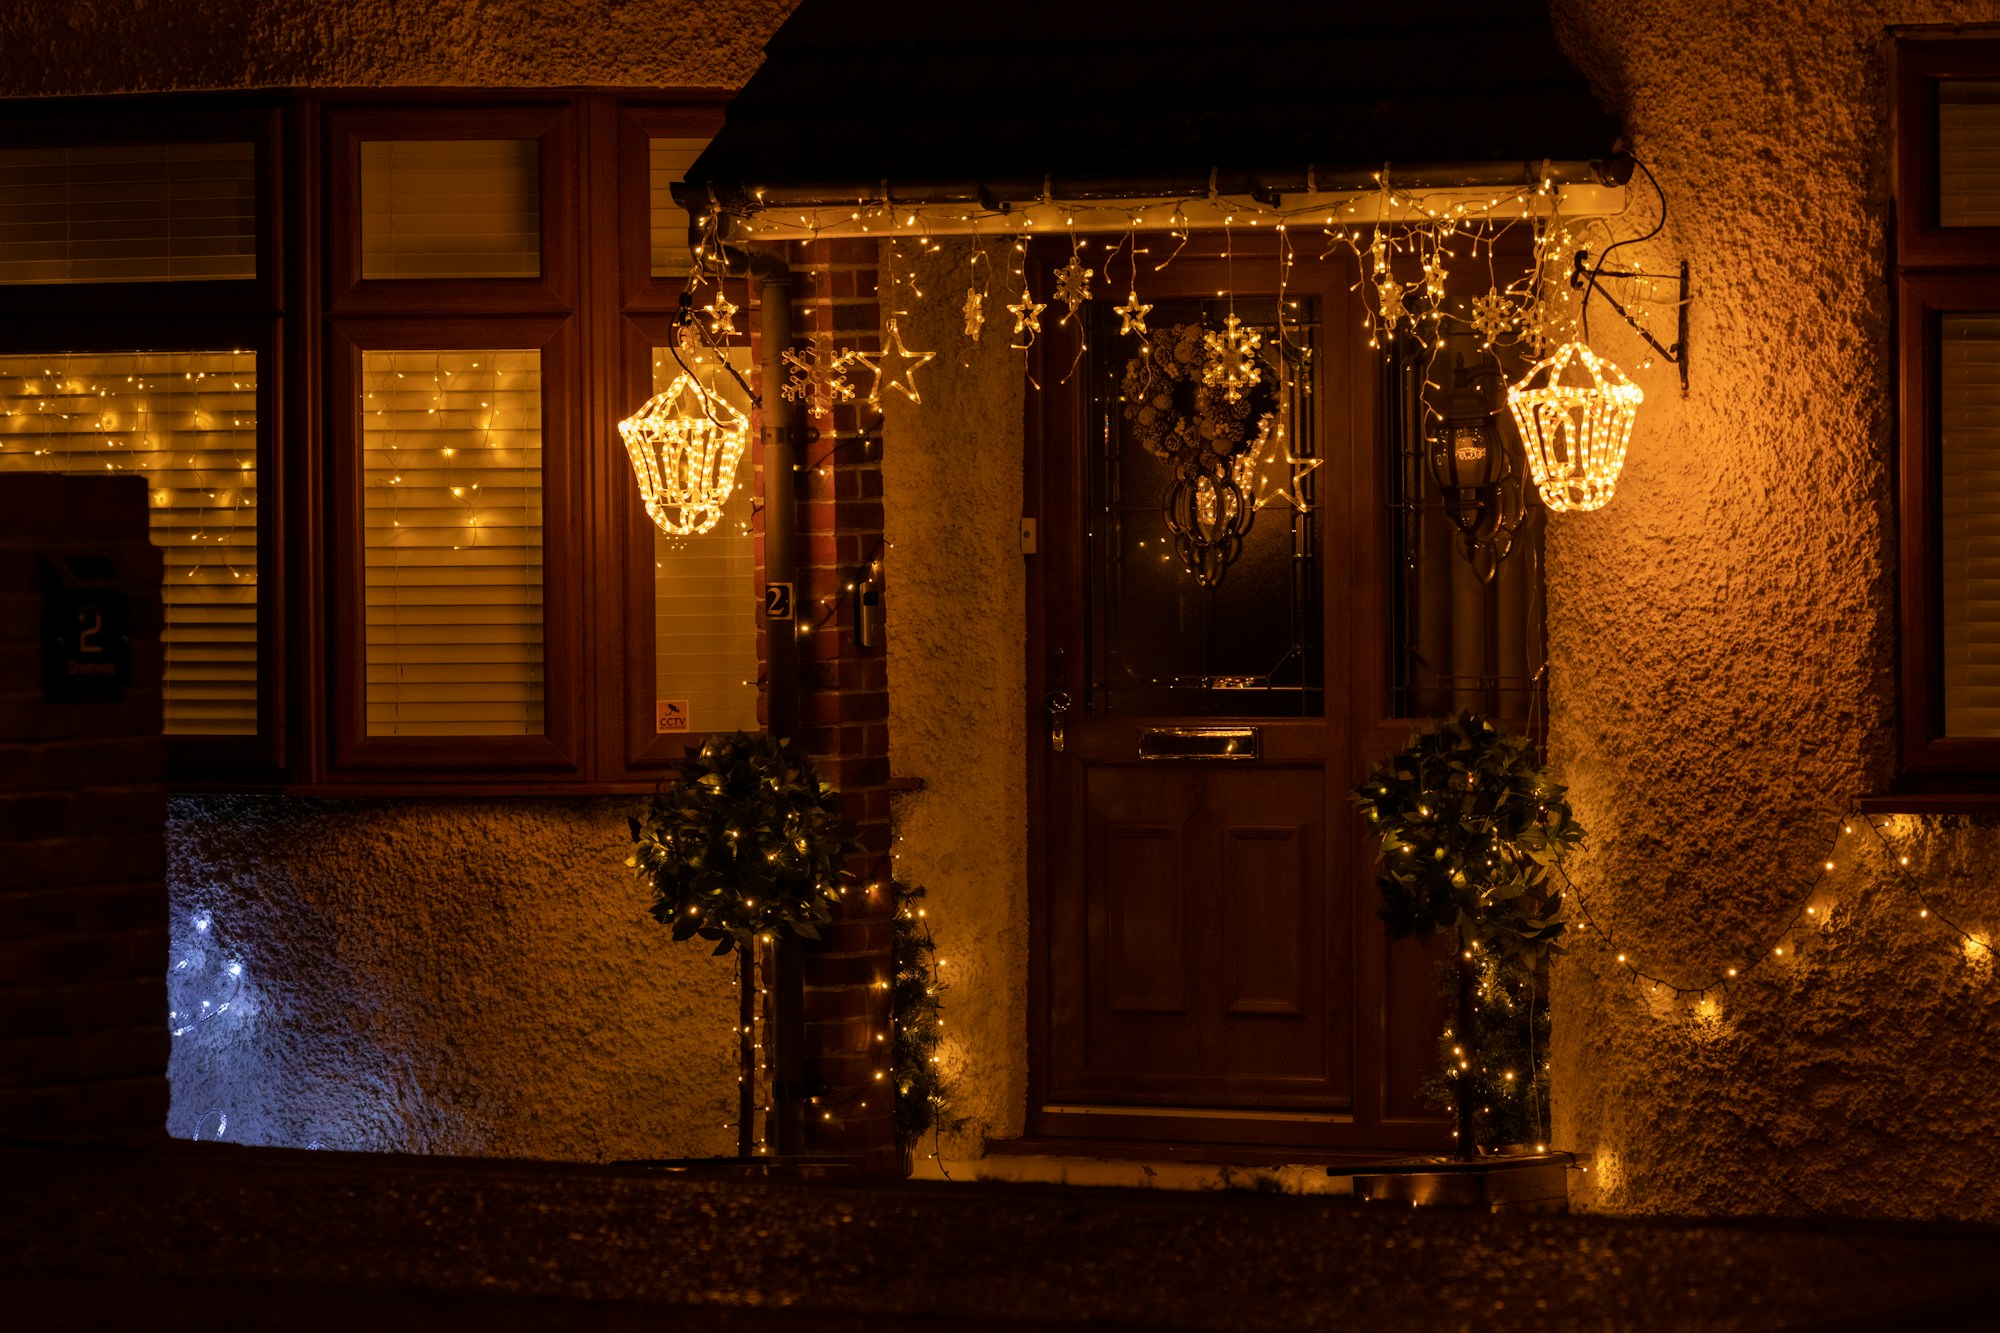
Nothing says welcome like a doorway glowing after dark, just like the cottages in those cozy Christmas prints. Drape warm white string lights along the porch roof, hang light up lantern shapes on each side, and set potted evergreens by the door. Use outdoor rated lights on a timer so the whole entry switches on at dusk by itself. Keep everything one warm color for that soft golden look. Would your neighbors notice a glow like this?
You will need: Outdoor rated warm white string lights, 2 light up lantern decorations, a timer, removable outdoor hooks, 2 potted evergreens, a small wreath.
How to make it: 1. Hang the string lights along the porch edge with removable hooks. 2. Mount the lantern lights on each side of the door. 3. Add the evergreens and wreath, then set the timer for dusk.
Thomas Kinkade Christmas Mailbox Swag

Little details along the lane are what make a Thomas Kinkade Christmas scene feel so complete, and the mailbox is the easiest place to start. A bundle of pine, cedar and berries tied with a big bow takes ten minutes and makes the mail carrier smile every single day. Use outdoor ribbon so it survives snow and rain. It is a tiny project with a big postcard look. Does your mailbox get dressed up for the holidays?
You will need: Mixed evergreen sprigs, faux berry picks, floral wire, a weatherproof ribbon, zip ties.
How to make it: 1. Layer longer sprigs at the back and shorter ones in front. 2. Wire the bundle tightly and add the berries. 3. Zip tie it to the mailbox post and finish with a full bow.
Stone Path Doormat With a Snow Stencil
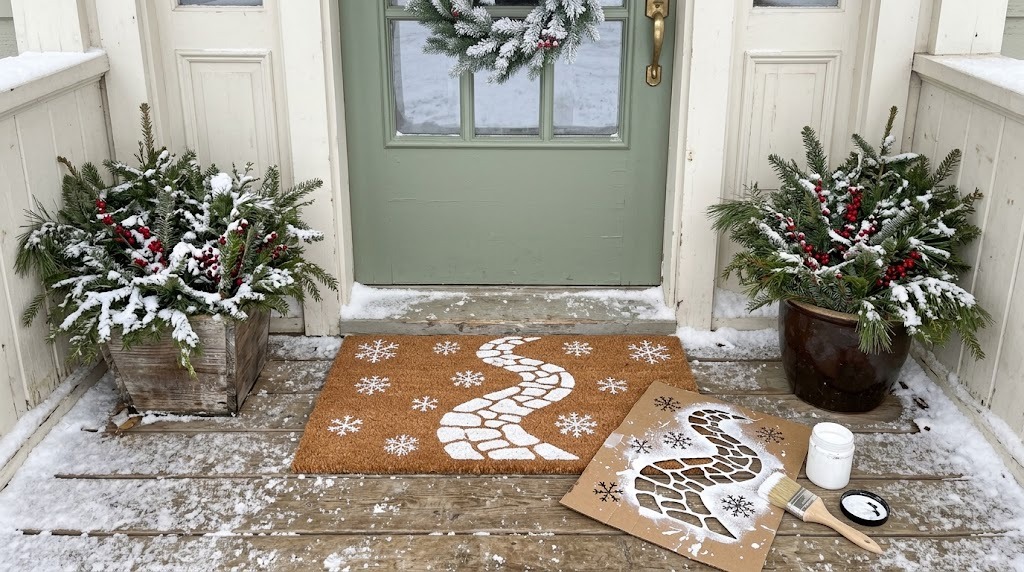
Every cozy cottage picture has a winding path leading to the door, so why not put one under your feet? Cut a simple stone path and snowflake stencil from cardboard and dab white outdoor paint onto a plain coir mat. It looks charming, it costs a few dollars, and it ties your porch decor together. Let it dry overnight before anyone wipes their boots. Would you add a few snowflakes or keep it simple?
You will need: A plain coir doormat, cardboard or stencil plastic, a craft knife, white outdoor acrylic paint, a stencil brush.
How to make it: 1. Draw rounded stones and snowflakes on cardboard and, with adult help, cut them out. 2. Tape the stencil to the mat and dab paint straight down. 3. Lift the stencil and let it dry 24 hours.
Mini Cottage Centerpiece on a Cake Stand
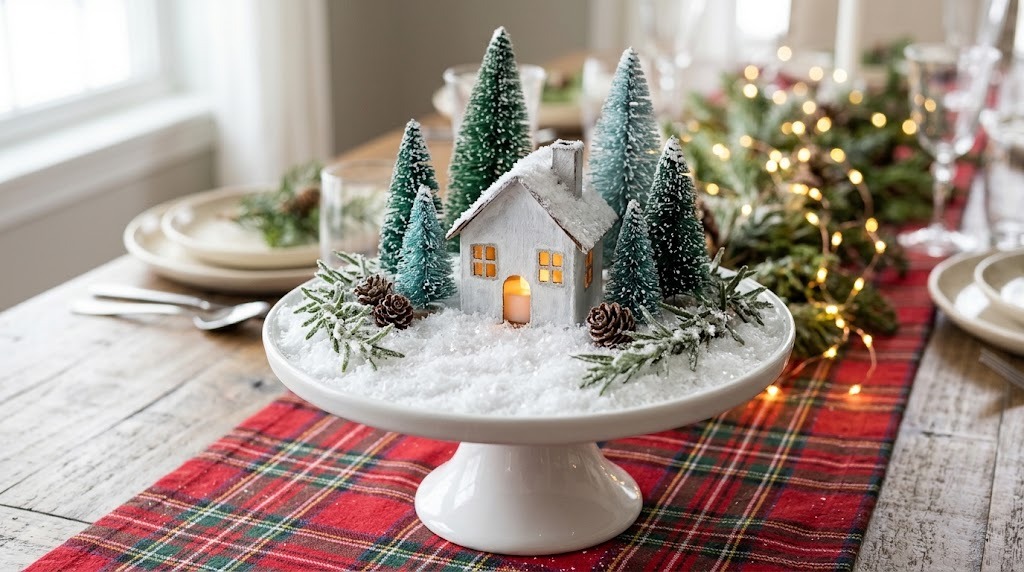
A plain cake stand makes the perfect little hill for a snowy cottage. Build a tiny house from painted cardboard, slip a battery tea light inside so the windows glow, and circle it with mini trees, sugared rosemary and fluffy snow. It looks so sweet on a holiday table, and it is low enough that everyone can still chat across it. Pair it with our bottle brush tree ideas for a full vintage look. What would you set it on?
You will need: A cake stand, cardboard, a craft knife, white and gray paint, a battery tea light, mini trees, rosemary, fake snow.
How to make it: 1. Cut and glue a small cardboard house with open windows. 2. Paint it, add snow to the roof and set a battery tea light inside. 3. Arrange trees, rosemary and snow around it on the stand.
Picket Fence Tree Collar
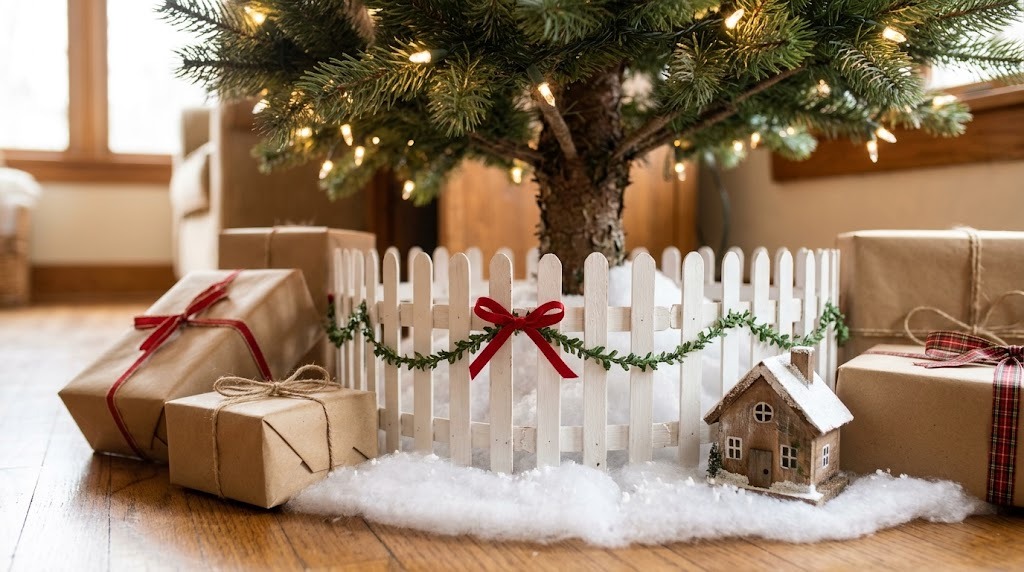
Turn the bottom of your tree into a little cottage garden with a white picket fence collar. Craft sticks glued to two rails make the pickets, and four panels hinged with ribbon wrap neatly around the stand. Paint it white, add a skinny garland and a bow, and suddenly the gifts look like they are waiting in a snowy front yard. It is one of those projects people always ask about. Will you leave it white or add a touch of red?
You will need: Jumbo craft sticks, thin wood strips for rails, wood glue, white paint, ribbon, a skinny garland.
How to make it: 1. Glue craft sticks onto two rails to make four fence panels. 2. Paint them white and let them dry. 3. Join the panels with ribbon ties and wrap them around the tree stand.
Wooden Sled With Pine and Berries

An old wooden sled leaning by the door is pure old fashioned Christmas. Look for one at a yard sale or thrift shop, or build a simple one from slats. Tuck pine branches, berries and a pair of mittens under the rope, and it becomes instant porch or entry decor. It brings back memories of snowy hills and cold cheeks for so many of us. Did you have a favorite sled as a kid?
You will need: A wooden sled, evergreen branches, faux berry picks, a plaid ribbon, a pair of knit mittens, floral wire.
How to make it: 1. Wipe the sled clean and touch up any paint. 2. Wire a bundle of greenery and berries to the top slats. 3. Add the mittens and a plaid bow, then lean it by the door.
Thomas Kinkade Christmas Bird House Ornaments
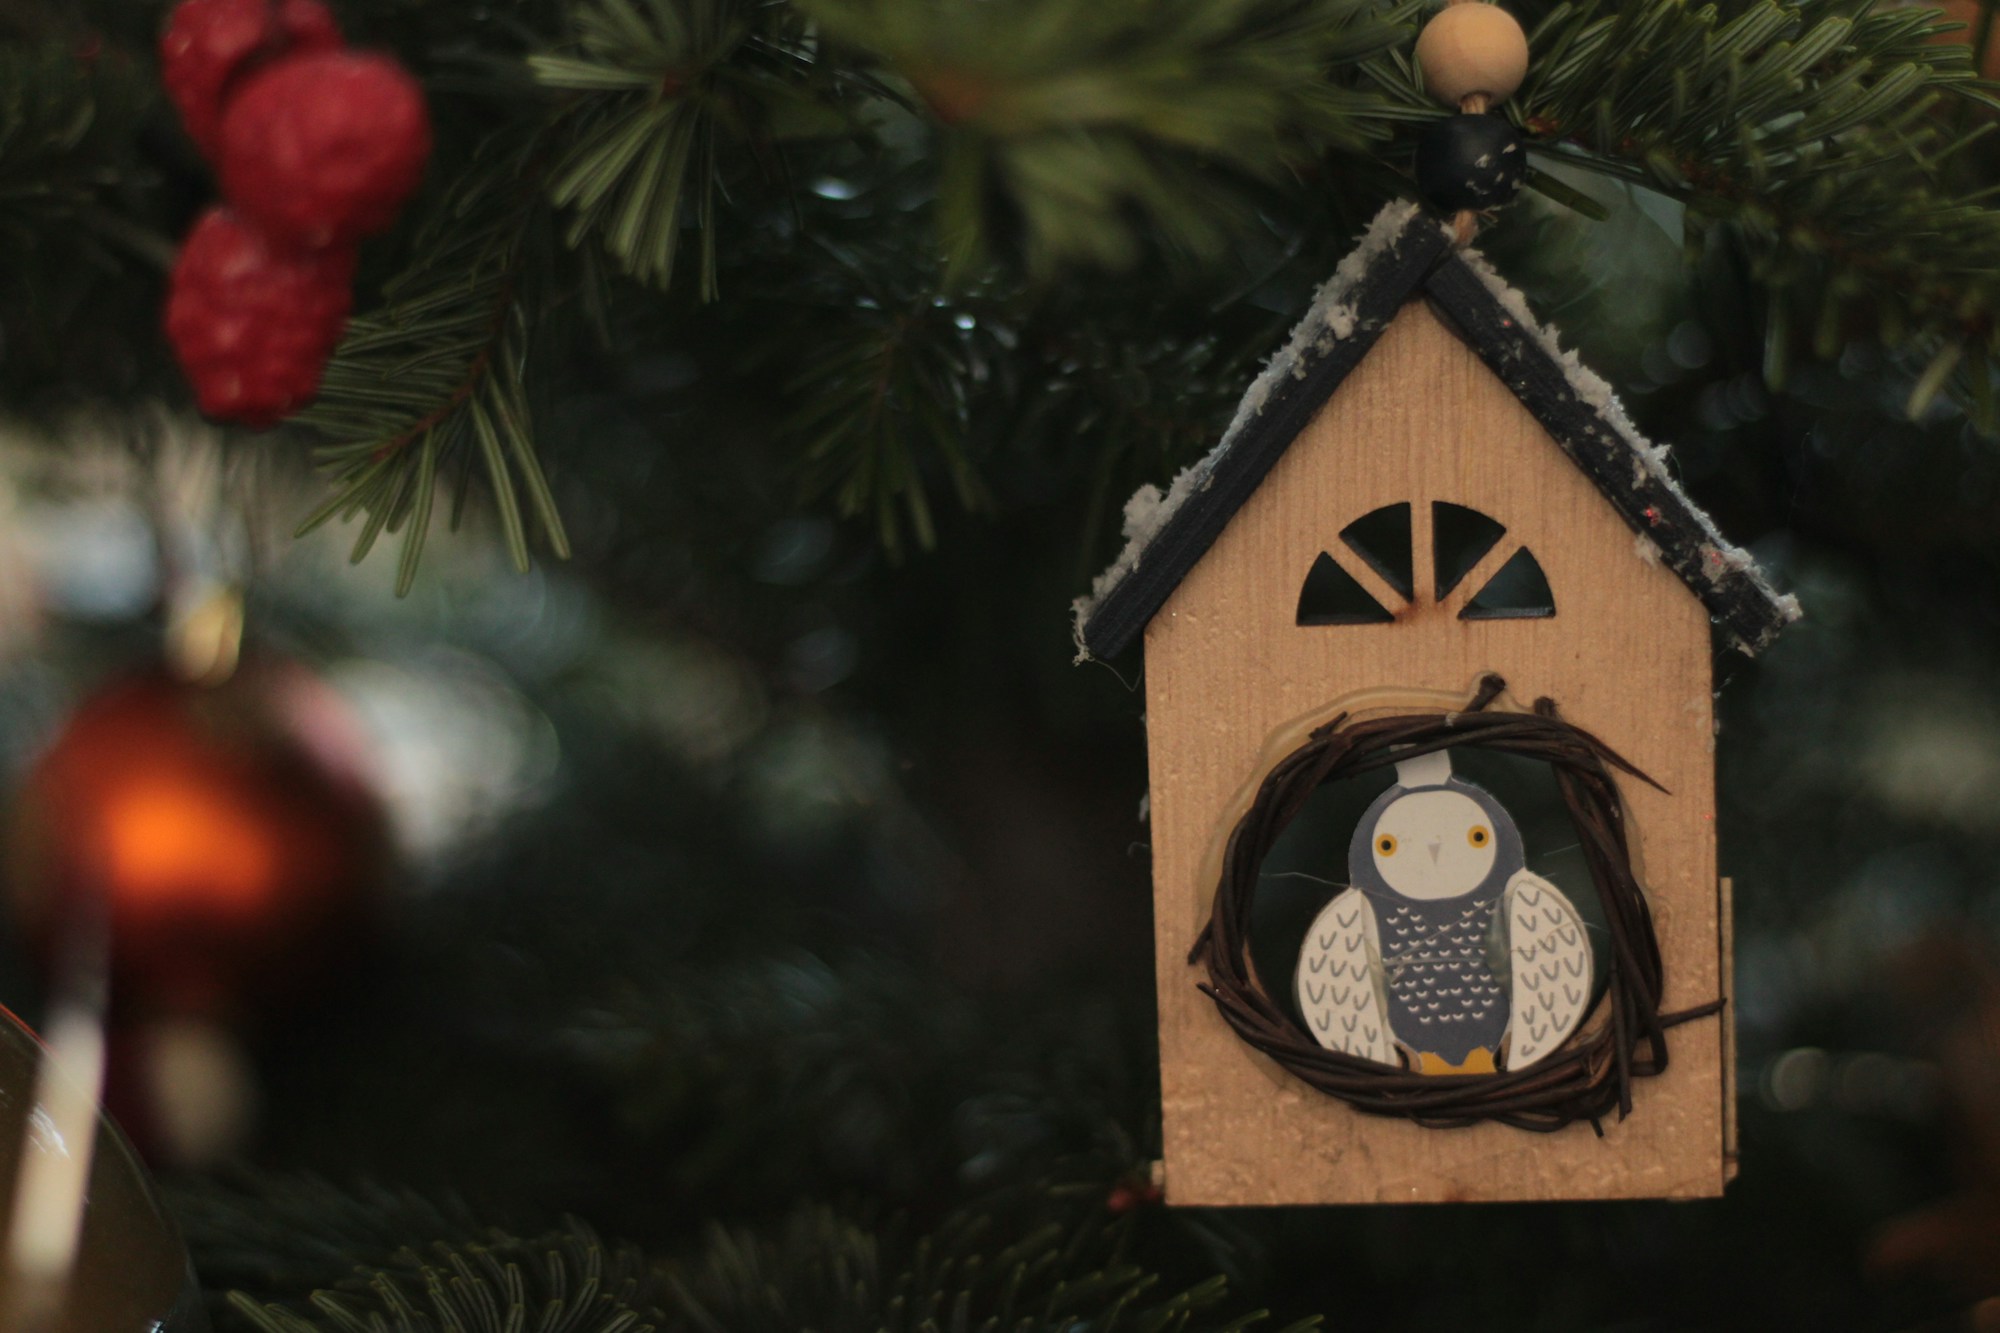
Tiny bird houses are a charming way to bring the Thomas Kinkade Christmas cottage feeling right onto your tree. Paint small unfinished wooden bird houses in cream, red and sage, add snowy roofs and hang them with twine. They look like a little village tucked between the branches. They also make lovely gifts for neighbors who love birds and gardens. Which colors would you choose for yours?
You will need: Mini unfinished wooden bird houses, craft paint, white paint for snow, twine, small screw eyes.
How to make it: 1. Twist a screw eye into the top of each bird house. 2. Paint the walls, then add a white snowy roof and a tiny door. 3. Thread twine through the eye and hang.
Cozy Plaid Throw and Pillow Nook
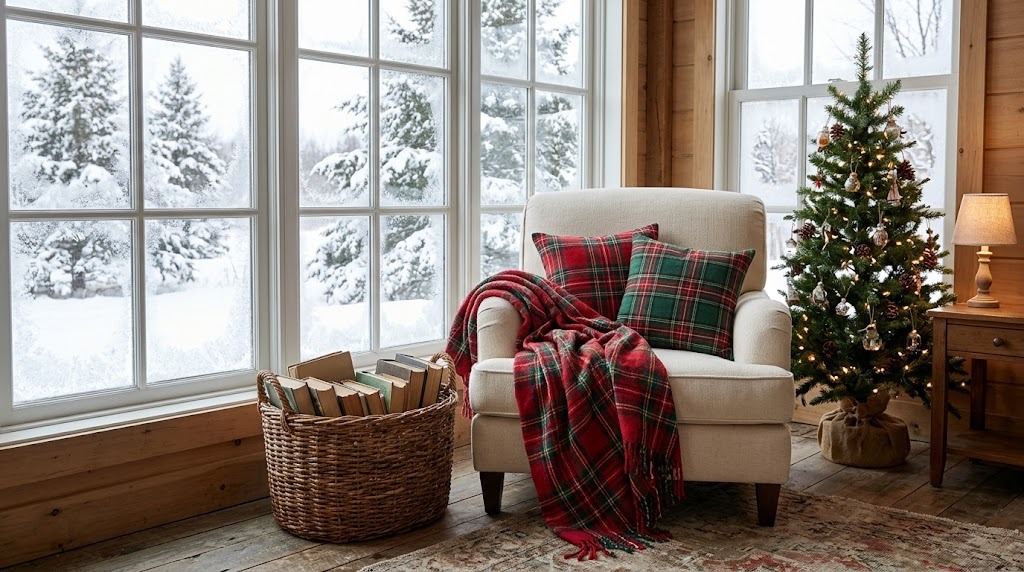
A cottage Christmas is as much about how a room feels as how it looks. Make a reading corner with a soft plaid throw, a stack of pillows and a little lamp, so there is always a warm spot to curl up. Sew simple envelope pillow covers from old flannel shirts or a thrift store blanket to keep the cost low. Add a basket for books and the nook is ready for snowy afternoons. Where would your cozy corner go?
You will need: A plaid throw or flannel fabric, pillow forms, a sewing machine or fabric glue, a basket, a small lamp.
How to make it: 1. Cut fabric for an envelope pillow cover with an overlapping back. 2. Sew or glue the side seams and turn it right side out. 3. Pile pillows and the throw in a chair and add the basket.
Bottle Brush Tree Forest by the Window
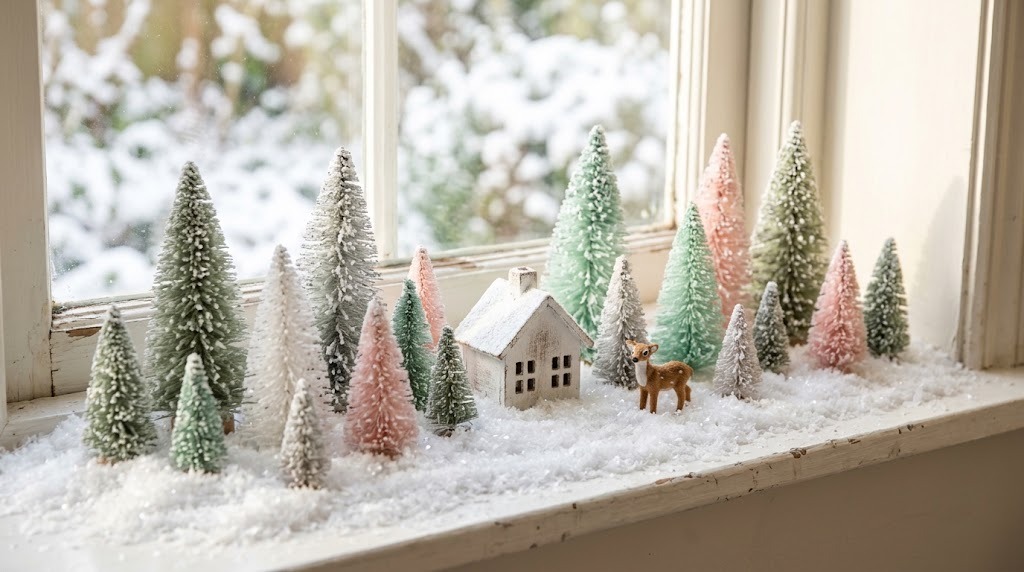
A little forest of bottle brush trees by the window looks like a snowy hillside outside a cottage. Mix heights and colors, from deep green to frosted white, and nestle them in fake snow on the sill or a tray. You can even bleach and dye plain trees in soft vintage colors for a grandma style touch. Add a single tiny house in the middle and the whole scene comes alive. How many trees will fit on your sill?
You will need: Bottle brush trees in several sizes, fake snow, a tray or windowsill, optional diluted bleach and fabric dye.
How to make it: 1. Group trees by height, tallest at the back. 2. Spread fake snow and press the trees into it. 3. Add a tiny house or deer in the middle of the forest.
Hand Painted Thomas Kinkade Christmas Covered Bridge Ornament
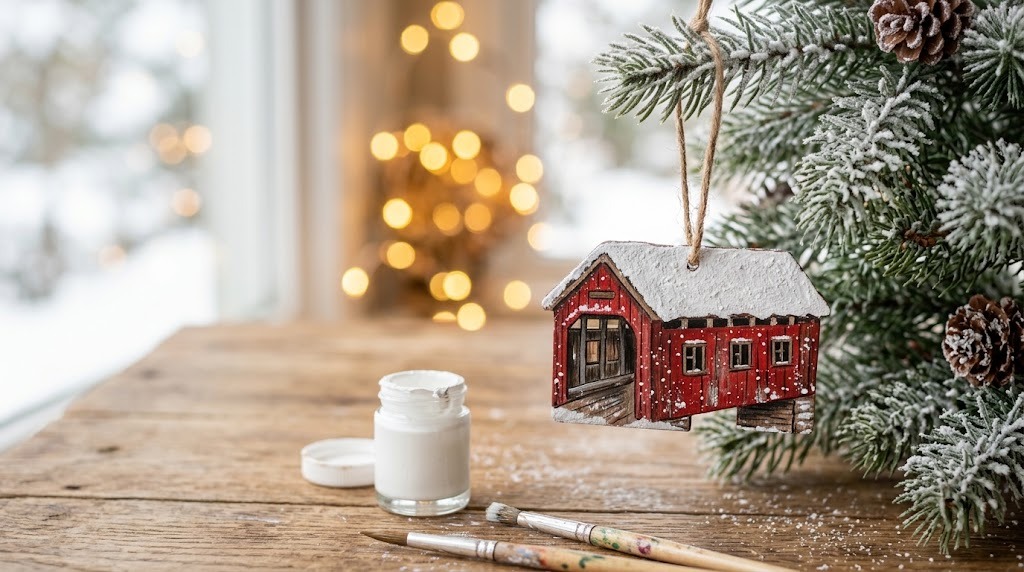
Covered bridges are a favorite in old country Christmas scenes, and a little wooden one makes a keepsake ornament that tells a story. Cut the shape from thin plywood or buy a blank, paint it barn red with a snowy roof and add tiny windows. Write the year on the back so it comes out every December as a family memory. It is a sweet way to finish your Thomas Kinkade Christmas collection. Who would you give one to?
You will need: A thin wood ornament blank or plywood scrap, a scroll saw or craft knife, red, white and brown paint, fine brushes, twine.
How to make it: 1. Sketch a bridge shape and, with adult help, cut it out and sand the edges. 2. Paint it red with a white roof and dark doorway. 3. Drill a small hole, add twine and write the year on the back.