Under Sink Organization: 15 Cheap DIY Fixes That Tame the Messiest Cabinet in Your Kitchen
Under sink organization is the one kitchen job almost everyone puts off, because that dark cabinet is full of pipes, spray bottles, old sponges and a box of trash bags that somehow keeps falling over. Then the holidays arrive, guests offer to help with the dishes, and someone opens that door. The good news is that you do not need a contractor or fancy store systems to fix it. With a few baskets, some scrap wood, a little paint and a free afternoon, you can turn the messiest cabinet in your kitchen into one that is calm, clean and easy to use. Before you start, take everything out, wipe the base dry, and if little ones visit, add a simple child safety latch to the doors. Ready to finally close that door with a smile..
Under Sink Organization Starts With a Simple Plan
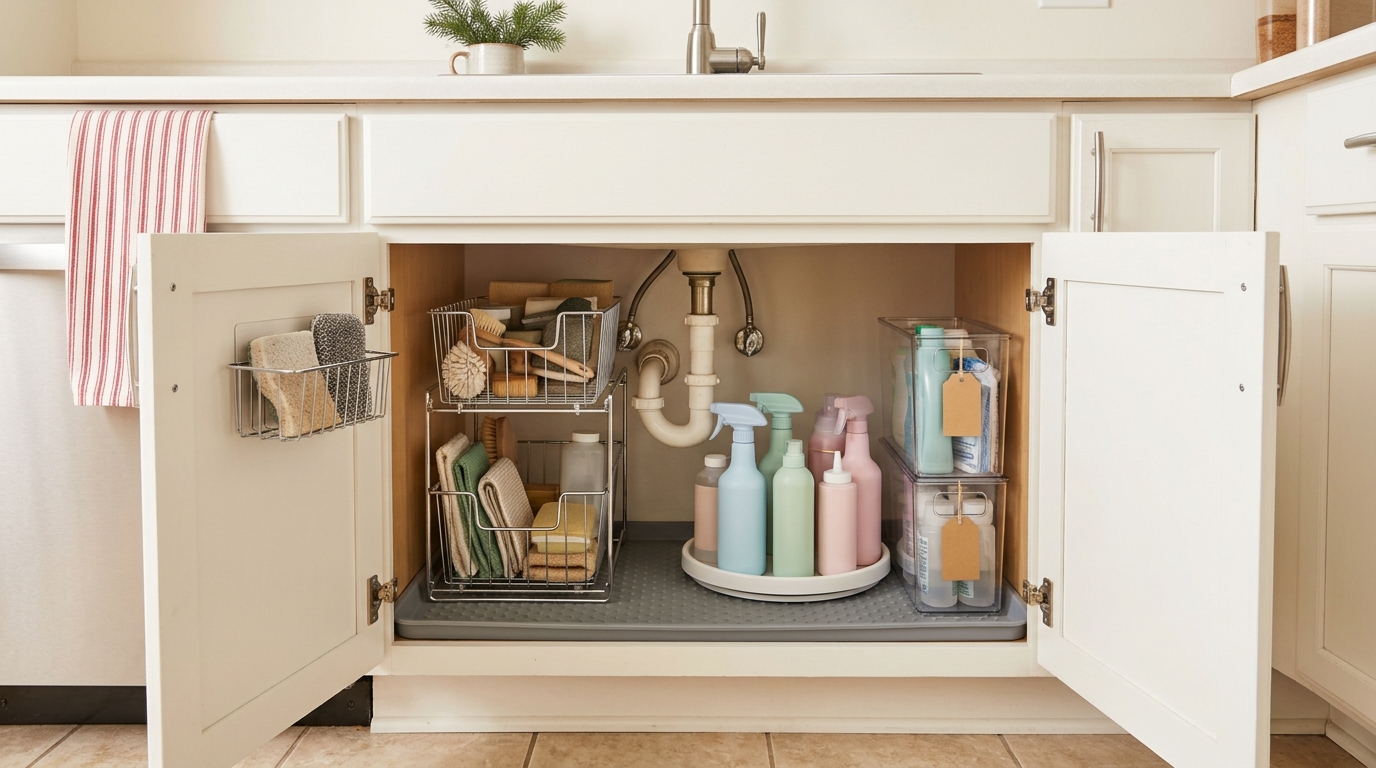
Every good under sink organization project starts by working around the pipes instead of fighting them. Pull everything out, toss the empty bottles and dried up sponges, and sort what is left into three piles: daily dish care, weekly cleaning and backups. Then look at the space in zones: the left side, the right side, the door and the floor. A popular under sink makeover on Instagram with more than 38,000 likes shows how much calmer the cabinet feels once each zone has one job. The baskets, turntable and tray on this cabinet are all coming up in this list. Which zone will you clear first..
You will need: A trash bag, a damp cloth, a towel, and a notepad to jot down what you actually use.
How to make it: 1. Empty the cabinet completely and wipe the base dry. 2. Sort items into daily, weekly and backup piles and toss anything old. 3. Measure the width, depth and the space around the pipe before you buy or build anything.
Two Tier Sliding Baskets That Clear the Pipe
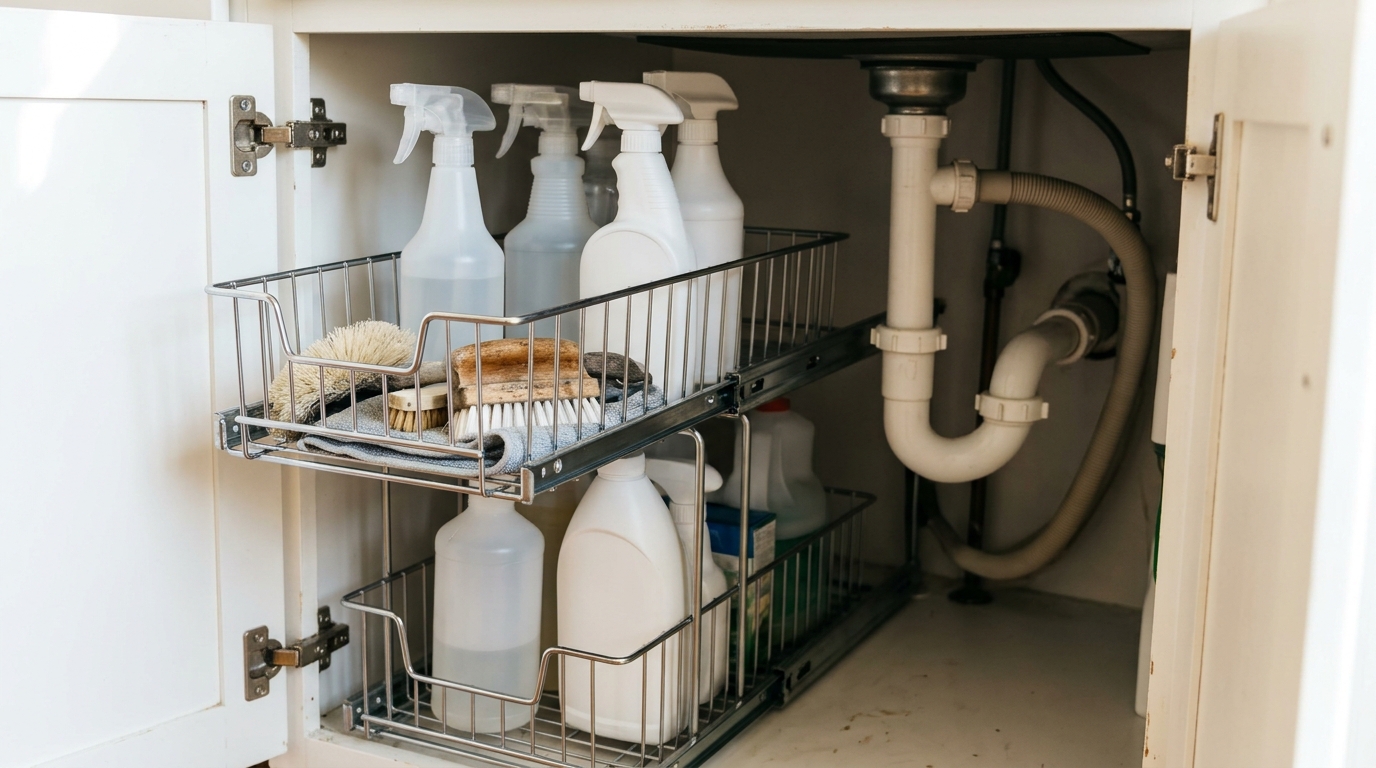
Tall drain pipes eat up the middle of the cabinet, but a slim two tier sliding basket tucks right beside them. The top drawer pulls out so you can grab a spray or a brush without reaching into the dark. Look for a narrow model in the home aisle, or build a simple version from two wire baskets on a small shelf. Put the things you use every day in the top drawer and refills in the bottom. Would a pull out drawer save your back?
You will need: A narrow two tier sliding basket or two wire baskets, a tape measure, and plain bottles to fill it.
How to make it: 1. Measure the gap between the pipe and the cabinet side. 2. Set the basket in place and check that the drawers slide past the pipe. 3. Load daily items on top and backups below.
Under Sink Organization for the Back Corner: A Turntable
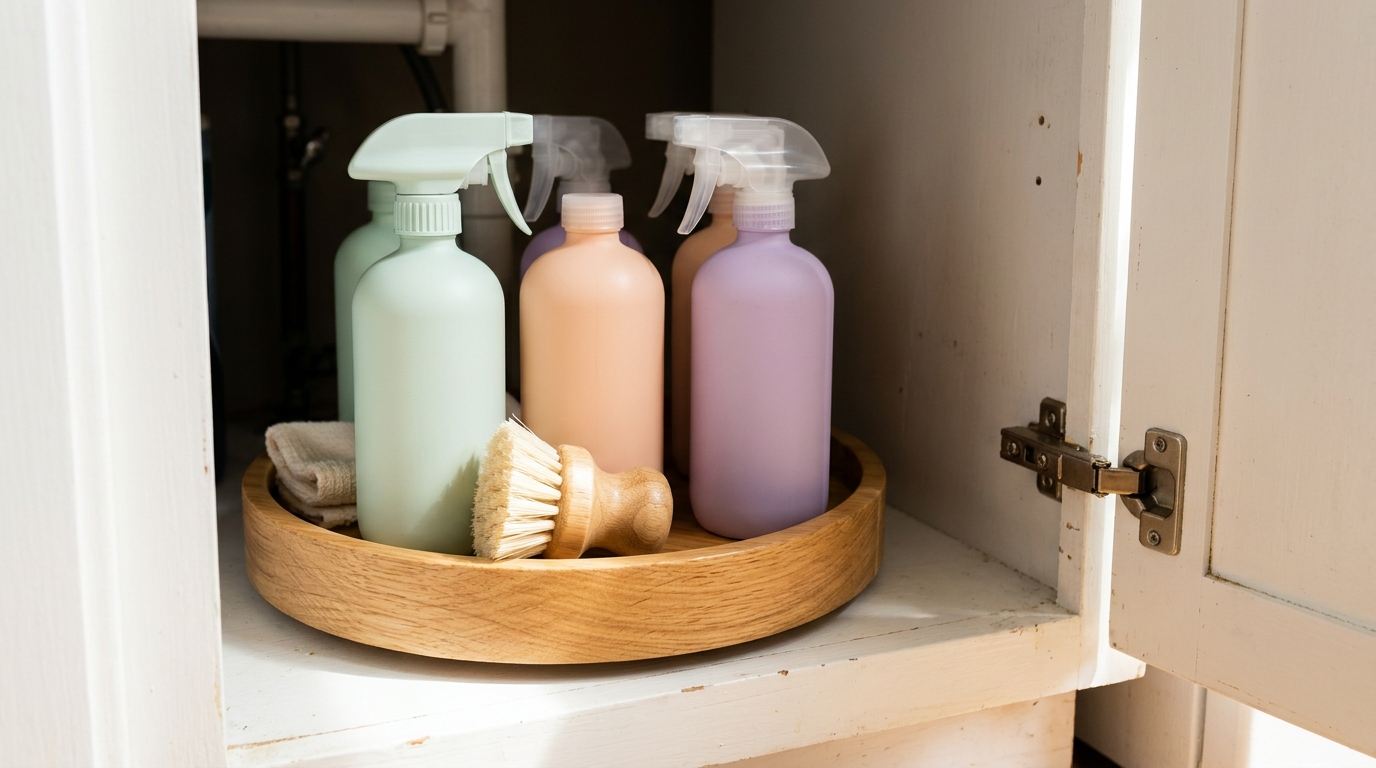
A round turntable is the cheapest trick for the deep back corner of the cabinet. Instead of knocking over three bottles to reach the one at the back, you just give it a spin. A wooden one looks warm and pretty, and you can make it from a round cutting board and a small lazy susan bearing. Keep sprays on the turntable and brushes in a cup in the middle. How many bottles are hiding at the back of yours?
You will need: A round wooden turntable or a round board with a lazy susan bearing, screws, and plain spray bottles.
How to make it: 1. If building, screw the bearing to the center of the round board. 2. Place it toward the back corner of the cabinet. 3. Line the bottles around the edge with tall ones at the back.
Under Sink Organization on the Door: A Sponge Caddy
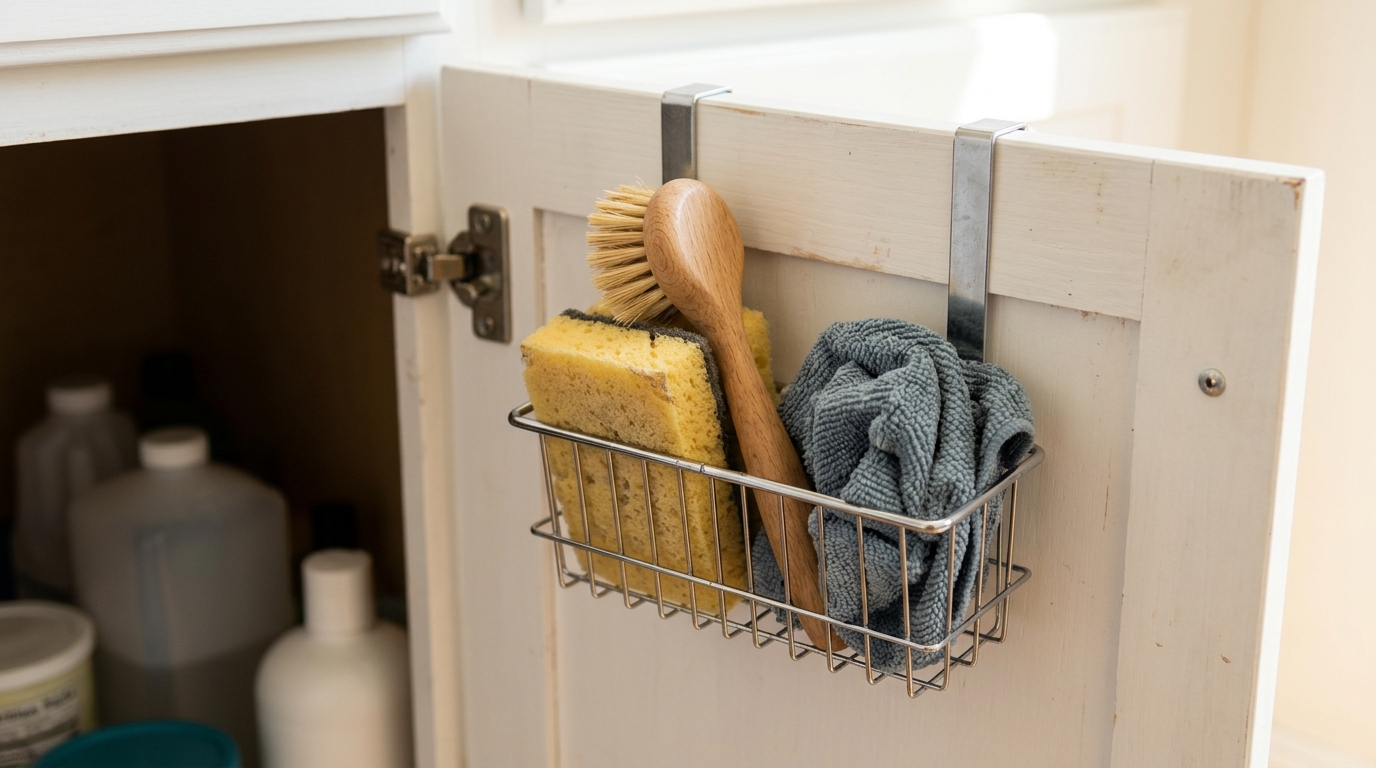
The inside of the cabinet door is free space, and under sink organization gets much easier once you use it. A small wire caddy hooks over the top of the door and holds a sponge, a dish brush and a cloth where they can drip dry instead of sitting in a puddle by the sink. Check that the door still closes before you fill it. Your counter stays clear for holiday cooking, too. What would you hang on your door?
You will need: A small over the door wire caddy, a sponge, a dish brush and a microfiber cloth.
How to make it: 1. Open the door and hook the caddy over the top edge. 2. Close the door gently to make sure nothing hits the pipe or shelf. 3. Fill it with the items you reach for after every meal.
Under Sink Organization Starts at the Base: A Pretty Liner
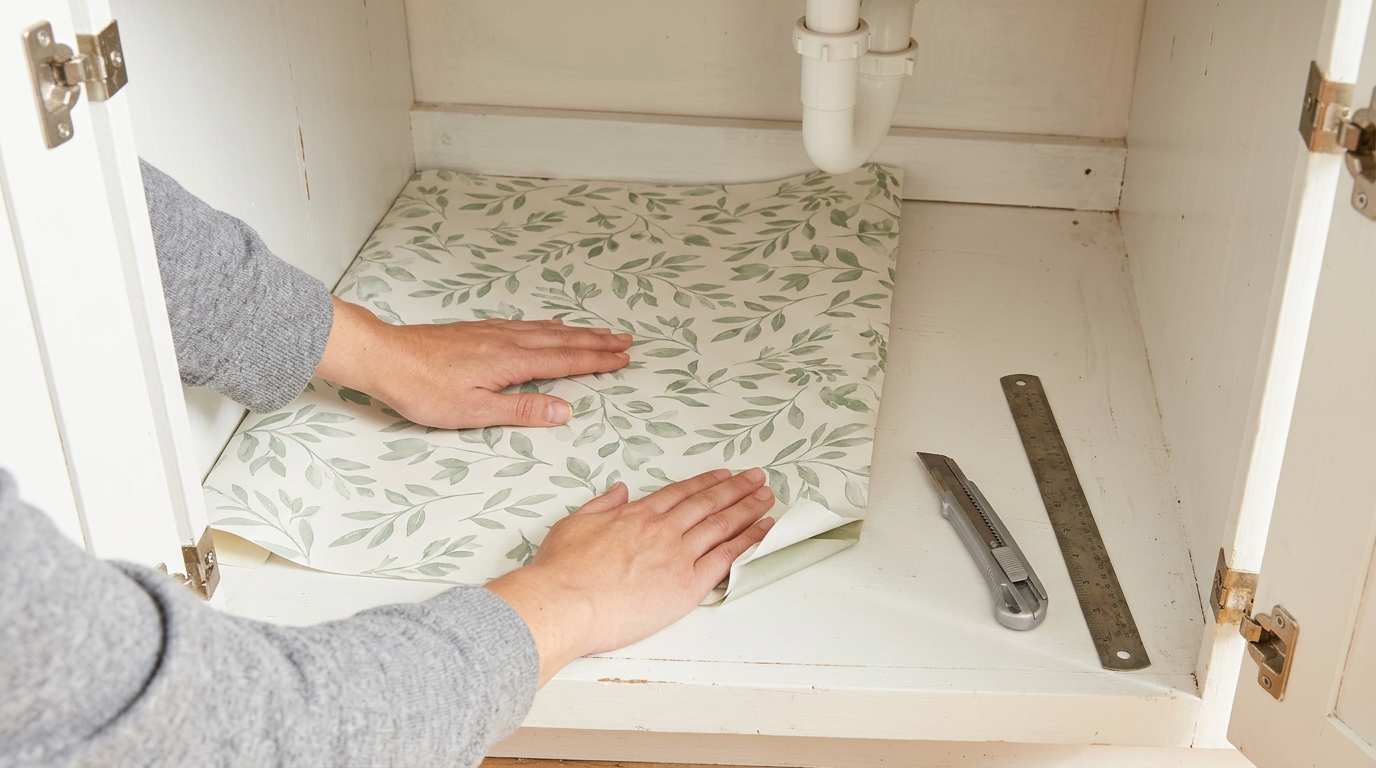
Old cabinet floors are often stained, swollen or just plain sad. A peel and stick liner in a soft pattern makes the space feel fresh and is easy to wipe. Measure the base, cut the liner on a flat surface, and smooth it down from the middle out to push out bubbles. An adult should handle the craft knife. It takes less than half an hour and makes everything you put back look nicer. Which pattern would you pick?
You will need: Peel and stick shelf liner, a ruler, a pencil, scissors or a craft knife, and a dry cloth.
How to make it: 1. Clean and dry the cabinet floor and measure it. 2. Cut the liner a little bigger and trim it in place. 3. Peel the backing slowly while smoothing it down with a cloth.
A Boot Tray Catches Drips and Small Leaks
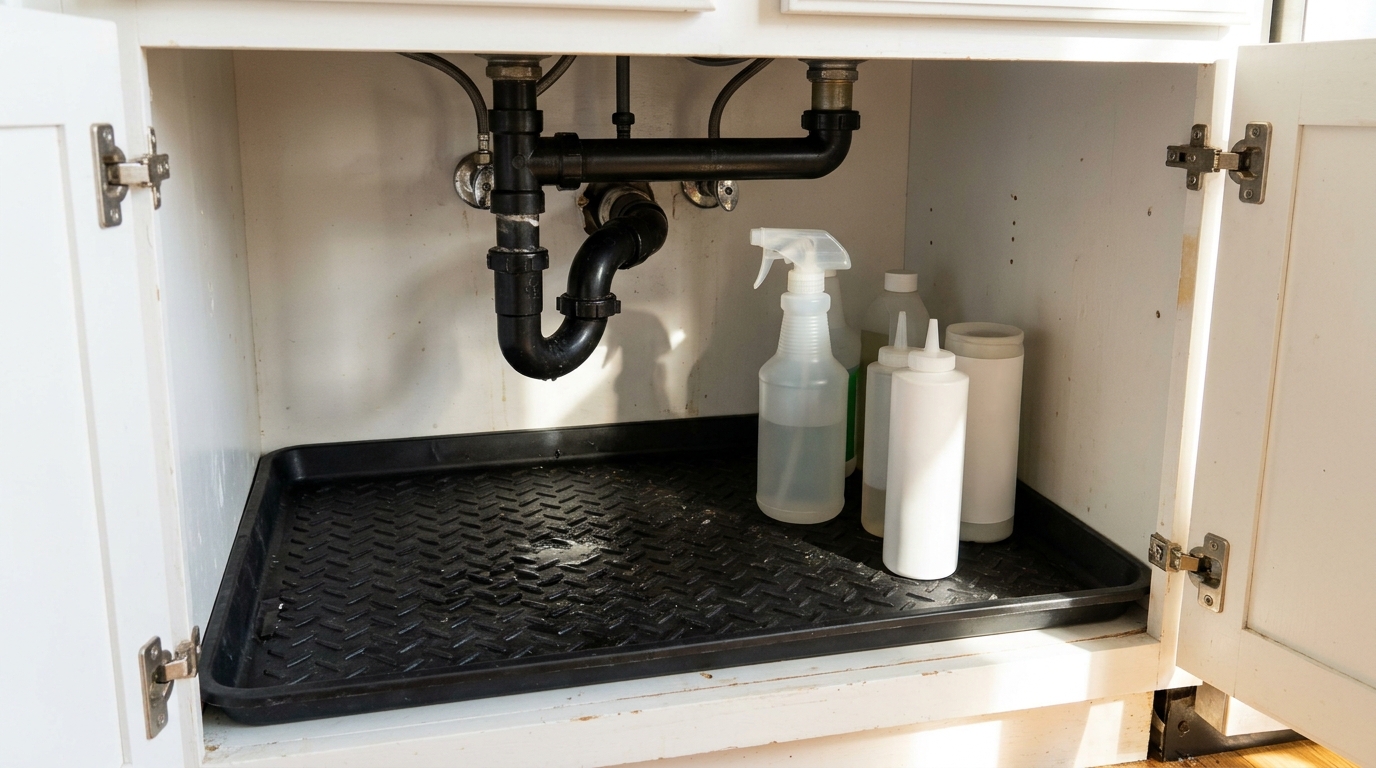
A rubber boot tray is one of the smartest cheap swaps for the cabinet floor. It catches drips from wet bottles and gives you an early warning if the pipe ever starts to leak, so your wooden base stays dry. Trim it with sturdy scissors if it is too wide. Check it once a week when you take out the trash. It is the kind of fix you forget about until it saves you from a big repair. Does your base have water stains already?
You will need: A rubber boot tray, sturdy scissors, and a tape measure.
How to make it: 1. Measure the floor of the cabinet. 2. Trim the tray to fit around the front frame if needed. 3. Set it under the pipe and stand bottles inside it.
A Scrap Wood Shelf Riser Doubles the Space
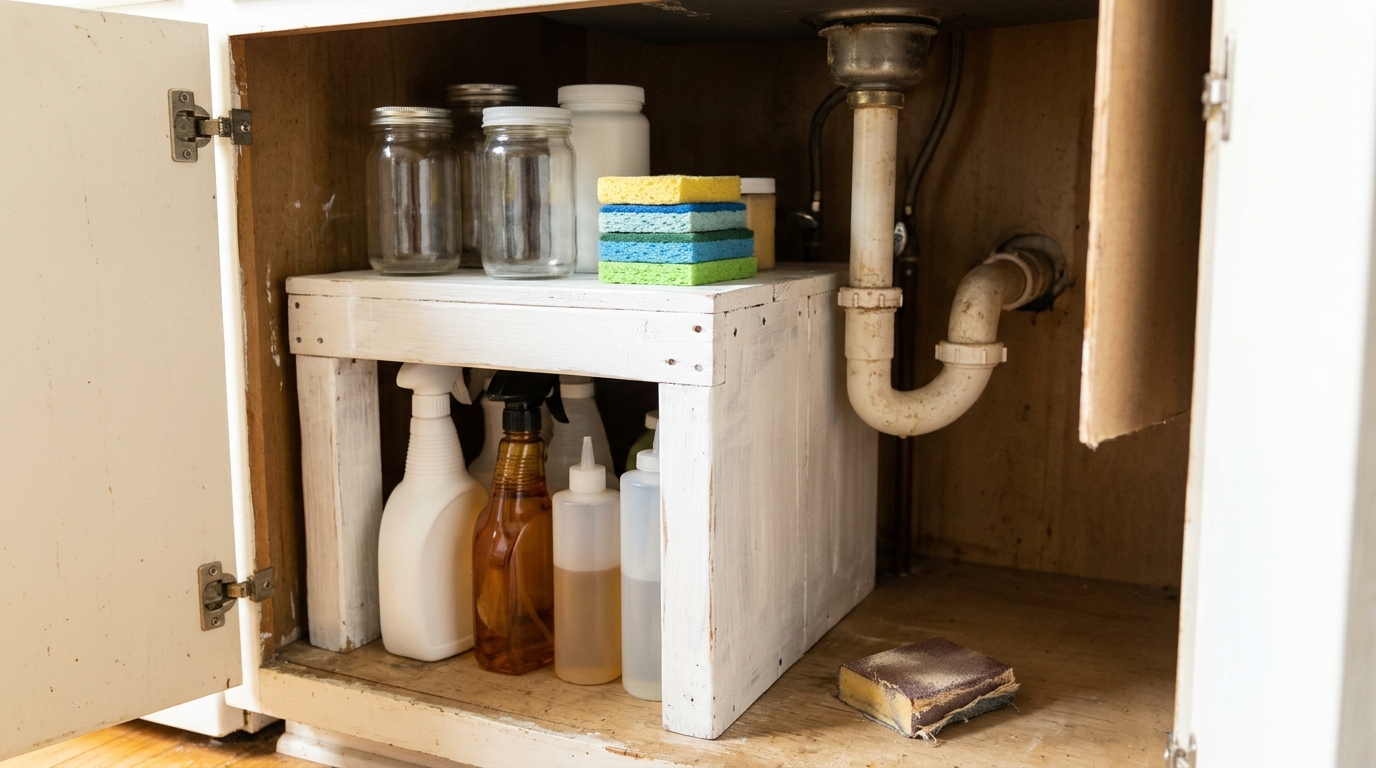
Most sink cabinets have tons of empty air above short bottles. A simple shelf riser made from scrap wood fixes that and looks like it came from a pricey store. Cut one board for the top and two short legs, glue and nail them together, then paint it white so it brightens the cabinet. Make it narrow enough to sit beside the pipe. Jars and sponges go on top and bottles below. Do you have a leftover board in the garage?
You will need: Scrap boards, a saw, wood glue, small nails, sandpaper and white paint. Adult help for cutting.
How to make it: 1. Cut a top board and two legs a little taller than your bottles. 2. Glue and nail the legs to the ends of the top. 3. Sand the edges, paint, let dry and slide it into the cabinet.
A Trash Bag Roll Holder From a Dowel
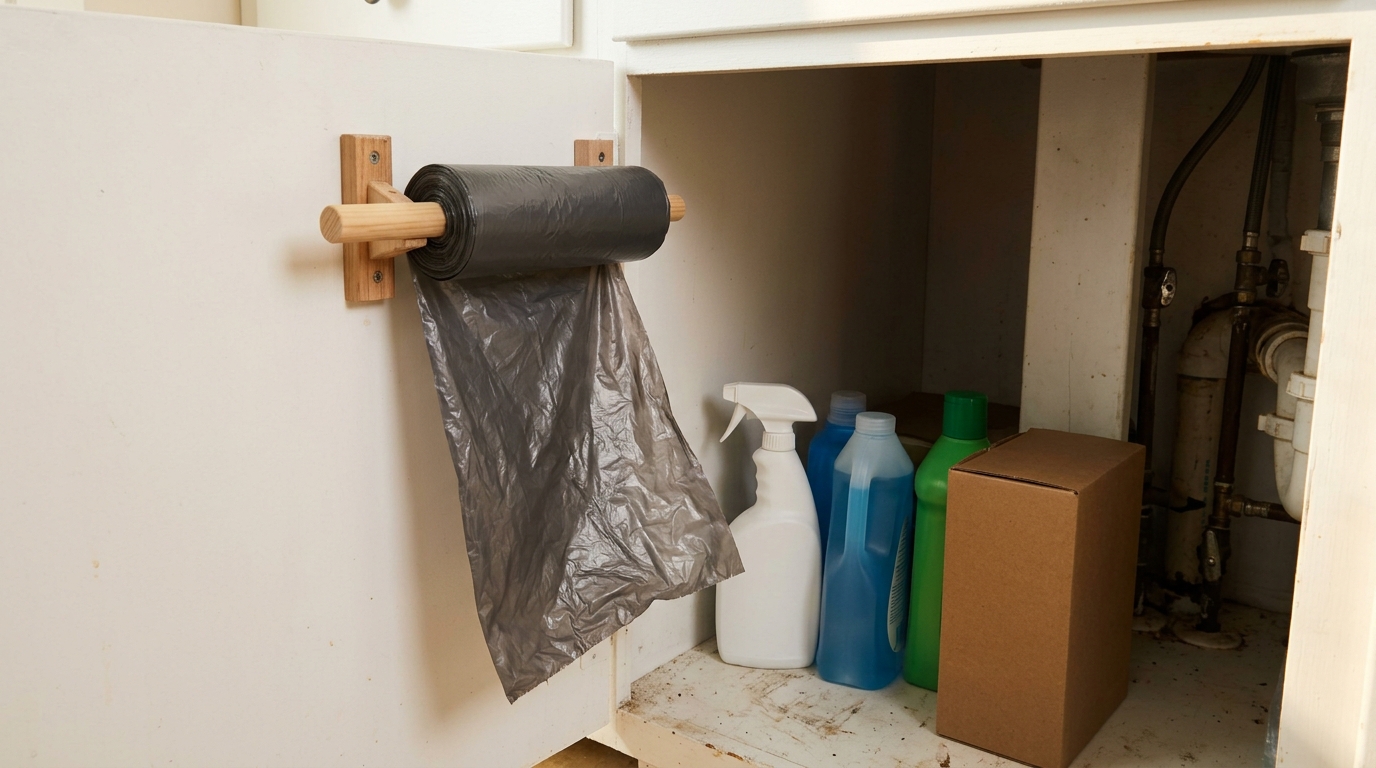
The trash bag box always ends up crushed and torn. A short dowel on two little brackets on the side panel or door holds the roll so bags pull off one at a time, just like paper towels. It costs a couple of dollars and takes ten minutes with short screws. Make sure the screws are shorter than the cabinet wall is thick. Now you can grab a fresh bag with one hand while holding the full one in the other. How handy would that be?
You will need: A wooden dowel, two small cup hooks or dowel brackets, short screws, a saw and a roll of trash bags.
How to make it: 1. Cut the dowel slightly wider than your bag roll. 2. Screw the two brackets onto the side panel or door at the same height. 3. Slide the roll onto the dowel and drop it into the brackets.
A Painted Lidded Tin for Dishwasher Tablets
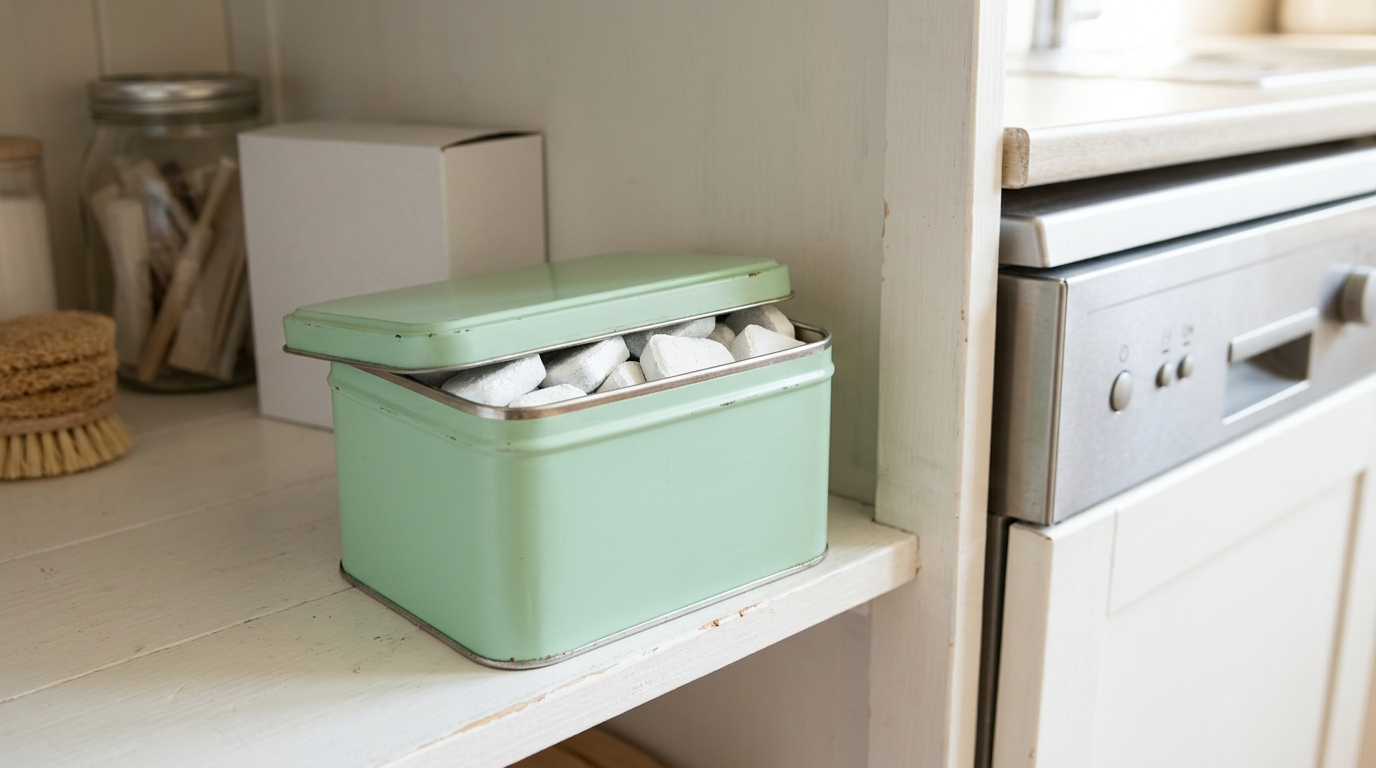
Dishwasher tablets look pretty but must stay away from little hands, so a sturdy tin with a tight lid is a much better home than a flimsy bag. Paint an old cookie tin in a soft color you love and keep it high on a shelf or in the cabinet behind a safety latch. It looks tidy, it keeps the tablets dry, and nobody has to hunt for the torn bag again. What color would match your kitchen?
You will need: An old metal tin with a tight lid, metal primer spray, soft colored spray paint, and a dry cloth.
How to make it: 1. Wash and dry the tin and spray it with primer outdoors. 2. Add two light coats of color and let it cure for a day. 3. Fill with tablets, press the lid on tight and store it out of reach of children.
Clear Adhesive Hooks for Rubber Gloves
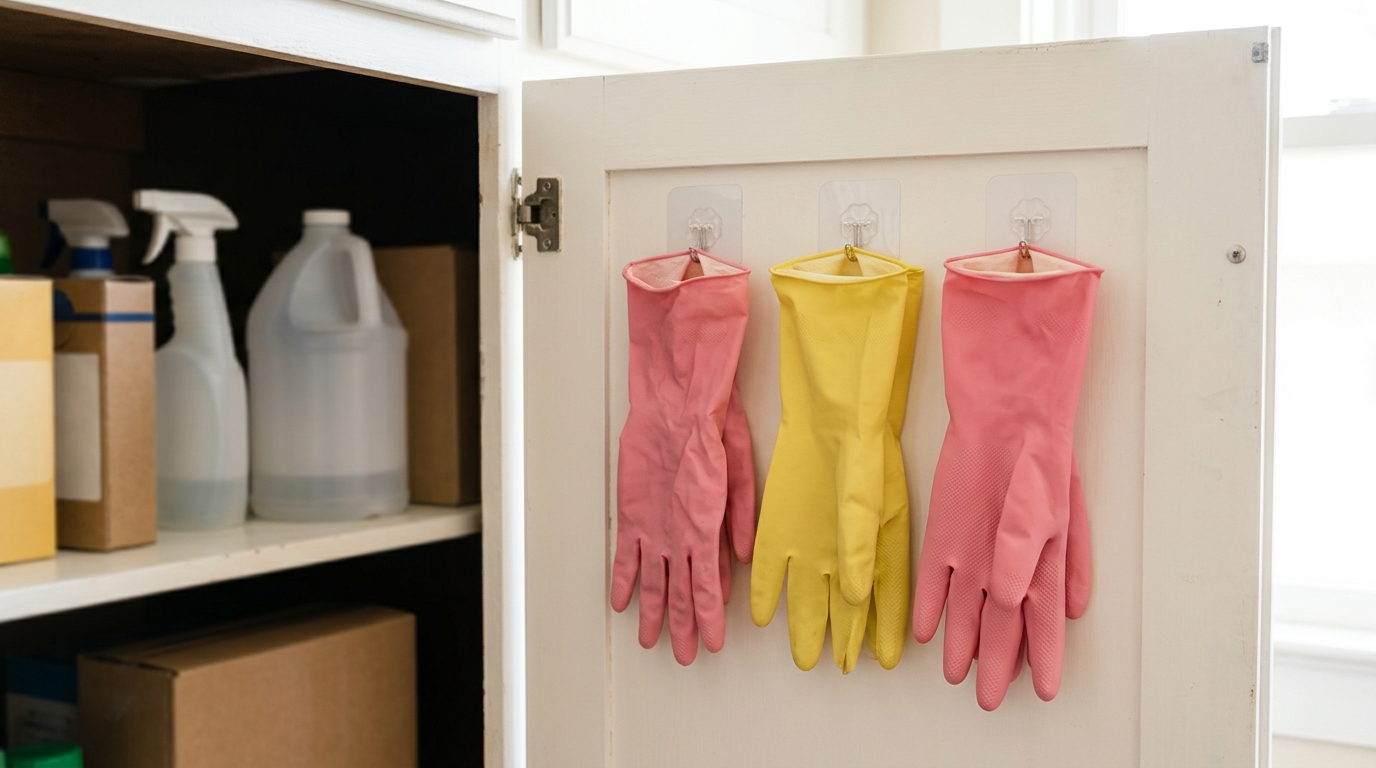
Wet rubber gloves tossed in the cabinet never dry and always smell. Three small clear adhesive hooks on the inside of the door fix that in two minutes. Hang the gloves by their cuffs so they air out, and keep a separate pair for dishes and for the bathroom. The hooks come off cleanly later. It is such a tiny fix, yet it makes the whole cabinet feel fresher. Where do your gloves end up right now?
You will need: Small clear adhesive hooks, rubbing alcohol on a cloth to clean the door, and two pairs of gloves.
How to make it: 1. Wipe the inside of the door clean and let it dry. 2. Press the hooks on firmly and wait an hour before using. 3. Hang gloves by their cuffs, one pair per hook.
Under Sink Organization by Task: Stackable Bins
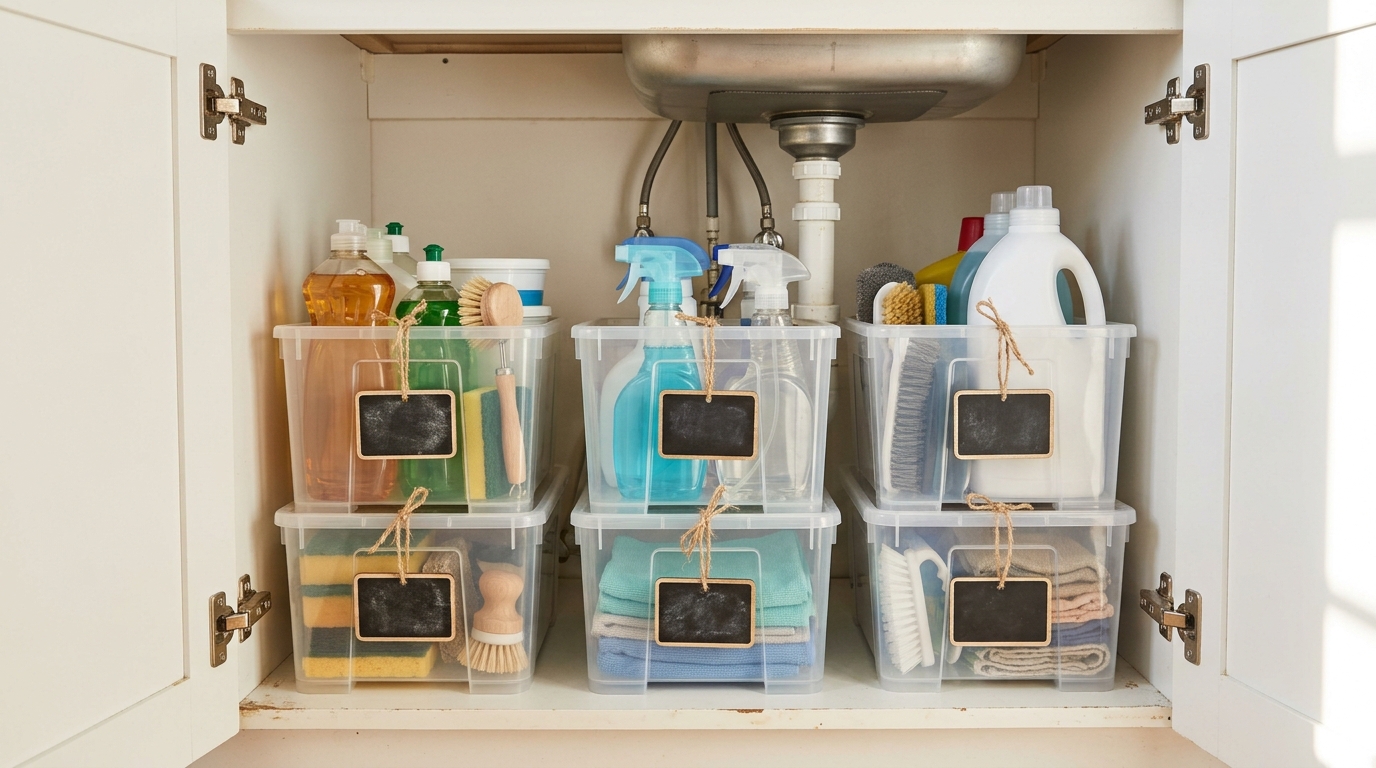
Under sink organization really clicks when every bin holds one job. Use clear stackable bins and sort them by task: dishes, floors, glass and backups. Tie a small handmade chalkboard tag to each with twine so anyone helping in the kitchen knows where things go. Clear sides let you see when you are running low before the big holiday cleanup. Bins also catch any spills. Which tasks would get a bin in your house?
You will need: Clear stackable bins, small wooden or cardboard tags, chalkboard paint, chalk markers and twine.
How to make it: 1. Paint the tags with chalkboard paint and let them dry. 2. Write one task on each tag and tie it to a bin. 3. Fill each bin with the supplies for that task only.
A DIY Wooden Cleaning Caddy You Can Carry
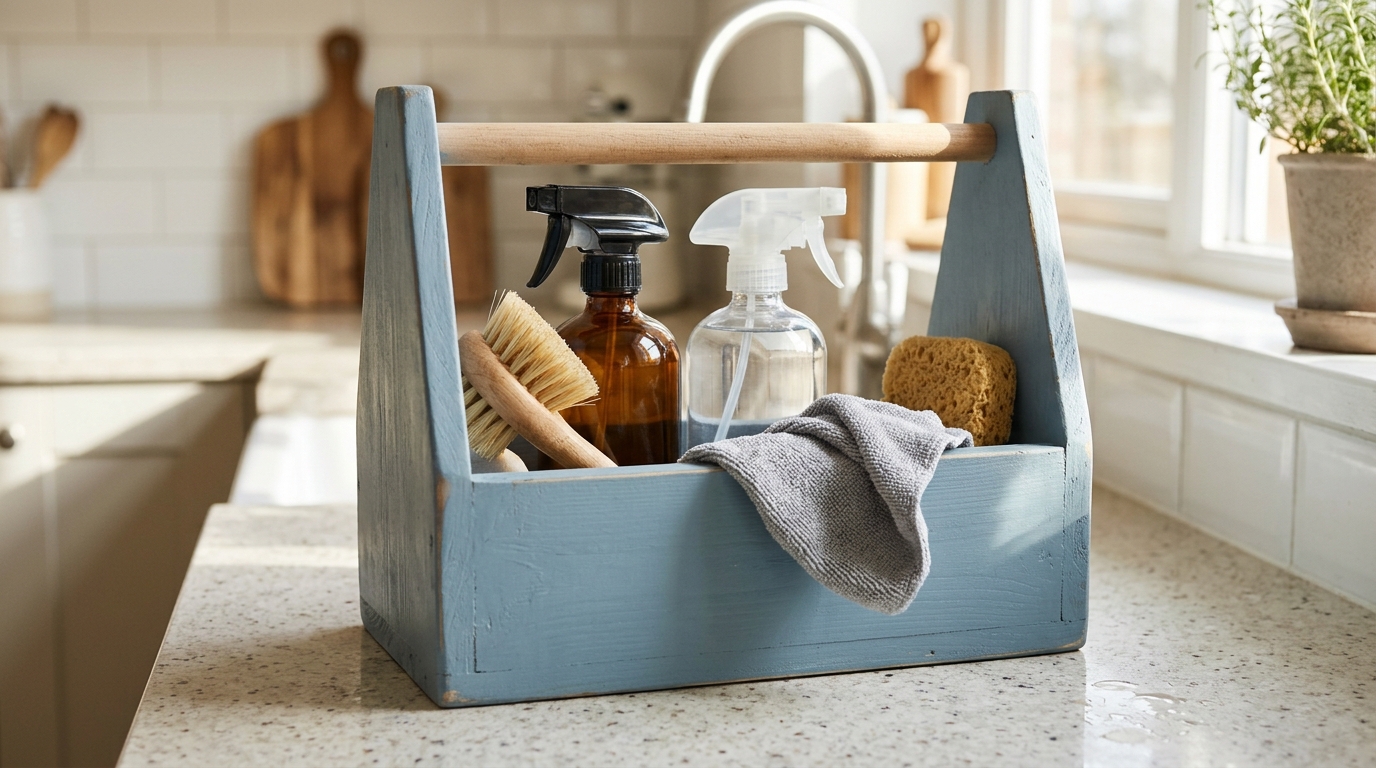
Instead of carrying bottles one by one, build a simple wooden caddy that holds your everyday kit and lives under the sink. Two end boards, a bottom, low sides and a dowel handle are all it takes. Paint it a soft color and it looks like a farmhouse find. Grab it by the handle and you have everything for a quick bathroom or table wipe down. It also makes a sweet housewarming gift. Would yours be blue, green or white?
You will need: Thin boards, a dowel for the handle, wood glue, small nails, a drill, sandpaper and paint. Adult help for cutting and drilling.
How to make it: 1. Cut a base, two low sides and two taller end pieces. 2. Drill a hole near the top of each end piece and fit the dowel through. 3. Glue and nail it together, sand, paint and fill.
A Paper Towel Holder on the Cabinet Door
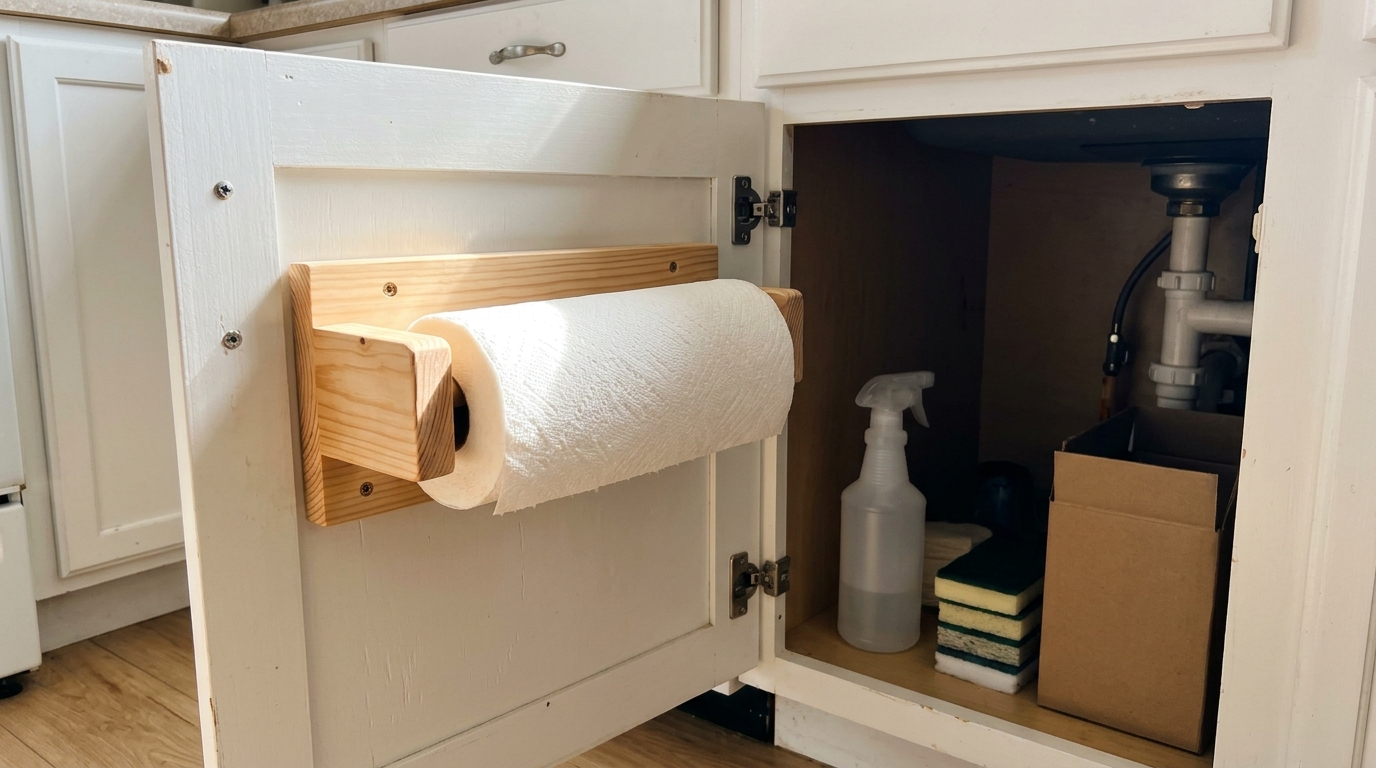
Counter space is gold during the holidays, so move the paper towel roll inside the sink cabinet door. A simple wooden holder screwed or stuck to the door keeps towels right where the spills happen, but hidden when guests come over. Pick a spot that will not hit the pipe when the door closes. It is a two minute job that looks neat and frees up a whole corner of the counter. For more clever cover ups, see our hide kitchen eyesores gallery. Would you try this one?
You will need: A small wooden paper towel holder, short screws or strong mounting strips, and a roll of paper towels.
How to make it: 1. Open the door and test where the roll can sit without hitting anything. 2. Fix the holder in place with short screws or mounting strips. 3. Add the roll and close the door to check.
Battery Tap Lights So You Can See the Back
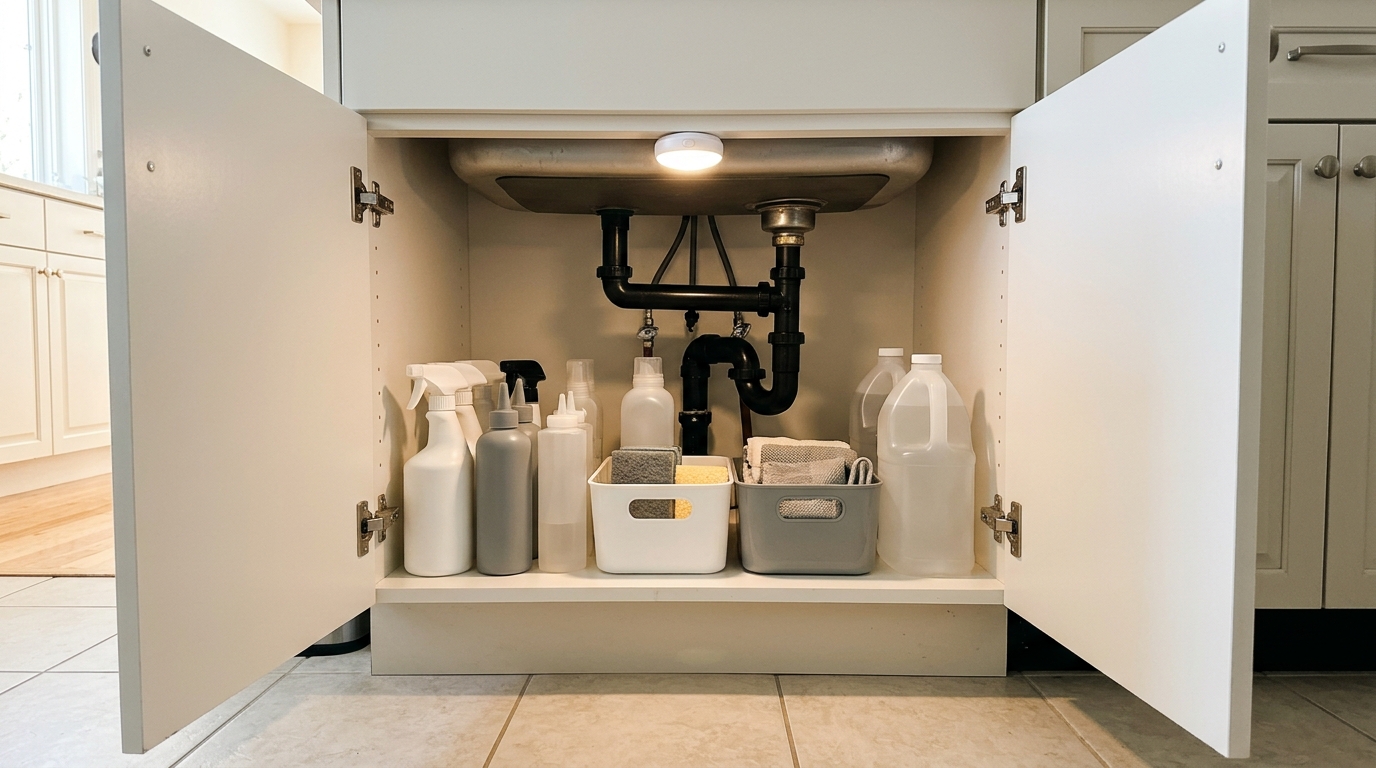
Sink cabinets are dark, which is why things get lost at the back for months. A small battery push light stuck to the top inside edge fixes that instantly with no wiring at all. Tap it on when you open the door and you can see every bottle, every bin and any drip right away. Choose a warm white light and keep spare batteries in your backup bin. Isn’t it nice when a small fix makes a big difference?
You will need: One or two battery push lights with adhesive backs and fresh batteries.
How to make it: 1. Wipe the top inside edge of the cabinet frame clean. 2. Stick the light near the front so it shines toward the back. 3. Tap it on and check that it lights the whole space.
Under Sink Organization Finish: Paint the Inside a Happy Color
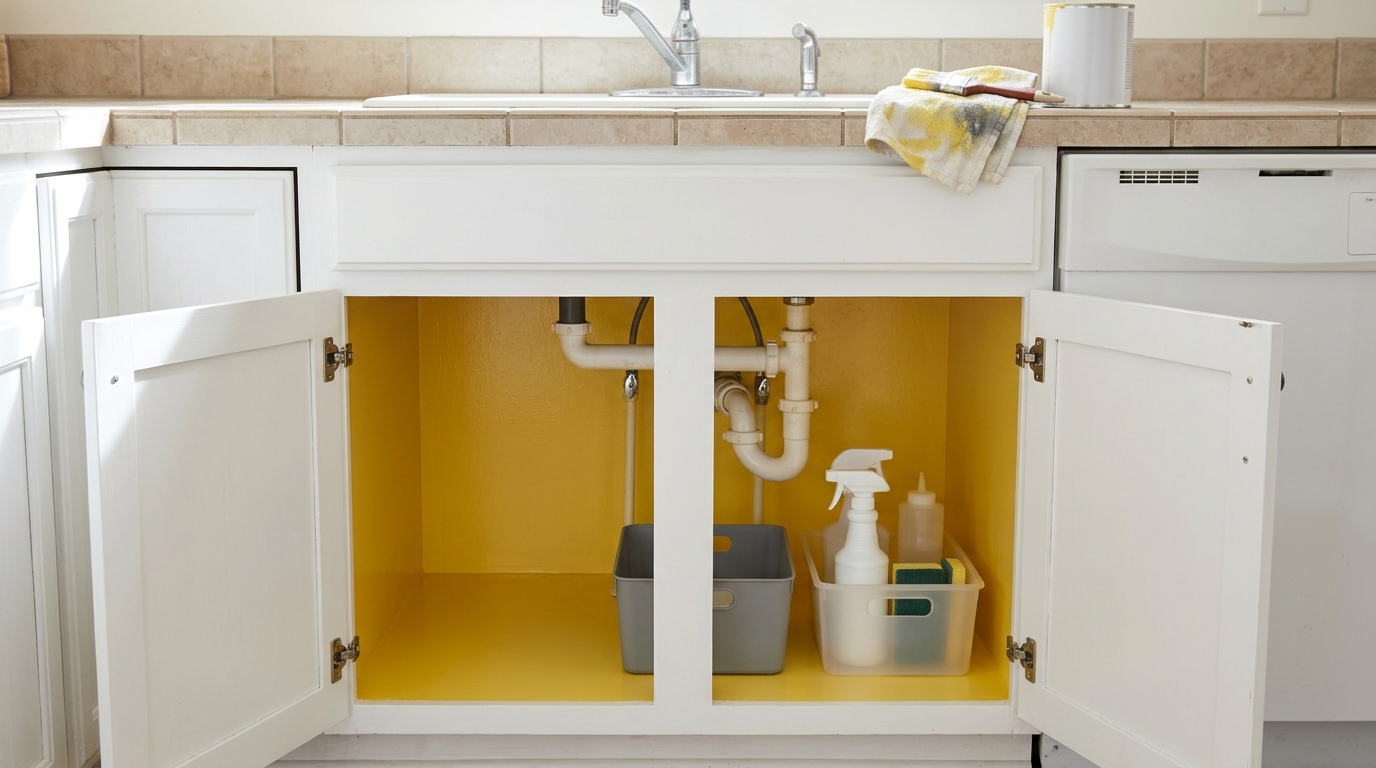
Here is the fun finish that makes a plain cabinet feel custom: paint the inside walls a cheerful color. Sunny yellow, soft mint or pale blue make it feel bright every time you open the door, and nobody else needs to know. Use a washable paint, keep a window open, and let it dry fully before putting everything back. It is a small craft project with a big smile at the end. Which color would make you happy every morning?
You will need: Washable interior paint in a happy color, a small brush, a mini roller, painter’s tape and a drop cloth.
How to make it: 1. Empty the cabinet, clean the walls and tape the front edges. 2. Brush the corners, then roll two thin coats. 3. Let it dry fully for a day before putting the liner, bins and caddies back in.