Bottle Cap Christmas Crafts: 16 Sparkly Ornaments From Caps You Were Going to Toss
Bottle cap Christmas crafts are popping up everywhere this month, and they cost exactly nothing. On October 19, a short video from a Spanish language craft channel showing Christmas ornaments made from bottle caps passed 559,000 views in just eight days. Another clip about saving your caps instead of tossing them gathered 73,000 views in under a week. It makes sense. Every home has a pile of plastic caps from milk jugs, juice and water bottles, and with a little paint, glue and ribbon they turn into snowmen, reindeer, wreaths and stars. These are perfect for a cozy evening with the kids or grandkids, and the tree ends up full of little memories. Start a cap jar today, and by December you will have plenty to play with..
Bottle Cap Christmas Crafts Everyone Is Making This Month
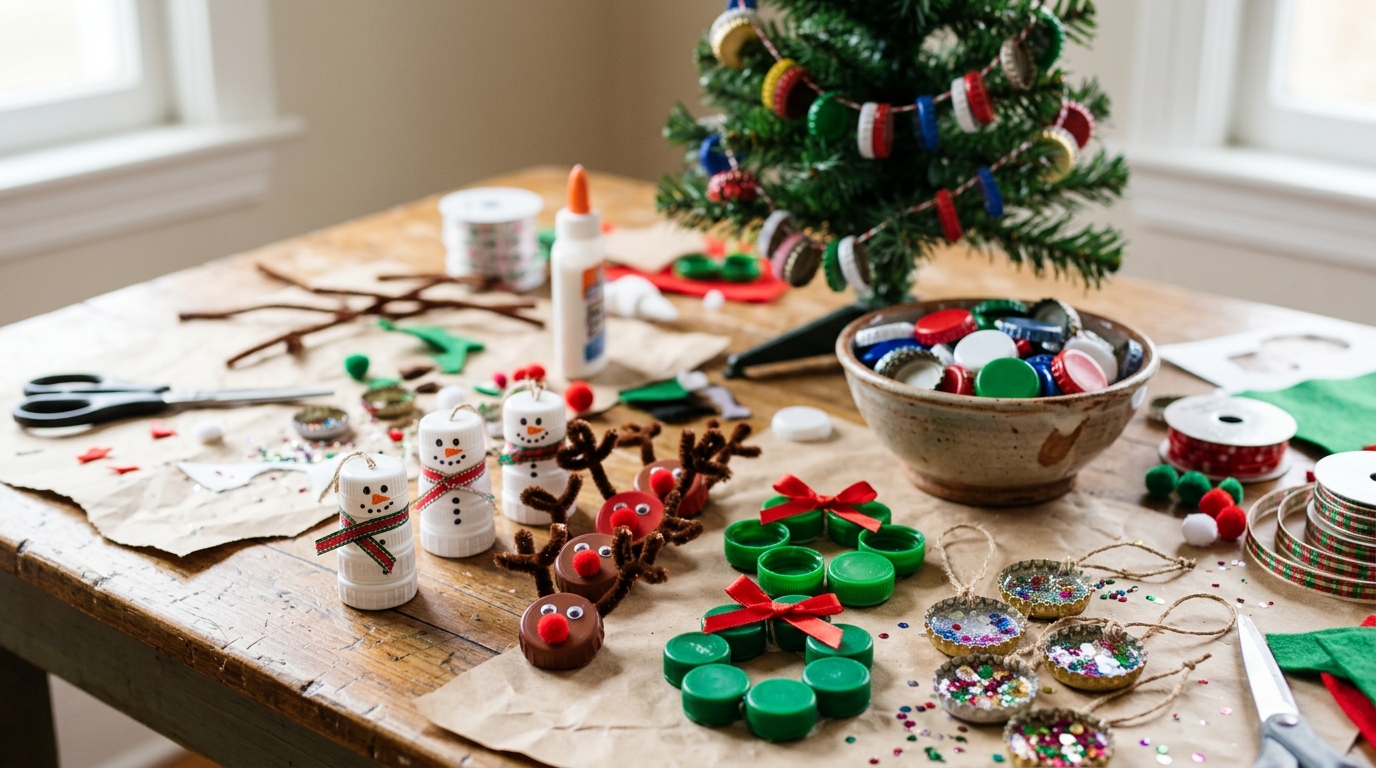
There is something so happy about a tree covered in handmade ornaments, especially when they cost nothing at all. That is the magic behind these little cap projects. The caps are already sitting in your recycling bin, they come in bright colors, and they are the perfect size for tiny faces, wreaths and stars. Kids love painting them, grown ups love how fast they come together, and everybody loves the cheerful result. Caps are small, so keep them away from toddlers, and let adults handle any hot glue. Grab a bowl, start sorting colors, and let the fun begin..
You will need: Clean plastic bottle caps in many colors, acrylic paint, small brushes, craft glue, ribbon, pipe cleaners and felt scraps.
How to make it: 1. Wash and dry the caps, then sort them by color. 2. Pick a few ideas from this list. 3. Set up a craft table with paint, glue and ribbon, and let everyone make their favorites.
A Three Cap Snowman Ornament
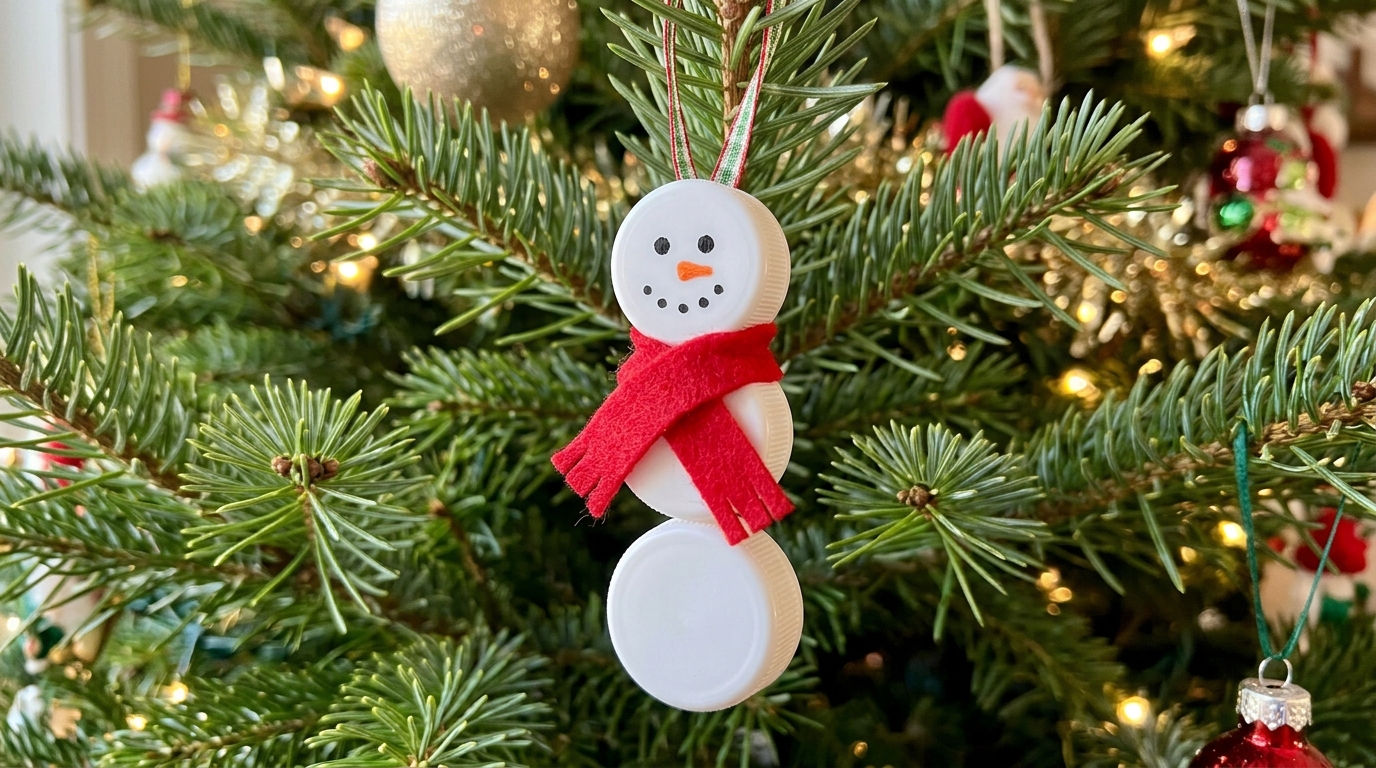
This is the first one most families make, and it never stops being cute. Stack three white caps, add two dot eyes and a tiny orange nose, and wrap a strip of red felt around his neck for a scarf. He takes five minutes and looks adorable from across the room. Make a whole snowman family in different scarf colors. Which one will be your favorite?
You will need: Three white plastic caps per snowman, craft glue, black and orange paint, a red felt strip and a ribbon loop.
How to make it: 1. Glue three caps in a line, edge to edge, and let them dry. 2. Paint eyes, a nose and buttons. 3. Tie on the felt scarf and glue a ribbon loop to the top.
Reindeer Faces With Pipe Cleaner Antlers
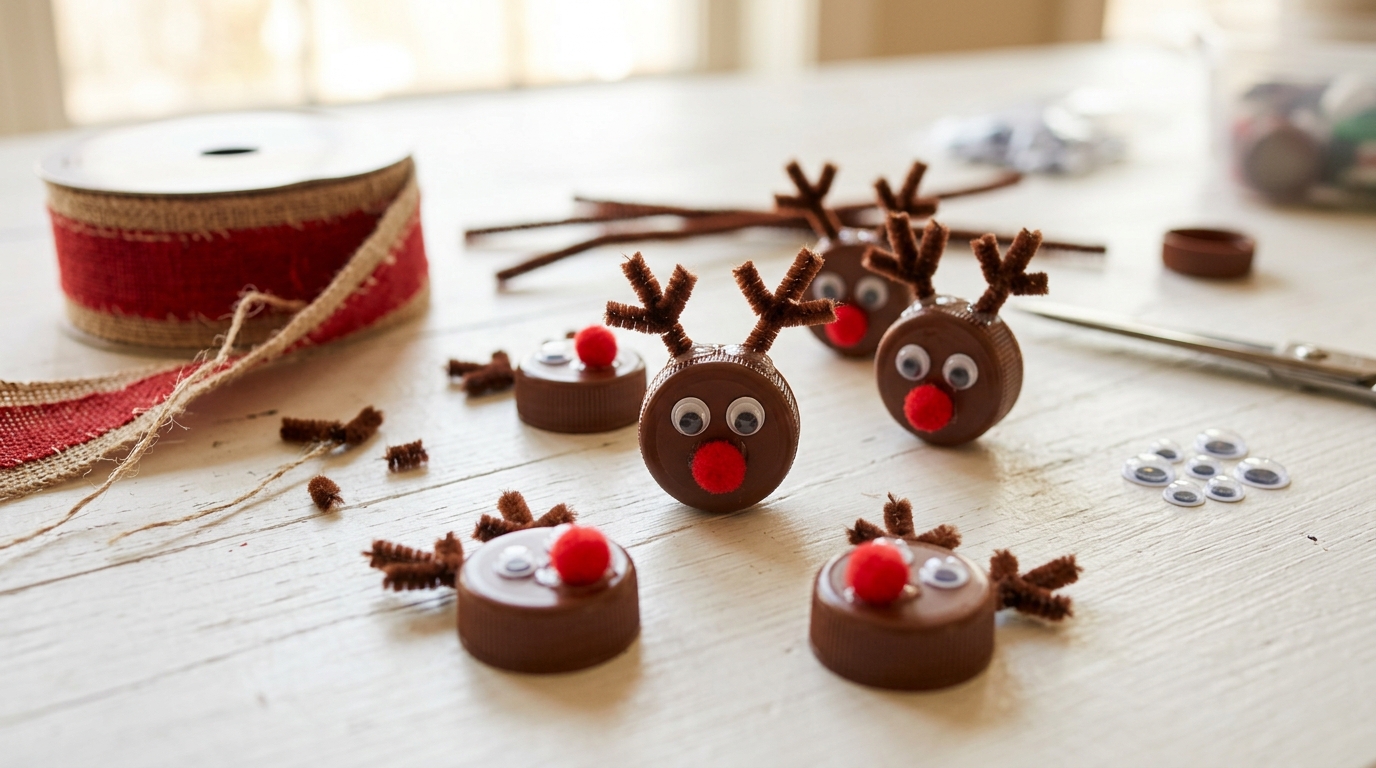
Brown caps become sweet little reindeer with just a few supplies. Bend brown pipe cleaners into twisty antlers, add googly eyes and a fluffy red pom pom nose, and you have the whole team ready to pull Santa’s sleigh. Kids can name each one. Hang them on the tree, glue them on cards, or line them up on a shelf. A set of these little bottle cap Christmas crafts looks adorable tucked into a holiday card or tied onto a gift bag. Will one of yours be Rudolph?
You will need: Brown plastic caps, brown pipe cleaners, small googly eyes, red pom poms and craft glue.
How to make it: 1. Twist a pipe cleaner into two branching antlers. 2. Glue the antlers to the back of the cap. 3. Add the eyes and pom pom nose on the front.
Bottle Cap Christmas Crafts: A Mini Green Wreath
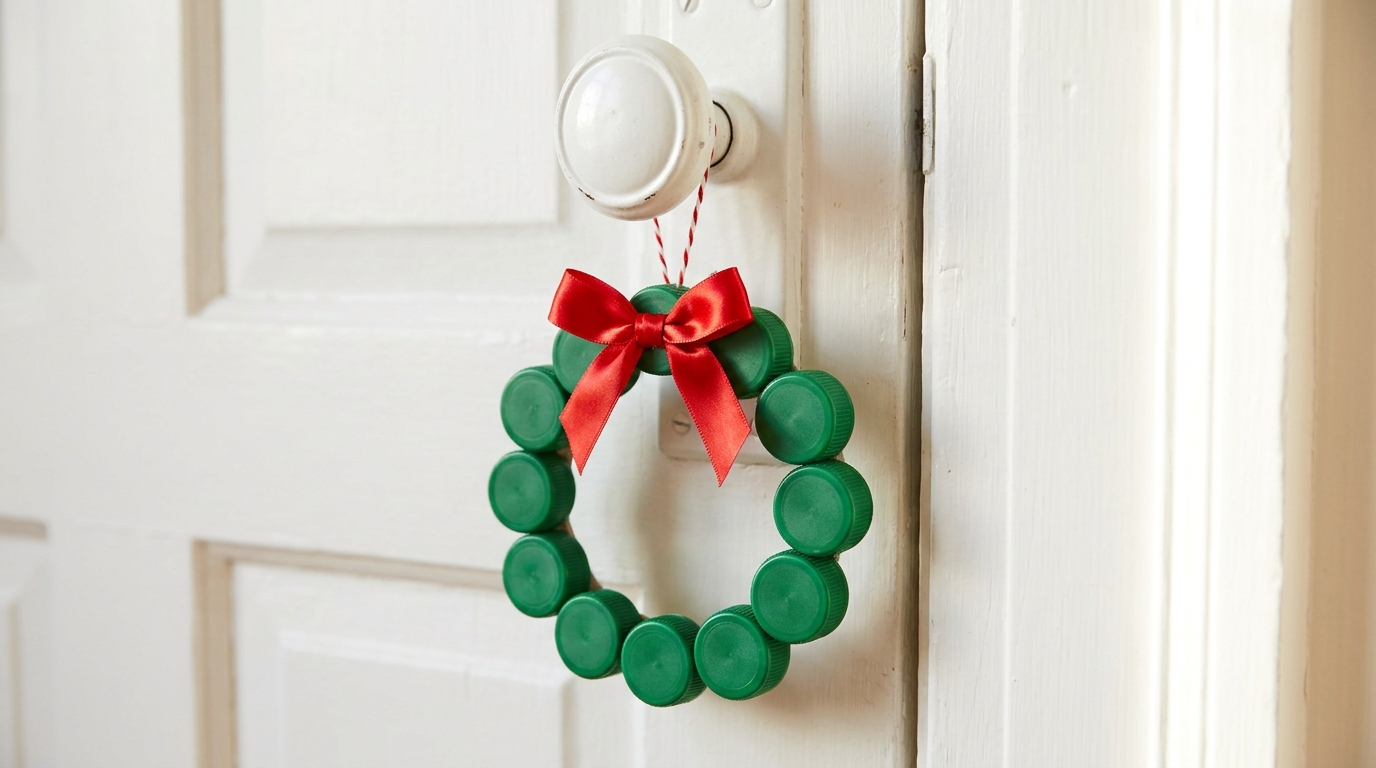
A ring of green caps glued side by side makes a tiny wreath that looks so charming on a door knob, cabinet handle or tree branch. Add a red satin bow on top and it looks just like the real thing, only small enough to fit in your hand. Make several and give them away as little gifts. Tie a few onto a ribbon for a sweet window hanging. Where would you hang yours?
You will need: About ten green plastic caps, a cardboard ring for the base, craft glue and red satin ribbon.
How to make it: 1. Cut a small cardboard ring as a base. 2. Glue the caps around it, edge to edge. 3. Tie a red bow and glue it to the top with a ribbon loop for hanging.
Bottle Cap Christmas Crafts That Sparkle: Glitter Filled Ornaments
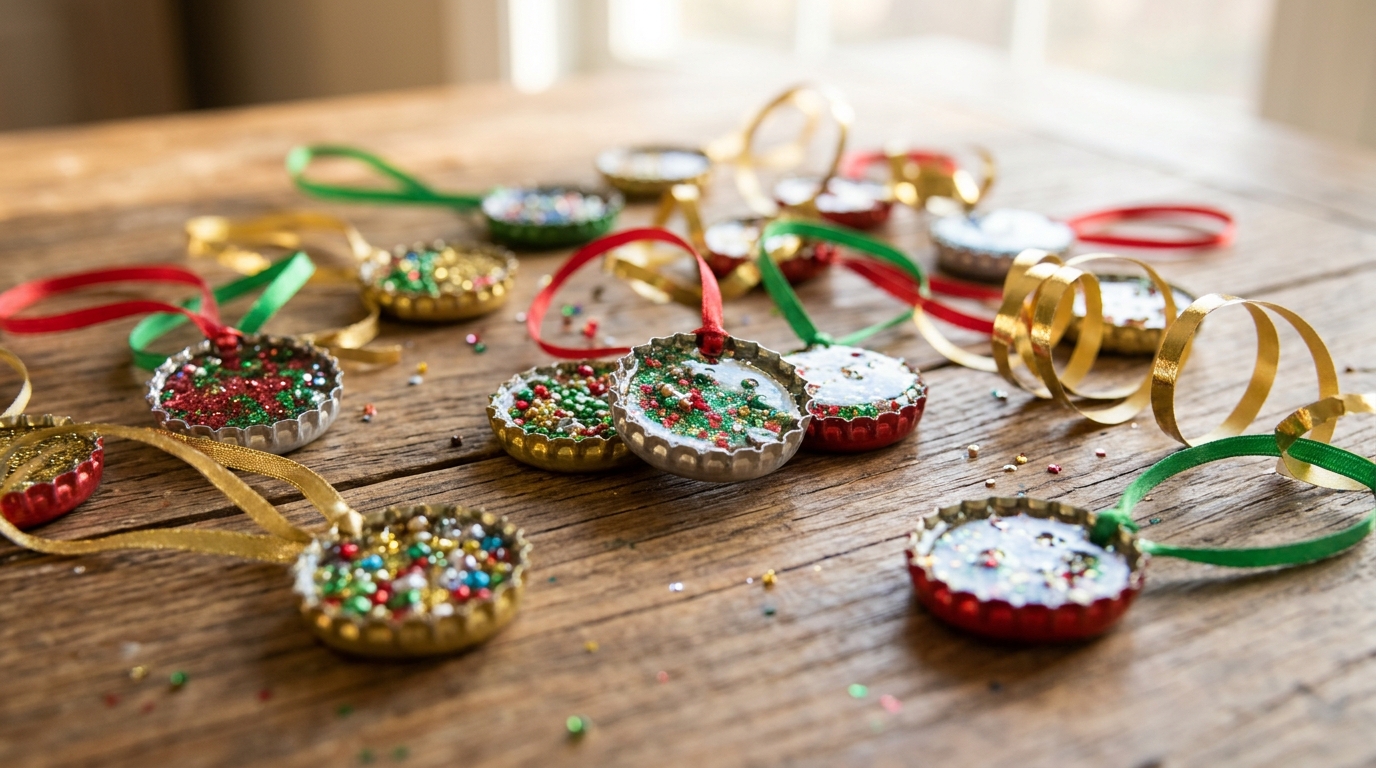
Turn a plain cap into a shiny little jewel. Fill it with glitter, tiny beads or sequins, then pour clear glue over the top to seal everything inside. When the glue dries, it looks like a sparkling window. Every one comes out different, which is part of the fun. These catch the light from the tree beautifully. What colors will you mix?
You will need: Plastic caps, fine glitter, small beads or sequins, thick clear craft glue or clear dimensional glaze, and ribbon.
How to make it: 1. Glue a ribbon loop to the edge of the cap. 2. Fill the cap halfway with glitter and beads. 3. Pour clear glue to the rim and let it dry flat for a full day.
A Stacked Cap Christmas Tree
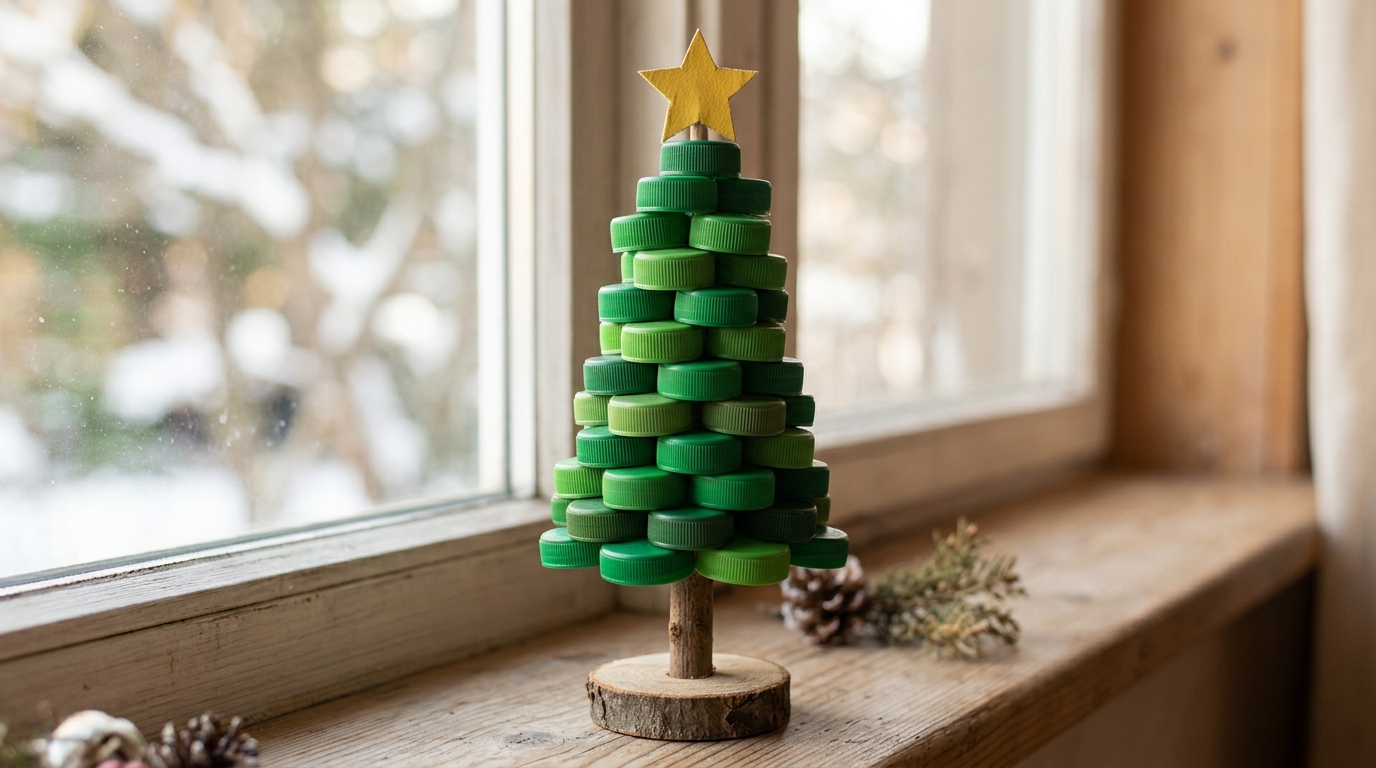
Green caps stacked in a cone around a stick make a sweet tabletop tree. Start with the widest ring at the bottom and use fewer caps as you go up. Top it with a yellow star and set it on a windowsill, a desk or a kitchen shelf. It is one of those bottle cap Christmas crafts that looks great from far away. Make a few in different sizes for a tiny forest. How tall can you build yours?
You will need: Lots of green plastic caps, a wooden dowel, a round wood base, craft glue and a small yellow star.
How to make it: 1. Glue the dowel upright in the base. 2. Glue rings of caps around it, starting wide and getting smaller. 3. Finish with a star on top.
Painted Santa Face Ornaments
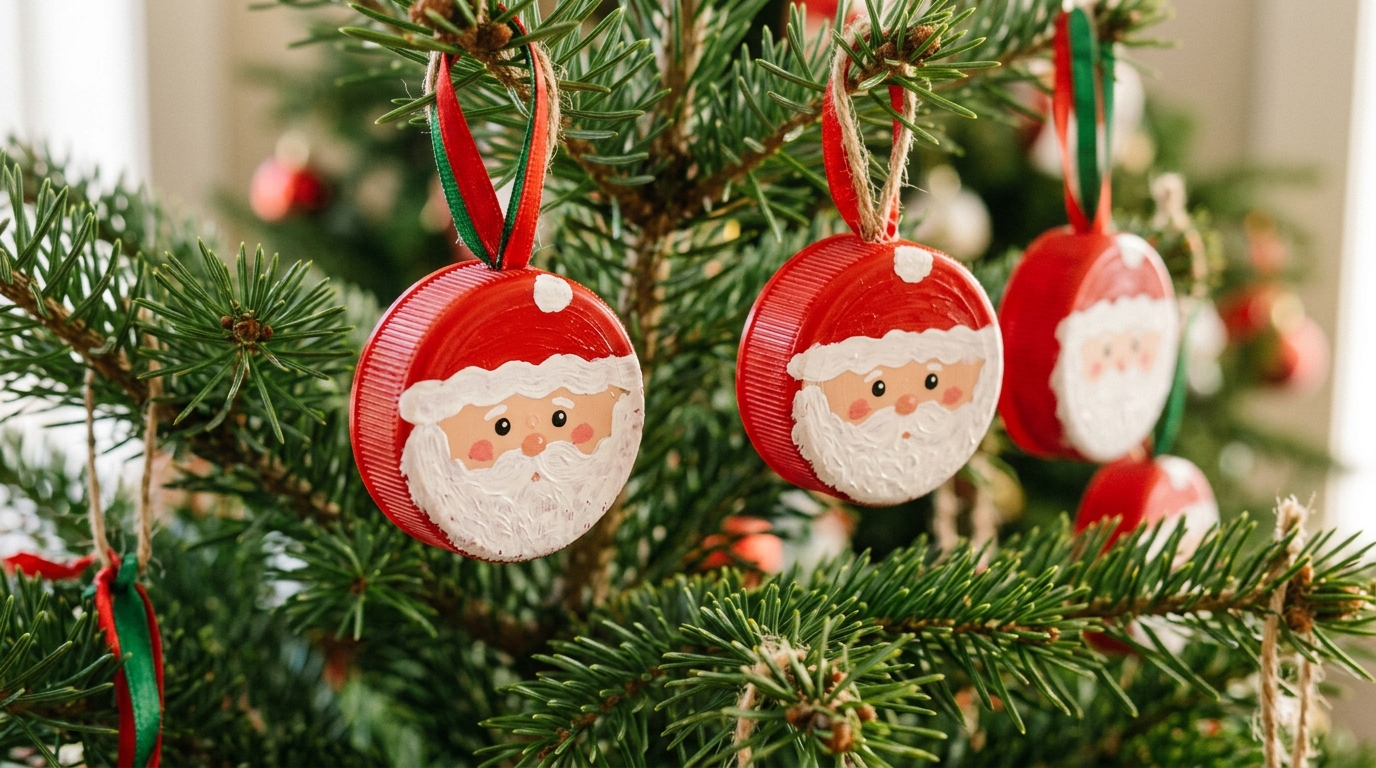
Red caps are already halfway to being Santa. Paint a peach circle for the face, a fluffy white beard and the trim of his hat, then add two little dot eyes and rosy cheeks. They look so jolly hanging in a row on the tree. Even if your painting is a little wobbly, Santa still looks happy. Paint a whole batch at once and let them dry in an egg carton so they do not smudge. Who in your family is the best painter?
You will need: Red plastic caps, white, peach and black acrylic paint, a small brush, a dotting tool or toothpick and ribbon.
How to make it: 1. Paint a peach face in the middle of the cap. 2. Add a white beard below and a white hat band above. 3. Dot on the eyes and cheeks, then glue a ribbon loop on top.
Bottle Cap Christmas Crafts With Tiny Family Photos
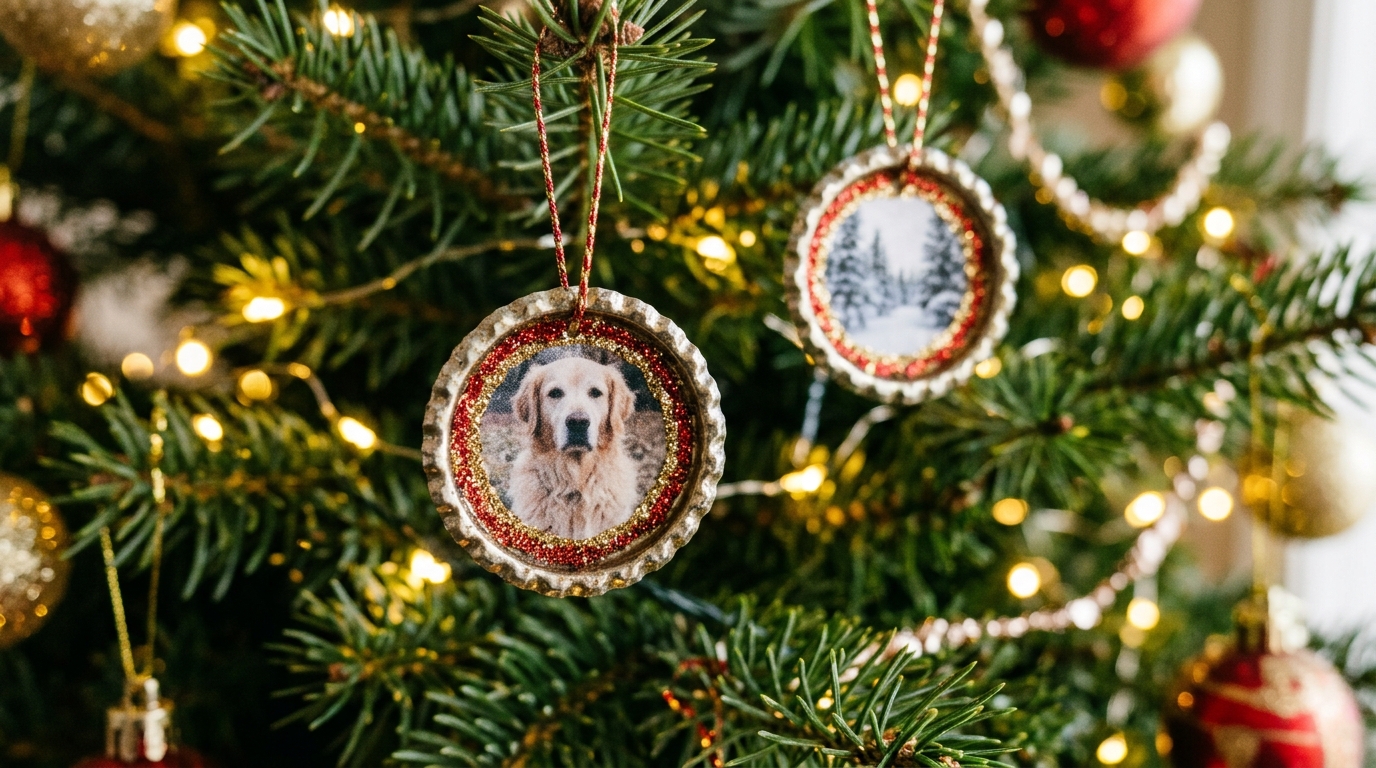
These might be the most loved ornaments on the tree. Cut out a tiny photo of a grandchild, a pet or a favorite place and glue it inside a cap. Add glitter around the edge for a frame. Every year when you unpack them, you will smile at the memories. They also make beautiful gifts for grandparents. Of all the bottle cap Christmas crafts here, these are the ones people keep for decades. Whose face would you put on yours?
You will need: Plastic or metal caps, small printed photos, a round paper punch or scissors, glue, glitter and ribbon.
How to make it: 1. Cut the photo into a circle that fits inside the cap. 2. Glue it in and add a thin line of glitter around the edge. 3. Seal with clear glue if you like and add a ribbon.
A Six Cap Snowflake
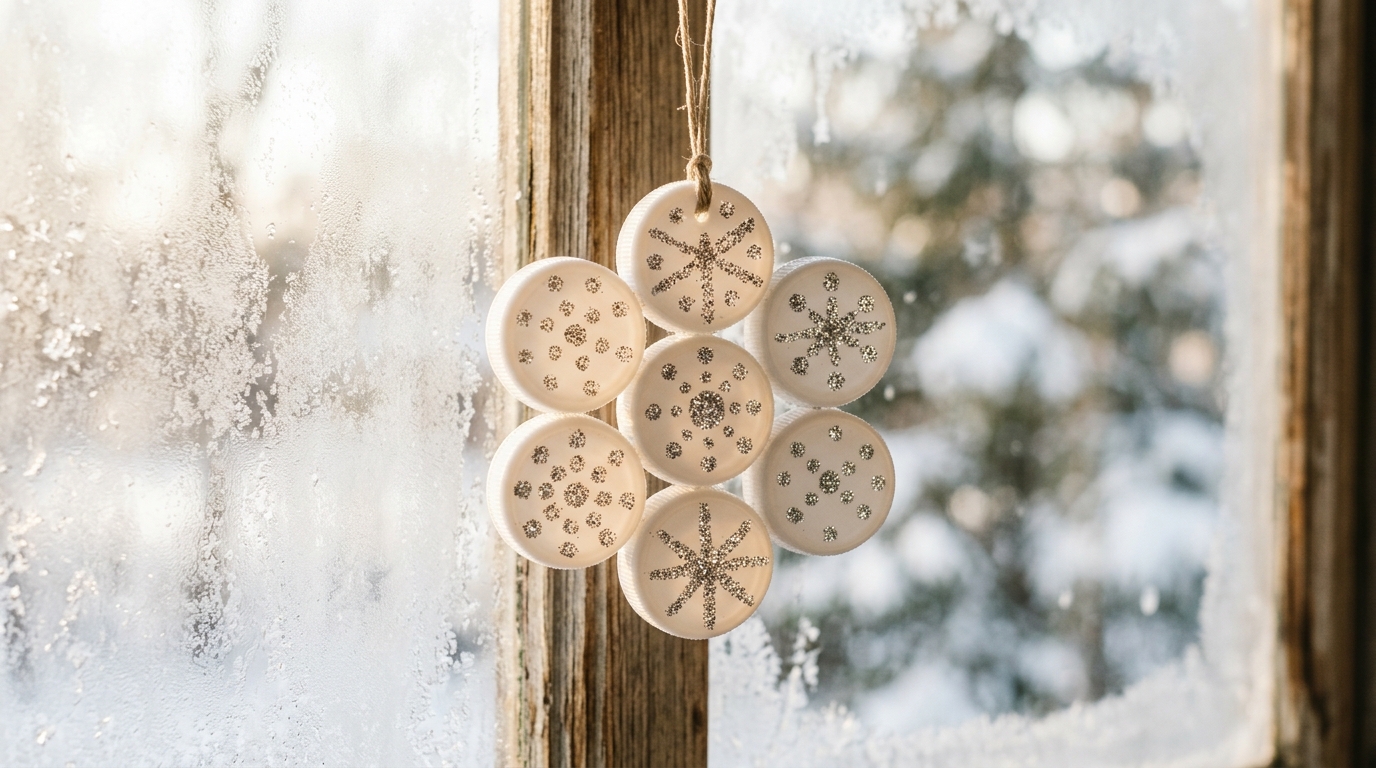
Arrange six white caps in a ring around a center cap and you have a simple, pretty snowflake. Silver glitter dots make it sparkle in a frosty window. Hang a few at different heights with fishing line, and they look like snow falling inside. These bottle cap Christmas crafts are lovely to keep up all winter long, not just in December. How many will fit in your window?
You will need: Seven white plastic caps per snowflake, a cardboard circle backing, craft glue, silver paint pen or glitter and fishing line.
How to make it: 1. Glue one cap in the center of a cardboard circle. 2. Glue six caps around it in a ring. 3. Add silver dots and hang it with fishing line.
A Colorful Cap Garland
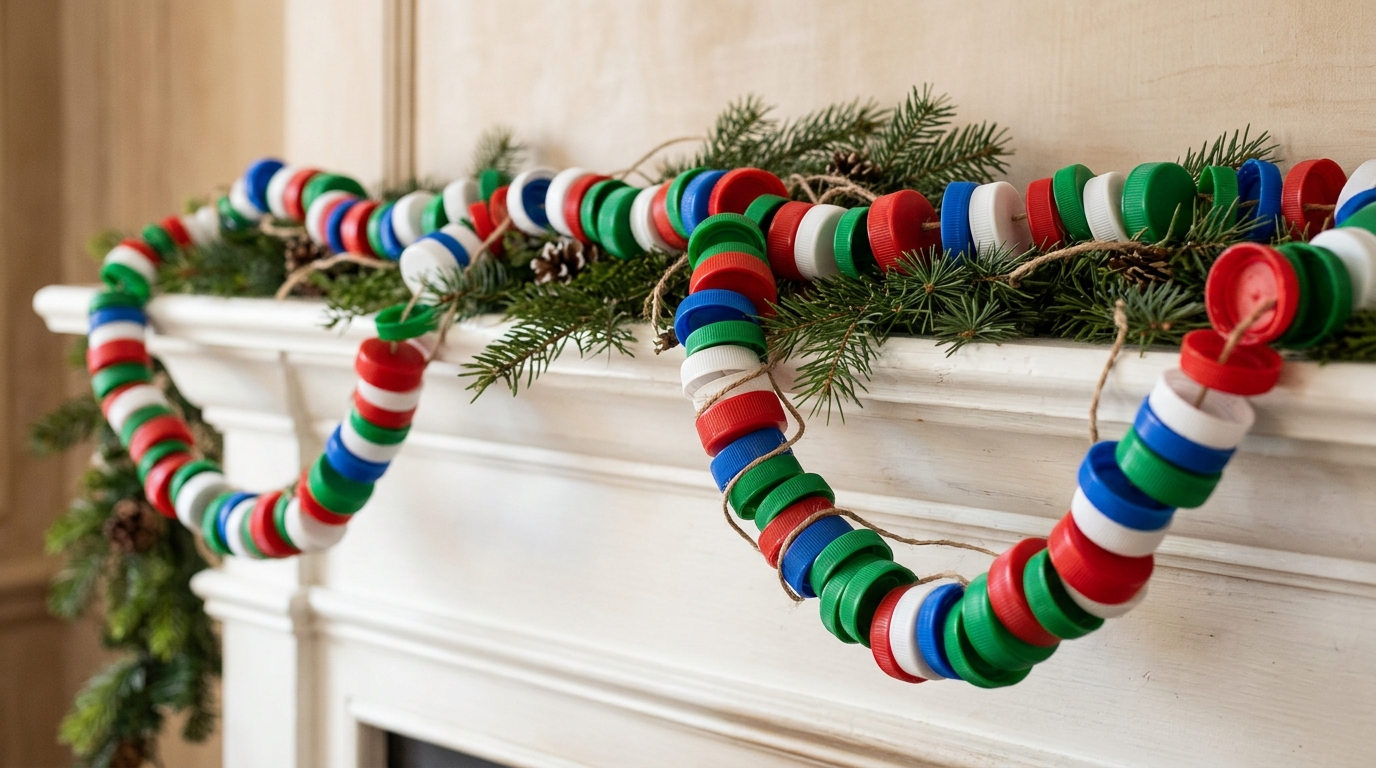
A garland of caps strung on twine adds instant cheer to a mantel, a bookshelf or a staircase. Use red, green and white for a classic look, or mix every color you have for a fun, playful feel. It is a great job for older kids while the grown ups handle the hole making. Bottle cap Christmas crafts like this one also look sweet on a kids room door or a classroom window. Do you have enough caps saved for a long one?
You will need: Many plastic caps, natural twine, a thick needle and an adult with a small hand drill.
How to make it: 1. An adult makes a small hole in the center of each cap. 2. Thread the caps onto the twine with a knot between each one. 3. Hang it with small hooks or tape.
Cute Cap Penguins
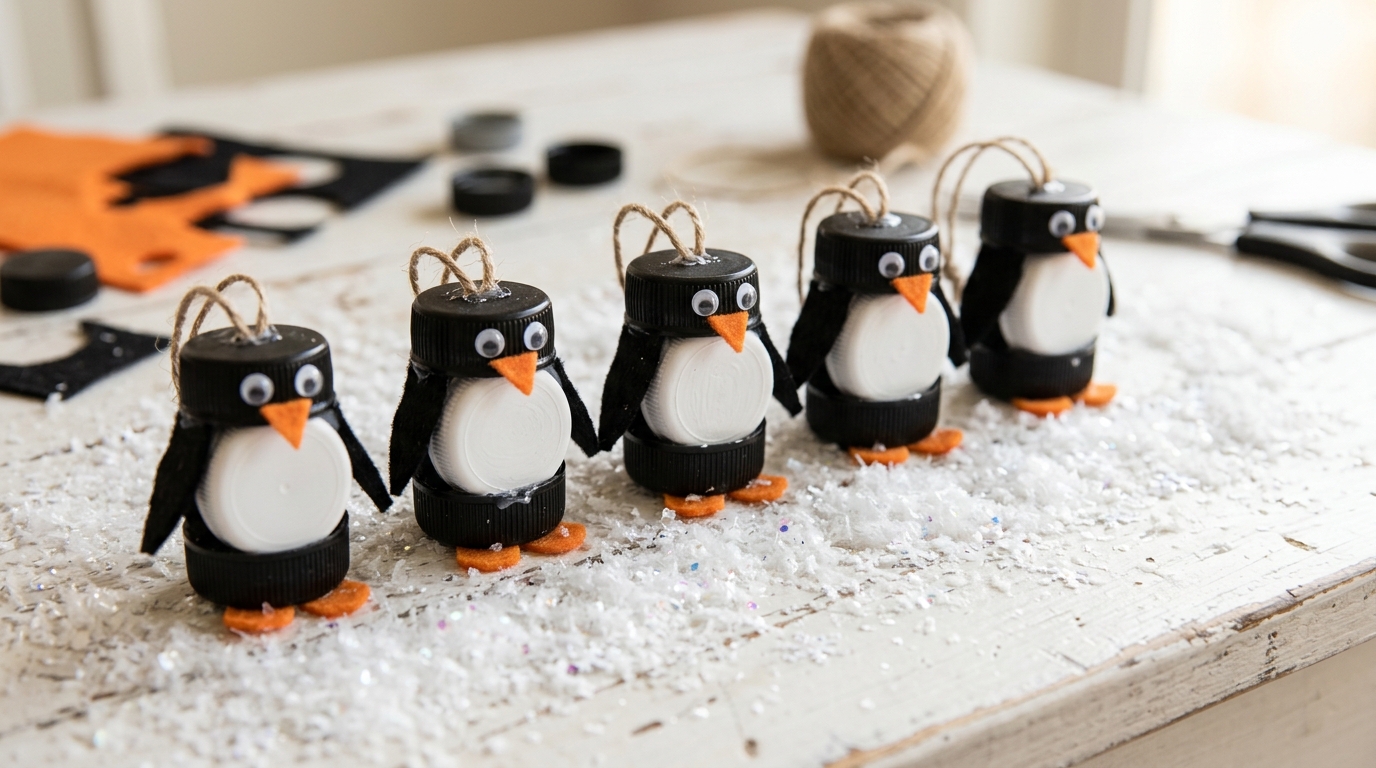
Black caps with a white painted tummy and a tiny orange beak turn into the cutest little penguins. Glue on felt wings and orange felt feet, and they look like they are waddling across the table. Line them up on a shelf, add them to a gift box, or hang them on the tree. Kids always ask to make a second batch. Pair them with the snowmen for a little winter scene on a shelf. Would you give yours little scarves too?
You will need: Black plastic caps, white and orange paint, black and orange felt, googly eyes and craft glue.
How to make it: 1. Paint a white oval on the front of a black cap. 2. Add eyes and a small orange beak. 3. Glue felt wings to the sides and felt feet at the bottom.
Holiday Cap Fridge Magnets
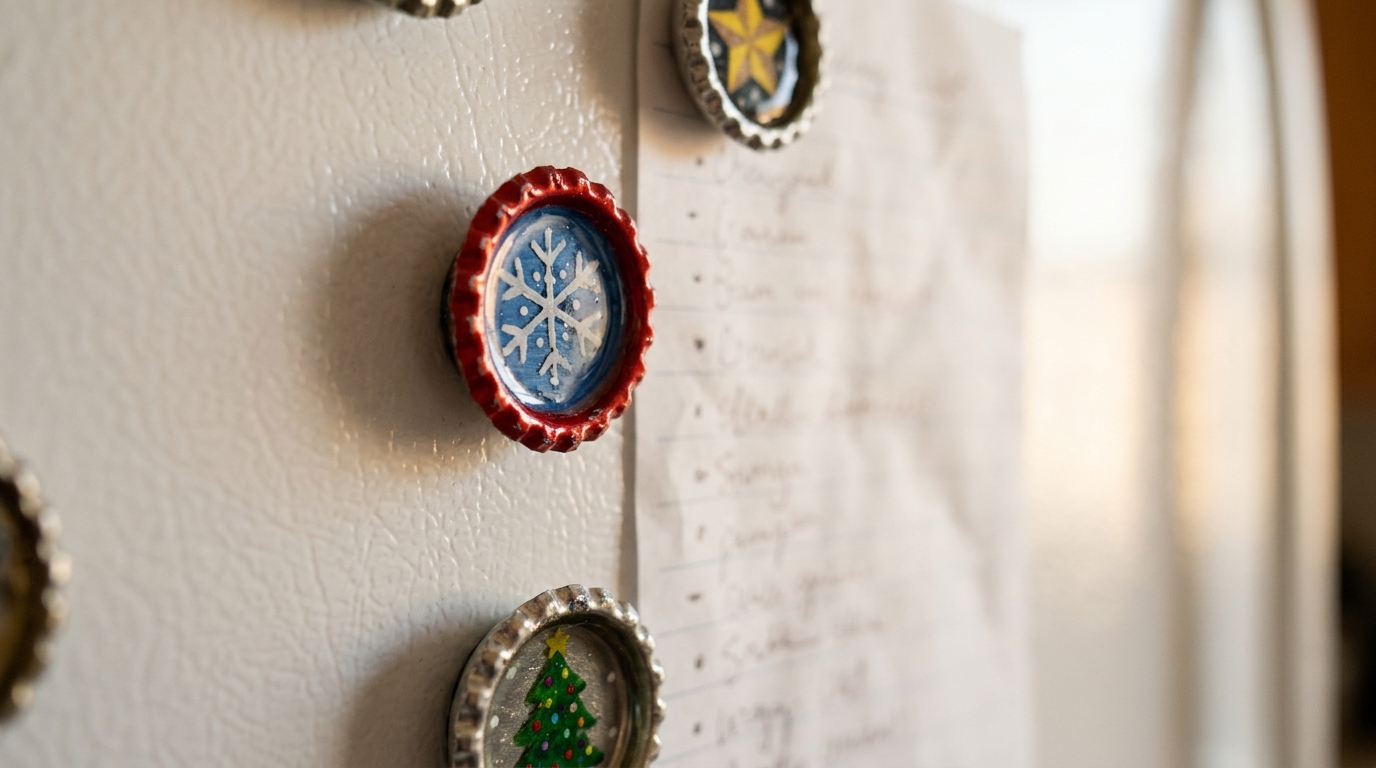
Small round magnets glued inside decorated caps make sweet little holiday magnets. Paint snowflakes, trees and stars, or glue in tiny bits of Christmas paper. They hold up shopping lists, school notes and holiday cards all season. A set of four tied with ribbon makes a perfect teacher or neighbor gift. Simple bottle cap Christmas crafts like these are great for a school or church craft table too. Which design would you make first?
You will need: Plastic caps, small round craft magnets, acrylic paint or Christmas paper scraps, glue and a clear sealer.
How to make it: 1. Decorate the top of each cap with paint or paper. 2. Seal it with a clear coat. 3. Glue a magnet inside the cap and let it dry.
Gingerbread Men Painted Inside Metal Caps
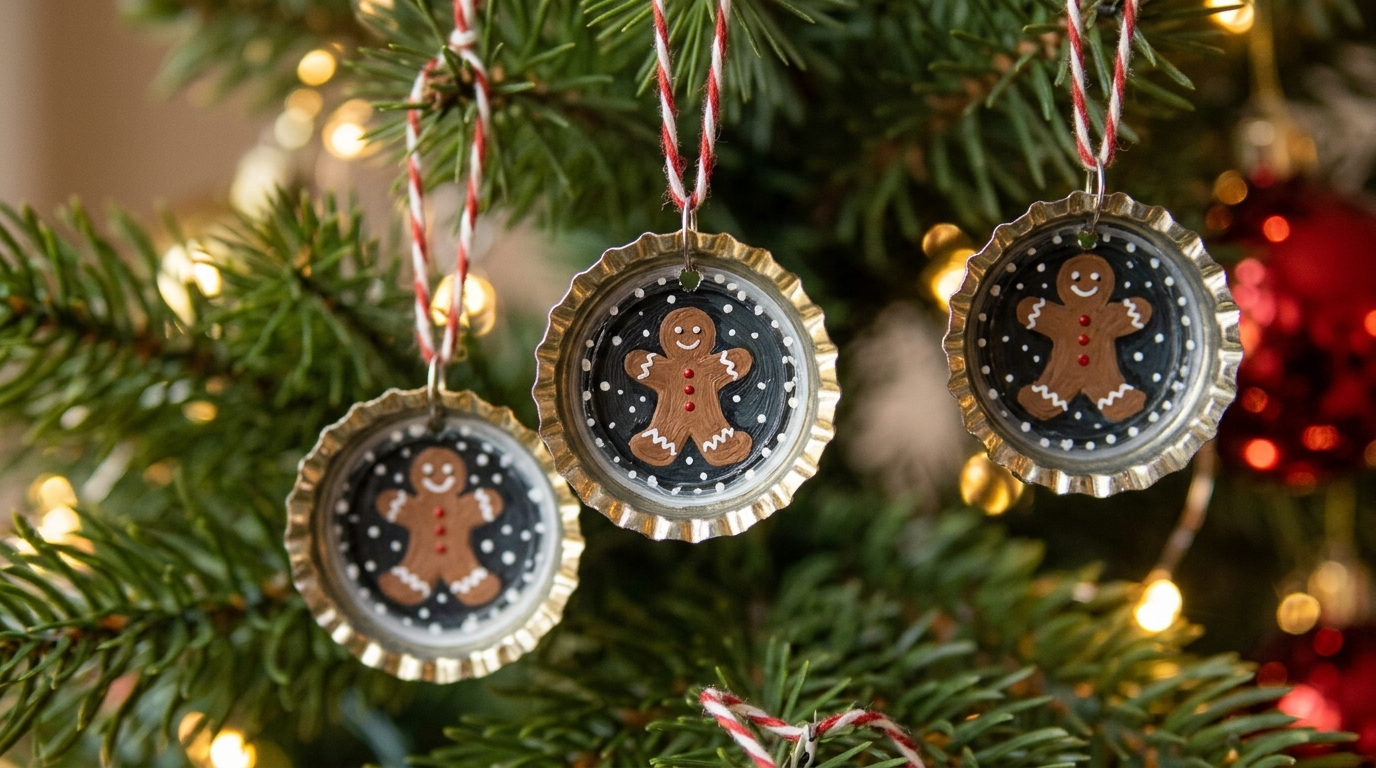
Metal caps have a little rim that makes a perfect frame. Paint a tiny gingerbread man inside, add white icing lines and two red buttons, and he looks good enough to eat. These have a sweet, vintage feel on the tree. Metal edges can be sharp, so grown ups should smooth them with a nail file first. Is gingerbread your favorite Christmas theme too?
You will need: Clean metal caps with no printing, a nail file, brown, white and red paint, a fine brush and ribbon.
How to make it: 1. An adult files any sharp edges smooth. 2. Paint a light background, then a small brown gingerbread man. 3. Add white icing lines, red buttons and a ribbon loop.
A Bottle Cap Star Tree Topper
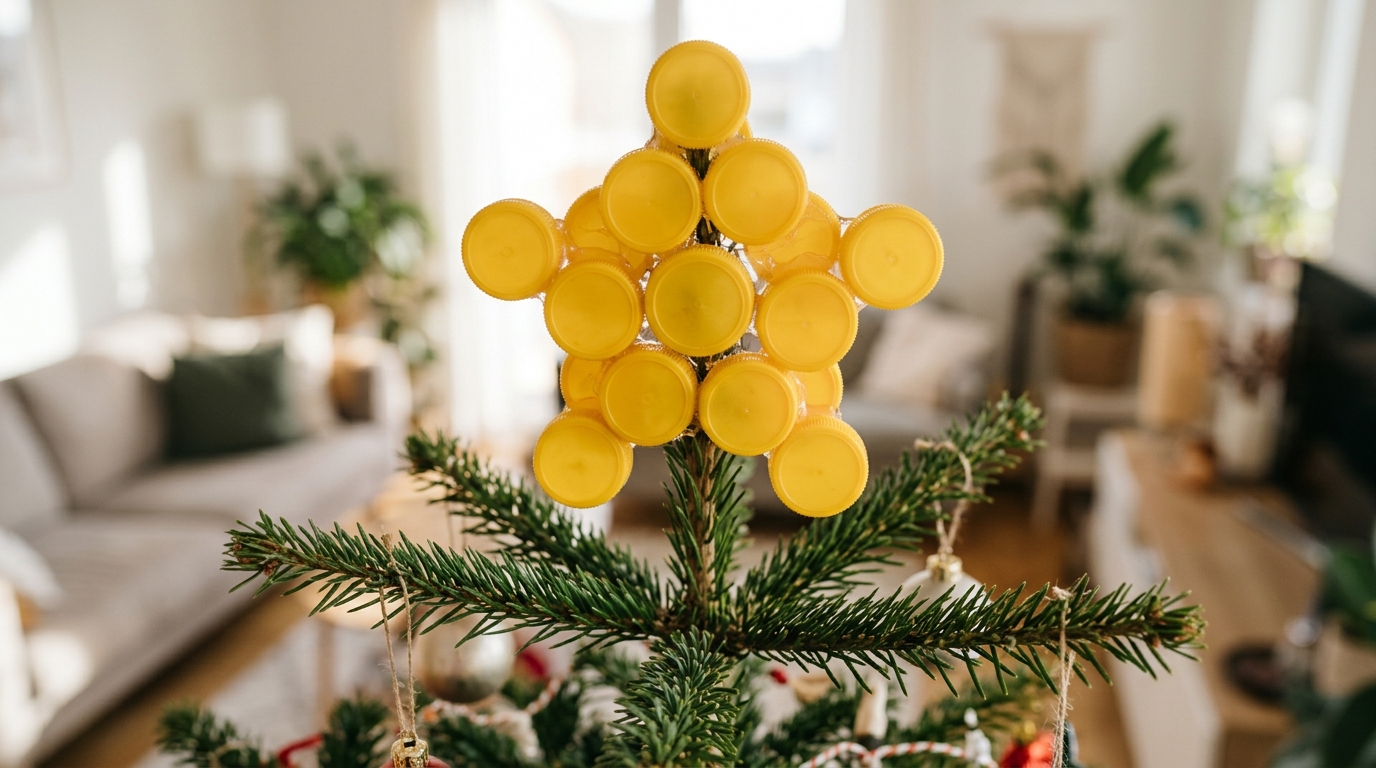
Yellow caps glued into a star shape make a bright, cheerful topper for a small tree. It is light, so it will not bend the top branch, and it adds a playful touch that kids are so proud of. Spray it gold for a fancier look, or keep the sunny yellow. It is a fun crowning piece for all your bottle cap Christmas crafts. Who gets to put it on the tree?
You will need: About twelve yellow plastic caps, a cardboard star template, craft glue, a short dowel or cone for mounting and optional gold paint.
How to make it: 1. Cut a cardboard star as a base. 2. Glue caps over it to fill the star shape. 3. Glue a cone or dowel to the back so it sits on the treetop.
Cap Gift Tags
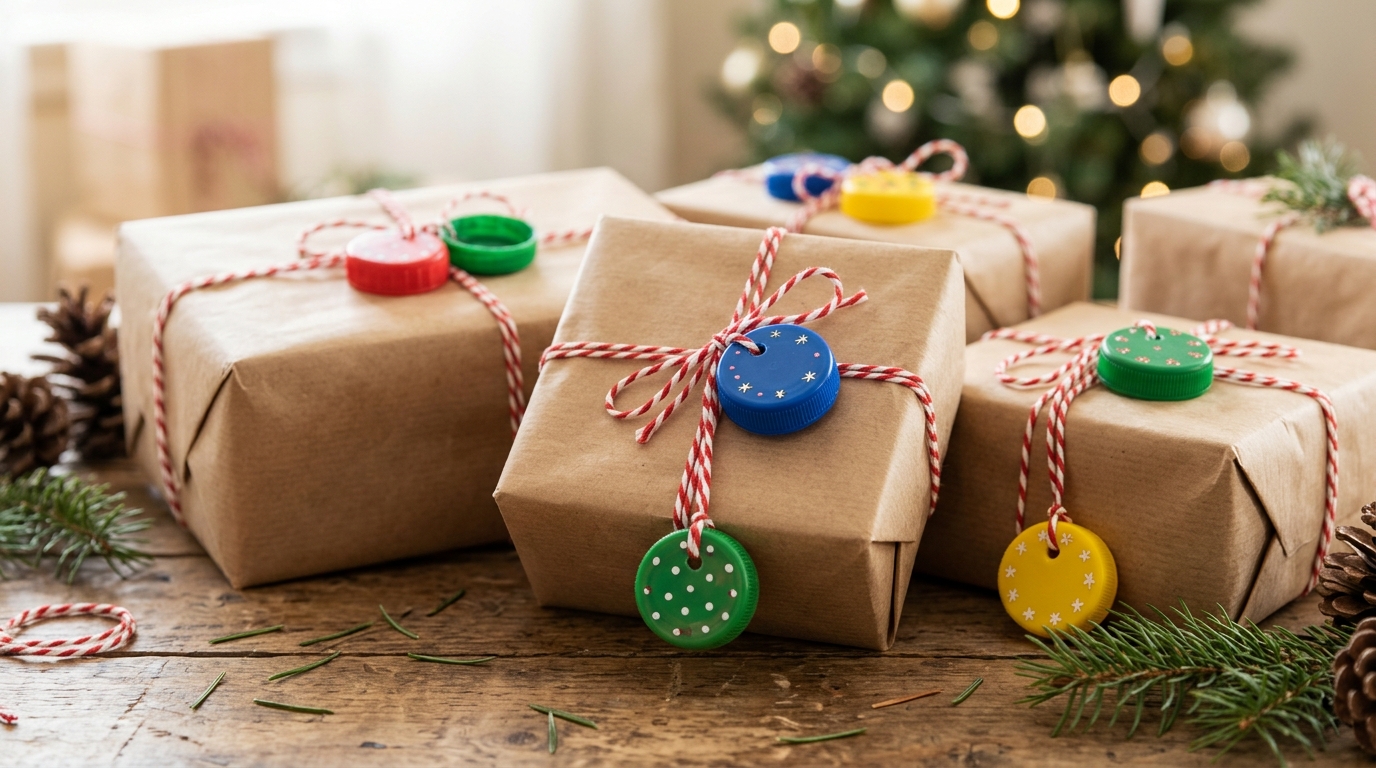
Skip the store bought tags this year. A painted cap tied to a present with twine looks charming and gives the gift an extra little treasure. Write the name on top with a paint pen or a sticker, and it doubles as an ornament after the wrapping comes off. Kraft paper and red twine make them really pop. Bottle cap Christmas crafts make even a plain brown box look thoughtful. Which present will you wrap first?
You will need: Plastic caps, paint pens or letter stickers, red and white twine and an adult with a small drill for holes.
How to make it: 1. An adult makes a small hole near the edge of each cap. 2. Write the name on top with a paint pen. 3. Thread the twine through and tie it around the gift.
Bottle Cap Christmas Crafts as Wall Art: A Mosaic Tree
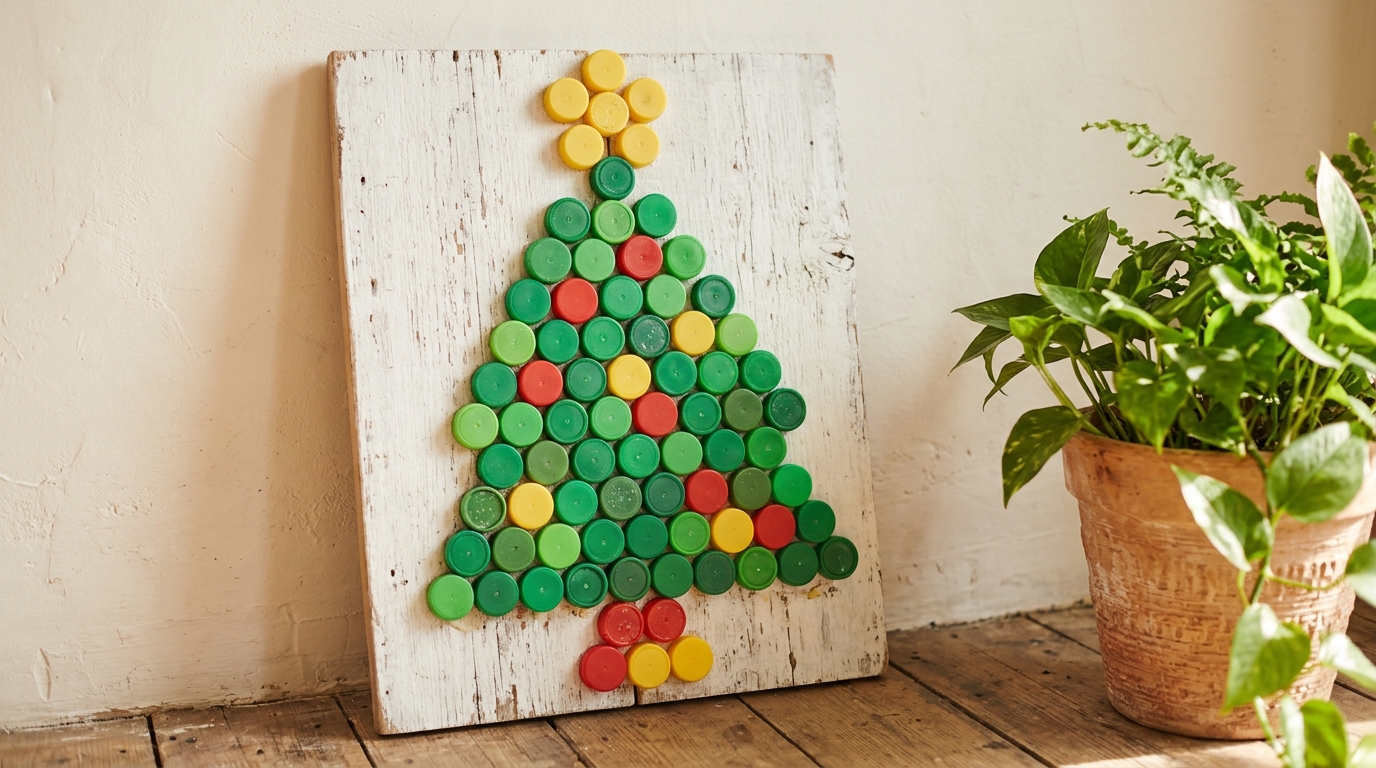
Here is a big project for the whole family. Glue green caps in a tree shape on a wooden board, add red and yellow caps as ornaments, and top it with a star. Lean it on a mantel, a porch or an entry table, and everyone who walks by will ask about it. It is a wonderful way to use a big pile of caps at once. Want even more ideas for the recycling bin? Our recycled Christmas decorations are full of them. Ready to start your mosaic?
You will need: A wooden board, white paint, lots of green caps plus red and yellow caps, strong craft glue and a pencil.
How to make it: 1. Paint the board white and sketch a tree shape. 2. Glue green caps inside the shape, row by row. 3. Add red and yellow caps as ornaments and a star on top.