Cone Christmas Trees: 13 Tabletop Trees You Can Make From Cheap Foam and Paper
Cone Christmas trees are the little secret behind so many magazine worthy mantels. Start with a cheap foam or poster board cone, wrap it in yarn, moss, book pages or tulle, and suddenly you have a tabletop tree that looks like it came from a fancy boutique. One yarn wrapped cone tree tutorial on Instagram passed 142,000 likes, and it is easy to see why. These trees cost very little, they are fun to make while watching a holiday movie, and they sell well at craft fairs too. Make a single tree for a side table or a whole forest in different heights for the mantel. Below are 13 ideas, each with a short supply list and easy steps. Grab a cone and let’s get wrapping..
A Mantel Full of Cone Christmas Trees

Picture a white mantel lined with little trees in every texture: soft yarn, rough sisal, green moss, cream book pages and fluffy tulle. Mixing heights and materials is what makes the display look styled instead of matchy. The secret is to keep the colors soft and similar, then let the textures do the talking. Start with three trees, then add more each weekend. You will be amazed how fast your little forest grows..
You will need: Foam or poster board cones in three to five sizes, a hot glue gun for an adult, and your chosen wraps like yarn, sisal, moss, paper or tulle.
How to make it: 1. Pick a color palette, like cream, green and gold. 2. Wrap or cover each cone in a different texture. 3. Group them in odd numbers of different heights. 4. Add greenery and LED fairy lights around the bases.
Yarn Wrapped Cone Christmas Trees

This is the one that went viral. The yarn wrapped cone tree tutorial shared on Instagram pulled about 142,000 likes. Chunky yarn wraps around the cone in neat rows, and it looks cozy like a knit sweater. Cream, sage and blush are the most popular colors. It is a calm, simple project with almost no mess. Which color yarn is waiting in your basket?
You will need: A foam cone, chunky yarn, a little glue and a pin to hold the end.
How to make it: 1. Pin the yarn end at the bottom of the cone. 2. Wrap upward in tight, even rows. 3. Add dots of glue every few rows. 4. Tuck and glue the end at the tip.
Sisal Rope Cone Tree

Sisal rope gives a rustic, natural look that fits farmhouse and coastal homes. Wrap it in tight coils from the bottom up, and top with a wooden bead or a small star. The rough texture looks great next to softer trees. It is sturdy too, so it can be used for years. Want a beachy version? Add a tiny starfish on top. Which style fits your home?
You will need: A foam cone, sisal or jute rope, a hot glue gun for an adult and a wooden bead.
How to make it: 1. Glue the rope end to the bottom. 2. Wrap upward in tight coils, gluing as you go. 3. Trim at the tip. 4. Glue the bead on top.
Moss Covered Cone Tree

Moss covered trees bring a fresh, woodland feel to any table. Sheet moss from the craft store wraps easily around a cone, and a little glue holds it in place. Set the tree in a small pot or on a wood slice. These look beautiful all winter, not just at Christmas. A few tiny red berries add a pop of color. Will you go for a forest look?
You will need: A foam cone, preserved sheet moss, craft glue, floral pins and a small pot or wood slice.
How to make it: 1. Spread glue over a section of the cone. 2. Press the moss on firmly. 3. Use floral pins to hold edges. 4. Set the tree in a pot and add berries.
Book Page Cone Tree

Old book pages turn into a soft, vintage tree. Roll small squares of pages into cones and glue them on in rows, or layer scallops cut from the pages. The cream and black tones look elegant on a bookshelf or desk. It is a perfect use for a damaged book. Our old book Christmas crafts gallery has more ways to use old pages. Ready to rescue a book?
You will need: A foam or poster board cone, old book pages, craft glue and scissors.
How to make it: 1. Cut pages into 3 inch squares. 2. Roll each square into a small cone. 3. Glue them on in rows from the bottom up. 4. Finish with a small rolled cone at the top.
Tulle Ruffle Cone Tree
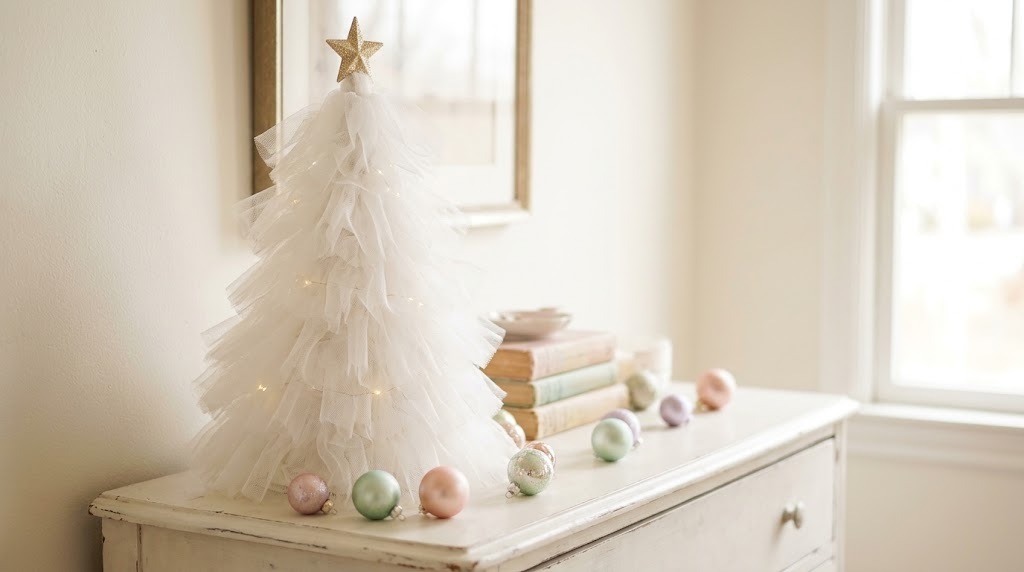
Tulle makes a soft, fluffy tree that looks like a ballerina’s skirt. Gather strips of tulle into ruffles and pin them on in rows. White and blush look dreamy, while green tulle looks like a snowy fir. Add a small gold star on top. It is light, pretty and perfect for a girl’s room or a pastel Christmas. How fluffy will yours be?
You will need: A foam cone, a roll of tulle, straight pins and a small star topper.
How to make it: 1. Cut tulle into long 4 inch strips. 2. Fold and pin ruffles around the base. 3. Work up in overlapping rows. 4. Pin the star on top.
Button Covered Cone Tree
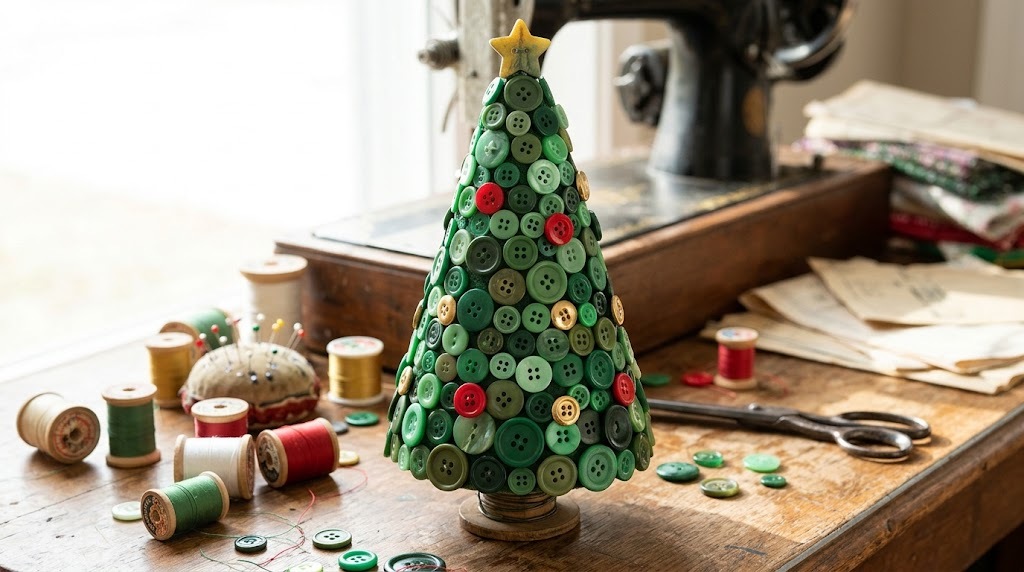
Buttons from grandma’s old tin turn into a cheerful little tree. Glue them on in layers, mixing sizes and shades of green, then add a few red or gold buttons as ornaments. It is a fun way to use up a collection and keep memories close. Every button tells a story. Who taught you to sew on your first button?
You will need: A foam cone, green felt or paint, lots of buttons, a hot glue gun for an adult and a star button for the top.
How to make it: 1. Paint the cone green or wrap it in felt. 2. Glue large buttons first. 3. Fill the gaps with smaller buttons. 4. Add a star button on top.
Cinnamon Stick Cone Christmas Trees
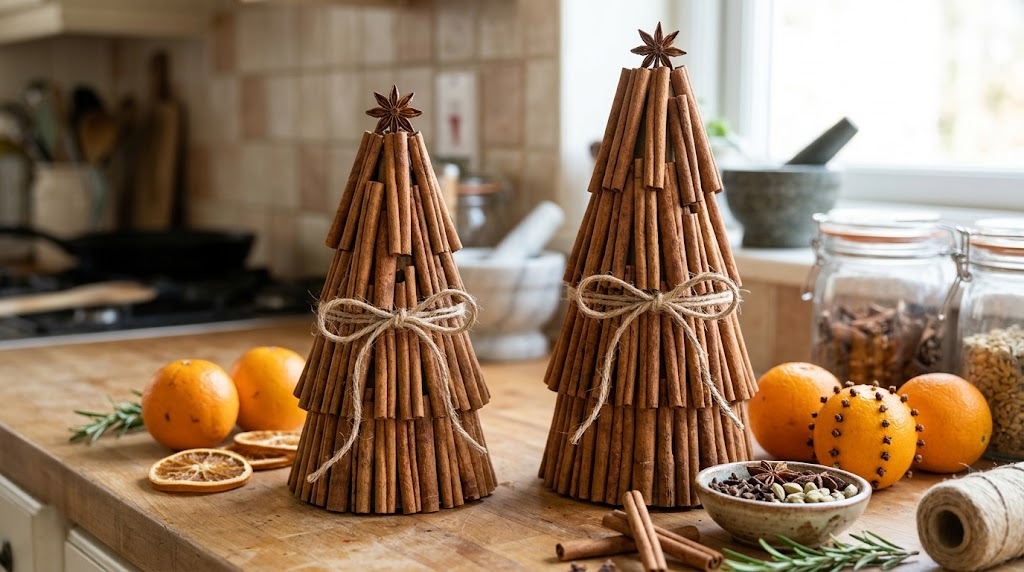
Cinnamon stick trees look rustic and smell amazing. Glue the sticks upright around the cone, cutting them to different lengths as you go up. Tie a twine bow around the middle and add a star anise on top. Your kitchen will smell like holiday baking all season. They make thoughtful gifts too. Who would love one on their counter?
You will need: A small foam cone, cinnamon sticks, a hot glue gun for an adult, twine and star anise.
How to make it: 1. An adult cuts sticks to different lengths. 2. Glue the longest sticks around the base. 3. Use shorter sticks as you go up. 4. Add twine and a star anise topper.
Faux Fur Cone Tree

Faux fur makes a tree that looks like a snowy mountain. Wrap white fur fabric around the cone and glue it at the back seam. Add a thin silver bead garland or a few tiny pearls. It looks cozy and glam at the same time. Use cream or blush fur for a softer look. These cone Christmas trees feel extra luxurious for very little money. Where would your fluffy tree go?
You will need: A foam cone, white faux fur fabric, fabric glue, scissors and a thin bead garland.
How to make it: 1. Cut a fur piece to fit around the cone. 2. Glue it along the back seam. 3. Trim the bottom edge. 4. Wrap the bead garland in a spiral.
Paper Cone Christmas Trees With Scalloped Layers
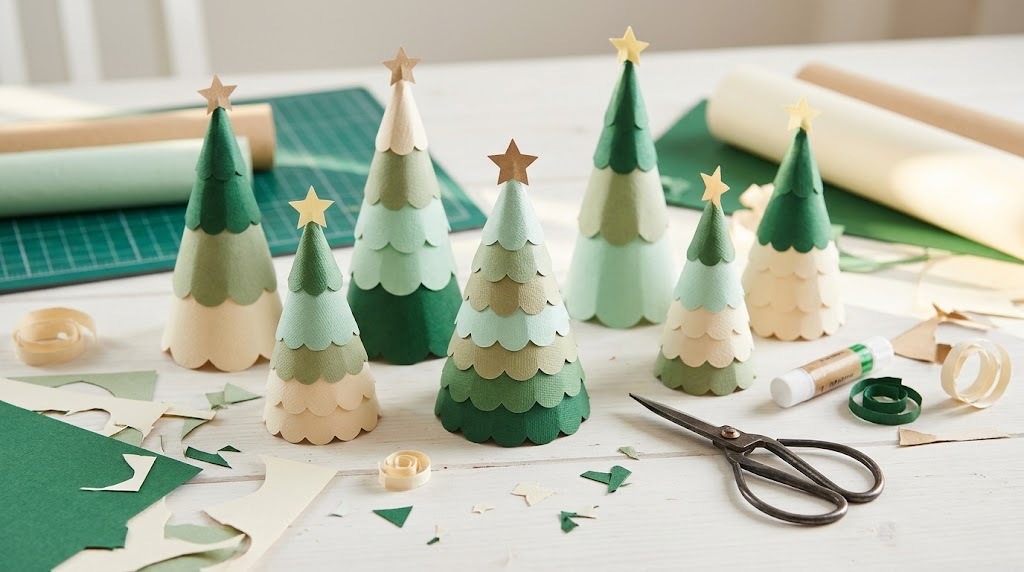
Scalloped paper layers make a sweet, vintage tree. Cut strips of cardstock with a scalloped edge and glue them around a poster board cone from the bottom up. Mix shades of green or go all cream for a soft look. These cone Christmas trees are cheap, quick and perfect for a craft night. Kids can help with the cutting too. Which colors will you layer?
You will need: A poster board cone, cardstock in two or three shades, scalloped scissors or a cup to trace, and a glue stick.
How to make it: 1. Cut cardstock strips with a scalloped edge. 2. Glue the first strip around the bottom. 3. Overlap each new row slightly. 4. Finish with a small paper star.
Burlap Rosette Cone Tree
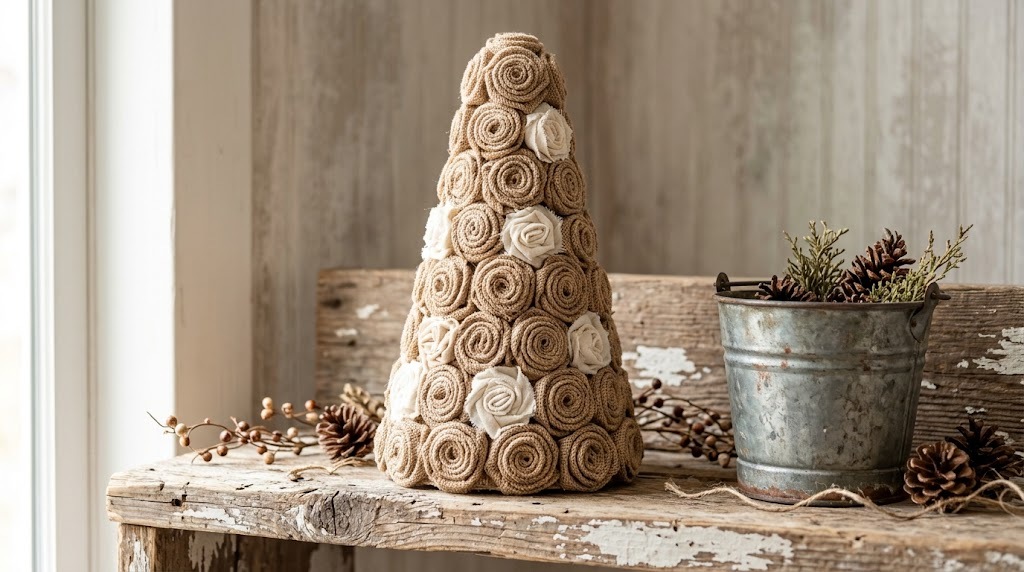
Burlap rosettes turn a plain cone into a textured farmhouse tree. Roll strips of burlap into little flowers and glue them on until the cone is covered. Add a few cream or red rosettes for color. It looks great on a rustic shelf or with galvanized metal decor. It takes a little time, but the result is lovely. Ready to roll some roses?
You will need: A foam cone, a roll of burlap ribbon, a hot glue gun for an adult and a few cream fabric rosettes.
How to make it: 1. Cut burlap into 12 inch strips. 2. Roll each strip tightly into a rosette and glue the end. 3. Glue rosettes on from the bottom up. 4. Fill gaps with small rosettes.
Felt Ball Cone Tree
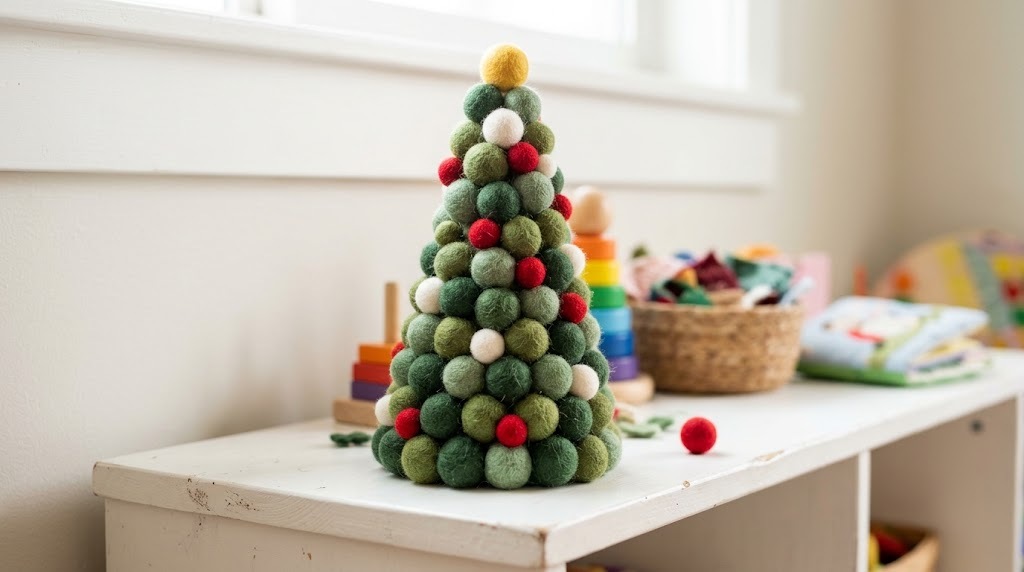
Felt balls make a playful, colorful tree that looks like a pile of gumdrops. Glue them all over a cone in green with a few red and white ones as ornaments. They are soft and safe, so this tree is perfect for a kids’ room or playroom. It is one of the most cheerful cone Christmas trees on this list. How many colors will you use?
You will need: A foam cone, a bag of felt balls in different colors and craft glue.
How to make it: 1. Paint the cone green so gaps do not show. 2. Glue felt balls on in rows. 3. Mix in a few colors as ornaments. 4. Add a yellow felt ball star on top.
Cone Christmas Trees Trio on a Tray
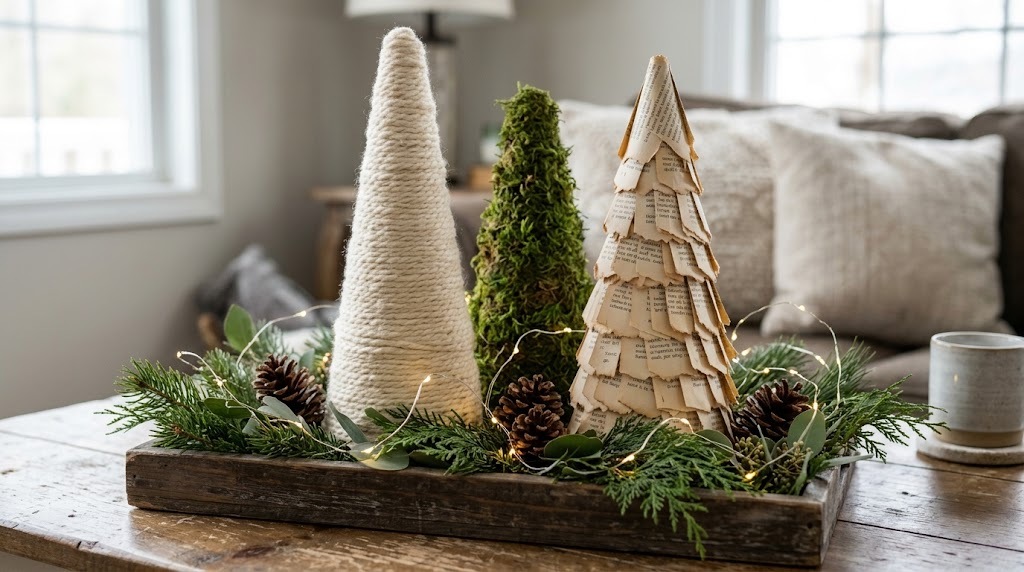
Put three of your favorite trees together on a tray and you have an instant centerpiece. Mix heights and textures, like yarn, moss and book pages, and add a little greenery and a few pinecones. Set it on a coffee table or dining table. Swap trees out during the season to keep it fresh. It is the easiest way to show off your handmade cone Christmas trees. Which three will you pick?
You will need: A wooden or metal tray, three finished cone trees, greenery, pinecones and battery LED fairy lights.
How to make it: 1. Place the tallest tree at the back. 2. Add the two smaller trees in front. 3. Fill around them with greenery and pinecones. 4. Weave LED fairy lights through the greenery.