Cake Art Challenges: 14 Show Stopping Cake Ideas From Videos Watched by Millions
Cake art challenges have become some of the most watched creative videos on the internet, and once you start watching, it is hard to stop. Bakers race the clock to turn plain sponge into monsters, gingerbread houses, giant donuts and cakes that look exactly like hamburgers. One challenge video has passed 78 million views, and new rounds keep getting bigger and wilder. The best part is that many of these ideas are easier than they look, and they are perfect for the parties coming up this season. Below are 14 show stopping cake ideas inspired by those videos, from spooky Halloween designs to cozy Thanksgiving and Christmas centerpieces, plus the simple tricks that make them work. Grab your piping bags, clear the counter and let your inner cake artist out..
Cake Art Challenges: Why Millions Are Watching
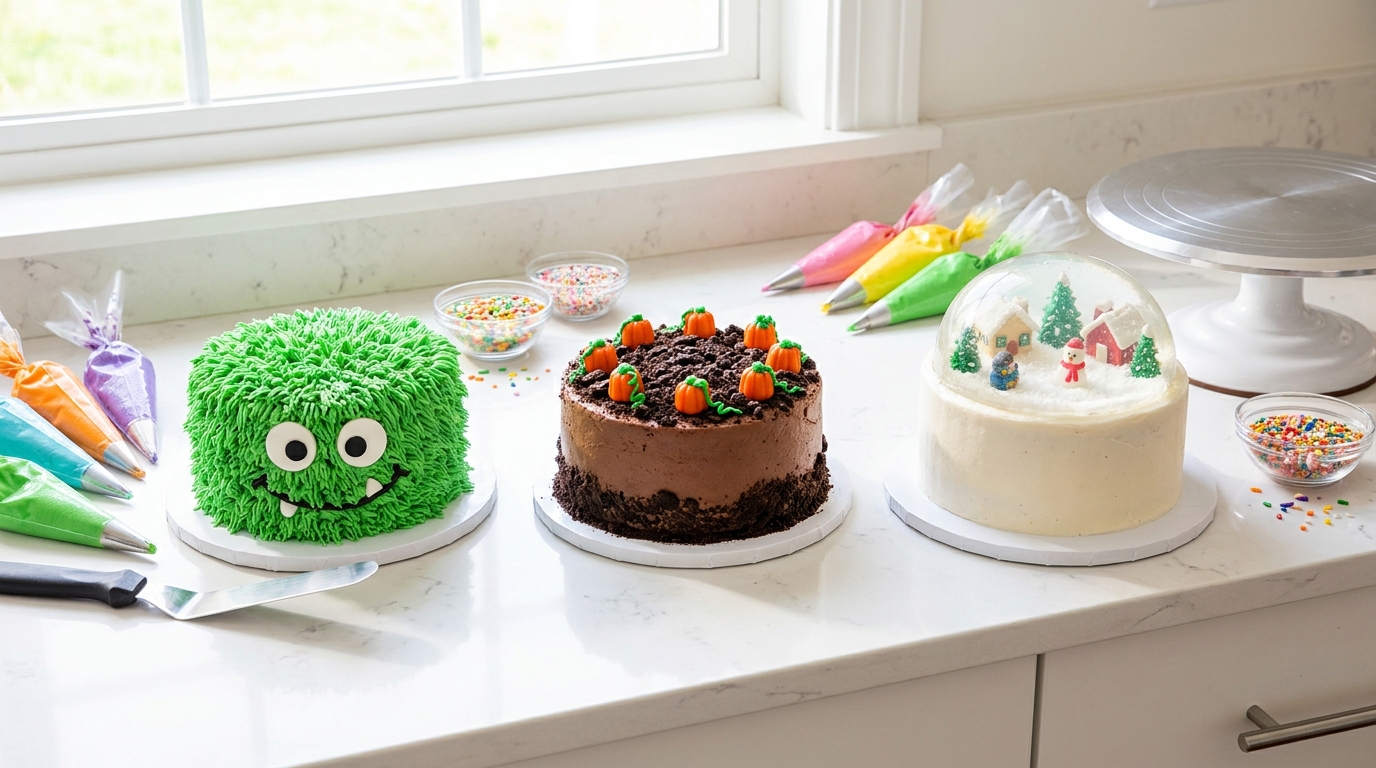
The craze is real. The YouTube channel Stay Wild, with about 25.9 million subscribers, posted Best Cake Art Wins $1,000! on March 30, 2025, and it has now passed 78,352,648 views, with themes from food to monsters. A newer round from November 2025 has more than 32 million views, and the cakes get bigger every round. People love the suspense, the colors and the big reveal at the end. Ready to try a few ideas at home..
You will need: Two or three baked and cooled cakes, a batch of buttercream, gel food colors, piping bags and tips, sprinkles and a turntable if you have one.
How to make it: 1. Pick one or two designs from this list to start. 2. Bake your cakes a day ahead so they are cool and firm. 3. Make plenty of buttercream and tint it in small bowls. 4. Set up all your tools before you start decorating.
Spooky Monster Face Cake
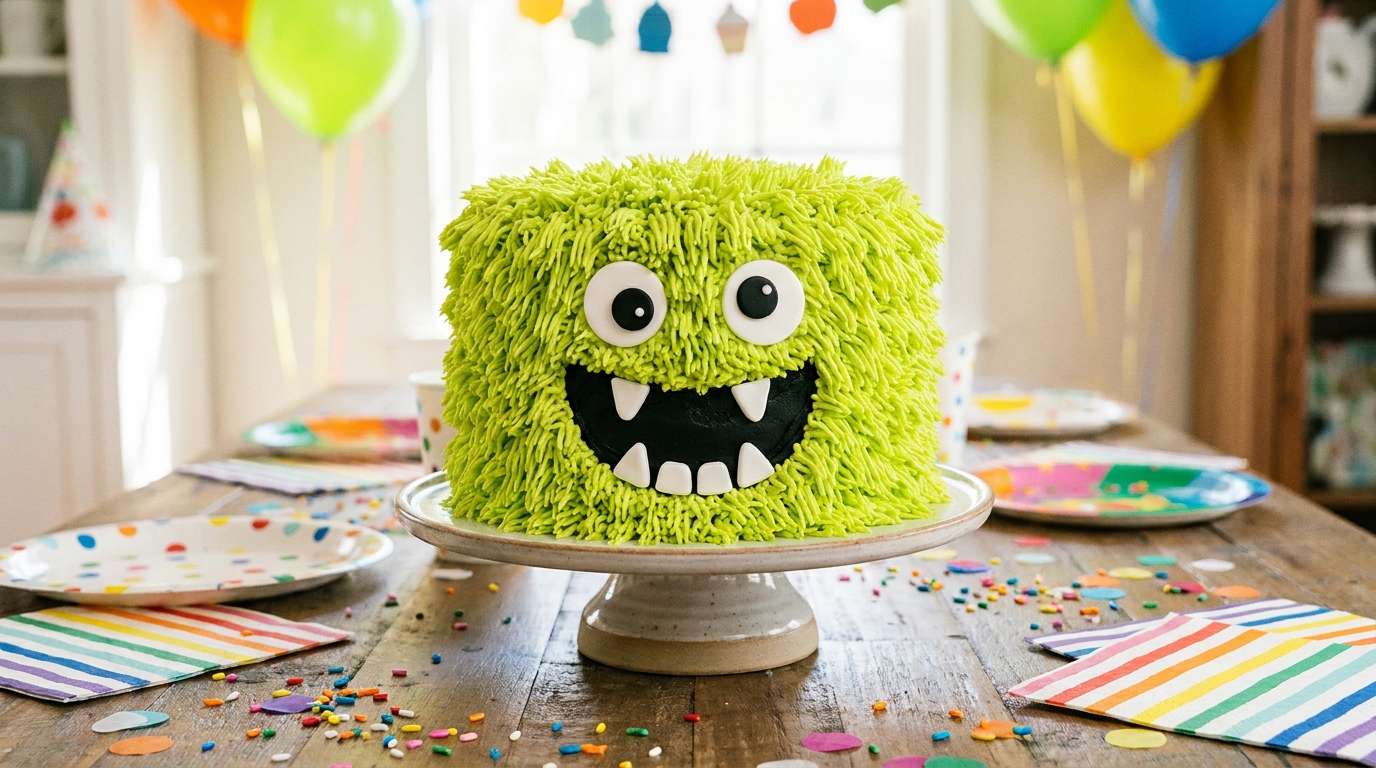
Monster cakes are a favorite in cake art challenges because they are silly, bright and forgiving. Shaggy green buttercream piped with a grass tip hides every bump, so there is no need for perfect smooth sides. Add two giant candy eyes and a goofy frosting mouth with fondant teeth, and you have a cake kids will scream about for all the right reasons. It is ideal for a Halloween party or a monster themed birthday. What color would your monster be?
You will need: One round cake, green buttercream, a grass piping tip, two large candy eyes or fondant circles, white fondant, black gel icing.
How to make it: 1. Frost the cake with a thin base layer of green buttercream. 2. Pipe shaggy fur all over with the grass tip. 3. Press on the candy eyes near the top. 4. Pipe a wide mouth with black icing and add small fondant teeth.
Pumpkin Patch Cake With Candy Pumpkins
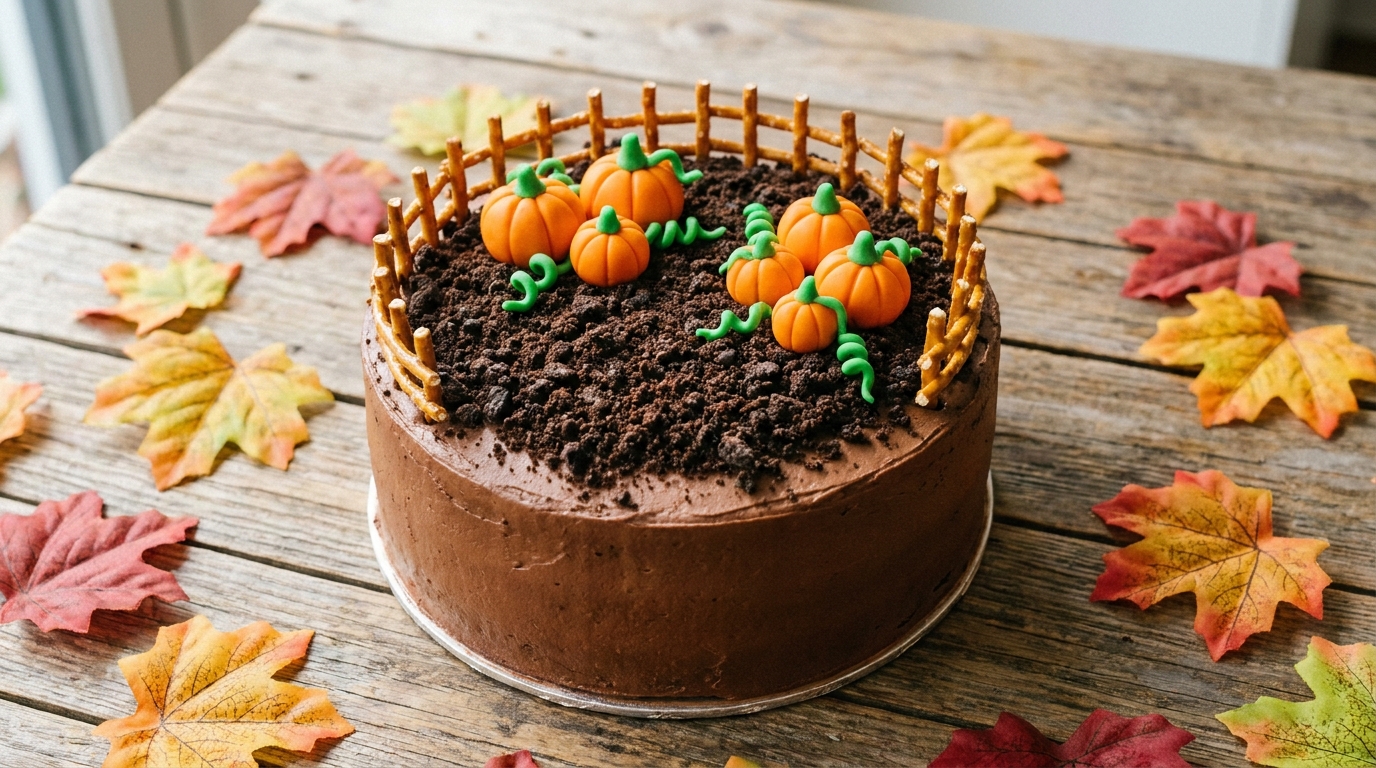
Like many cake art challenges entries, this one looks like a tiny world, a farm field, and it is perfect for fall parties. Chocolate frosting gets covered with crushed chocolate cookies to look like soil, then little orange pumpkins made from fondant or candy melts sit on top with curly green vines. A fence made of pretzel sticks finishes the scene. It is a great project for kids, because rolling little pumpkins is like playing with modeling clay. How many pumpkins will your patch hold?
You will need: One chocolate frosted cake, crushed chocolate sandwich cookies, orange and green fondant, a toothpick, pretzel sticks.
How to make it: 1. Cover the top of the cake with crushed cookie crumbs. 2. Roll small orange fondant balls and press lines in with a toothpick. 3. Add tiny green stems and curly vines. 4. Arrange the pumpkins and push pretzel sticks around the edge as a fence.
Ghost Drip Cake
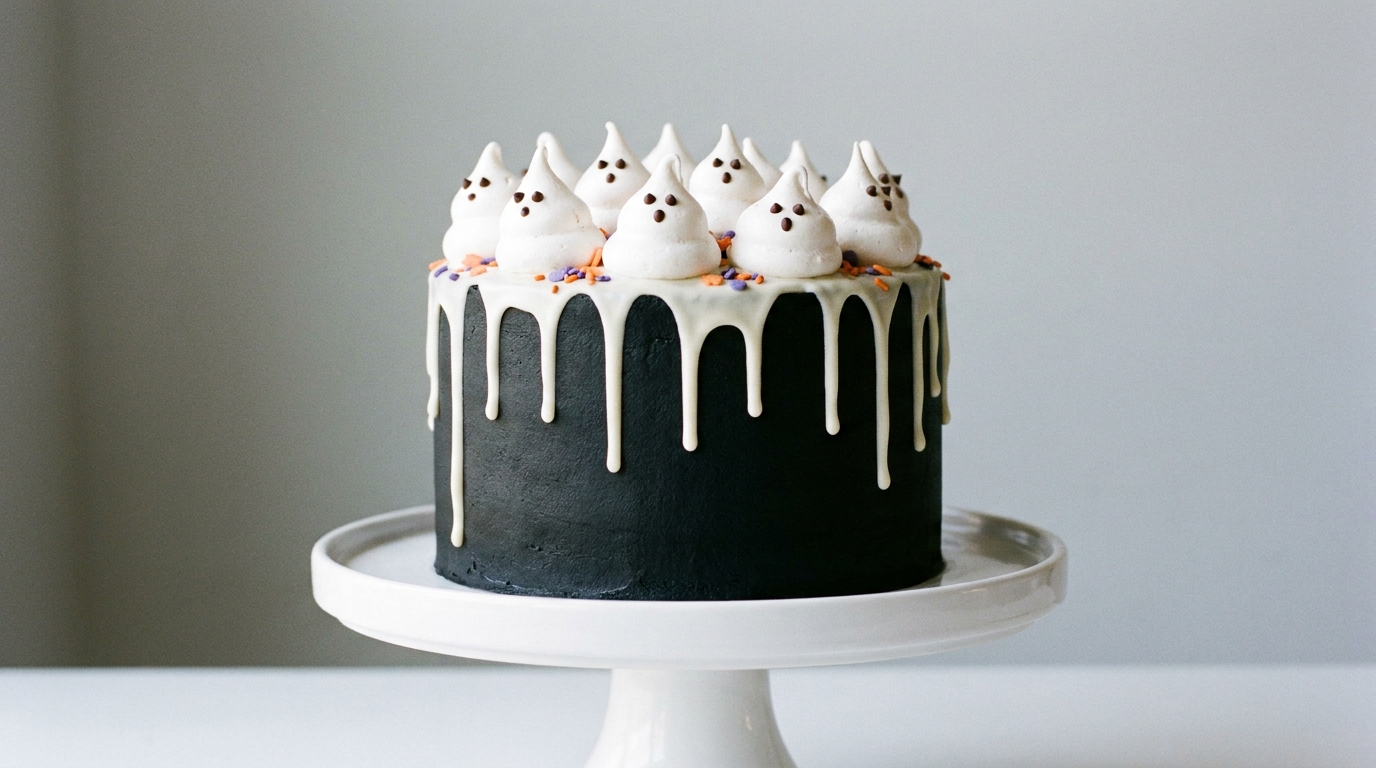
Drip cakes are one of the most copied looks from cake art challenges, and this spooky version is easier than it seems. A black or dark gray frosted cake gets a pour of white icing that runs down the sides like melting wax. Then cute meringue ghosts with tiny chocolate eyes float on top. The contrast is striking and photographs beautifully. Keep the cake chilled before the drip so it sets in neat lines. Would your guests guess how easy it was?
You will need: One tall frosted cake chilled until firm, white candy melts or white icing, a squeeze bottle or spoon, store bought or homemade meringue kisses, mini chocolate chips.
How to make it: 1. Chill the frosted cake for at least 30 minutes. 2. Warm the white icing until just pourable, then let it cool a little. 3. Drip it around the top edge, letting it run down the sides. 4. Fill in the top, then add meringue ghosts with chocolate chip eyes.
Spider Web Cake Inspired by Cake Art Challenges
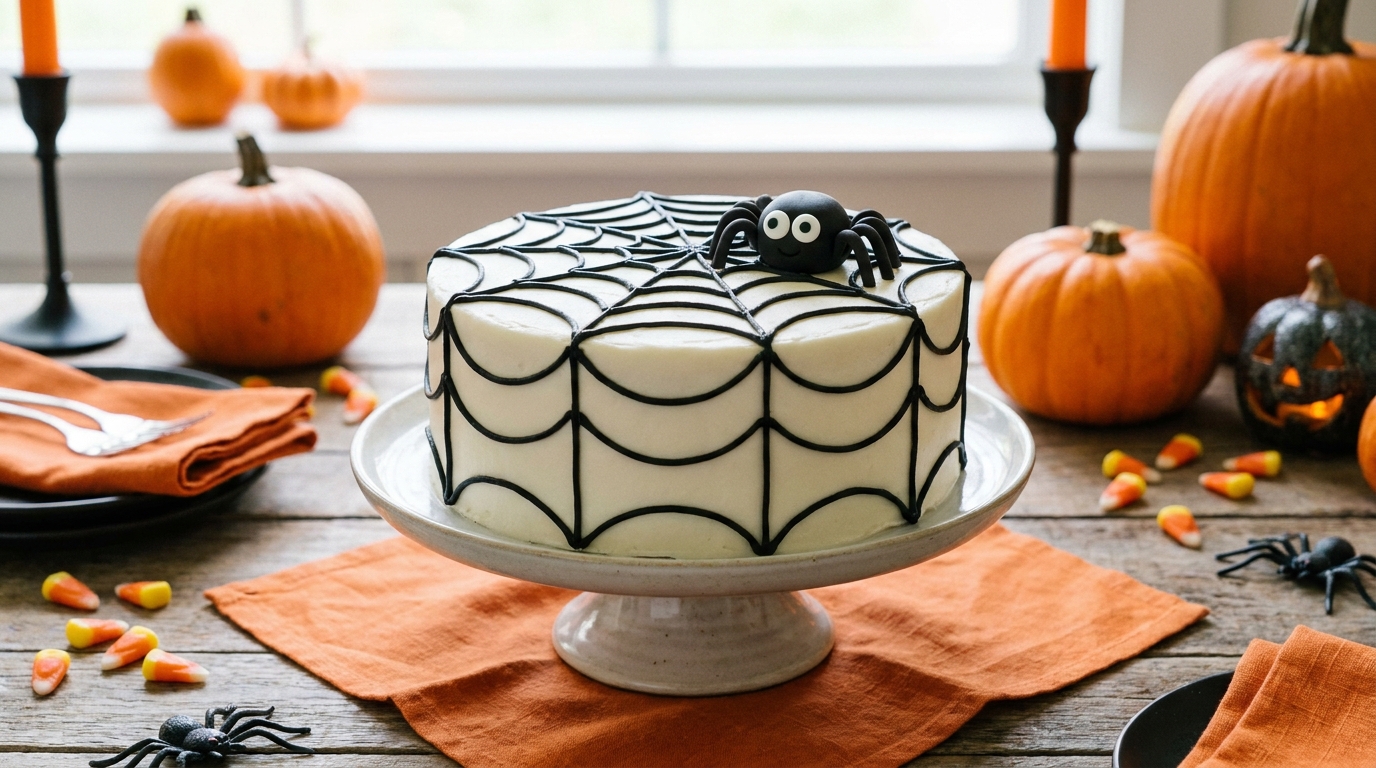
Spider webs are a classic in cake art challenges because one simple trick creates a dramatic look. Pipe circles of black icing on a white cake, then drag a toothpick from the center out to the edge, and the web appears like magic. A cute round fondant spider with candy eyes adds personality without being too creepy for little ones. It takes about ten minutes once the cake is frosted. Have you ever tried the toothpick drag trick?
You will need: One white frosted cake, black icing in a piping bag with a small round tip, a toothpick or skewer, black fondant, candy eyes.
How to make it: 1. Pipe four or five rings of black icing on the top of the cake. 2. Drag a toothpick from the center to the edge in eight even lines. 3. Pipe lines down the sides to continue the web. 4. Roll a fondant spider, add candy eyes and set it on the web.
Turkey Cake for Thanksgiving
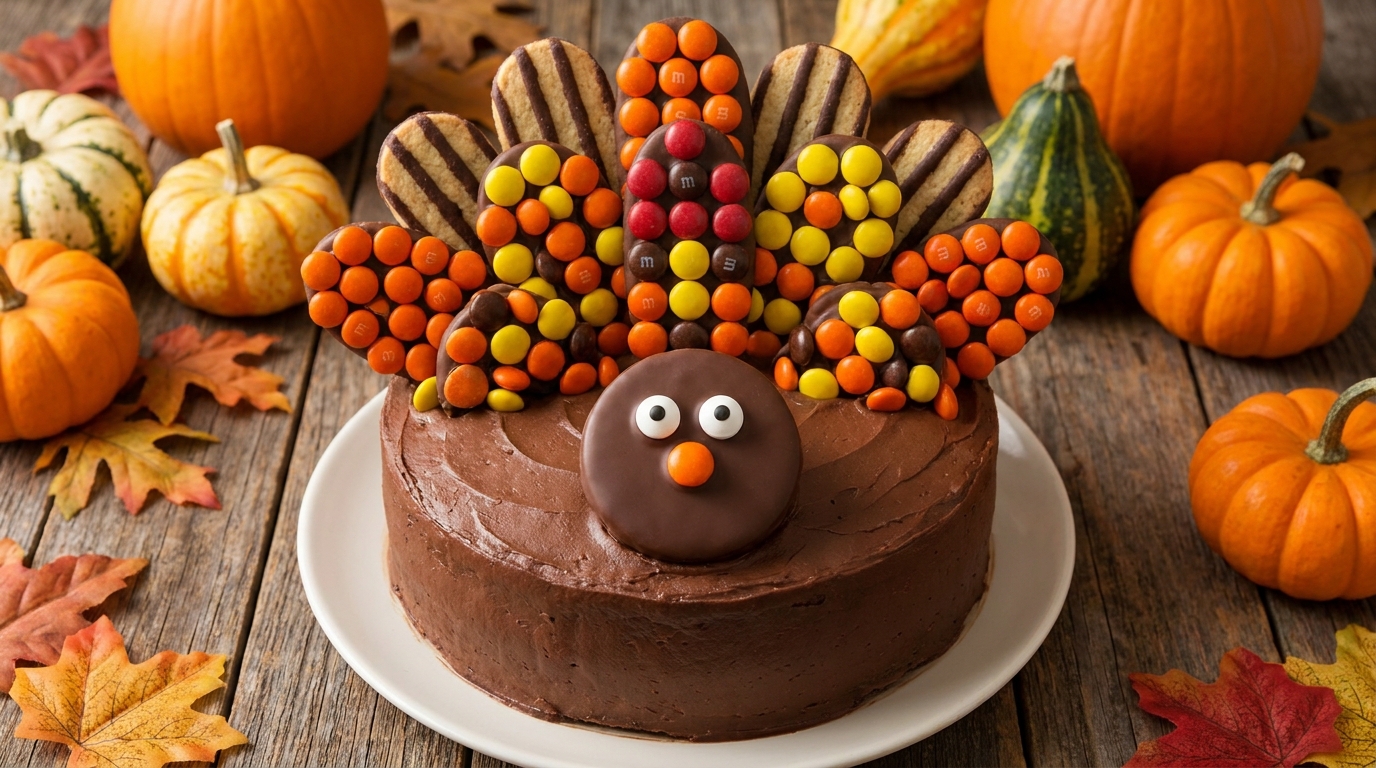
Want a dessert that makes everyone at Thanksgiving smile? This turkey cake does the trick. A round chocolate cake becomes the body, a fan of colorful candies and cookies stands up at the back as tail feathers, and a little face with candy eyes and an orange beak sits in front. It is bright, playful and easy enough for kids to help with. It also makes a fun break from the usual pies. Who will get the first slice at your table?
You will need: One round chocolate frosted cake, colorful candy coated chocolates, round cookies, candy eyes, orange and red fondant.
How to make it: 1. Press a row of round cookies upright into the back edge of the cake. 2. Stick colorful candies onto the cookies in rows like feathers. 3. Add a round chocolate cookie face near the front. 4. Finish with candy eyes, a fondant beak and a red wattle.
Gingerbread House Cake
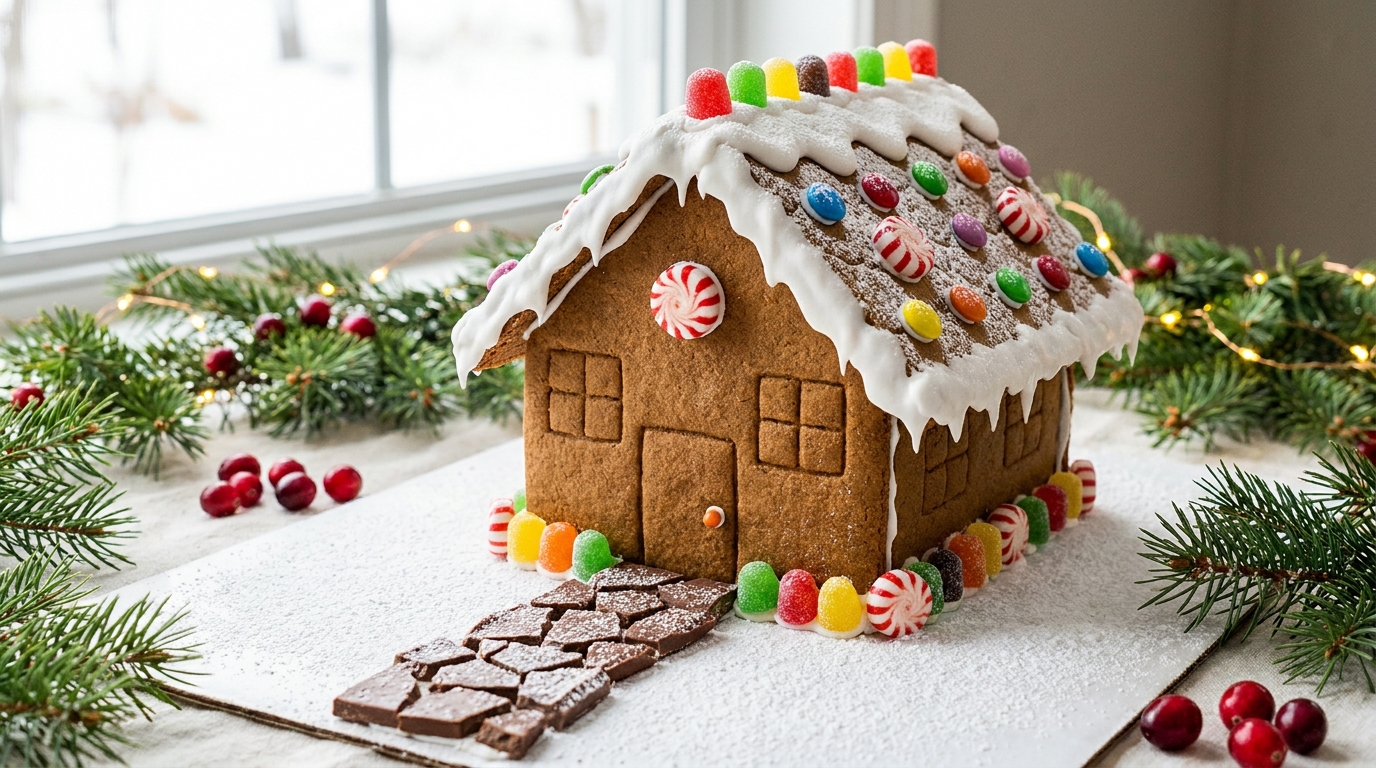
Building a gingerbread house is a holiday tradition, but a gingerbread house cake is even better, because the whole thing is soft and delicious. A spiced cake is cut into a house shape, then decorated with royal icing snow, candy buttons, gumdrops and peppermints. A chocolate path leads to the door. It is the kind of centerpiece from cake art challenges that makes people grab their phones for a photo. Make it a family activity on a cold afternoon. What candy would you put on the roof?
You will need: A loaf or sheet cake, a sharp knife (adult help), buttercream, white royal icing, gumdrops, peppermint candies, candy buttons, powdered sugar.
How to make it: 1. Cut the cake into a house shape with a triangle roof. 2. Frost it with a thin layer of buttercream. 3. Pipe royal icing snow along the roof edges and windows. 4. Press on candies and dust with powdered sugar snow.
Snow Globe Cake
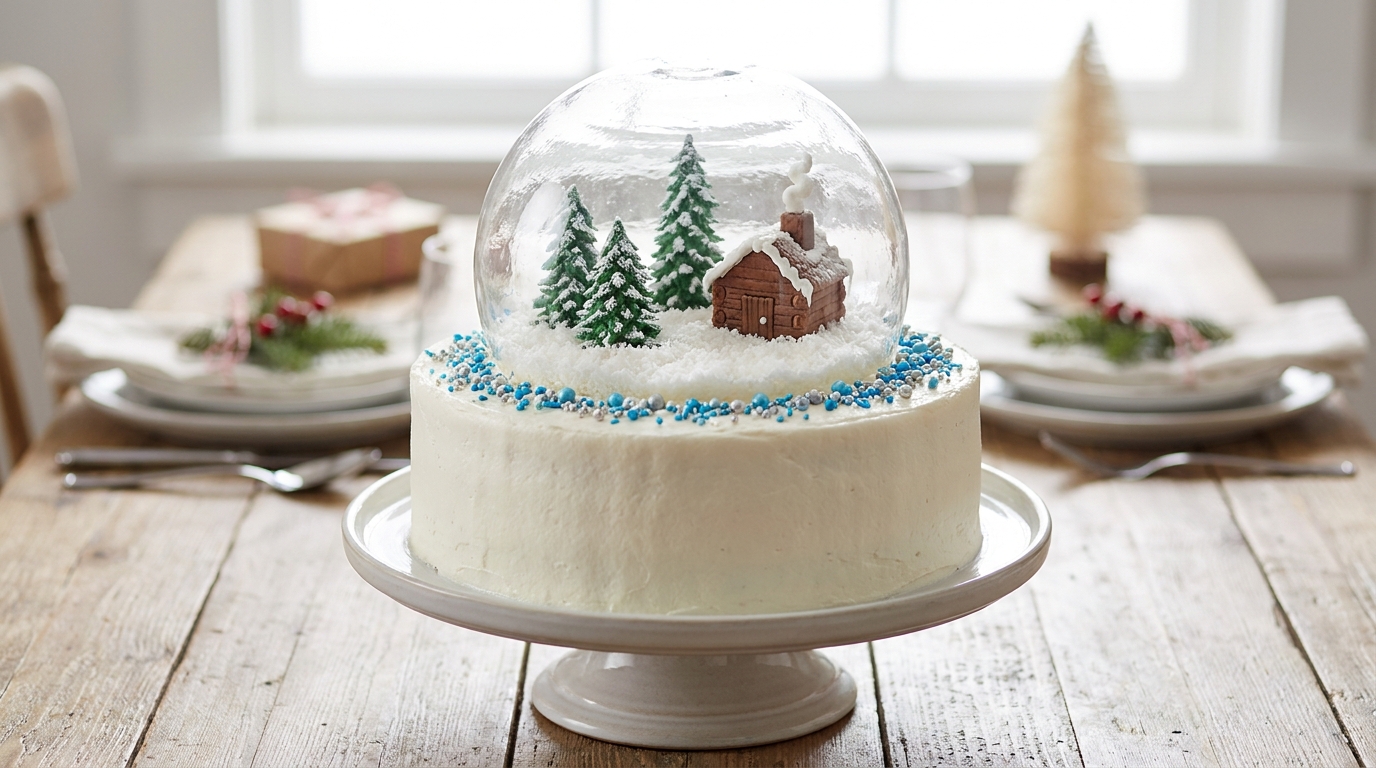
Snow globe cakes always win oohs and aahs in cake art challenges. A clear dome sits on top of a simple frosted cake, holding a tiny winter world inside with fondant trees, a little cabin and coconut snow. Many bakers make the dome from melted sugar or gelatin, but a clean plastic dome works too and is much easier. It turns any holiday table into a little wonderland. What tiny scene would you put inside your globe?
You will need: One white frosted cake, a clear food safe plastic dome or sugar dome, green and brown fondant, shredded coconut, blue and silver sprinkles.
How to make it: 1. Frost the cake smooth and white. 2. Make small fondant trees and a little cabin. 3. Arrange them on top with coconut snow. 4. Set the clear dome over the scene and add sprinkles around the base.
Christmas Tree Stacked Cake
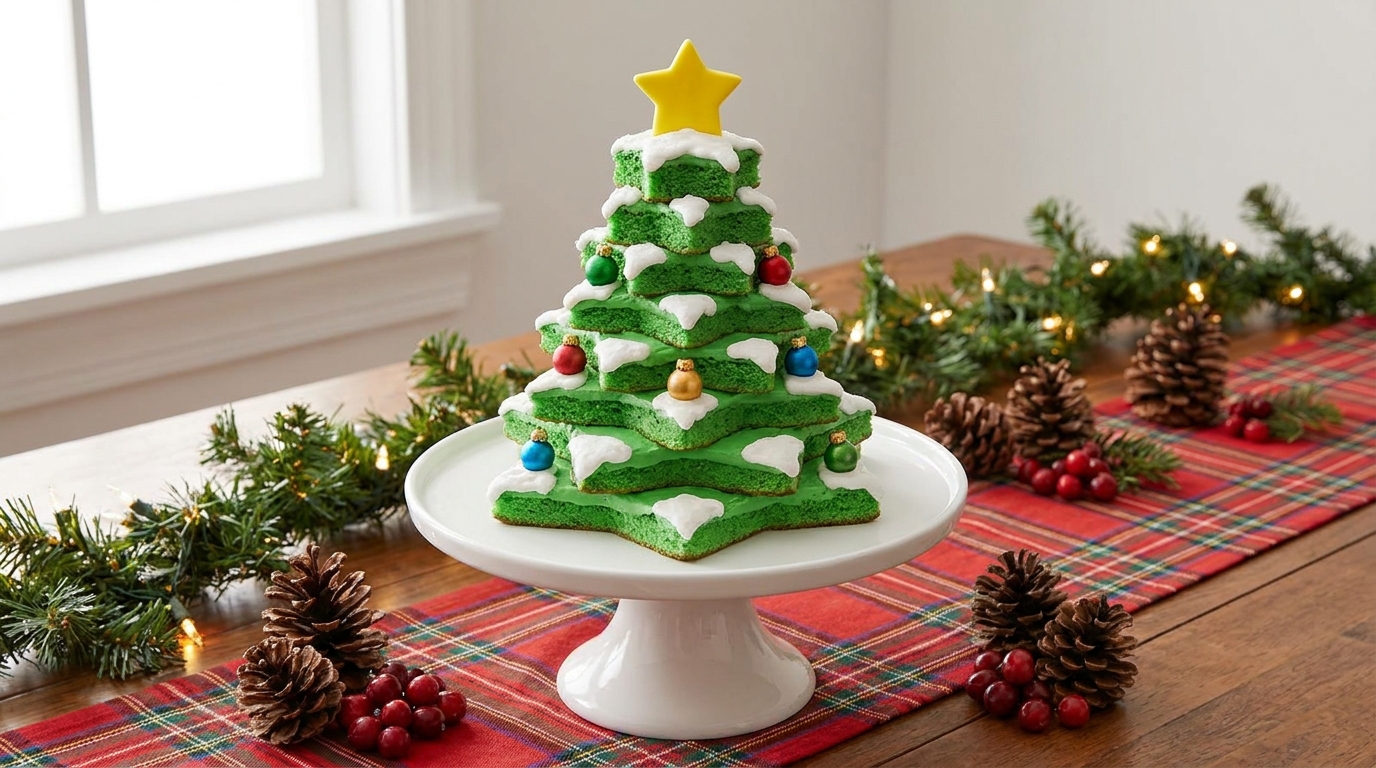
This cake looks complicated but it is just a stack of star shaped layers. Cut stars from sheet cakes in decreasing sizes, stack them with frosting in between and turn each one slightly so the points spiral like branches. Green frosting, white icing snow on the tips and tiny candy ornaments finish the tree, with a yellow star on top. It is a showstopper straight out of cake art challenges for any Christmas dessert table. Will you make one big tree or a few mini ones?
You will need: Two sheet cakes, star shaped cookie cutters or paper templates in several sizes, green buttercream, white icing, small candies, yellow fondant.
How to make it: 1. Cut stars in graduated sizes from the sheet cakes. 2. Stack them largest to smallest with frosting between, twisting each layer. 3. Frost lightly in green and pipe white snow on the tips. 4. Add candy ornaments and a fondant star on top.
Hamburger Illusion Cake, a Cake Art Challenges Favorite
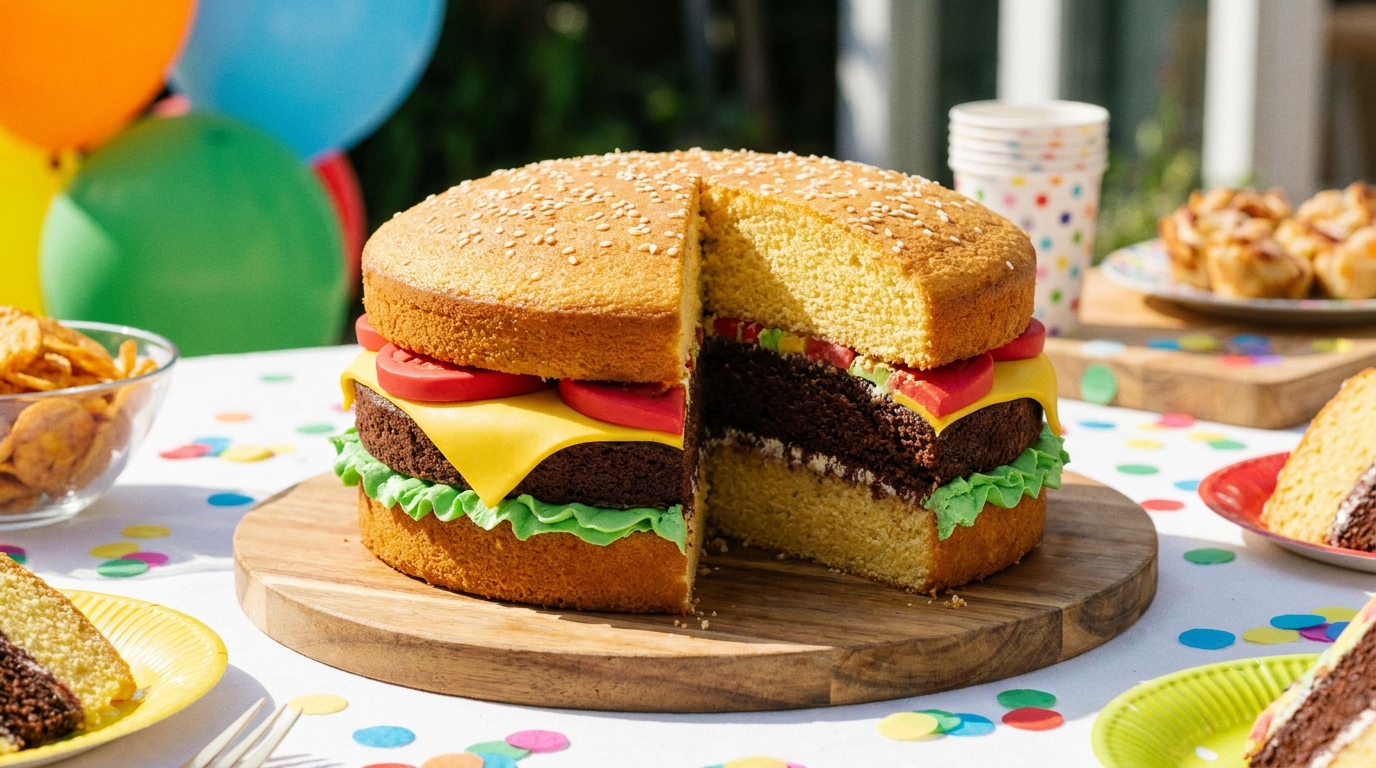
Illusion cakes are pure fun, and the hamburger is the classic. Golden sponge layers become the buns, a chocolate cake layer is the patty, and green buttercream, red fondant and yellow fondant play the lettuce, tomato and cheese. White sprinkles look just like sesame seeds. When you cut it open, everyone laughs. It is a hit at summer parties, birthdays and game nights alike. If you love things that fool the eye, you will also enjoy these realistic clay crafts that people try to eat. Who would you trick first?
You will need: Two round yellow cakes, one round chocolate cake, green buttercream, red and yellow fondant, white sprinkles, a serrated knife (adult help).
How to make it: 1. Dome one yellow cake for the top bun and level the other for the bottom. 2. Stack bottom bun, chocolate patty, yellow cheese and red tomato. 3. Pipe green ruffled lettuce around the edge. 4. Add the top bun and sprinkle white seeds on top.
Giant Donut Cake
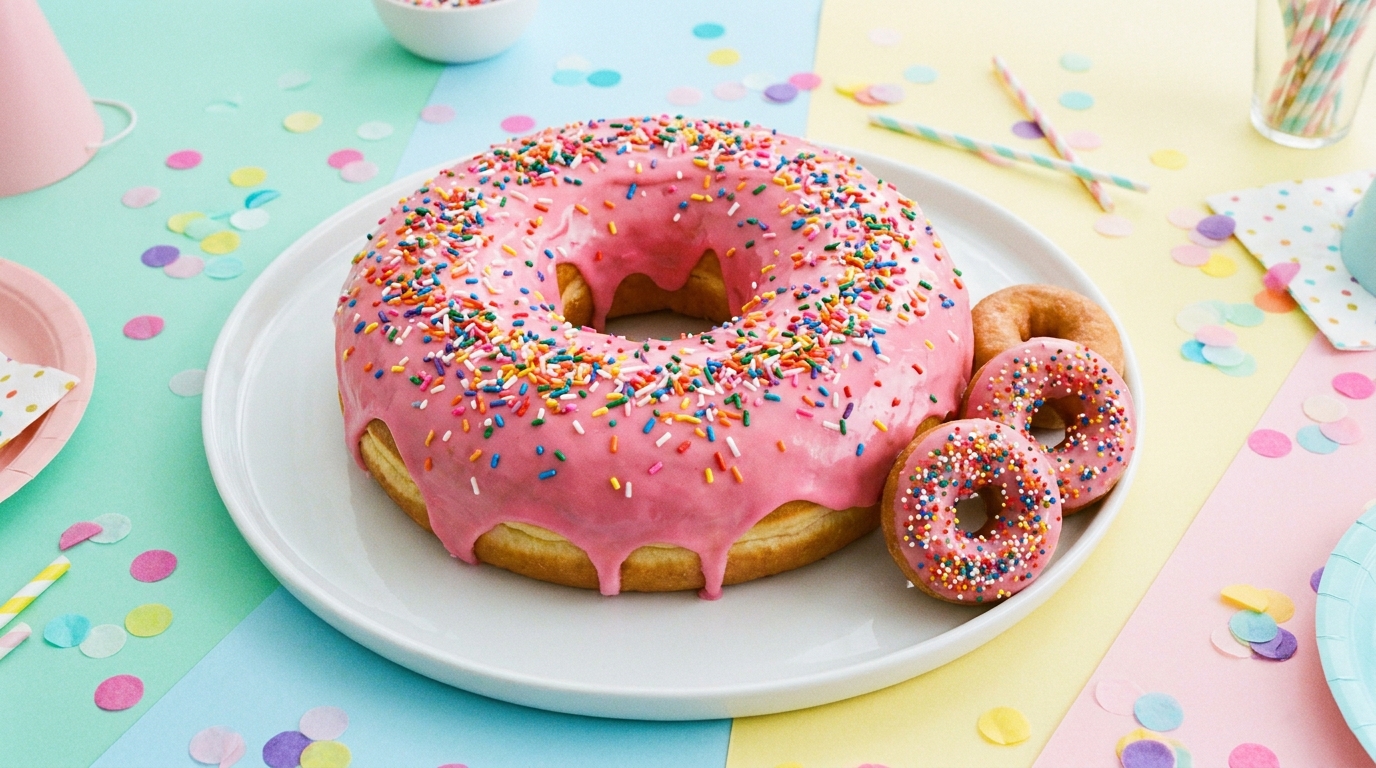
Bigger is better, and a giant donut cake proves why cake art challenges keep going bigger. Bake a cake in a ring pan, cover it in glossy pink icing and shower it with rainbow sprinkles. Set a few regular donuts next to it, and the giant size becomes even funnier. It is one of the easiest big wow cakes you can make, with no carving at all. Kids love it for birthdays and sleepovers. What color glaze would you choose?
You will need: A ring or bundt cake, powdered sugar, milk, pink gel color, rainbow sprinkles, a large plate.
How to make it: 1. Bake and cool the ring cake, then set it rounded side up. 2. Whisk powdered sugar and milk into a thick glaze and tint it pink. 3. Pour the glaze over the top, letting it drip a little. 4. Cover with sprinkles before the glaze sets.
Rainbow Surprise Inside Cake
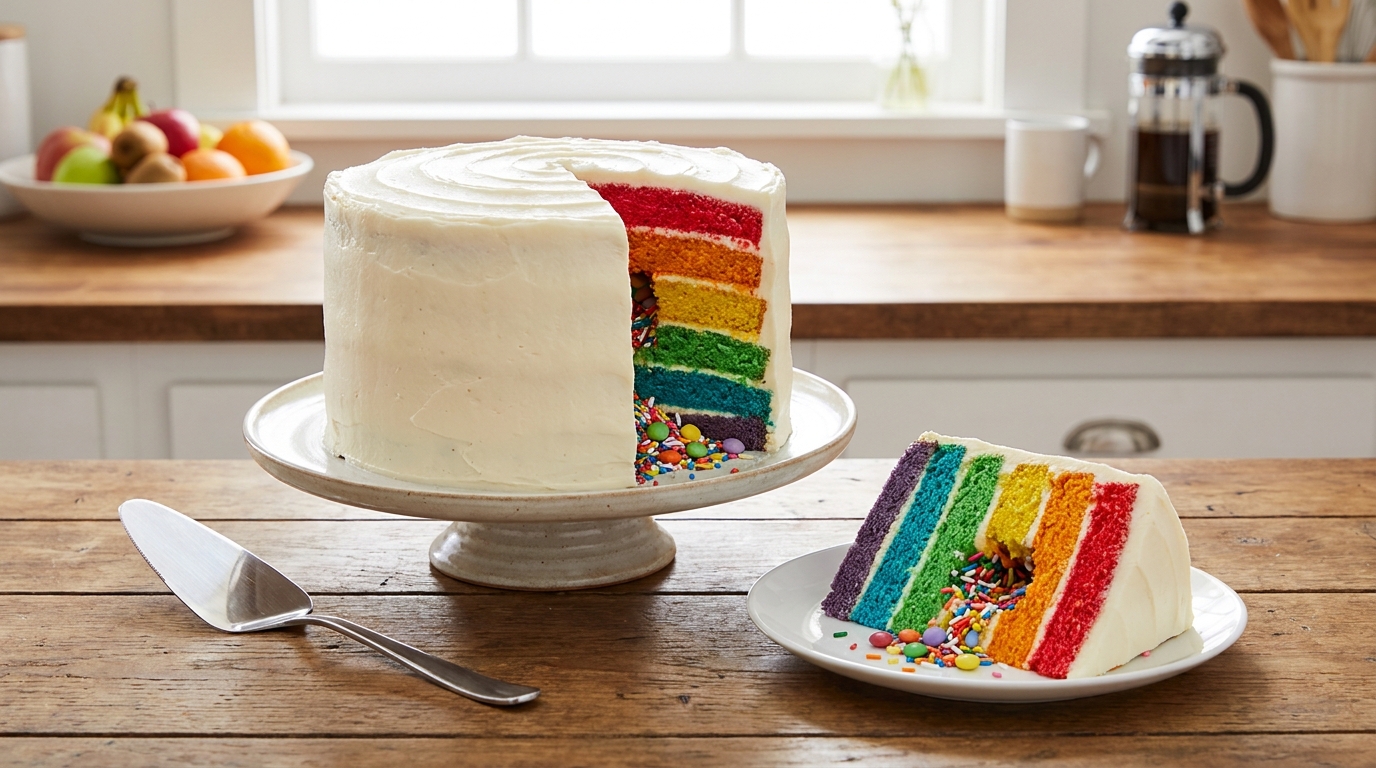
From the outside it looks like a simple white cake. Then you cut the first slice and rainbow layers appear, along with a burst of sprinkles from a hidden center. The surprise moment is exactly why these cakes do so well in cake art challenges. Each layer is just white cake batter tinted a different color, and the hidden pocket is made by cutting a circle from the middle layers. It is perfect for birthdays and graduations. Who would love this surprise?
You will need: White cake batter, gel colors in six shades, six round pans or bake in batches, white buttercream, colorful sprinkles, a round cutter.
How to make it: 1. Divide the batter into six bowls and tint each a rainbow color. 2. Bake thin layers and let them cool. 3. Cut a circle from the center of the middle layers and stack them, filling the hole with sprinkles. 4. Top with the last layer and frost everything white.
Miniature Tiny Cakes From Cake Art Challenges
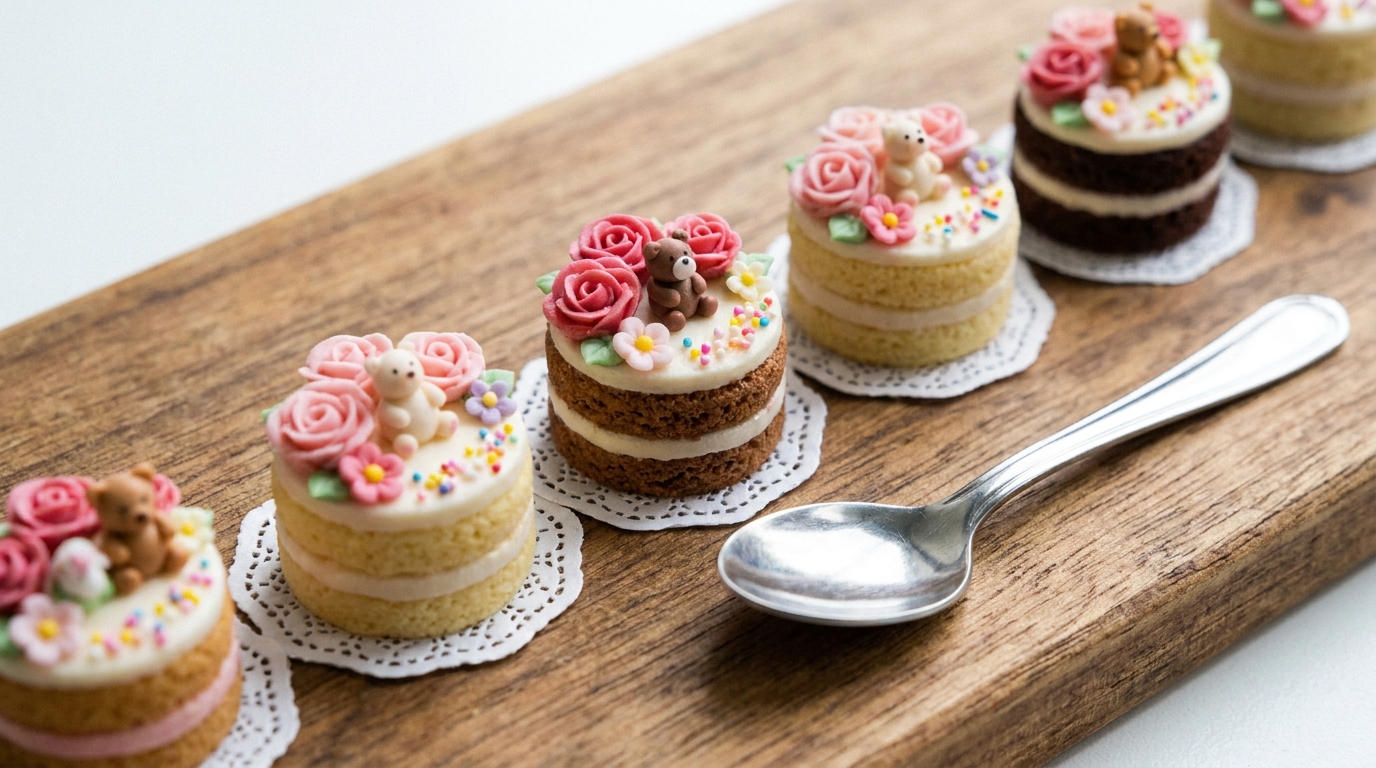
At the opposite end of the giant cakes are the tiny ones, and they are just as popular. A miniature chocolate decorated cake video has passed 16 million views this year alone. These little cakes are cut from a sheet cake with a small round cutter, then decorated with mini piped roses and tiny sprinkles. They are adorable on a dessert table and perfect for portion control at parties. Fair warning: making them is strangely addictive. How small can you go?
You will need: A thin sheet cake, a small round cutter, buttercream, a piping bag with a tiny star tip, mini sprinkles, small paper doilies.
How to make it: 1. Cut small rounds from the chilled sheet cake. 2. Stack two rounds with frosting in between. 3. Frost the outside and pipe tiny rosettes on top. 4. Add mini sprinkles and set each one on a doily.
Cake Art Challenges Tips: Crumb Coat, Piping Bags and Food Color
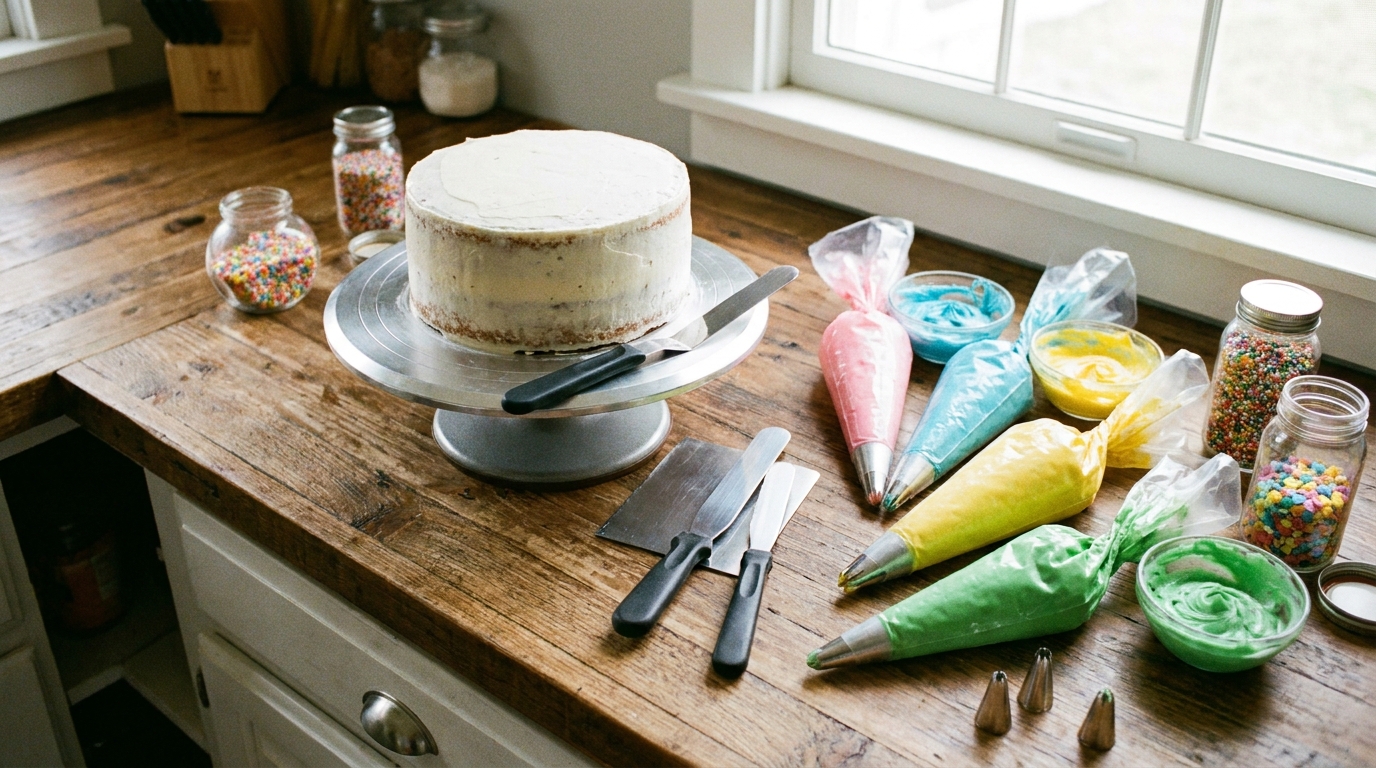
Every amazing cake starts with a few simple basics. A crumb coat is a thin first layer of frosting that traps loose crumbs, so the final coat stays clean. Chill the cake for 20 minutes before adding the second layer. Gel food colors give bright shades without making frosting runny. Fill piping bags only halfway so they are easier to control. Practice on a plate before piping on the cake. With these tips, you are ready for any challenge. Which design will you try first?
You will need: An offset spatula, a bench scraper, a turntable, piping bags and tips, gel food colors, small bowls, plastic wrap.
How to make it: 1. Spread a thin crumb coat over the whole cake and chill it. 2. Add a thicker final coat and smooth it with the scraper while turning the cake. 3. Tint frosting in small bowls with gel color. 4. Fill piping bags halfway, twist the top and practice on a plate first.