18 DIY Pet Hideaways That Made Cats and Dogs Happier Than Ever
These DIY pet hideaways are proof that our cats and dogs do not need fancy store bought furniture to feel safe and loved. Every pet wants a quiet spot of their own, a little den where they can nap, hide from the vacuum or watch the world go by. With a free weekend and a few simple supplies, you can turn wasted corners of your home into cozy nooks that look good and make your pet happy. Videos of hidden dog rooms and cat shelves have been watched millions of times this year, and once you see a dog curled up in a den made just for them, you will understand why. Pick the space your pet already loves most, and start there..
DIY Pet Hideaways Start With a Dog Room Under the Stairs
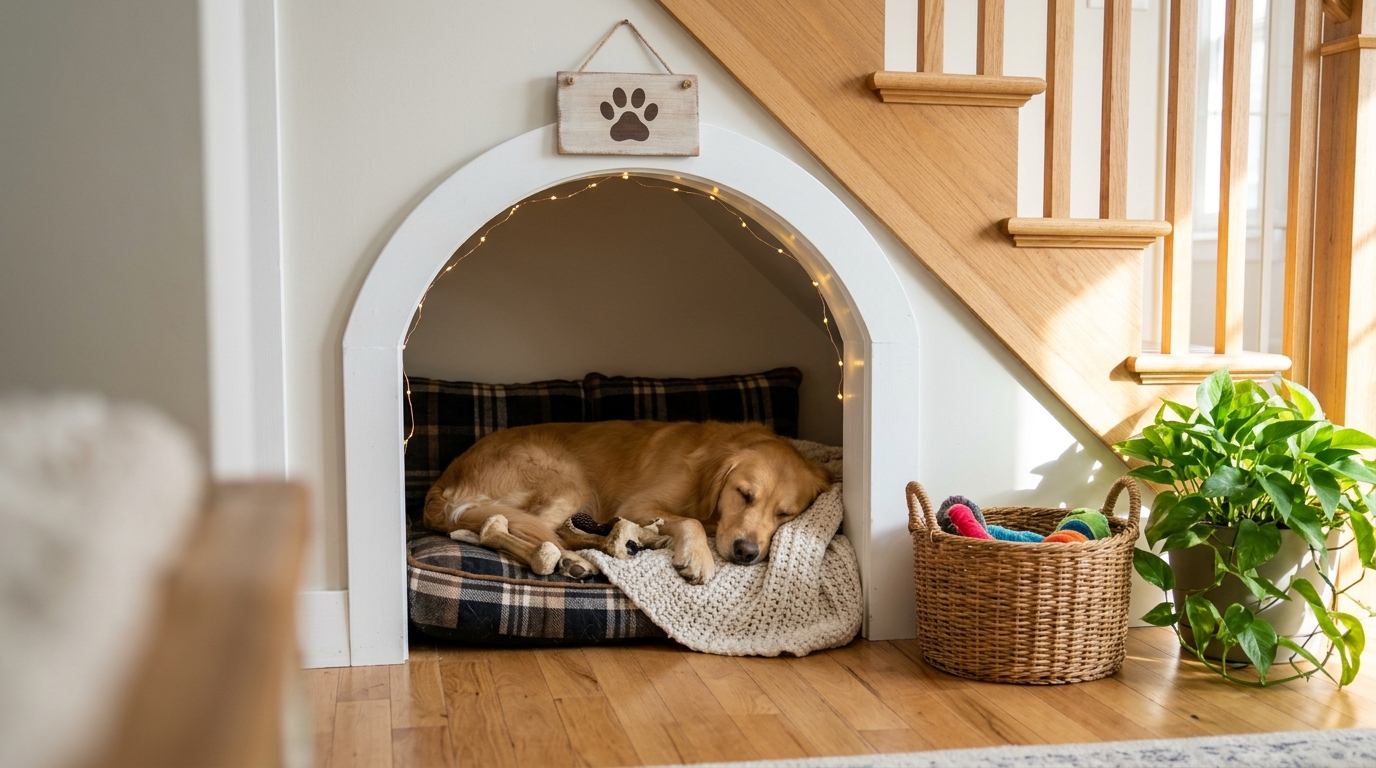
That awkward space under the stairs is the perfect den for a dog, and it might be the most loved of all DIY pet hideaways. Frame a small arched opening, paint it a soft color, lay a thick cushion inside and add a string of battery fairy lights along the arch. Your dog gets a quiet cave right in the middle of family life. A short video of a hidden dog room under the stairs passed 24 million views. Measure your space tonight and start dreaming..
You will need: Plywood or trim boards for the frame, paint, a jigsaw (adults only), a thick dog cushion, battery fairy lights.
How to make it: 1. Measure the space under your stairs and sketch an arched doorway. 2. Have an adult cut and attach the trim, then paint it. 3. Add a cushion, a blanket and battery lights, then invite your dog in with a treat.
A Balcony Catio Lets Cats Enjoy Fresh Air Safely
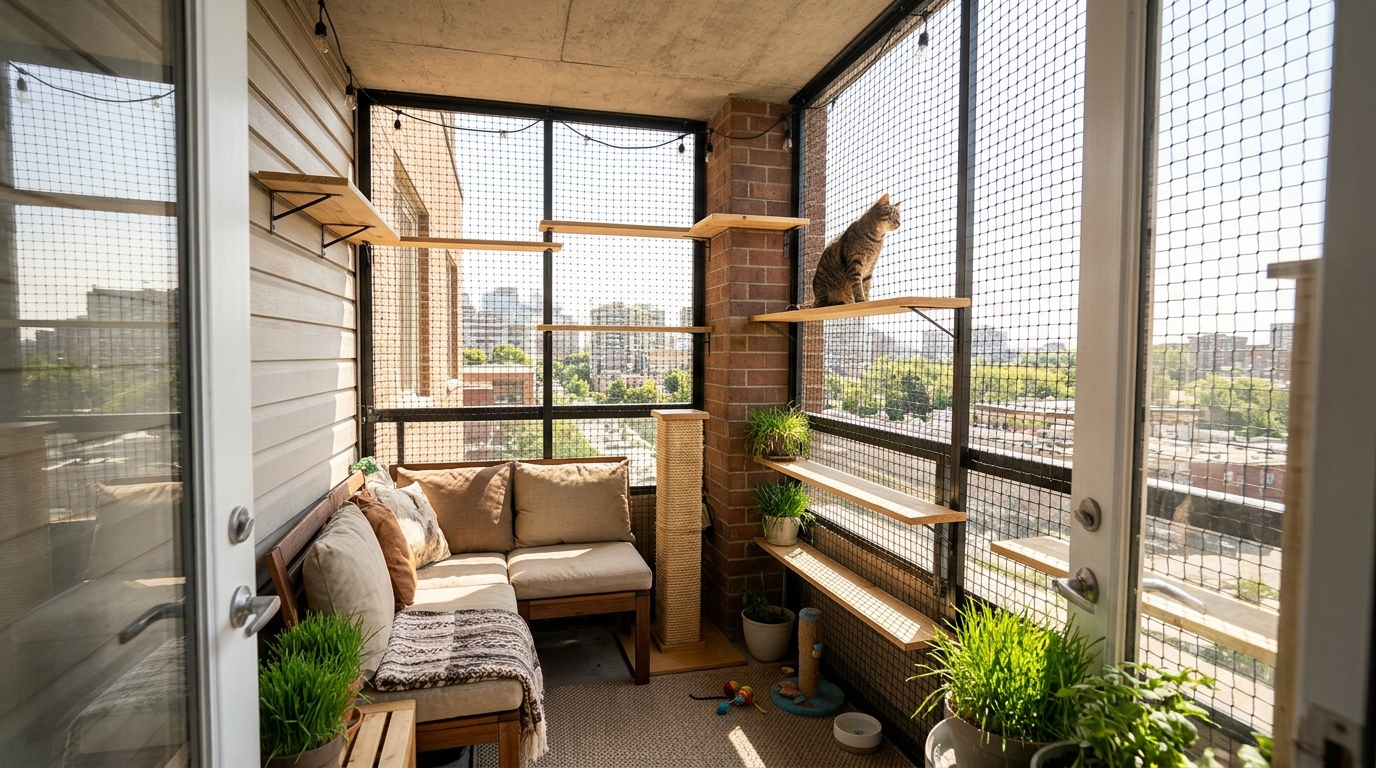
Outdoor time can be part of your DIY pet hideaways too. Cats love fresh air and bird watching, but open balconies are risky. Enclose yours with sturdy pet mesh and it becomes a safe little catio. Add wooden shelves at different heights, a rope scratching post, a pot of cat grass and a cushioned bench for you. Check every gap carefully, since cats can squeeze through surprisingly small spaces. If you rent, use tension rods and zip ties instead of screws. Would your cat rather watch birds or nap in the sun?
You will need: Pet safe mesh netting, tension rods or wood frame, zip ties, small shelves, a rope post, cat grass.
How to make it: 1. Measure the balcony and attach mesh from floor to ceiling on a frame or tension rods. 2. Secure every edge with zip ties and check for gaps. 3. Add shelves, a scratching post and cushions.
A Window Box Cat Perch for Sunbathing
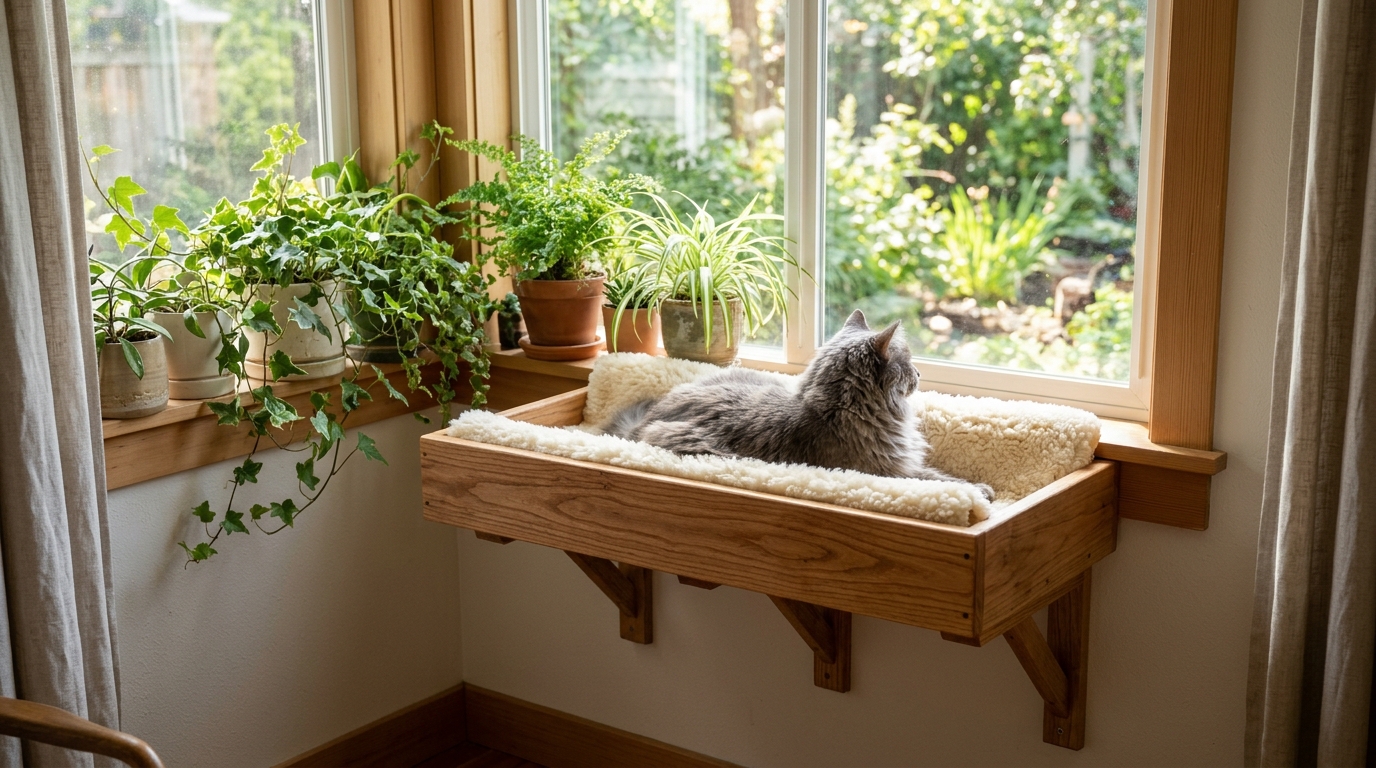
Every cat dreams of a warm sunny window. A simple wooden box mounted below the sill gives them a front row seat. Line it with a soft cushion, and your cat will spend hours there watching birds and soaking up the sun. Make sure the brackets are strong enough to hold more than your cat weighs, since cats love to jump in with a thud. It also keeps them off your plants and counters. Which window in your home gets the best afternoon light?
You will need: A small wooden box or crate, two sturdy shelf brackets, screws, a drill (adults only), a soft cushion.
How to make it: 1. Sand the box and paint or stain it. 2. Have an adult mount the brackets below the window and screw the box on top. 3. Add a cushion and test it with a gentle push before your cat moves in.
Wall Mounted Cat Shelves Make DIY Pet Hideaways Up High
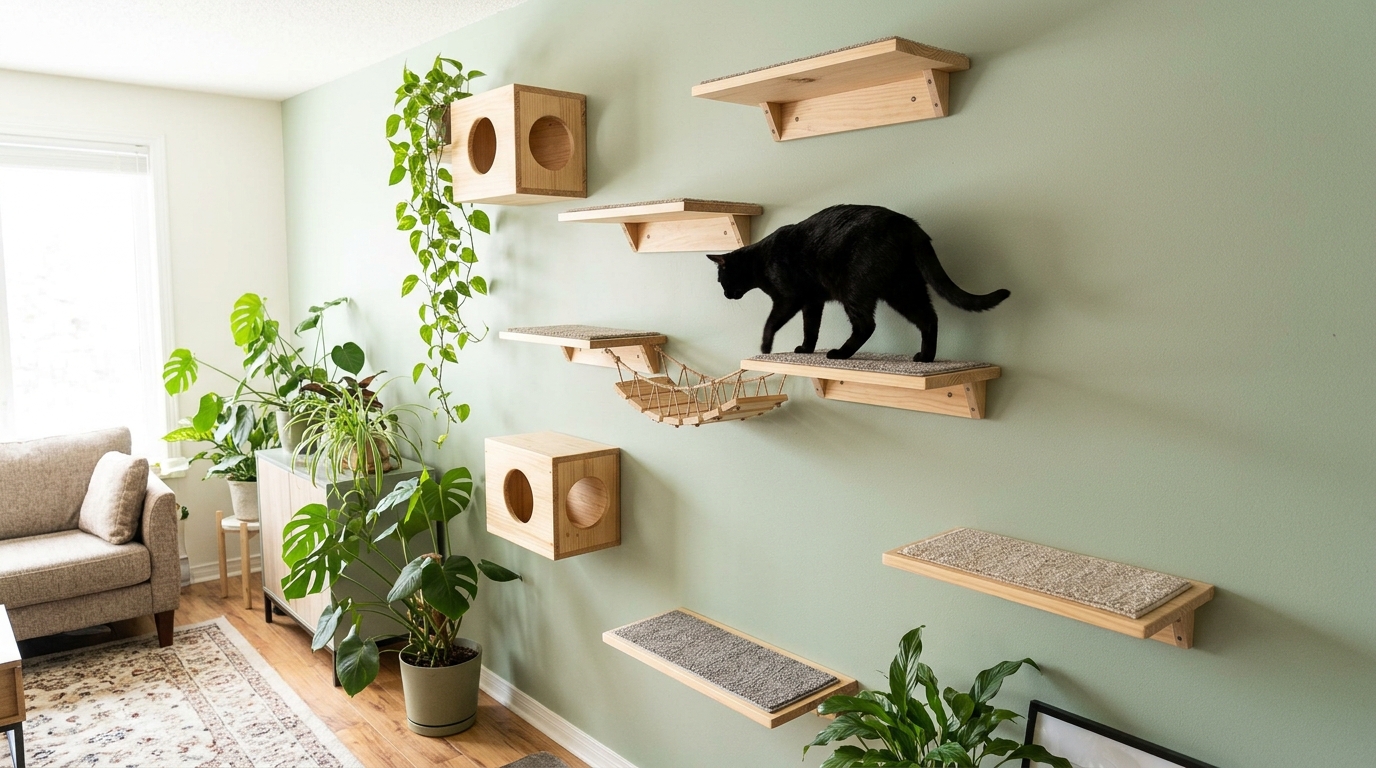
Cats feel safest up high, and wall shelves give them a whole climbing path without taking any floor space. Stagger a few sturdy shelves and small boxes up the wall, add carpet pads so paws do not slip, and connect two with a little rope bridge. It works like exercise and entertainment at the same time, and it looks like art on the wall. Always screw into studs so every shelf holds a jumping cat. How high do you think your cat would climb?
You will need: Wooden shelves and boxes, heavy duty brackets, carpet squares, rope, screws, a stud finder, a drill (adults only).
How to make it: 1. Plan a zigzag path on the wall with paper templates. 2. Have an adult screw the brackets into wall studs and attach the shelves. 3. Glue carpet squares on top and add a rope bridge between two shelves.
A Laundry Hamper Becomes a Cat Tunnel
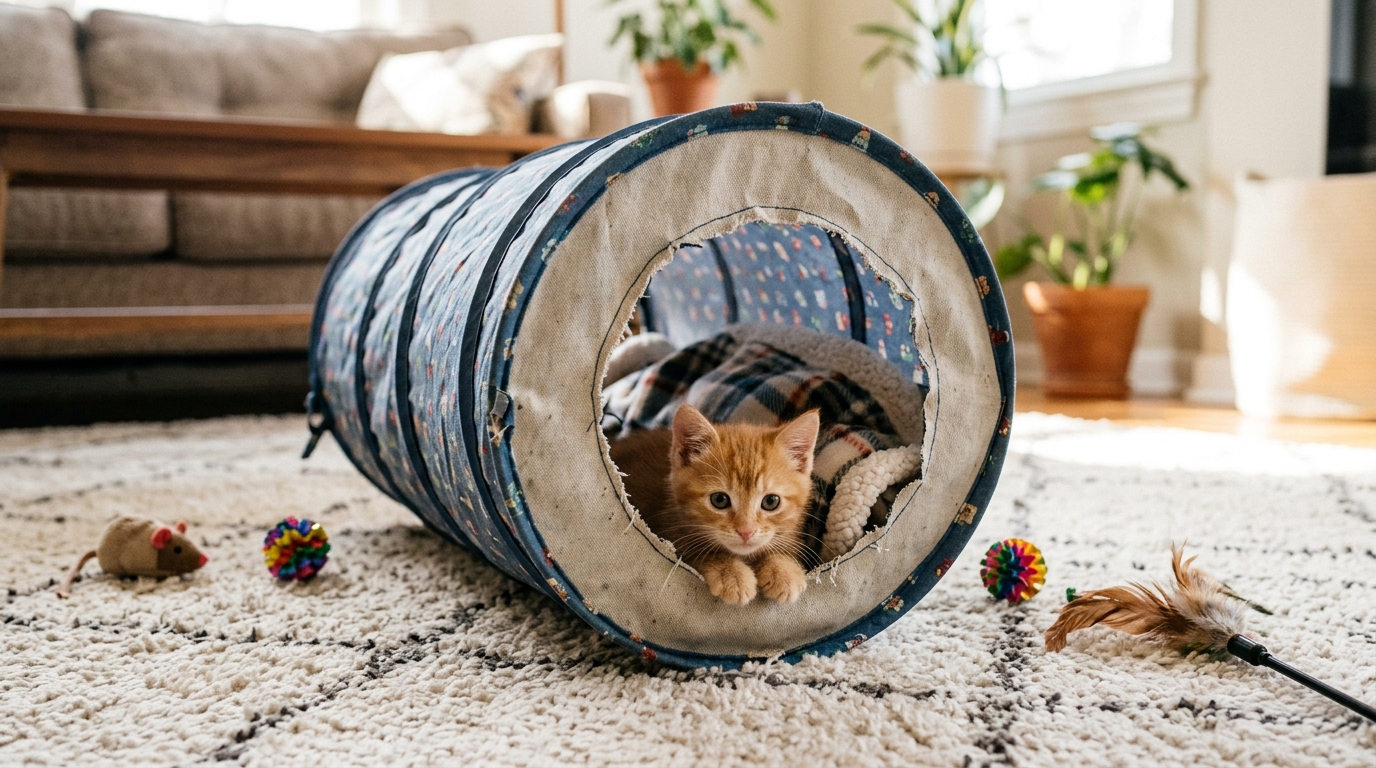
A collapsible fabric hamper is basically a cat tunnel waiting to happen. Lay it on its side, cut a round hole in the bottom, and fold the raw edge under with fabric glue. Line it with a soft fleece blanket and drop in a toy. Kittens love racing through, and older cats often use it as a quiet hiding spot. It folds flat when you need the space back. Of all the DIY pet hideaways here, this one takes the least time. Ready to watch the zoomies begin?
You will need: A collapsible fabric laundry hamper, scissors, fabric glue, a fleece blanket.
How to make it: 1. Lay the hamper on its side and trace a round hole on the bottom. 2. Cut it out and glue the edge under so there are no loose threads. 3. Line it with fleece and toss in a favorite toy.
A Tufted Cat Rug Your Pet Will Claim Instantly
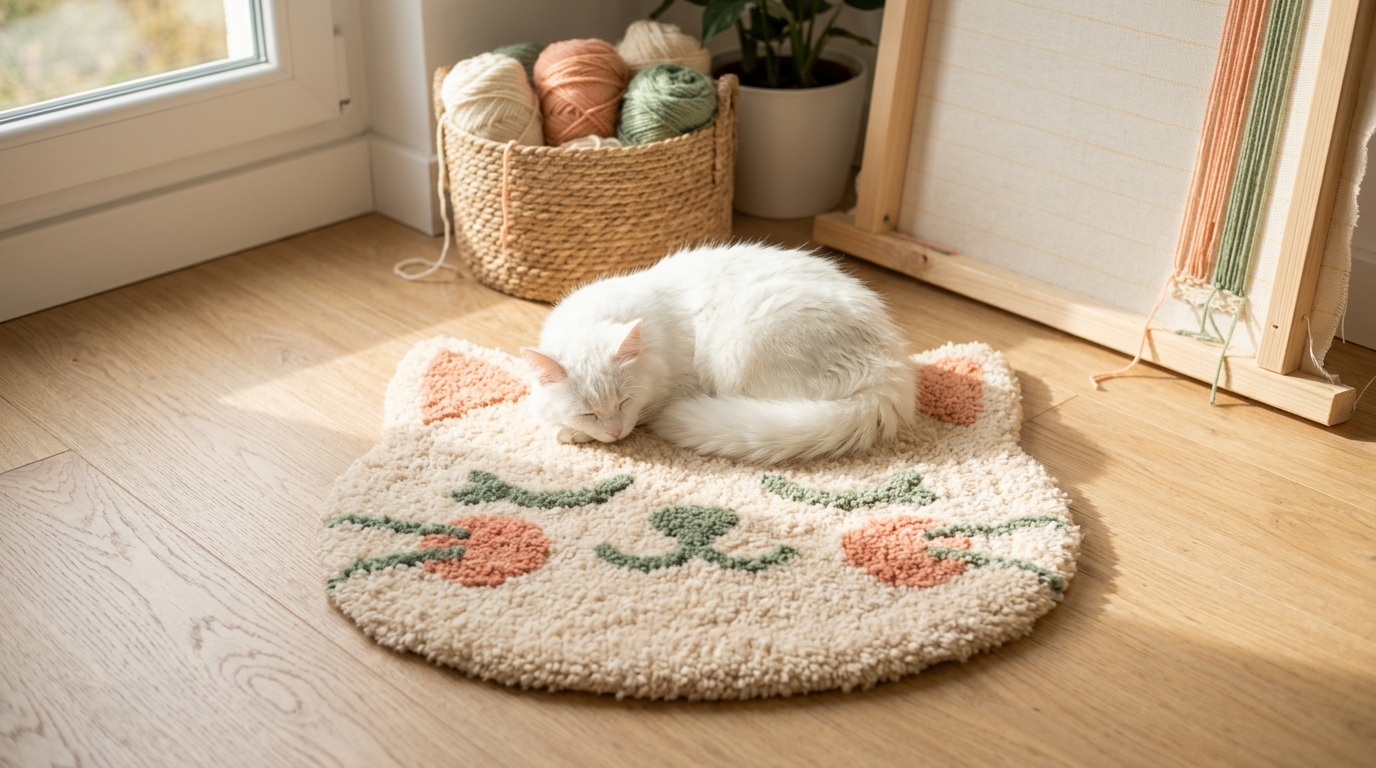
Tufted rugs are having a big moment in DIY pet hideaways, and a cat shaped rug is the cutest place for a cat to nap. A video of one passed 40 million views. You stretch fabric on a frame, draw a simple cat face with ears, and punch yarn through with a tufting tool. Then you glue on a backing and trim the pile. It takes practice, but the result is soft, colorful and completely one of a kind. Want your cat to have a rug that looks just like them?
You will need: A tufting frame, monk cloth, a tufting tool, rug yarn, rug glue, felt backing, scissors.
How to make it: 1. Stretch the cloth on the frame and draw a round cat face with ears. 2. Tuft each color section, then apply glue on the back. 3. Add felt backing, trim the edges and shear the pile even.
A Bookcase With a Built In Dog Nook
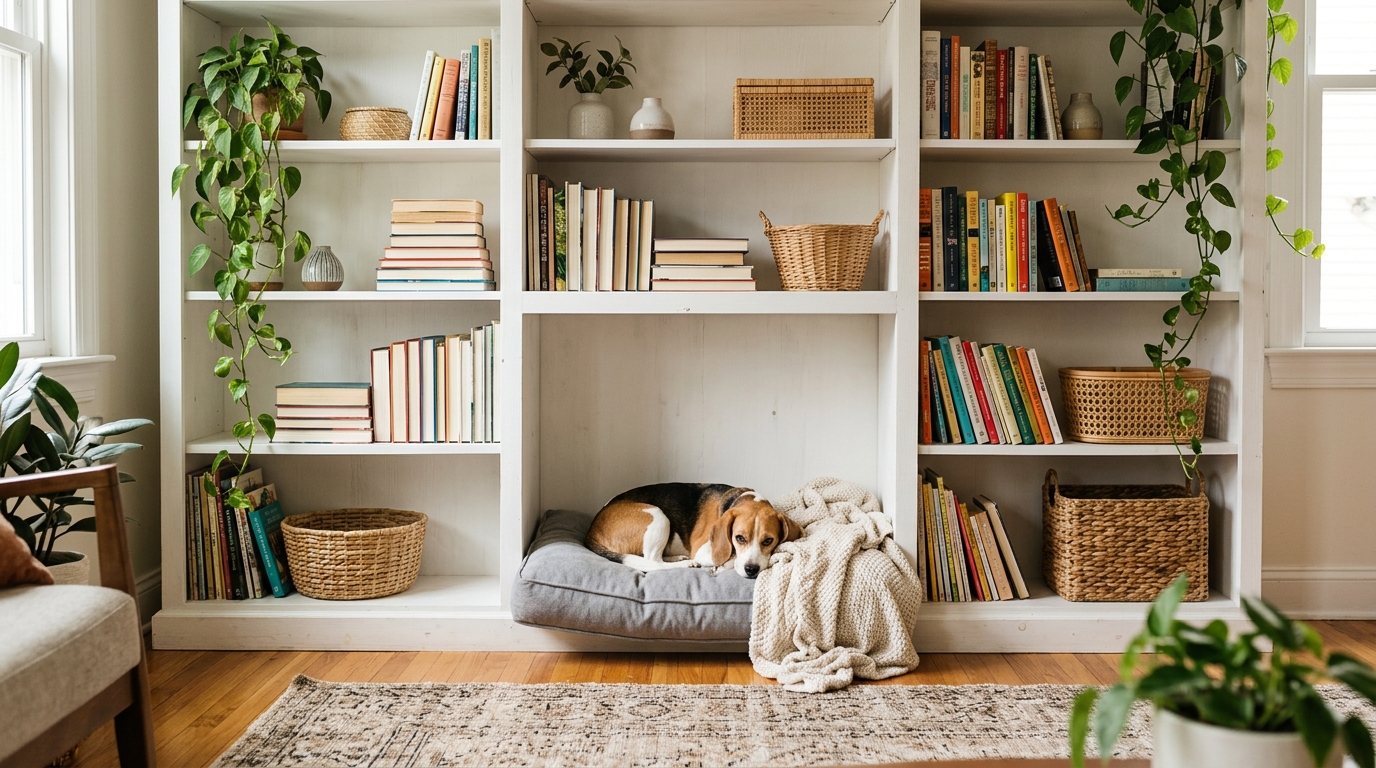
Some DIY pet hideaways hide in plain sight. Want your dog close by without a bulky bed in the middle of the floor? Remove the bottom middle shelves of a bookcase and turn that space into a cozy den. Add a cushion cut to fit and a soft blanket, and your dog has a cave right in the living room. Books, plants and baskets above keep it looking like regular furniture. Smaller dogs love this setup, and it is easy to vacuum around. Which bookcase in your home could give up a shelf?
You will need: A sturdy bookcase, a screwdriver, a foam cushion, a blanket, wall anchors.
How to make it: 1. Anchor the bookcase to the wall for safety. 2. Remove the lower middle shelves and sand any rough edges. 3. Fit a cushion inside and add a blanket that smells like home.
A Dog Crate Hidden Inside an End Table
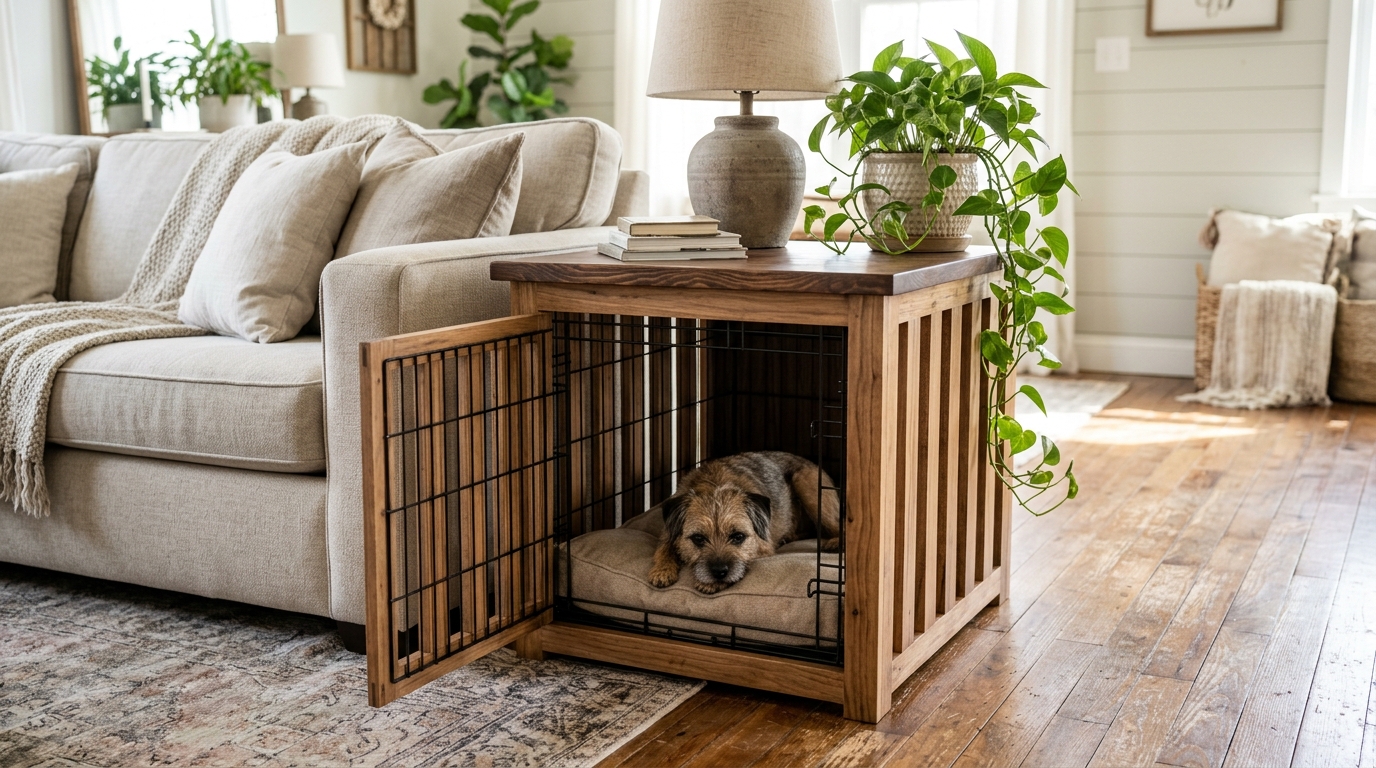
Dog crates are useful, but they are not exactly pretty. Among DIY pet hideaways, this one is a favorite for small homes. Building a simple wooden frame around one turns it into an end table you will actually like. Slatted sides keep air flowing, a stained top holds a lamp and a plant, and your dog gets a calm den beside the sofa. Leave the door open during the day so it becomes a favorite resting spot, not just a place for bedtime. Does your dog already love their crate?
You will need: A wire crate, wood boards, wood glue, screws, stain, a saw and drill (adults only).
How to make it: 1. Measure the crate and plan a frame that is a little larger on every side. 2. Have an adult cut and assemble the frame with slatted sides and a solid top. 3. Stain it, slide the crate inside and add a soft pad.
A Raised Dog Feeding Station With Storage
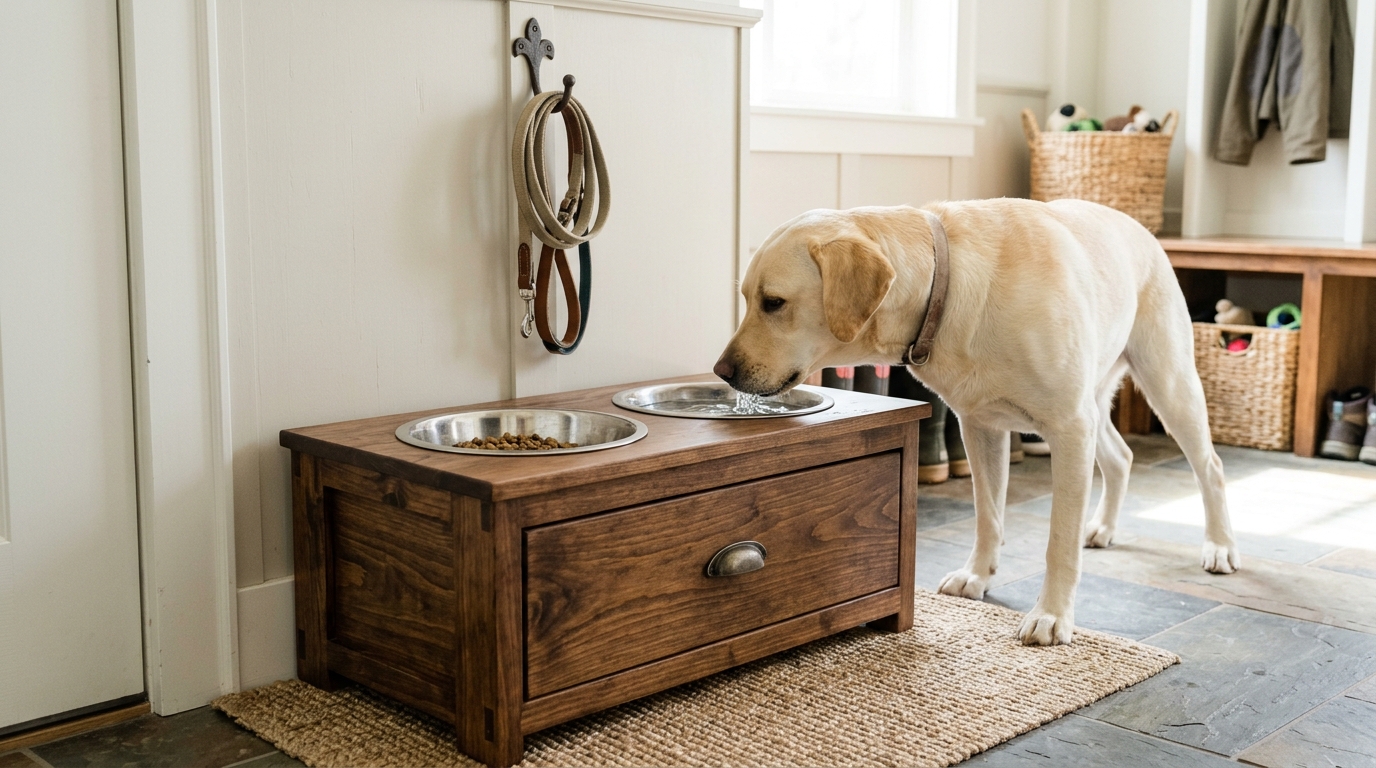
A raised feeding station keeps bowls from sliding around and gives you a tidy place to store food and treats. Cut two holes in a wooden top to hold steel bowls, and add a drawer or bin underneath. It keeps the floor neater and makes mealtime feel special. Match the stain to your floors or cabinets so it blends in. If you love simple home upgrades like this, try our genius kitchen fixes too. Where does your dog eat now?
You will need: Wood boards, two steel bowls, a jigsaw and drill (adults only), stain, drawer hardware.
How to make it: 1. Trace the bowls on the top board and have an adult cut the holes slightly smaller than the rim. 2. Build a simple box base with a drawer. 3. Stain, seal and set the bowls in place.
A Pallet Dog Bed for the Porch
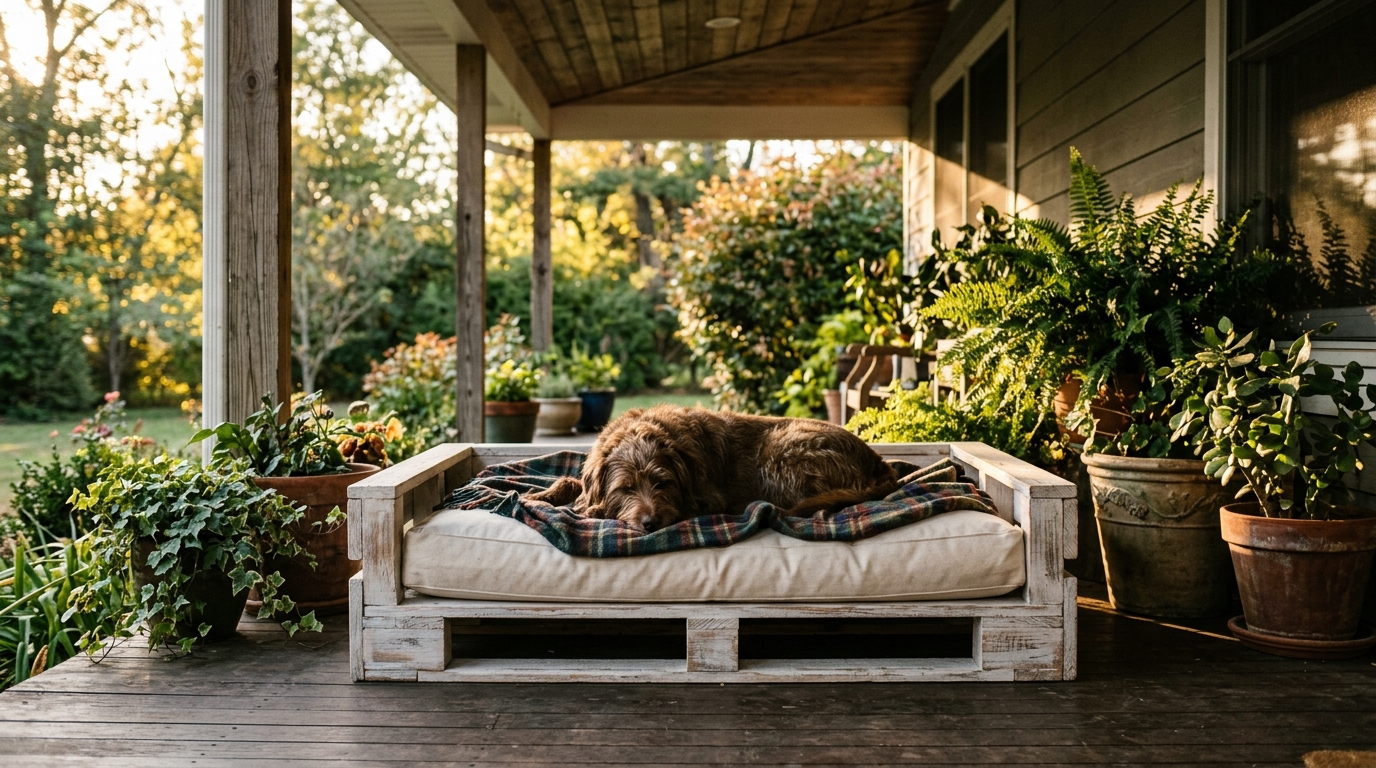
A wooden pallet makes a sturdy raised bed that keeps your dog off cold floors. Sand every surface smooth, give it a whitewash finish and top it with a thick outdoor cushion. It fits beautifully on a covered porch or in a mudroom. Make sure the pallet is marked as heat treated rather than chemically treated before you use it. Your dog gets a comfy lookout spot and you get a piece that looks like farmhouse decor. Where would your pup like to nap?
You will need: A heat treated pallet, sandpaper or a sander (adults only), whitewash paint, a thick cushion.
How to make it: 1. Check the pallet stamp for heat treatment, then sand it until smooth. 2. Brush on whitewash and let it dry. 3. Add a cushion and a washable blanket.
A Nightstand With a Built In Cat Bed
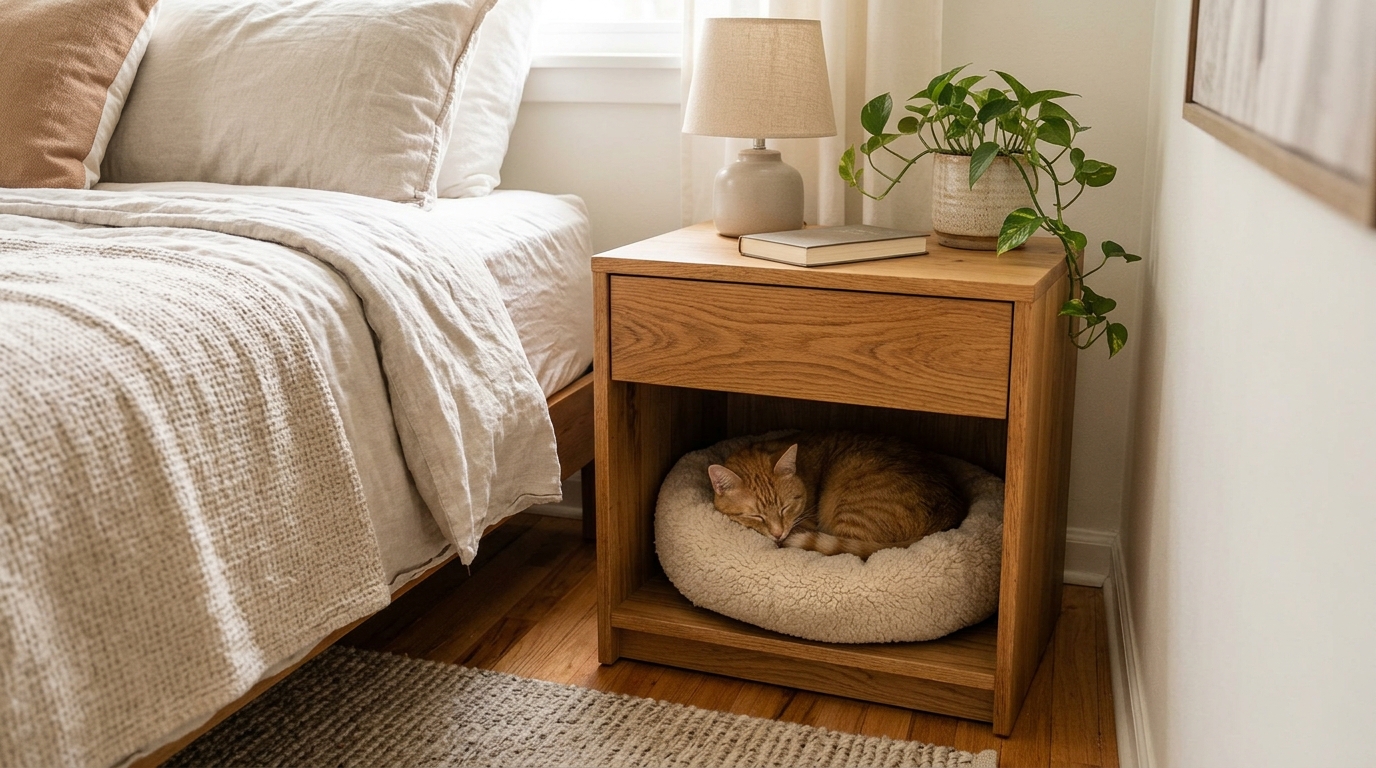
Many cats want to sleep near you, and a nightstand with a cozy bottom shelf lets them do just that. Remove a drawer or use an open shelf and line it with a round cushion and fleece. Your cat gets a snug cave beside your bed, and you still have room on top for a lamp and a book. It is one of the easiest DIY pet hideaways because you probably already own the furniture. Does your cat follow you to bed every night?
You will need: A nightstand with a removable drawer or open shelf, a round cushion, fleece fabric.
How to make it: 1. Remove the bottom drawer and sand any rough edges inside. 2. Cut a cushion or folded fleece to fit. 3. Add a toy or a shirt that smells like you to make it inviting.
A Pet Teepee in an Afternoon
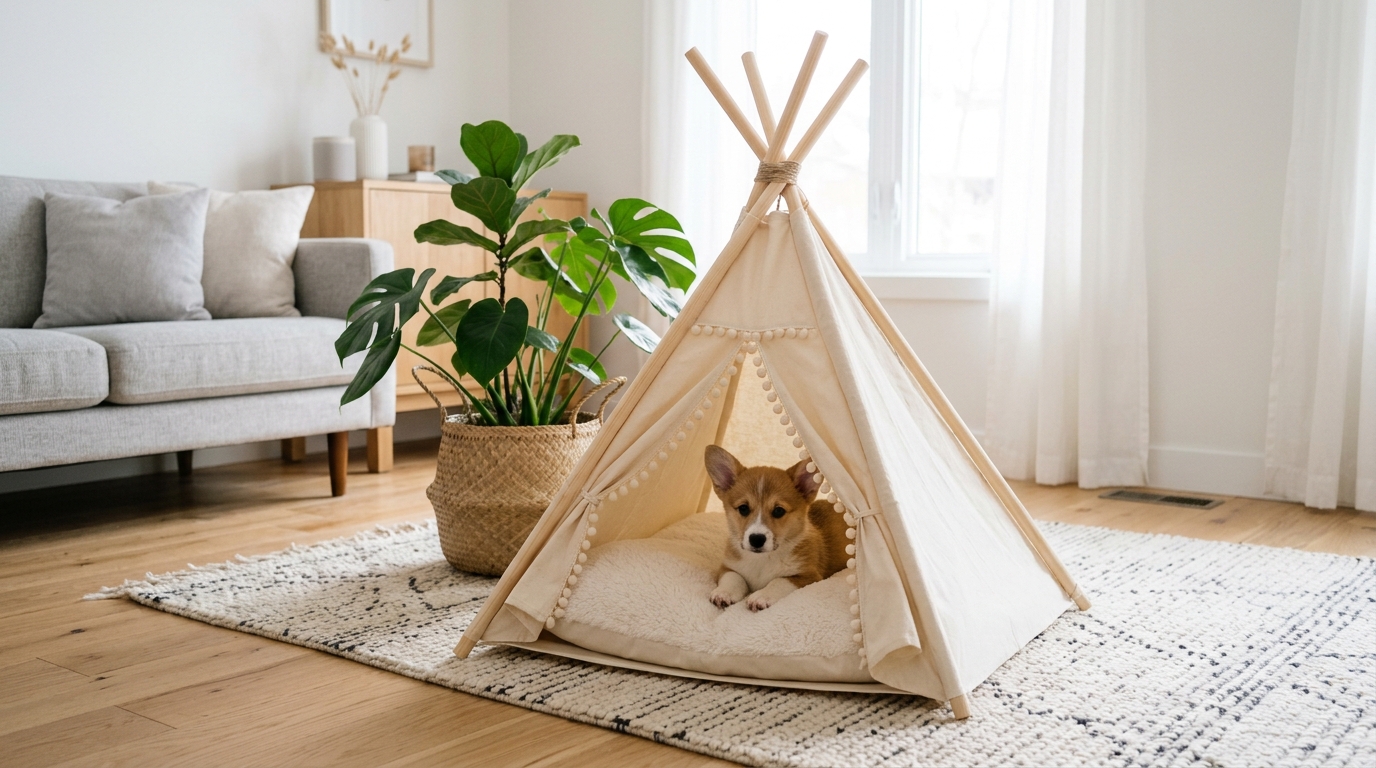
A pet teepee is part bed and part decor, and it is easier to make than it looks. Tie five wooden dowels together near the top, wrap them with canvas cut in a simple fan shape, and add a cushion inside. Pom-pom trim or a painted pattern gives it personality. Small dogs and cats love the cozy, covered feeling. It also folds up for storage or travel. These DIY pet hideaways make sweet gifts for new puppy owners too. What color would you pick?
You will need: Five wooden dowels, twine, canvas fabric, fabric glue or a sewing machine, a cushion, pom-pom trim.
How to make it: 1. Tie the dowels together about 4 inches from the top and spread them out. 2. Cut canvas to wrap around four sides, leaving one opening. 3. Glue or sew the edges, add trim and slide a cushion inside.
A Hidden Litter Box Cabinet
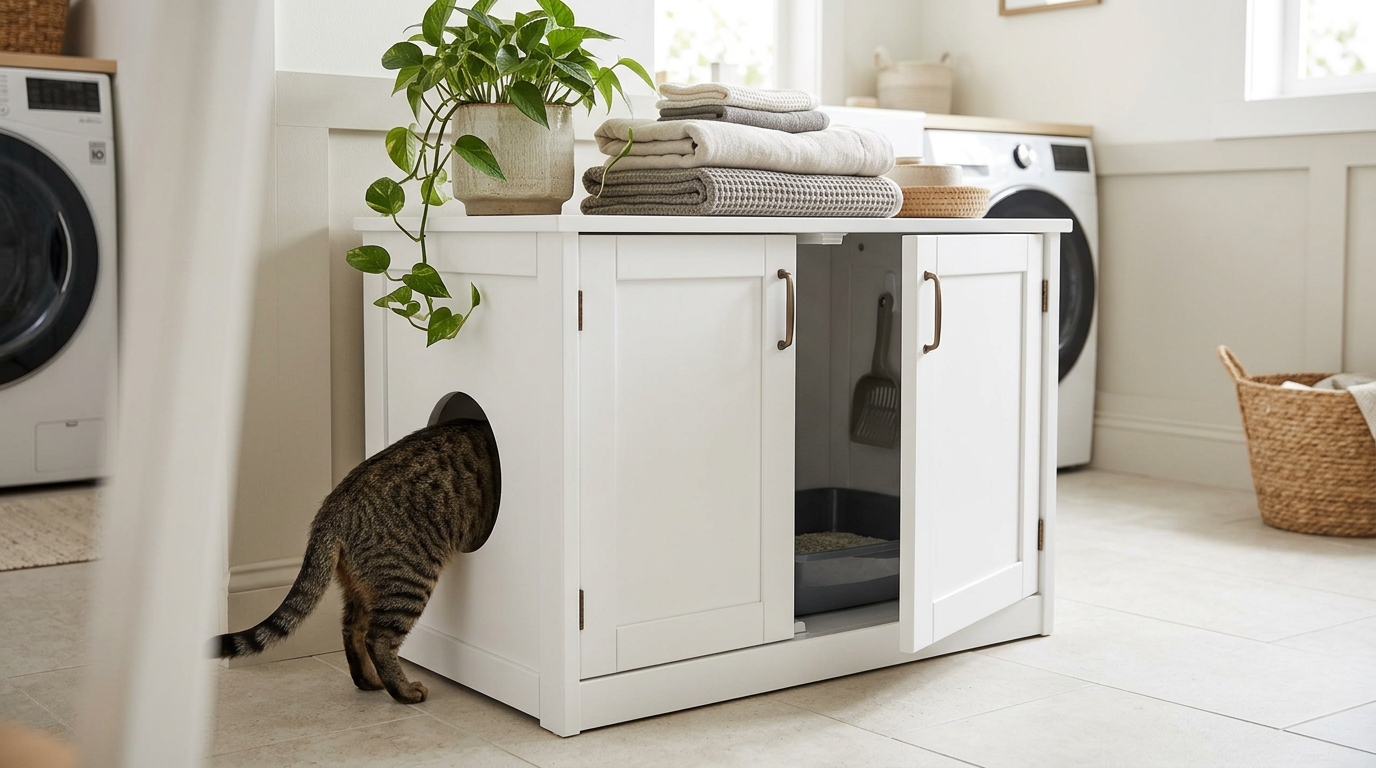
Not all DIY pet hideaways are for naps. Nobody wants a litter box as the center of attention. Hiding it inside a cabinet keeps things tidy and gives your cat privacy. Cut a cat sized hole in the side of a sturdy cabinet, place the litter box inside, and keep the front door for easy cleaning. A rubber mat under the box catches stray litter. Leave a gap at the back for airflow and scoop daily so it stays fresh. Is your litter box the eyesore you would love to hide?
You will need: A sturdy cabinet, a jigsaw (adults only), sandpaper, a litter mat, edge trim.
How to make it: 1. Trace a 7 inch round hole on the side of the cabinet. 2. Have an adult cut it out and sand the edges smooth. 3. Add edge trim, place the litter box and mat inside and leave the back slightly open for air.
An Old Door Becomes a Charming Dog Gate
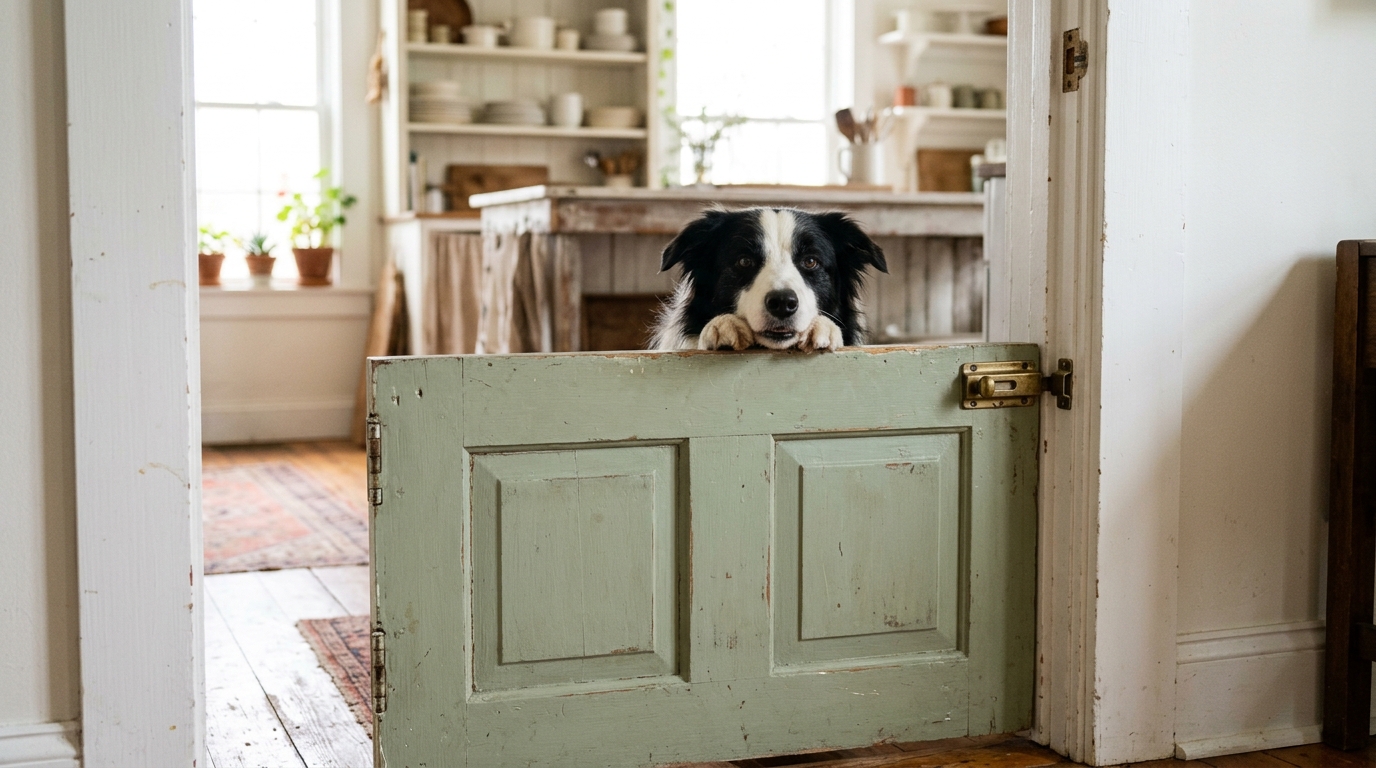
Baby gates do the job, but an old wooden door cut in half looks so much nicer. Hang the lower half in a doorway on hinges and add a simple latch, and you have a Dutch style dog gate that matches your home. Paint it a cheerful color and your dog will soon learn to rest their chin on top while watching you cook. Choose a height your dog cannot jump. Have you seen an old door at a yard sale lately?
You will need: An old solid wood door, a circular saw (adults only), hinges, a latch, paint.
How to make it: 1. Have an adult cut the door to the right height and sand the cut edge. 2. Paint it and let it dry. 3. Attach hinges to the door frame and add a latch on the other side.
DIY Pet Hideaways by the Window: A Cozy Window Seat
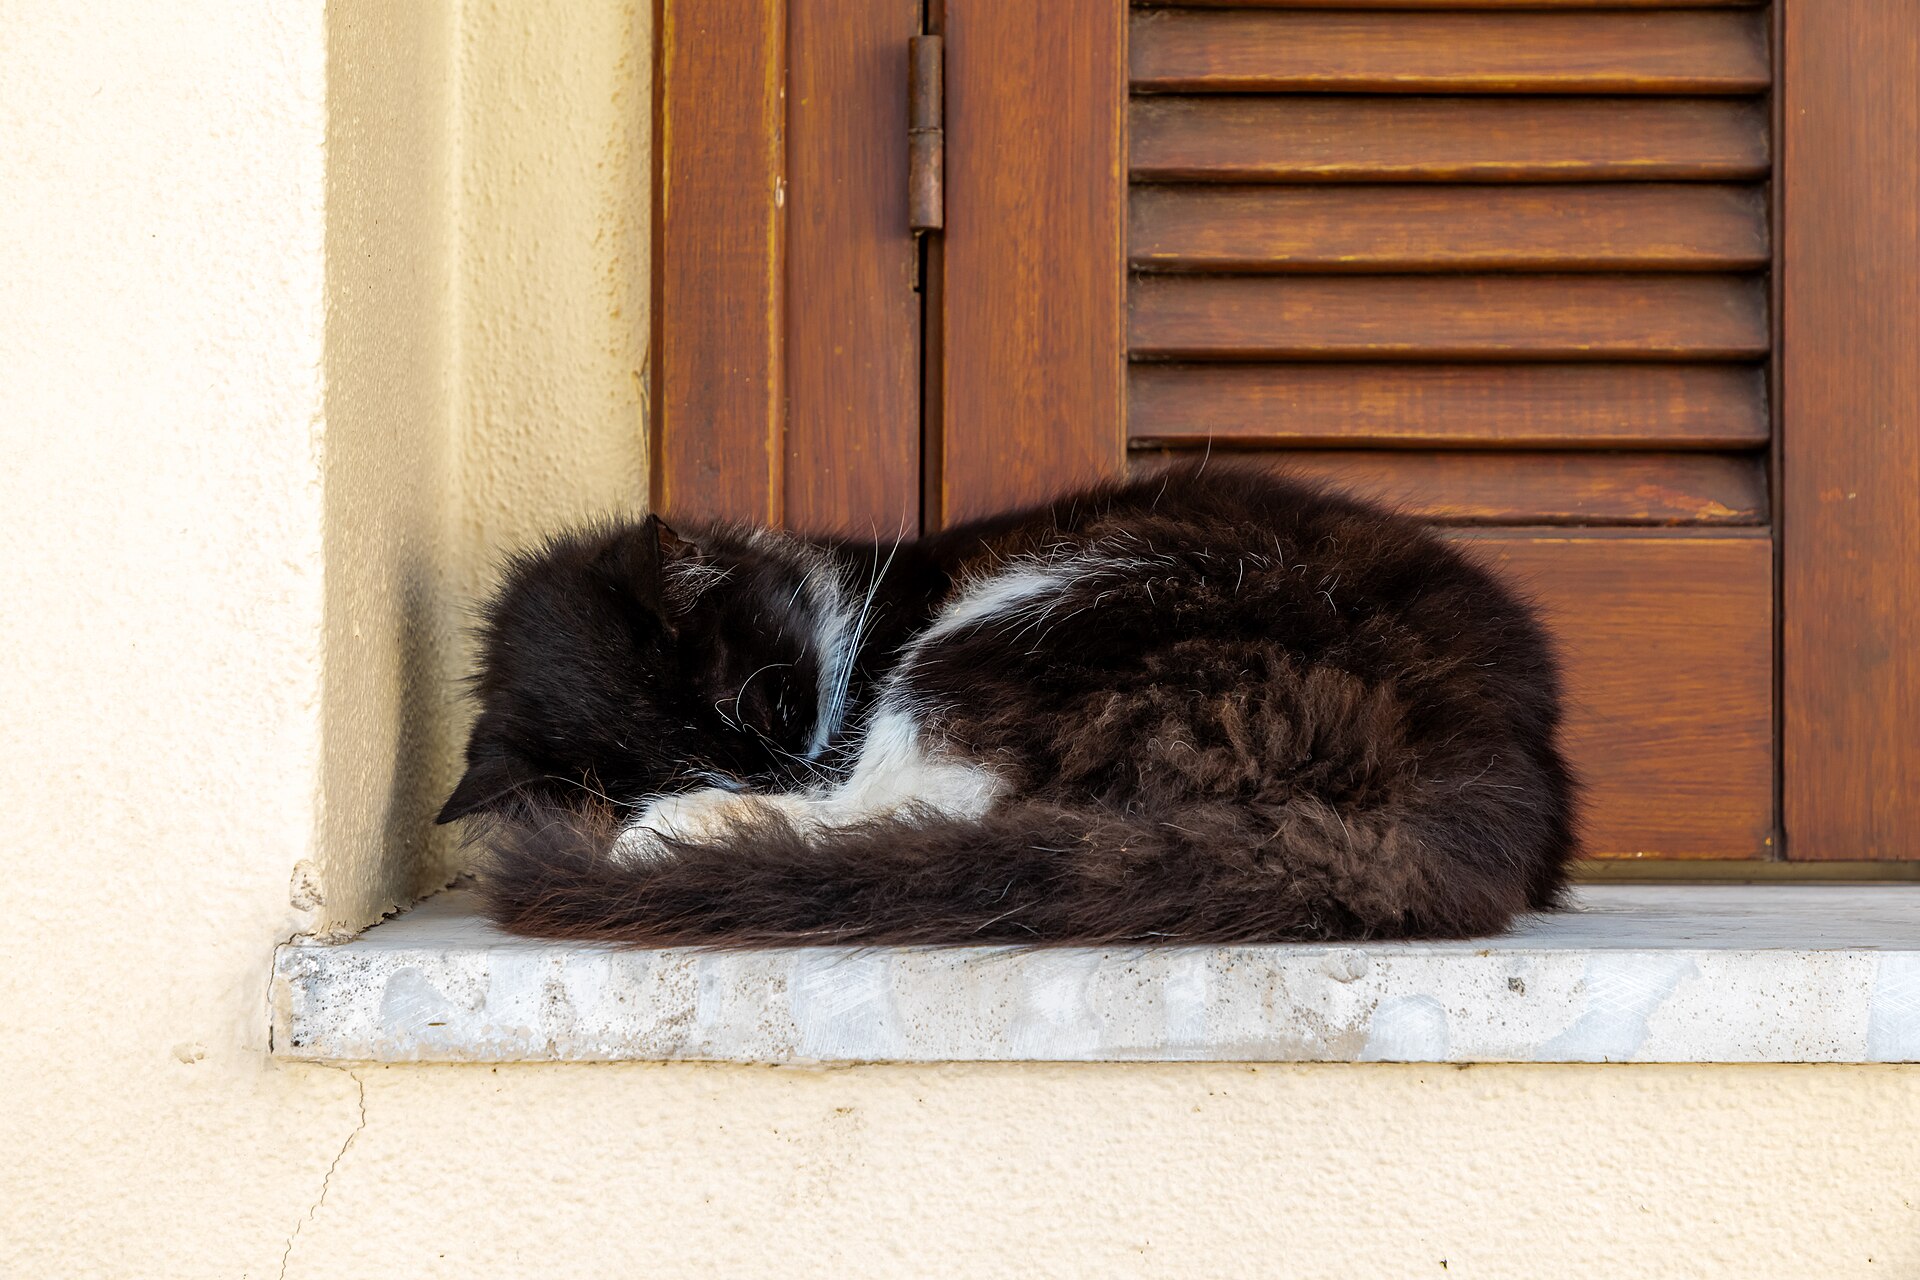
Pets follow the sunshine around the house all day. Some of the best DIY pet hideaways are already in your home. A wide window seat, even a simple padded bench under a window, gives them the best spot in the house. Add a washable cushion and a soft throw, and you have created a warm place for naps and bird watching. A wide sill or a sturdy low bench works too. You might find yourself sharing it with a book and a cup of tea. Which window does your pet already claim?
You will need: A low bench or window seat, foam, washable fabric, a staple gun (adults only), a throw blanket.
How to make it: 1. Cut foam to fit the bench top. 2. Wrap it in fabric and staple underneath. 3. Place it by your sunniest window and add a soft throw.
A Wicker Basket Bed With a Soft Lining
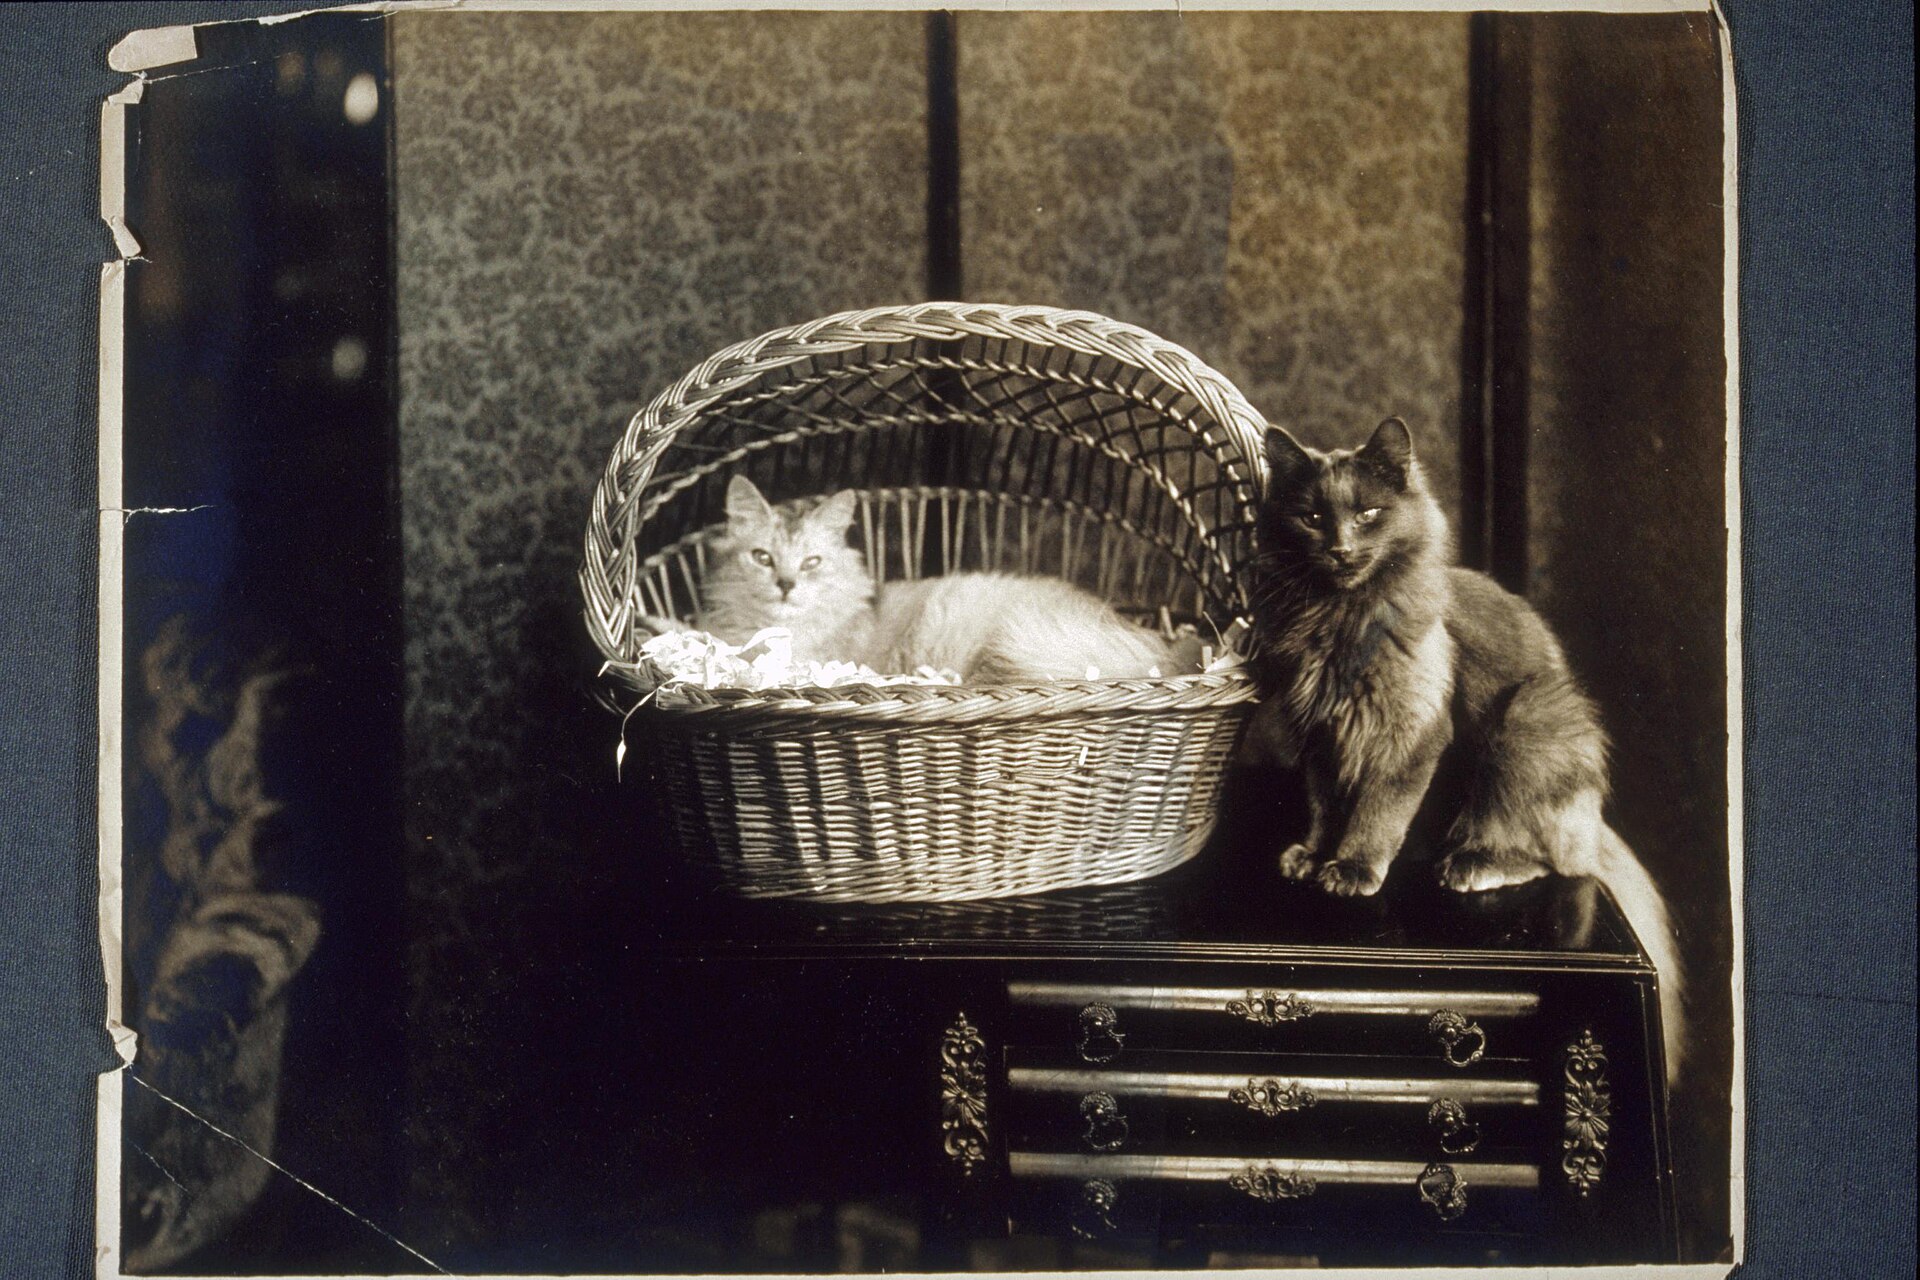
Sometimes the simplest hideaway is the best one. A sturdy wicker basket with a soft lining has been a favorite cat bed for generations, as this sweet vintage photo shows. Choose a basket with low sides so your pet can hop in easily, then sew or tie in a padded liner. Set it somewhere quiet but close to the family. You can make a lid from fabric for cats who love to hide. Are any baskets sitting empty in your closet?
You will need: A sturdy wicker basket, quilted fabric, batting, ribbon or ties, scissors.
How to make it: 1. Trace the basket bottom on fabric and cut two layers plus batting. 2. Sew or glue the layers together. 3. Tie the liner into the basket with ribbons so it does not slide.
A Quiet Corner Bed for Small Dogs
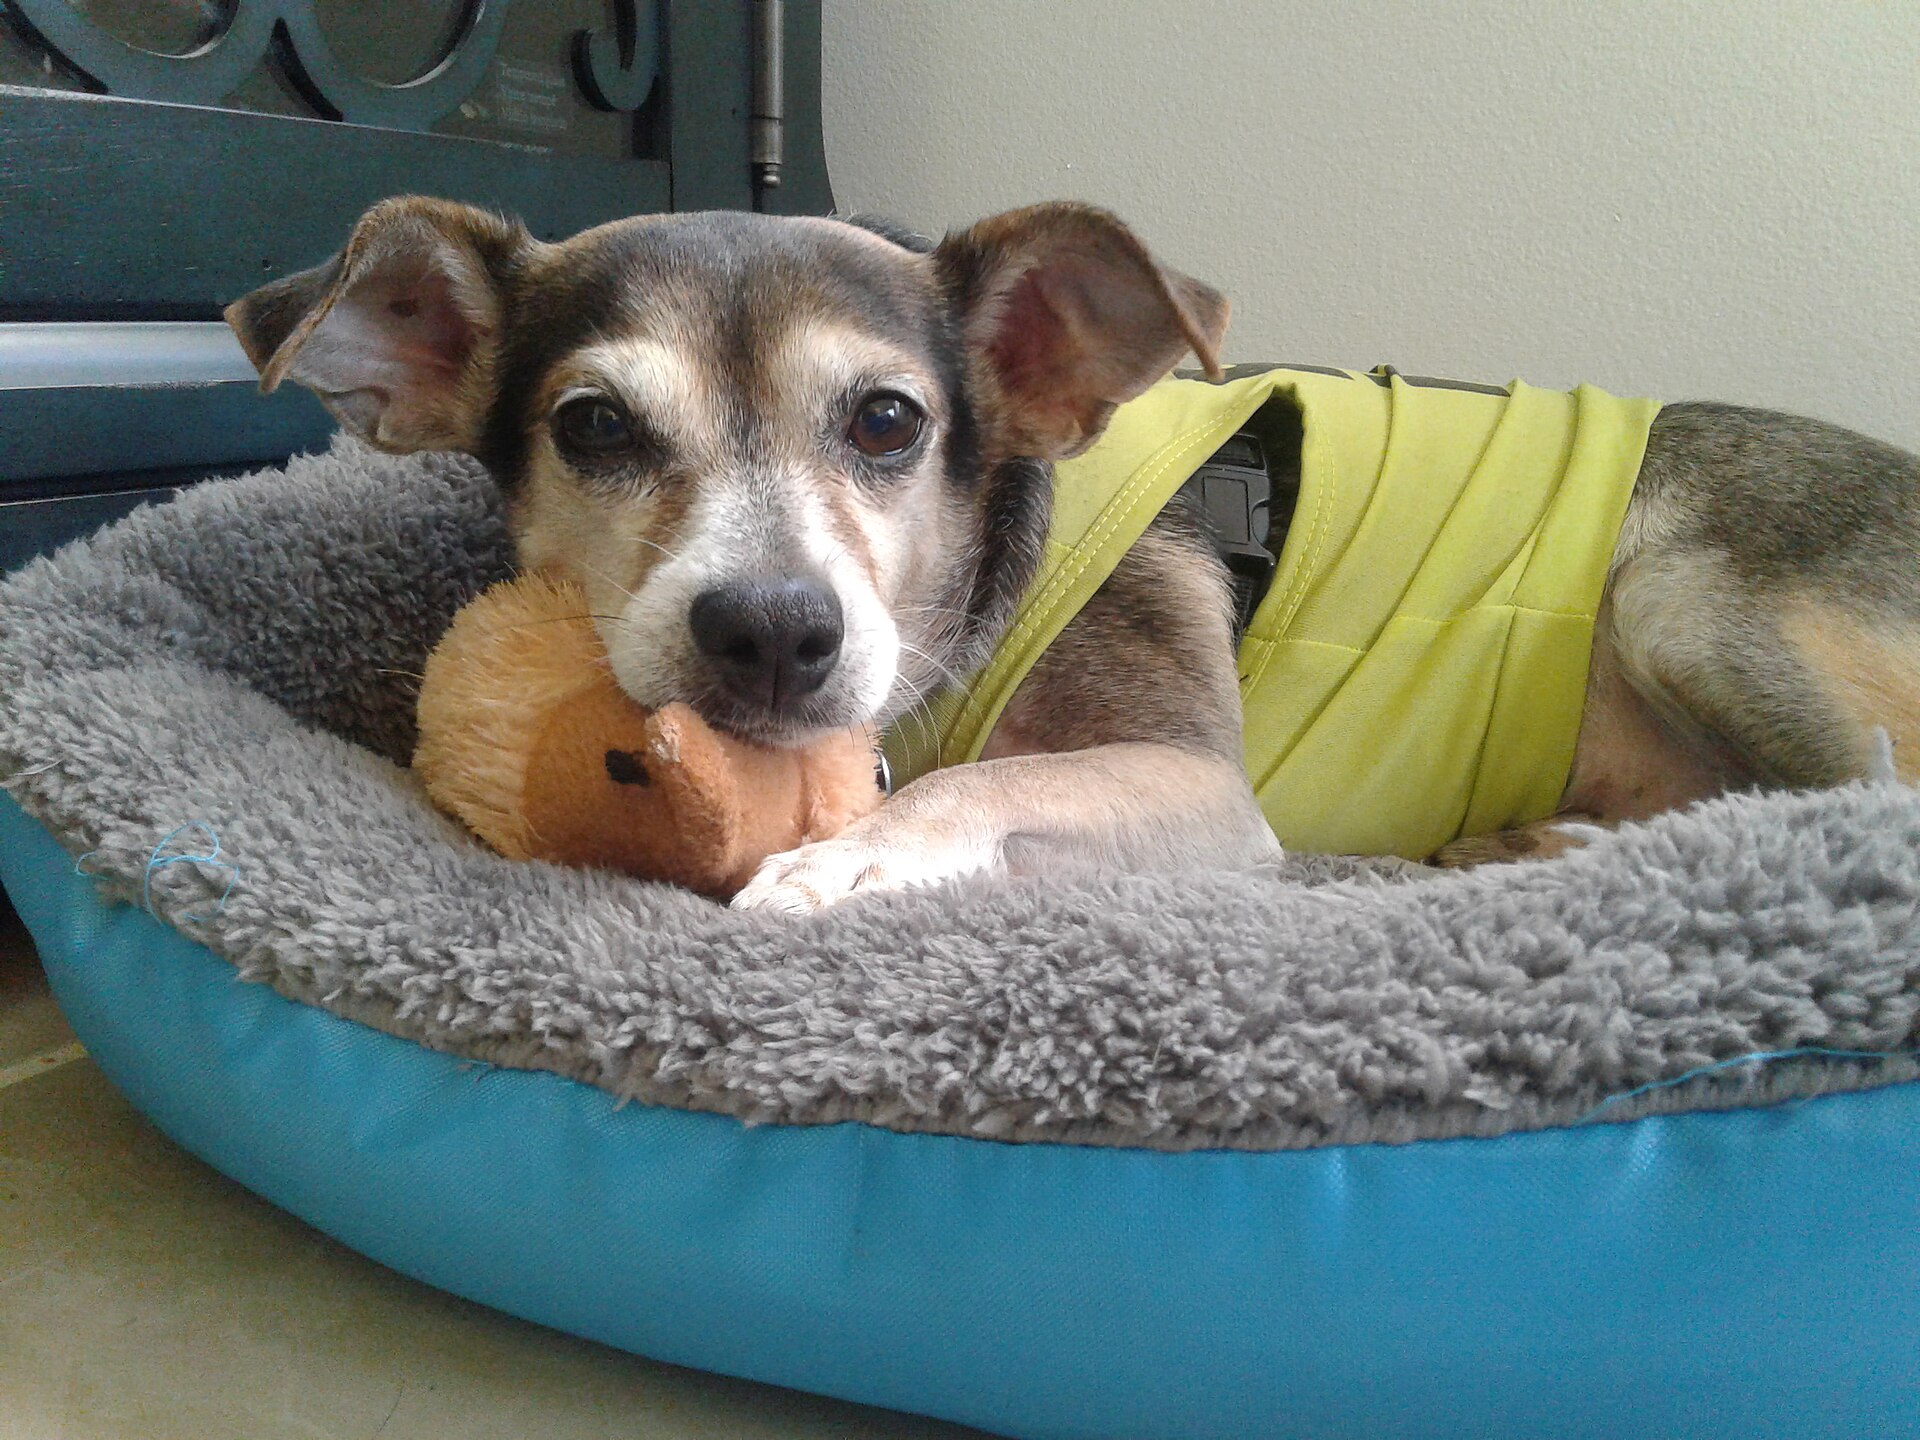
Small dogs love a round bed with high sides they can lean against. Placing one in a quiet corner, away from foot traffic, turns it into a true hideaway. Add a canopy made from a fabric scrap draped over a curtain rod bracket, and the space feels even more like a den. Keep a favorite toy and a blanket that smells like you inside. DIY pet hideaways like this one are perfect for shy or rescue dogs. Where does your dog go to feel safe?
You will need: A round bolster bed, a curtain bracket, a fabric scrap, a soft blanket.
How to make it: 1. Pick a calm corner away from doors and heaters. 2. Mount a bracket above and drape fabric over it to make a canopy. 3. Add the bed, a blanket and a toy.
A Leash and Toy Station With a Painted Pet Sign
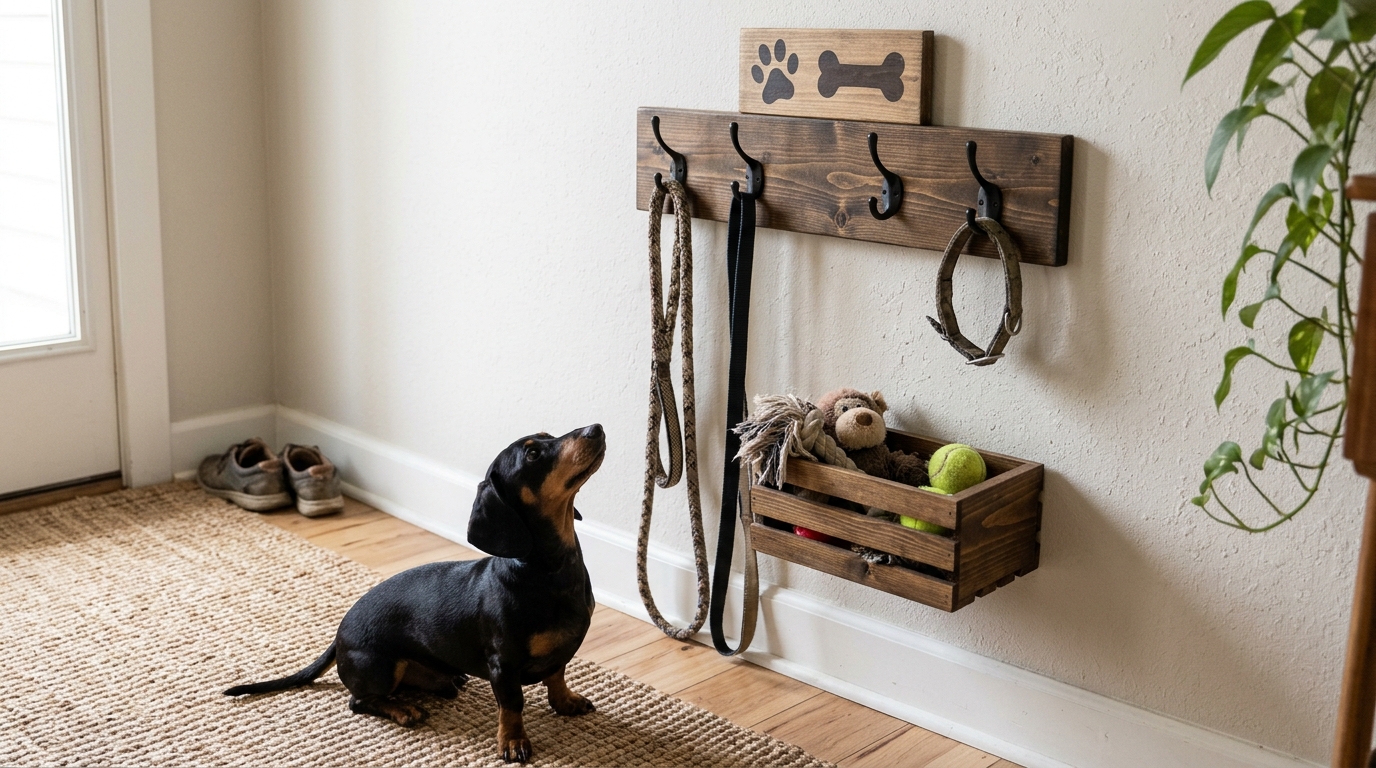
Finish your pet corner with a station by the door. Screw a few hooks into a stained board for leashes and collars, hang a small basket below for toys, and add a painted wooden sign with your pet name or a paw print. It keeps walks easy and makes the entry feel welcoming. Kids can help paint the sign. Ending with this makes all your DIY pet hideaways feel like one happy home for your pet. What would your sign say?
You will need: A wood board, hooks, a small basket, a wood plaque, acrylic paint, screws, a drill (adults only).
How to make it: 1. Stain the board and screw in the hooks. 2. Paint the plaque with a name or paw print. 3. Mount everything near the door and hang the basket below.