DIY Bird Feeders: 17 Easy Ideas That Bring Your Backyard to Life All Winter
DIY bird feeders turn a quiet winter window into the best show in the house. There is something special about making a little feeder with your own hands, hanging it outside, and then spotting a bright red cardinal stopping by for breakfast. Kids press their noses to the glass, grandparents start keeping a list of visitors, and the whole family slows down for a moment. A popsicle stick feeder video on YouTube has been watched more than 672 million times, which tells you how many people love this simple joy. The best part is that most of these ideas use things you already have, like bottles, teacups, pinecones and old cans. Below are 17 easy feeders, each with a short supply list and simple steps. Grab some birdseed and let’s welcome a few feathered friends..
Popsicle Stick Feeder, the Star of DIY Bird Feeders
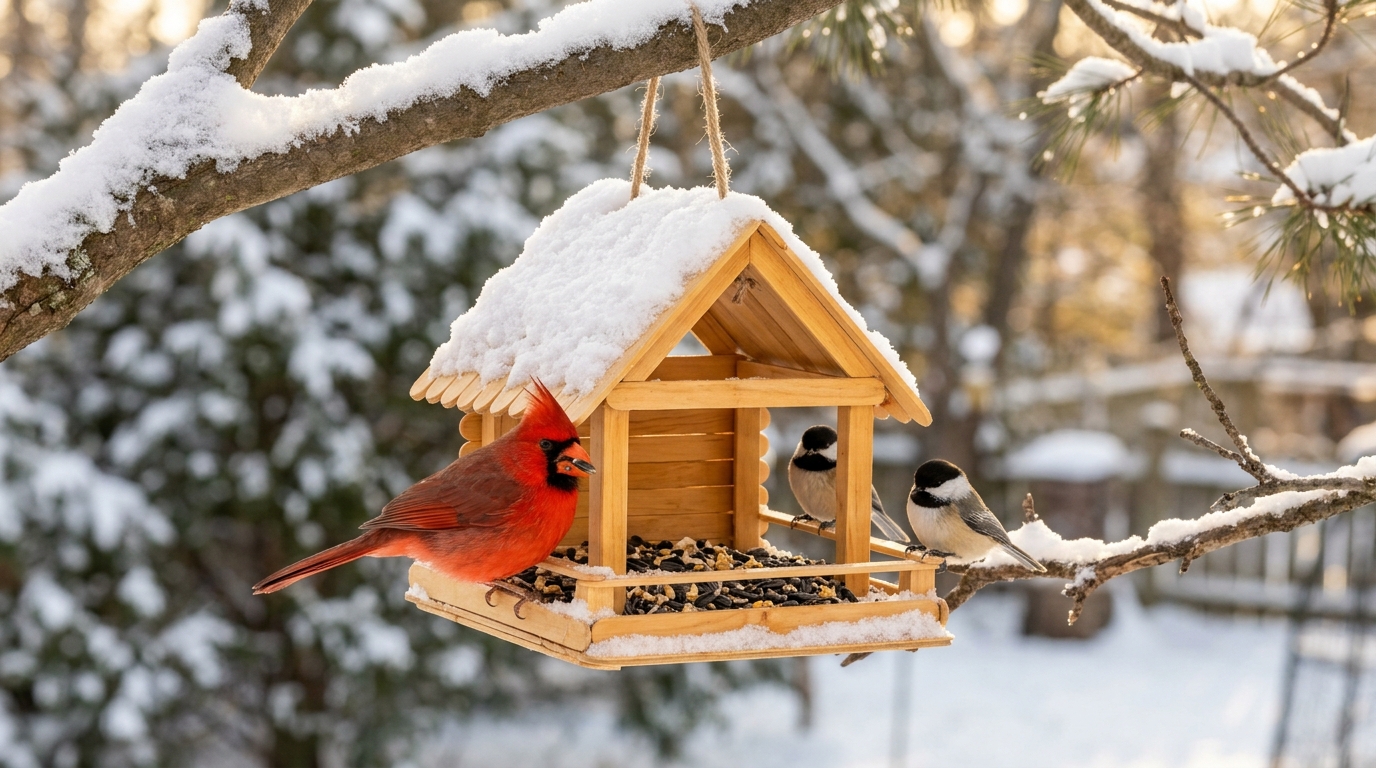
This little popsicle stick feeder looks like a tiny log cabin, and it might be the most shared of all DIY bird feeders online. Craft sticks are stacked and glued into a square tray, then topped with a simple peaked roof to keep the seed a bit drier. Hang it on a branch you can see from the kitchen window and wait for the first visitor. Kids can build most of it themselves with an adult handling the hot glue. For more ideas, this popsicle stick feeder video on YouTube shows how fast it comes together. The moment a cardinal lands on something you made yourself is pure magic..
You will need: About 60 wooden craft sticks, wood glue or hot glue (adult help), twine, birdseed, small sandpaper block.
How to make it: 1. Lay 10 sticks side by side and glue 2 sticks across them to make a flat floor. 2. Stack sticks log cabin style around the edges, gluing each corner, to make low walls. 3. Glue sticks into two slanted panels for a roof and attach them with two upright sticks at each end. 4. Sand any rough edges and tie twine to the roof peak. 5. Fill the tray with birdseed and hang it on a sturdy branch.
Bottle and Spoon Feeder
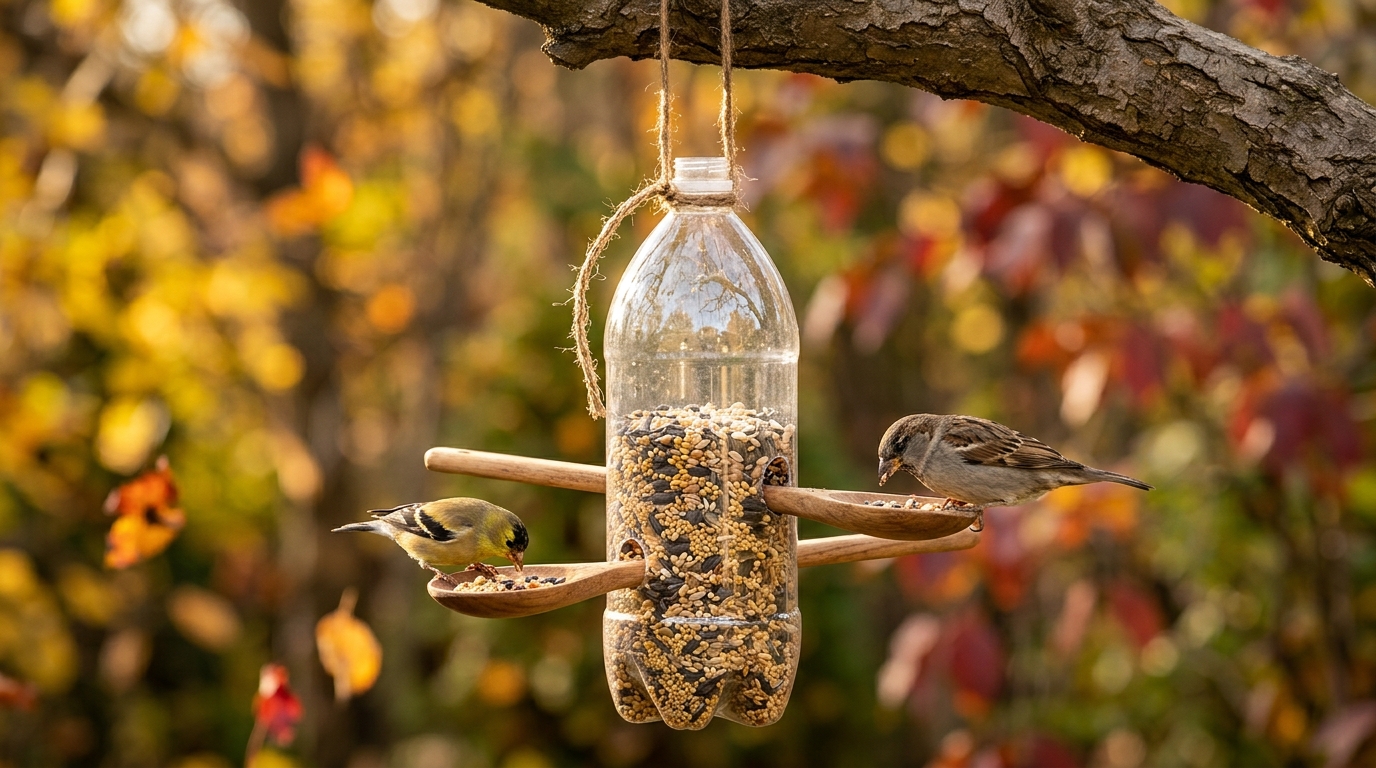
An empty plastic bottle and two old wooden spoons make one of the cleverest feeders around. The spoons slide through the bottle at an angle, so seed spills gently into each spoon bowl while the handle on the other side becomes a perch. It holds plenty of seed, and you can watch the level drop from the window. It is one of the thriftiest DIY bird feeders, and a great way to reuse a bottle instead of tossing it. Who in your house would love to make this one?
You will need: Clean, dry plastic bottle with cap, 2 wooden spoons, craft knife (adult only), twine, birdseed, funnel.
How to make it: 1. Have an adult cut a small hole a few inches from the bottom of the bottle and a slightly higher hole on the opposite side. 2. Push a spoon through so the bowl sits outside the larger hole. 3. Repeat with the second spoon a little higher, facing the other way. 4. Fill the bottle with seed using a funnel and replace the cap. 5. Tie twine around the neck and hang it.
Teacup and Saucer Feeder
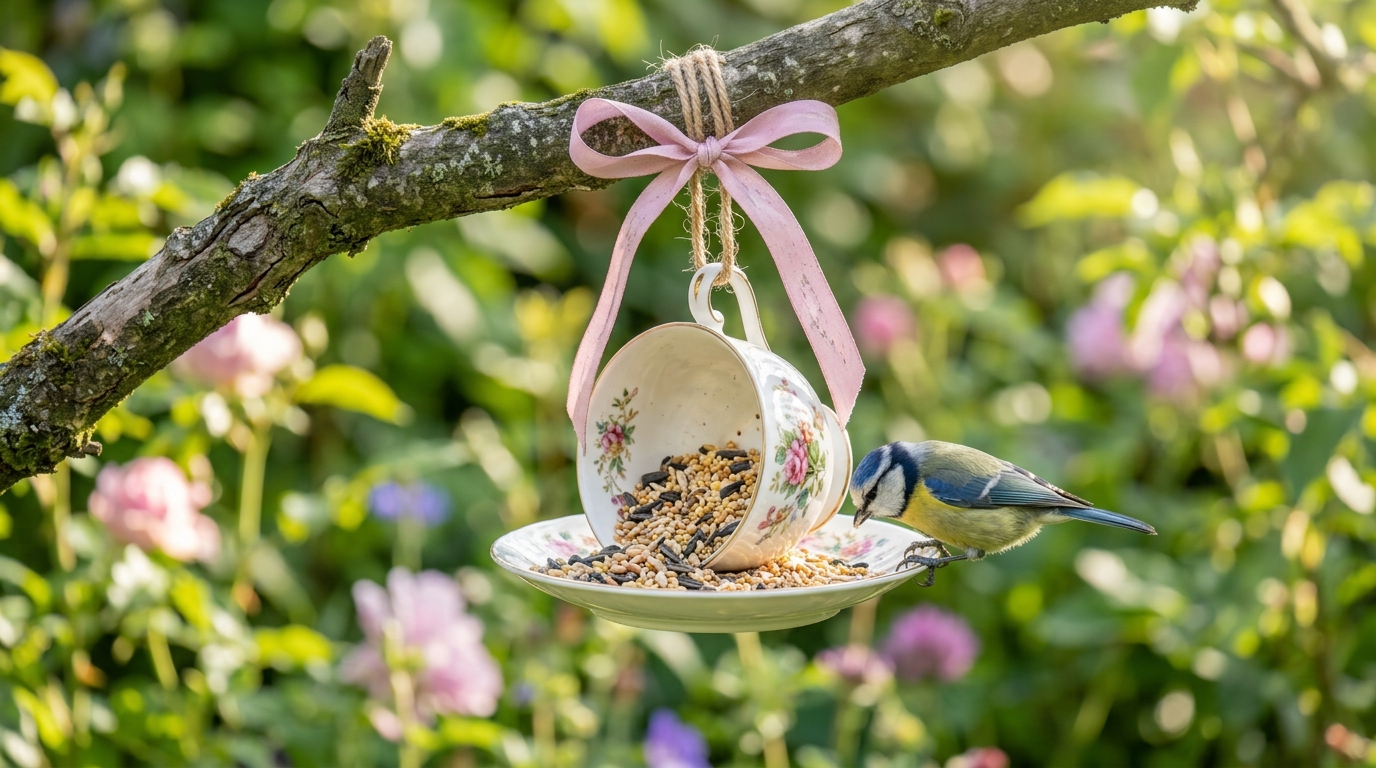
If you have a single teacup that lost its partner, this is the perfect way to give it a second life. The cup is glued to its saucer at an angle so it holds seed like a little bowl, and the saucer becomes a landing spot. Floral china looks so pretty in a garden, and it makes a sweet gift for a tea loving friend or a grandmother. DIY bird feeders like this also brighten a patio table. Thrift stores often sell odd cups for very little. Would you hang yours from a tree or set it on a post?
You will need: Teacup and saucer, strong waterproof glue made for ceramics, ribbon or sturdy twine, birdseed.
How to make it: 1. Wash and dry the cup and saucer. 2. Glue the side of the cup to the saucer so the cup tips slightly upward, and let it cure for a full day. 3. Tie sturdy twine around the cup handle, adding a ribbon bow for looks. 4. Fill the cup with seed. 5. Hang it from a branch at a height you can reach to refill.
Pinecone Seed Feeders
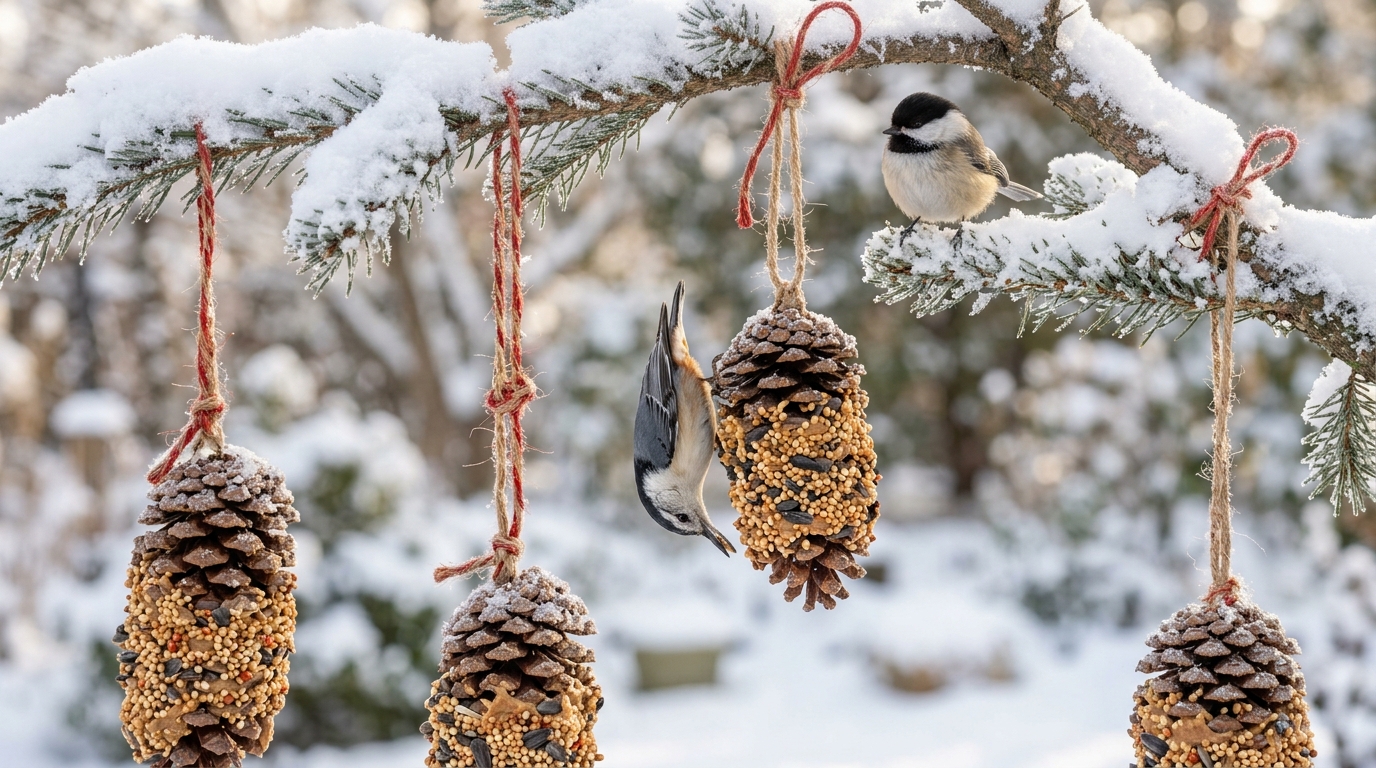
Pinecone feeders are a classic winter project for a reason. Each cone gets a thin coat of seed butter or peanut butter and a roll in birdseed, and the scales hold the seed like little shelves. Nuthatches and chickadees love to cling to them and pick away. Kids can make a whole batch of these DIY bird feeders at the kitchen table in about twenty minutes, and it is wonderfully messy fun. Tie them at different heights for a pretty display. How many pinecones can you find on your next walk?
You will need: Large dry pinecones, twine, seed butter or peanut butter, butter knife, birdseed, shallow tray.
How to make it: 1. Tie a long piece of twine around the top of each pinecone. 2. Spread a thin layer of seed butter into the scales with a butter knife. 3. Roll the cone in a tray of birdseed, pressing gently so the seed sticks. 4. Chill for a few minutes to firm up. 5. Hang them from branches outside.
Orange Peel Feeder
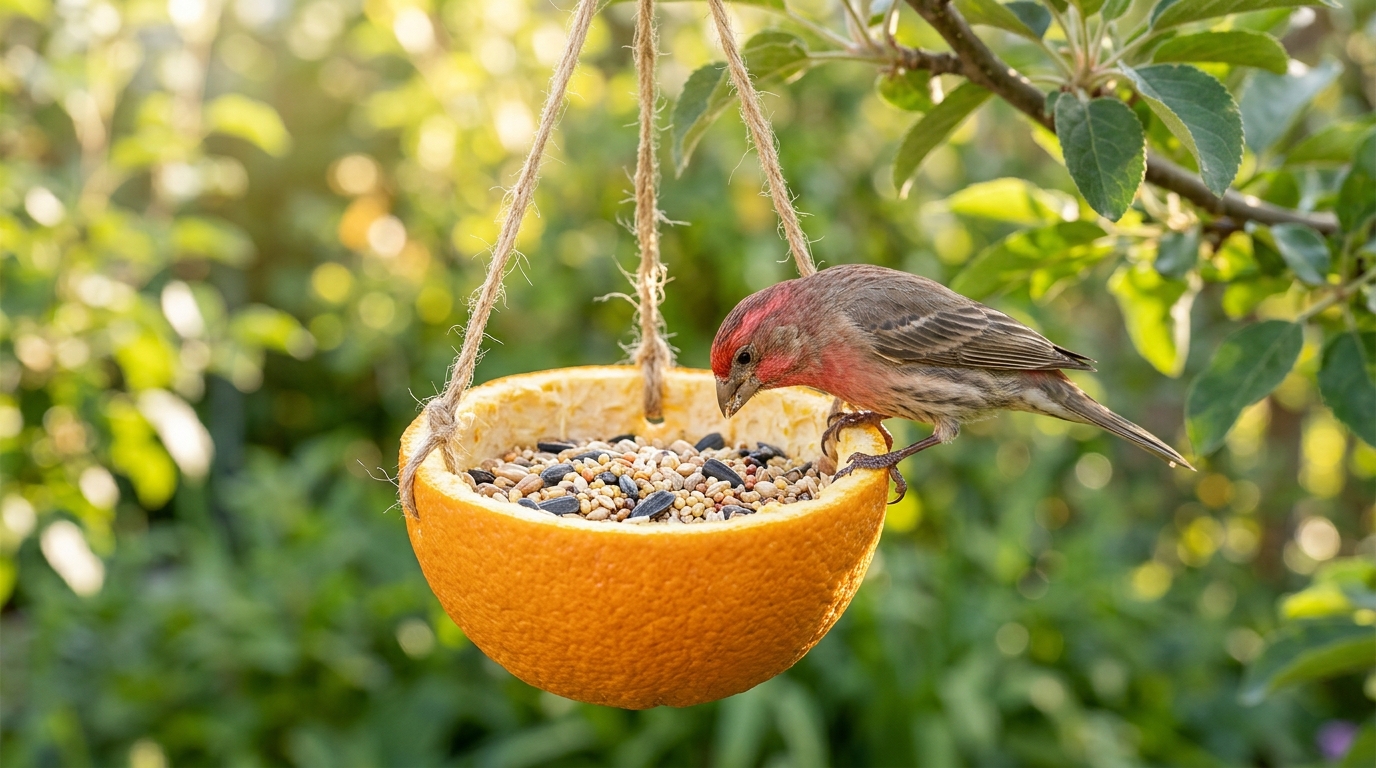
After breakfast, do not toss that orange peel. Half a hollowed orange makes a bright little basket feeder that looks cheerful against bare branches. Three strings tied through the rim let it hang level, and it holds a nice scoop of seed. Like other fruit DIY bird feeders, it only lasts a few days outside, so it is a perfect quick project to repeat. The bright color is lovely in photos too. Have you ever tried making something useful from fruit peels?
You will need: Orange, spoon, skewer, twine, birdseed, scissors.
How to make it: 1. Cut the orange in half and scoop out the fruit with a spoon. 2. Poke three evenly spaced holes near the rim with a skewer. 3. Thread a piece of twine through each hole and knot it. 4. Tie the three strings together at the top. 5. Fill the peel with seed and hang it from a branch.
Painted Tin Can Feeder
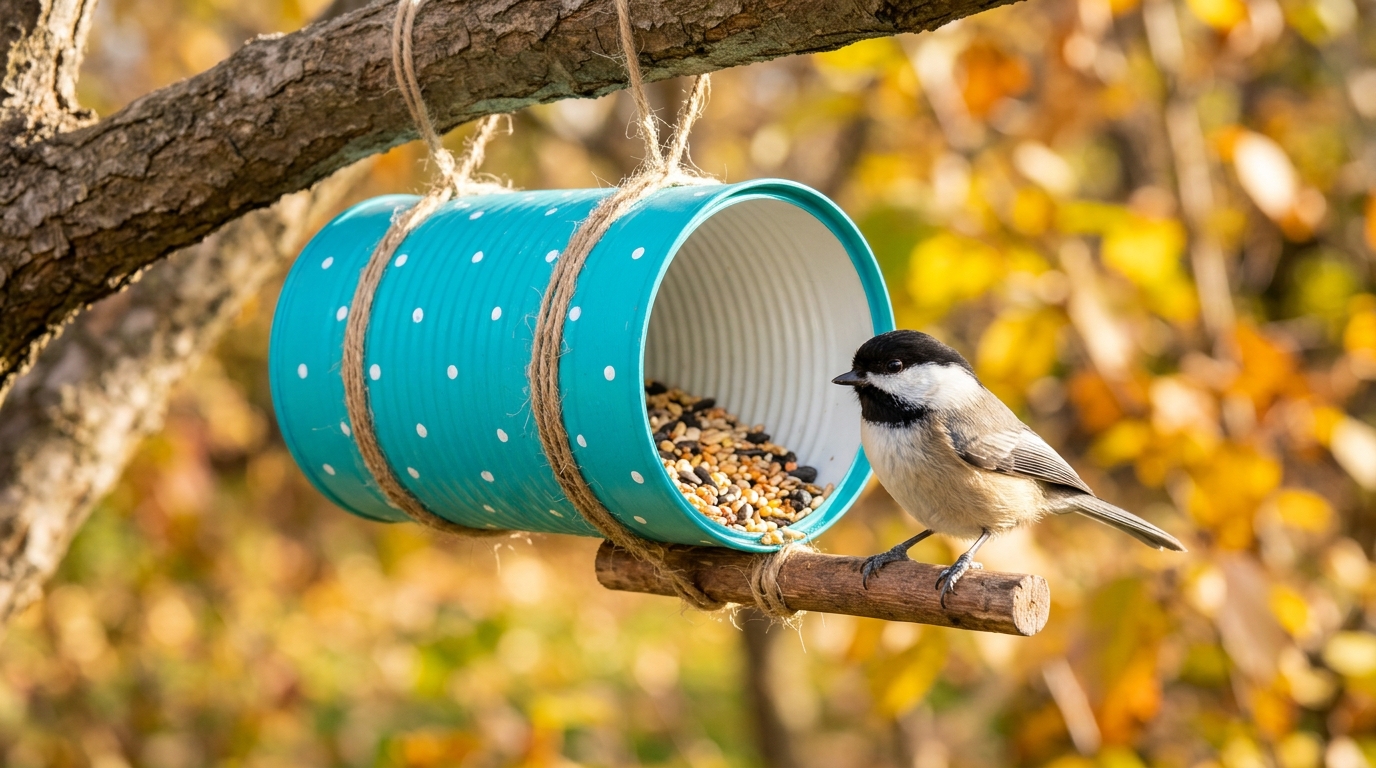
A clean tin can and a bit of outdoor paint can become a bright, sturdy feeder that lasts all season. The can hangs on its side so the seed stays mostly dry, and a short dowel below the opening gives birds a place to stand. Turquoise with white polka dots looks so happy in the garden. The key safety step is making sure the rim is smooth, so ask an adult to check it and cover it with tape if needed. What colors would you paint yours?
You will need: Clean tin can with a smooth rolled rim, outdoor acrylic paint, brush, wooden dowel, strong glue, sturdy twine, duct tape for the rim if needed, birdseed.
How to make it: 1. Wash the can, remove the label and have an adult check that the rim has no sharp edges. 2. Paint the outside and let it dry completely. 3. Glue a short dowel under the opening as a perch. 4. Wrap twine around the middle of the can, knot it on top and make a hanging loop. 5. Add seed and hang it on its side.
Big Jug Feeder
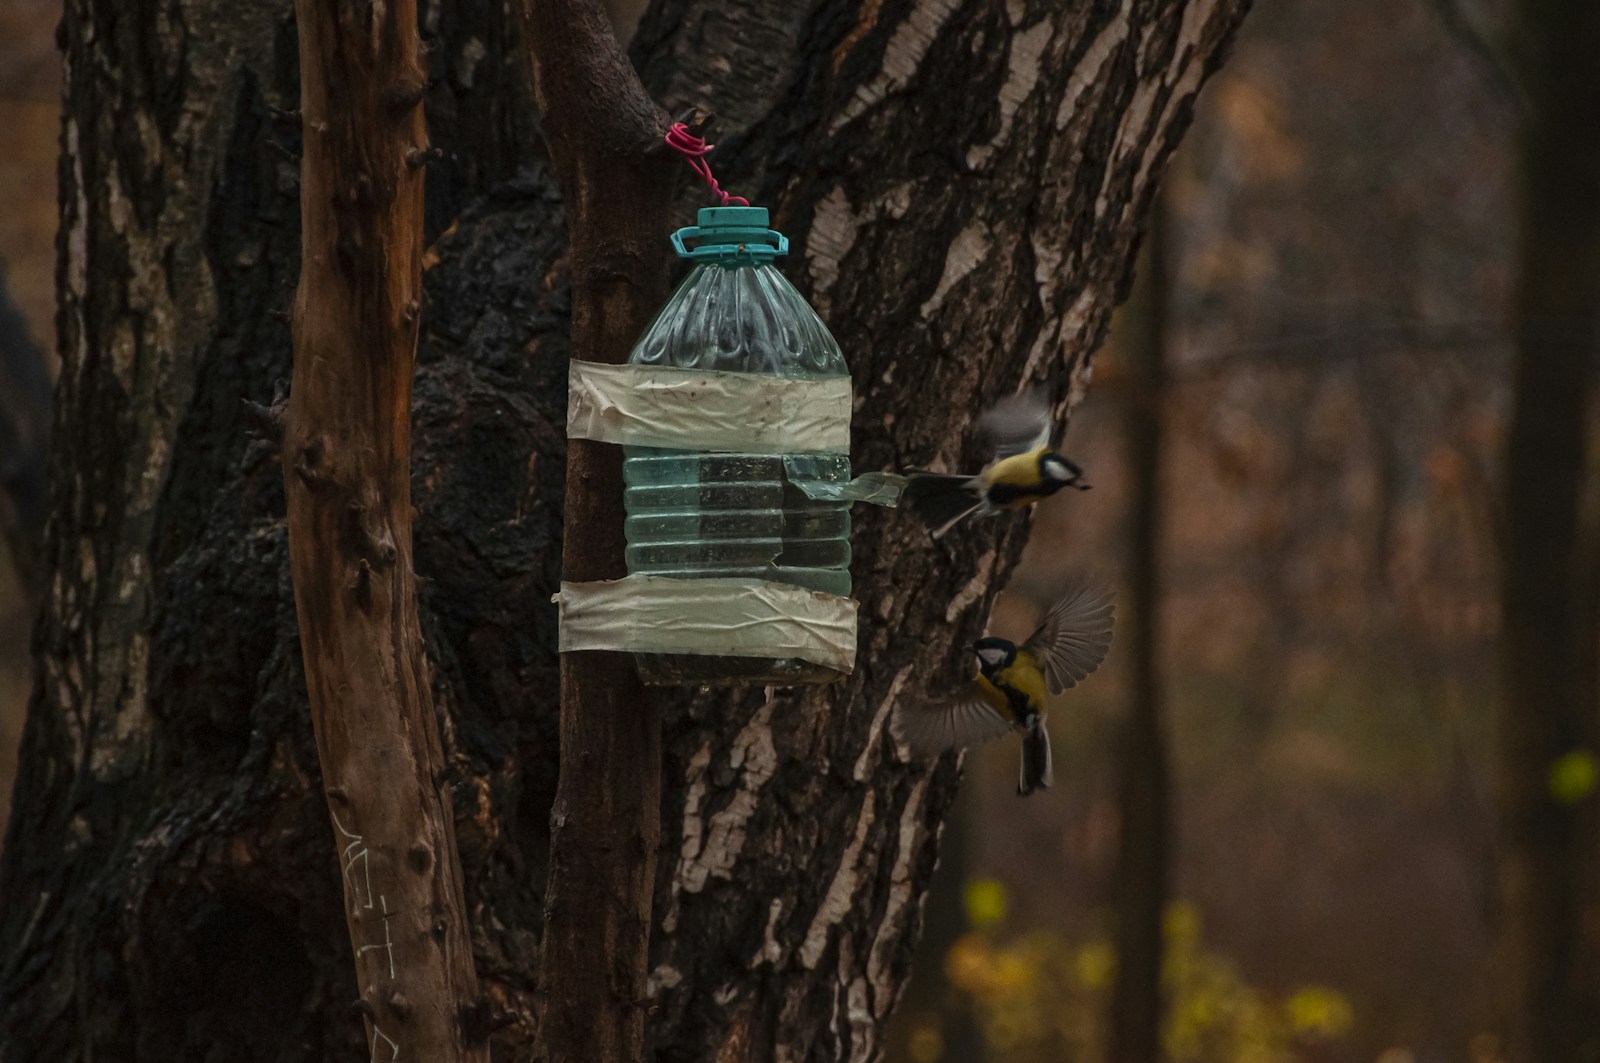
A big plastic jug is a wonderful feeder for busy backyards because it holds so much seed. Wide windows cut into the sides let birds pop in and out, and tape over the edges keeps them smooth. Strap it to a tree trunk and you will soon have a steady line of visitors. Like most DIY bird feeders made from recycled things, it costs almost nothing. Do you have a jug in your recycling bin right now?
You will need: Clean plastic jug, craft knife (adult only), waterproof tape, twine or strap, birdseed.
How to make it: 1. Have an adult cut one or two wide windows in the sides of the jug, leaving a few inches at the bottom to hold seed. 2. Cover the cut edges with waterproof tape. 3. Poke a few tiny holes in the bottom so rain can drain. 4. Add seed. 5. Tie or strap the jug to a tree trunk or hang it from the handle.
Birdseed Ornaments
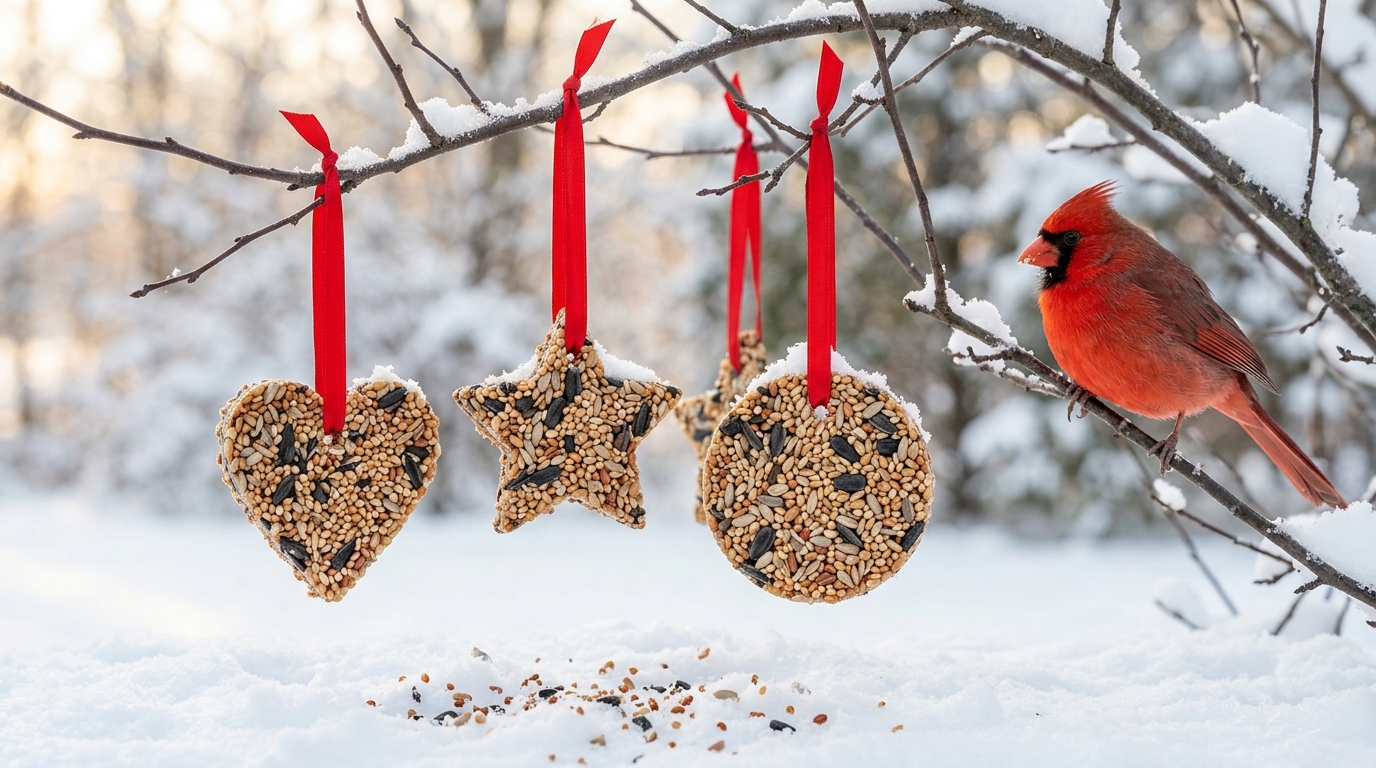
Birdseed ornaments are some of the prettiest DIY bird feeders, especially when you shape them with cookie cutters. Hearts, stars and circles hanging on red ribbon look like a holiday tree for the birds. The seed is held together with a simple mix of gelatin and flour, and the ornaments set firm overnight. They make a sweet gift for neighbors, too. Which shapes would you choose from your cookie cutter drawer?
You will need: Birdseed, 1 packet unflavored gelatin, flour, water, cookie cutters, parchment paper, straw, ribbon.
How to make it: 1. Dissolve the gelatin in a little hot water (adult help), then stir in a few spoons of flour. 2. Mix in birdseed until everything is coated. 3. Set cookie cutters on parchment and press the mix in firmly. 4. Push a straw through the top of each to make a hole and let them dry overnight. 5. Pop them out, thread ribbon through and hang.
Natural Treat Garland
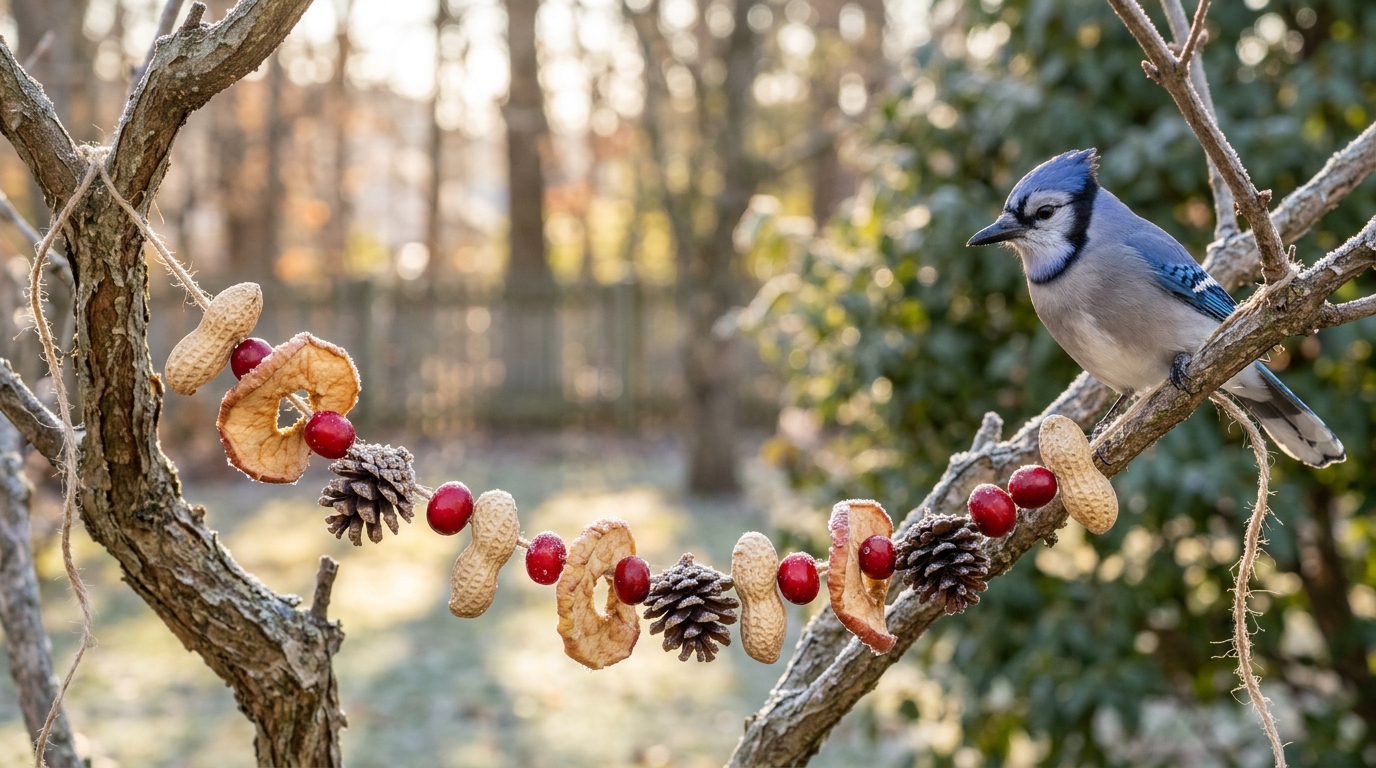
This garland looks like a holiday decoration, but it is a snack bar for birds. Unsalted peanuts in the shell, dried apple rings, fresh cranberries and small pinecones are strung on twine and draped between branches. Blue jays are often the first to spot the peanuts. It is a calm, cozy project for an evening at home with music on. Skip anything salted, sugared or painted. Where would you drape a garland like this?
You will need: Strong twine, large blunt needle, unsalted peanuts in shells, dried apple rings, fresh cranberries, small pinecones.
How to make it: 1. Thread the blunt needle with a long piece of twine and knot the end. 2. String peanuts, apple rings and cranberries in a repeating pattern. 3. Tie small pinecones in every so often. 4. Leave long ends on both sides. 5. Drape the garland between two branches and tie it in place.
Teapot Feeder
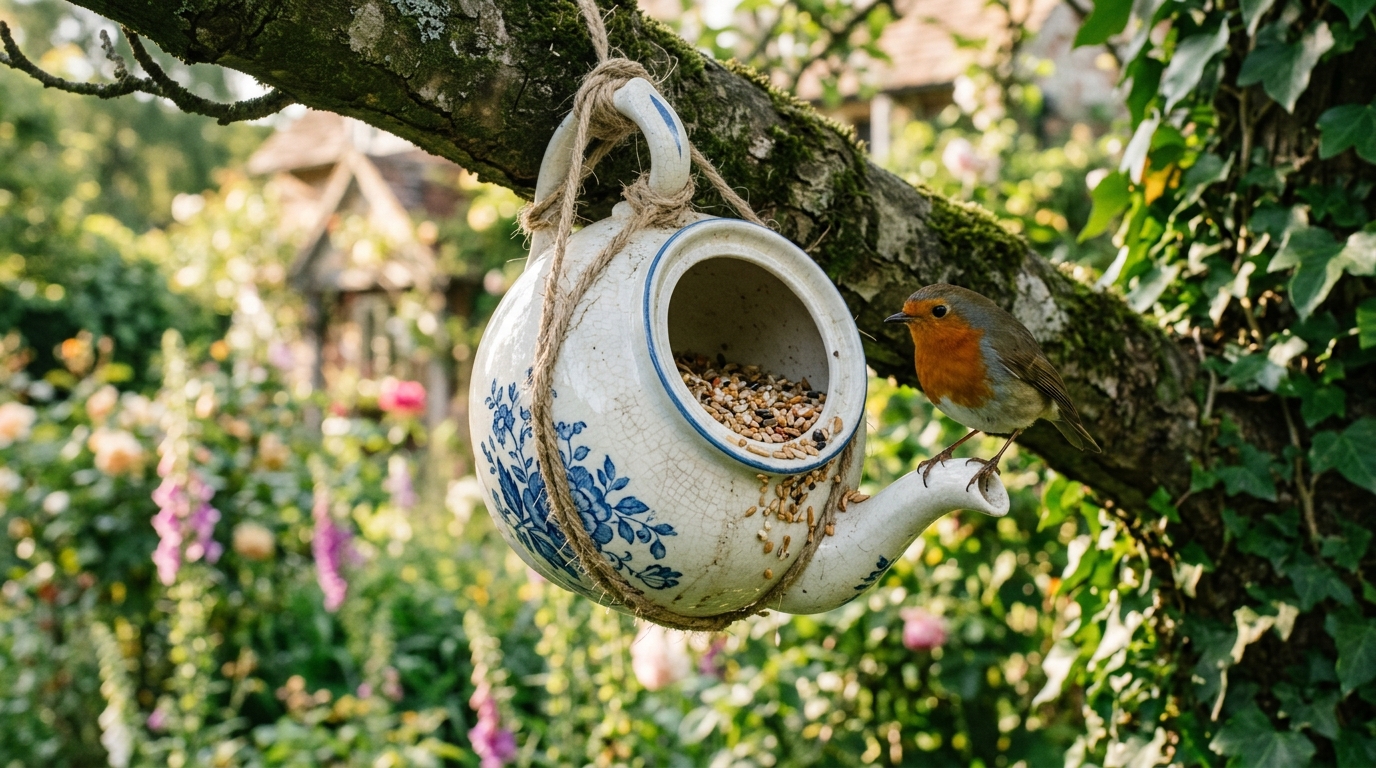
An old teapot hung on its side makes a charming little shelter feeder. The round belly keeps seed out of the rain, and the spout makes a perfect perch. Garden robins and small songbirds seem to love it, and it looks like something out of a storybook. Chipped teapots from the back of the cupboard or a thrift shop work beautifully. Pair it with the teacup feeder for a set of matching DIY bird feeders, like a little garden tea party. Do you have an old teapot that could use a new job?
You will need: Ceramic teapot, strong waterproof glue made for ceramics, sturdy twine or chain, birdseed.
How to make it: 1. Glue the lid to the teapot in a half open position and let it cure for a full day. 2. Wrap sturdy twine around the handle and the spout so it hangs on its side. 3. Test that it hangs level and holds tight. 4. Fill the belly with seed. 5. Hang it under a branch with some cover above.
Window Feeder
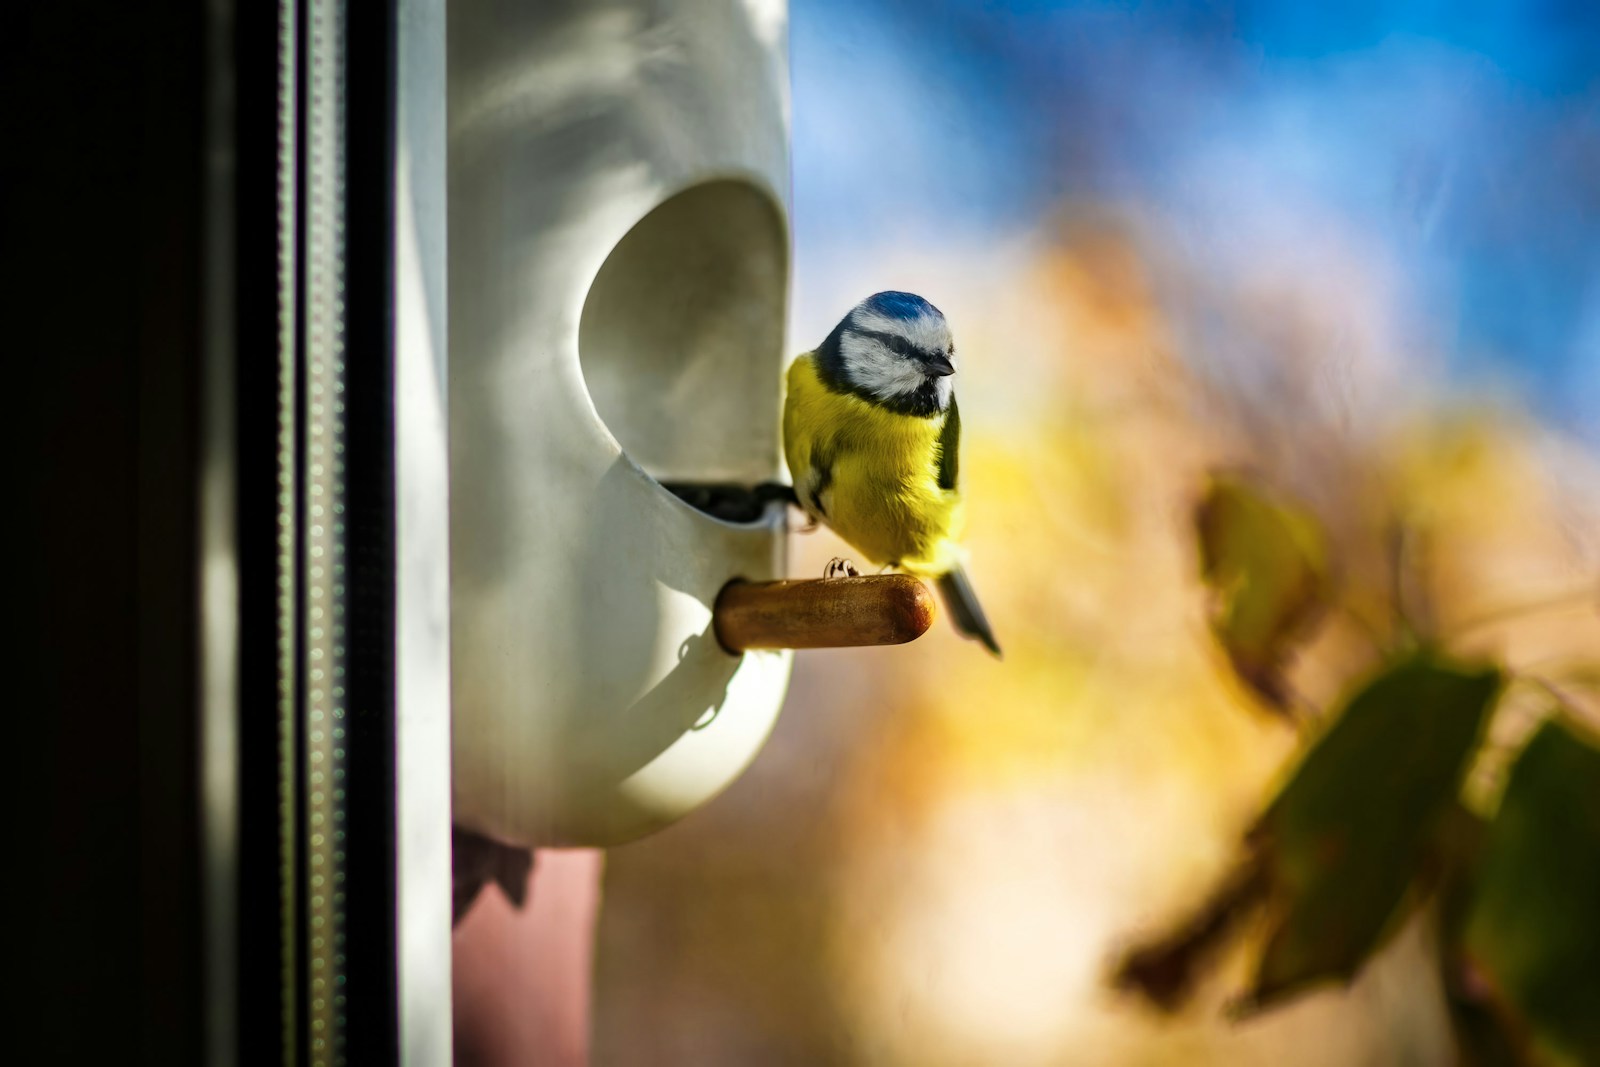
A window feeder brings the birds right up to the glass, so you can watch them up close from the couch. Simple clear or white trays stick on with suction cups, and some families build a small wooden box version that clips to the sill. Little blue tits and chickadees are usually brave enough to visit first. It is a dream for kids and anyone who loves bird watching. Keep it on a window you look through every day. Which window would be your front row seat?
You will need: Clear plastic container or small wooden tray, strong suction cups with hooks, drill or awl (adult only), twine, birdseed.
How to make it: 1. Clean the window well so the suction cups grip. 2. Have an adult make two holes near the back edge of the tray. 3. Thread twine through the holes and hang the tray from two suction cup hooks. 4. Press the cups firmly onto the glass. 5. Add a small scoop of seed and check it daily.
Hanging Tray Feeder
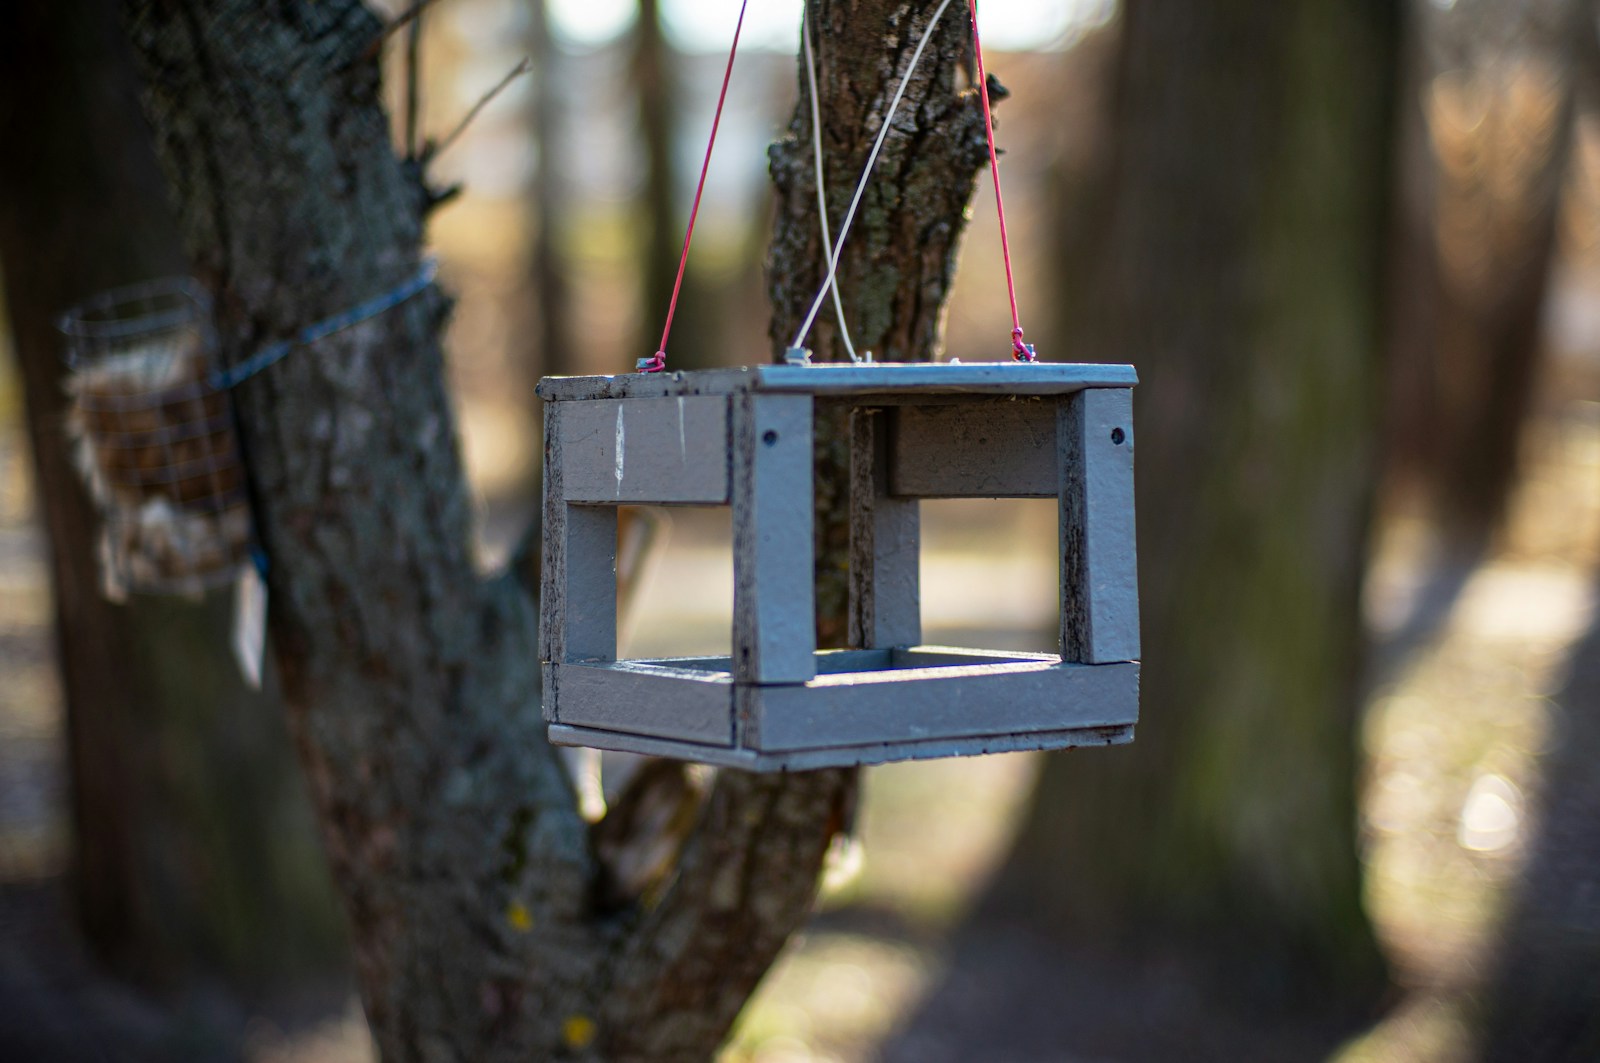
A hanging tray feeder is easy to build from scrap wood, and it gives larger birds plenty of room to land. Four short corner posts and a flat roof turn a simple tray into a little open pavilion. Paint it a soft gray or leave it natural, then hang it with four strings so it stays steady in the wind. Of all the DIY bird feeders here, it is a great first woodworking project to do with an adult. Would you paint yours or leave the wood natural?
You will need: Scrap wood boards, small wood strips for posts, wood glue, small nails or screws, hammer or drill (adult only), sandpaper, outdoor paint (optional), sturdy cord, birdseed.
How to make it: 1. Cut a square base and a matching roof from scrap wood, with an adult handling the saw. 2. Glue and nail thin strips around the base edges to keep seed in. 3. Attach four short posts at the corners and fix the roof on top. 4. Sand all edges smooth and paint if you like. 5. Tie cord to each corner, join them above and hang.
Homemade Seed Balls
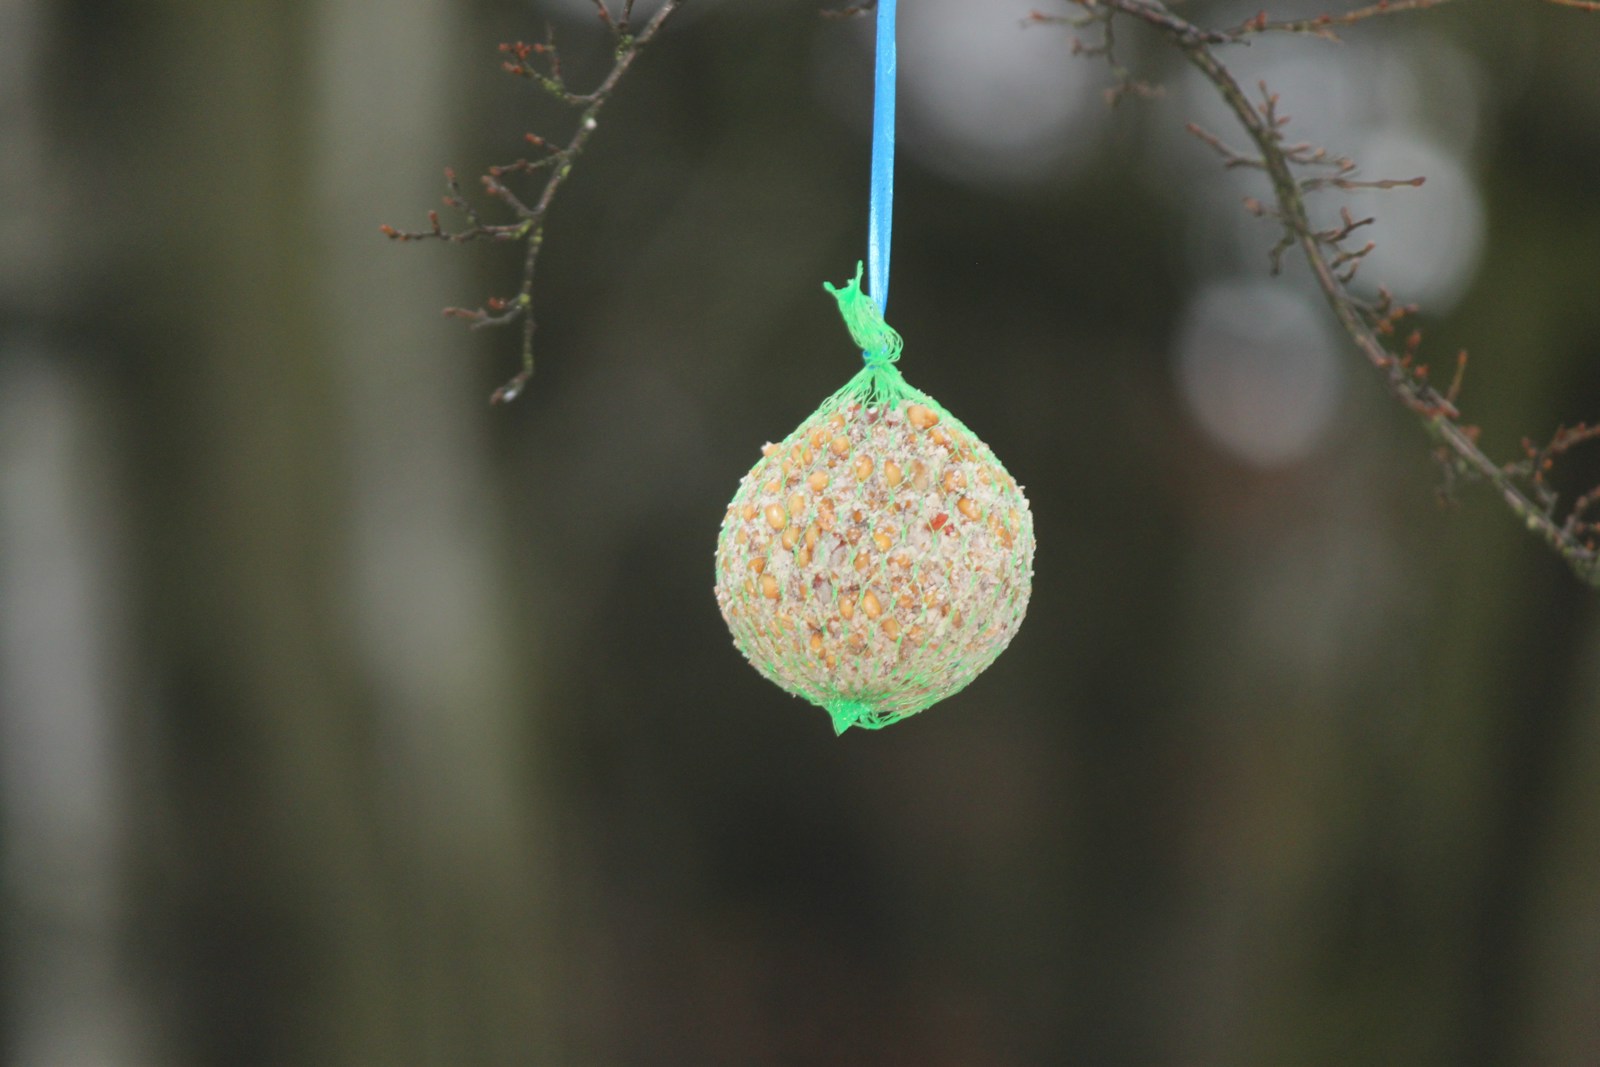
Seed balls are one of the simplest DIY bird feeders you can make in the kitchen. Birdseed is mixed with a little melted vegetable shortening, pressed into a ball around a loop of string and chilled until firm. They look sweet hanging from a bare branch. Skip mesh bags and hang the balls on string or ribbon instead, since mesh can snag little feet. Try rolling a few in extra oats for texture. How many could you make in one batch?
You will need: Birdseed, vegetable shortening, saucepan (adult help), mixing bowl, spoon, string or ribbon, muffin liners or waxed paper.
How to make it: 1. Gently melt shortening with an adult’s help and let it cool slightly. 2. Stir in birdseed until it holds together. 3. Fold a piece of string in half and press a handful of the mix firmly around the knot. 4. Set the balls on waxed paper and chill until hard. 5. Hang them by the string in a shady spot.
Wooden Platform Feeder
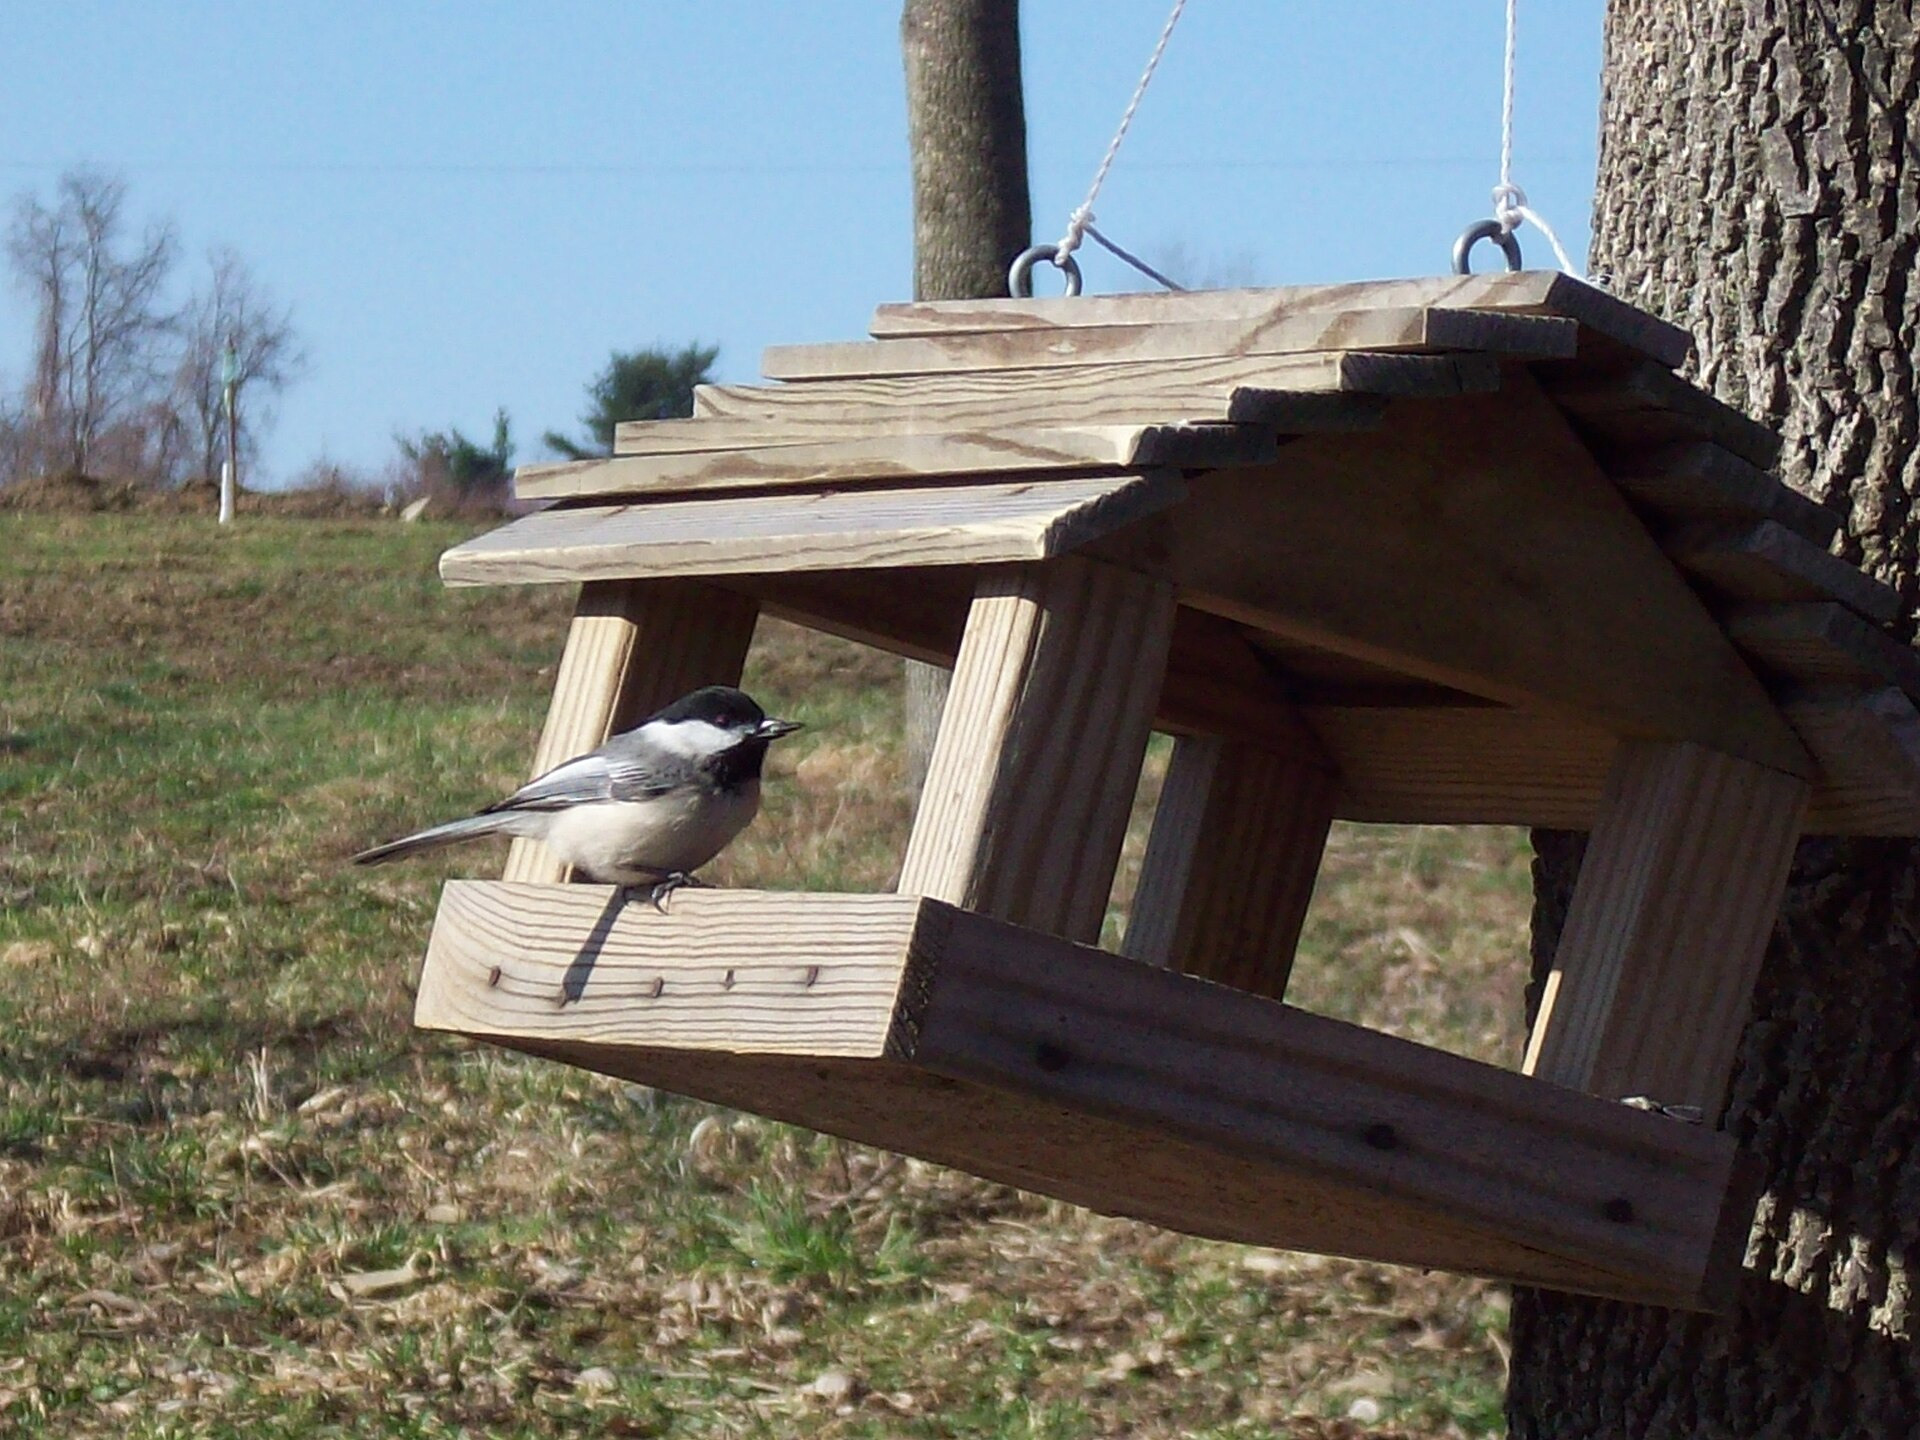
A covered platform feeder with a little shingled roof is a classic you can build in an afternoon. The wide floor holds plenty of seed, the open sides let birds come and go, and the roof keeps rain off. Chickadees are often the first guests. Hang it from a branch or set it on a post near a shrub so birds feel safe. It is a lovely project to build with a grandparent who loves woodworking. Who would you build it with?
You will need: Cedar or pine boards, small wood strips, wood glue, galvanized screws, drill (adult only), sandpaper, eye hooks, chain or sturdy cord, birdseed.
How to make it: 1. Cut a floor, two gable ends and two roof panels from boards, with an adult using the saw. 2. Add a low rim around the floor to hold the seed. 3. Screw the gable ends to the floor and fix the roof panels on top. 4. Sand every edge smooth. 5. Add eye hooks to the roof, attach chain and hang it.
Post Suet Feeder
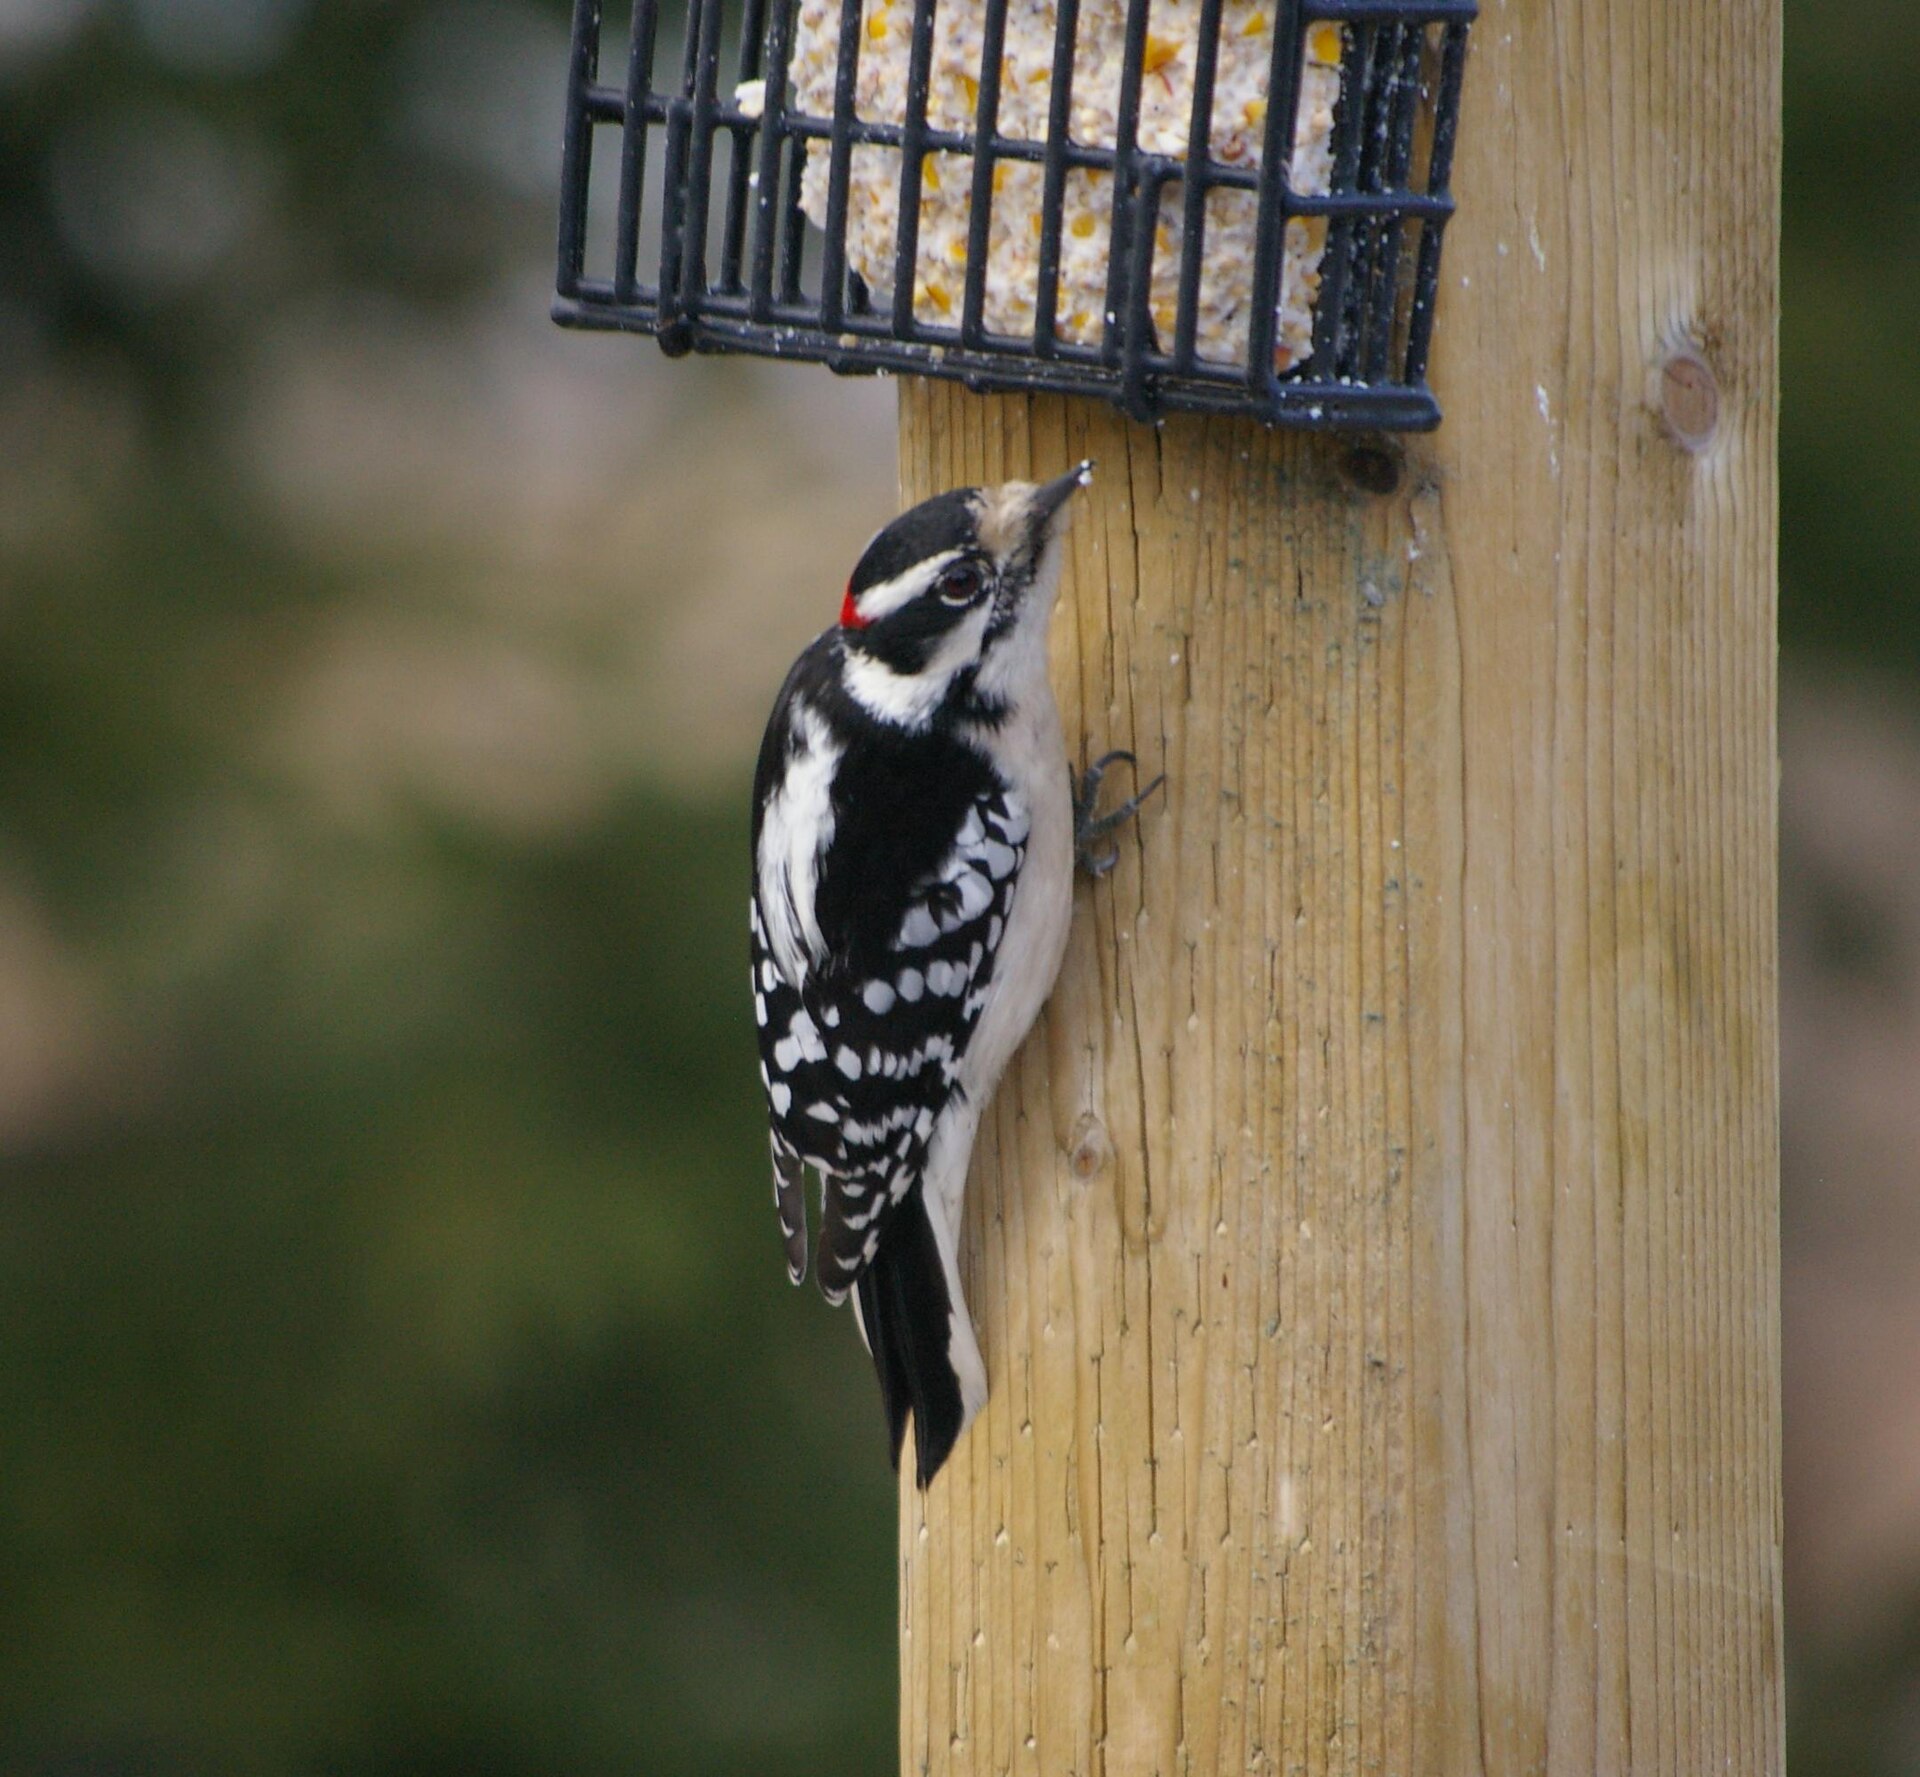
Woodpeckers love clinging to a feeder that feels like a tree. A thick wooden post or log with a small suet cage screwed to one side gives them just that. Downy woodpeckers will hang on the wood while they nibble, and it is a joy to watch their little red caps bob up and down. Not all DIY bird feeders need seed, and a store suet cake fits right in the cage. Set it near trees where you already hear tapping. Have you ever spotted a woodpecker in your yard?
You will need: Thick log or wooden post, small suet cage, screws, drill (adult only), suet cake, sturdy hook or stake.
How to make it: 1. Choose a sturdy log or post and stand it securely in the ground or hang it from a strong hook. 2. Have an adult screw the suet cage to one side. 3. Slide in a suet cake and close the cage. 4. Place it near trees or shrubs. 5. Refill when the cake is gone.
Snowy Bird Table
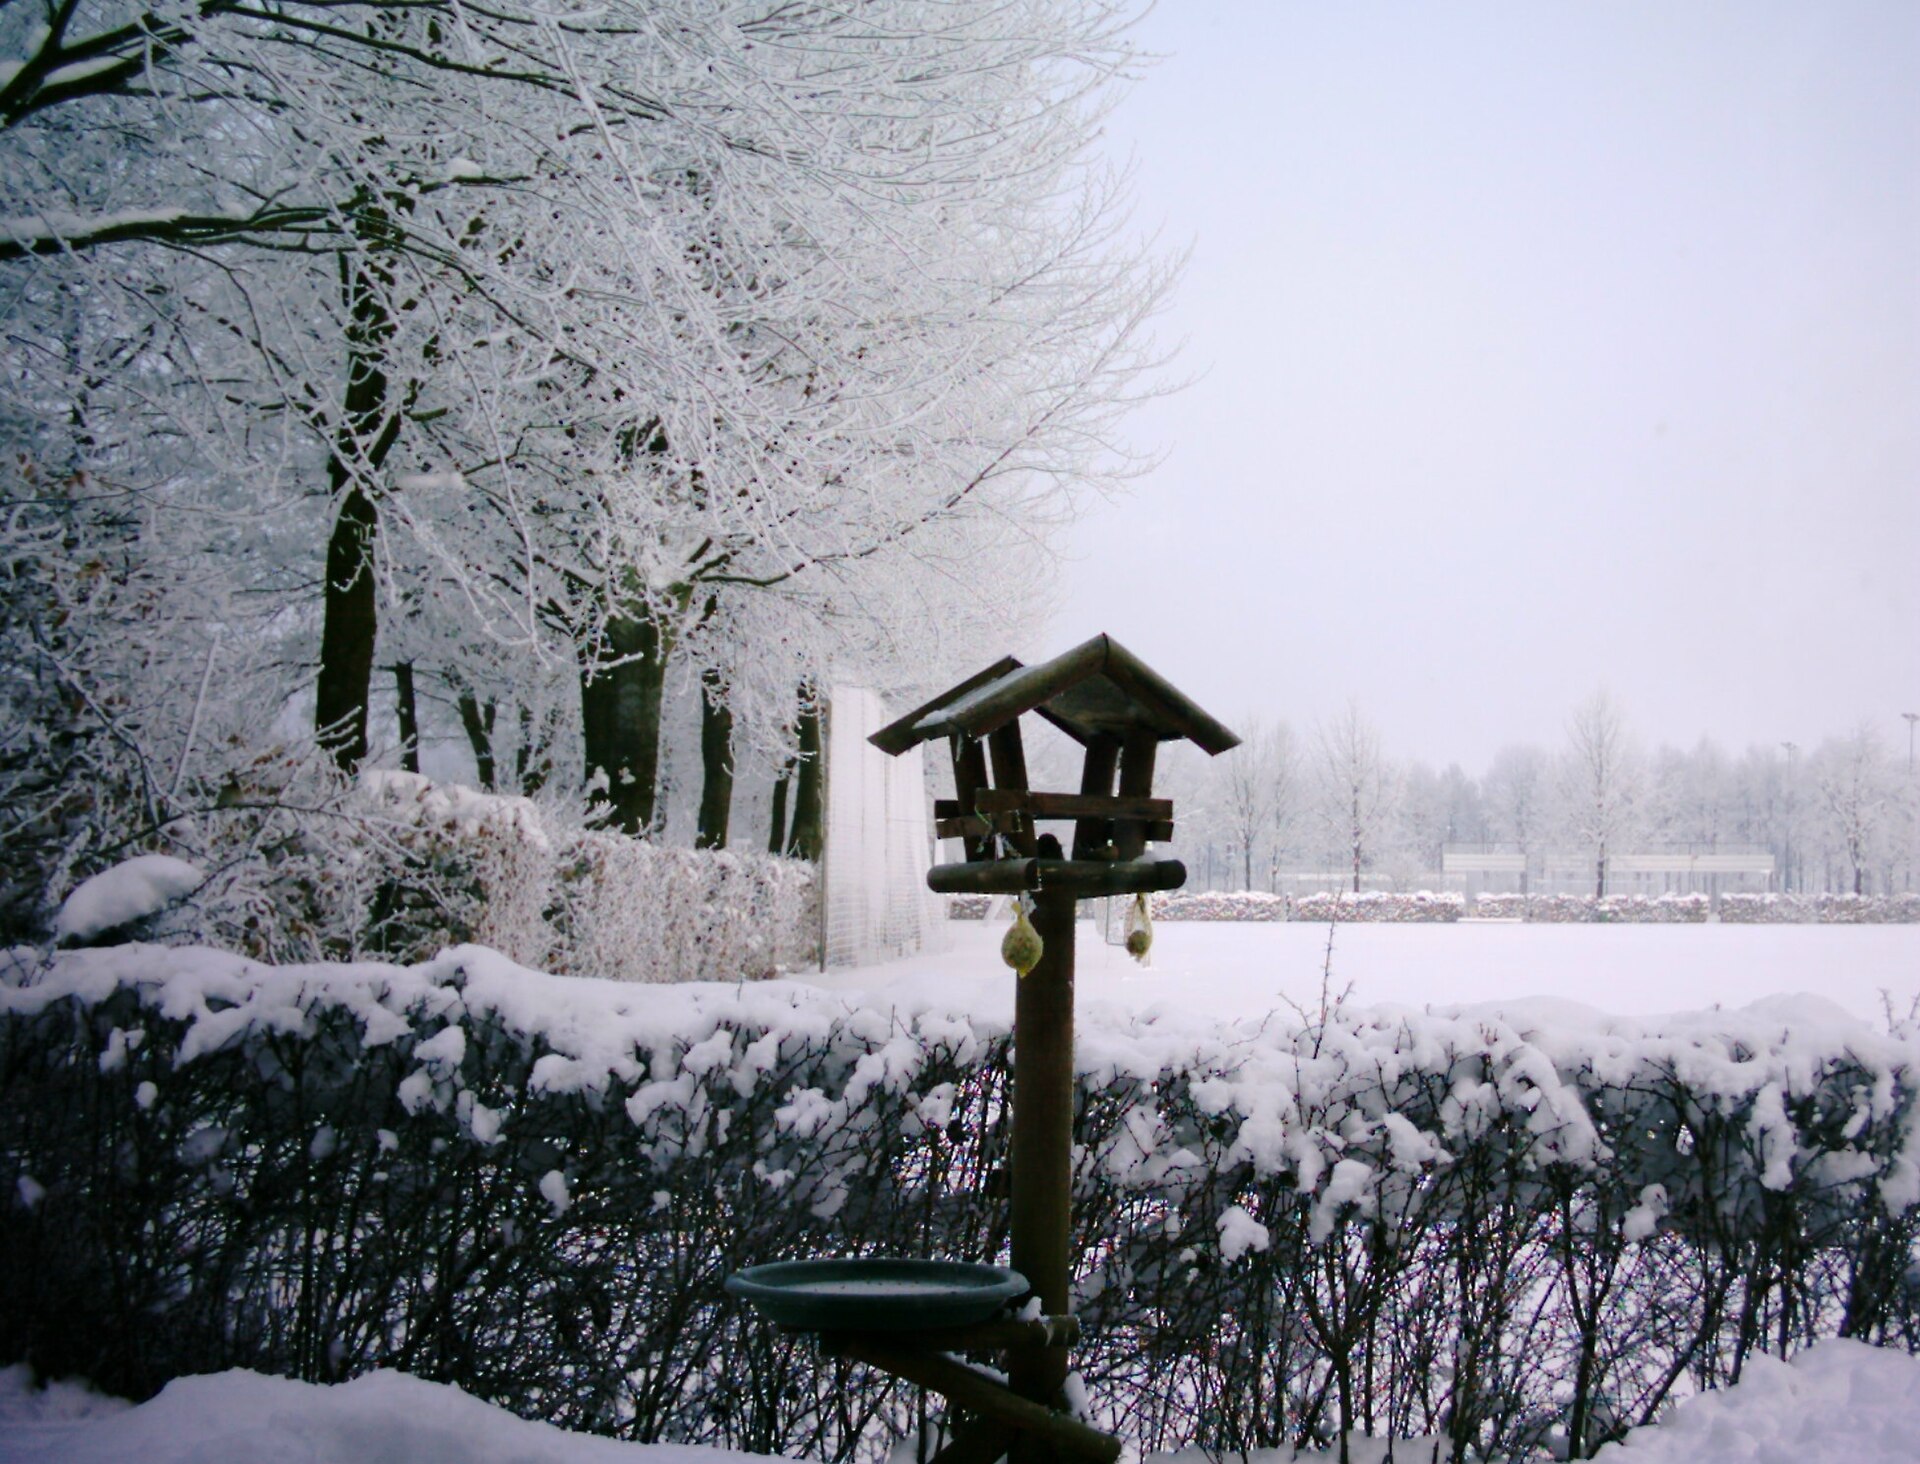
A bird table on a post is the heart of many winter gardens. A flat tray with a small roof sits on a tall pole, so birds can eat in the open while keeping an eye out. In snow it looks like a scene from a holiday card. Like many DIY bird feeders, you can make one from a fence post, a square of plywood and a few scraps for the roof. Place it where you can see it from your favorite chair. Is there a spot in your yard that needs a bird table?
You will need: Wooden post, plywood square, wood strips, roof boards, galvanized screws, drill (adult only), sandpaper, outdoor stain, post stake or bucket of gravel.
How to make it: 1. Screw thin strips around the plywood square to make a tray with a lip. 2. Attach four short posts and a small pitched roof. 3. Sand and stain all the wood. 4. Screw the tray firmly to the top of the post. 5. Set the post in a stake or deep gravel so it stands steady.
Garden Bird Bath to Pair With Your DIY Bird Feeders
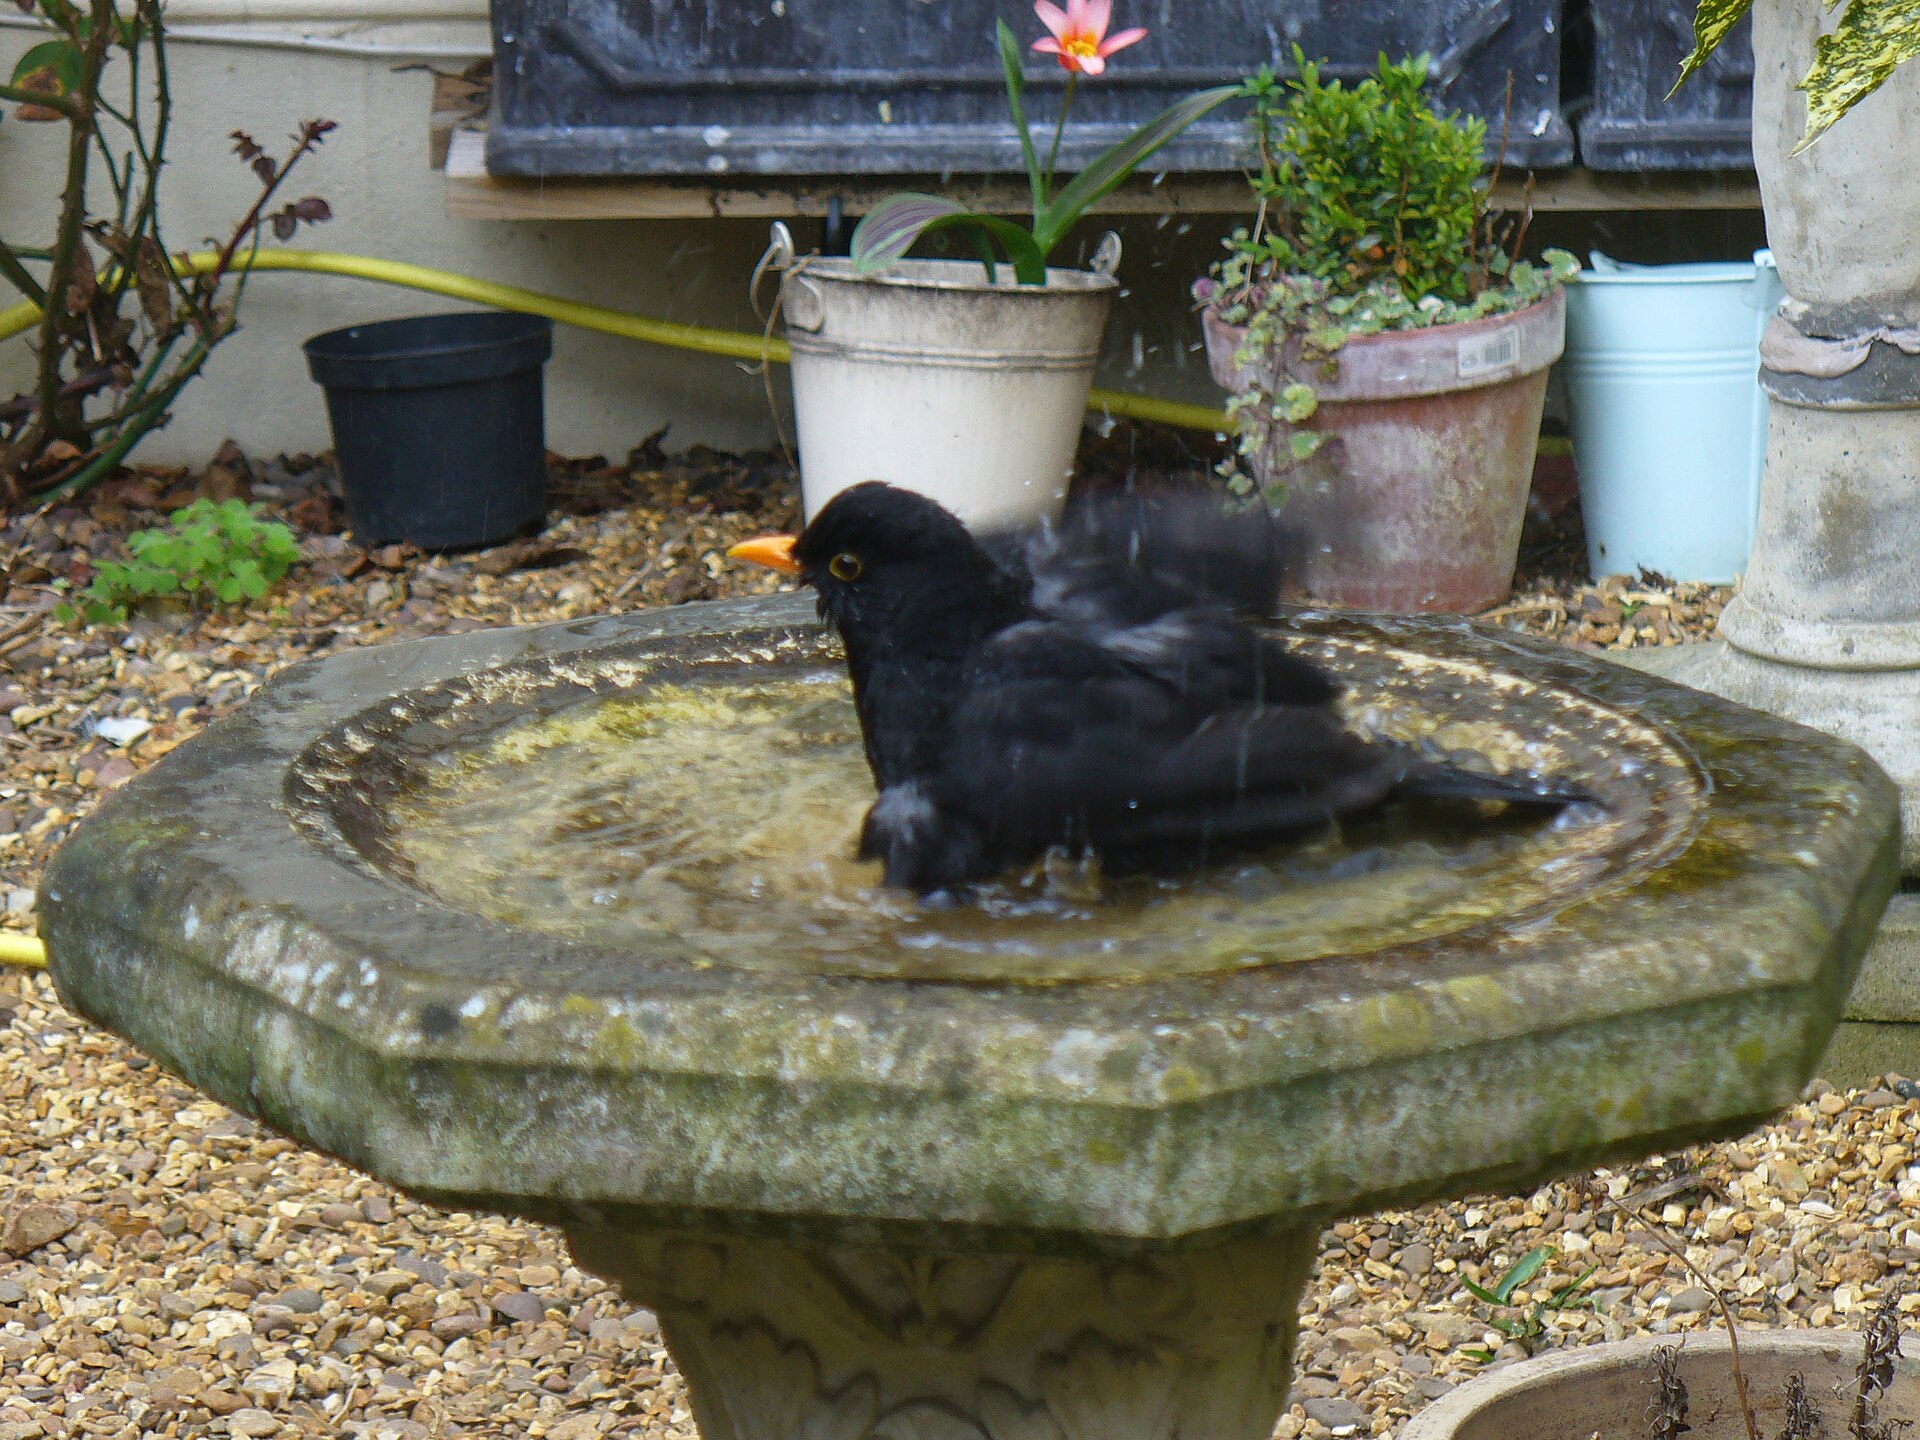
Birds need water as much as seed, and a shallow bath turns your feeding spot into a full backyard cafe. A wide stone or terracotta dish on a stand works well, and blackbirds and robins love a good splash. Keep the water shallow and change it often. If you love simple recycled projects, you will also enjoy these mason jar crafts. It is the perfect finishing touch for all your DIY bird feeders. Which feeder from this list will you build first?
You will need: Wide shallow dish or large plant saucer, stand or upturned pot, a few flat stones, outdoor waterproof glue (optional), water.
How to make it: 1. Pick a shallow dish no deeper than a couple of inches. 2. Set it on a sturdy stand or upturned pot and glue it if you like. 3. Add a few flat stones so small birds can stand. 4. Fill with fresh water. 5. Rinse and refill every few days.