Julia Child Kitchen: 14 Genius Storage Ideas From the Famous Kitchen Now at the Smithsonian
The Julia Child kitchen is one of the most loved rooms in America, and you can walk right into it. Julia was six feet two inches tall, so her husband Paul designed their Cambridge kitchen with high counters to fit her, and every pot and tool lived out in the open where she could grab it. That cheerful, hard working room later became the set for three of her television series. When she was done with it, she donated the whole thing to the Smithsonian’s National Museum of American History, where it is on display today. You do not need a TV crew to borrow her style. Before the holiday cooking marathon starts, here are fourteen easy DIY storage ideas inspired by her famous kitchen that make any space feel generous, organized and ready for company..
A Julia Child Kitchen Pegboard Wall for Pots and Pans
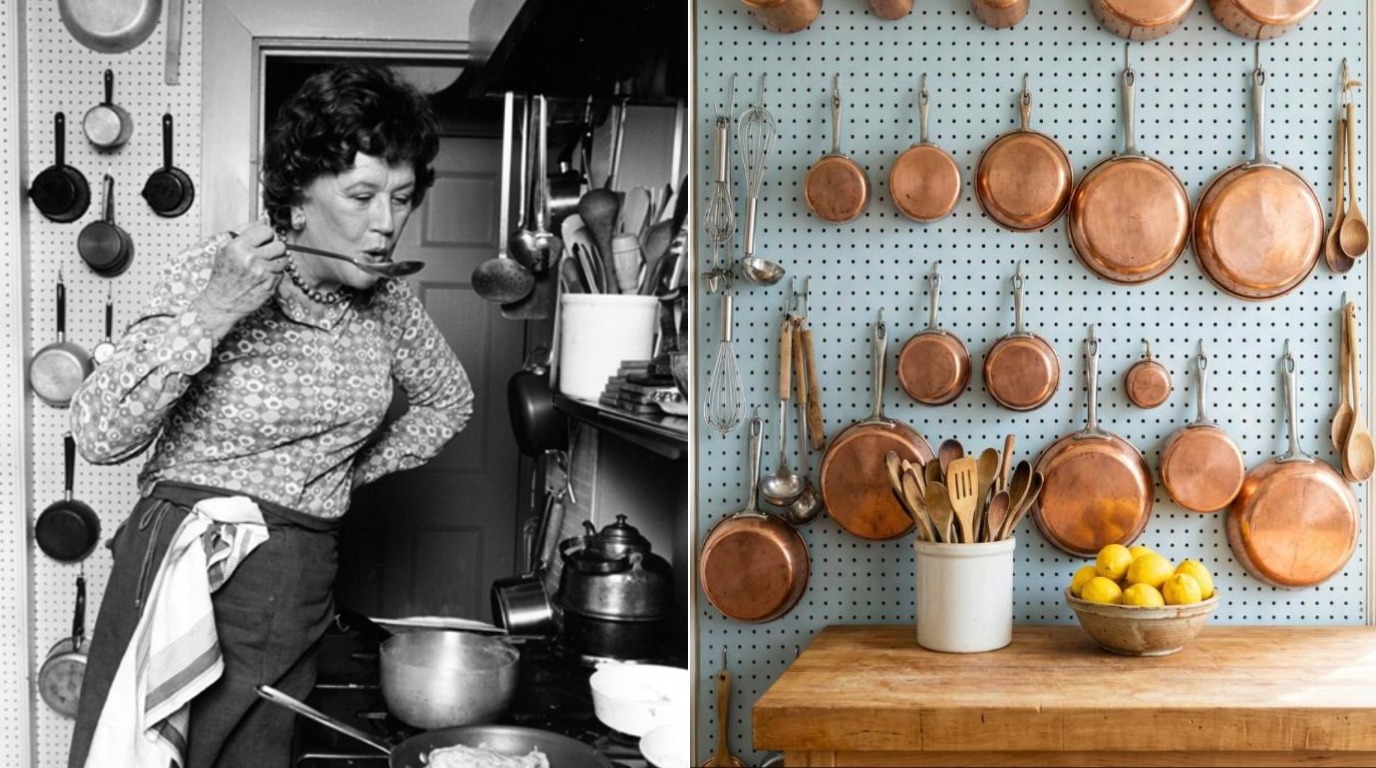
Look at any photo of Julia at the stove and you will see pans hanging right behind her, close enough to grab with one hand. A pegboard wall is the easiest way to get that look at home. It is cheap, it goes up in an afternoon, and it frees up whole cabinets. Paint it a soft blue or white so the pans become the decoration. Copper and cast iron look especially handsome against a pale board. Which wall in your kitchen could take a pegboard..
You will need: Pegboard sheet cut to size, 2.5 cm wood furring strips, screws and wall anchors, pegboard hooks, paint and a small roller.
How to make it: 1. Paint the pegboard and let it dry. 2. Screw furring strips to the wall so the board sits off the wall for the hooks. 3. Screw the board to the strips and add hooks for your pans and tools.
Trace an Outline So Every Pan Has a Home
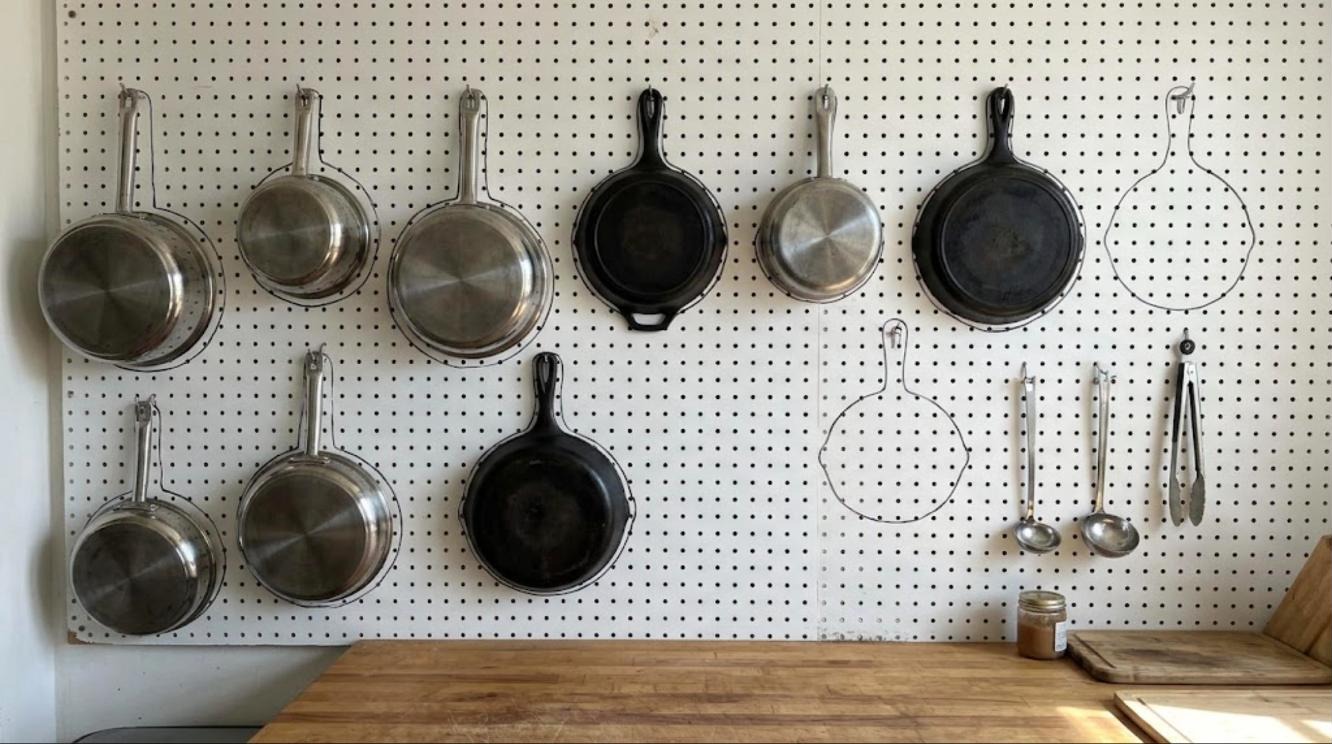
Here is a clever trick for a Julia Child kitchen look: once your pans are hung where you like them, trace around each one with a marker. The outlines act like a map, so anyone helping in the kitchen knows exactly where the skillet goes back. It also shows you at a glance which pan is still in the sink. This is perfect for busy holiday weeks when the whole family is cooking. It costs nothing but a marker and five minutes. Who in your house needs the map most?
You will need: A pegboard with pans already hung, a fine black paint marker or a thin brush and black paint, a pencil.
How to make it: 1. Hang each pan in its spot. 2. Lightly trace around it with a pencil. 3. Take the pan down, go over the line with the paint marker and rehang it.
Copper Pots Hung Within Easy Reach
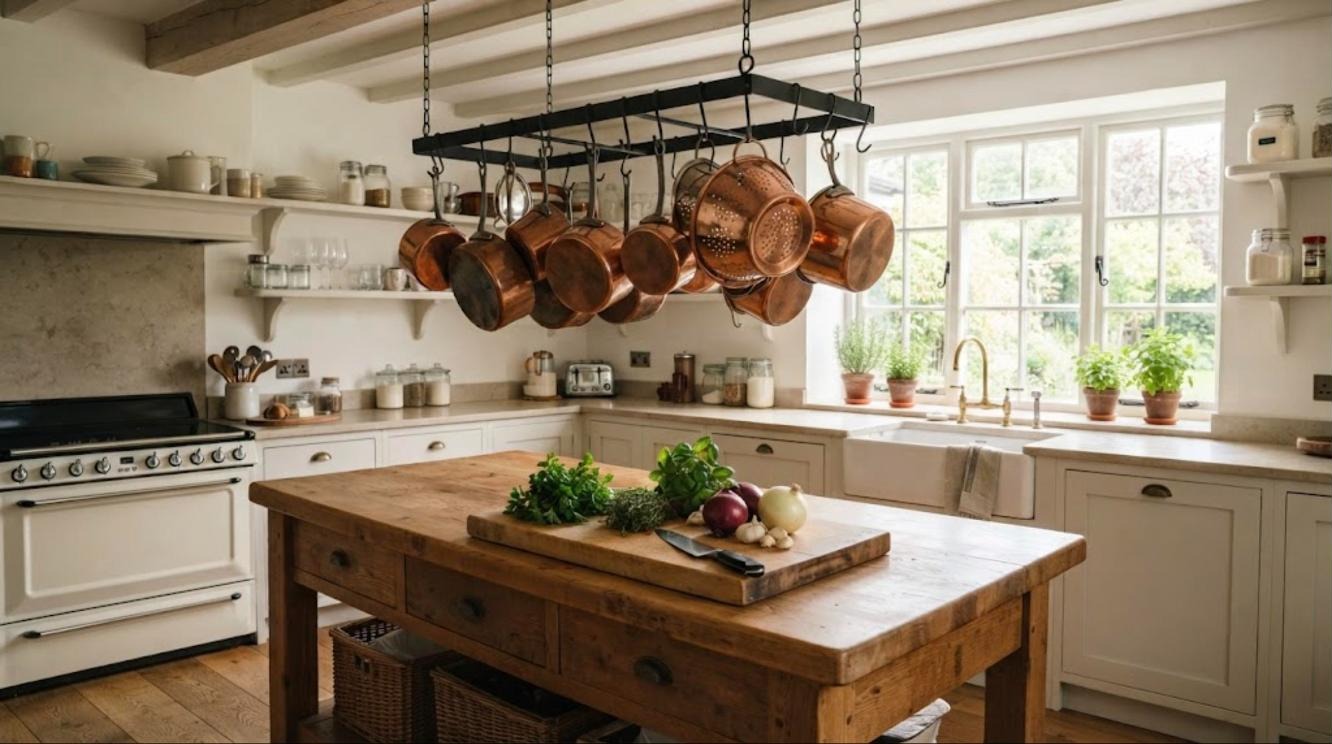
Julia’s copper pots were famous in their own right. After years on display in Napa, California, they were reunited with her kitchen at the Smithsonian in 2009. You can get the same glow with a simple iron pot rack hung over an island or a table. Hang the pots you use most at arm’s height and the pretty ones higher up. A rack also clears out a whole lower cabinet. Do you have a set of pans that deserves to be seen?
You will need: Ceiling pot rack or a length of iron pipe with chains, ceiling hooks rated for the weight, S hooks, a stud finder.
How to make it: 1. Find the ceiling joists with a stud finder. 2. An adult screws the hooks into the joists and hangs the rack level. 3. Add S hooks and hang the pots by weight, heaviest in the middle.
Raise the Counter Height to Fit the Cook
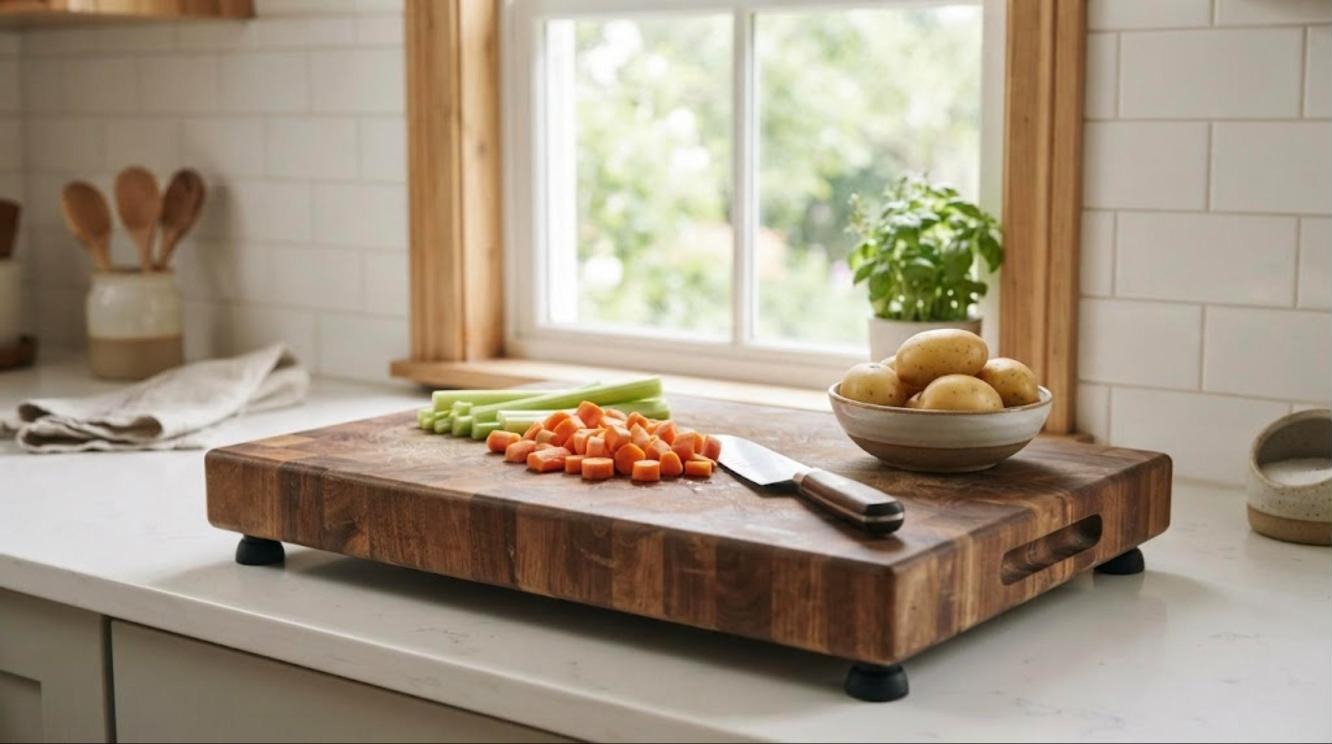
Julia’s counters were built higher than standard to suit her height, and that detail is what made the Julia Child kitchen work so well for her. You can do a renter friendly version for a tall cook. A thick butcher block board on rubber feet lifts your chopping surface a few centimeters, and it moves wherever you need it. For a short cook, a sturdy step stool does the opposite job. Try chopping on a raised board for one week and notice how your shoulders feel. Could your counters use a lift?
You will need: A thick butcher block cutting board, four rubber furniture feet, a drill, food safe board oil.
How to make it: 1. Mark the four corners on the underside of the board. 2. An adult drills small pilot holes and screws on the rubber feet. 3. Oil the board and set it on the counter where you prep the most.
The Real Julia Child Kitchen Pan Wall at the Smithsonian
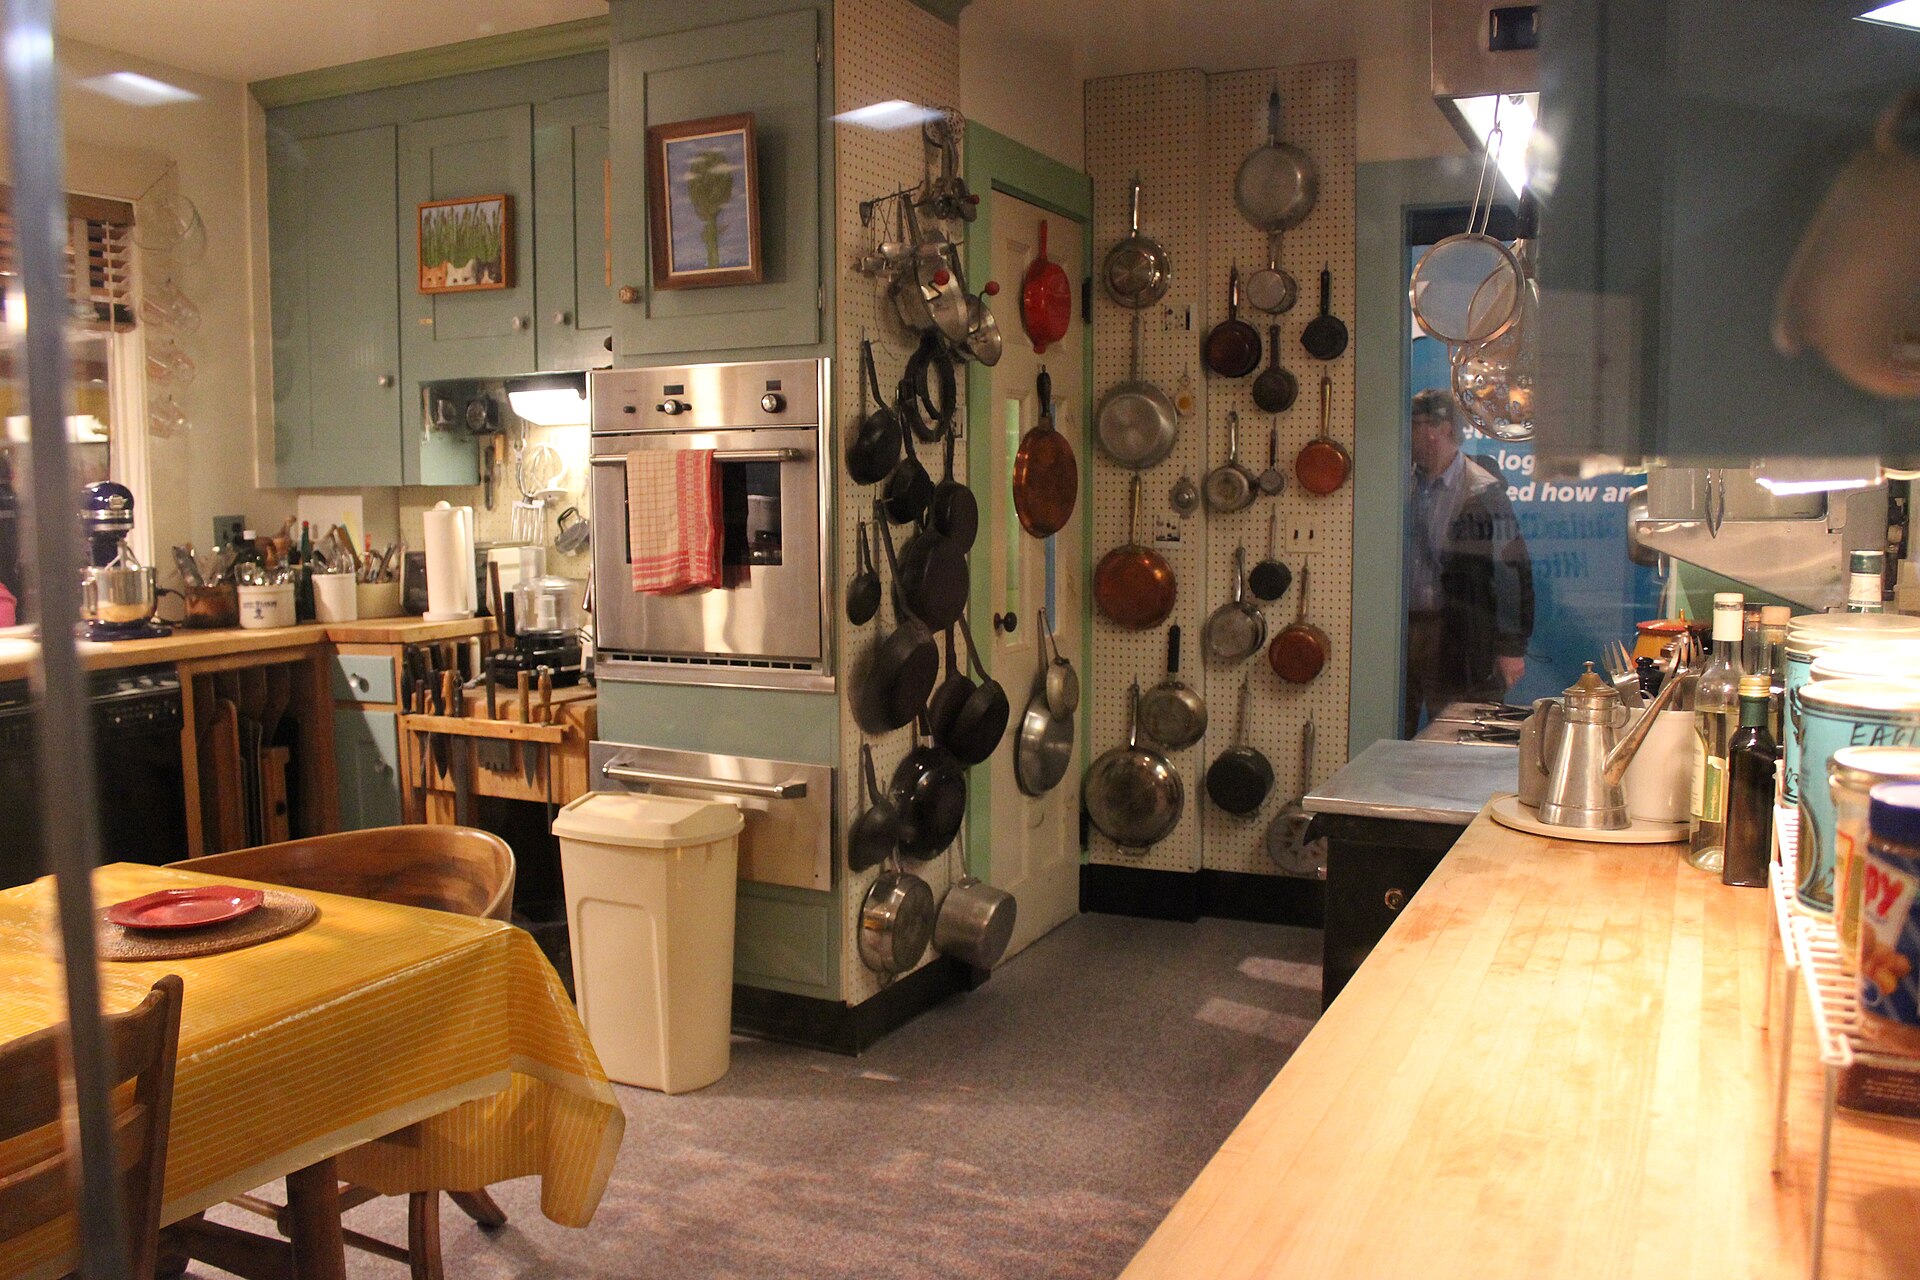
If you ever visit Washington, D.C., go see it in person. In the exhibit you can still see a pegboard wall packed with pots, pans, lids and strainers, all hung within a step of the stove. It is a great reminder that a small kitchen can hold a lot when you use the walls. Notice how the narrow wall beside the oven does most of the work. Take a quick photo of your own narrowest wall today. Could it hold your pans too?
You will need: Pegboard or a hanging rail for a narrow wall, hooks, a level, screws and wall anchors.
How to make it: 1. Measure the narrow wall beside your oven or fridge. 2. Mount a pegboard panel or a rail at a height you can reach. 3. Hang the pans you use most, largest at the bottom.
Open Shelves for Everyday Dishes and Bowls
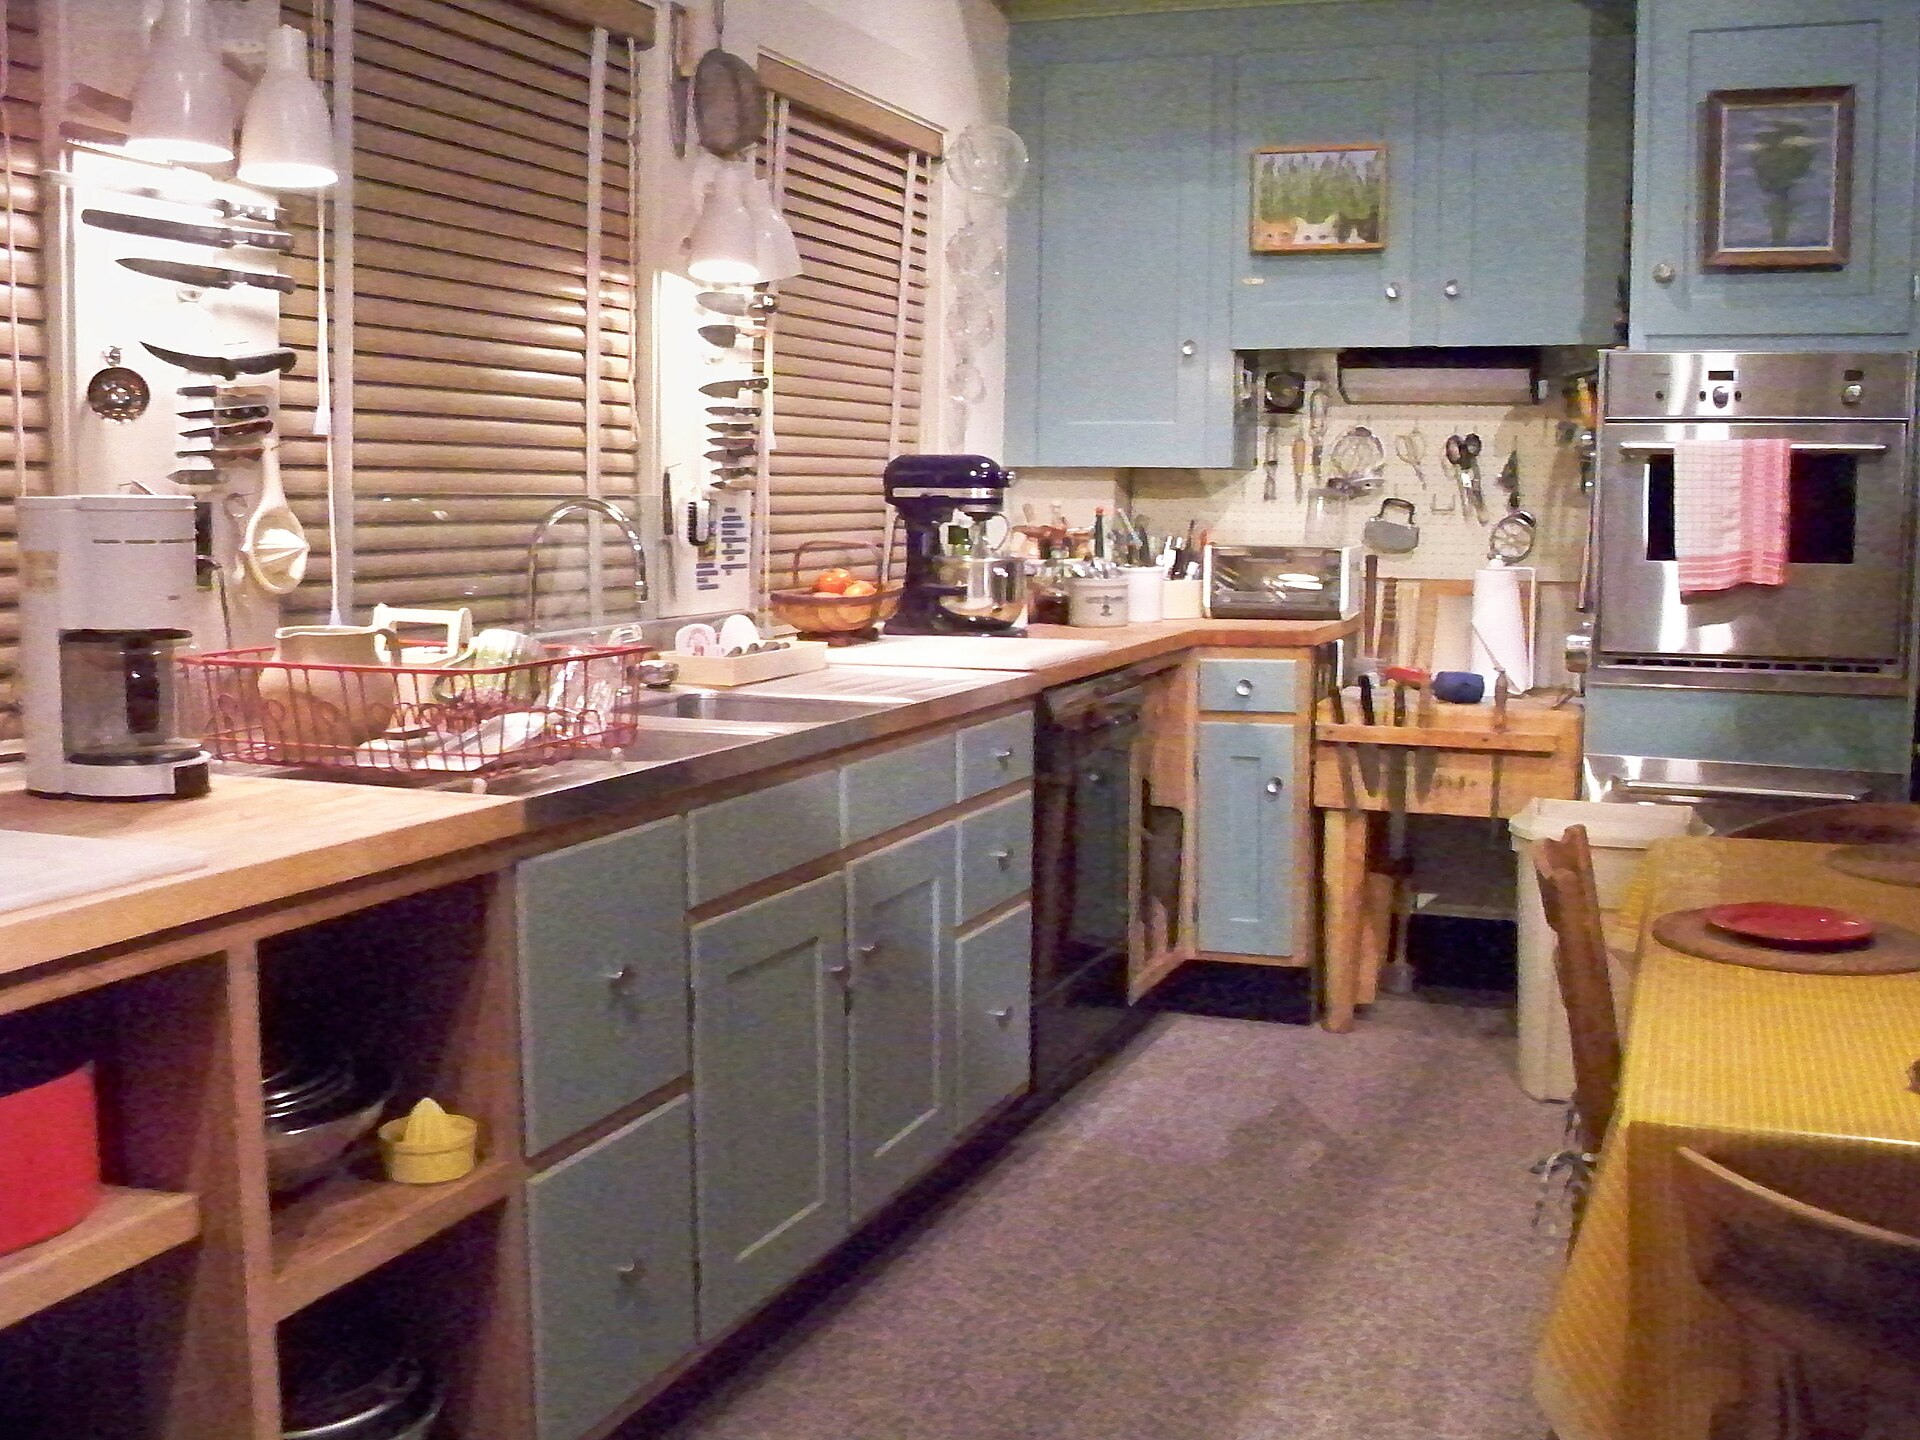
Open storage is the heart of the Julia Child kitchen style. In the Smithsonian display you can see cubbies and open shelves under the counters, so bowls and baskets come out without opening a single door. At home, try taking the doors off one lower cabinet, or add a simple open shelf. Keep only what you use every day there so it stays tidy. It instantly makes a kitchen feel friendlier and faster. Which cabinet would you open up first?
You will need: A screwdriver, wood filler, paint, baskets or bowls for the shelf, optional shelf liner.
How to make it: 1. Unscrew the cabinet door and hinges. 2. Fill the hinge holes with wood filler and paint over them. 3. Line the shelf and fill it with everyday bowls and baskets.
A Magnetic Knife Bar, Julia Child Kitchen Style
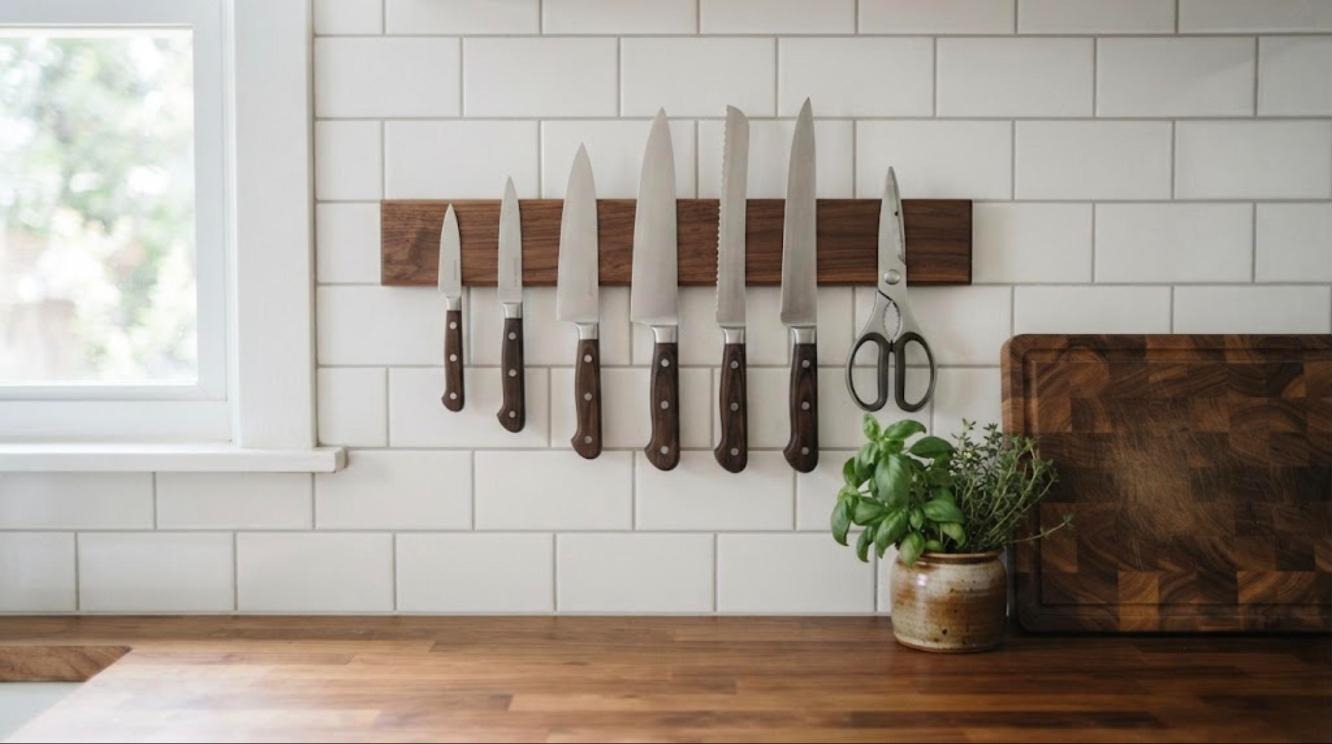
A knife block eats counter space, and drawers dull blades. A magnetic knife bar keeps every knife in sight and off the counter, just like a pro kitchen. Mount it above your main chopping spot and keep it out of reach of small children. A walnut bar looks warm and elegant and is easy to make from a board and a few strong magnets. Kitchen shears stick to it too. Is your knife block taking up more room than it should?
You will need: A hardwood board about 40 cm long, strong neodymium bar magnets, a router or chisel (adult use), wood glue, screws, a level.
How to make it: 1. An adult routs a shallow channel in the back of the board for the magnets. 2. Glue the magnets in and let them set. 3. Screw the bar to the wall, level, above your prep area.
A Utensil Crock Right by the Stove
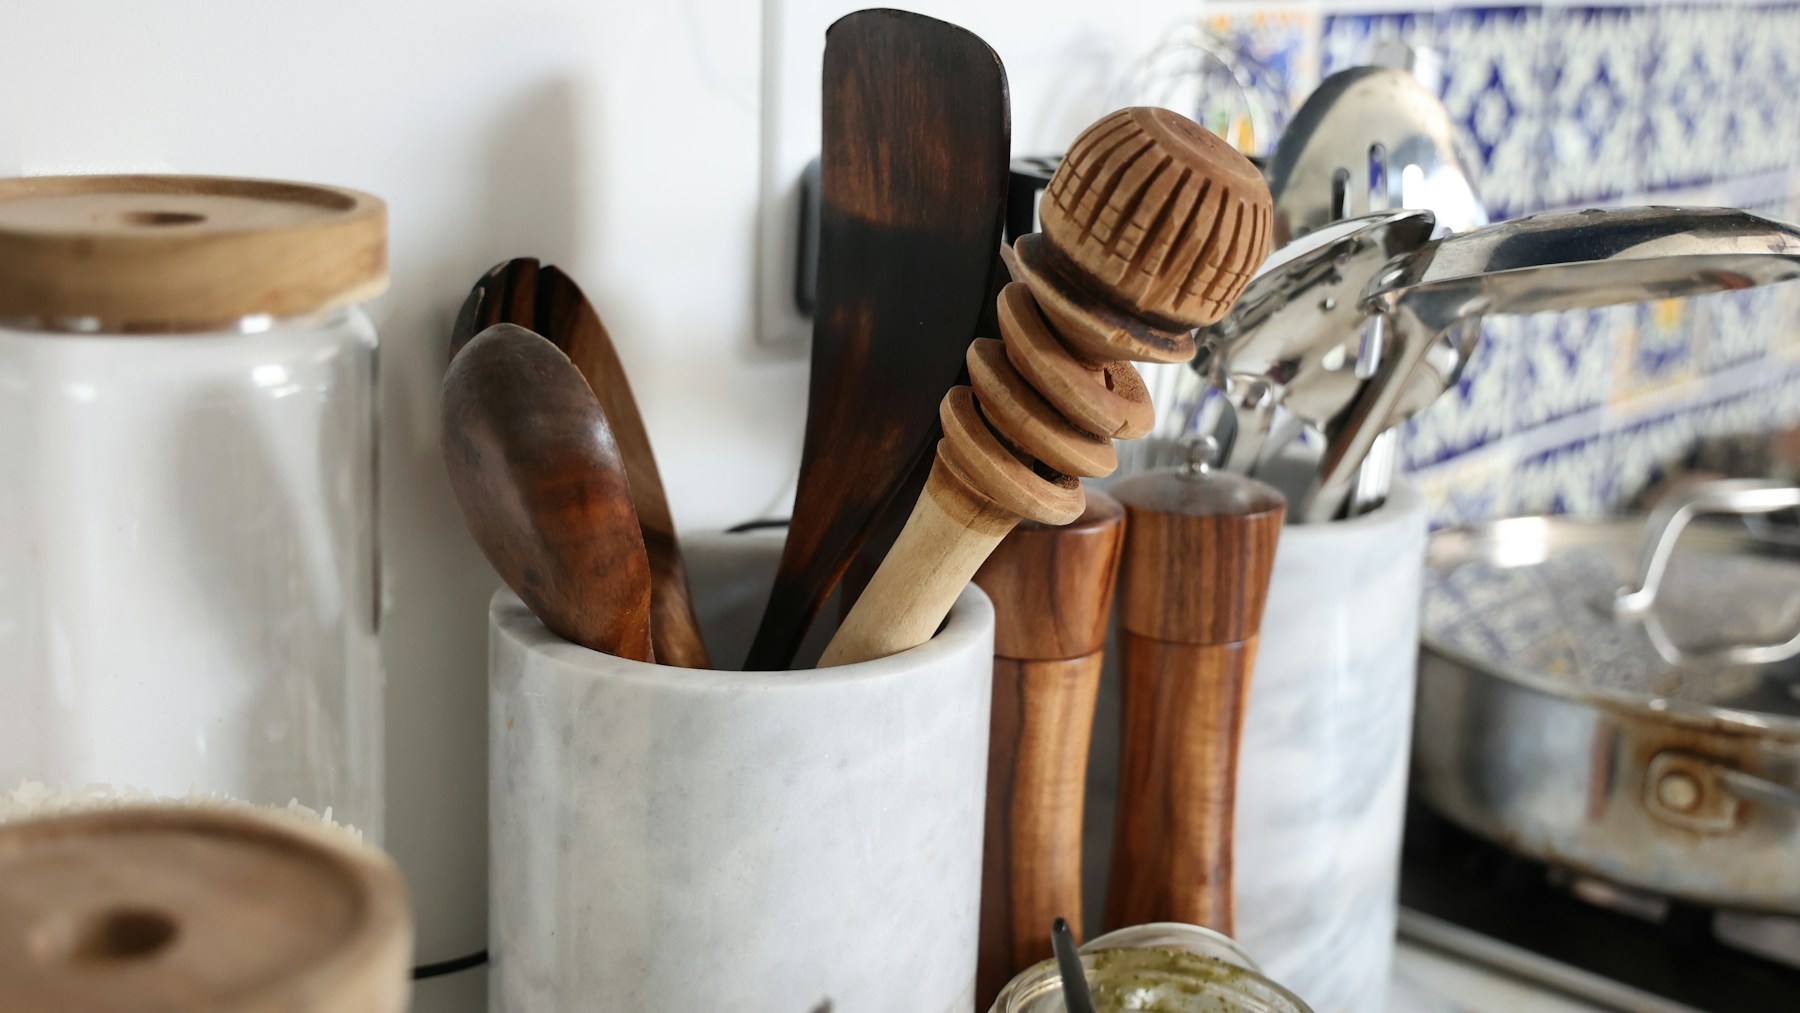
Julia kept her tools close, and so should you. A heavy crock full of wooden spoons, ladles and spatulas right next to the stove saves you a hundred trips to the drawer. Marble, stoneware or even an old flour tin works. If the crock gets crowded, split it into two, one for wood and one for metal. You can also paint a plain thrift store crock in a holiday color. Which spoon do you reach for the most?
You will need: A heavy crock or tin, sandpaper, acrylic or ceramic paint (optional), a sealer, your favorite utensils.
How to make it: 1. Clean the crock and lightly sand it if you plan to paint. 2. Paint and seal it, then let it cure. 3. Fill it with the utensils you use daily and set it by the stove.
A Julia Child Kitchen Spice Drawer
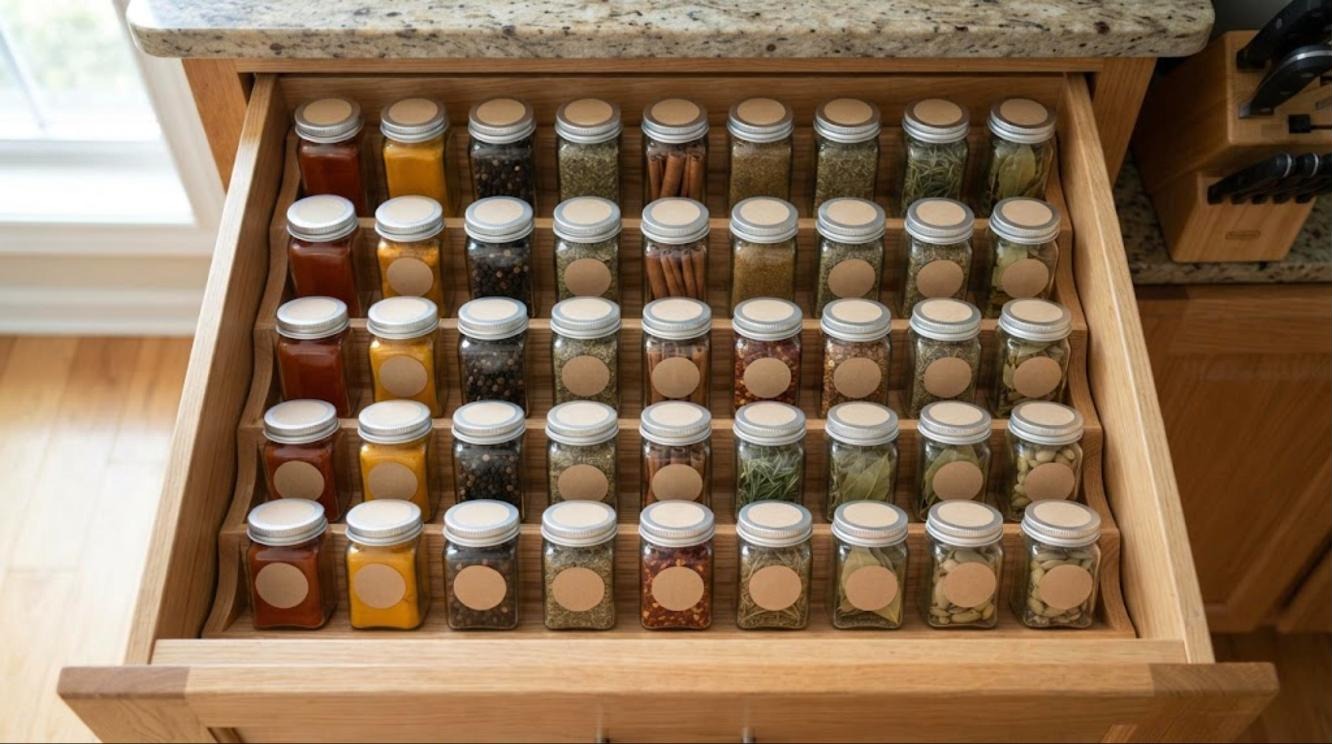
A cook who made French food every day needed her seasonings ready. A spice drawer is the modern way to get there. A tiered wooden insert holds jars at an angle so you can read every lid from above. Pour spices into matching jars and add round kraft stickers on top. This is a weekend project that makes the whole kitchen feel calmer. For more ideas like this, see our list of genius kitchen fixes. Ready to empty that messy cabinet?
You will need: A tiered drawer insert or thin wood strips, matching small glass jars, round kraft stickers, a marker, a funnel.
How to make it: 1. Measure the drawer and fit or build the tiered insert. 2. Funnel each spice into a jar and label the lid. 3. Arrange the jars in order, the ones you use most in front.
A Cookbook Ledge That Keeps Recipes Open
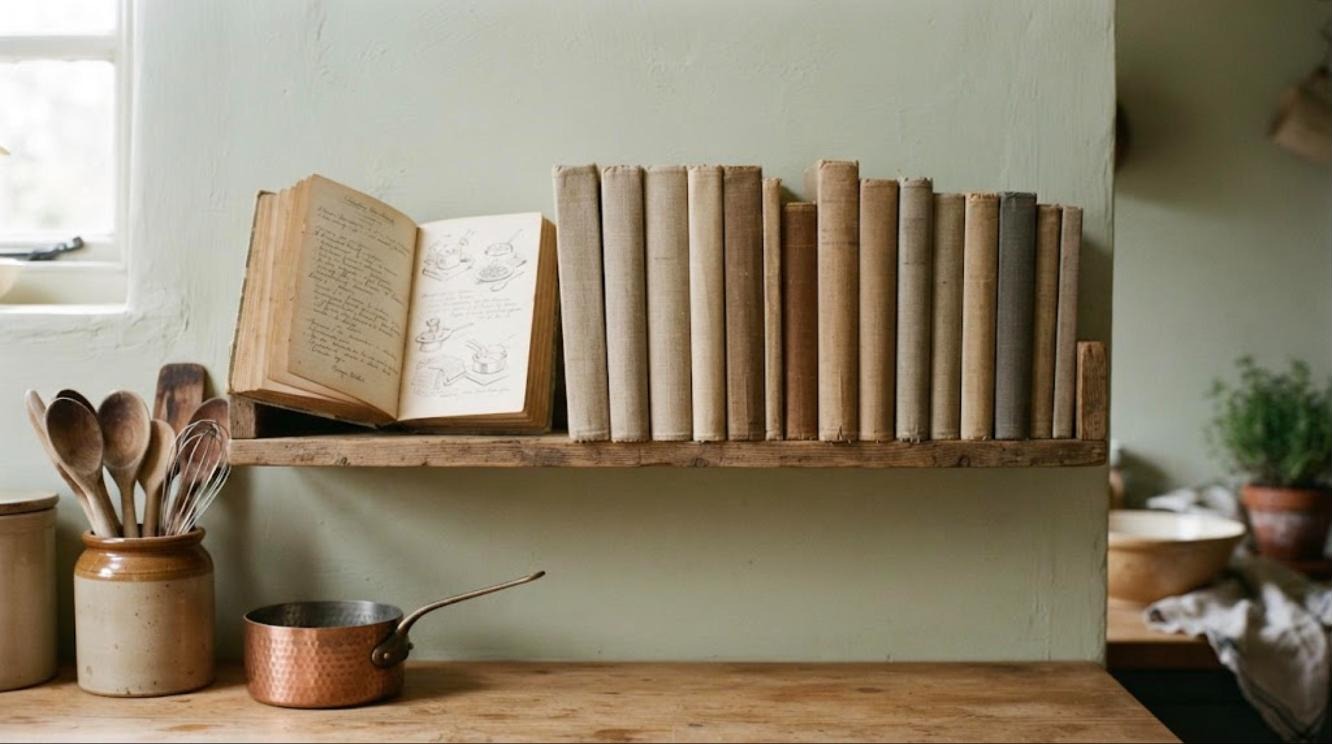
Julia wrote some of the most famous cookbooks in the world, starting with Mastering the Art of French Cooking. In a Julia Child kitchen, books belong where you cook. Give your own favorites a place of honor with a simple wooden ledge on the wall. Old cookbooks with faded cloth covers look lovely lined up, and one can stand open to tonight’s recipe. A ledge also keeps splattering sauces away from the pages. It takes one board and two brackets. Which cookbook would you put front and center?
You will need: A 1.5 cm thick board, a thin strip of wood for the lip, two brackets or hidden shelf hardware, wood glue, stain or paint.
How to make it: 1. Glue the thin lip along the front edge of the board. 2. Stain or paint it and let it dry. 3. Mount it on the wall with the brackets, level, above the counter.
Julia Child Kitchen Trick: Baking Sheet Slots From Tension Rods
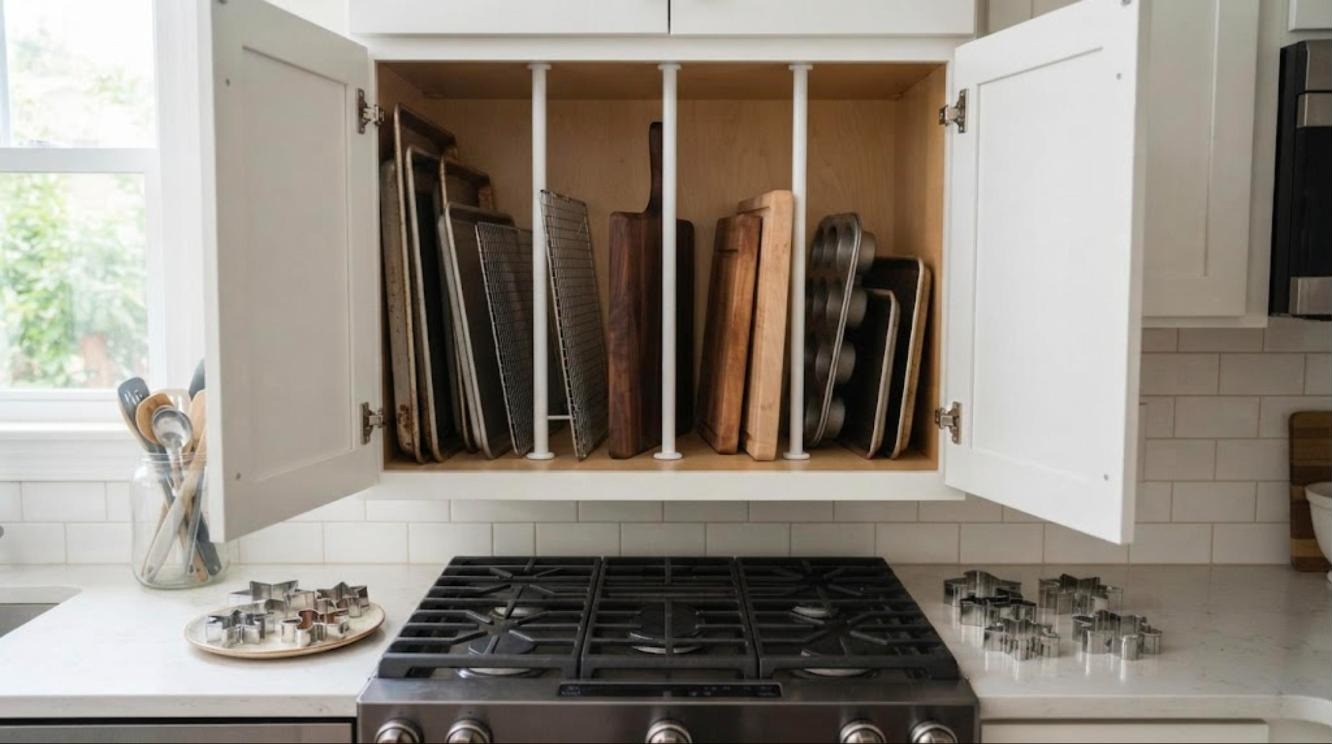
Baking sheets never stack nicely, and during cookie season they always seem to be at the bottom of the pile. Here is the fix: put three short tension rods upright inside a cabinet to make slots. Sheets, racks, cutting boards and muffin tins stand on their edges and slide right out. No tools, no holes, and you can move the rods any time. This is one of those tricks that makes holiday baking feel easier. How many sheets are hiding in your oven drawer?
You will need: Three short tension rods, a measuring tape, small rubber pads (optional) to stop slipping.
How to make it: 1. Empty the cabinet and measure its inside height. 2. Twist each tension rod until it fits snugly from shelf to ceiling of the cabinet. 3. Slide sheets and boards into the slots.
A Big Work Table in the Middle of the Julia Child Kitchen
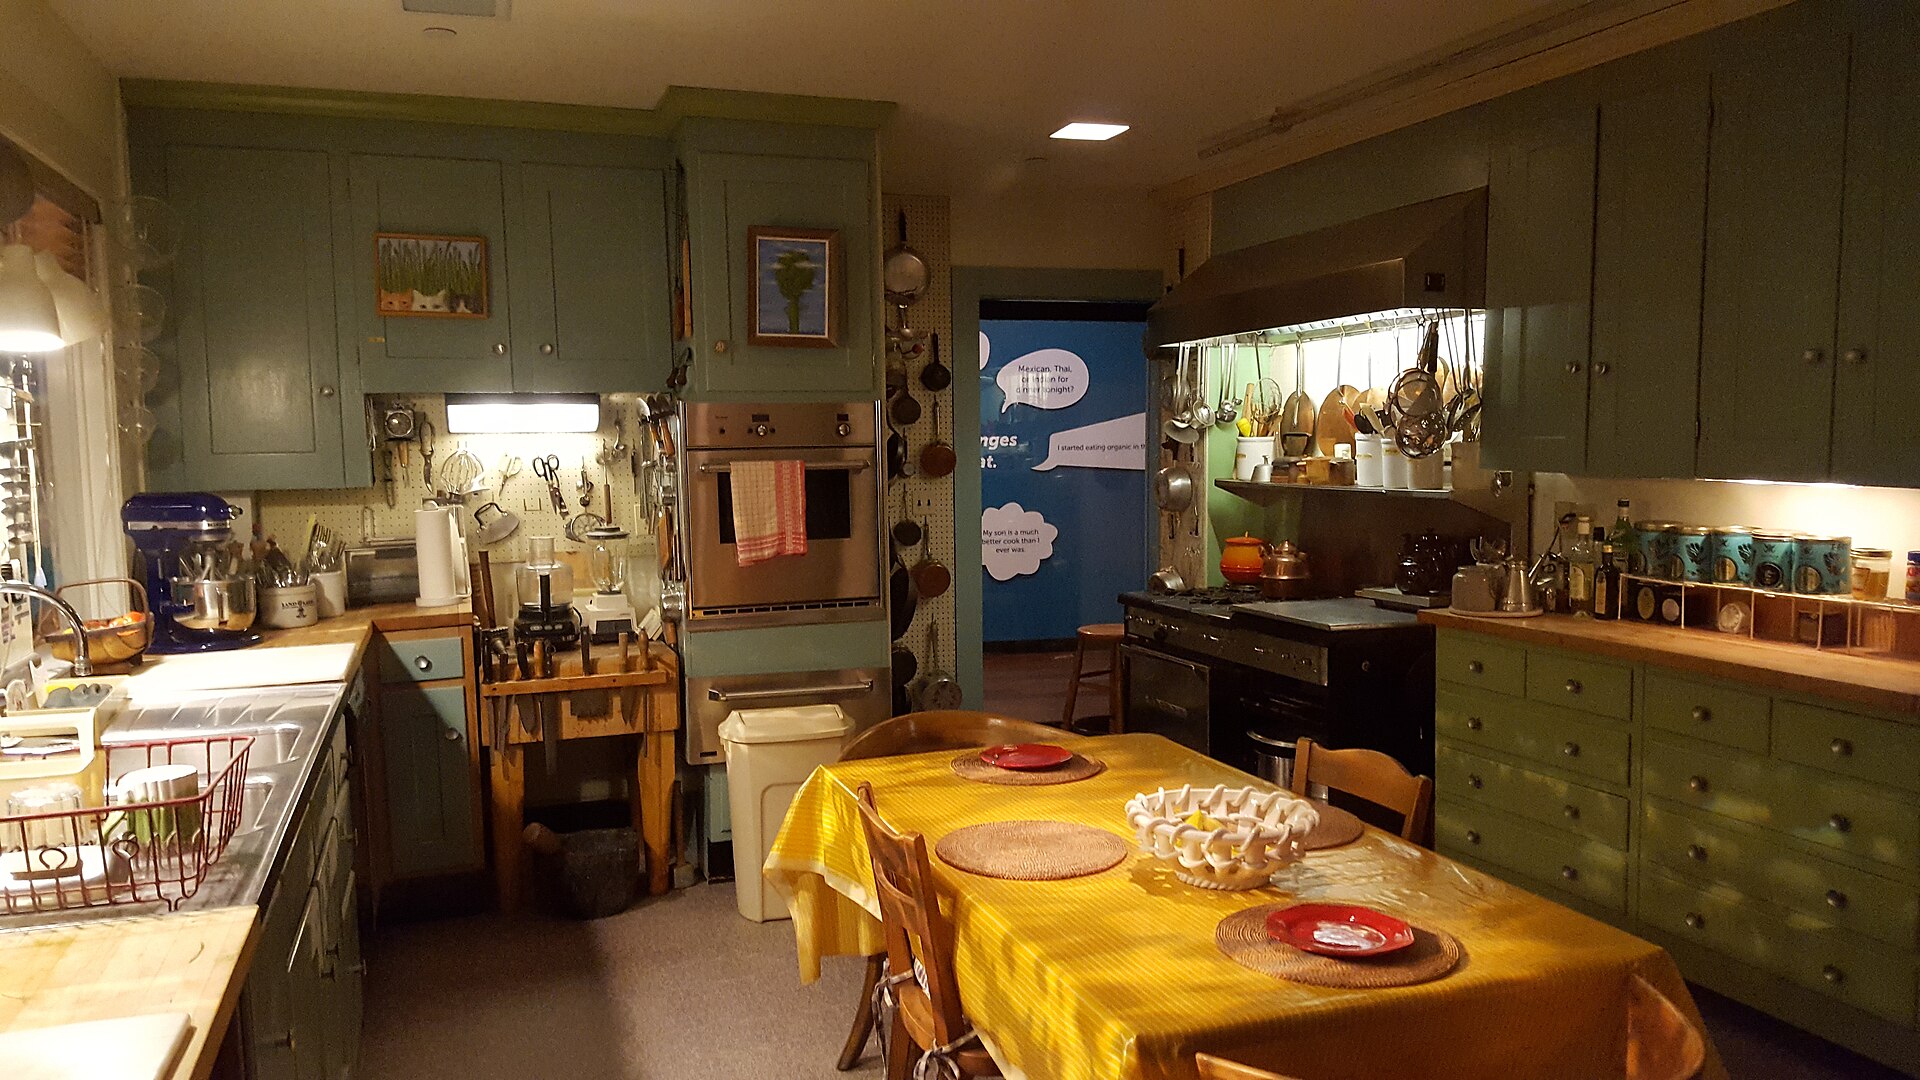
One of the coziest details in the Julia Child kitchen is the big table in the middle of the room, dressed in a cheerful yellow cloth. It was a place to prep, eat and talk, all at once. If you have room, a sturdy farmhouse table works as an island and seats guests too. Add a washable cloth in a bright color so it can take a mess. At holiday time, this is where everyone gathers anyway. Where do your guests end up during a party?
You will need: A sturdy secondhand table, sandpaper, paint or stain, a bright washable tablecloth, felt pads for the legs.
How to make it: 1. Sand and refinish the table if needed. 2. Add felt pads so it slides easily. 3. Set it in the center of the room and dress it with a bright cloth.
A Rolling Cart for Holiday Baking
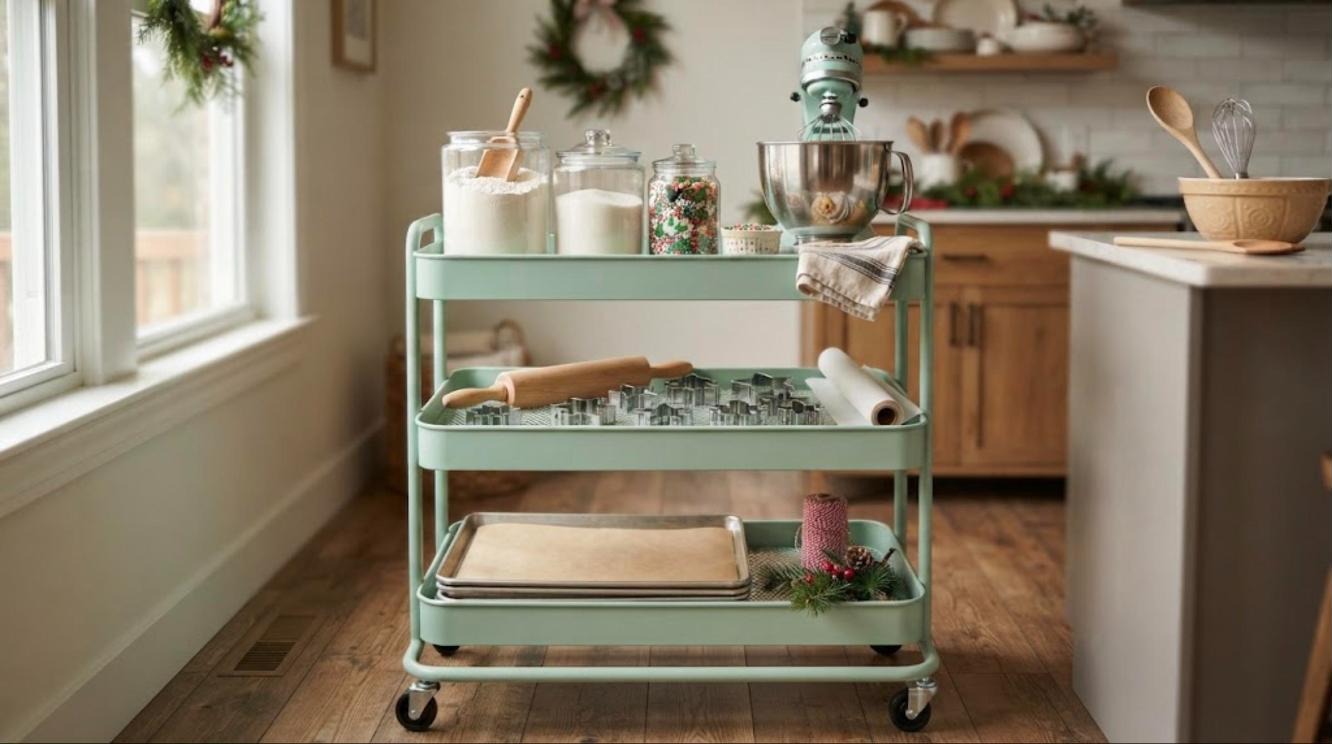
A rolling cart is like a second kitchen that goes wherever you need it. Set one up as a holiday baking station with flour, sugar, sprinkles, cookie cutters and parchment, then roll it next to the counter on baking day. When you are done, it tucks into a corner or the pantry. Kids love having their own cart for decorating cookies, too. It is one of the cheapest ways to bring a little Julia Child kitchen spirit to a small space. What would you keep on yours?
You will need: A three tier metal rolling cart, glass jars with lids, a small bin for cookie cutters, spray paint (optional, adult use, outdoors).
How to make it: 1. Spray paint the cart in a cheerful color if you like and let it cure. 2. Fill the top tier with jars, the middle with tools and the bottom with sheets. 3. Park it near your main counter.
Apron Hooks by the Kitchen Door
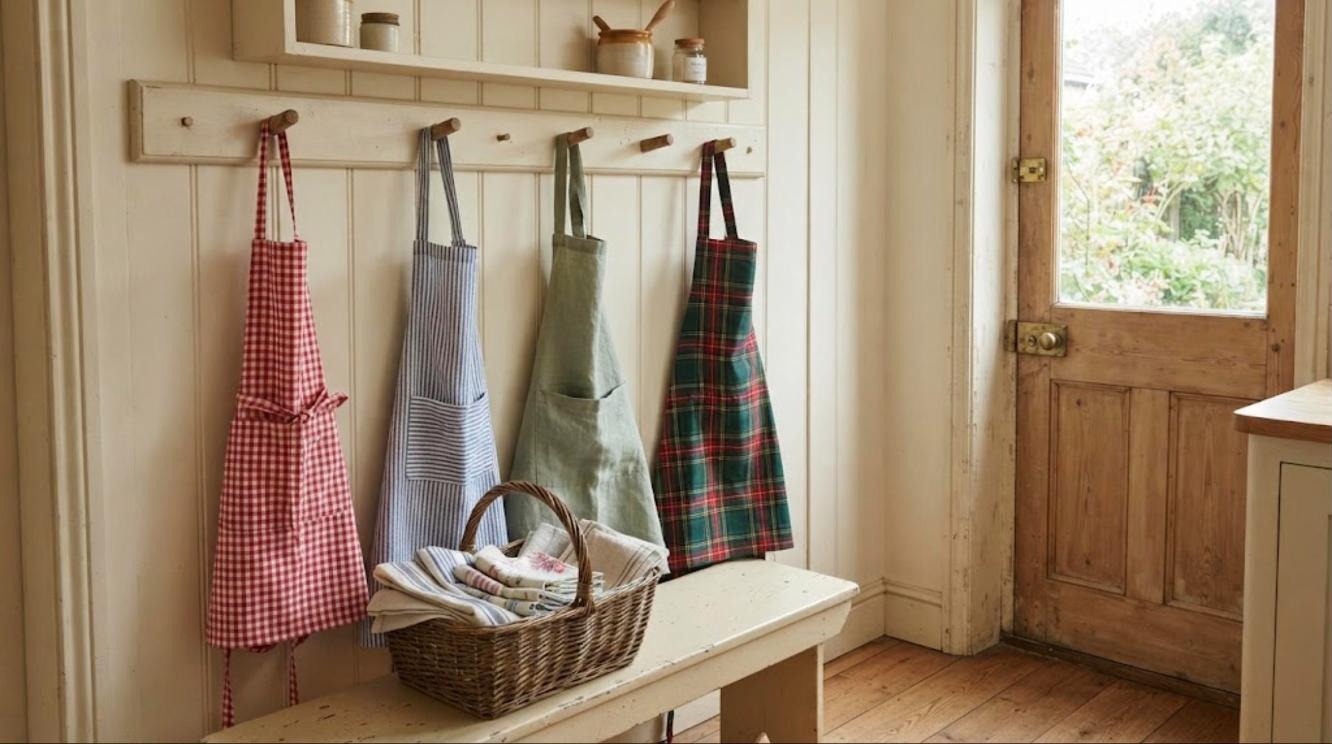
Julia always cooked with a towel tucked into her apron, ready for any spill. Give your aprons a home with a peg rail by the door so everyone can grab one on the way in. Mix fabrics for a fun look: gingham, stripes, linen and a holiday plaid. Add a basket of dish towels on a bench below and the corner looks like a country kitchen. It is the finishing touch on any Julia Child kitchen makeover, and you can make a peg rail from one board and a few wooden pegs. Whose apron goes on the first hook?
You will need: A pine board, 4 to 6 wooden Shaker pegs, a drill with a spade bit (adult use), wood glue, paint, wall anchors.
How to make it: 1. Mark evenly spaced holes along the board and drill them. 2. Glue the pegs in and paint the rail. 3. Mount the rail on the wall by the door and hang the aprons.