Martha Stewart Christmas Crafts: 14 Classic Handmade Ideas That Look Way More Expensive Than They Are
Martha Stewart Christmas decorating has a quiet magic that never goes out of style: crisp white linen, glossy greenery, a little silver and a lot of handmade charm. The best part is that her classic look is built on simple crafts you can make at your kitchen table, often for just a few dollars. Think paper stars dusted with glitter, pine cones painted silver, dried oranges on twine and a magnolia wreath that looks like it came from a florist. We gathered 14 timeless projects inspired by her style, each with a short supply list and easy steps. None of them need special skills, only a free evening, a cozy playlist and maybe a cup of cocoa. Pick a favorite and start making your home feel like a holiday magazine cover..
Martha Stewart Christmas Style Starts at the Table
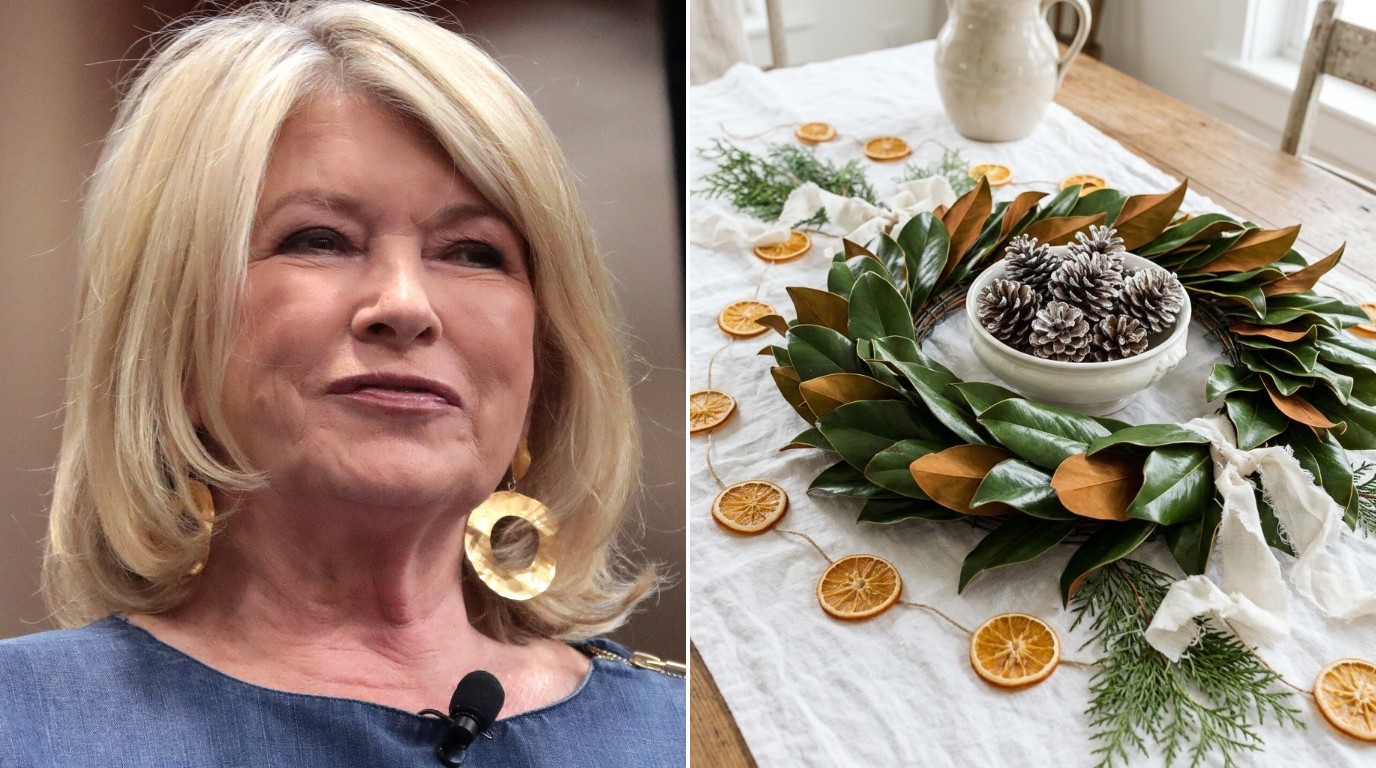
Long before she became a household name, Martha Stewart started a catering business in her basement in 1976, and her first book, Entertaining, came out on December 13, 1982, according to Wikipedia. Her holiday tables have inspired home crafters ever since. This one is easy to copy: lay a magnolia wreath flat on white linen, set a bowl of pine cones in the middle and trail a dried orange garland around it. It looks rich, smells wonderful and costs very little. Could this be your table this year..
You will need: A magnolia leaf wreath, a white ironstone bowl, pine cones, a dried orange garland, a white linen tablecloth, cedar sprigs.
How to make it: 1. Cover the table with white linen and lay the wreath flat in the center. 2. Set the bowl of pine cones inside the wreath. 3. Weave the orange garland and cedar sprigs around it.
Glittered Paper Star Garland for the Window
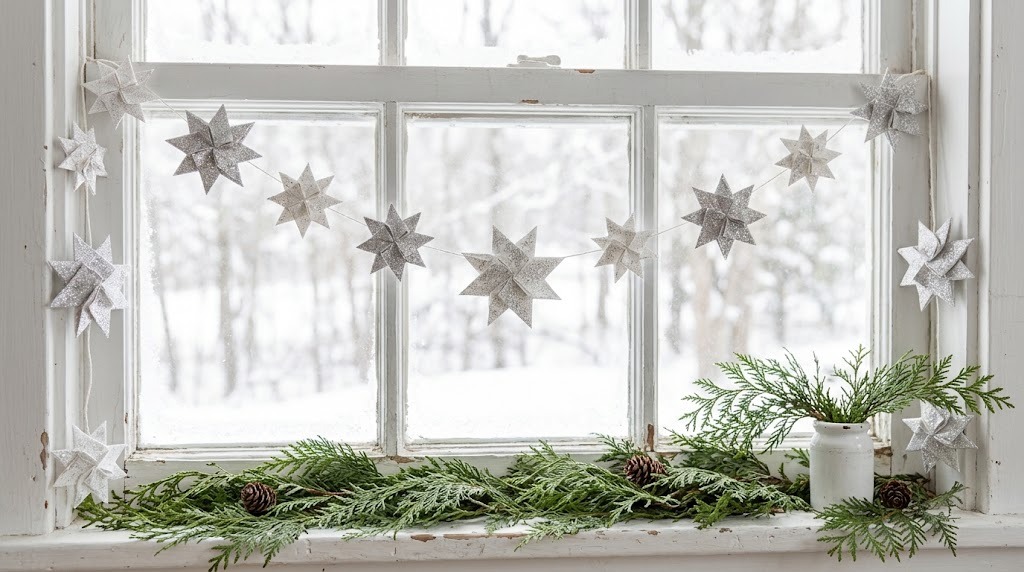
Paper stars are one of the most classic handmade decorations, and a little glitter makes them shine like frost. Fold or cut simple stars from heavy white paper, brush on glue and dust them with fine silver glitter. String them on thin thread and hang them in a window where the daylight catches every sparkle. They cost almost nothing and pack flat for next year. Kids love helping with the glitter part, so lay down newspaper first and make it a family night. How many stars will you make?
You will need: Heavy white paper or cardstock, a star template, scissors, white glue, fine silver glitter, thin thread, a needle.
How to make it: 1. Cut 15 to 20 stars from the paper. 2. Brush glue on one side, sprinkle glitter and tap off the extra. 3. Sew the stars onto thread about six inches apart and hang.
A Martha Stewart Christmas Swag of Dried Citrus and Bay Leaves
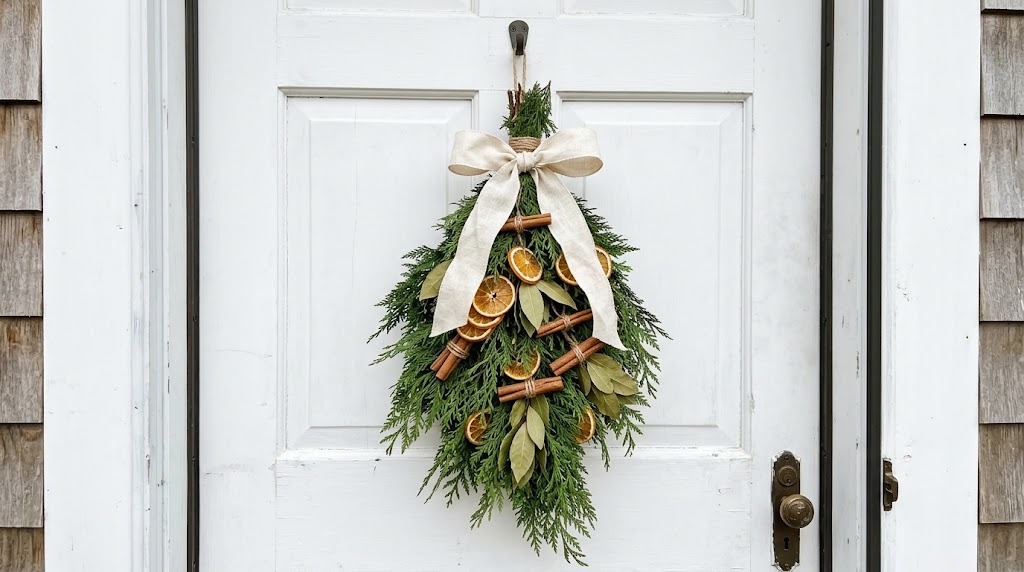
A door swag is a lovely change from a round wreath, and this one smells as good as it looks. Bundle fresh cedar, tie in dried orange slices, bay leaves and a few cinnamon sticks, then finish with a soft linen ribbon. It has that natural, collected look that feels straight out of a farmhouse kitchen. Dry the orange slices in a low oven a day ahead so they are crisp and glowing. Hang it on the front door, a pantry door or even a kitchen cabinet. Can you smell it already?
You will need: Fresh cedar or pine stems, dried orange slices, bay leaves, cinnamon sticks, floral wire, jute twine, linen ribbon.
How to make it: 1. Layer the cedar stems into a long bundle and wire the top tightly. 2. Wire the oranges, bay leaves and cinnamon in a cluster near the top. 3. Cover the wire with twine and a linen bow and add a hanging loop.
Frost Tipped Pine Cones as Bowl Filler
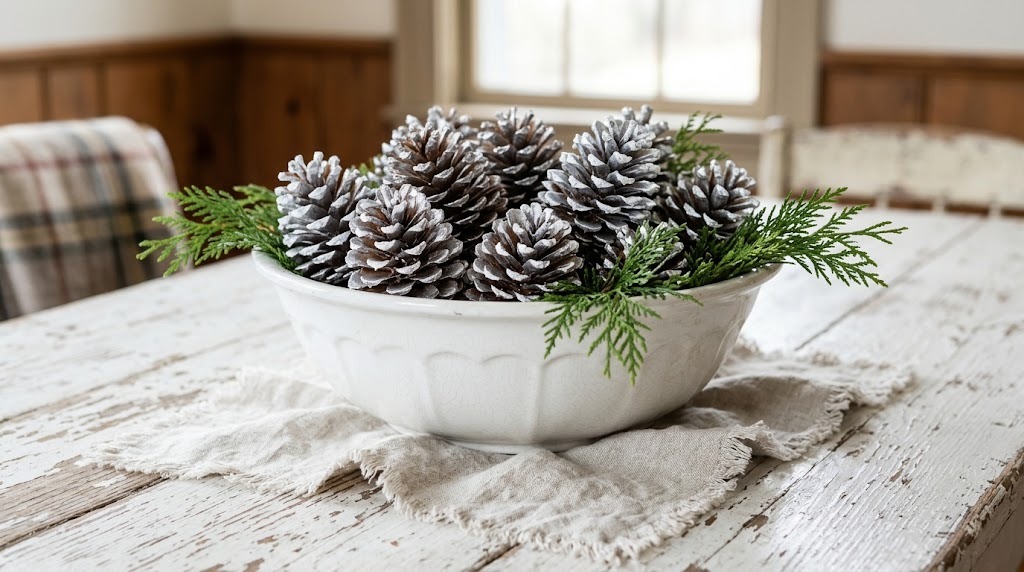
Pine cones are free on almost any walk, and a little white paint on the tips makes them look like expensive frosted decor. For extra shine, spray them silver first, then dry brush the tips white and pile them into your prettiest bowl. Add a few sprigs of cedar for color and you have a centerpiece that works from December all the way through winter. Bake the cones on low heat first to dry them and open the scales. For more ideas with this free find, see our pine cone Christmas crafts. Ready for a nature walk?
You will need: Dry pine cones, white craft paint, a dry brush, silver spray paint (optional), a wide bowl, cedar sprigs.
How to make it: 1. Spray the cones silver outdoors if you want shine and let them dry. 2. Dry brush the tips with a little white paint. 3. Pile them into the bowl and tuck in cedar sprigs.
Mercury Glass Look Vase From a Plain Jar
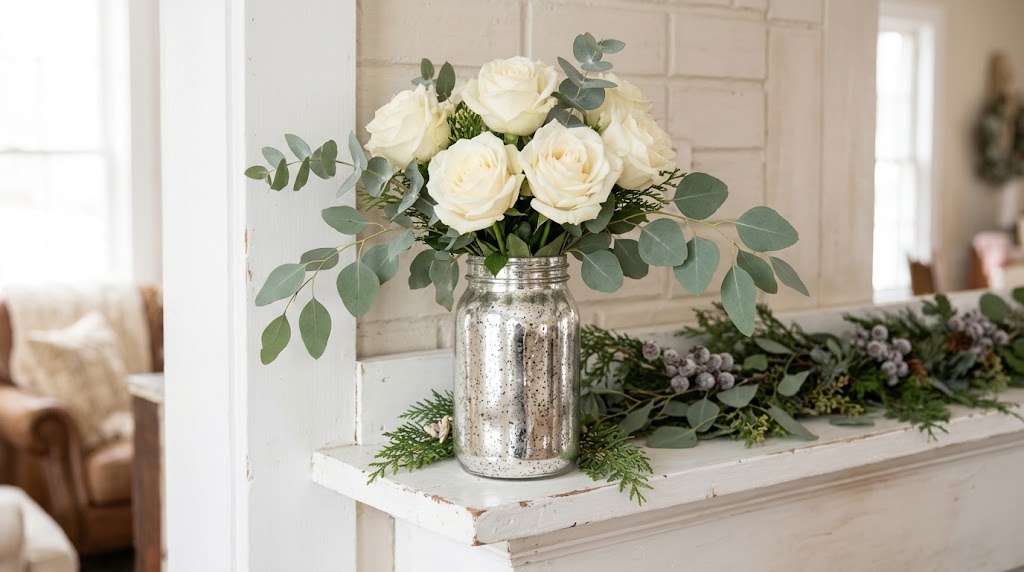
Real antique mercury glass can be pricey, but you can fake the look with a cheap glass jar and mirror effect spray paint. Mist the inside with water, spray lightly and let the droplets create that speckled, aged finish. The result looks like a treasure from a flea market. Fill it with white roses and eucalyptus, or simply a few branches of greenery. Make a few in different sizes to line a mantel. Follow the paint label and spray in a well aired space. Which jar will you use?
You will need: A clean glass jar or vase, mirror effect spray paint, a spray bottle of water, a paper towel, flowers or greenery.
How to make it: 1. Mist the inside of the jar lightly with water. 2. Spray a thin coat of mirror paint inside and dab gently with a paper towel. 3. Repeat once for depth, let it cure and add flowers.
Ribbon Wrapped Candy Cane Ornaments

These little candy canes look sweet and classic, and they will never break or get sticky. Bend a pipe cleaner into a hook shape and wrap it tightly with red and white striped ribbon. A dot of glue at each end keeps everything neat. Make a big batch in an evening and fill the tree, tie them onto gifts or hang them from a garland. They are a perfect craft for little helpers because there is nothing sharp or hot involved. How many can your family make in one night?
You will need: Pipe cleaners, narrow red and white striped ribbon, white glue, scissors.
How to make it: 1. Bend each pipe cleaner into a candy cane shape. 2. Glue the ribbon end at the bottom and wrap it tightly all the way up. 3. Glue the end at the top and let it dry.
A Martha Stewart Christmas Centerpiece of Cranberries and Greenery
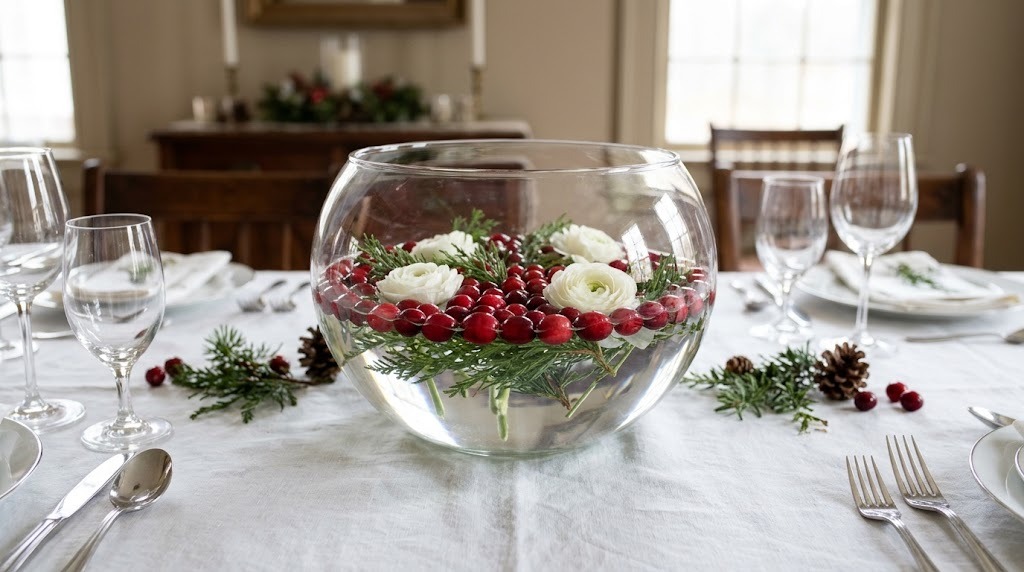
Fresh cranberries are one of the cheapest ways to bring bright color to a holiday table. Pour them into a wide glass bowl of water, tuck in sprigs of evergreen and float a few white blooms on top. The red and green glow against white linen and silver is pure classic Christmas. It takes about ten minutes to put together and stays fresh for days if you top up the water. After the holidays, the berries can go straight into the compost. Who is coming to dinner this year?
You will need: A wide clear glass bowl, two bags of fresh cranberries, evergreen sprigs, a few white flowers, water.
How to make it: 1. Fill the bowl two thirds with water. 2. Pour in the cranberries so they float in a thick layer. 3. Tuck evergreen around the edge and float the flowers in the center.
Hand Stamped Kraft Paper Gift Wrap
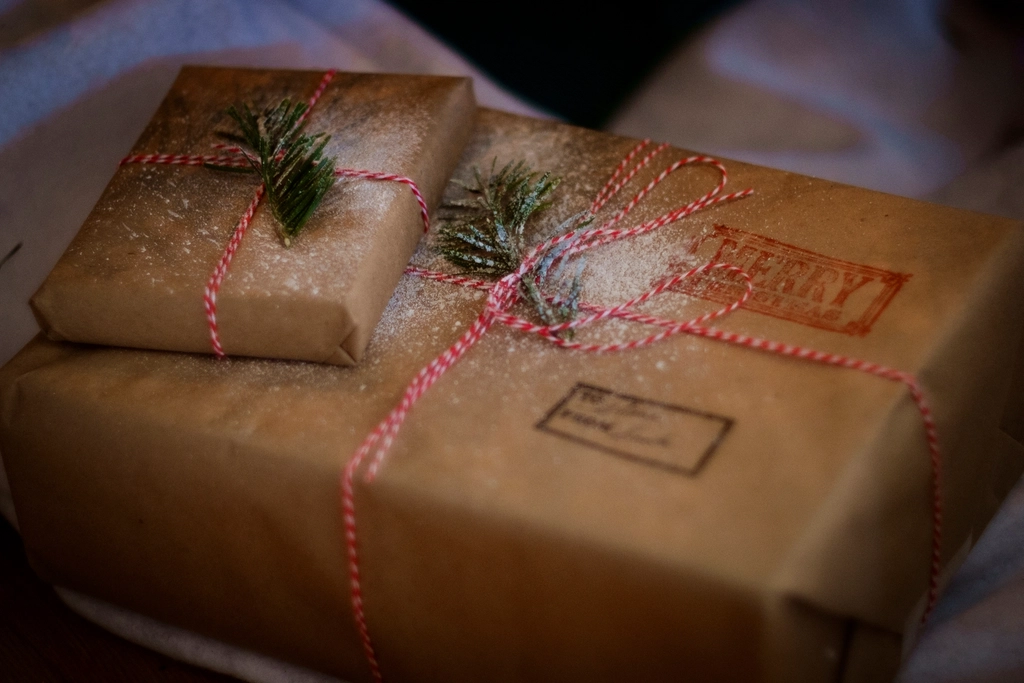
A roll of plain brown kraft paper is cheap, and with a homemade stamp it becomes gift wrap that looks like it came from a high end boutique. Carve a simple star or tree into a potato or an eraser, dip it in white or red paint and stamp a pattern across the paper. Finish each gift with twine and a sprig of greenery. Everything under the tree will match, and guests always notice. If you love wrapping, try our gift wrapping tricks too. What shape will your stamp be?
You will need: Brown kraft paper, a potato or rubber eraser, a small knife (adult help), white and red craft paint, twine, greenery sprigs.
How to make it: 1. An adult carves a simple shape into the cut potato or eraser. 2. Dip it lightly in paint and stamp a pattern across the paper, then let it dry. 3. Wrap your gifts and tie them with twine and greenery.
Velvet Ribbon Bow Tree Topper
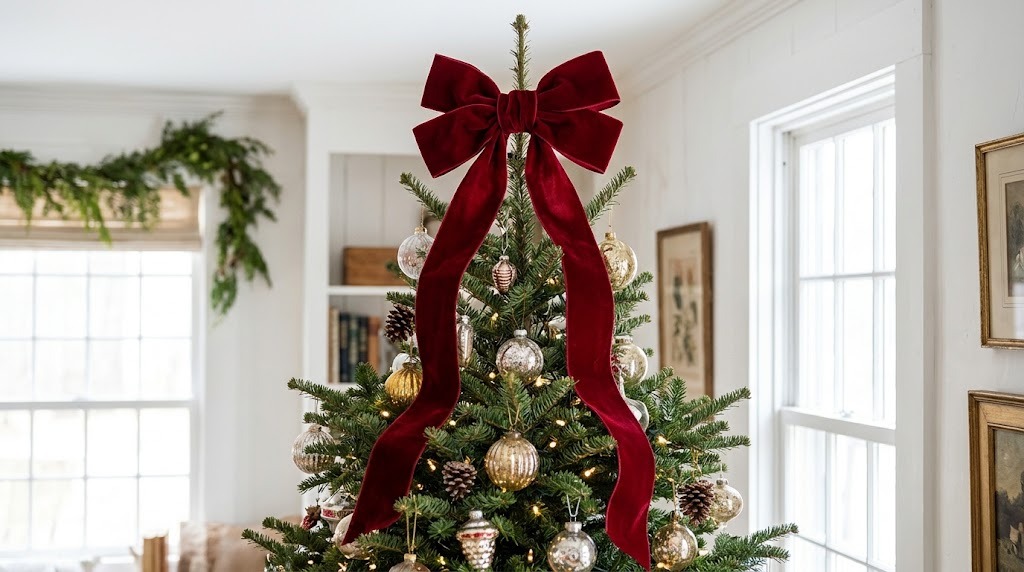
A giant velvet bow is one of the most elegant ways to top a tree, and you can tie it yourself with a single roll of wide ribbon. Make the loops big and let the tails trail down through the branches so the whole tree feels pulled together. Deep red velvet looks rich against green and catches the glow of the lights. It is also much lighter than a heavy star, so it will not tip the top branch. Tuck extra ribbon pieces lower on the tree to echo the bow. Ready to tie one?
You will need: A roll of wide deep red velvet ribbon, floral wire, scissors.
How to make it: 1. Make four big loops, pinch them in the middle and wire them tight. 2. Wrap a short piece of ribbon around the center to hide the wire. 3. Wire the bow to the top branch and drape the long tails down the tree.
Mini Evergreen Trees in Vintage Tins
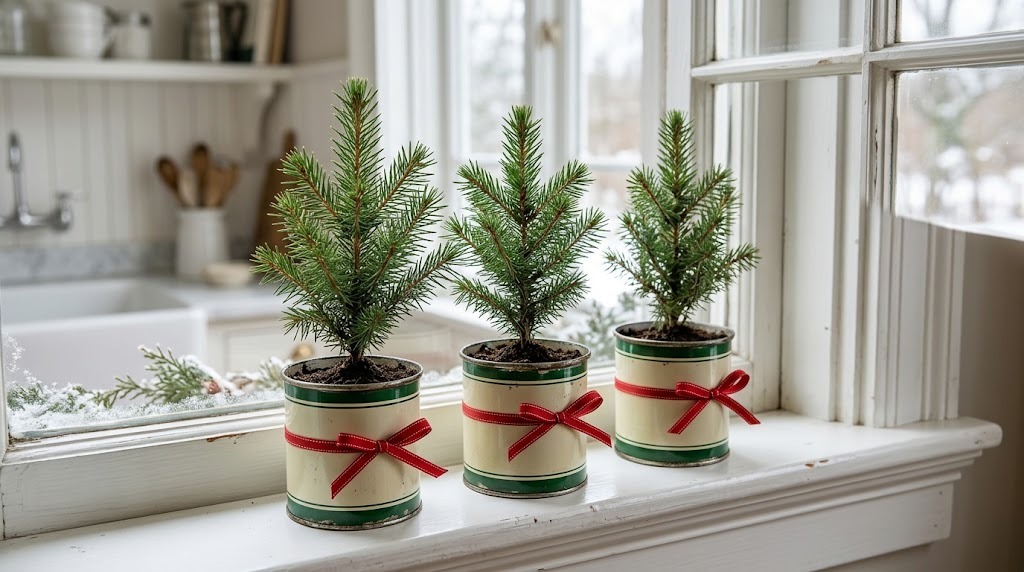
Martha Stewart restored an old farmhouse called Turkey Hill, which later became the model for her TV studio, and old fashioned touches like this fill that kind of home. Little live evergreens planted in vintage tins look charming in a row on a windowsill. Look for tins at thrift stores, add a few pebbles for drainage and tie a red ribbon around each one. After the season, the small trees can be planted outdoors. They also make lovely hostess gifts. Where would your row of trees go?
You will need: Small live evergreen seedlings or tabletop trees, vintage tins, pebbles, potting soil, red ribbon.
How to make it: 1. Add a layer of pebbles to each tin. 2. Plant a small tree in potting soil and water lightly. 3. Tie a ribbon around each tin and line them up in the light.
Martha Stewart Christmas Stockings in Embroidered Felt
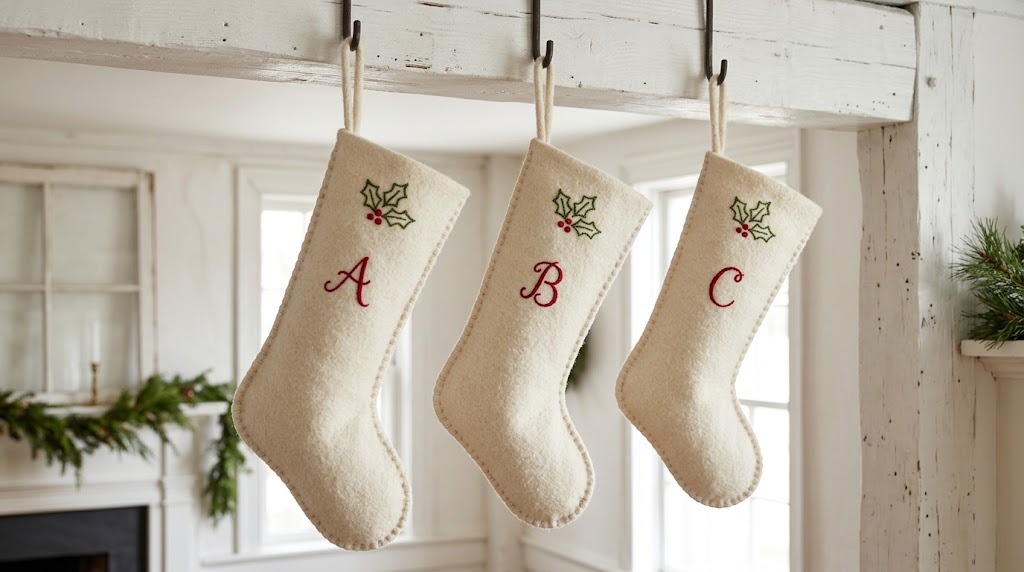
Store bought stockings can be surprisingly expensive, but cream wool felt and a little embroidery make heirloom pieces you will keep for decades. Cut two stocking shapes, stitch a simple holly sprig and an initial on the front, then sew the edges together. Even beginners can manage a running stitch and a few French knots for berries. Hang them from a beam, a mantel or the stair rail. Each family member can pick their own thread color. Whose initial goes first?
You will need: Cream wool felt, a stocking template, red and green embroidery floss, a needle, pins, scissors, ribbon for loops.
How to make it: 1. Cut two stocking pieces from the felt. 2. Embroider the holly and initial on the front piece. 3. Pin the pieces together, sew around the edge and stitch on a ribbon loop.
Gingerbread Look Clay Ornaments
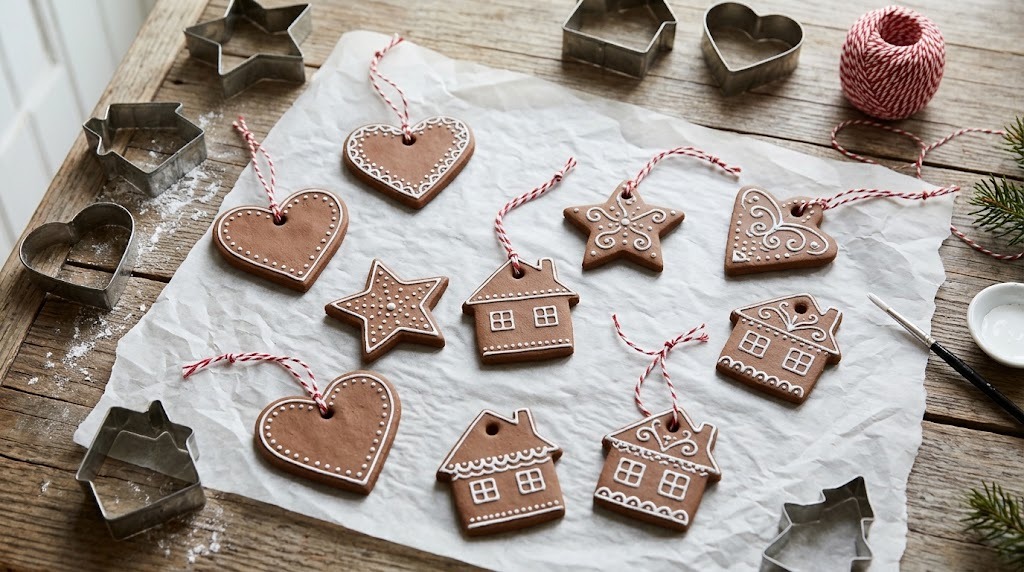
These ornaments look exactly like fresh gingerbread cookies, but they are made from brown air dry clay, so they last for years. Roll the clay out, cut shapes with cookie cutters and poke a hole at the top before it dries. Once they are hard, add icing details with white paint. They are adorable on the tree, on packages or strung into a garland. Remind little ones that these are for looking, not eating. Which cookie cutter will you use first?
You will need: Brown air dry clay, a rolling pin, cookie cutters, a straw for holes, white paint pen, baker’s twine.
How to make it: 1. Roll the clay about a quarter inch thick and cut your shapes. 2. Poke a hole at the top and let them dry for two days. 3. Draw icing lines with the paint pen and add twine loops.
Big Paper Snowflakes on the Windows
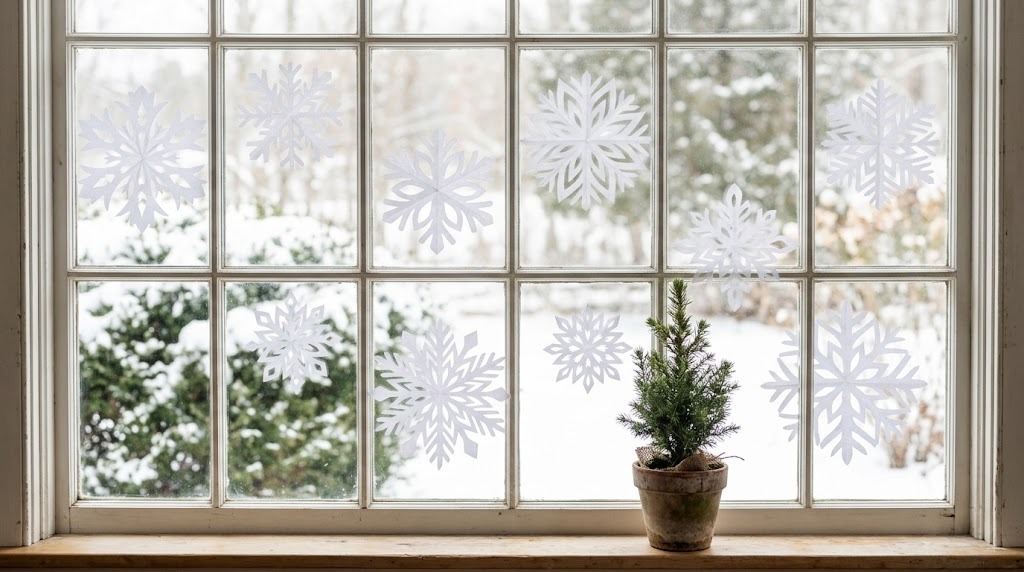
Paper snowflakes are a timeless winter craft, and big ones on the windows make the whole house look festive from outside. Fold a square of white paper into a triangle, snip shapes along the edges and unfold it to reveal the pattern. Every one turns out different, just like real snow. Stick them up with a tiny dab of washable glue stick or removable tape. This is a perfect cozy afternoon project with kids or grandkids. How many windows can you fill?
You will need: White copy or tissue paper, scissors, a pencil, removable tape or washable glue stick.
How to make it: 1. Fold a square of paper in half three times into a narrow triangle. 2. Cut small shapes along the edges, then unfold carefully. 3. Press flat under a book and stick them to the glass.
A Magnolia Leaf Wreath Fit for a Martha Stewart Christmas
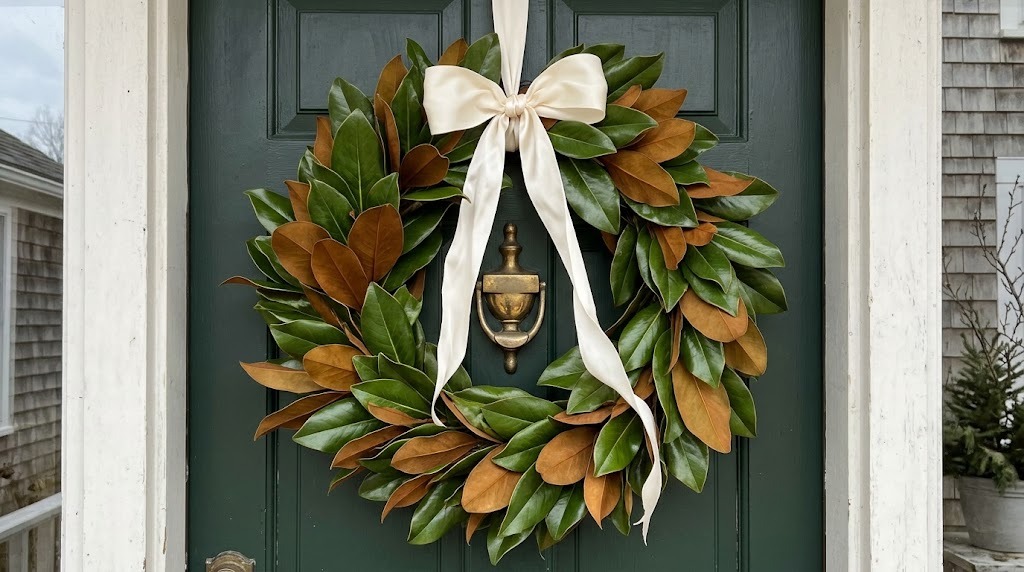
Magnolia wreaths are the signature of a classic Southern and New England holiday, and they sell for a small fortune in shops. You can make one with a wire wreath frame and a bundle of magnolia branches. Wire the leaves in overlapping clusters, flipping some to show the velvety bronze side. A cream silk ribbon at the top keeps it simple and elegant. It will dry beautifully and last well past New Year. If you loved her Thanksgiving style, see our Martha Stewart inspired Thanksgiving table ideas. Which door gets the wreath?
You will need: A 16 inch wire wreath frame, a large bundle of magnolia branches, floral wire, pruners (adult help), a cream silk ribbon.
How to make it: 1. Cut the magnolia into short clusters of three to five leaves. 2. Wire each cluster to the frame, overlapping in one direction and flipping some leaves. 3. Tie the ribbon at the top as a hanger.