Martha Stewart Thanksgiving: 15 Elegant Table and Decor Ideas Worth Copying This Year
Martha Stewart Thanksgiving style is the gold standard so many of us quietly try to copy every November. Long before social media, Martha Stewart started a small catering business in her basement in 1976, and her first book, Entertaining, came out in 1982. Since then, her name has meant one thing to home cooks and crafters: a table that looks calm, warm and beautiful without trying too hard. Searches for her Thanksgiving table and decor ideas are climbing fast this month, and it is easy to see why. The best part is that the look comes from simple, handmade touches, not expensive things. Below are fifteen ideas inspired by that classic style, each one easy to make at home with a little time and a lot of love. Pour a cup of cider and start planning the prettiest table you have ever set..
Martha Stewart Thanksgiving Starts With a Long, Calm Table
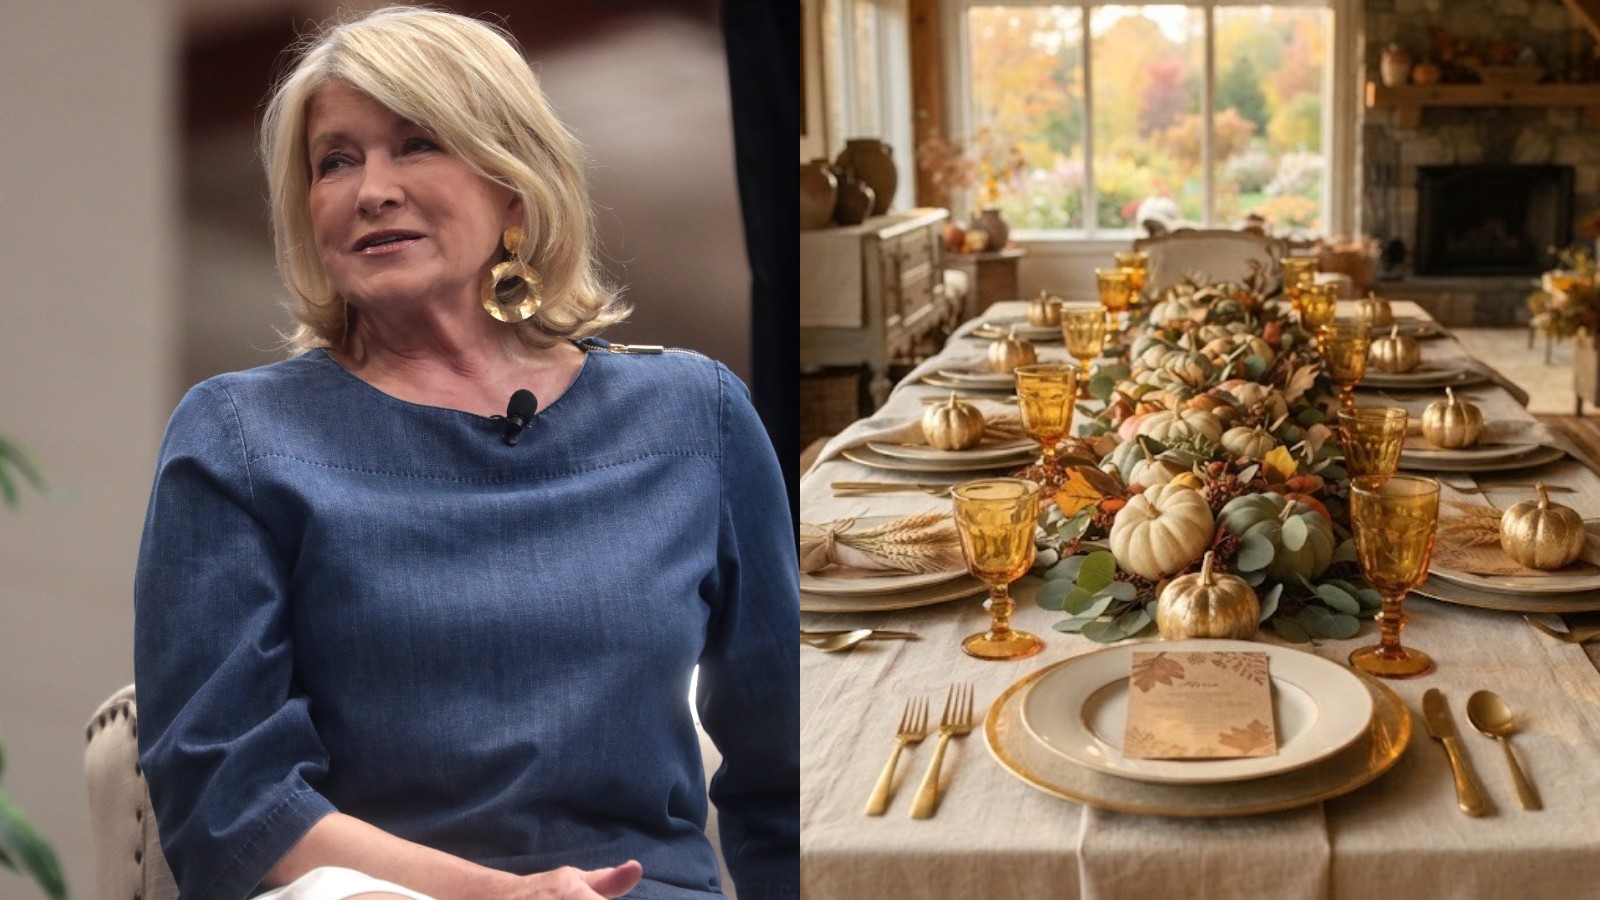
Picture a long table in soft autumn light, set with cream plates, gold touches, little pumpkins and wheat. Nothing shouts, yet everything feels special. That is the heart of a Martha Stewart Thanksgiving: a few natural materials, repeated with care. Fun fact: the farmhouse she restored in Westport, Connecticut sat on a road called Turkey Hill, which feels just right for this holiday. Start with a neutral cloth, add one color family and let nature do the rest. Ready to set a table your family will remember..
You will need: A neutral tablecloth or linen runner, cream or white plates, small pumpkins, wheat stems, a few brass or gold accents.
How to make it: 1. Lay the cloth and runner so the edges hang evenly. 2. Set the plates and repeat the same small pumpkin and wheat bundle at every place. 3. Fill the center with low pumpkins and leaves, leaving room for serving dishes.
Martha Stewart Thanksgiving Gilded Pumpkin Place Cards
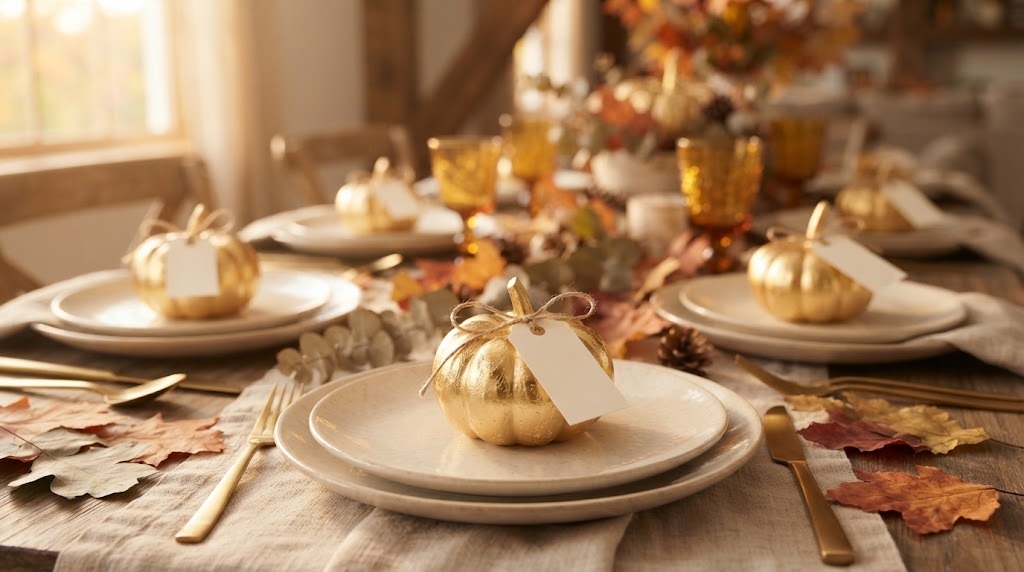
Tiny gold pumpkins at each plate do two jobs at once. They decorate the table, and they tell guests where to sit. Brush gold paint or gold leaf over mini pumpkins, then tuck a small name card into the stem with a slit. They glow softly in the light and make every guest feel expected. Kids love helping with the painting, and the pumpkins can go home with guests as a little gift. This is one of the most loved Martha Stewart Thanksgiving touches to copy. Will you use gold, copper or silver?
You will need: Mini pumpkins or gourds, gold acrylic paint or gold leaf with size adhesive, a soft brush, small cream cards, a craft knife (adult only), a pen.
How to make it: 1. Paint the pumpkins gold, or brush on adhesive and press gold leaf on top, and let them dry. 2. Have an adult cut a small slit in each stem. 3. Write names on the cards and slide one into each stem.
Wheat Bundle Napkin Rings
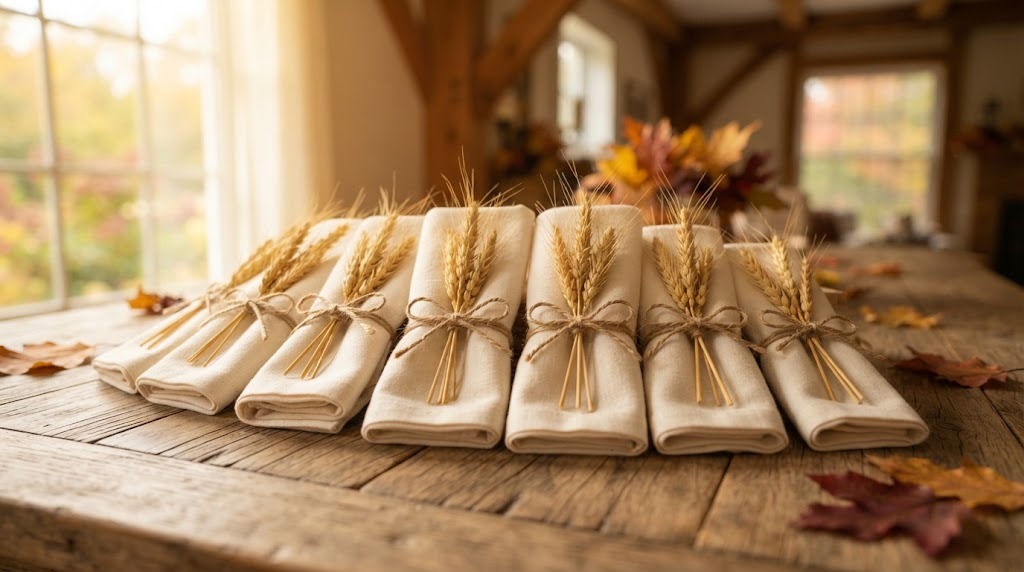
Wheat is one of the oldest symbols of the harvest, and it looks beautiful wrapped around a linen napkin. Gather six or seven dried wheat stems, tie them with twine or a thin velvet ribbon, and slip them over a rolled napkin. The golden heads fan out across the plate like a little bouquet. They cost almost nothing and feel straight out of a country inn. Martha Stewart Thanksgiving tables often lean on natural details like this. Would you tie yours with twine or velvet?
You will need: Dried wheat stems, linen or cotton napkins, jute twine or thin velvet ribbon, scissors.
How to make it: 1. Roll or fold each napkin neatly. 2. Lay a small bunch of wheat across it and trim the stems even. 3. Tie the wheat and napkin together with twine or ribbon in a neat bow.
A Low Centerpiece So Everyone Can Talk
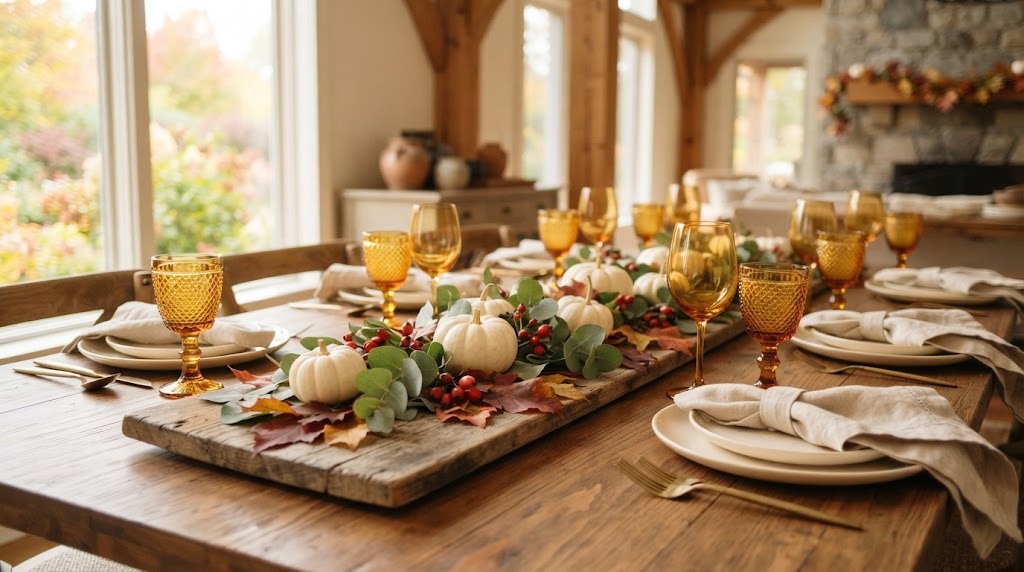
The best Thanksgiving tables are made for conversation, and a Martha Stewart Thanksgiving look is no exception. Keep the centerpiece low so guests can see each other across the table. Small pumpkins, pears, clusters of grapes, magnolia leaves and a few short flowers laid along the middle look rich without blocking anyone. Battery LED votives add a warm glow without any open flame. This simple rule changes the whole feel of dinner. For even more inspiration, browse our Thanksgiving table ideas. Who will you be chatting with across the table this year?
You will need: Small pumpkins and gourds, pears, grapes, magnolia or other leaves, a few short flowers, battery LED votives.
How to make it: 1. Lay the leaves down the center of the table as a base. 2. Arrange pumpkins, pears and grapes in small clusters along it. 3. Tuck in short flowers and LED votives, keeping everything below eye level.
Pressed Leaf Menu Cards
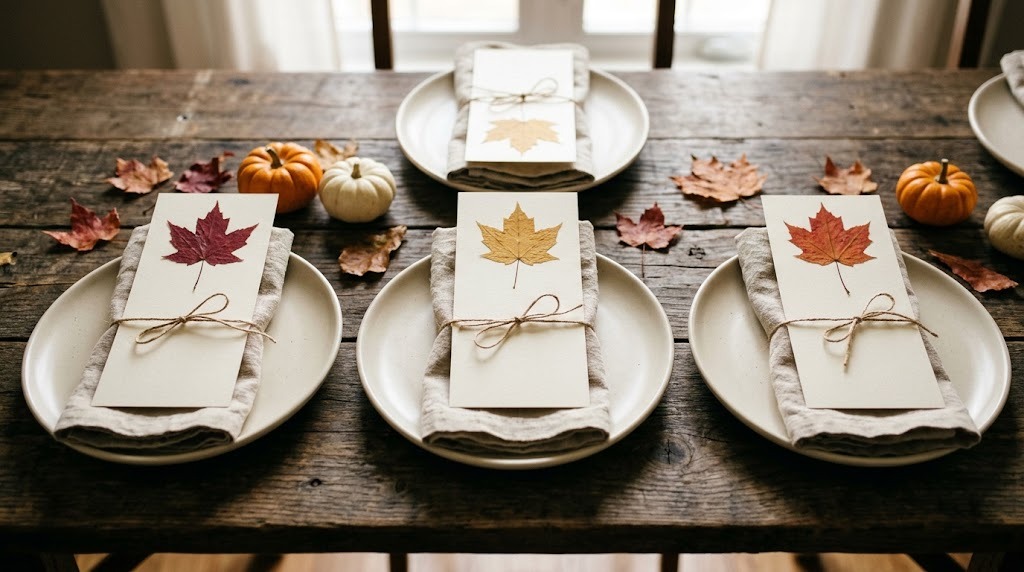
A handwritten menu card makes dinner feel like a special occasion. Glue a pressed autumn leaf to the top of a cream card, then write out the dishes in your best handwriting below. Set one at each place or tuck it into the napkin. Guests often keep them, and they make a lovely keepsake of the day. Press the leaves a week ahead in a heavy book so they lie flat. Which dish will be at the top of your menu?
You will need: Colorful autumn leaves, a heavy book, cream cardstock, a glue stick, a fine pen or marker.
How to make it: 1. Press the leaves between paper in a heavy book for about a week. 2. Glue one leaf at the top of each card. 3. Write the menu below the leaf and let it dry flat.
A Martha Stewart Thanksgiving Squash Runner
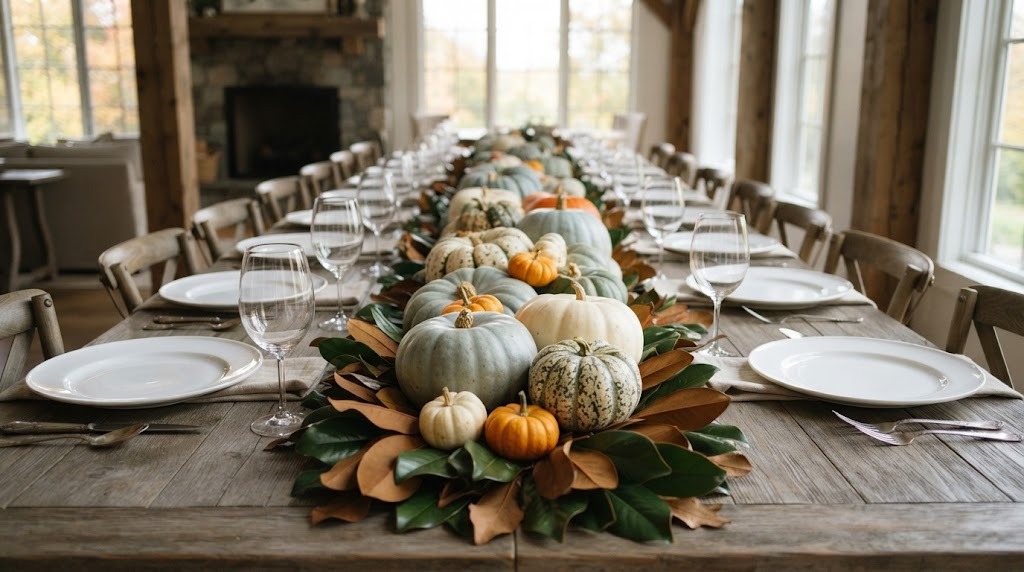
Heirloom squash come in the most beautiful colors, from soft blue gray to cream, sage and deep orange. Line them down the center of the table on a bed of leaves and you have a runner that looks like a painting. After the holiday, many of them can be cooked, so nothing goes to waste. Group them by size and color for a calm, collected look. It is one of the easiest Martha Stewart Thanksgiving ideas to pull off with farm stand finds. Which color squash do you love most?
You will need: An assortment of heirloom squash and pumpkins, fresh or faux leaves, a neutral runner.
How to make it: 1. Lay the runner and a line of leaves down the table. 2. Place the largest squash first, spaced evenly. 3. Fill in with smaller ones, mixing colors and leaving room for plates.
A Kraft Paper Cover for the Kids’ End
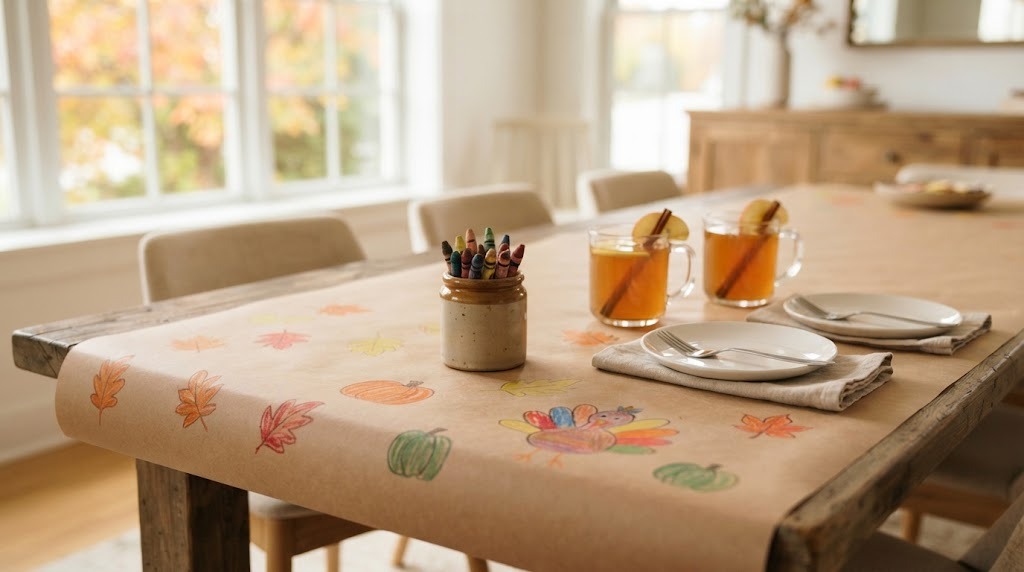
Every family has a kids’ end of the table, and this idea keeps them busy and happy. Roll brown kraft paper over the cloth and set out a cup of crayons. Kids can draw turkeys, trace their hands and write what they are thankful for. Grownups usually end up joining in, too. When dinner is over, roll the paper up and save the best drawings. What would your little ones draw first?
You will need: A roll of brown kraft paper, tape, a cup of crayons or washable markers.
How to make it: 1. Roll the paper over the end of the table and tape it underneath. 2. Set out crayons in a small cup. 3. Write a fun prompt at each seat, like draw your favorite dish.
Martha Stewart Thanksgiving Monogram Napkins
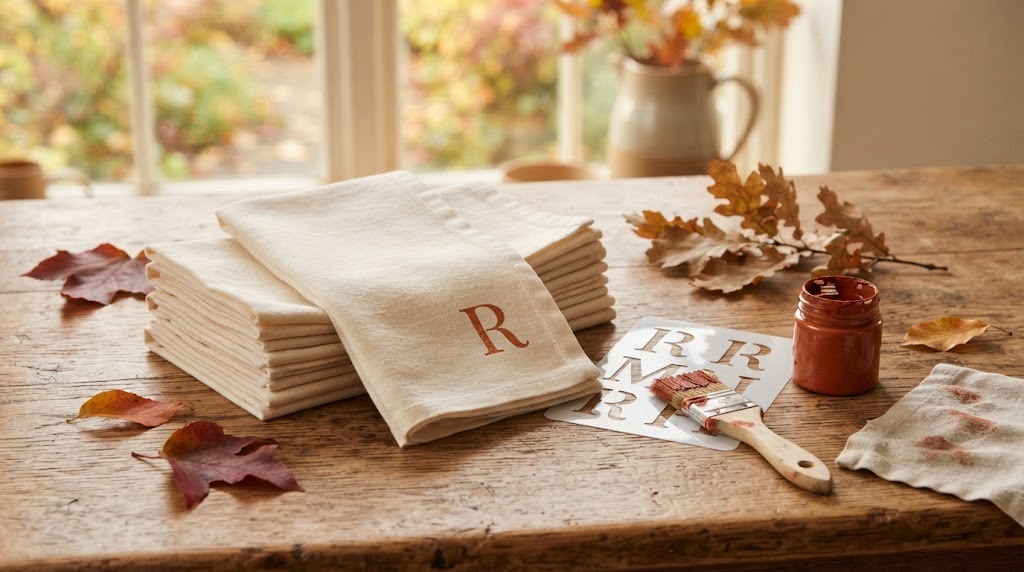
Monogrammed linens feel grand, but you can make them at home with a stencil and fabric paint. Stamp a single initial, your family’s last name letter, in the corner of each cloth napkin. Soft gold, rust or deep green on cream linen looks especially elegant. Heat set the paint as the label says so the napkins can be washed and used for years. A Martha Stewart Thanksgiving table always has a personal touch, and this is a great one. Which initial will you use?
You will need: Plain cotton or linen napkins, a letter stencil, fabric paint, a small stencil brush, painter’s tape, an iron (adult help).
How to make it: 1. Tape the stencil in one corner of a napkin. 2. Dab on the fabric paint lightly with the brush and lift the stencil. 3. Let it dry and have an adult heat set it with an iron.
A Bare Branch and Berry Arrangement
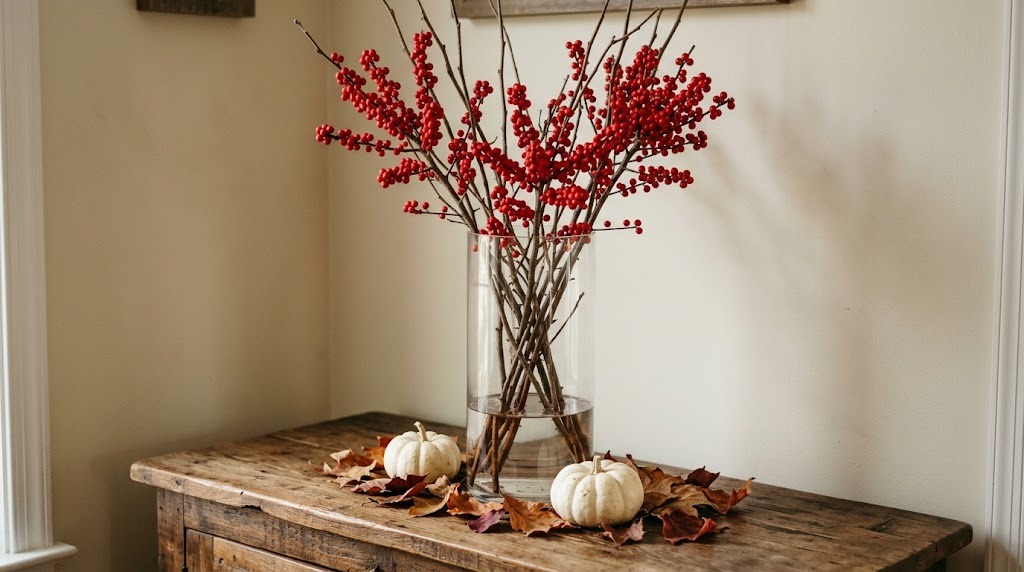
A tall vase of bare branches with clusters of red berries is simple, striking and perfect for a sideboard or entry table. Gather fallen branches on a walk, then add faux or real berry sprigs and a few autumn leaves. It brings the outdoors in and takes about ten minutes. Because it is tall, place it on the sideboard rather than the dinner table so guests can still see each other. It will look lovely right through December, too. Do you have a favorite tree for branches nearby?
You will need: A tall vase or crock, bare branches, berry sprigs, a few autumn leaves, small stones for weight.
How to make it: 1. Put stones in the bottom of the vase to keep it steady. 2. Arrange the branches so they fan out naturally. 3. Tuck berry sprigs and leaves between the branches.
Apple Votive Holders With LED Tea Lights
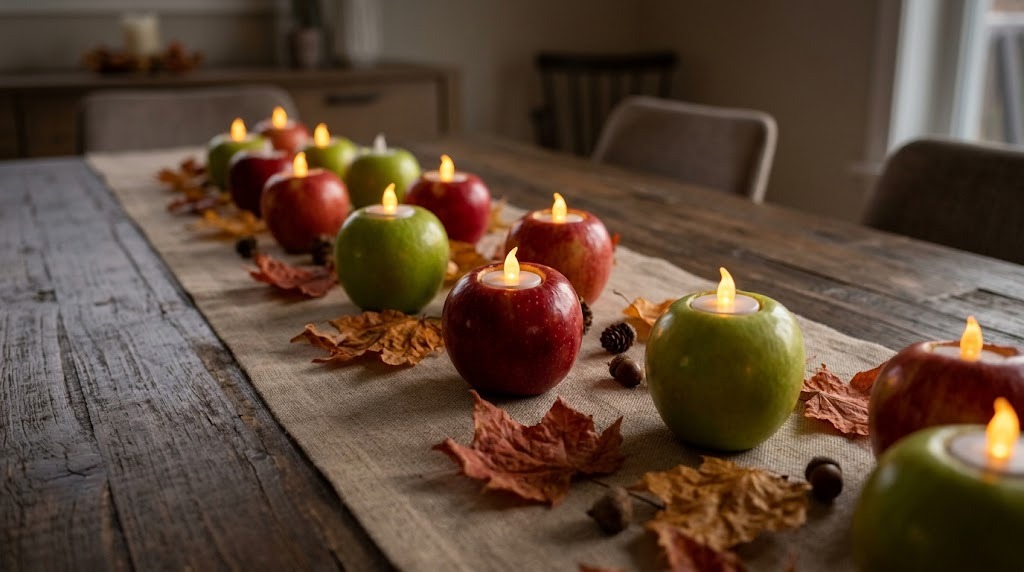
Here is a sweet harvest idea that kids love. Hollow a small space in the top of red apples with a melon baller and set a battery LED tea light inside. Line them along the table or a windowsill for a warm, glowing look with no open flame. Mix red and green apples for extra color. They smell lovely and look like something from a country magazine. How many apples will your table need?
You will need: Firm red and green apples, a melon baller or small spoon, battery LED tea lights, a little lemon juice.
How to make it: 1. Scoop a shallow round hole in the top of each apple, just wide enough for a tea light. 2. Brush the cut part with lemon juice so it stays fresh. 3. Set an LED tea light inside and switch it on.
A Mismatched Vintage China Mix
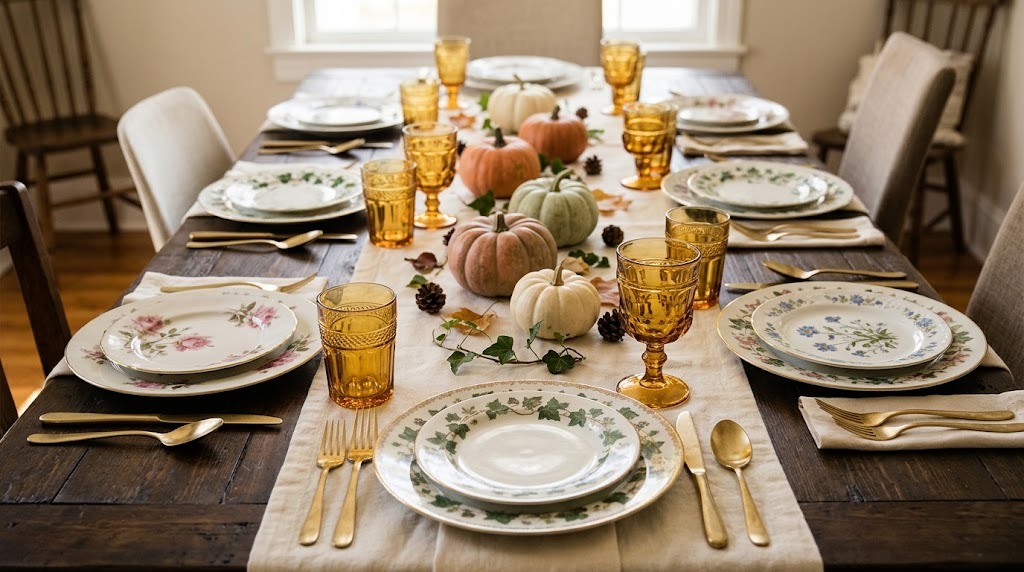
You do not need a matching set of dishes to set a gorgeous table. Mixing vintage plates with different floral patterns feels collected and full of stories, and it suits a Martha Stewart Thanksgiving table perfectly. Keep one thing the same, like all cream backgrounds or all brown transferware, so the mix looks planned. Thrift shops and estate sales are full of single plates for a dollar or two. Each guest gets a different plate, which always starts a conversation. Do you have a few odd plates in the cupboard?
You will need: Vintage plates in a shared color, matching or simple glasses, plain napkins, simple flatware.
How to make it: 1. Choose plates that share one color or style. 2. Set a different plate at each seat. 3. Tie it together with matching napkins and glasses.
Hand Lettered Gratitude Cards
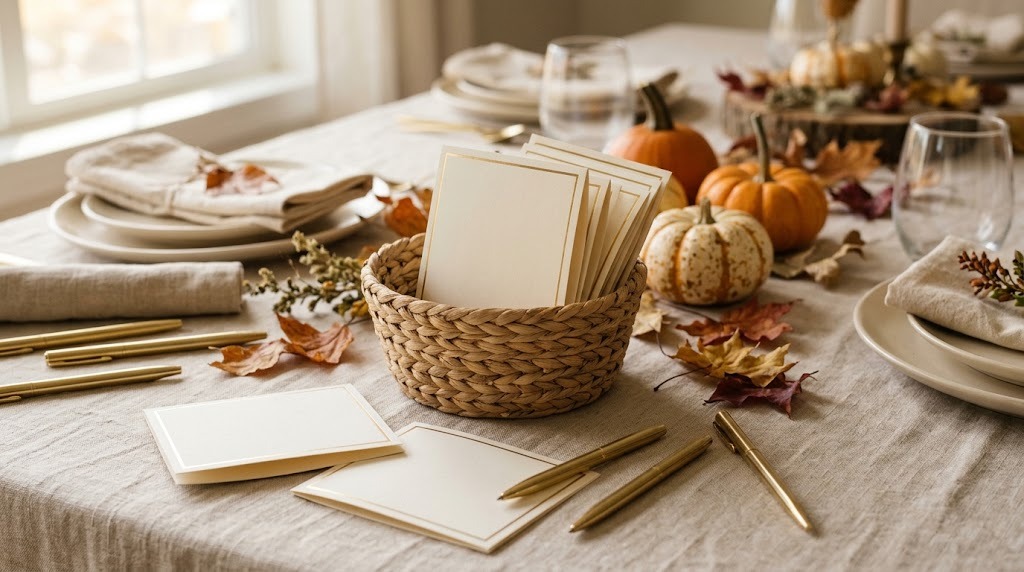
Before dinner, set a small card and a pen at each place with a simple question: what are you thankful for this year? Collect them in a basket and read them out loud during dessert. It is often the moment people remember most. Use cream cards with a gold edge or a small pressed leaf so they match the table. Save the cards in a box and you will have a family history of thankfulness. What will you write on yours?
You will need: Cream cards, gold paint pen, small pens, a basket.
How to make it: 1. Write the question at the top of each card or tuck in a pressed leaf. 2. Place one card and pen at every seat. 3. Collect the cards in a basket and read them aloud at dessert.
A Martha Stewart Thanksgiving Palette in Copper and White
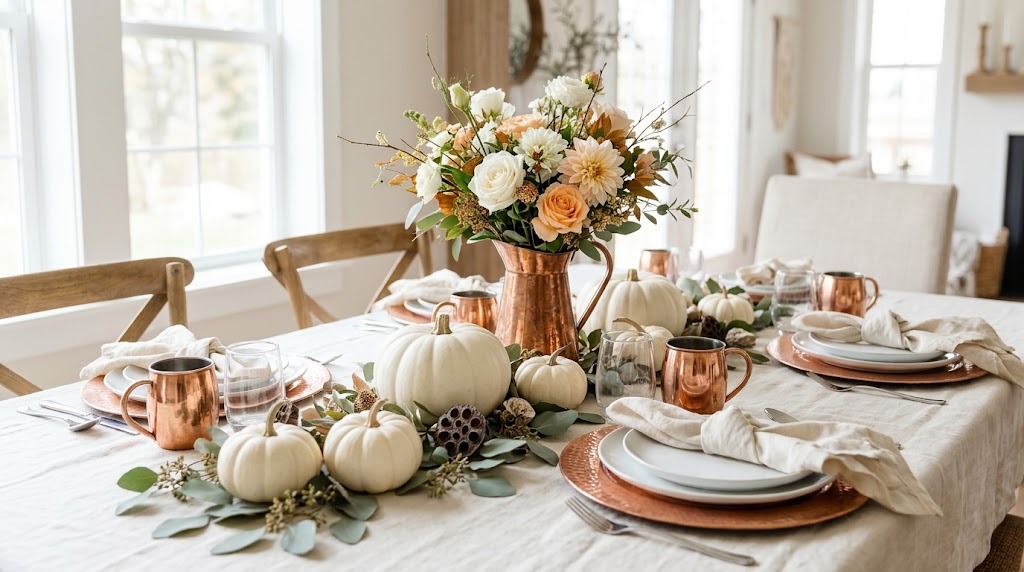
If you want a fresh look this year, try white and copper. White pumpkins, cream linens and copper accents like mugs, chargers or a copper pitcher of flowers look warm and modern at the same time. It is a calm palette that lets the food shine. You can find white pumpkins at most farm stands, and a few copper pieces go a long way. Martha Stewart Thanksgiving style often sticks to a short color list like this. Which two colors would you choose?
You will need: White pumpkins, cream linens, a few copper pieces such as mugs or a pitcher, simple white flowers.
How to make it: 1. Lay cream linens and white plates as the base. 2. Add white pumpkins down the center. 3. Place copper pieces around the table and fill the pitcher with white flowers.
A Dried Hydrangea Wreath
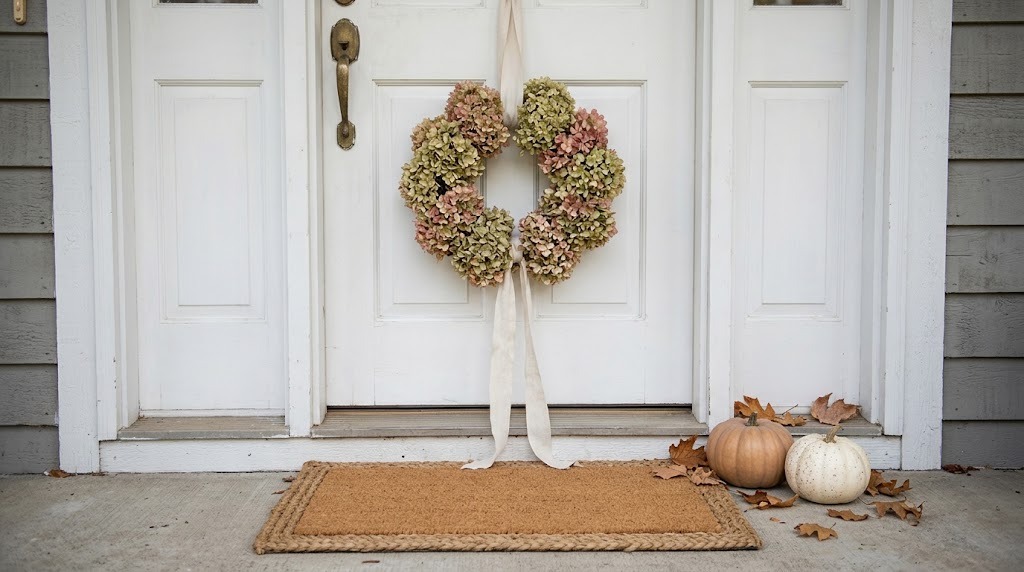
Hydrangeas dry beautifully into soft antique shades of green, rose and blush. Tuck the dried heads into a simple wreath form and hang it on the front door or above the sideboard. It looks elegant and gentle, and it lasts for months. If you grow hydrangeas, cut them in late summer and let them dry in a vase with a little water. It is a lovely way to carry the garden into the holidays. Where would you hang yours?
You will need: A wire or grapevine wreath form, dried hydrangea heads, floral wire, a velvet ribbon.
How to make it: 1. Cut the hydrangea heads with short stems. 2. Wire each one to the wreath form, overlapping so no gaps show. 3. Tie a velvet ribbon at the top and hang it.
Buffet Labels on Mini Chalkboards
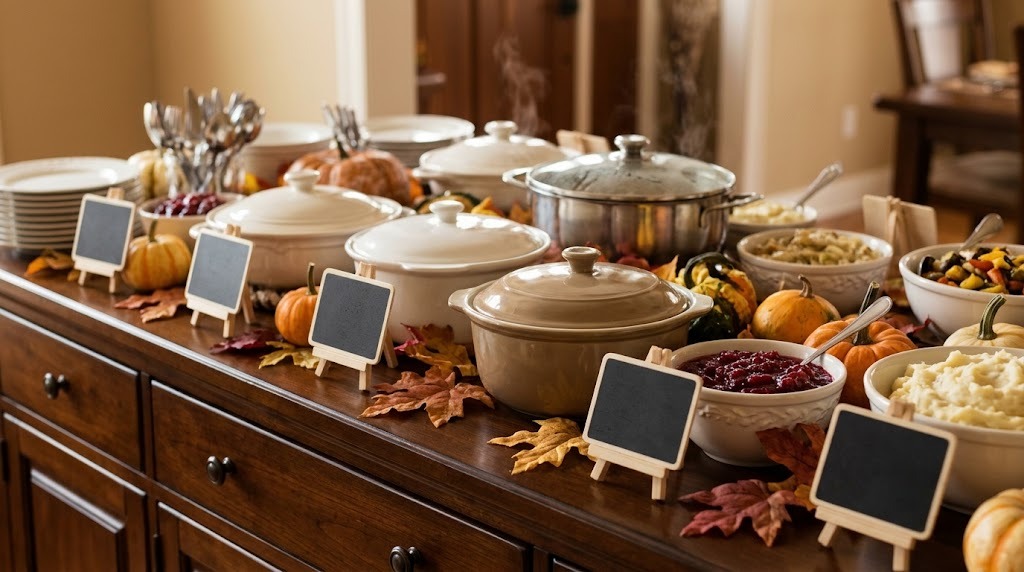
If you serve buffet style, little chalkboard labels make it easy for guests to find every dish. Write the name of each dish and set the sign in front of it, or tuck it into a small pumpkin. It looks charming and helps anyone with food allergies know what is inside. Mini chalkboards are cheap and you can use them again for every holiday. It is the perfect final touch for a calm, organized Thanksgiving. Which dish gets the first label?
You will need: Mini chalkboard signs or chalkboard tags, chalk markers, small pumpkins or stands.
How to make it: 1. Write each dish name neatly with a chalk marker. 2. Let it dry so it does not smudge. 3. Set each sign in front of its dish or in a small pumpkin stand.