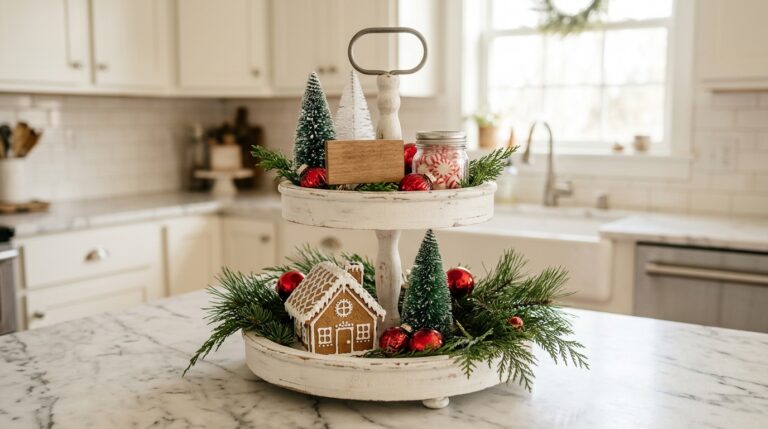
Candle Jar Makeovers: 14 Dollar Store Upcycles That Look Like Boutique Christmas Decor
Candle Jar Makeovers are the cheapest way to fill your home with boutique style Christmas decor this year. Almost everyone has a few heavy glass jars left over from burned down candles, or can grab plain ones at the dollar store for a couple of dollars. Most of us toss them, but that thick glass is exactly what fancy home shops sell for twenty dollars and up. With a little paint, some gold leaf, a napkin or a strand of battery fairy lights, those jars turn into gifts and decor that look like they came from a pricey boutique. Crafters online have racked up millions of views showing these flips, and once you try one you will see why. Below are 14 easy ideas, starting with a simple trick to get the old wax out. Clear a spot on the kitchen table and let’s get started..
Candle Jar Makeovers That Look Straight Out of a Boutique
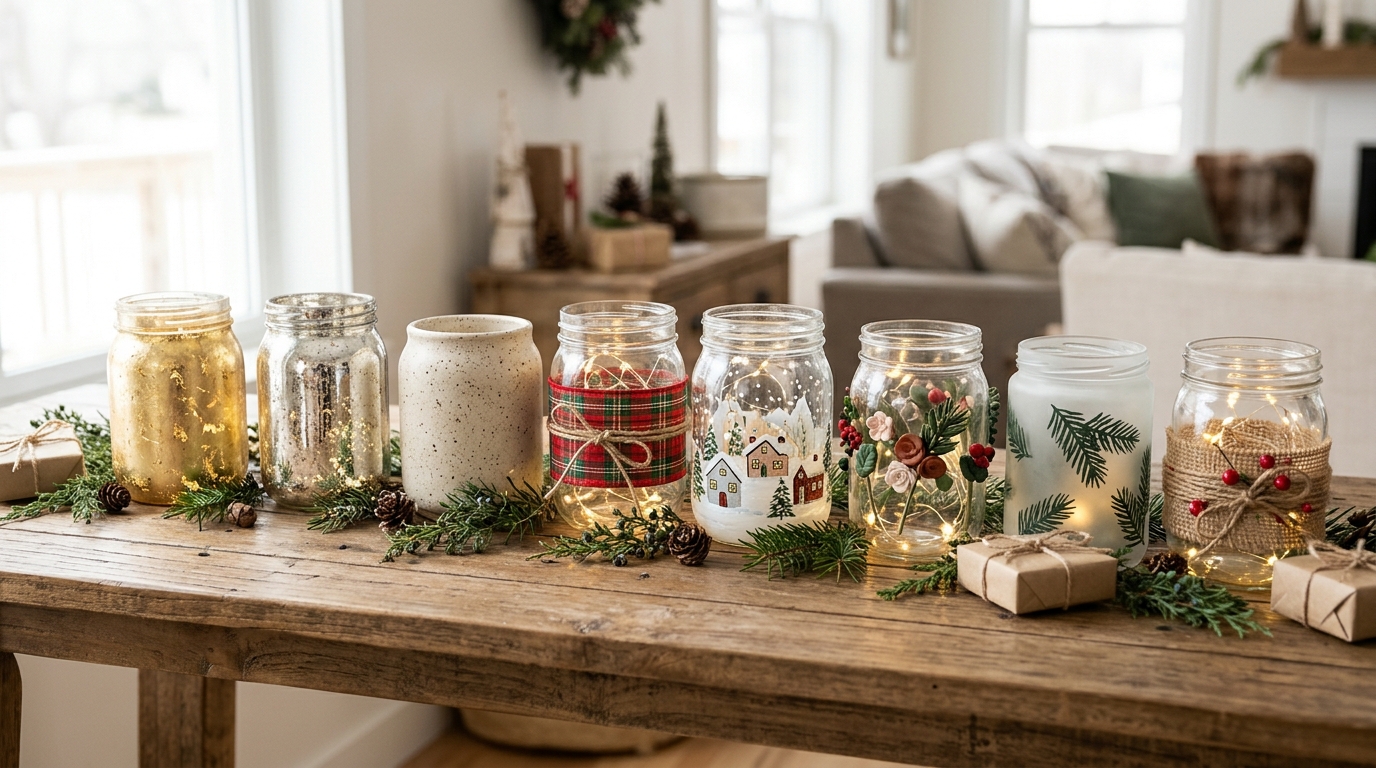
Candle Jar Makeovers look this good when you line up a few different styles together. Here a gold leaf jar sits beside a silver mercury glass jar, a speckled pottery look jar and a jar wrapped in plaid ribbon, all glowing with tiny battery fairy lights. Not one of them cost more than a few dollars to make. Pick two or three styles that match your home and group them on a shelf, a tray or the middle of the table. Which look will you try first..
You will need: Clean empty glass jars, a few craft supplies from the ideas below, battery fairy lights and some pine sprigs.
How to make it: 1. Clean every jar first using the next slide. 2. Pick two or three looks that suit your colors. 3. Group them in odd numbers with greenery and slip fairy lights inside for a soft glow.
The Freezer Trick That Pops Out Old Wax
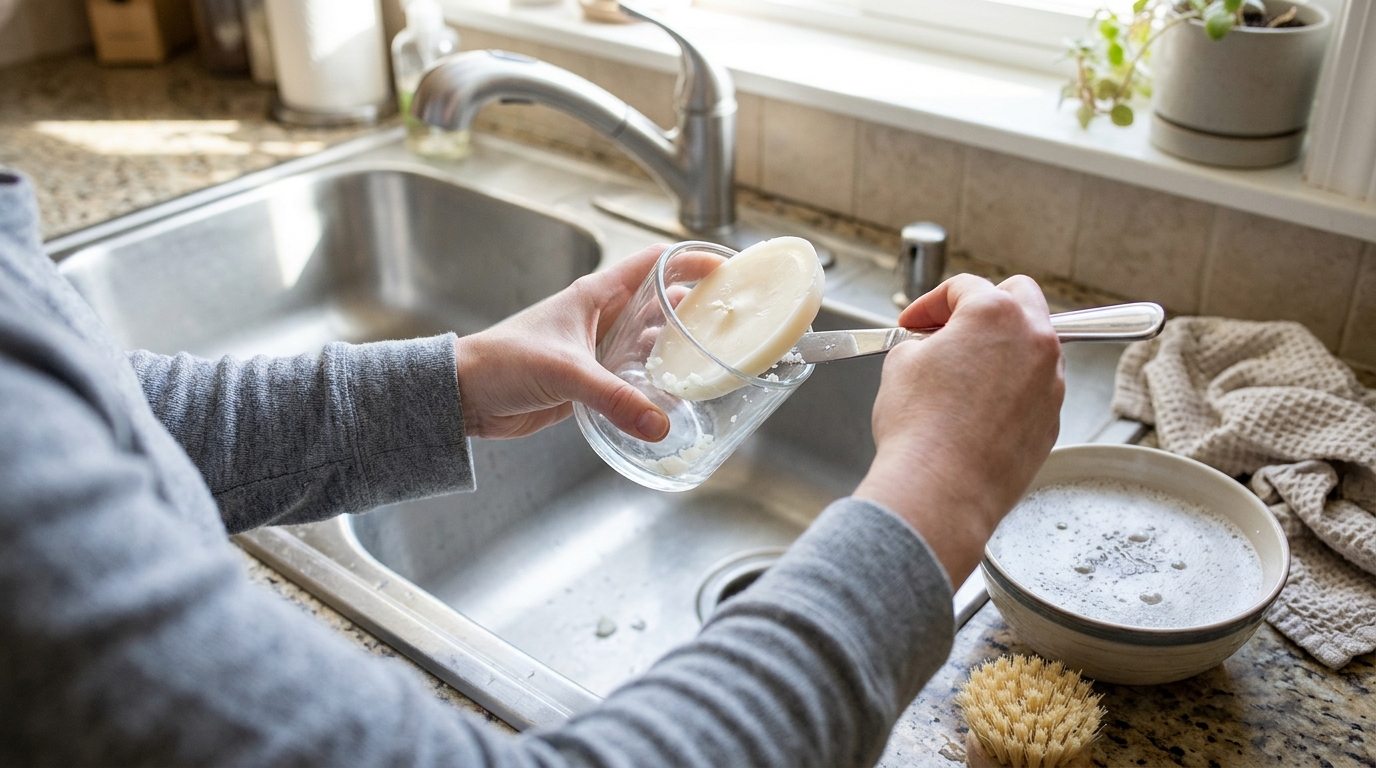
Every makeover starts with a clean jar, and the easiest way to get old wax out needs no heat at all. Put the jar in the freezer for a few hours. Wax shrinks when it gets cold, so it pulls away from the glass and pops out in one piece with a butter knife. Wash the jar in warm soapy water, peel the label and rub off any sticky spots with a little cooking oil. Your jar is now ready for anything. How many old jars are hiding in your cupboards?
You will need: Old glass candle jars, a freezer, a butter knife, dish soap, warm water and a little cooking oil for sticky labels.
How to make it: 1. Freeze the jar for about 3 hours. 2. Slide a butter knife under the wax and lift it out. 3. Wash the jar in warm soapy water, soak off the label and wipe away glue with oil.
Candle Jar Makeovers With Glowing Gold Leaf
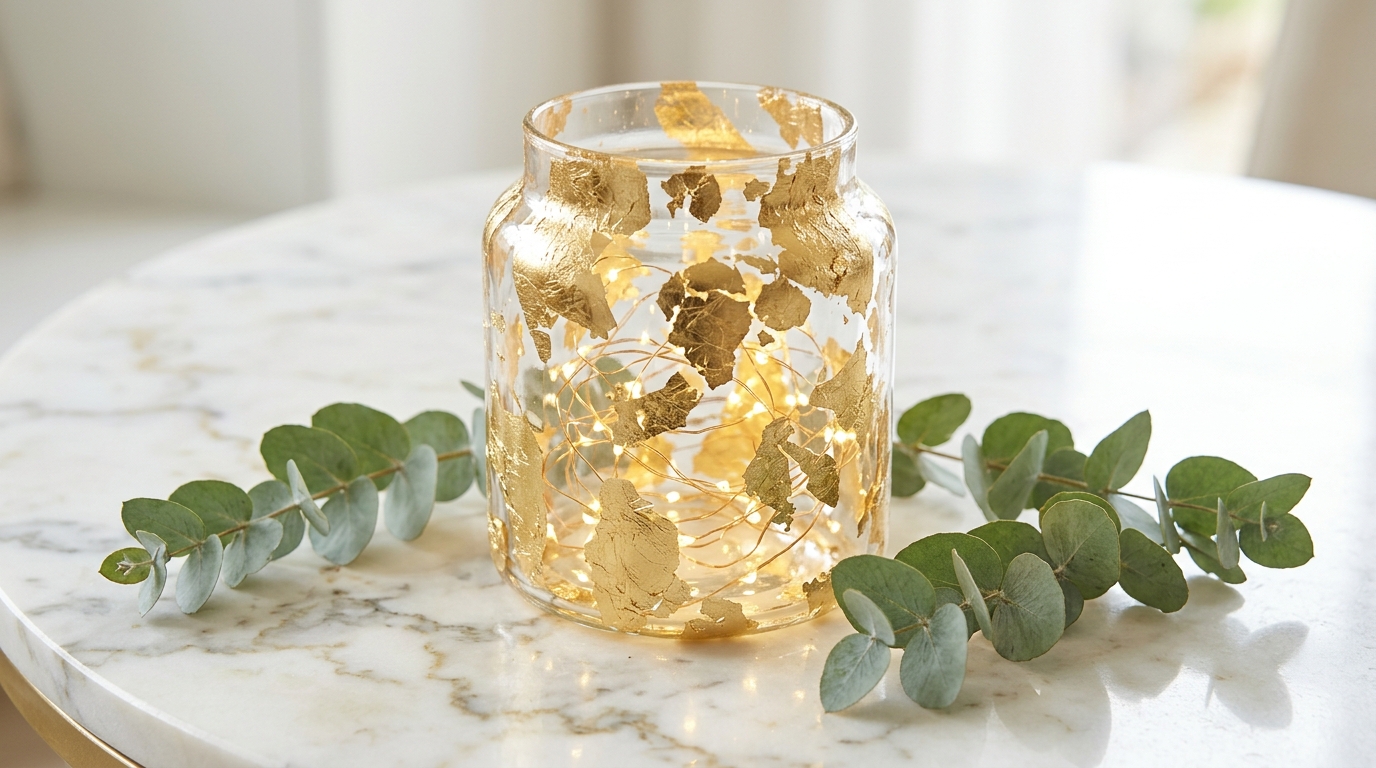
Candle Jar Makeovers do not get more glamorous than gold leaf. A thin brush of adhesive size on the outside of the jar, a few sheets of imitation gold leaf pressed on with a soft brush, and the jar looks like something from a hotel lobby. The torn, uneven edges are part of the charm, so there is no need to be neat. Add fairy lights inside and the gold glows warmly at night. A pack of leaf costs a few dollars and covers several jars. Who on your list would love a little gold?
You will need: A clean jar, gold leaf adhesive size, imitation gold leaf sheets, a soft dry brush and battery fairy lights.
How to make it: 1. Brush adhesive in loose patches on the outside of the jar and wait until it turns tacky. 2. Lay gold leaf over the patches and press with the soft brush. 3. Brush away the loose flakes and seal with a clear spray if you like.
A Faux Mercury Glass Jar That Looks Antique
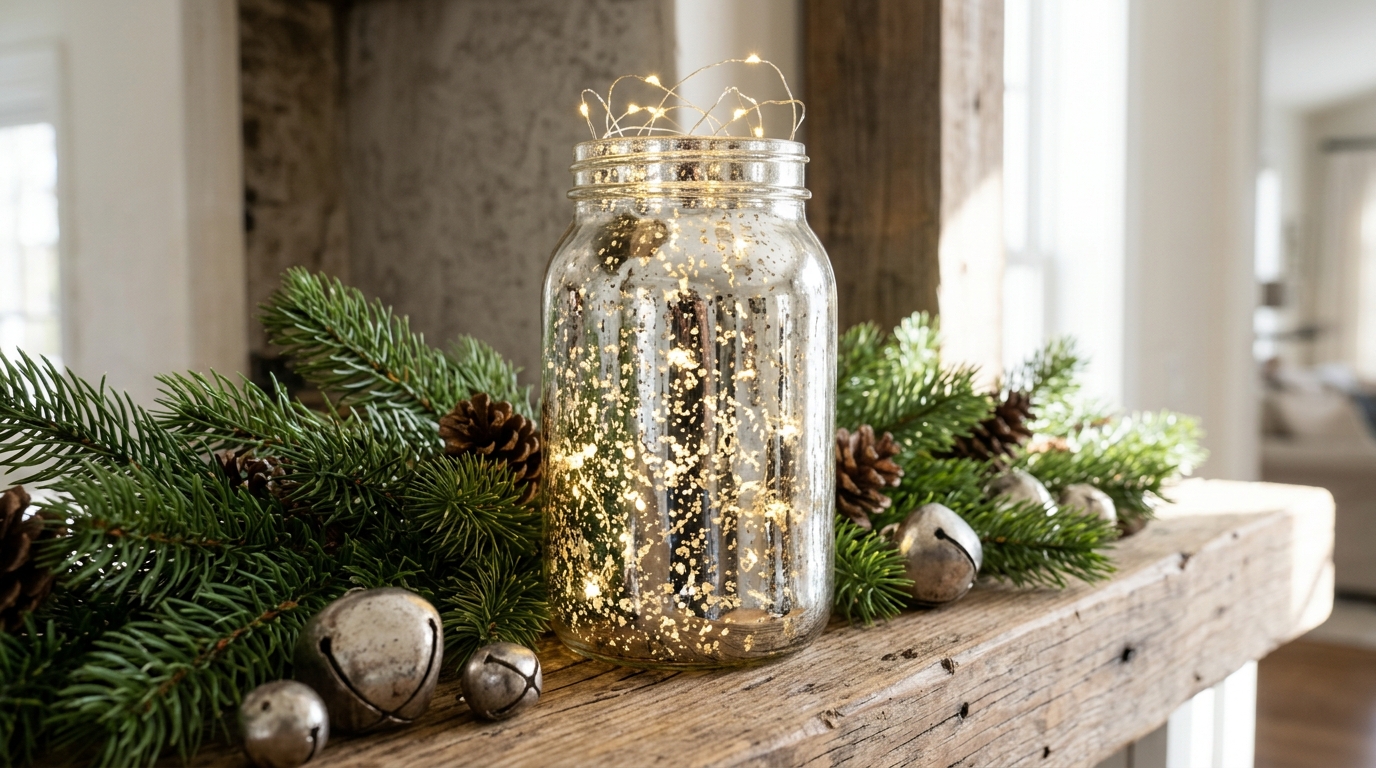
Real mercury glass costs a small fortune at antique shops, but you can fake the look in about fifteen minutes. Mist the outside of the jar lightly with water and vinegar, then spray a light coat of mirror effect paint over it. The drops stop the paint from sticking evenly, which creates those dark, aged spots. Dab with a paper towel and repeat until you like it. With fairy lights inside it sparkles like silver. Would anyone guess it started life as an old candle jar?
You will need: A clean jar, a spray bottle with half water and half white vinegar, mirror effect spray paint, paper towels.
How to make it: 1. Work outdoors or in a well aired space. 2. Mist the jar with the water mix, then spray a light coat of mirror paint. 3. Dab gently with a paper towel, let it dry and repeat for a deeper antique look.
Candle Jar Makeovers With a Speckled Pottery Look
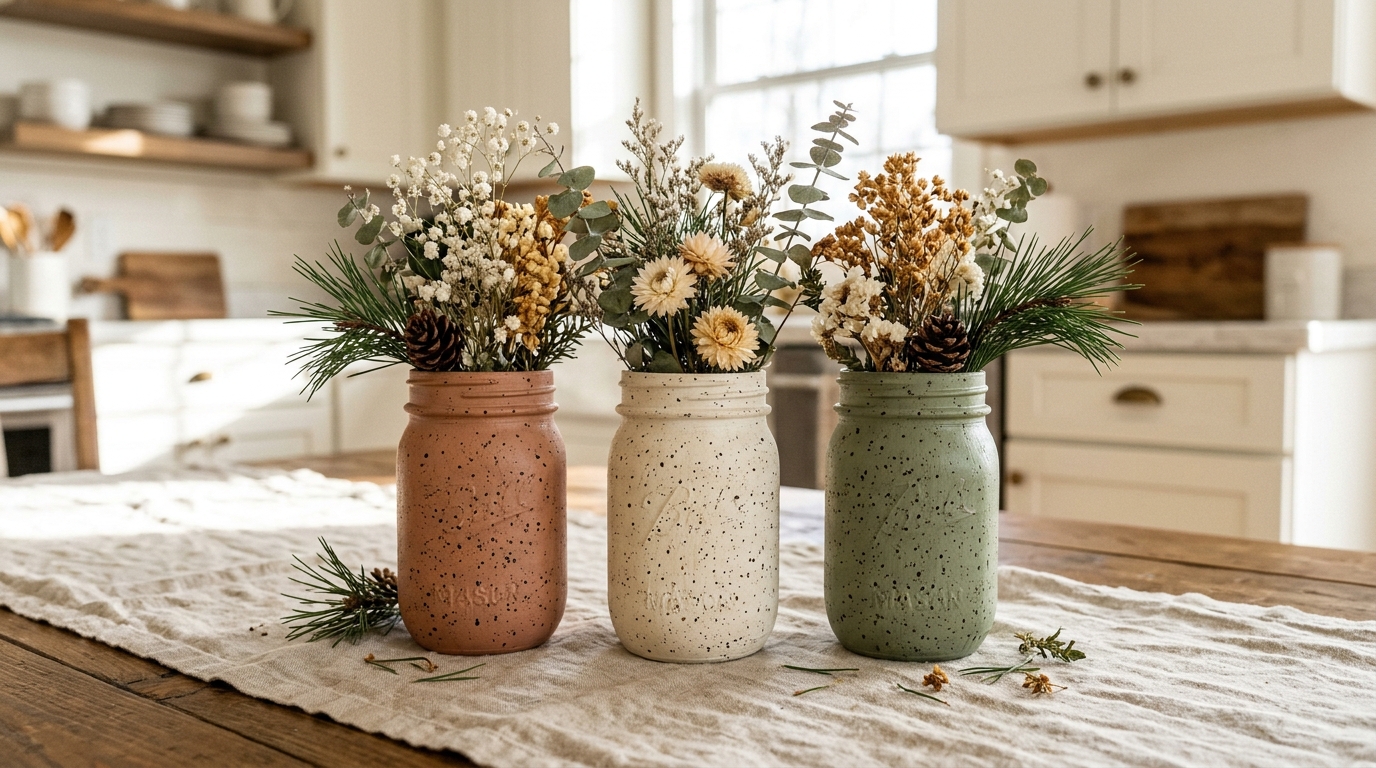
Candle Jar Makeovers with a pottery look are everywhere right now, and they are almost too easy. Mix a spoonful of baking soda into chalky craft paint and it turns thick and gritty, just like real stoneware. Paint two coats on the outside of the jar, then flick a stiff brush dipped in brown paint to add tiny speckles. The result looks like a handmade vase from a pottery studio. Cream, sage green and terracotta look lovely together. Which color would suit your kitchen?
You will need: Clean jars, chalky craft paint, baking soda, a foam brush, a stiff old toothbrush and a little brown paint.
How to make it: 1. Stir about one spoon of baking soda into a quarter cup of paint. 2. Dab on two coats and let each one dry. 3. Flick brown speckles with the toothbrush and finish with a clear matte sealer.
The Viral Clay Flower Jar
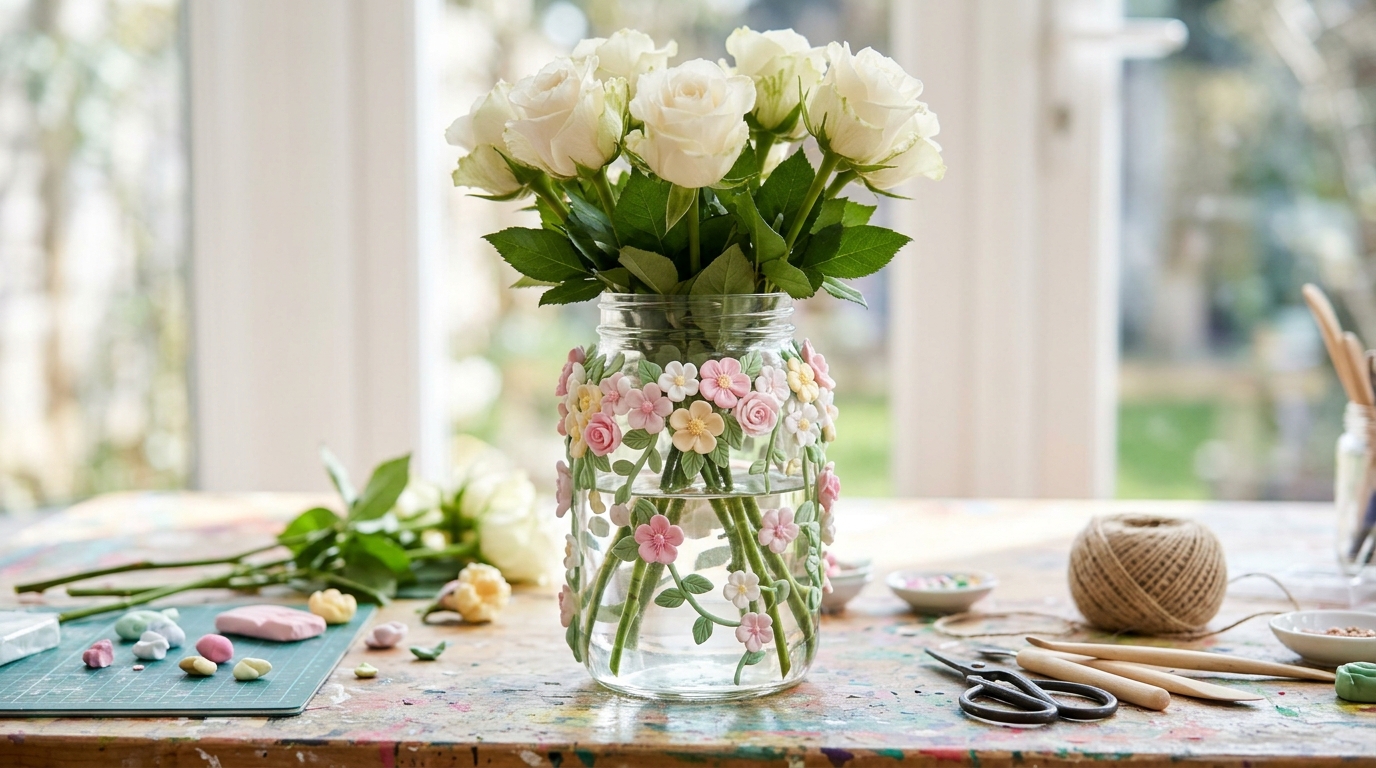
This is the makeover that took the internet by storm. Artist Annie’s Art Studio turned plain dollar store glass candles into flower covered vases, and her short video passed 4 million views. Roll little petals from air dry clay, press them onto the glass in clusters and add tiny leaves. Once dry, paint them in soft colors and the jar becomes a sweet vase that feels like spring in the middle of winter. It makes a darling gift for a teacher too. Who would you make one for?
You will need: A clean jar, white air dry clay, a toothpick, acrylic paints, a small brush and clear sealer.
How to make it: 1. Roll small balls of clay, flatten them into petals and press five together into a flower on the jar. 2. Add leaves and let the clay dry overnight. 3. Paint the flowers and seal the whole jar.
Candle Jar Makeovers That Stack Into a Glowing Snowman
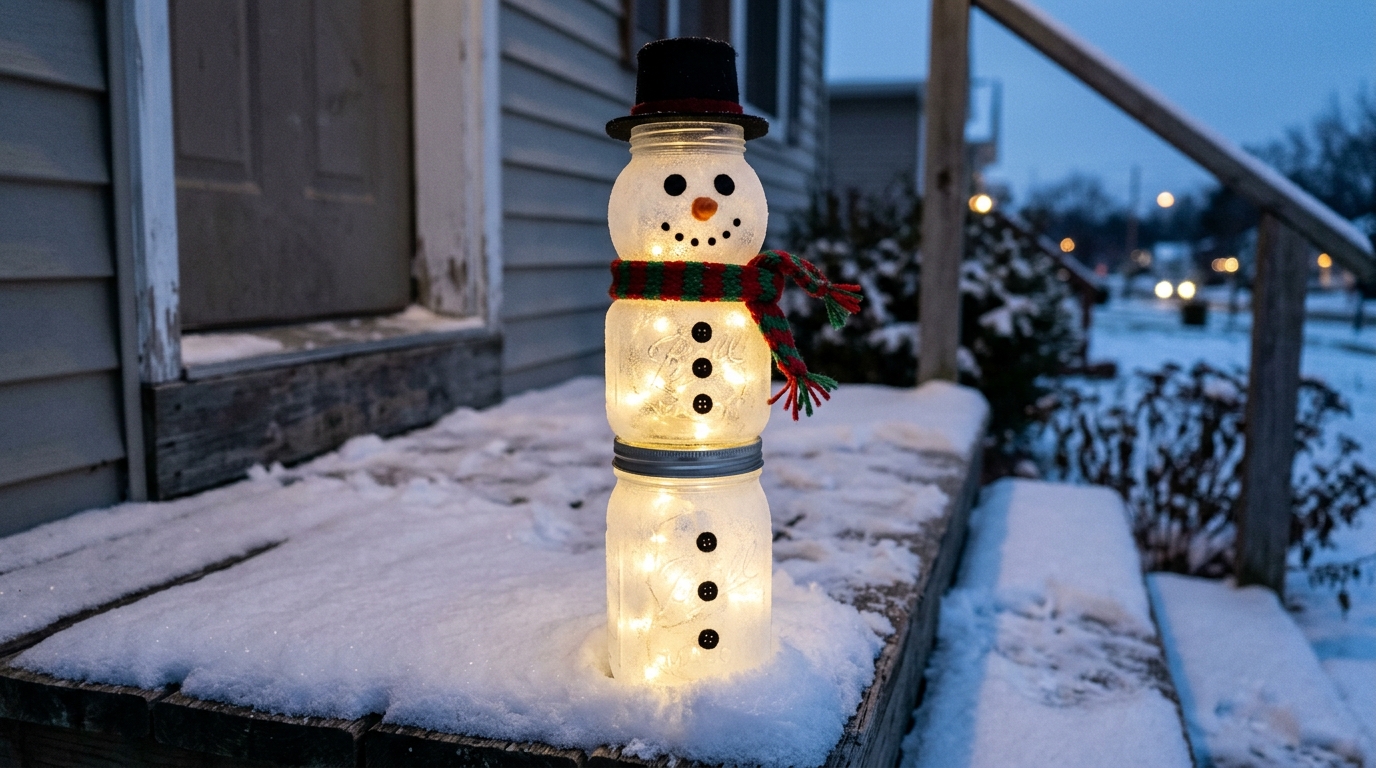
Candle Jar Makeovers can even become a whole snowman. Crafter Dezi showed how to stack three jars of different sizes, largest on the bottom, and glue them rim to base, and her glowing snowman video earned more than 1.6 million views. Spray the glass with frosted paint, add felt eyes and buttons, a tiny knit scarf and a little hat. Fill the jars with fairy lights and he glows on a porch step or a bookshelf all winter. Do you have three jar sizes saved?
You will need: Three clean jars in small, medium and large, strong glass glue, frosted glass spray, black felt, a scrap of knit fabric, a mini hat and fairy lights.
How to make it: 1. Spray each jar with frosted paint and let it dry. 2. With adult help, glue the jars in a stack from large to small and let them set for a day. 3. Add felt eyes, buttons, the scarf and hat, then tuck fairy lights inside.
A Hand Painted Snowy Village Jar
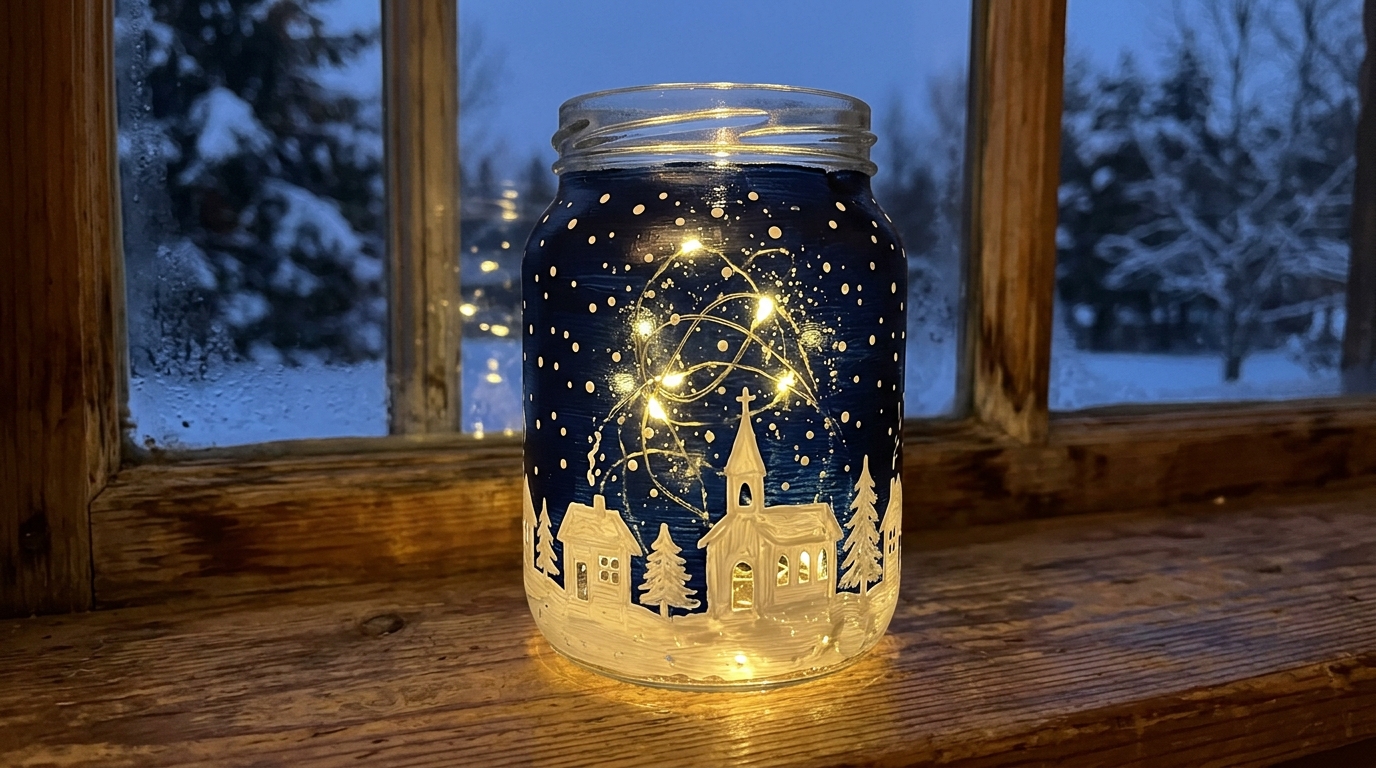
You do not need to be an artist for this one. Paint the outside of the jar deep navy, then use a white paint pen to draw a simple row of little houses, a church and pine trees around the bottom. Leave tiny squares unpainted for windows. When you add fairy lights, the windows glow and the whole village looks lit up on a winter night. Dot white snowflakes across the sky to finish. It is a lovely craft for a quiet evening. What would you add to your little town?
You will need: A clean jar, navy acrylic paint, a sponge brush, a white paint pen, painter’s tape and fairy lights.
How to make it: 1. Sponge two coats of navy paint on the outside of the jar. 2. Draw the village outline with the paint pen and fill it in white, leaving small window squares bare. 3. Dot snowflakes above, seal and add lights.
Candle Jar Makeovers With Pretty Christmas Napkins
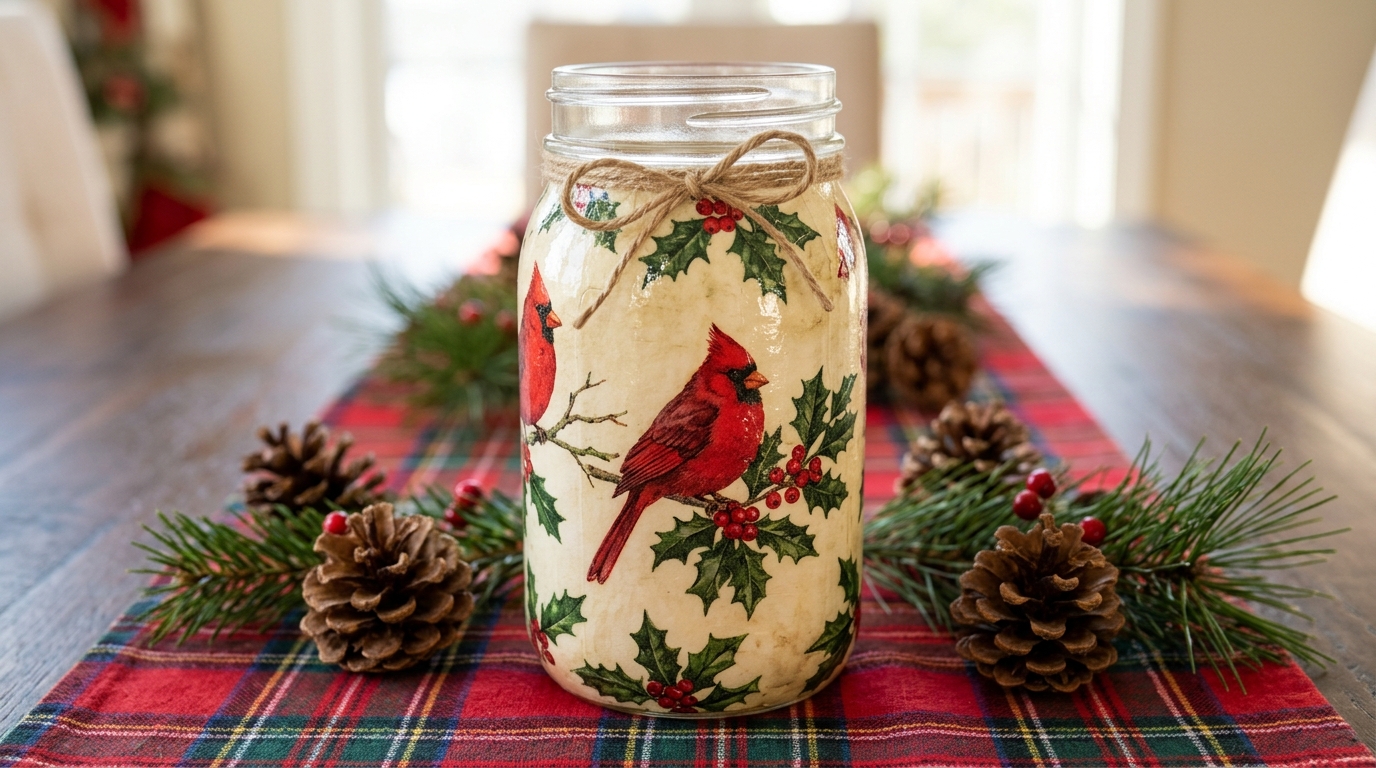
Candle Jar Makeovers with paper napkins are a classic decoupage trick, and they come out looking hand painted. Pick a holiday napkin with cardinals, holly or vintage Santas, peel away the plain back layers and tear out the prettiest pieces. Brush decoupage glue on the jar, lay the thin printed layer on top and smooth it gently with more glue. The thin paper melts into the glass and the seams almost vanish. One pack of napkins makes a dozen jars. Which napkin pattern would you pick?
You will need: A clean jar, holiday paper napkins, decoupage glue, a soft flat brush and a little plastic wrap for smoothing.
How to make it: 1. Separate the napkin and keep only the thin printed top layer. 2. Brush glue on the jar, place the napkin piece and smooth it with plastic wrap. 3. Brush a top coat of glue and let it dry overnight.
A Stained Glass Jar Made With Tissue Paper
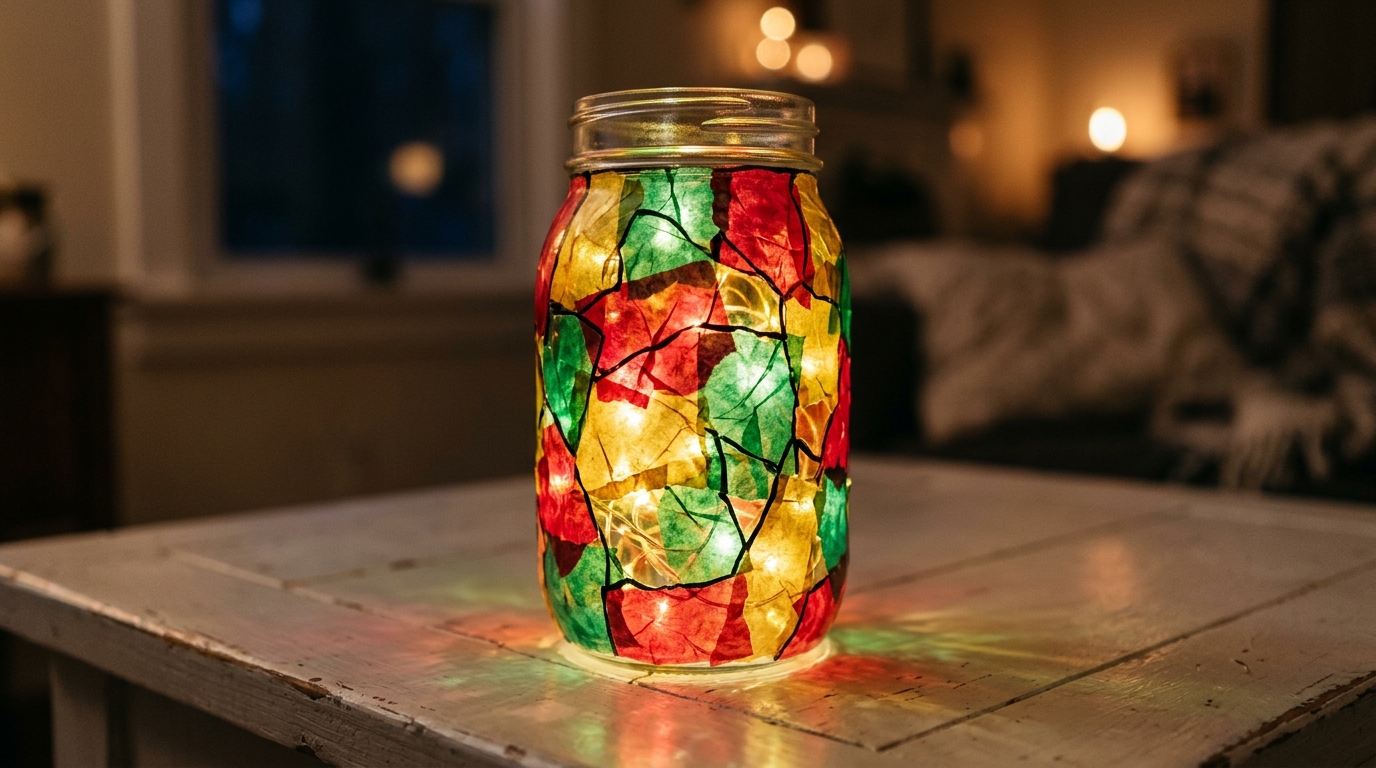
This easy idea gives you the look of a church window for pennies. Cut red, green and gold tissue paper into small shapes and glue them onto the jar so they overlap a little. Once dry, draw thin black lines between the shapes with a paint pen to look like lead lines. When the fairy lights go in, the colors glow and throw warm patches of light across the table. Kids can help with the gluing, which makes it a sweet family project. Where would you set yours to glow?
You will need: A clean jar, red, green and gold tissue paper, white school glue mixed with a little water, a brush and a black paint pen.
How to make it: 1. Cut the tissue into small squares and triangles. 2. Brush glue on the jar and press the pieces on, overlapping the edges. 3. Coat with glue again, let it dry and add black lines with the paint pen.
Candle Jar Makeovers With a Cookie Cutter Lid
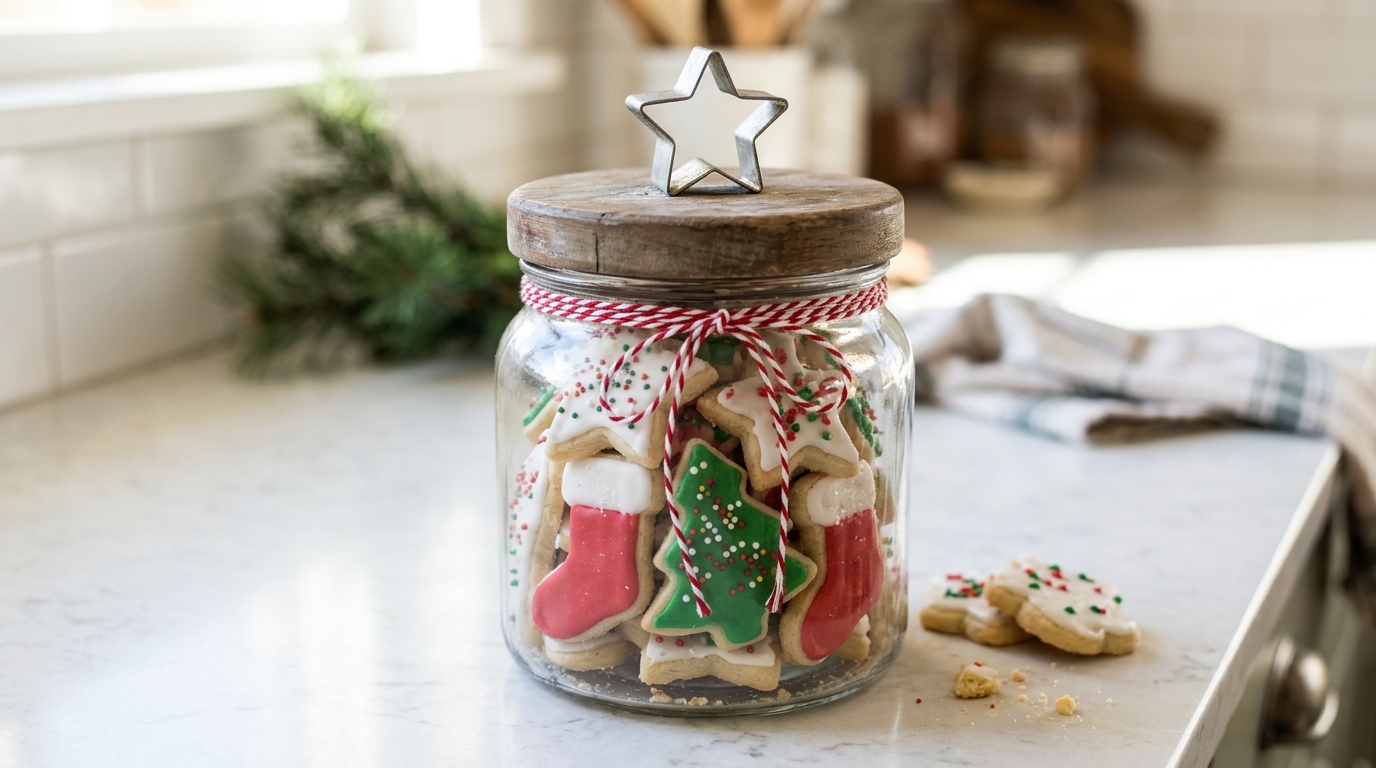
Many fancy candles come with a heavy wooden lid, and that lid is the secret to this sweet gift. Glue a small metal cookie cutter on top as a handle, like a star, a tree or a gingerbread man. Fill the clean jar with homemade sugar cookies or cocoa mix, tie baker’s twine around the neck and add a tag. It looks like a pricey bakery canister, and the cookie cutter is a little bonus gift. No lid? Dollar stores sell wooden lids that fit. Who would love a jar of cookies?
You will need: A clean jar with a wooden lid, a small metal cookie cutter, strong craft glue, baker’s twine and treats to fill it.
How to make it: 1. Sand the lid lightly where the cutter will sit. 2. Glue the cookie cutter on its side so it stands up like a handle and let it set. 3. Fill the jar, close it and tie on twine and a tag.
Paperwhites Growing in a Jar for a Living Gift
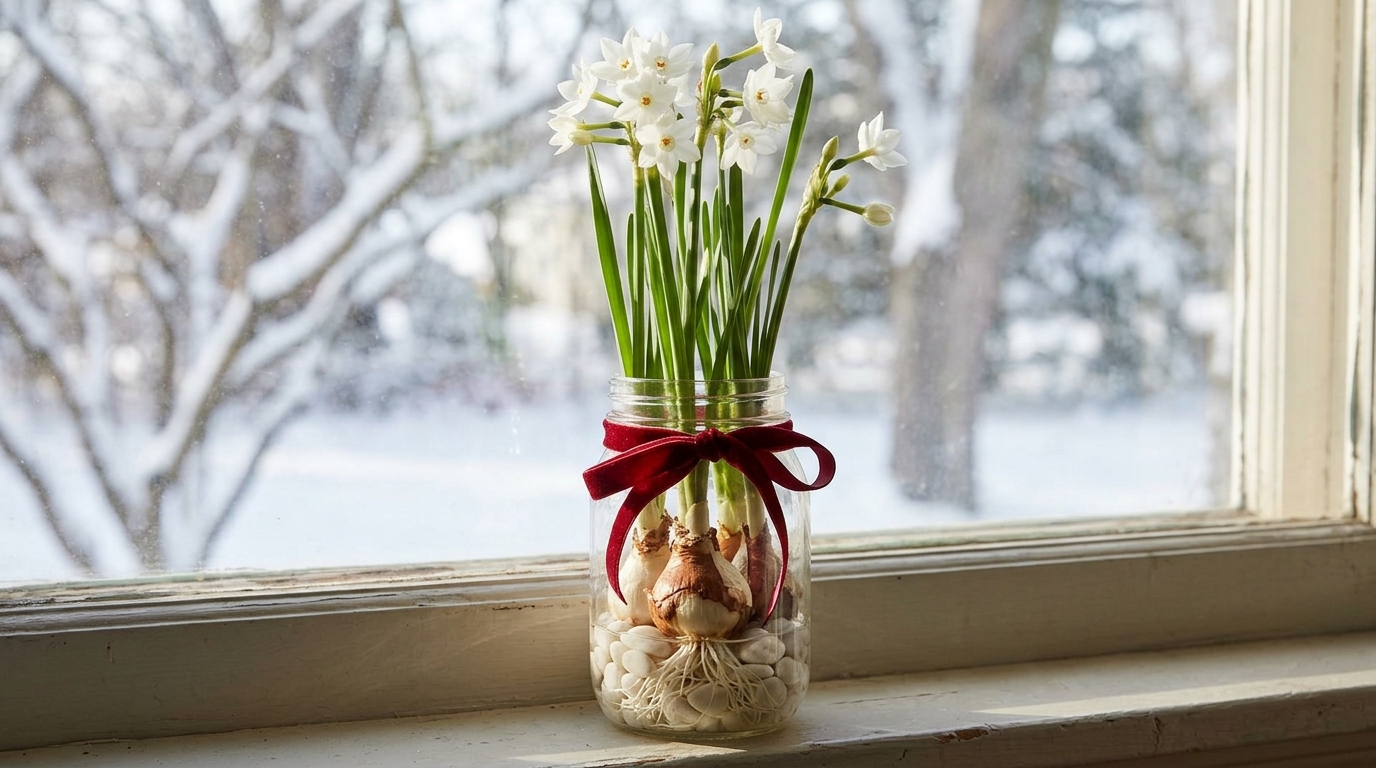
Here is a gift that keeps growing after you give it. Fill a clean jar halfway with white pebbles, nestle in two or three paperwhite bulbs and add water just up to the base of the bulbs. In about four weeks they send up tall green stems and clusters of white flowers. The clear glass lets you watch the roots grow, which kids find fascinating. Tie a red velvet ribbon around the jar and you have a living gift for a neighbor. Who would enjoy watching these bloom?
You will need: A clean jar, white pebbles or marbles, two or three paperwhite bulbs, water and a red velvet ribbon.
How to make it: 1. Fill the jar halfway with pebbles. 2. Set the bulbs pointed side up and add a few pebbles around them to hold them. 3. Add water just to the bottom of the bulbs and place in a bright spot.
Candle Jar Makeovers as a Makeup Brush Holder Gift
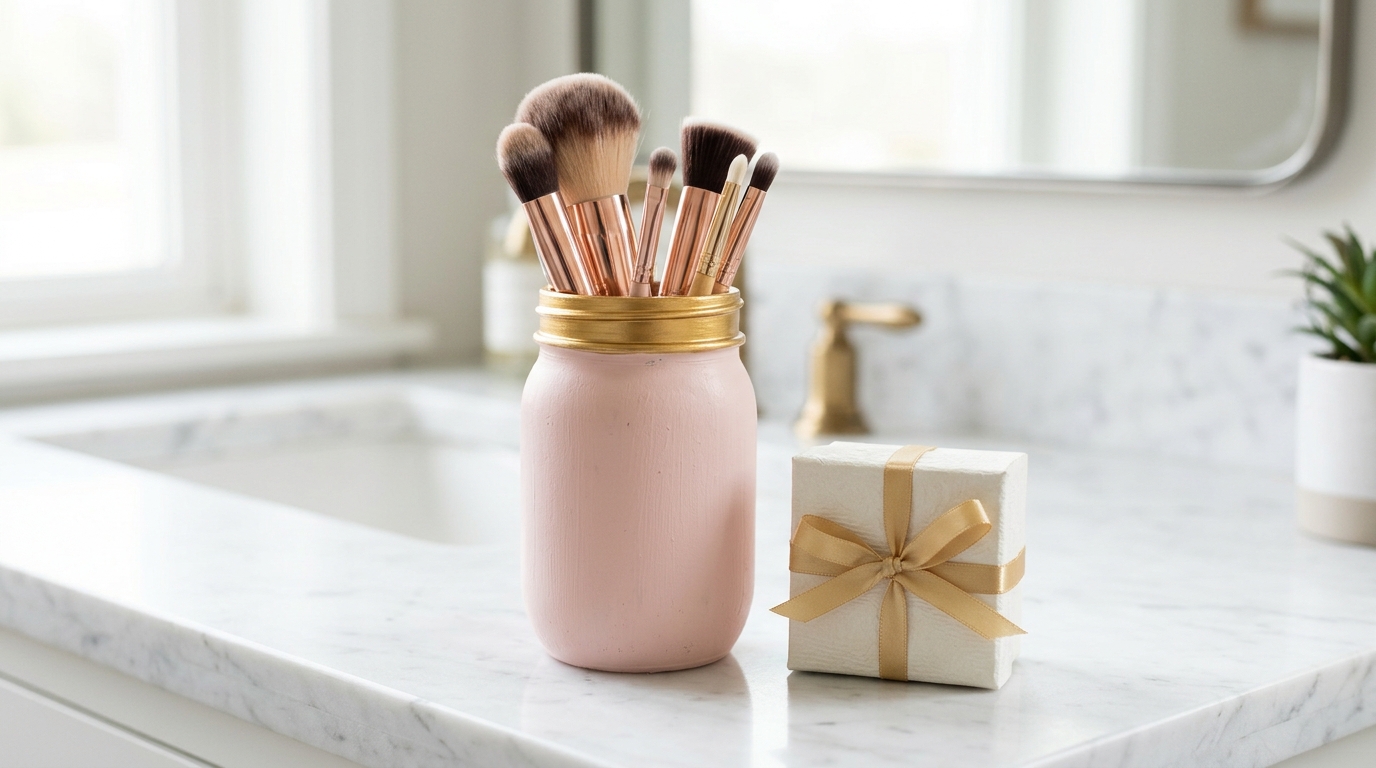
Candle Jar Makeovers make thoughtful gifts too, and this one gets used every day. Small, heavy candle jars are the perfect size and weight for makeup brushes because they do not tip over. Paint the outside a soft blush, cream or sage, add a thin gold rim with a paint pen and fill the bottom with a few coffee beans or rice so the brushes stand up. Tuck in a new brush or two as part of the gift. For more ideas like this, see our frosted mason jars. Who on your list loves a pretty vanity?
You will need: A small clean jar, chalky paint in a soft color, a gold paint pen, rice or coffee beans, and a new makeup brush for the gift.
How to make it: 1. Paint two coats on the outside of the jar and let it dry. 2. Run the gold pen around the rim for a polished edge. 3. Pour in a little rice and stand the brushes inside.
A Spa Style Bathroom Jar Trio to Finish
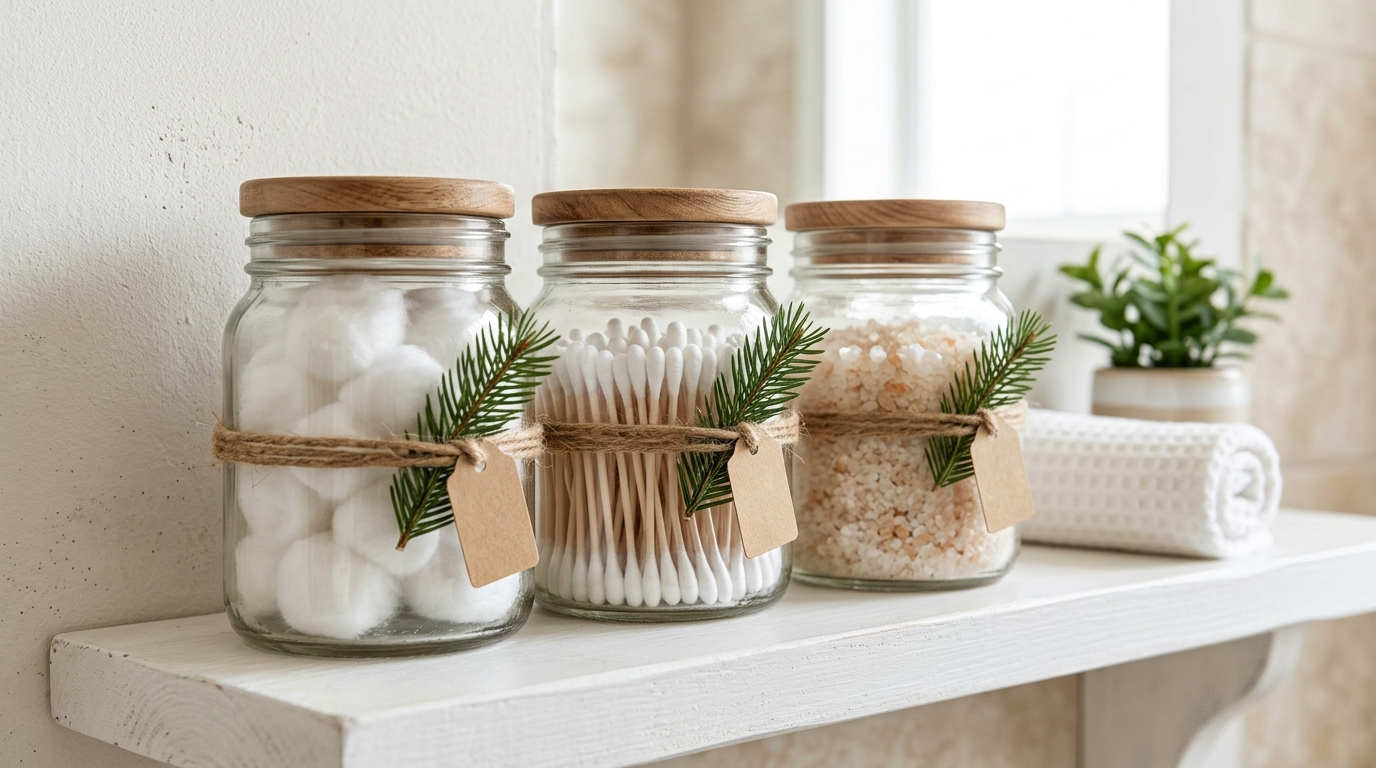
Save your three favorite jars with lids for this last idea, because together they look like a set from a hotel spa. Fill one with cotton balls, one with cotton swabs and one with bath salts, then wrap each with a band of jute twine. They tidy up a bathroom counter right away, and as a gift set they look far more expensive than they are. Add a sprig of pine and a tag and you are done. Which of these Candle Jar Makeovers will you make first?
You will need: Three clean jars with lids, cotton balls, cotton swabs, bath salts, jute twine, a pine sprig and gift tags.
How to make it: 1. Pick three jars that match in shape or color. 2. Fill each one and wrap twine three times around the middle. 3. Tie on a pine sprig and tag and set them on a tray to give.