Sandra Lee Tablescapes: 15 Semi Homemade Thanksgiving Tables That Look Expensive
Sandra Lee Tablescapes turned the Thanksgiving table into a little work of art, and the secret was never a big budget. On her cooking show Semi-Homemade Cooking, Sandra Lee decorated the whole table to match each meal’s theme and called these settings tablescapes, a word she is credited with coining (you can read more about her on Wikipedia). Her famous rule was simple: mix about 70 percent store bought with 30 percent fresh and handmade. That same idea works beautifully for decor. Grab a few dollar store pumpkins, a roll of burlap and some wheat, add your own handmade touches, and your table looks like it came out of a magazine. Here are 15 semi homemade Thanksgiving tables you can copy this year, one easy idea at a time. Let’s set a table your family will remember..
Sandra Lee Tablescapes Start With One Color Story
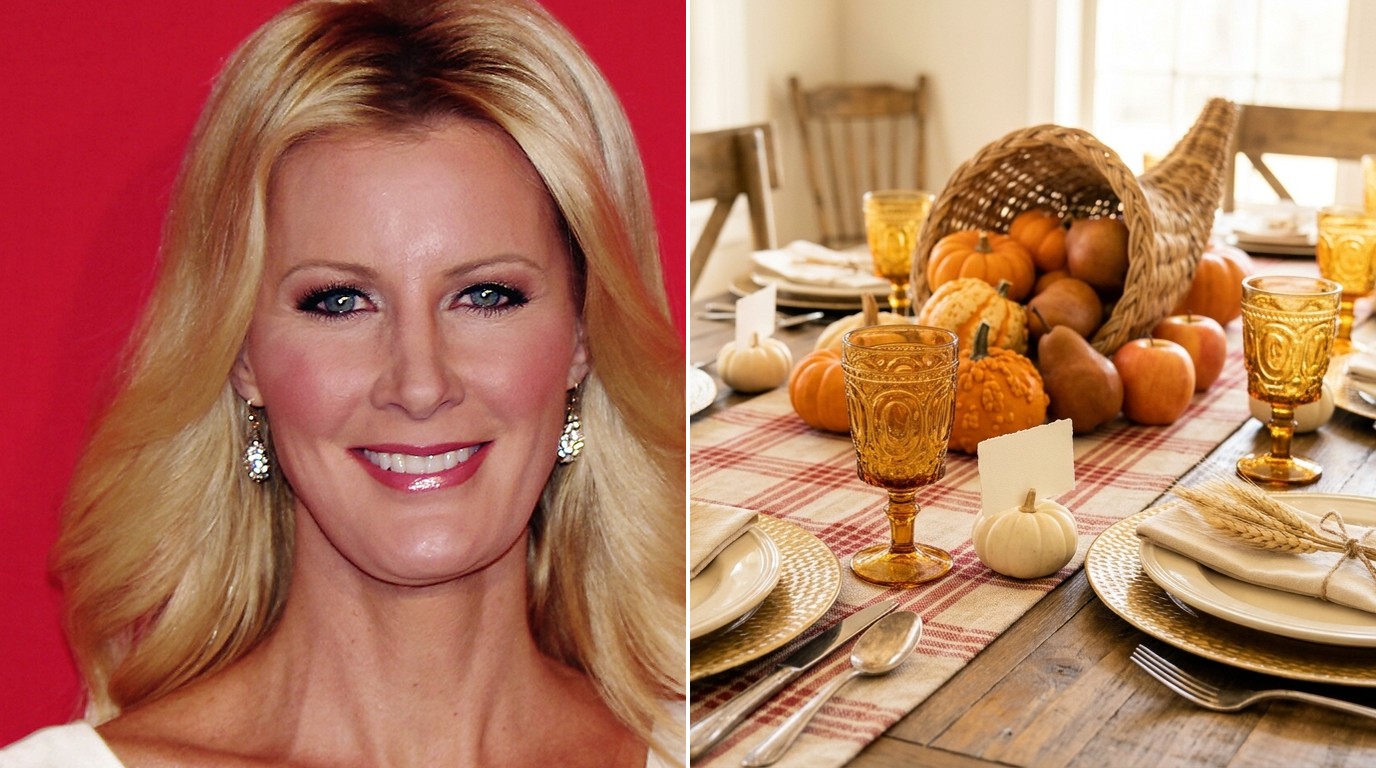
The first rule of Sandra Lee Tablescapes is picking one color story and sticking to it. Orange and cream is the easiest for Thanksgiving because almost everything at the store already comes in those shades. Plaid runner, amber glasses, white mini pumpkins, gold chargers and a basket of fruit all talk to each other, so the whole table looks planned. Nothing has to be expensive. It just has to match. Which two colors would you build your table around this year..
You will need: A plaid table runner, cream plates, gold chargers, amber glasses, mini white pumpkins, wheat stems, a wicker cornucopia basket.
How to make it: 1. Pick two main colors and one metal, like orange, cream and gold. 2. Pull everything you already own in those colors and fill gaps with dollar store finds. 3. Set one place first, photograph it, then copy it down the whole table.
Dollar Store Pumpkin and Gourd Runner
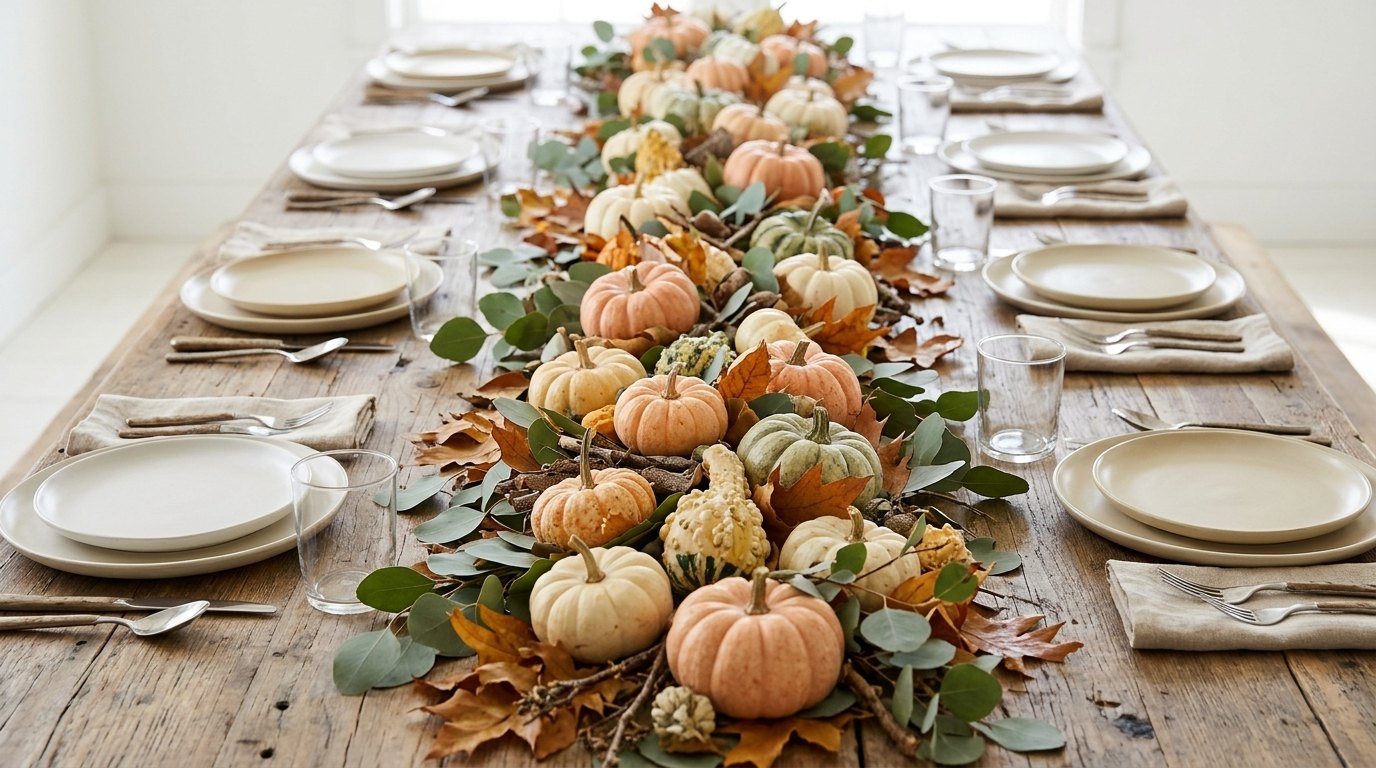
A row of faux pumpkins down the middle of the table is the fastest centerpiece there is. Dollar store pumpkins in orange, white and sage green look rich when you pack them close together and tuck greenery between them. Add a few dried leaves and some eucalyptus and the gaps disappear. The best part is that you can pack it all in a bin and use it again next year. How many pumpkins would your table need?
You will need: 12 to 20 small faux pumpkins and gourds, faux eucalyptus stems, dried or faux autumn leaves.
How to make it: 1. Lay the eucalyptus down the center of the table first as a base. 2. Place the biggest pumpkins every foot or so, then fill between them with the small ones. 3. Tuck leaves into any gaps so no table shows through.
Burlap and Plaid Runner for Sandra Lee Tablescapes on a Budget
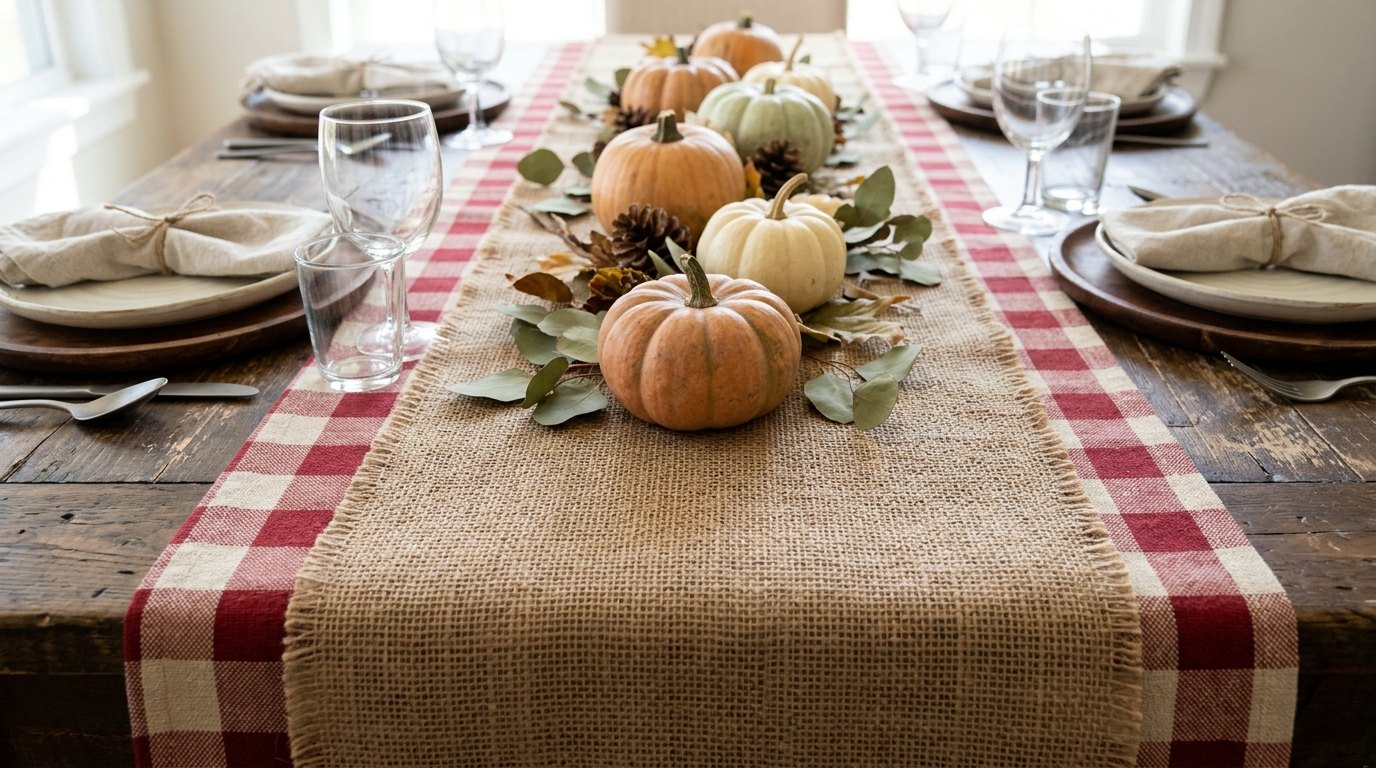
Layering two cheap runners is a classic Sandra Lee Tablescapes trick that makes a plain table look custom. A wide plaid runner goes down first and a narrow strip of burlap sits on top, so you see a frame of plaid on both sides. Burlap costs very little by the yard and the edges can stay raw for a rustic look. Top it with a few pumpkins and you are done. Would you choose red plaid or a softer cream check?
You will need: A wide plaid or buffalo check runner, a yard of burlap, fabric scissors, a few small pumpkins.
How to make it: 1. Center the plaid runner on the table. 2. Cut the burlap about two thirds as wide as the plaid and the same length. 3. Lay it on top, pull a few threads on the ends for fringe, then add the pumpkins.
Mini Pumpkin Place Card Holders
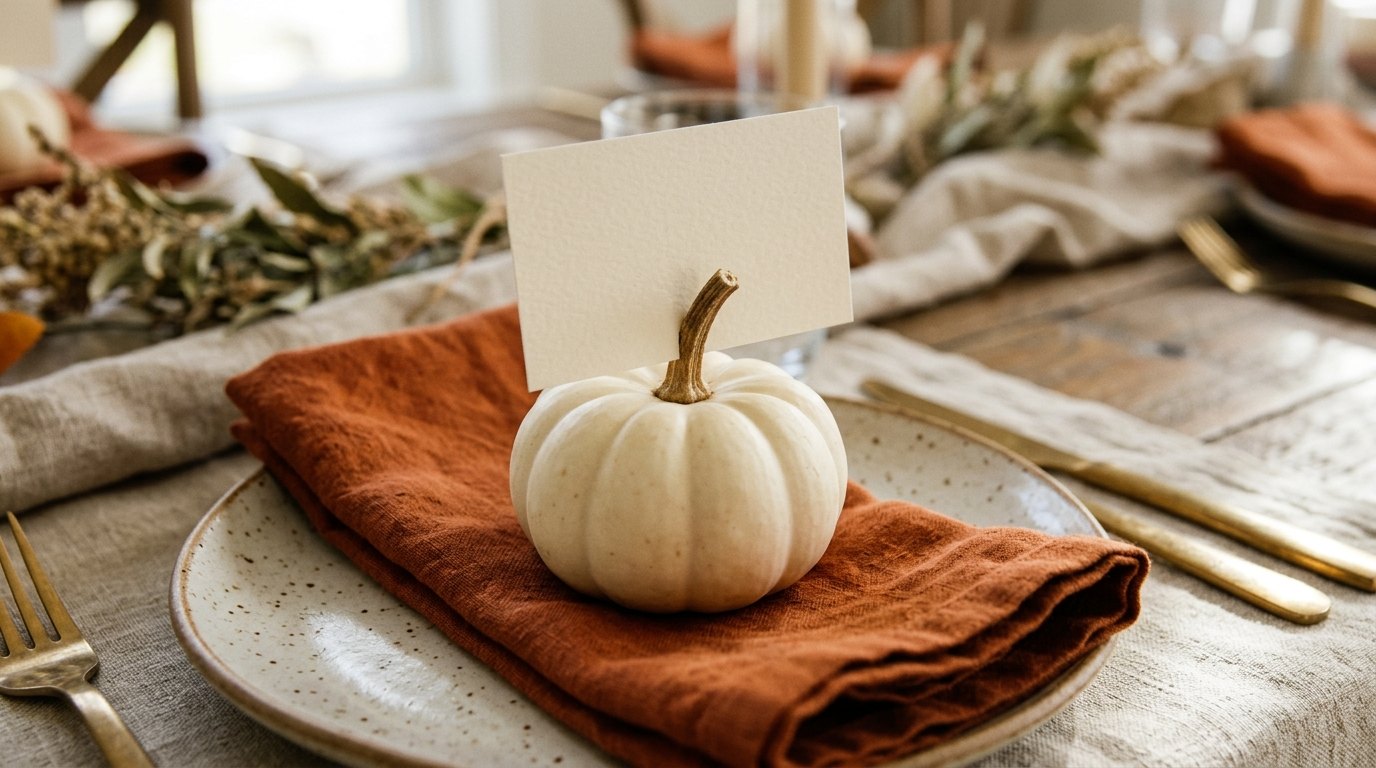
A tiny white pumpkin makes the sweetest place card holder, and guests love taking them home. A small slit in the stem or the top holds a card upright. Write each name in your best handwriting, or print them on cream cardstock for a cleaner look. Set one on top of each folded napkin and every seat suddenly feels personal. Who gets the head of the table at your house?
You will need: Mini white pumpkins (real or faux), cream cardstock, a pen, a small craft knife for adult use.
How to make it: 1. Cut cardstock into small rectangles about 2 by 3 inches and write each name. 2. With an adult handling the knife, cut a short slit in the top of each pumpkin or the stem. 3. Slide the card in and set a pumpkin on every plate.
Wheat Bundle Napkin Rings, a Sandra Lee Tablescapes Favorite
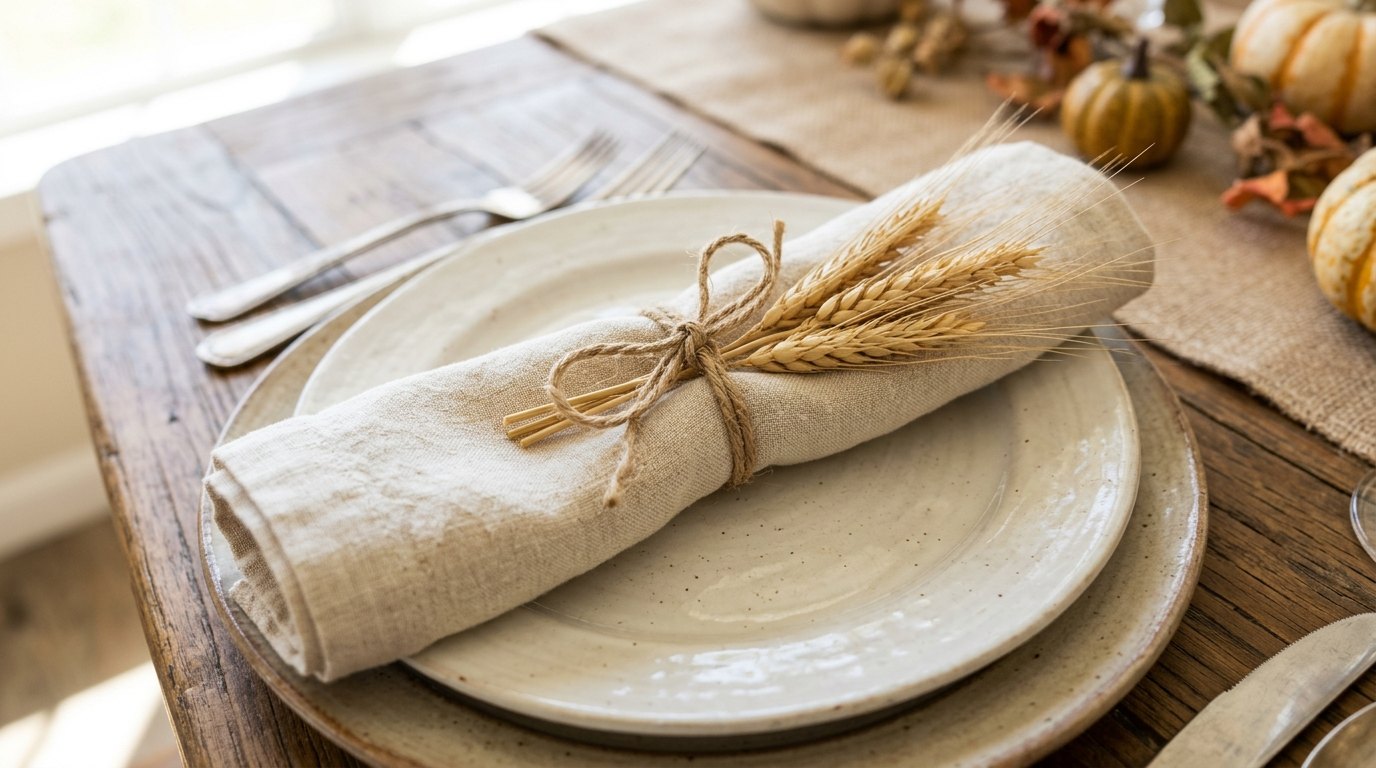
Dried wheat is one of those cheap craft store finds that looks instantly elegant, which is why it shows up in so many Sandra Lee Tablescapes style settings. A small bundle tied around a rolled linen napkin feels like harvest time in one little detail. Jute twine keeps it rustic. You can make all of them while watching a movie the night before. Could you make a dozen before dinner tomorrow?
You will need: Dried wheat stems, jute twine, cloth napkins in cream or linen, scissors.
How to make it: 1. Roll each napkin into a neat tube. 2. Cut wheat stems to about 6 inches and gather four or five into a small bundle. 3. Lay the bundle on the napkin and wrap twine around both three times, then tie a bow.
Faux Leaf Charger Plates
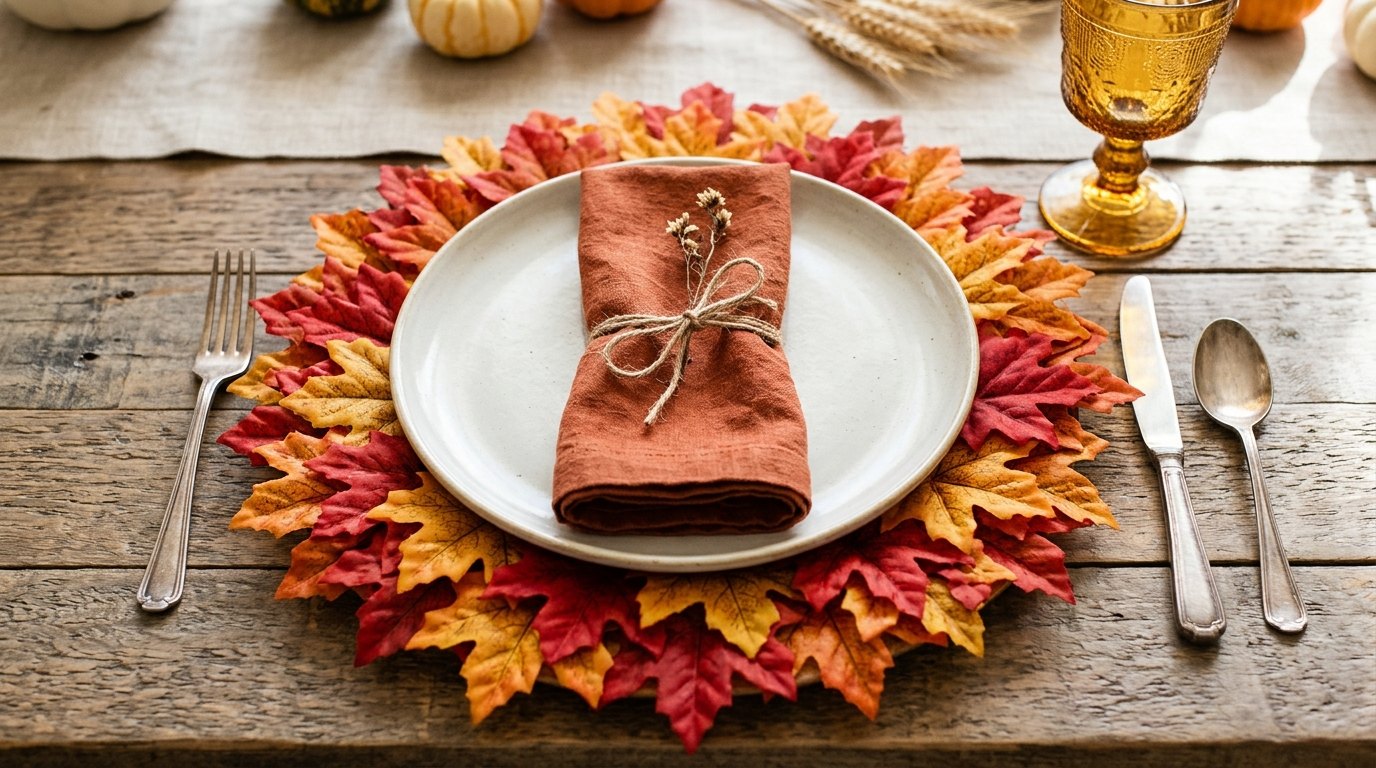
Charger plates make a table look fancy, but buying a set can cost more than the turkey. Make your own by gluing faux autumn leaves around a cheap round cardboard cake base. The red, orange and gold leaves frame every plate like a wreath. With a white plate on top, it looks like something from a high end catalog. Which leaf colors would you mix?
You will need: Round cardboard cake bases or old chargers, a bag of faux autumn leaves, hot glue (with adult help) or strong craft glue.
How to make it: 1. Pull the leaves off their stems and sort them by size. 2. Start at the outer edge and glue a ring of big leaves pointing out, then add a second ring of smaller leaves inside it. 3. Leave the center bare so the plate sits flat.
Mason Jar Nosegays, Straight From Sandra Lee Tablescapes
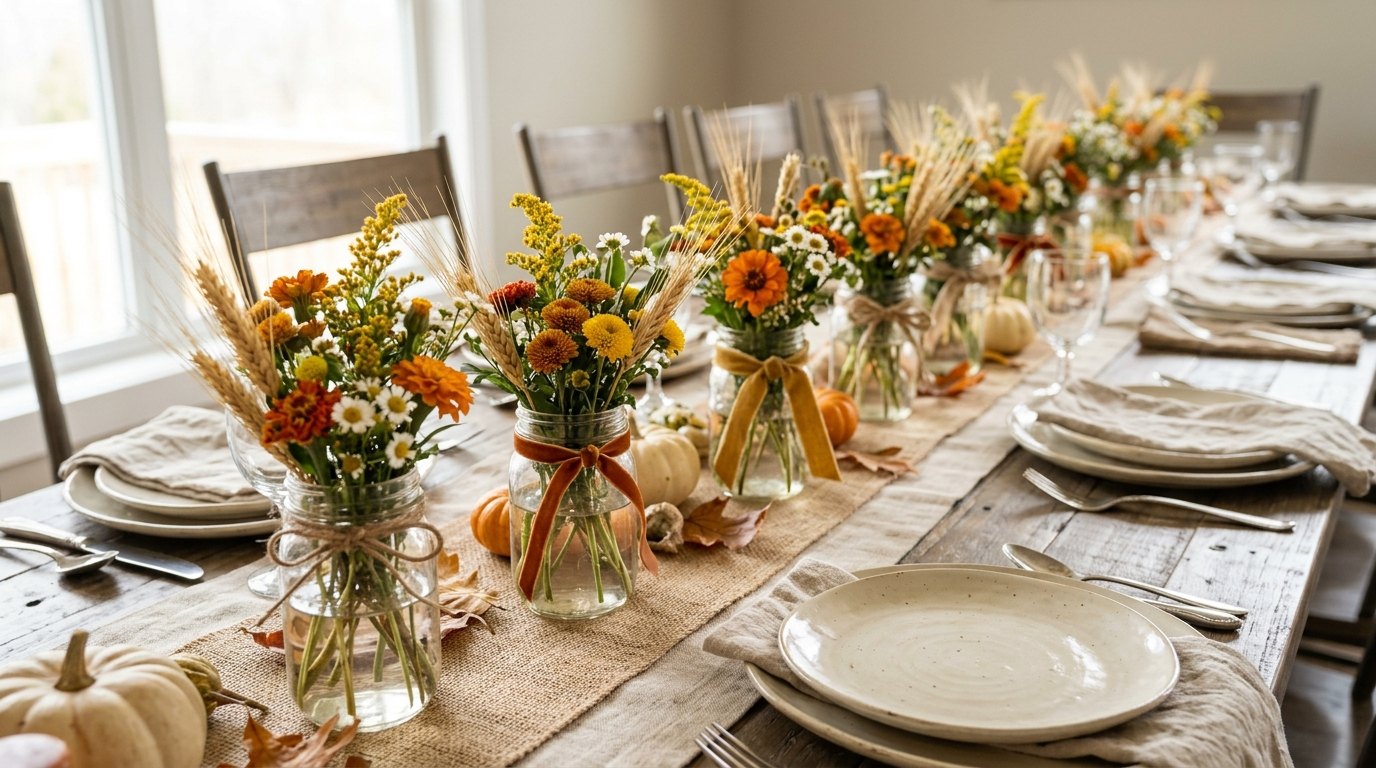
Sandra Lee has shown off small flower bunches called nosegays on her tables, and they are one of the easiest Sandra Lee Tablescapes ideas to copy. Little mason jars with grocery store blooms, wheat and a ribbon tie look charming lined down the table. They are low enough that guests can talk across them, which is a big win. Split one cheap bouquet across six jars and you have a full row. Which flowers do you usually find at your grocery store?
You will need: Small mason jars, one or two grocery store bouquets in fall colors, a few wheat stems, satin or burlap ribbon.
How to make it: 1. Fill each jar about two thirds with water. 2. Cut the flowers short, about two inches taller than the jar, and split them into small bunches with a wheat stem or two. 3. Tie a ribbon around each jar neck and space them down the table.
Gold Painted Acorns in a Wooden Bowl
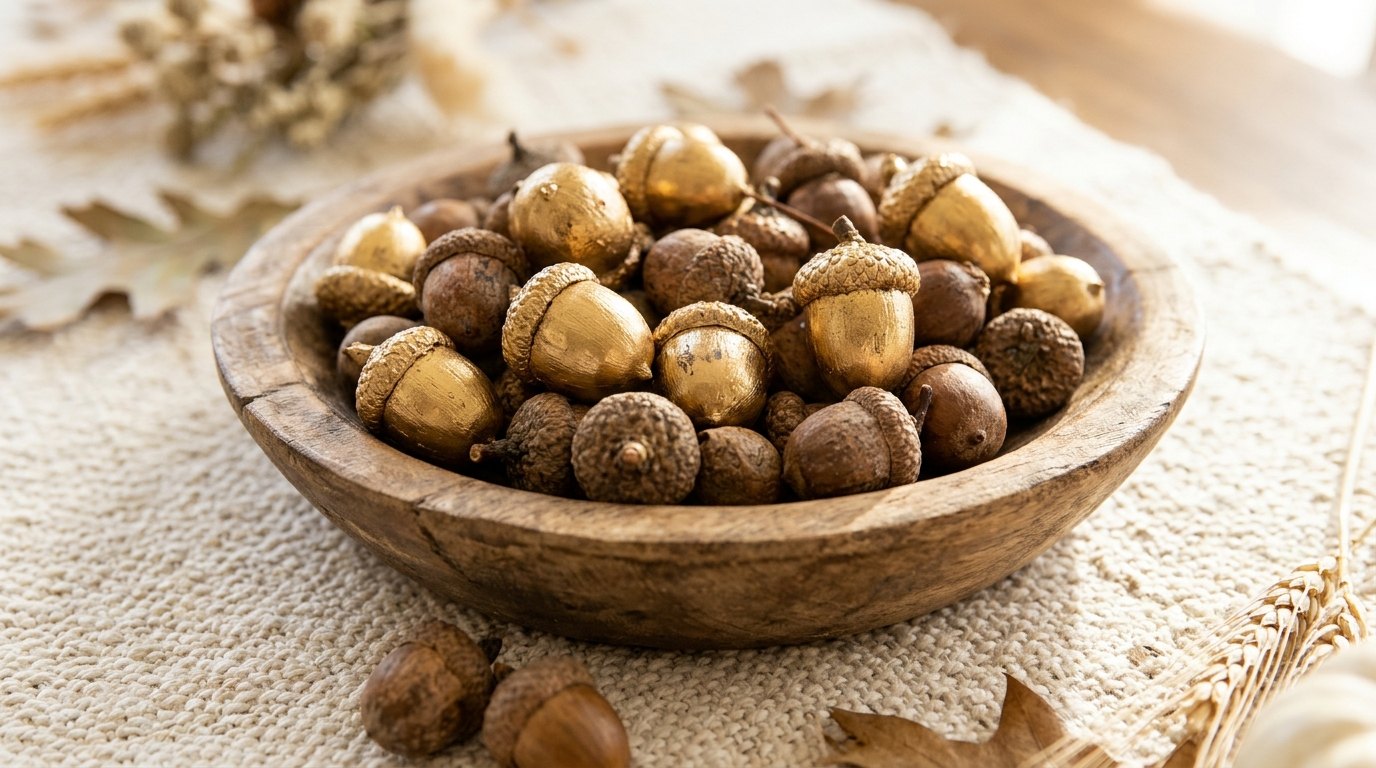
A walk in the park can fill a whole centerpiece for free. Gather acorns, brush some with gold paint and mix them with natural brown ones in a wooden bowl. The shiny gold catches the light and looks like a pricey decor piece. Kids love helping with this one too. Bake the acorns low in the oven first if you want to keep them for years. Do you have an oak tree nearby?
You will need: Acorns, metallic gold acrylic paint, a small brush or sponge, a baking sheet, a shallow wooden bowl.
How to make it: 1. Rinse the acorns and let them dry, then bake at a low heat for about an hour with adult help. 2. Brush gold paint over half of them and let them dry on paper. 3. Toss gold and natural acorns together in the bowl.
Apple and Pear Name Card Holders for Sandra Lee Tablescapes
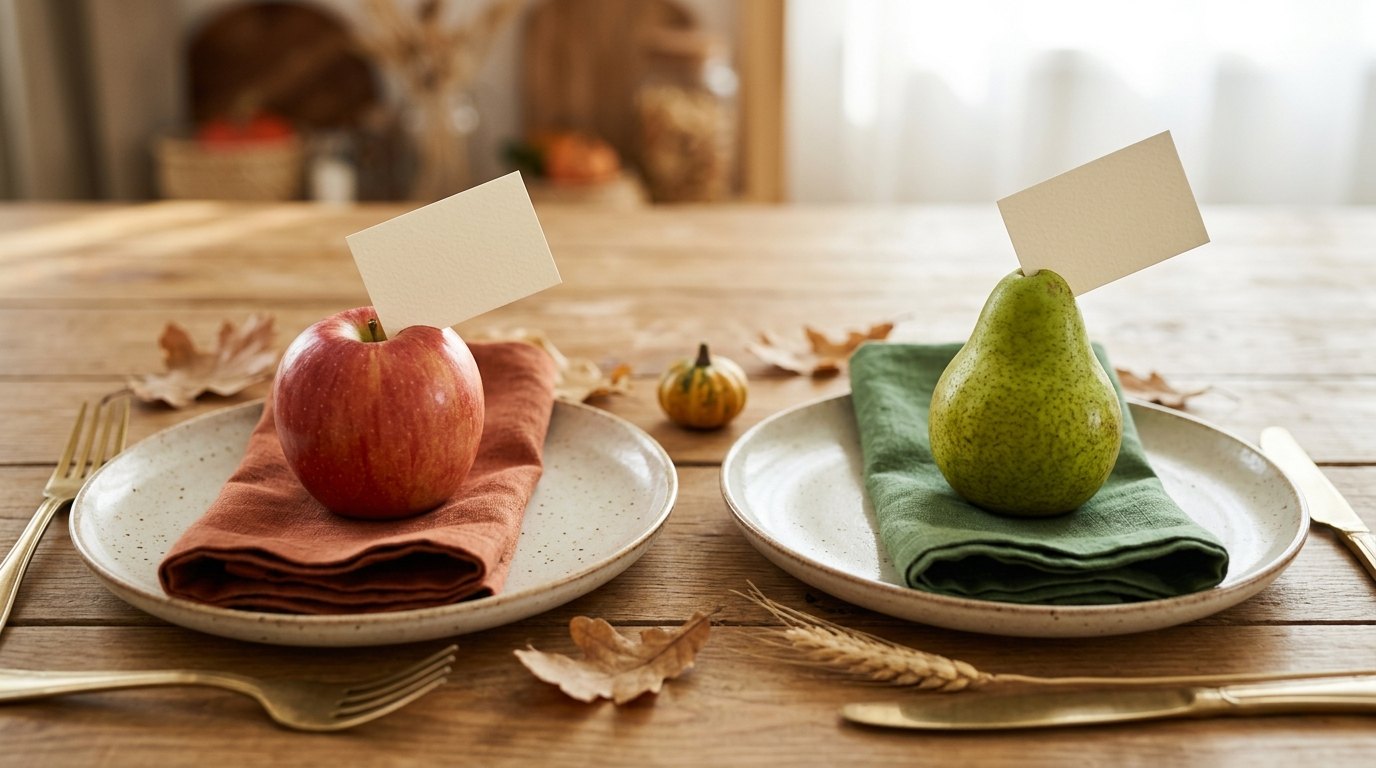
Fruit makes some of the prettiest place cards, and it is pure Sandra Lee Tablescapes thinking: a store bought apple or pear plus one handmade card. Cut a small slit in the top, tuck in a name, and set it on a matching napkin. Red apples on rust napkins and green pears on sage napkins look so pulled together. After dinner, guests can even eat their place card. Would your family pick apples or pears?
You will need: Red apples and green pears with flat bottoms, cream cardstock, a pen, a small paring knife for adult use.
How to make it: 1. Pick fruit that stands up on its own, or slice a thin piece off the bottom. 2. An adult cuts a short slit near the stem. 3. Write the names on small cards and slide one into each piece of fruit.
Cornucopia Centerpiece From a Basket
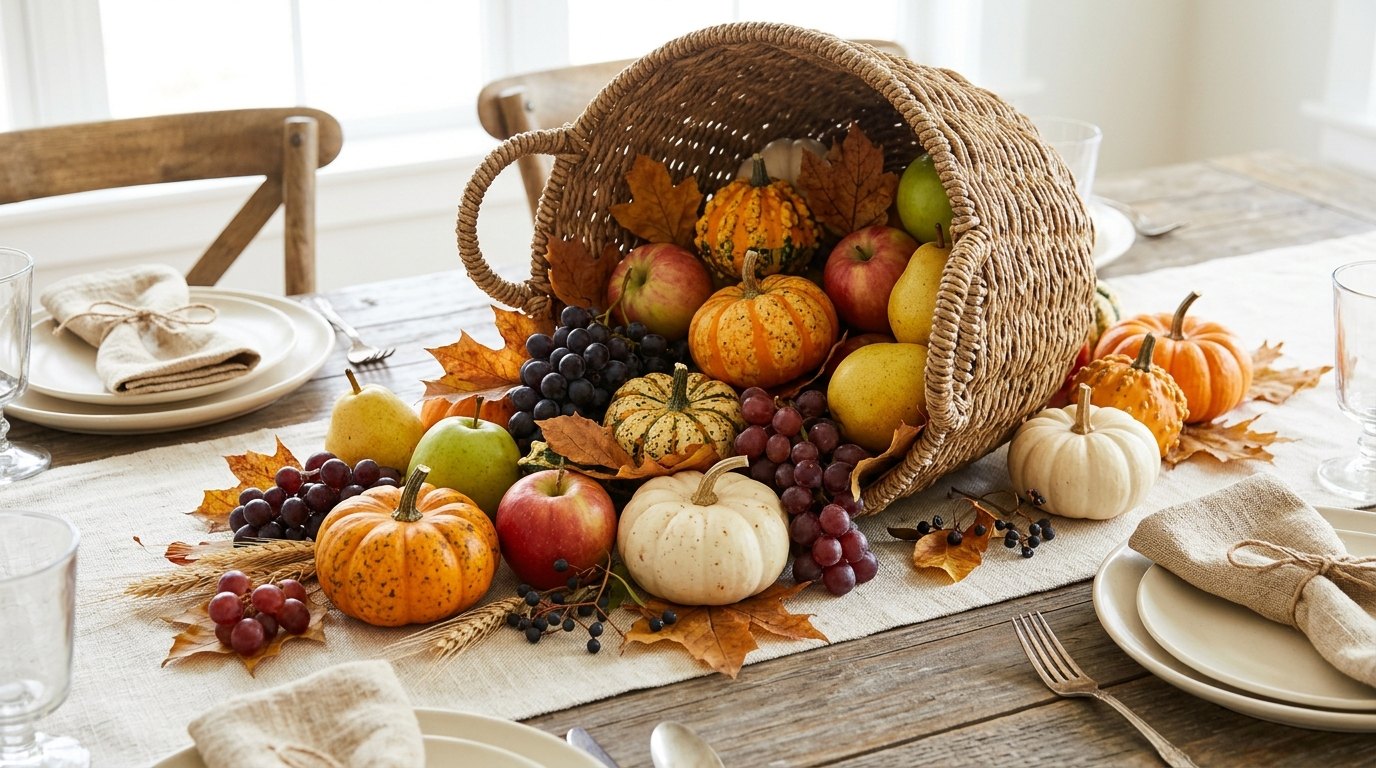
You do not need a real horn of plenty for a cornucopia. A simple wicker basket tipped on its side does the job. Spill out pumpkins, apples, pears, grapes and leaves so it looks like the harvest is pouring across the table. Most of it can be real fruit you will eat later in the week. If you want more ideas like this, our Thanksgiving centerpieces roundup has plenty. What would you spill out of yours?
You will need: A wicker basket, small pumpkins and gourds, apples, pears, grapes, autumn leaves, a little moss or paper filler.
How to make it: 1. Lay the basket on its side in the center of the table and wedge a folded towel under it so it does not roll. 2. Fill the back of the basket with paper so the fruit sits up at the opening. 3. Pile the fruit and pumpkins so they spill out and down the runner.
Thankful Notes Tucked in Every Napkin
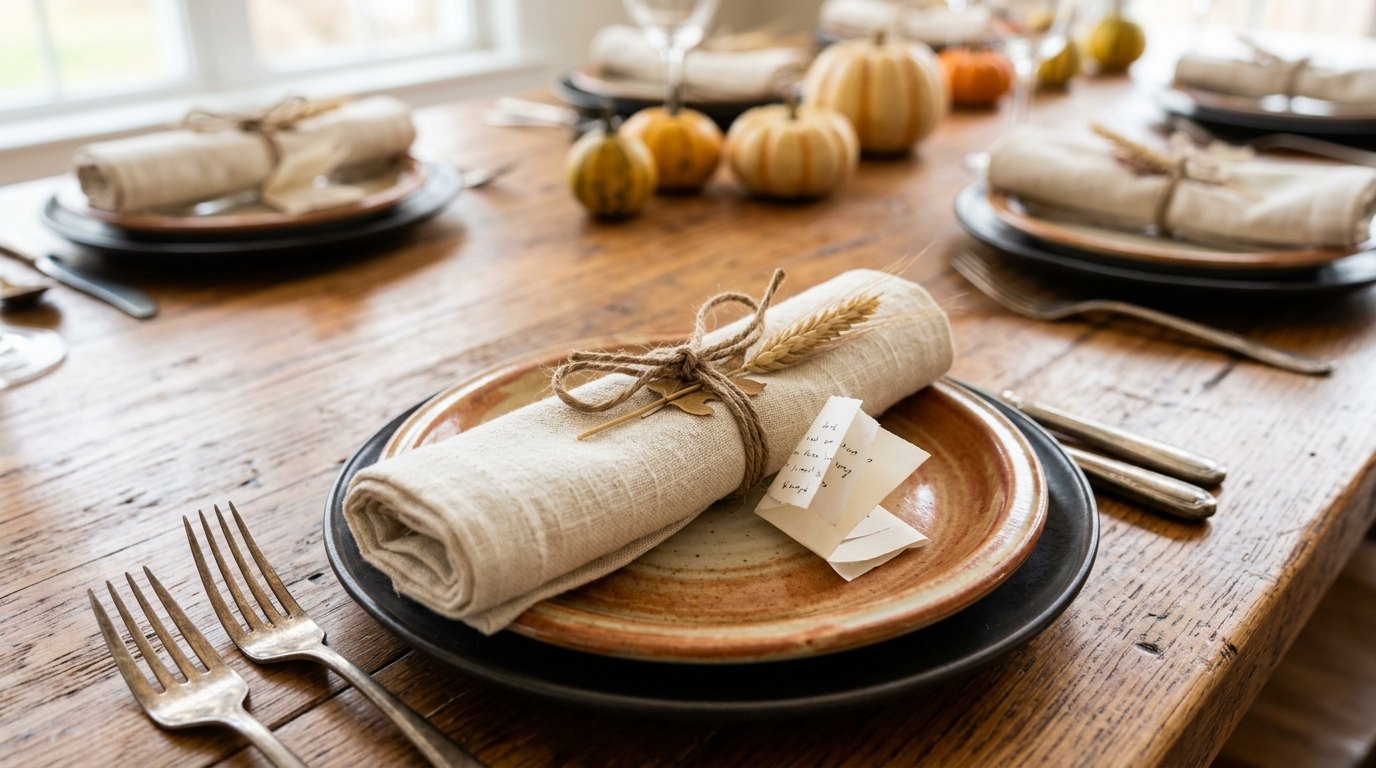
This is the idea people remember long after the pie is gone. Before dinner, write a short note to each guest saying one thing you are thankful for about them. Fold it small and tuck it into their napkin under the twine. When everyone sits down, the table goes quiet while they read. It costs nothing but a few minutes and some paper. Who would you write the first note to?
You will need: Small pieces of cream paper or cardstock, a nice pen, twine, cloth napkins.
How to make it: 1. Write one short, kind note for each guest. 2. Fold each note in half twice. 3. Roll the napkins, tie them with twine and slip a note under each knot.
Store Bought Pie Dressed Up the Sandra Lee Tablescapes Way
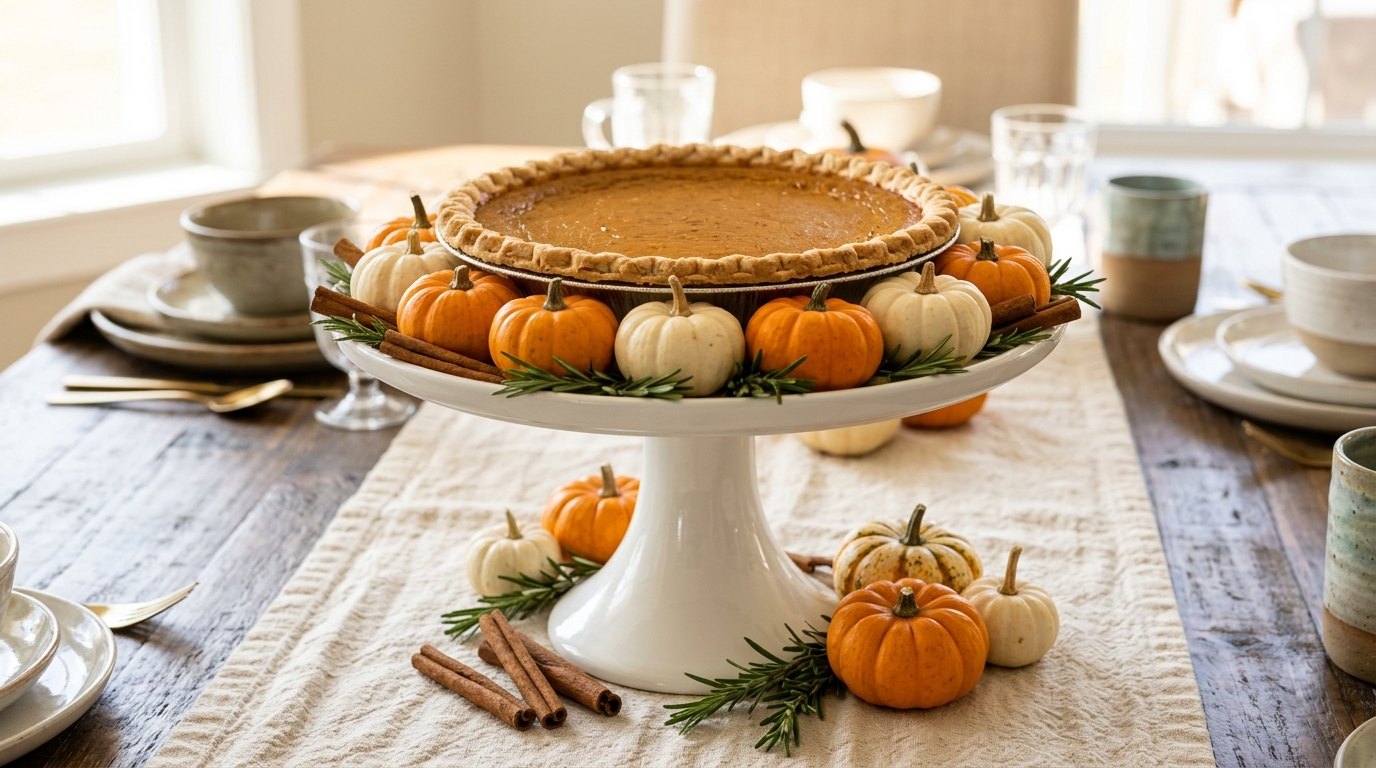
This is semi homemade at its best and one of the most fun Sandra Lee Tablescapes tricks. Take a store bought pumpkin pie, set it on a tall white cake stand, and ring it with mini pumpkins, rosemary and cinnamon sticks. Suddenly it looks like the star of a bakery window and doubles as your centerpiece. Nobody needs to know you did not bake it. Would you admit it was store bought, or keep the secret?
You will need: A store bought pumpkin pie, a tall cake stand, mini pumpkins, fresh rosemary sprigs, cinnamon sticks.
How to make it: 1. Set the pie on the cake stand in the middle of the table. 2. Ring the edge of the stand with mini pumpkins and rosemary. 3. Scatter cinnamon sticks and more pumpkins around the base of the stand.
Copper and Amber Glass Table
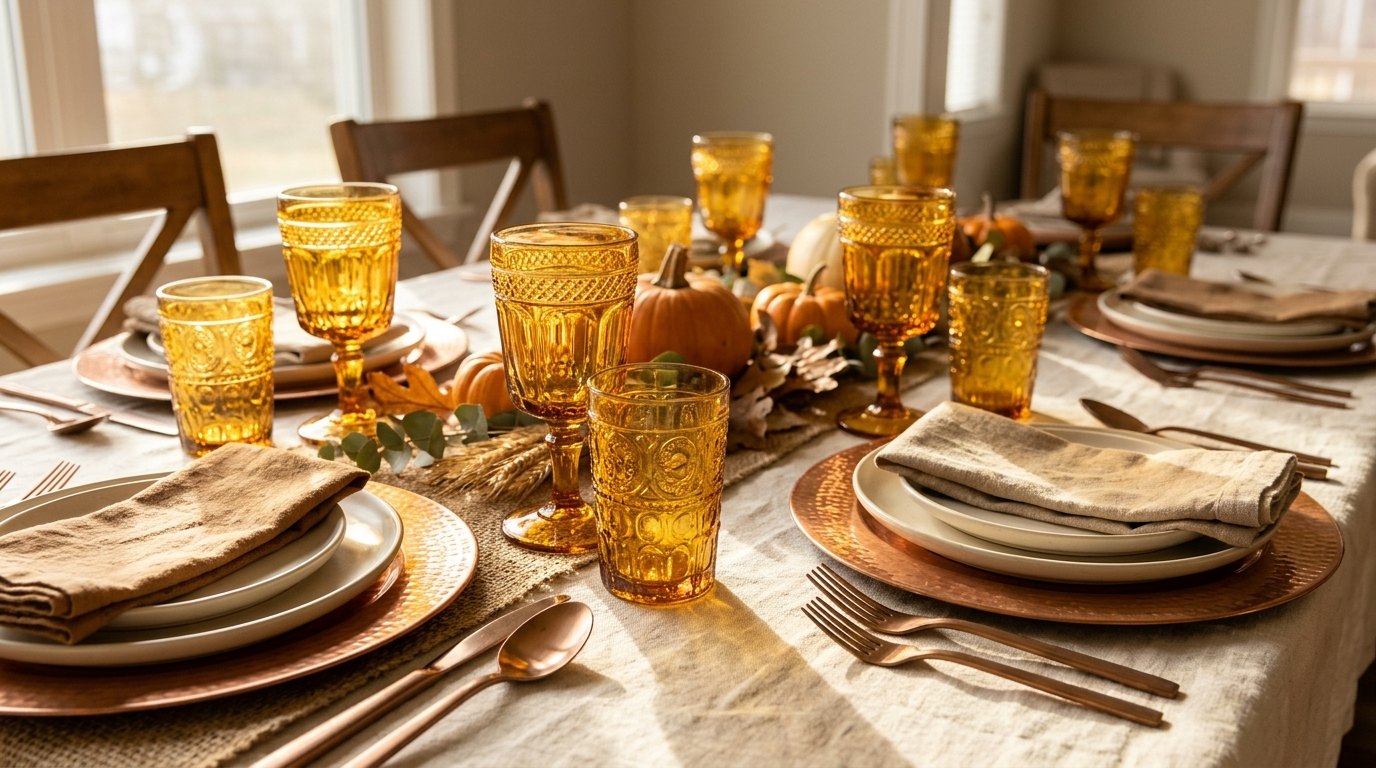
Copper and amber glass are a dreamy pair for fall. The amber glass glows when sunlight hits it and the copper adds a warm shine without looking flashy. Thrift stores are full of amber goblets and tumblers, often for a dollar or two each, and they do not need to match perfectly as long as the color does. Copper chargers can be plain plastic ones painted with metallic paint. Which thrift store will you check first?
You will need: Amber glass goblets or tumblers, copper chargers or plastic chargers and copper metallic paint, linen napkins, small pumpkins.
How to make it: 1. Collect amber glassware in different shapes but the same honey color. 2. Paint plastic chargers with two coats of copper paint if needed and let them dry. 3. Set a charger, plate, linen napkin and one amber glass at each place, with small pumpkins in between.
Kids Table With a Kraft Paper Cover, Sandra Lee Tablescapes Style
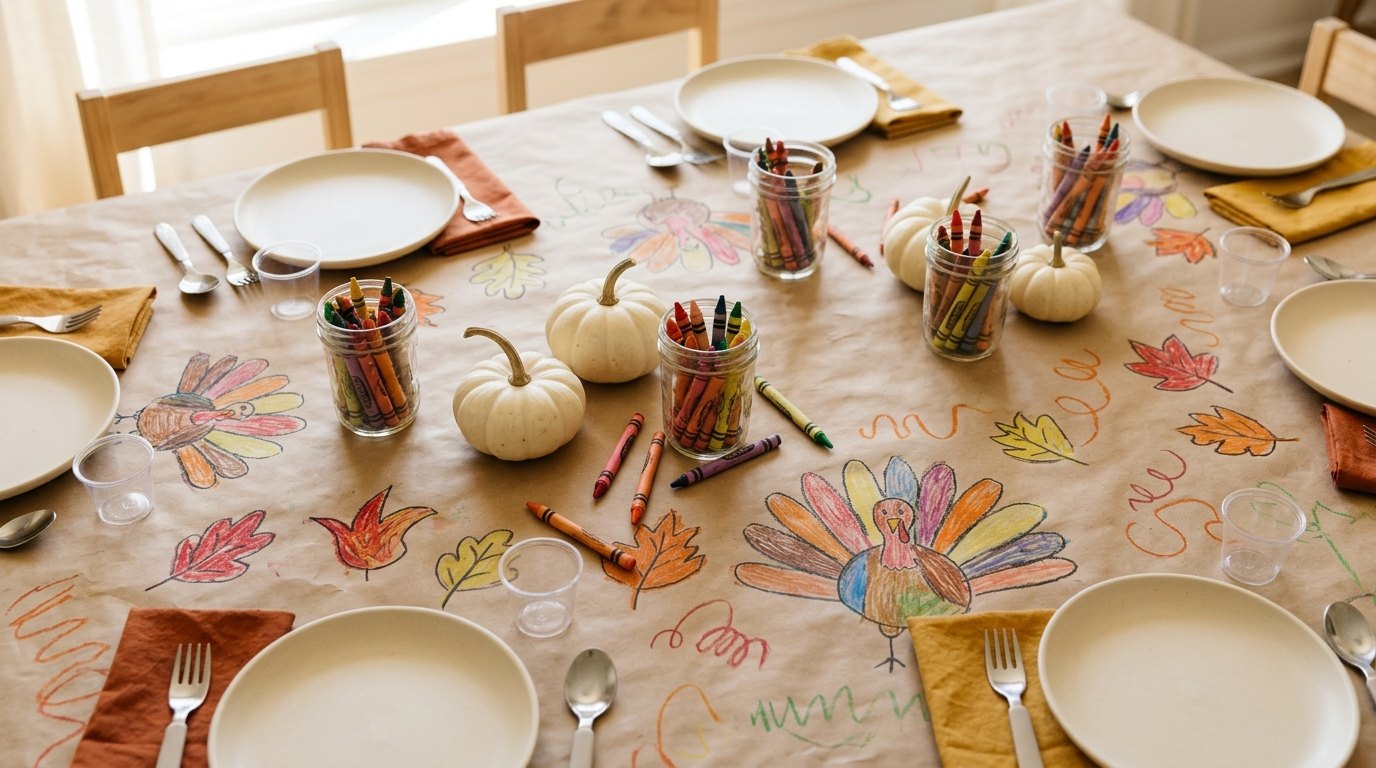
The kids table can be the happiest spot in the house with one roll of kraft paper. Cover the table, set out crayons in little mason jars and let the kids draw turkeys, leaves and hand tracings while they wait for dinner. It keeps them busy, protects the table and keeps the Sandra Lee Tablescapes color story going with orange napkins and white pumpkins. Afterward, cut out the best drawings to keep. What would your kids draw first?
You will need: A roll of brown kraft paper, tape, crayons, small mason jars, mini white pumpkins, colorful napkins.
How to make it: 1. Roll the paper over the whole table and tape it underneath at the edges. 2. Fill jars with crayons and place one between every two seats. 3. Draw a few leaves and turkey outlines yourself to get them started.
Buffet Table Styled With Risers
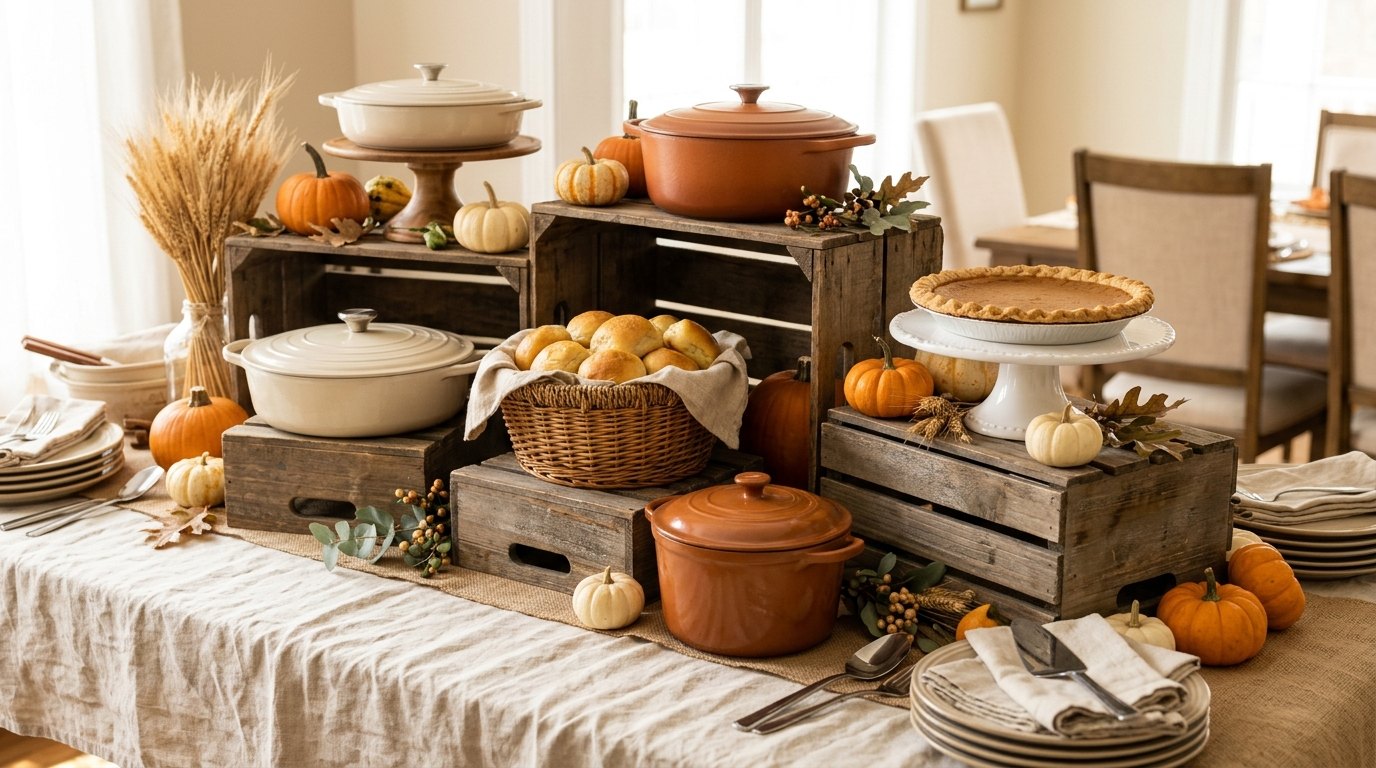
A buffet looks so much more inviting when the food sits at different heights. Wooden crates, flipped bowls and cake stands make easy risers. Put tall things in the back, flat dishes in the front and tuck pumpkins and wheat into the gaps. Keep the same orange and cream colors from your main table so the whole room matches. It makes even a simple potluck feel like a party. What would go on your top shelf?
You will need: Two or three wooden crates, cake stands, a tablecloth, small pumpkins, wheat stems, serving dishes.
How to make it: 1. Set the crates at the back of the table and drape the tablecloth over them. 2. Place cake stands and the tallest dishes on the crates and flat dishes in front. 3. Fill any gaps with pumpkins and wheat so the display looks full.