Tin Can Crafts: 15 Cozy Ways to Turn Empty Cans Into Holiday Decor and Gifts
Tin can crafts might be the friendliest way to start your holiday making, because the main supply is already sitting in your recycling bin. And people have clearly noticed. In the week to October 29, 2026, the Google search “upcycle tin cans with socks” hit Breakout status in the United States, and interest in the tin topic jumped about 1,750 percent. There is something sweet about rescuing a soup can and turning it into a gift someone keeps for years. These projects cost almost nothing, use simple tools and look lovely on a shelf, a desk or a holiday table. Below are 15 cozy ideas, from sweater sock planters to a glowing star lantern. One quick safety note before you start: always file or tape any sharp rim, and let an adult handle the hammer, nails and hot glue..
Tin Can Crafts Start Here: Cozy Sweater Sock Planters
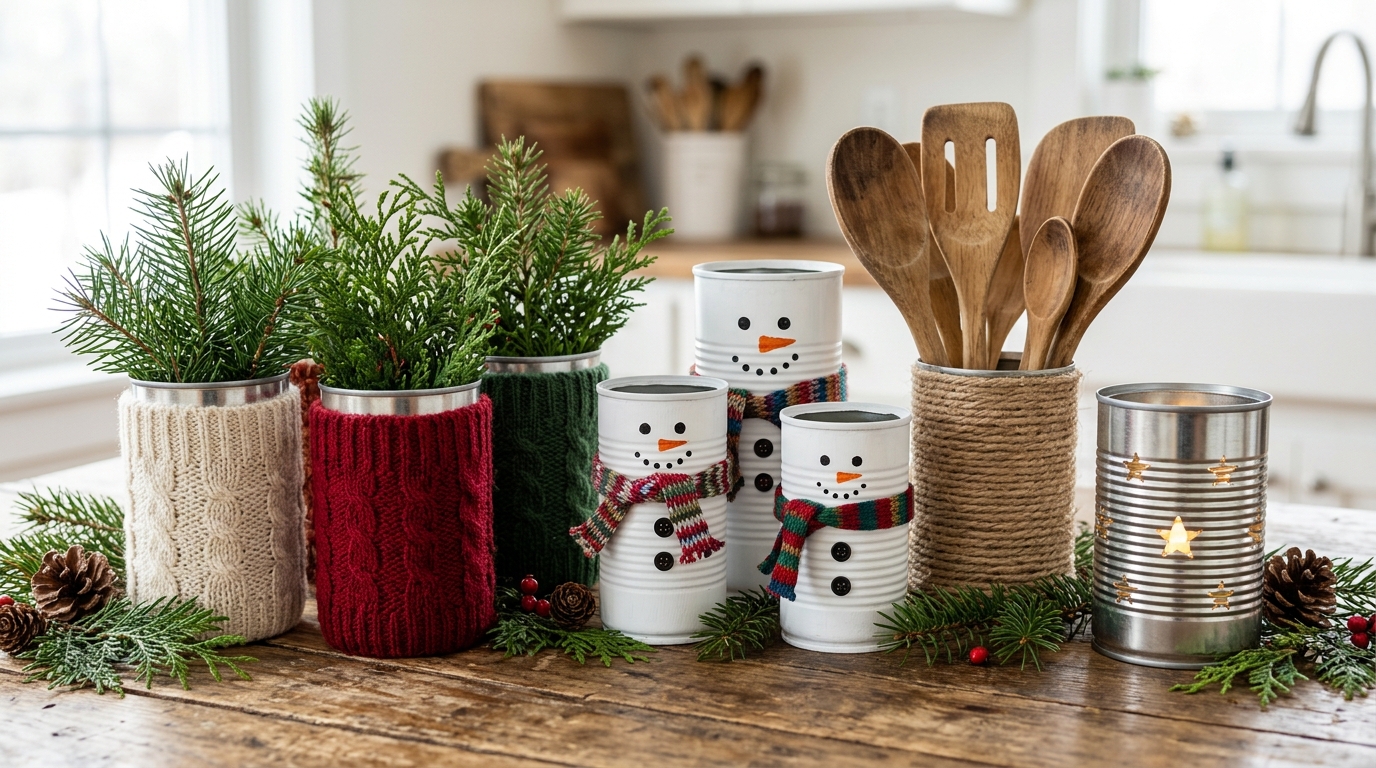
This is the idea everyone is searching for right now, and it is pure comfort. An old knee sock or a sweater sleeve slides right over a clean can and turns it into a soft little planter cover in seconds. Chunky cable knits look the coziest, and red, cream and green mix beautifully for the holidays. If you have a drawer of lonely socks or a sweater with a hole in the elbow, you are already halfway there. Want more ways to use that knitwear? Our old sweater upcycles are full of ideas..
You will need: Clean cans with smooth rims, old knee socks or sweater sleeves, scissors, a little potting soil and small plants or evergreen sprigs.
How to make it: 1. Wash the can, peel the label and file or tape any sharp edge. 2. Cut the sock to the can height plus two inches and pull it on, folding the top inside. 3. Add soil and a small plant, or fill with evergreen sprigs for a no water display.
Jute Wrapped Utensil Holders for a Farmhouse Kitchen

A plain can wrapped in natural jute twine looks like something from a country store, and it takes about twenty minutes. Larger cans from tomatoes or beans are perfect for wooden spoons, whisks and spatulas next to the stove. The twine gives a nice grip and a warm texture that fits almost any kitchen. If you like to watch before you try, this short video from Neda DIY shows a few quick tin can crafts. Which corner of your counter needs a little rustic charm?
You will need: Large clean cans, a roll of natural jute twine, a hot glue gun (adult help), scissors and a sprig of greenery.
How to make it: 1. File or tape the rim and dry the can well. 2. With adult help, add a dot of hot glue at the bottom and wrap the twine tightly round and round to the top, adding glue every few rows. 3. Tie on a sprig of greenery and fill with your favorite kitchen tools.
A Snowman Family Made With Tin Can Crafts
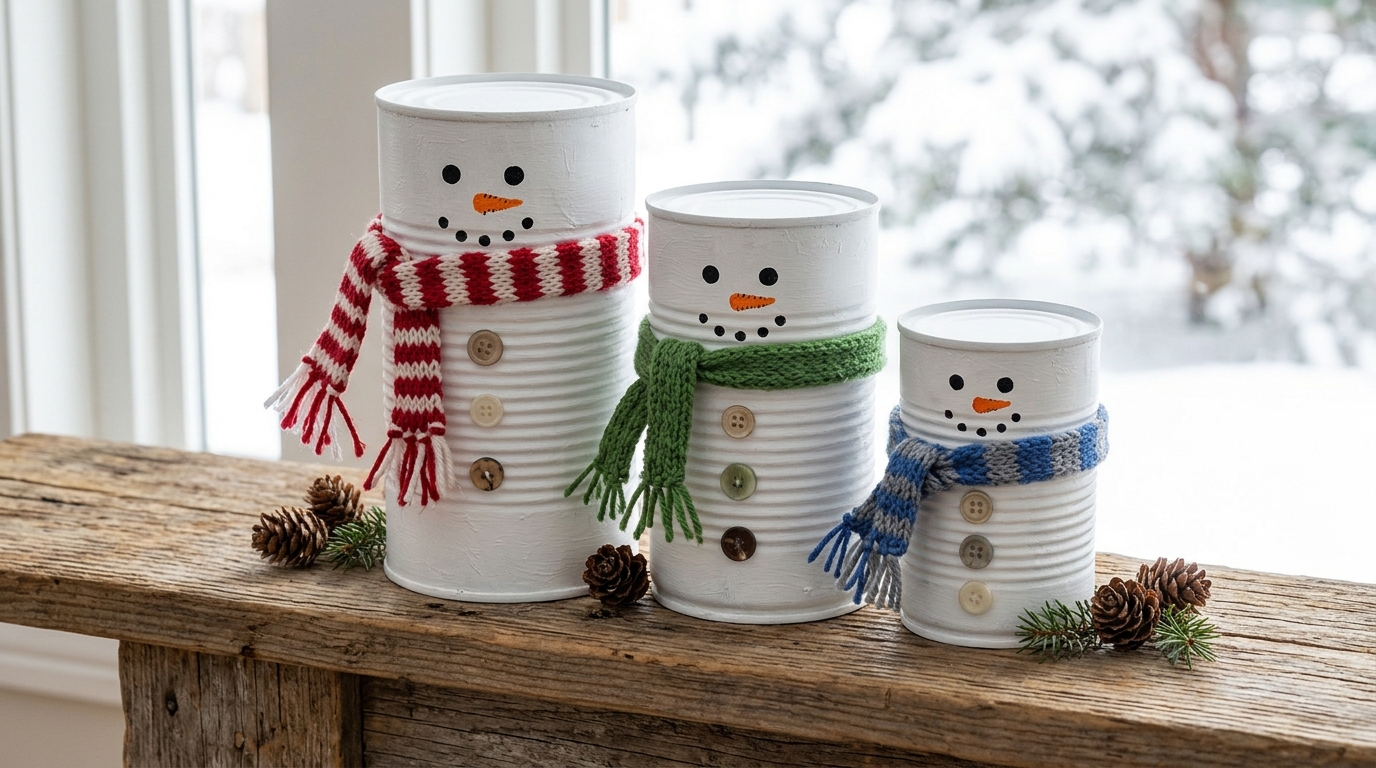
Three cans in three sizes become a happy snowman family that can stay out from November to February. Kids love this one because the painting is simple and every snowman ends up with its own personality. A real scrap of knit or fleece for each scarf makes them look extra snug. Use a small soup can, a vegetable can and a large coffee can so the family has a dad, a mom and a little one. What would you name your snowman crew?
You will need: Three cans in different sizes, white acrylic paint, a sponge brush, black and orange paint, a cotton swab, and scraps of knit fabric for scarves.
How to make it: 1. Tape any sharp rims, then paint each can white with two coats. 2. Dot on coal eyes and buttons with a cotton swab, then paint an orange carrot nose. 3. Tie a strip of knit fabric around the top of each can as a scarf.
Cookie Gift Cans Tied With a Big Bow

Homemade cookies feel even more special when they arrive in a pretty can instead of a paper plate. Wrap the outside in checked paper or leftover gift wrap, add a wide ribbon, and you have a sweet gift for neighbors, teachers or the mail carrier. Always wrap the cookies in a cellophane bag first, so the treats never touch the can itself. It is one of the sweetest tin can crafts to give away. Who on your list would love a can full of cookies?
You will need: A clean can with a smooth rim, patterned paper, double sided tape, wide satin ribbon, a cellophane treat bag and a gift tag.
How to make it: 1. File or tape the rim and measure paper to wrap around the can. 2. Stick the paper on with double sided tape and tie a big ribbon bow around the middle. 3. Fill a cellophane bag with cookies, twist it closed and tuck it inside.
Tin Can Crafts That Glow: Punched Star Lanterns

Punched lanterns are a classic for good reason. Tiny holes in the shape of stars or snowflakes throw dots of light across the wall, and the effect is magical on a dark winter evening. The old trick is to fill the can with water and freeze it overnight, so the ice holds the shape while an adult taps the holes with a hammer and nail. Light them only with small battery LED tea lights, never a real flame. Where would a little starry glow look best in your home?
You will need: Clean cans, water and a freezer, a printed star pattern, tape, a hammer and nails (adult only), a towel, and battery LED tea lights.
How to make it: 1. Fill the can with water, freeze it solid and tape your pattern around the outside. 2. An adult lays the can on a folded towel and taps holes along the pattern lines with a hammer and nail. 3. Let the ice melt, dry the can, file the rim and pop a battery LED light inside.
Pastel Pencil Cups for a Happy Desk

A desk feels calmer when every pen and pencil has a home. A set of small cans painted in soft pastels is one of the easiest tin can crafts for school or a home office, and you can finish it in one afternoon. Group them by color for a sweet rainbow look, or give each one a job: pencils, markers, scissors and brushes. A strip of washi tape around the rim covers the edge and adds a neat finish. Which color would you choose for your favorite cup?
You will need: Small clean cans, spray primer or chalk paint in pastel shades, washi tape, a paintbrush and a drop cloth.
How to make it: 1. Wash the cans, remove the labels and cover the rims with washi tape. 2. Paint two light coats on the outside, letting each coat dry. 3. Arrange them on your desk and fill each one with a different kind of supply.
A Tiered Can Organizer for Ribbon and Yarn
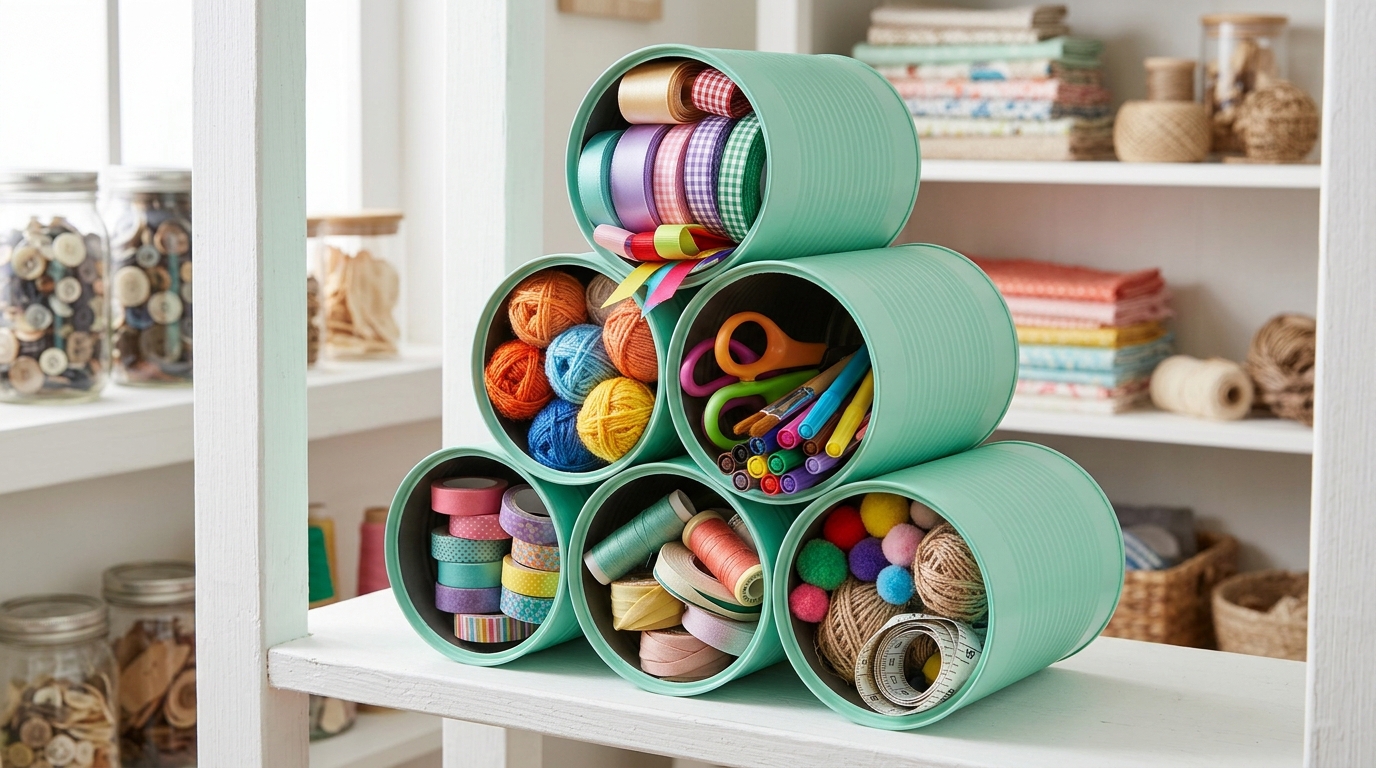
If your ribbon and yarn end up in a tangled pile, this stacked organizer is a little life saver. Cans glued on their sides in a pyramid create cubbies that show off every roll and ball, so you can grab the right color at a glance. Painting them all one shade, like mint green or soft gray, makes the stack look like a store display. It also works for rolled towels in a bathroom or kids art supplies. What would you keep in your can pyramid?
You will need: Six to ten cans of the same size, spray paint in one color, strong craft glue or hot glue (adult help), clothespins and a flat board for the base.
How to make it: 1. File or tape the rims and paint all the cans the same color. 2. Lay a bottom row on the board and glue them side by side, holding them with clothespins while they dry. 3. Glue each next row into the gaps above until you reach the top can.
Tin Can Crafts for a Sunny Windowsill Garden
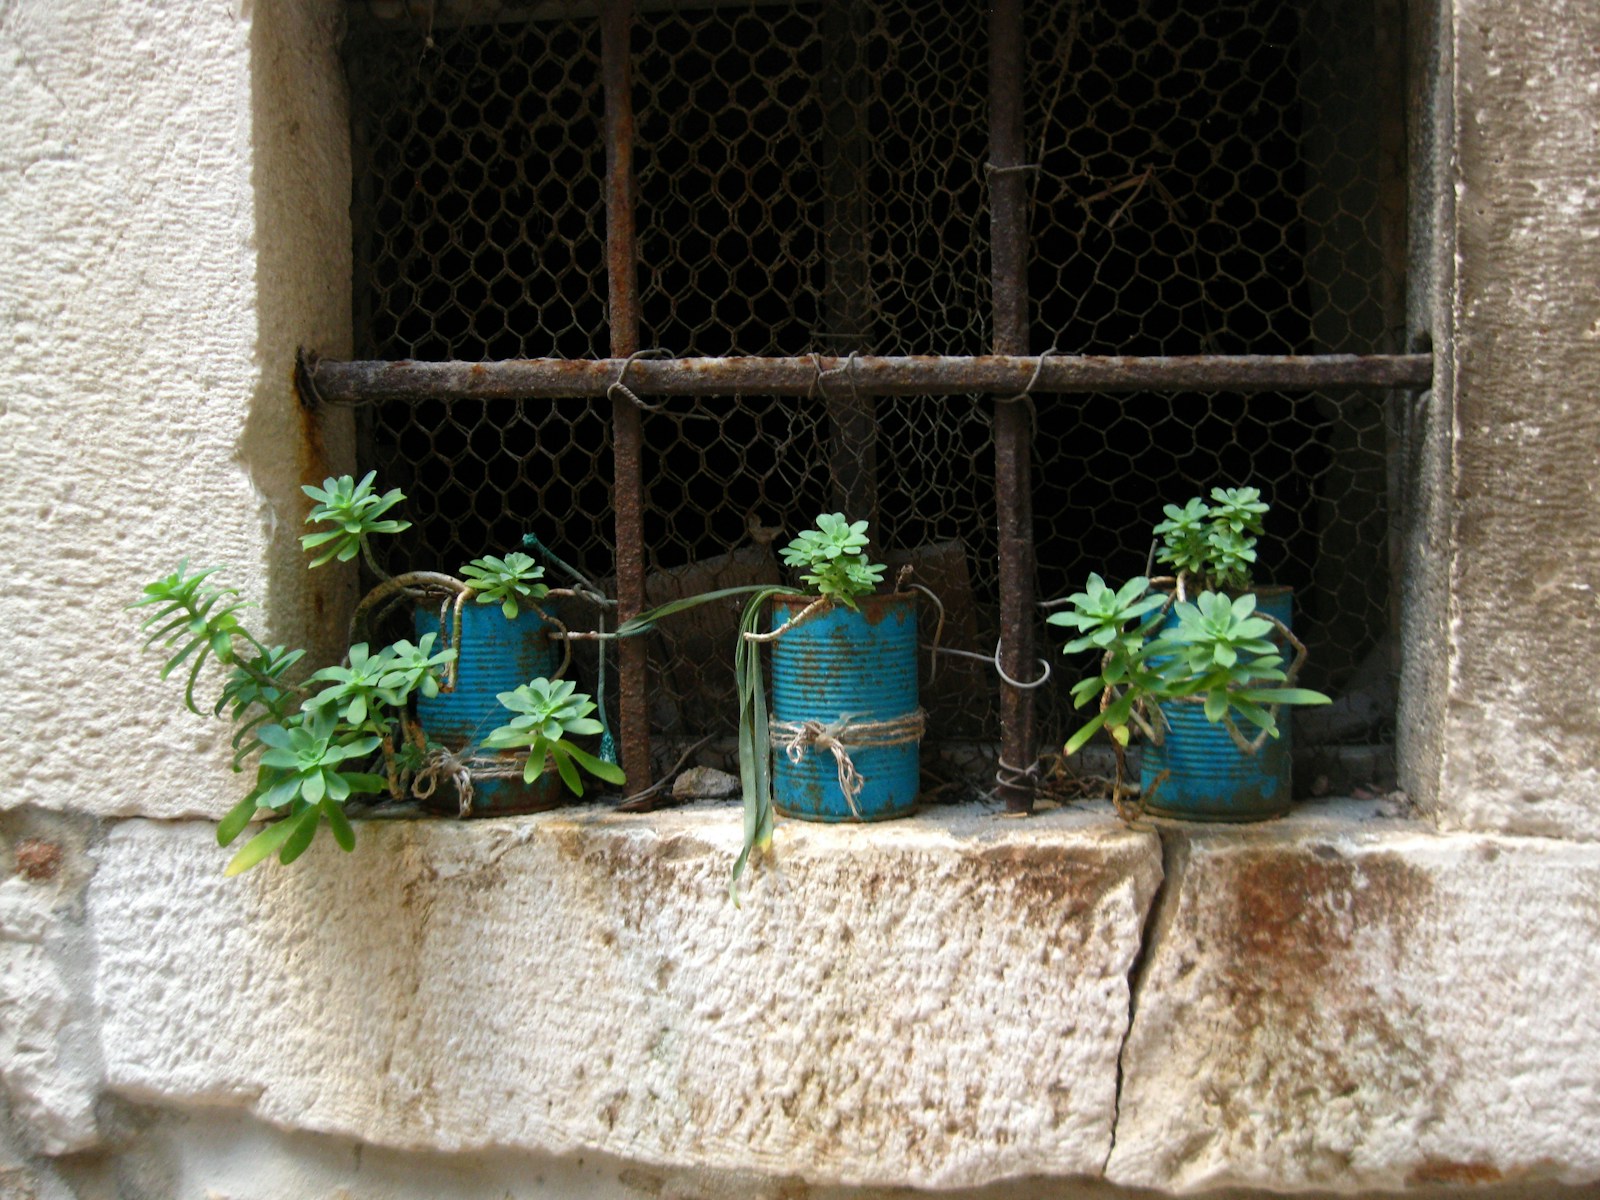
A row of small painted cans on a windowsill is one of the prettiest ways to grow succulents or kitchen herbs. Blue cans tied with a loop of twine, like the ones in this photo, look fresh against stone or white paint. Succulents need very little water, so they are a perfect match for small containers. If you prefer herbs, basil, mint and chives grow happily in cans on a bright sill. Just add drainage holes and a saucer underneath. Which plants would you line up in your window?
You will need: Small clean cans, outdoor paint in one or two colors, twine, a hammer and nail (adult only), small pebbles, cactus soil and small succulents or herbs.
How to make it: 1. An adult taps three or four drainage holes in each can bottom, then file the rims. 2. Paint the outside, let it dry and tie a band of twine around each can. 3. Add a layer of pebbles, then soil and your plants, and set them on a saucer by the window.
A Beaded Wind Chime That Sings on the Porch
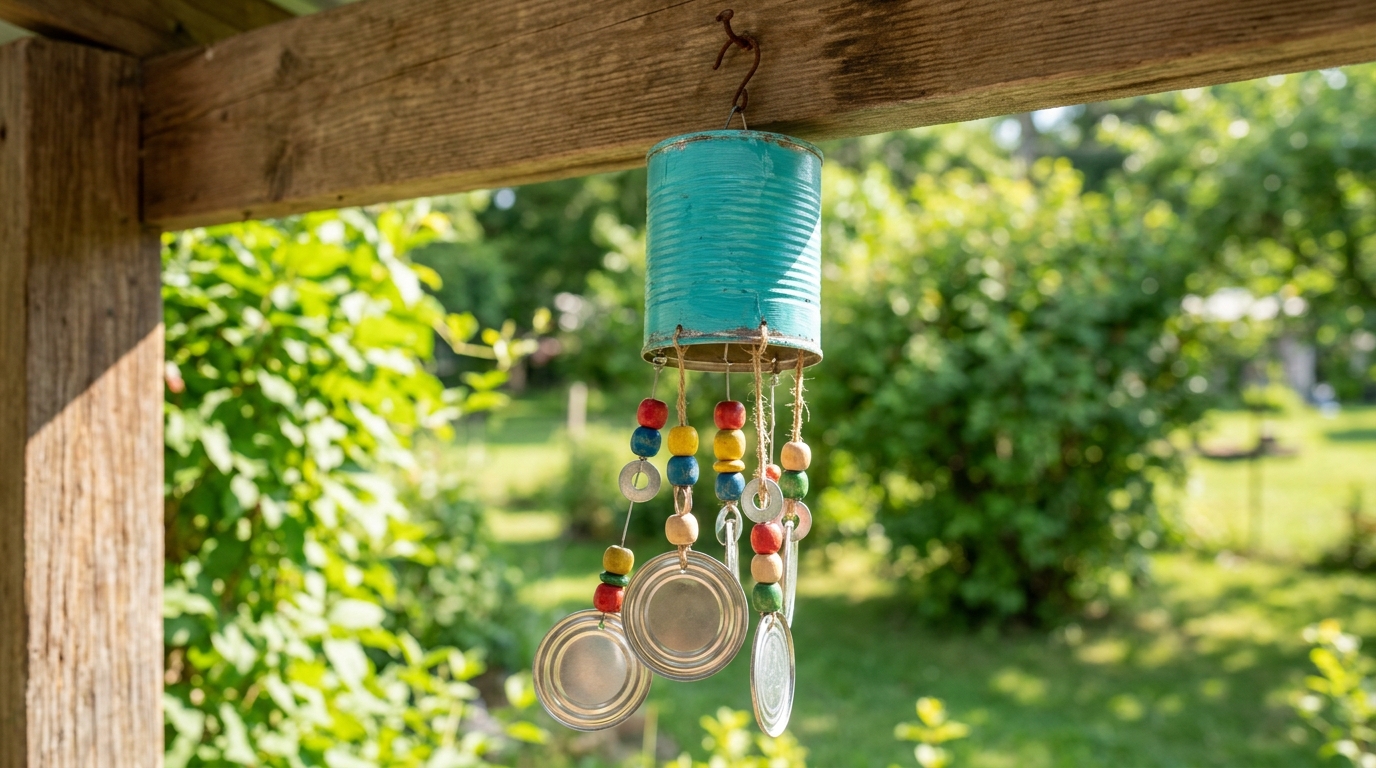
Do not throw away those can lids. The smooth inside lid from a safety can opener makes a lovely tinkling sound, and together with wooden beads it turns one can into a cheerful wind chime. A bright turquoise or coral can at the top looks great against a porch beam or a tree branch. Of all the tin can crafts here, this one is the most fun for kids, who can thread the beads in bright color patterns while an adult punches the holes. When the breeze picks up, you will hear it before you see it. Ready to make some music?
You will need: One clean can, smooth edged lids from a safety can opener, acrylic paint, fishing line or strong cord, wooden beads, a hammer and nail (adult only).
How to make it: 1. Paint the can, then an adult punches four holes around the bottom and two in the top. 2. Thread strings of beads through the bottom holes, tying a can lid or bead cluster at each end. 3. Loop a cord through the top holes and hang it from a porch hook.
Tin Can Crafts Christmas Tree Centerpiece
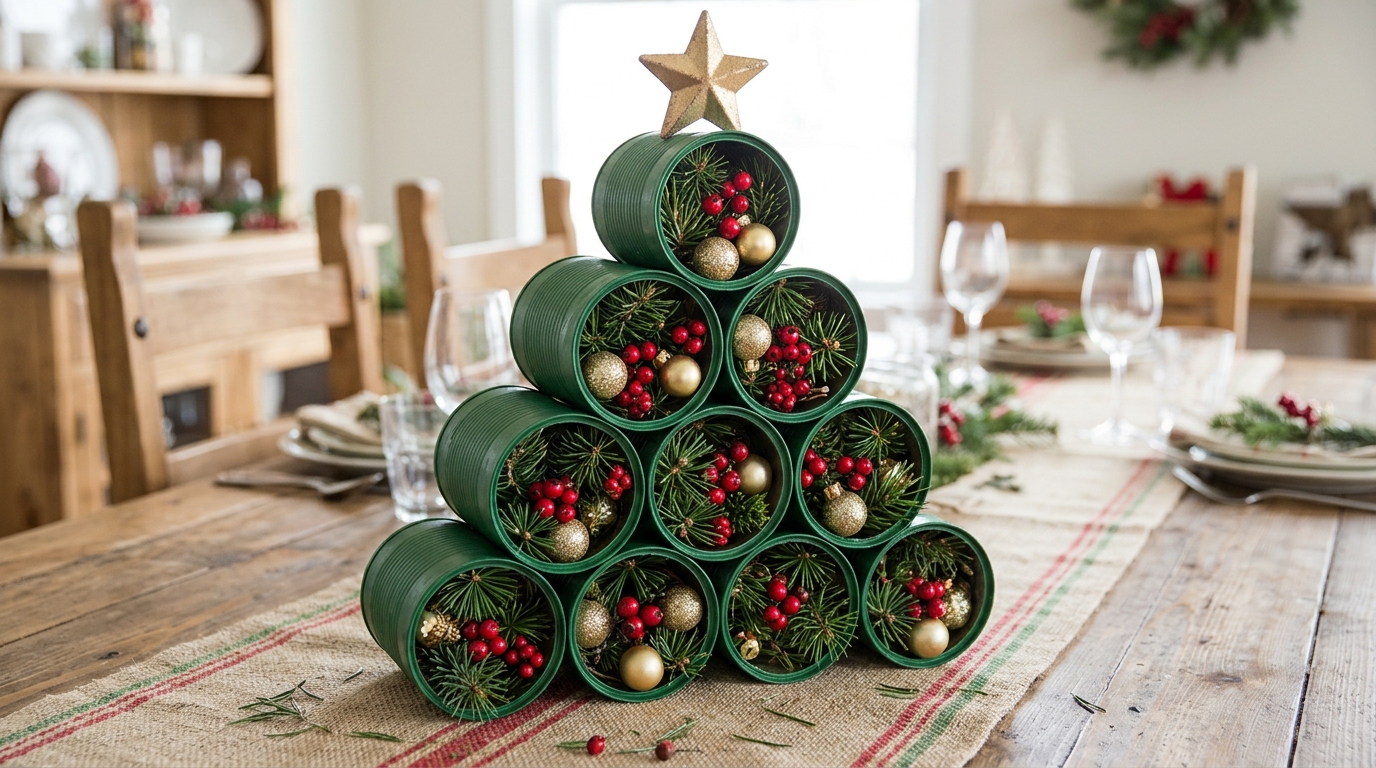
This centerpiece always gets a second look at the holiday table. Ten cans stacked on their sides in rows of four, three, two and one make a perfect little tree shape, and each opening becomes a tiny window for pine, berries and gold ornaments. Paint them deep green or bright red, and top the stack with a simple star. It is a fun family project, and you can change the fillings for other seasons, like flowers in spring. What would you tuck into your tree?
You will need: Ten cans of the same size, green spray paint, strong glue (adult help), clothespins, pine sprigs, faux berries, small shatterproof ornaments and a star.
How to make it: 1. File the rims and paint all ten cans green, then let them dry. 2. Glue a row of four on their sides, then three, two and one on top, clamping with clothespins. 3. Fill each can with greenery, berries and ornaments and add the star at the top.
A Hot Cocoa Gift Caddy for Cozy Nights
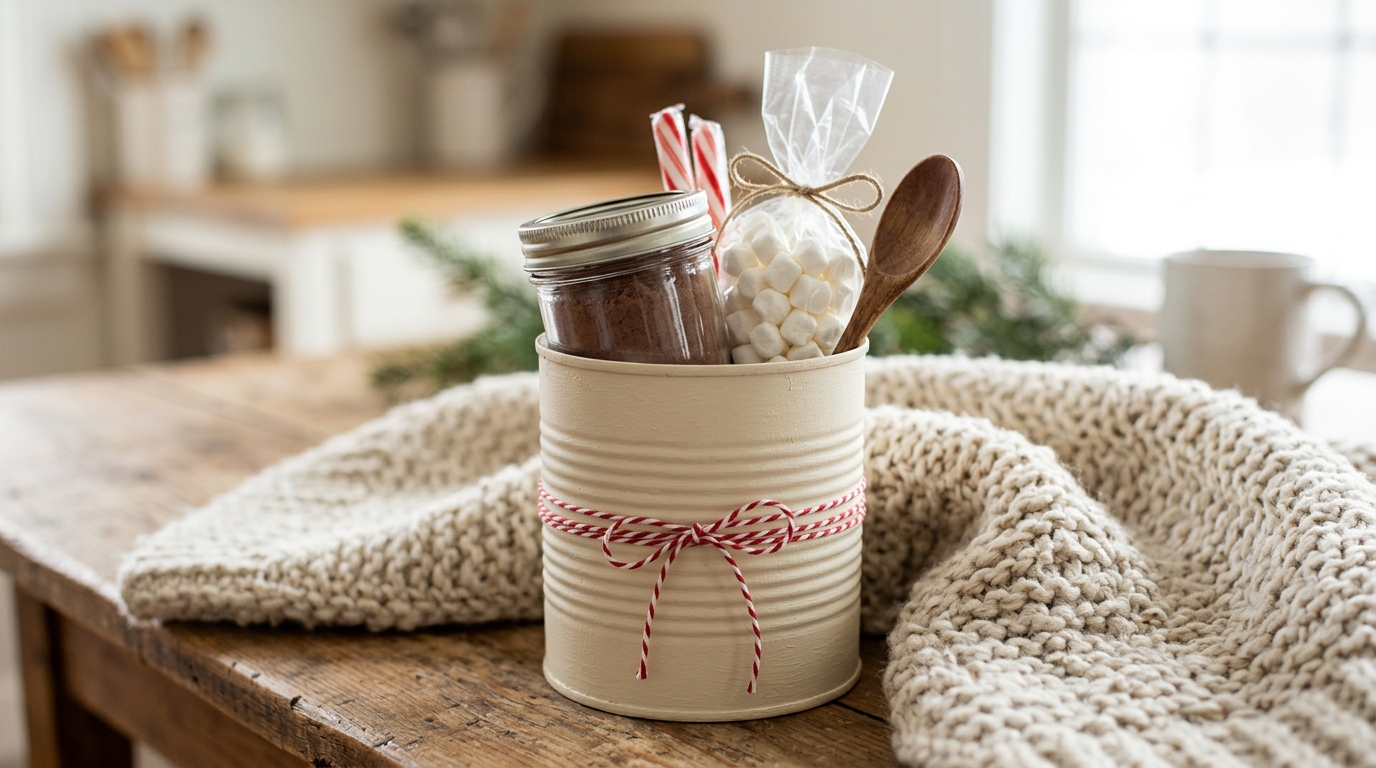
Pack a whole cozy evening into one of the most giftable tin can crafts. A large can painted cream and wrapped with candy cane twine holds a small jar of cocoa mix, a bag of marshmallows, peppermint sticks and a spoon. It makes a thoughtful gift for a friend, a teacher or a new neighbor, and the can lives on as a utensil holder or plant pot later. Keep the treats in their own sealed jar and bags so nothing touches the can. Who would you surprise with one?
You will need: A large clean can, cream paint, red and white baker’s twine, a small jar of cocoa mix, a bag of marshmallows, peppermint sticks and a wooden spoon.
How to make it: 1. File or tape the rim and paint the can cream. 2. Wrap baker’s twine around the middle several times and tie a bow. 3. Stand the jar, sealed treat bags and spoon inside and add a handwritten tag.
Chalkboard Pantry Cans With Labels You Can Change
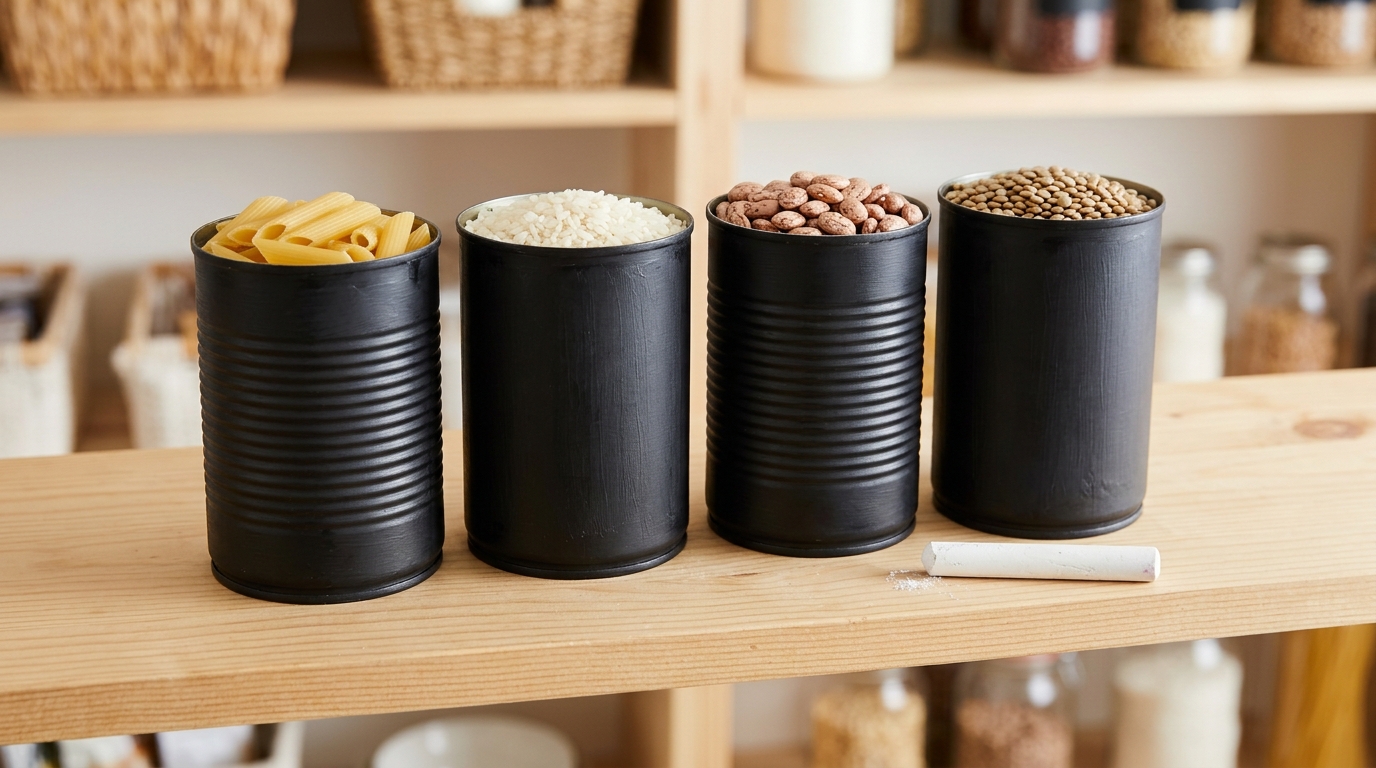
Chalkboard paint turns ordinary cans into neat pantry storage with labels you can wipe and rewrite whenever you like. Lined up on a shelf, they look tidy and a little bit French cafe. Use them for pasta, rice, beans or tea packets. Paint the outside only, and for loose food, slip a food storage bag inside the can first so everything stays fresh and clean. Kids love writing the labels in their best handwriting. What would go on your first label?
You will need: Clean cans with filed rims, black chalkboard paint, a foam brush, chalk or a chalk marker, and sealed food storage bags.
How to make it: 1. Wash and dry the cans, then file or tape the rims. 2. Paint the outside with two coats of chalkboard paint and let it cure for a day. 3. Write a label on each can, fill with bagged pantry goods and line them up on the shelf.
Tin Can Crafts for the Birds: A Simple Hanging Feeder
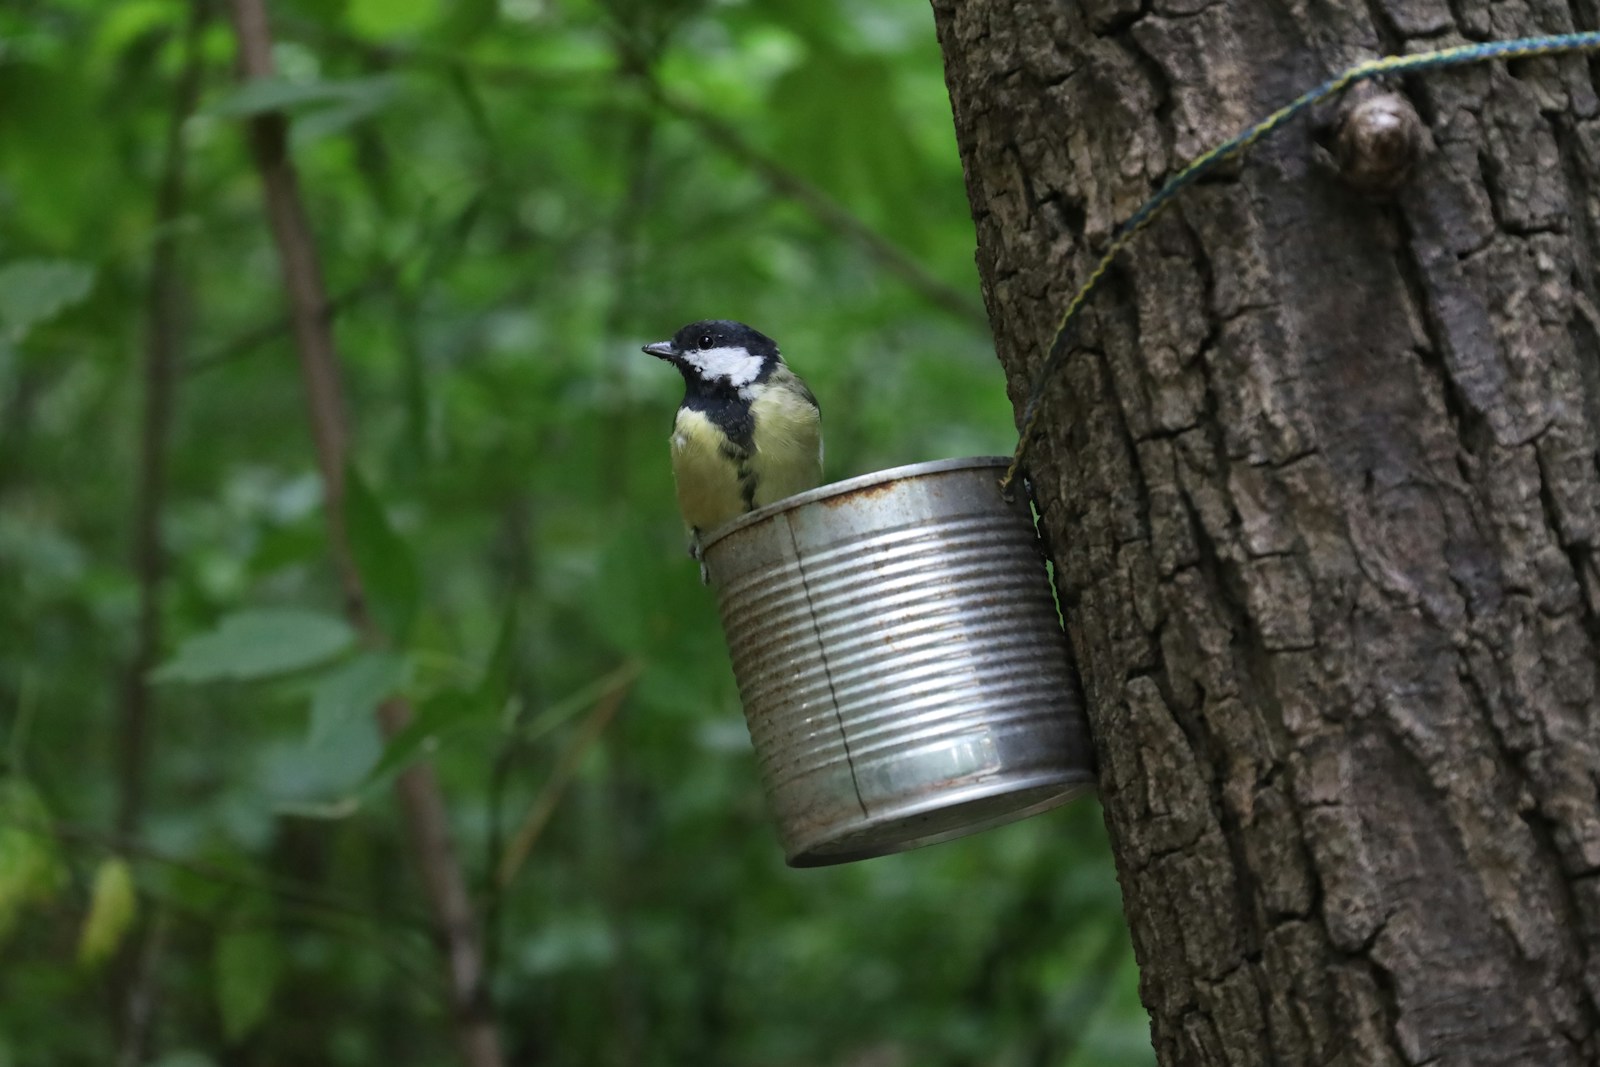
A tin can hung on a tree trunk can turn into a busy bird cafe, as this little great tit shows. Fill it with seed, hang it near a window and you will have something fun to watch over breakfast all winter. Choose a can opened with a safety can opener so the rim is smooth, and file any rough spot so small birds stay safe. Hang it where cats cannot reach and refresh the seed often. Which birds visit your yard?
You will need: A clean can with a smooth rim, a file, sturdy wire or cord, outdoor paint (optional) and wild bird seed.
How to make it: 1. File the rim until it is completely smooth and paint the outside if you like. 2. Wrap sturdy wire around the can and twist a loop at the back. 3. Hang it on a branch or post with the opening tilted slightly down, and fill with seed.
Rustic Can Vases for Fresh Flowers
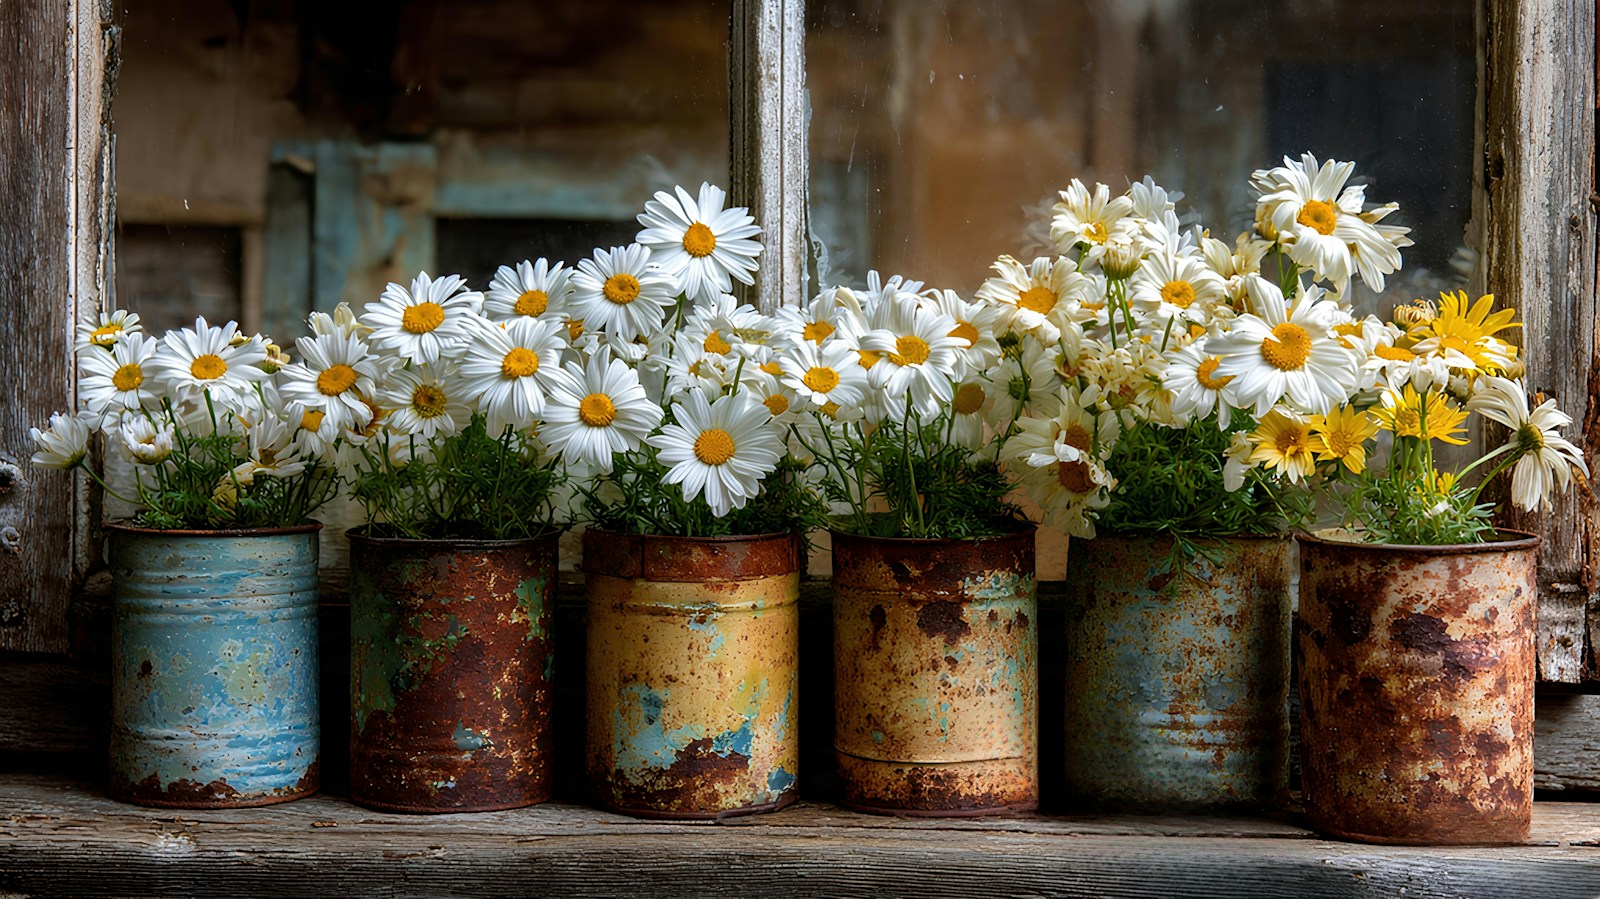
Not all tin can crafts need a fresh coat of paint. Old, weathered cans with a bit of chipped color make wonderful rustic vases, especially for simple flowers like daisies, sunflowers or dried wheat. A row of them on a windowsill feels like a cottage garden brought inside. If your cans are brand new, dab on two paint colors and lightly sand them for that same vintage look. Put a glass jar inside if you want to keep water away from the metal. Which flowers would you pick first?
You will need: Clean cans with filed rims, two shades of acrylic paint, fine sandpaper, small glass jars that fit inside, and fresh or dried flowers.
How to make it: 1. Paint the can in one color, let it dry, then dab a second color on top. 2. Lightly sand the edges and raised ridges for a worn look. 3. Slip a jar of water inside and add your flowers.
A Macrame Hanging Planter for a Boho Corner

Finish your collection of tin can crafts with one that floats in the air. A simple macrame hanger made from cotton cord cradles a painted can, and a trailing pothos spills over the side like a little green waterfall. Soft terracotta or sage paint keeps the look warm and natural. If you are new to macrame, a basic square knot is all you need, and there are only a few rows to tie. Which window in your home is asking for a hanging plant?
You will need: A medium can with drainage holes made by an adult, terracotta paint, cotton macrame cord, a wooden ring, scissors, soil and a trailing plant.
How to make it: 1. Paint the can and file the rim smooth. 2. Tie eight cords to a wooden ring, then tie rows of square knots and gather them into a basket under the can. 3. Plant your pothos, slip the can into the hanger and hang it from a ceiling hook.