Vintage Bakeware Christmas Decor: 16 Thrifted Jello Mold and Bundt Pan Ideas Straight From Grandma’s Kitchen
Vintage Bakeware Christmas Decor is the sweetest thrift store trend of the season, and it starts with the old pans most of us walk right past. Jello molds, bundt pans, tart tins and loaf pans from the 1950s and 1960s sell for a dollar or two, yet they shine like silver and copper once you add ribbon and greenery. Country Living featured bundt pan wreaths and tart tin trees in its vintage holiday kitchen roundup, and Facebook craft pages keep sharing jello mold bells every fall. Our own readers loved farmhouse and vintage kitchen galleries, so we gathered 16 easy projects you can finish in an afternoon. Every idea below uses cheap thrifted pans, a little paint, ribbon and battery lights where needed. Grab a basket and head to the thrift store, because Vintage Bakeware Christmas Decor looks best when every piece has a story..
Vintage Bakeware Christmas Decor Starts With Jello Mold Bells
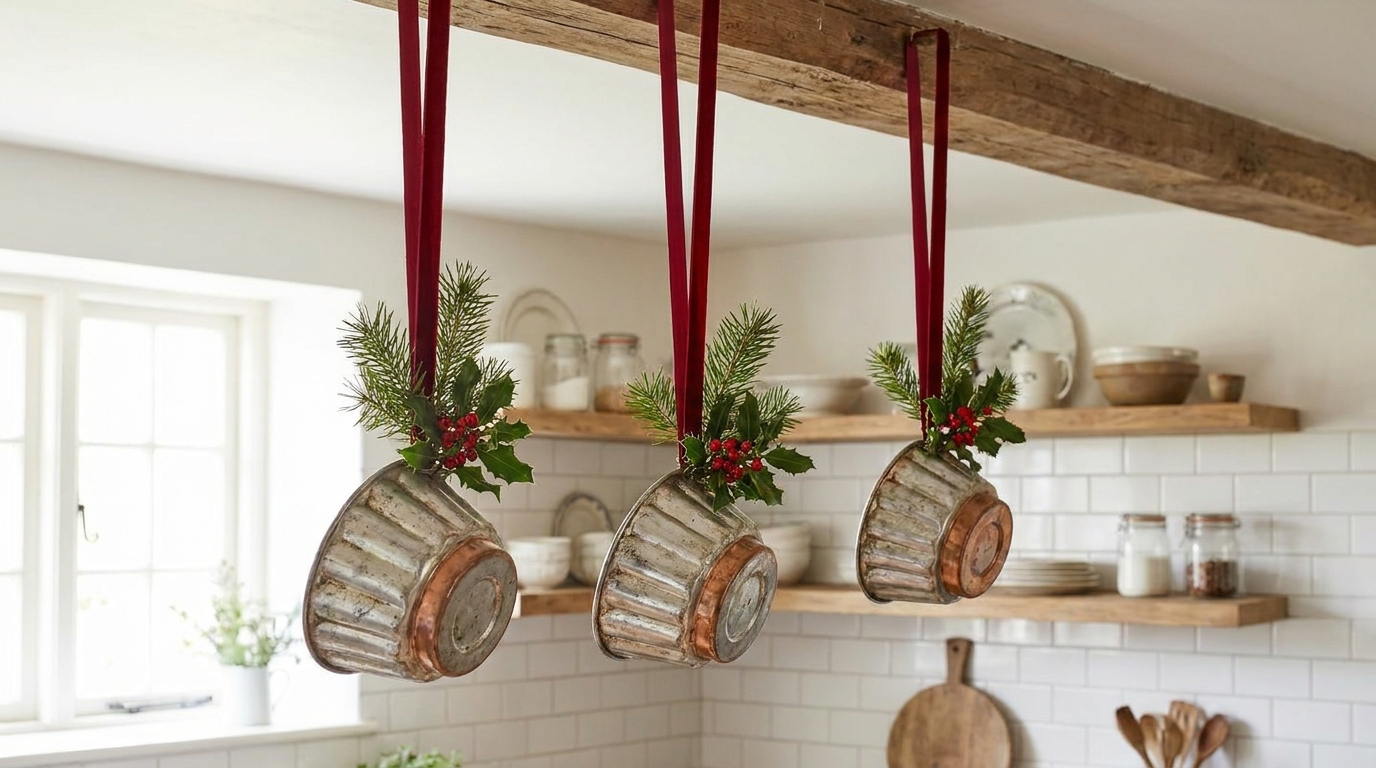
Turn a fluted jello mold upside down and it already looks like a bell. That simple trick is why stacked jello mold bells became the star of so many holiday kitchens this year. Hang three molds at different heights from a beam, a curtain rod or a hook in the ceiling, and suddenly the room feels like a snowy country inn. They pair beautifully with other vintage kitchen features like open shelves and farmhouse sinks. Copper and aluminum molds mix well, so buy whatever the thrift store has..
You will need: 3 or 4 thrifted jello molds, red velvet ribbon, small wooden beads, hot glue, pine sprigs, faux red berries.
How to make it: 1. Wash the molds and let them dry. 2. Thread ribbon through a large wooden bead and glue the bead inside the top of each mold so it hangs like a clapper. 3. Tie a long loop of ribbon at the top. 4. Tuck pine and berries into the bow and hang the bells at staggered heights.
A Pegboard Wall of Thrifted Bundt Pans
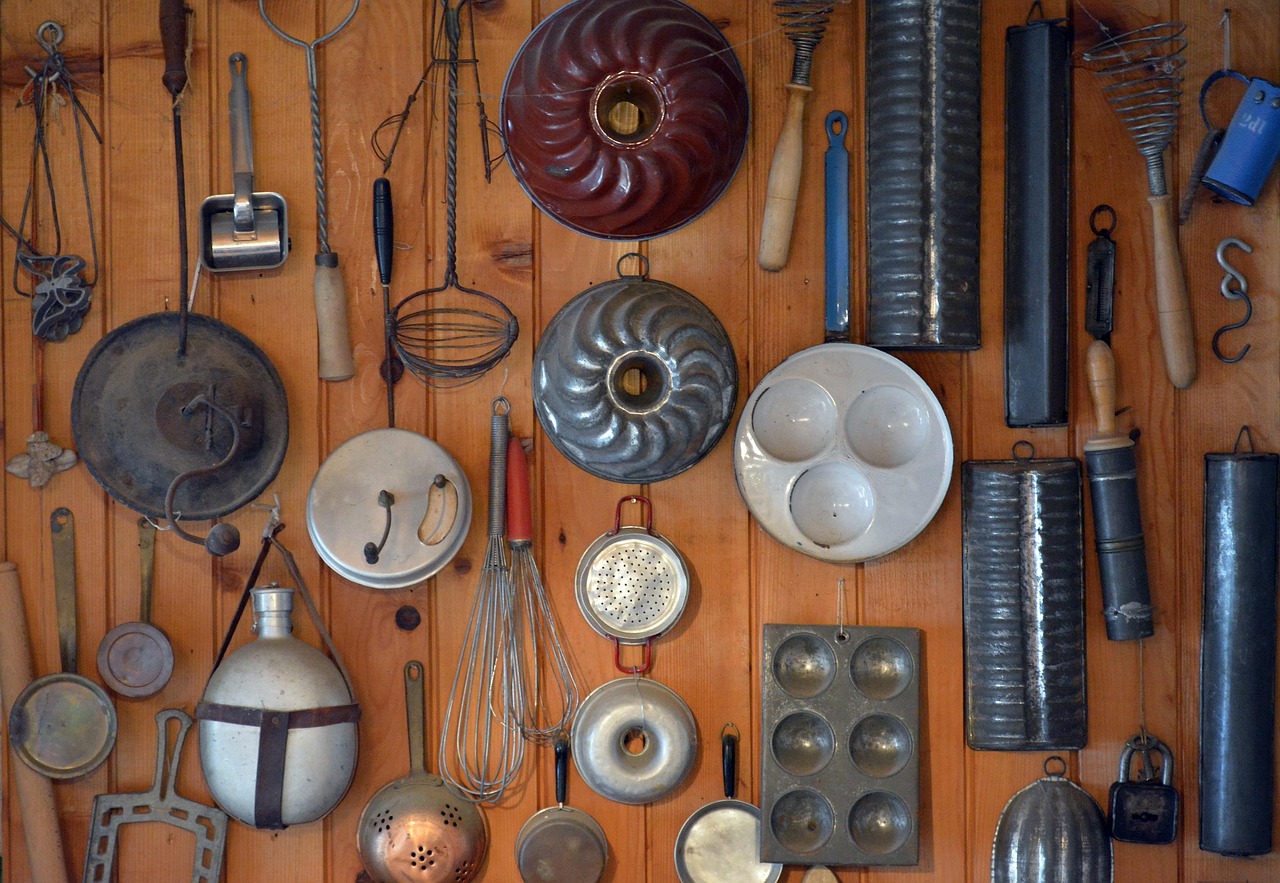
Grandma never hid her bakeware in a cupboard, and this wall shows why. Fluted bundt pans, ring molds and old tins look like sculpture when you hang them together on a wooden board. For the holidays, slip a small sprig of cedar and a red bow through the center tube of each bundt pan and you get a row of tiny wreaths with zero extra work. It is one of our favorite thrift store decor finds because the pans go back to baking duty in January.
You will need: Pegboard or a painted plank, pegboard hooks or cup hooks, 4 to 8 thrifted bundt pans and tins, cedar sprigs, red ribbon.
How to make it: 1. Mount the board on a wall stud. 2. Plan the layout on the floor, largest pans in the middle. 3. Hang each pan on a hook through its center tube. 4. Tie a short bow and a sprig of cedar on each pan.
Vintage Bakeware Christmas Decor Tree From Three Jello Molds
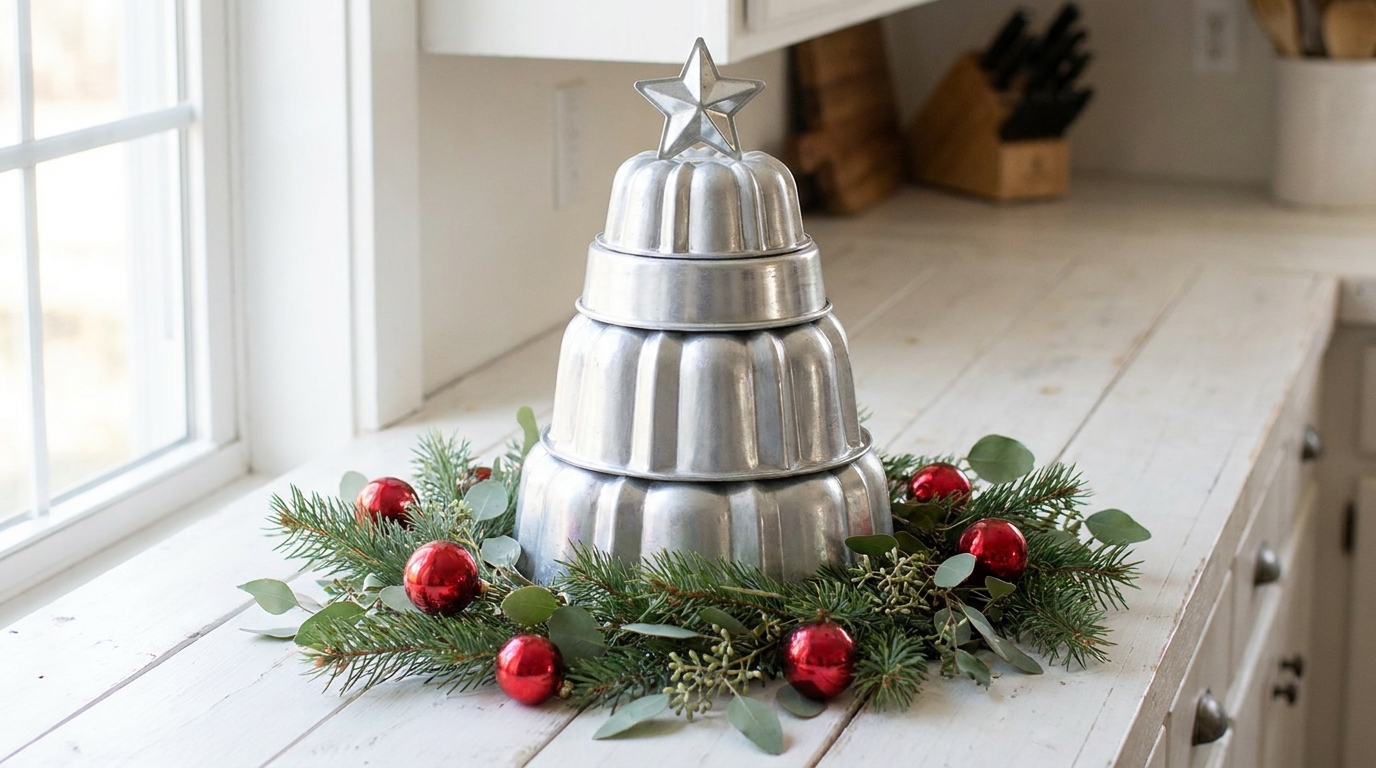
This little tree takes about ten minutes once the paint dries. Stack three jello molds from large to small, glue them together and spray the tower shiny silver. The ridges catch the light like tinsel, so it looks far fancier than three dollars of thrift store metal. Set it on the counter, a bar cart or a windowsill where a full tree will never fit. If you like slim shapes for small spaces, you will enjoy these skinny tree ideas too. This is Vintage Bakeware Christmas Decor at its simplest.
You will need: 3 jello molds in graduated sizes, strong metal glue, silver spray paint, a small star topper, felt circle.
How to make it: 1. Clean the molds with soapy water and dry them. 2. Glue the largest mold upside down on a felt circle, then stack the medium and small molds on top. 3. Spray paint outdoors in light coats. 4. Glue a small star on top once dry.
Copper Molds Lined Up on a Kitchen Shelf
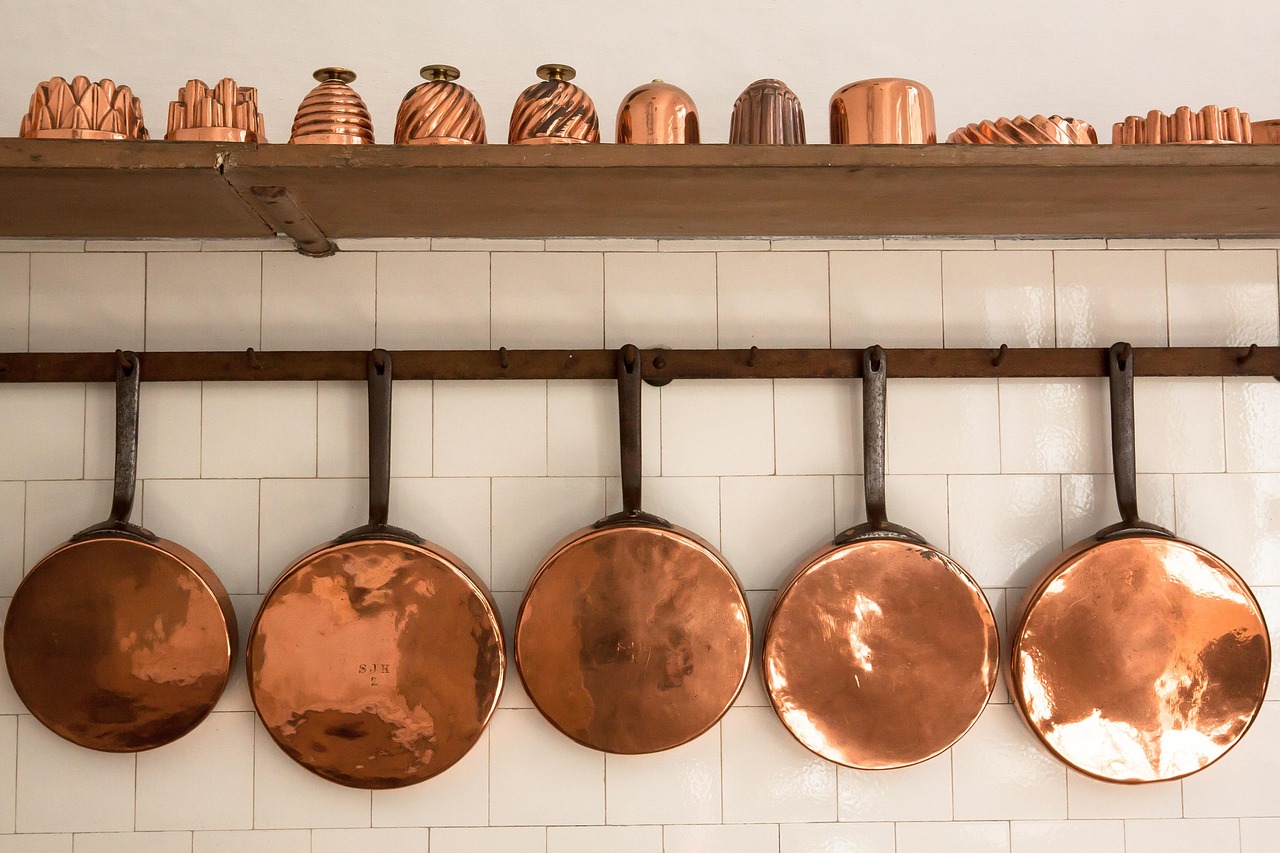
A row of small copper molds on a high shelf is all the decor some kitchens need. Fish shapes, ring molds and little fluted cups glow warm against white tile, and in December they look even richer with a strand of greenery running behind them. Hang a few copper pans below and you get that old European kitchen feeling without spending much. Copper mixes nicely with brass holiday pieces too, so you can blend finds from several thrift trips. Copper pieces are some of the warmest Vintage Bakeware Christmas Decor you can find.
You will need: Copper molds, a wall shelf or plate rail, faux cedar garland, thin red ribbon, removable hooks.
How to make it: 1. Polish the copper with lemon juice and salt, then rinse and dry. 2. Lay garland along the back of the shelf. 3. Line the molds up from small to large. 4. Tie thin red ribbon bows on two or three of them for color.
Tart Tin Ornaments With Tiny Bottle Brush Trees
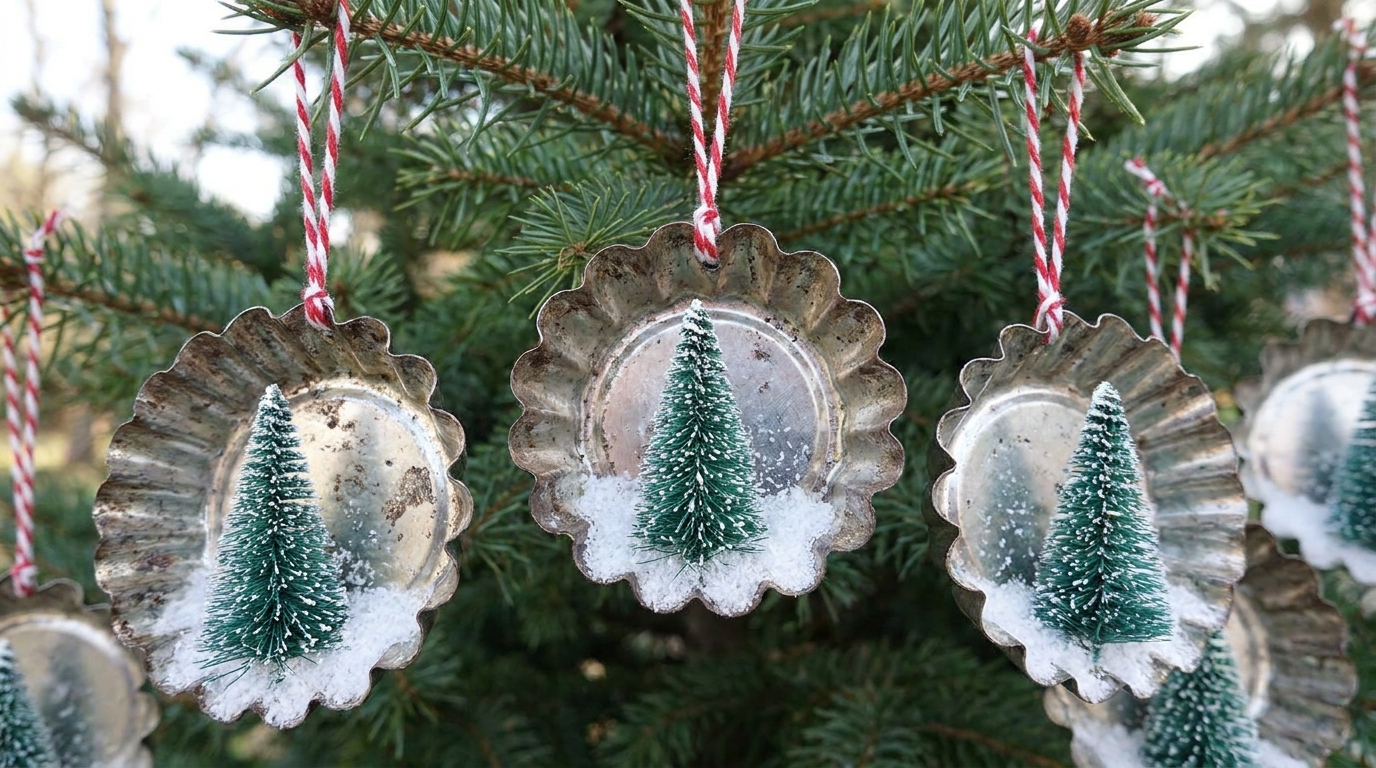
Small fluted tart tins are perfect ready made frames for a miniature winter scene. Glue a tiny bottle brush tree inside, add a pinch of faux snow and hang the tin with twine. They look like little shadow boxes on the branches and they never break if a pet knocks one down. Kids love helping with this one because each tin turns into its own tiny forest. Mix them with old fashioned ornaments from the same era for a sweet, nostalgic tree.
You will need: Thrifted tart tins, mini bottle brush trees, faux snow, white glue, red and white twine, a nail and hammer.
How to make it: 1. Tap a small opening near the rim with a nail. 2. Glue a mini tree in the center of the tin. 3. Brush glue around the base and sprinkle faux snow. 4. Thread twine through the opening and tie a loop.
A Muffin Tin Advent Calendar
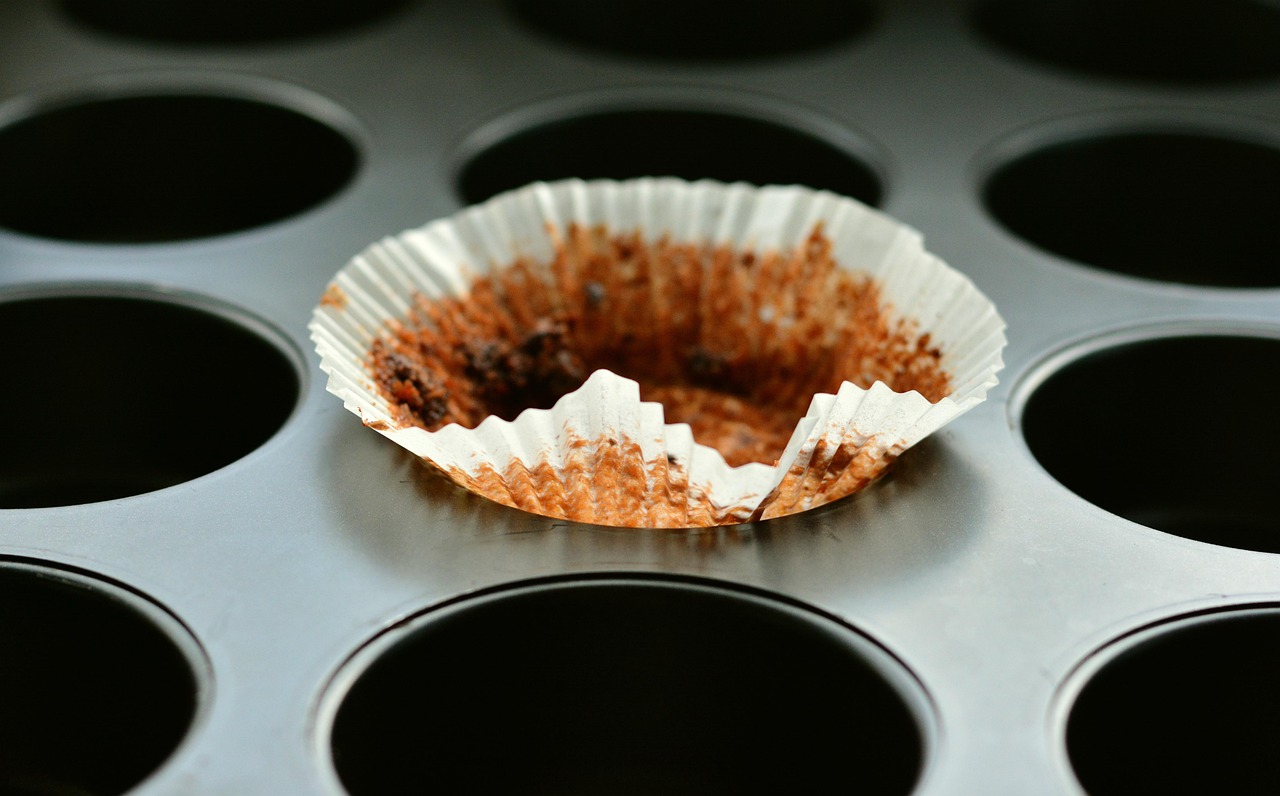
An old muffin tin already has the perfect grid for counting down to Christmas. Use two 12 cup tins side by side for 24 days, line each cup with a paper baking cup and tuck in a tiny treat, a note or a small toy. Cover the cups with numbered paper circles held on with magnets and let the kids open one each morning. Lean the tins on a counter or hang them on the wall. If you want even more countdown fun, browse more advent calendar ideas for every budget.
You will need: Two 12 cup muffin tins, paper baking cups, cardstock circles, small round magnets, a marker, tiny treats.
How to make it: 1. Line every cup with a paper baking cup. 2. Fill the cups with small surprises. 3. Number 24 cardstock circles and glue a magnet on the back of each. 4. Place the circles over the cups and open one a day.
Vintage Bakeware Christmas Decor Centerpiece in a Bundt Pan
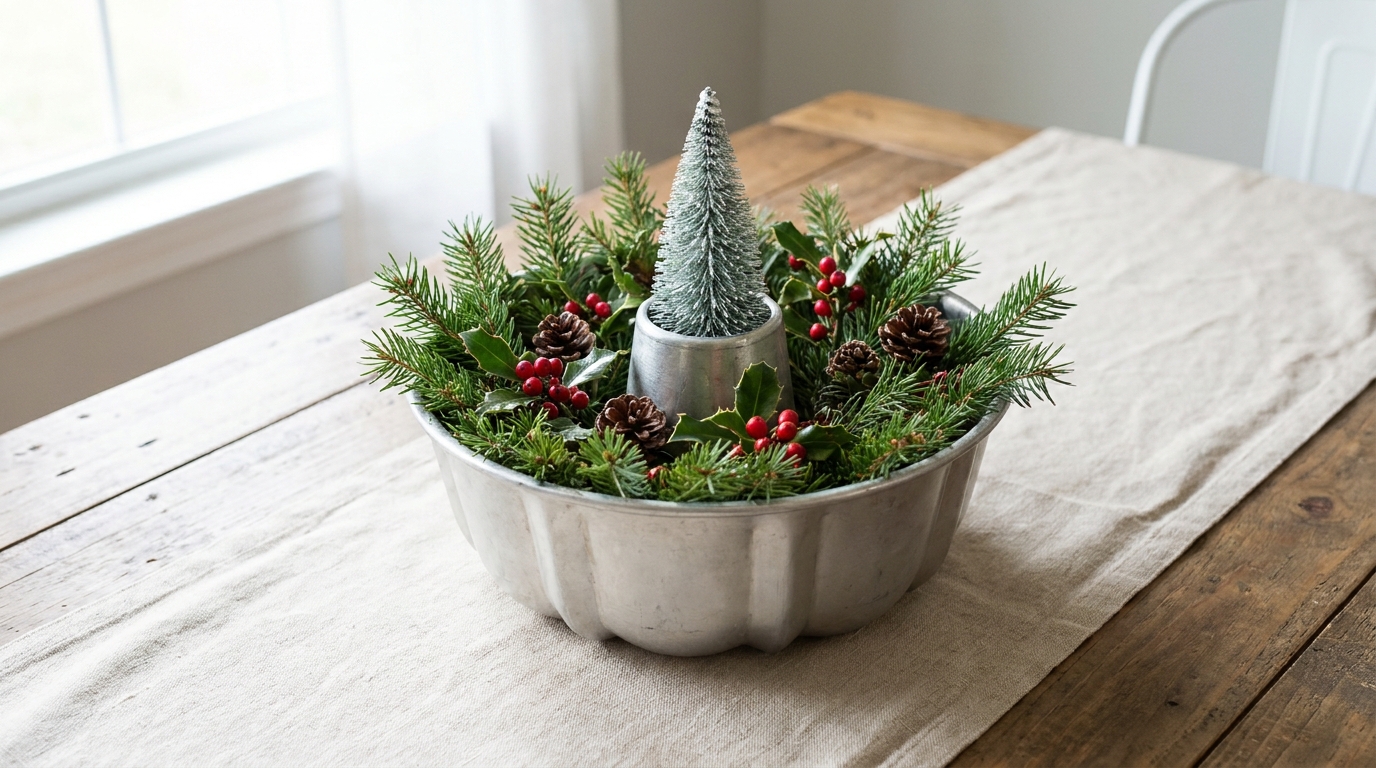
A bundt pan makes the easiest table centerpiece because the center tube holds something tall while the ring holds greenery. Fill the ring with pine, berries and pine cones, then stand a frosted bottle brush tree in the middle. For a soft glow at night, swap the tree for a battery LED pillar. This is Vintage Bakeware Christmas Decor that works for a dinner party and still fits on a small table. Keep it in a red and white color scheme for a classic farmhouse feel.
You will need: A thrifted bundt pan, floral foam, fresh or faux pine, red berries, small pine cones, a bottle brush tree or battery LED pillar.
How to make it: 1. Cut floral foam to fit the ring of the pan. 2. Push pine sprigs in all around. 3. Add berries and pine cones in groups of three. 4. Set the tree or LED pillar on the center tube.
Carved Cookie Molds as Holiday Wall Art
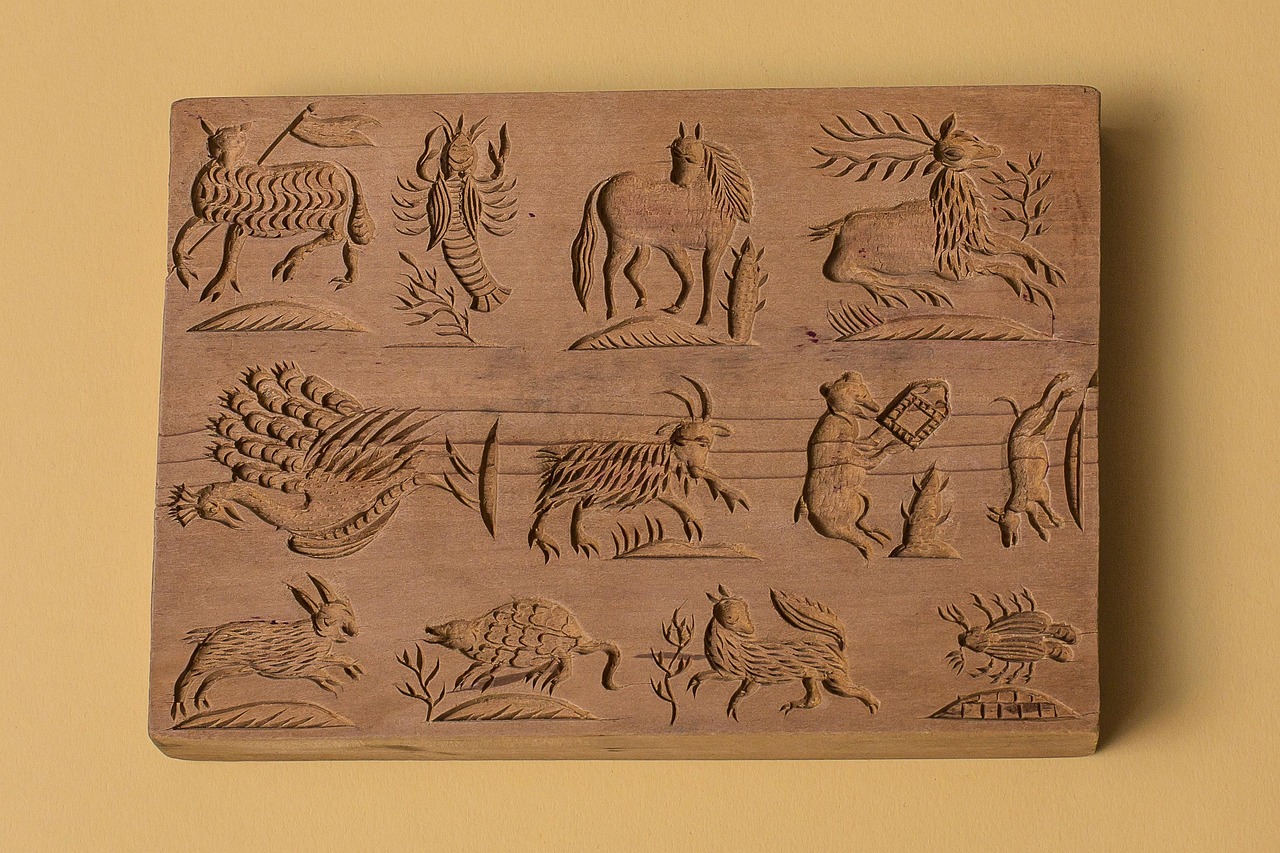
Long before bundt pans, German bakers pressed anise cookies called springerle into carved wooden boards. Those boards are full of tiny animals, flowers and figures, and they make beautiful wall art in a holiday kitchen. Hang one or two on a plate hanger, lean them on a shelf or tie a plaid ribbon through a picture hook. Look for them at estate sales and antique malls. They pair well with your cookie cutter crafts for a full baking themed display.
You will need: Wooden cookie molds, plate hangers or sawtooth hangers, plaid ribbon, beeswax polish, a soft cloth.
How to make it: 1. Brush flour dust out of the carvings with a soft toothbrush. 2. Rub in a little beeswax polish and buff. 3. Attach a sawtooth hanger to the back. 4. Hang the molds in a group and add a ribbon bow to one corner.
Mini Loaf Pan Snowman Scenes
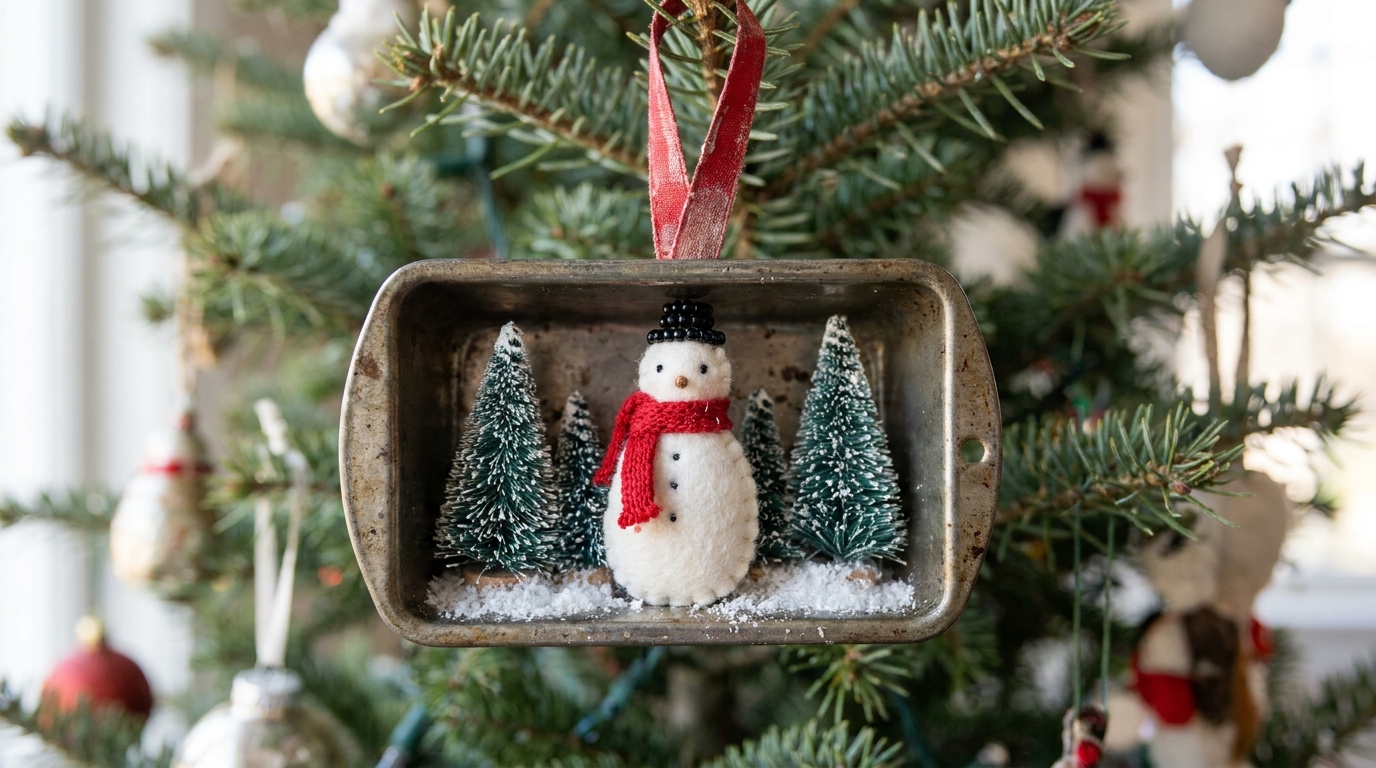
Tiny loaf pans from the 1970s were sold in sets for gift bread, and thrift stores often have stacks of them. Turned on their side, each pan becomes a little stage for a felt snowman, a couple of mini trees and some faux snow. Hang them on the tree with ribbon or line them up on a mantel like a row of snowy rooms. They take about twenty minutes each and cost almost nothing. You will find even more cheerful snowman decor ideas to round out the theme.
You will need: Mini loaf pans, white felt, orange and black felt bits for faces, red yarn, mini bottle brush trees, faux snow, glue.
How to make it: 1. Cut two felt circles and glue them into a little snowman. 2. Add a yarn scarf and felt face. 3. Glue the snowman and trees inside the pan. 4. Sprinkle snow and glue a ribbon loop to the top edge.
An Open Shelf of Old Muffin and Loaf Pans
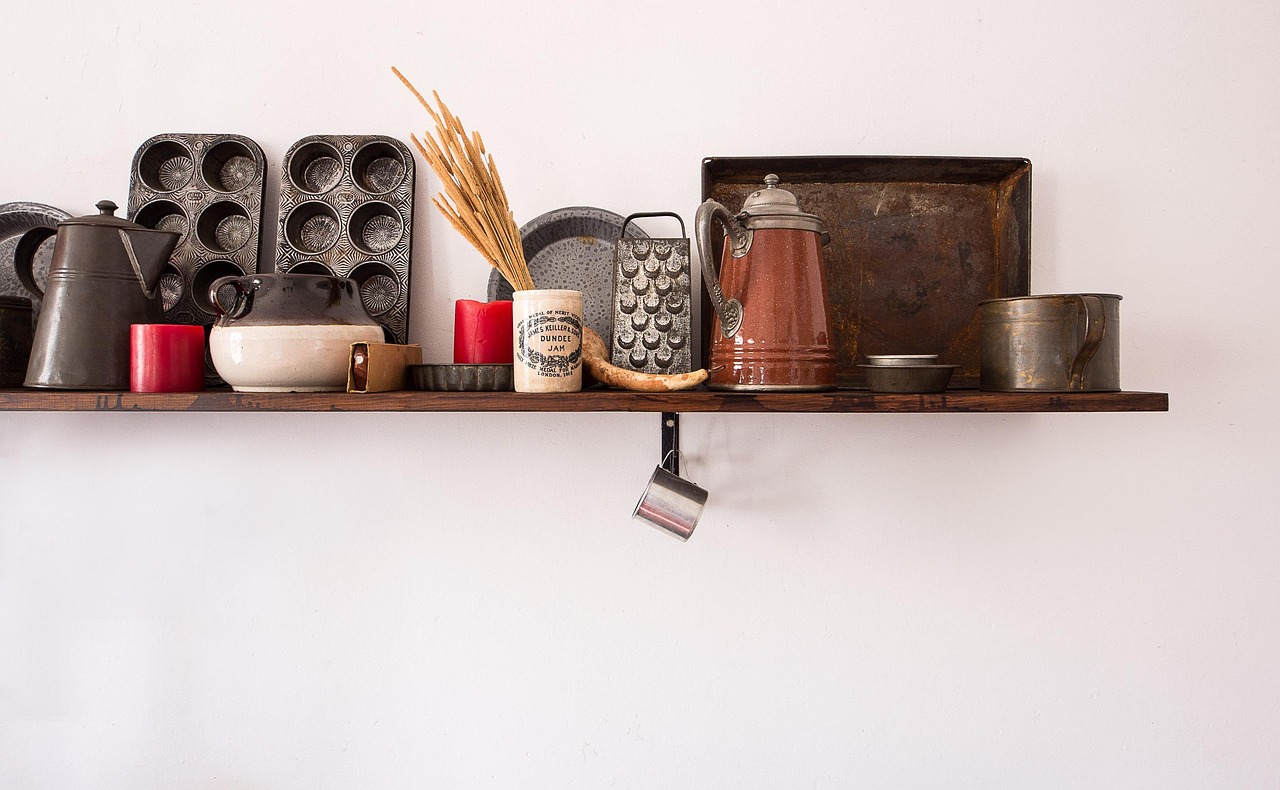
Sometimes the prettiest Vintage Bakeware Christmas Decor is just good pans on an open shelf. Dark muffin tins, a rusty loaf pan and a speckled pot look honest and warm on a simple wood shelf against a white wall. For December, add a small evergreen sprig in a jar, a red bowl and a strand of battery fairy lights. Keep the pans you use every week up front so the shelf works as hard as it looks. These pantry organization tricks help you decide what stays out and what gets stored.
You will need: A wall shelf, brackets, thrifted muffin tins and loaf pans, a small jar, evergreen sprigs, battery fairy lights.
How to make it: 1. Mount the shelf at eye level. 2. Stand the flat pans upright at the back. 3. Layer smaller pieces in front. 4. Add one evergreen jar and weave the fairy lights through.
Vintage Bakeware Christmas Decor Village in a Jello Mold
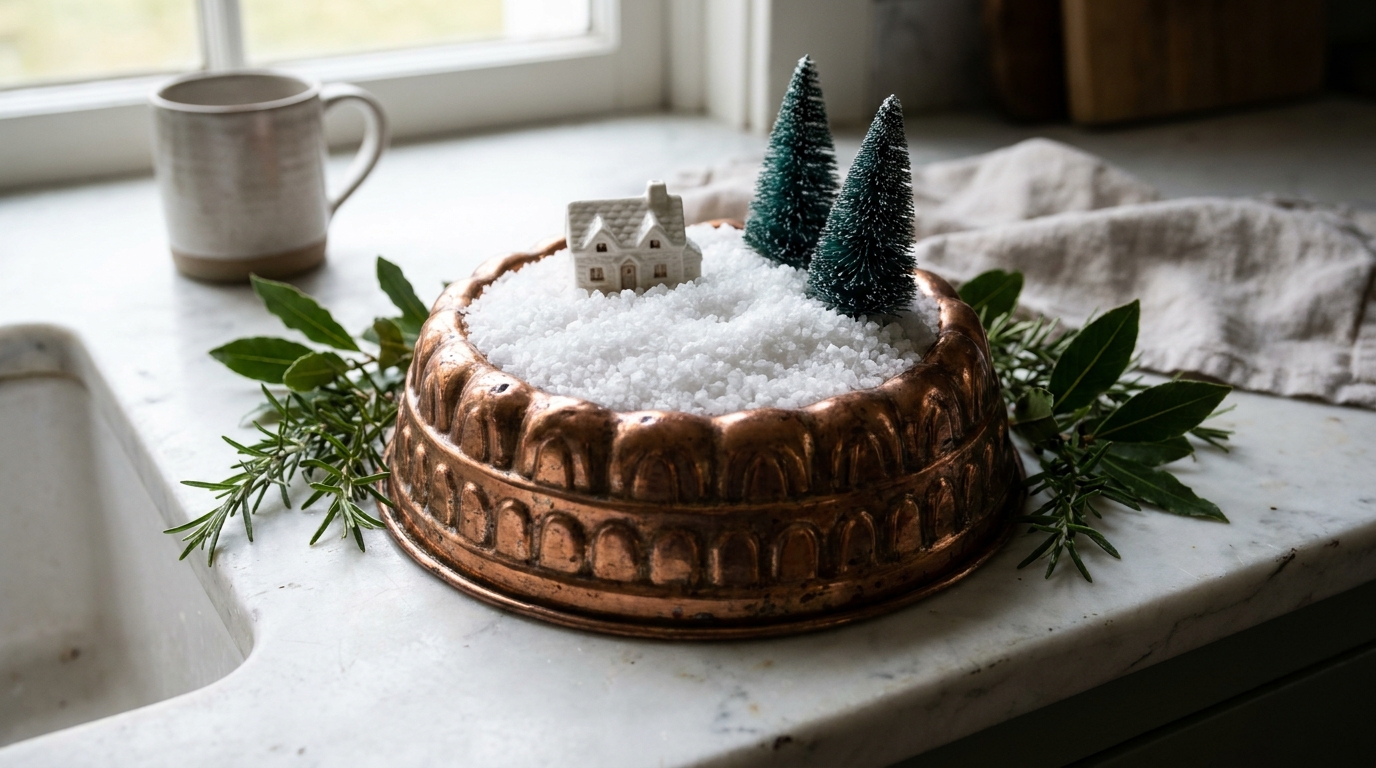
A ring shaped jello mold becomes a snowy little world when you fill it with coarse salt. Nestle a tiny ceramic house and two bottle brush trees into the salt and the curved sides frame the scene like a snow globe without the glass. It is a fun way to show off a single village piece you love. If you enjoy building miniature worlds, these tiny diorama scenes will give you plenty more inspiration. This Vintage Bakeware Christmas Decor idea also looks lovely on a bathroom shelf.
You will need: A ring jello mold, coarse kosher salt or Epsom salt, a mini ceramic house, 2 mini bottle brush trees, sprigs of greenery.
How to make it: 1. Pour salt into the mold until it is about two thirds full. 2. Press the house into the salt. 3. Add the trees on either side. 4. Tuck greenery around the outside of the mold.
Grandma’s Hand Sifter Makes the Snow
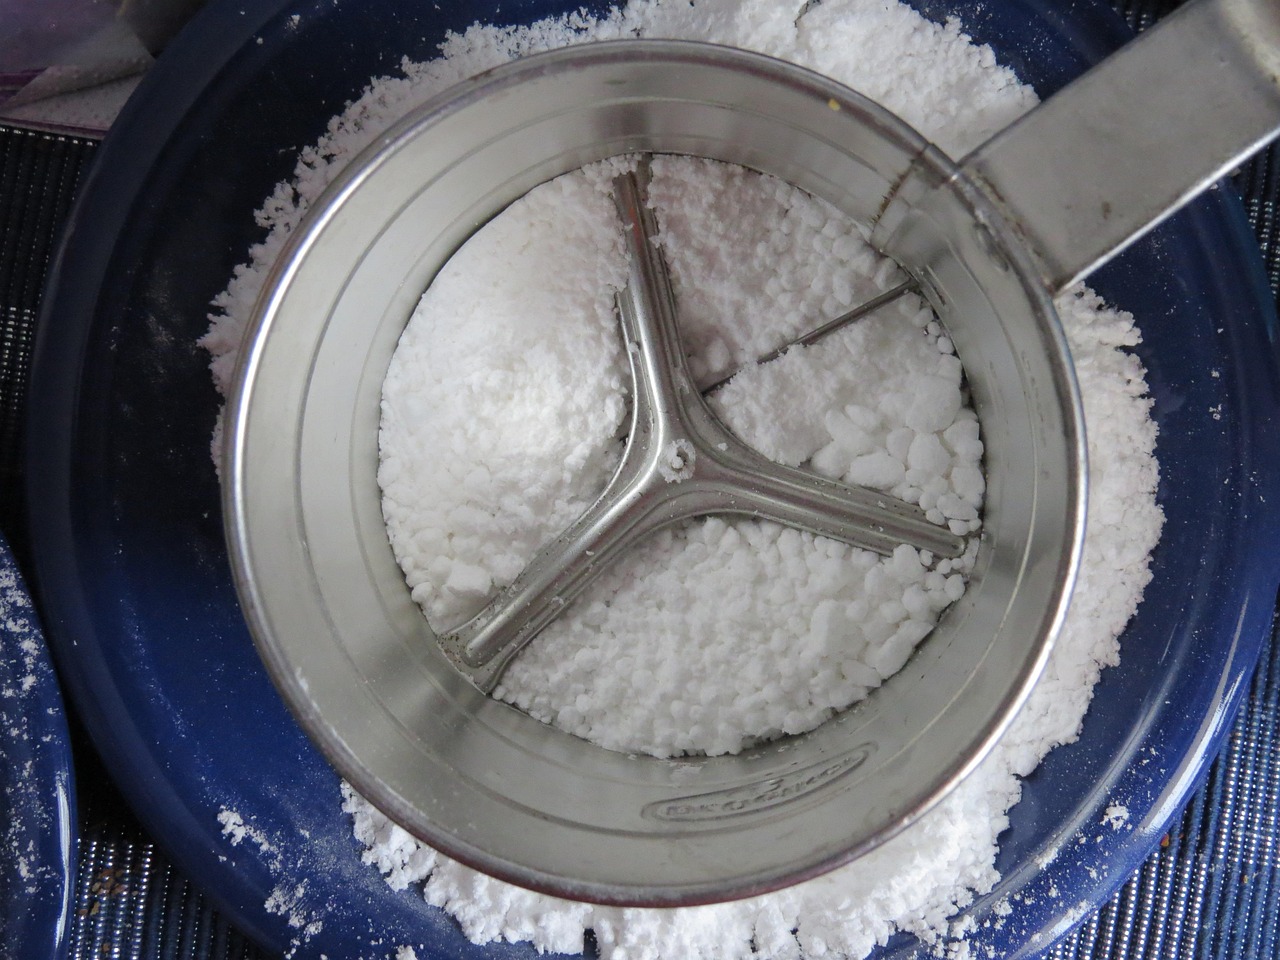
An old crank or squeeze sifter is the secret tool for a snowy display. Fill it with baking soda or fake snow powder and sift a soft dusting over trays, cake stands and mini villages. It lands far more evenly than snow from a bag. When you are done, the sifter itself looks charming tucked into a basket with greenery and a few ornaments. It fits right in with a cozy grandma chic look and costs a couple of dollars at most thrift stores.
You will need: A thrifted hand sifter, baking soda or faux snow powder, a tray to work on, a dry brush for cleanup.
How to make it: 1. Set your display on a tray. 2. Fill the sifter halfway. 3. Hold it about a foot above and sift in short bursts. 4. Brush away any extra and store the sifter with your holiday supplies.
Vintage Bakeware Christmas Decor Wreath From a Springform Ring
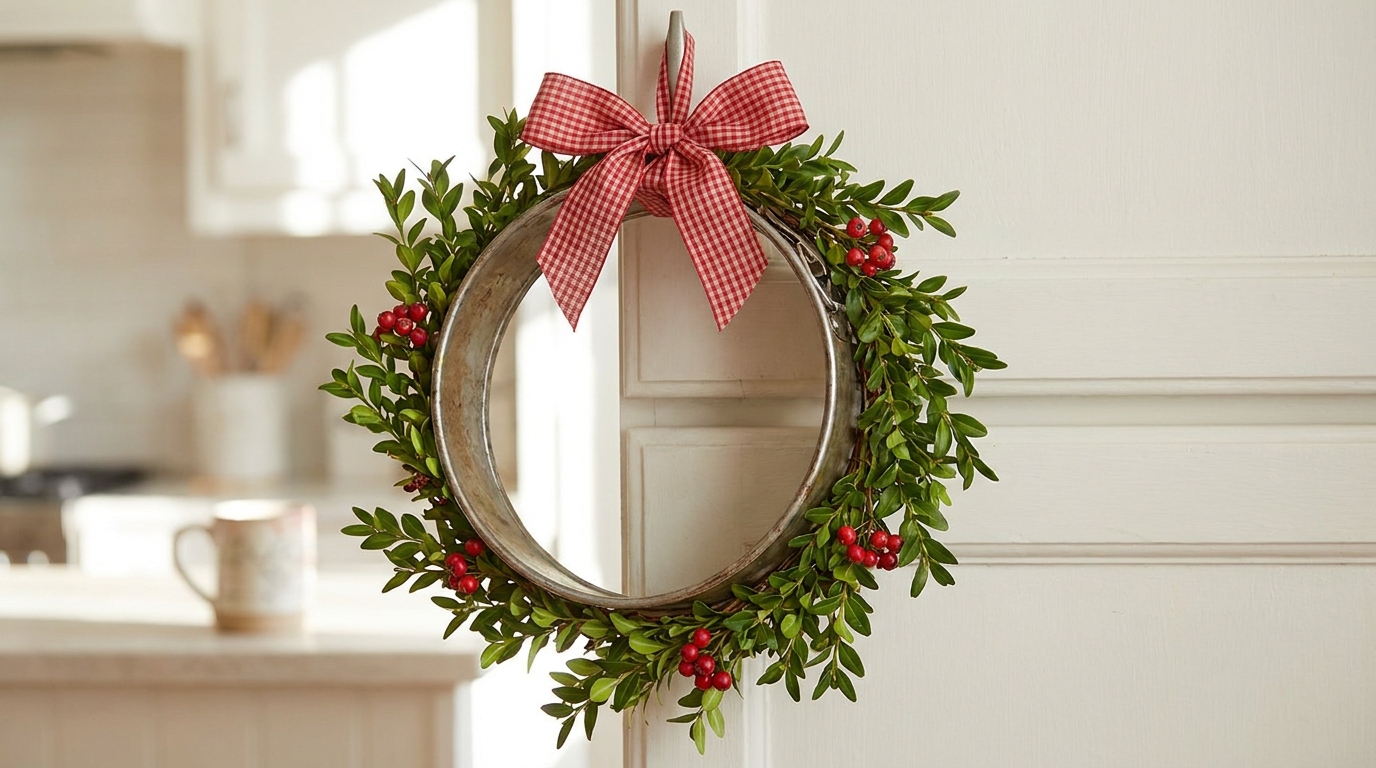
When a springform pan loses its bottom, the ring is still useful. That sturdy metal circle is the perfect form for a small wreath. Wrap it with boxwood sprigs, add a few tiny red berries and finish with a gingham bow. Hang it on a cabinet door, a pantry door or a chair back. It is one of the cheapest pieces of Vintage Bakeware Christmas Decor because the ring is often sold for under a dollar. Love wreaths? Try these colorful ornament wreaths next.
You will need: A springform pan ring, faux or fresh boxwood, thin floral wire, tiny red berries, gingham ribbon.
How to make it: 1. Remove the latch hardware if it sticks out. 2. Wire small bundles of boxwood around the ring, overlapping each one. 3. Wire berries in at three spots. 4. Tie the bow at the top and hang.
Copper Molds and Kettles on a Sunny Windowsill
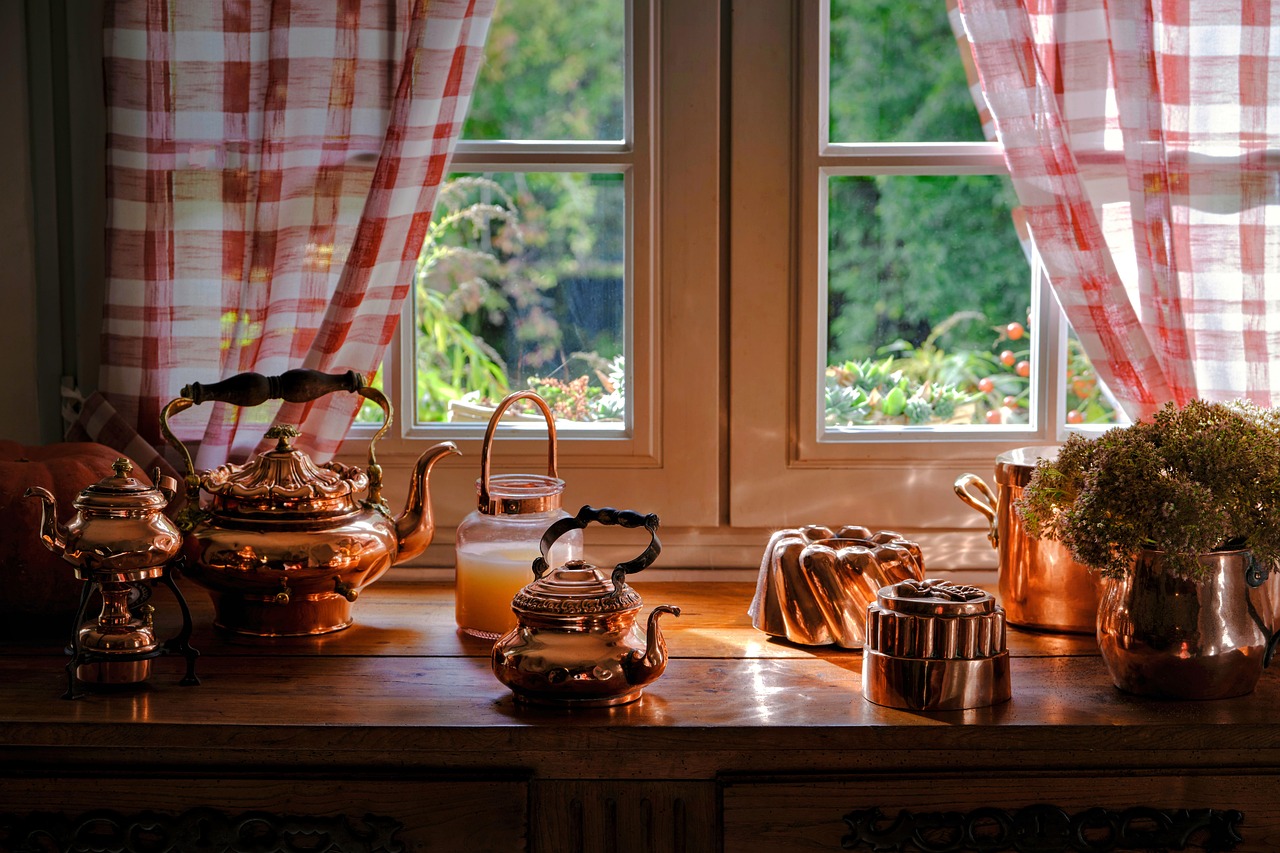
Copper looks its best in daylight, so a windowsill is the perfect spot for a little collection. Group a kettle, a fluted mold and a small pot together, then frame the window with checked curtains for that cozy cottage feel. Add a small potted evergreen and you have instant Vintage Bakeware Christmas Decor for the window. Copper molds also make thoughtful thrift store gifts for friends who love to bake, especially with a recipe card tied on.
You will need: Copper molds and kettles, copper polish or lemon and salt, a small potted evergreen, checked fabric for curtains.
How to make it: 1. Polish the copper and dry it well. 2. Place the tallest piece at one end of the sill. 3. Fill in with smaller molds. 4. Add the evergreen and hang the curtains on a tension rod.
Vintage Bakeware Christmas Decor Ornaments on a Kitchen Tree
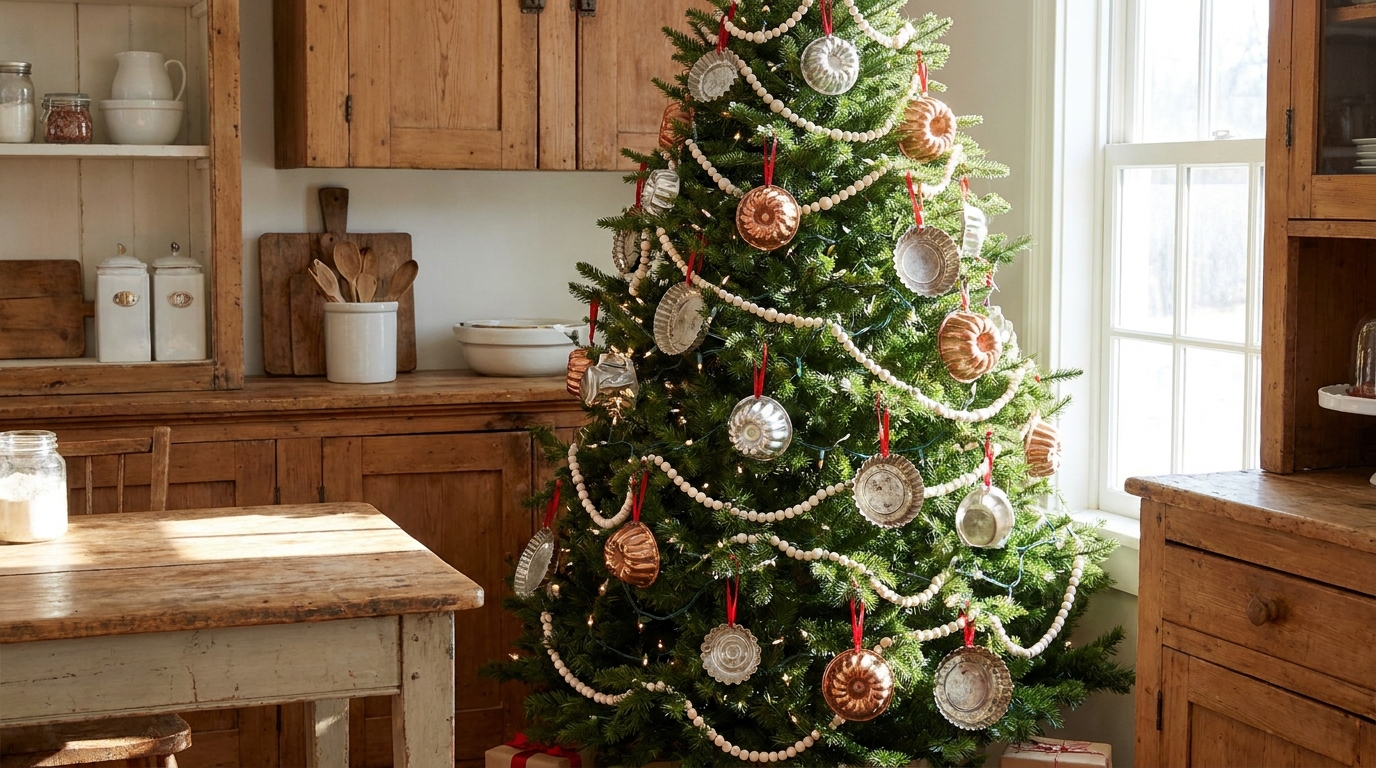
Give the kitchen its own tree and decorate it only with bakeware. Small jello molds, tart tins and mini bundt pans all hang easily from red ribbon, and their shiny metal reflects the room like mercury glass. Add a wooden bead garland and a few cookie cutters if you have them. This Vintage Bakeware Christmas Decor tree tells guests exactly where the cookies come from. For more themed trees, scroll through these ornament tree ideas.
You will need: A small artificial tree, 15 to 20 small molds and tins, red ribbon, wooden bead garland, battery fairy lights.
How to make it: 1. Fluff the tree and add the fairy lights first. 2. Wrap the bead garland. 3. Tie ribbon loops on each mold. 4. Hang the biggest pieces low and the smallest near the top.
A Cookie Sheet That Does Double Duty

Bake your gingerbread on that dark old cookie sheet, then give it a second job. Steel cookie sheets hold magnets, so a thrifted one hung on the wall becomes a board for holiday cards and photos. Paint the rim red or wrap it with washi tape, add a ribbon hanger and pin up every card that arrives. It is a sweet way to honor the tradition that started with the first American Christmas cards. In January, take it down and get back to baking.
You will need: A steel cookie sheet (test it with a magnet), small strong magnets, red paint or washi tape, ribbon, two adhesive hooks.
How to make it: 1. Clean the sheet and paint or tape the rim. 2. Glue a ribbon loop to the back corners. 3. Hang it on adhesive hooks. 4. Use small magnets to display cards as they arrive.