14 No-Carve Pumpkin Ideas So Cute You Will Never Pick Up a Knife Again
These no-carve pumpkin ideas are for anyone who loves Halloween but hates the slimy mess, the sore wrists and the sharp knife. Every single one uses paint, glue, fabric, yarn or a few fun extras instead of carving, so little kids can help and your pumpkins last for weeks instead of days. Pinterest says searches for pumpkin ideas have jumped this fall, and painted pumpkins are the top DIY search in America right now. We picked the cutest looks people are copying, from a teddy bear built out of stacked pumpkins to a glowing mummy wrapped in cheesecloth. Most take less than an hour and cost only a few dollars. Grab a pumpkin, clear the kitchen table and pick your favorite..
No-Carve Pumpkin Ideas Start With This Stacked Teddy Bear
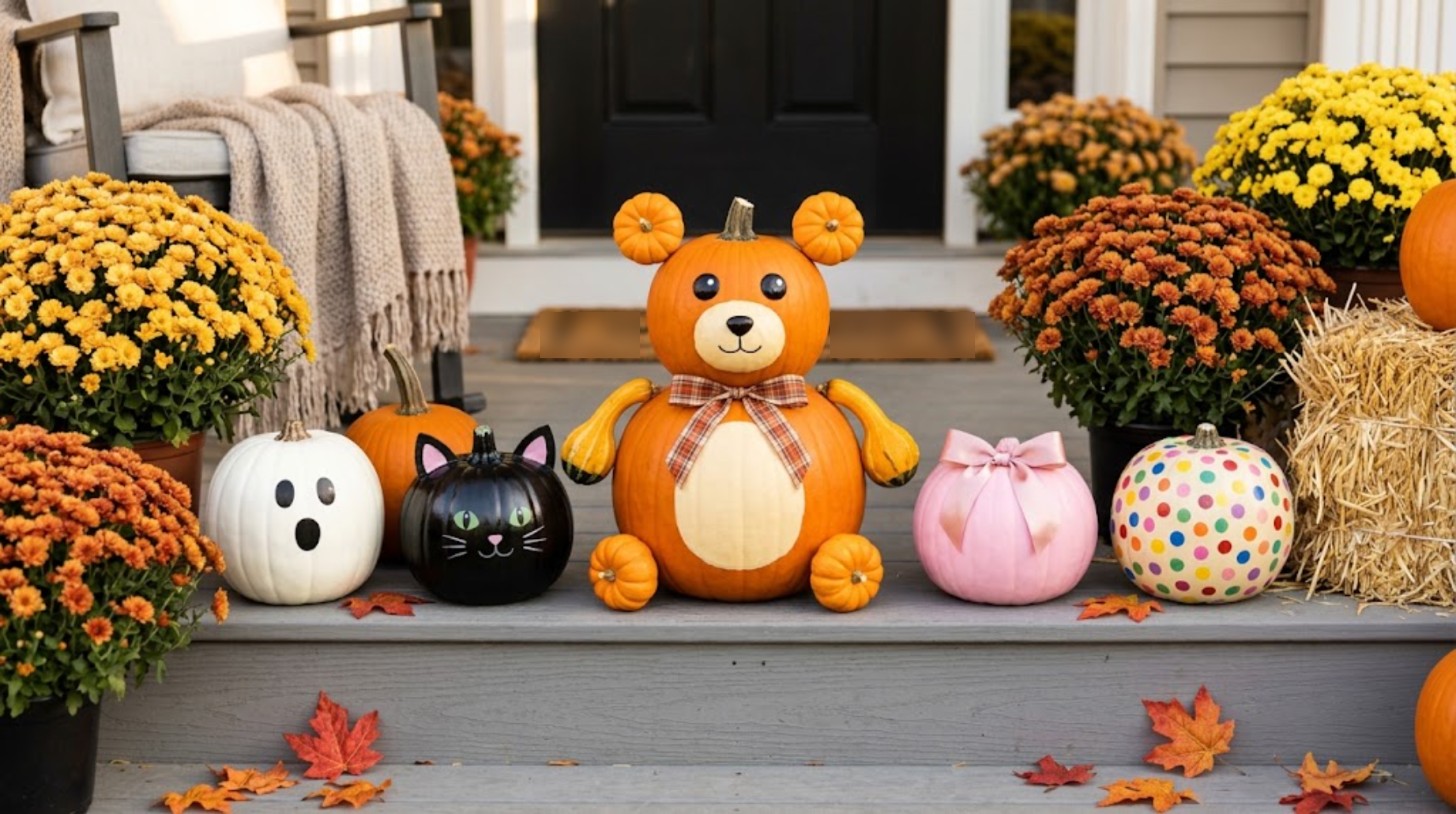
This sweet teddy bear is the pumpkin idea taking over Facebook this month, and it is easier than it looks. One big pumpkin makes the body, a smaller one makes the head, and two tiny pumpkins pop on top as ears. A painted cream muzzle and a plaid bow finish the look. Kids giggle every time they walk past it, and neighbors stop on the sidewalk to take photos. It also lasts for weeks on a cool porch because nothing is cut open. Who in your family will name your bear first..
You will need: 1 large pumpkin, 1 medium pumpkin, 2 mini pumpkins, 2 small gourds, cream and black acrylic paint, a foam brush, wooden skewers, a ribbon bow.
How to make it: 1. Paint a cream oval on the big pumpkin for the tummy and a small cream circle on the medium one for the muzzle. 2. Ask an adult to push a skewer into the top of the big pumpkin and set the head on it. 3. Attach the mini pumpkin ears and gourd arms with short skewers. 4. Paint black eyes and a nose, then tie the bow at the neck.
White Pumpkin With a Black Ghost Face
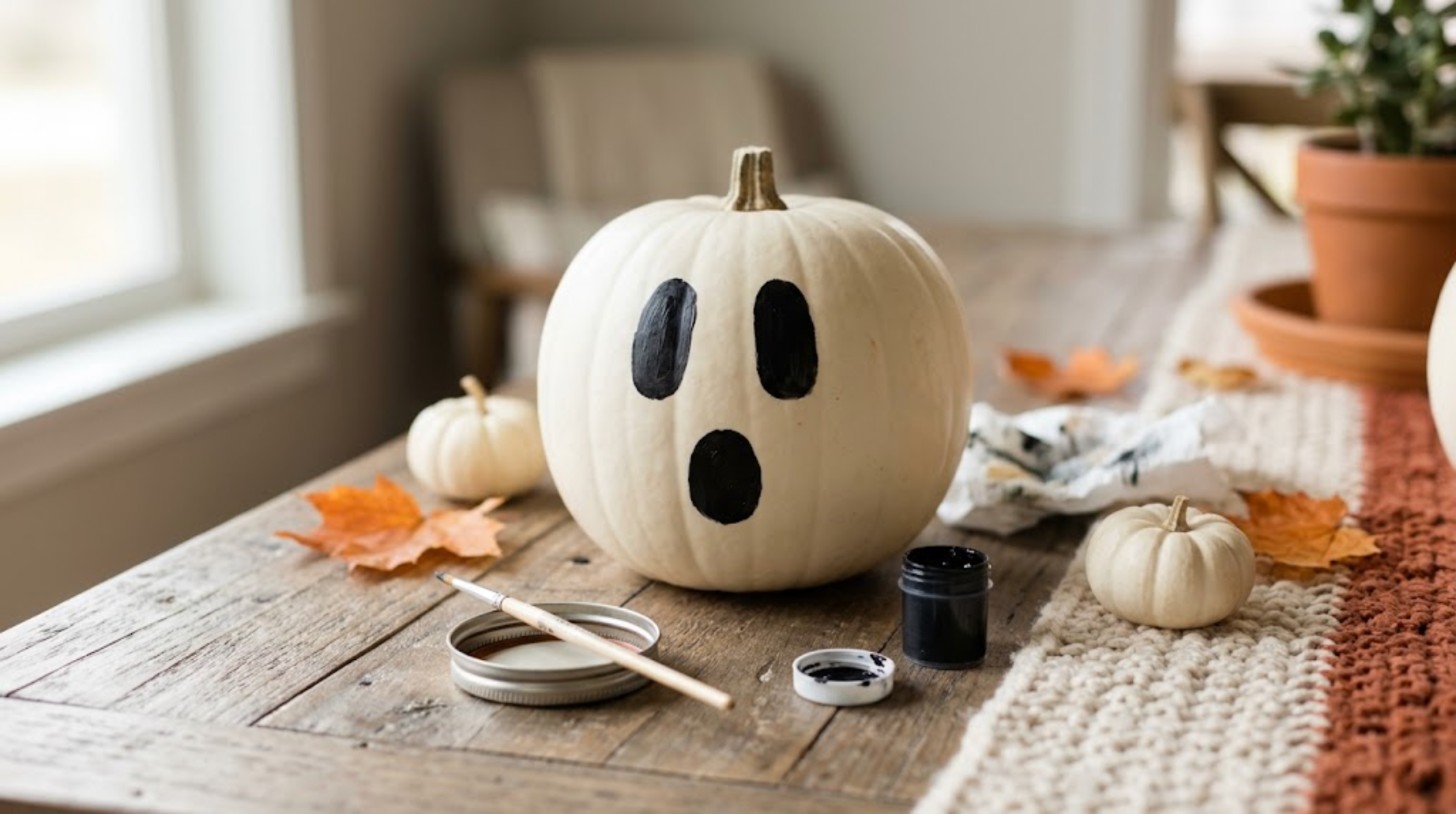
Ghost face pumpkins are one of the breakout searches of the season, and Pinterest Trends shows Halloween pumpkin ideas climbing fast. Best of all, this one is ready in about ten minutes. A smooth white pumpkin already looks like a little ghost, so all you add is a face. Two tall oval eyes and a round open mouth make it look surprised and silly instead of scary. It is a perfect first project for small kids because there is almost nothing to mess up. Line up three in different sizes and you have a ghost family on your steps. Ready to give it a try?
You will need: 1 white pumpkin, black acrylic or chalk paint, a small round brush, a pencil, a damp paper towel.
How to make it: 1. Wipe the pumpkin clean and let it dry. 2. Lightly sketch two ovals and a circle with a pencil. 3. Fill them in with black paint, using two thin coats for a solid finish. 4. Wipe away any pencil marks with the damp towel once the paint is dry.
Black Cat Painted Pumpkin
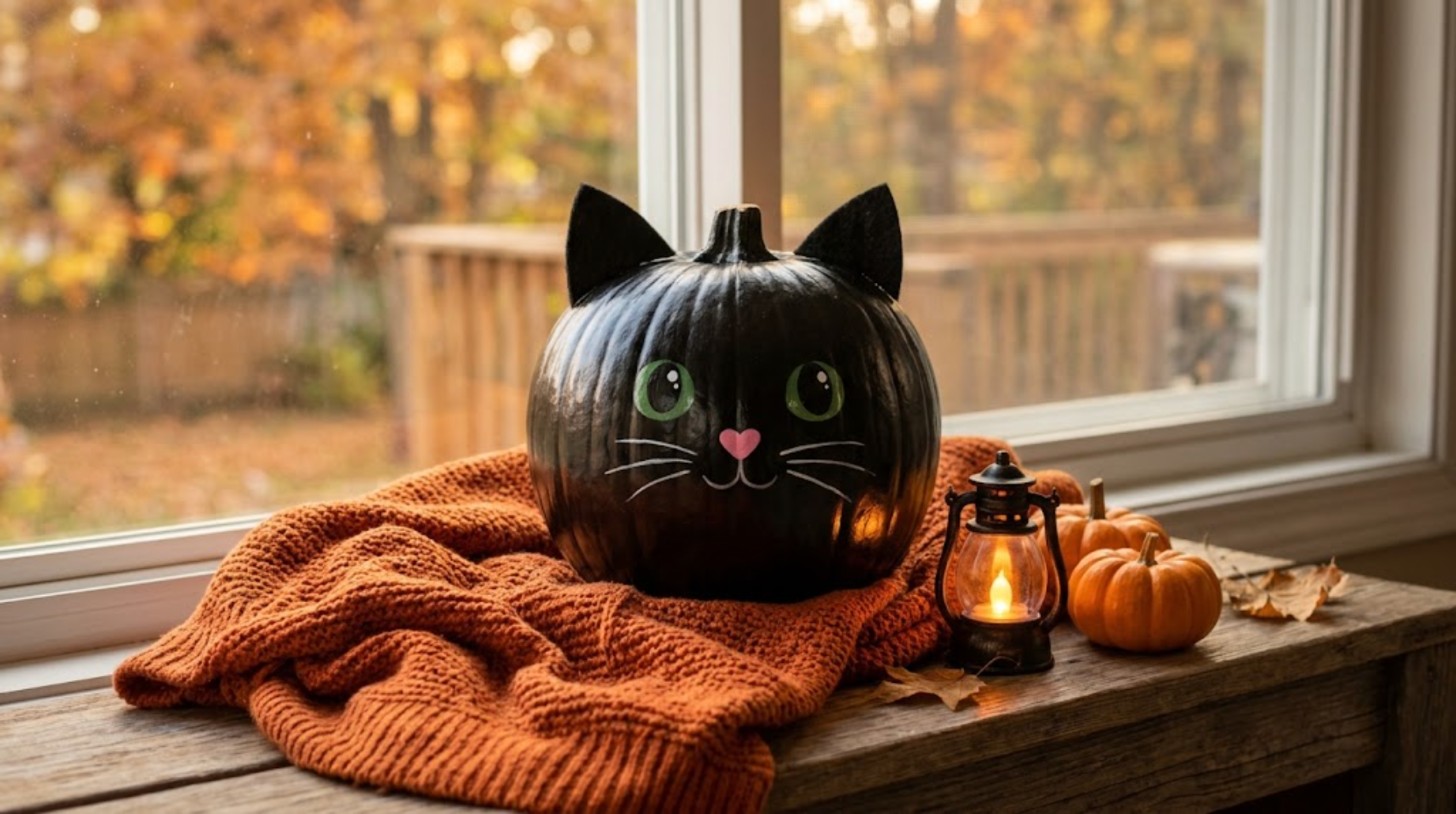
Cat pumpkin painting is one of the fastest rising Halloween searches this year, and one look explains why. Paint a pumpkin glossy black, glue on two felt ears and give it big green eyes and a tiny pink nose. Suddenly you have the friendliest black cat on the block. It looks adorable on a windowsill next to a battery lantern, and it is a great way to use a lumpy pumpkin that is not quite round. Would your cat be sleepy, sassy or surprised?
You will need: 1 pumpkin, black acrylic paint, white, green and pink paint, black felt, craft glue, a fine paint pen, a foam brush.
How to make it: 1. Give the pumpkin two coats of black paint and let it dry. 2. Cut two triangle ears from felt, fold the bottom edge and glue them on top. 3. Paint two green eyes with white highlights and a pink nose. 4. Add thin whiskers with a white paint pen.
Thumbprint Faces: No-Carve Pumpkin Ideas Kids Can Do
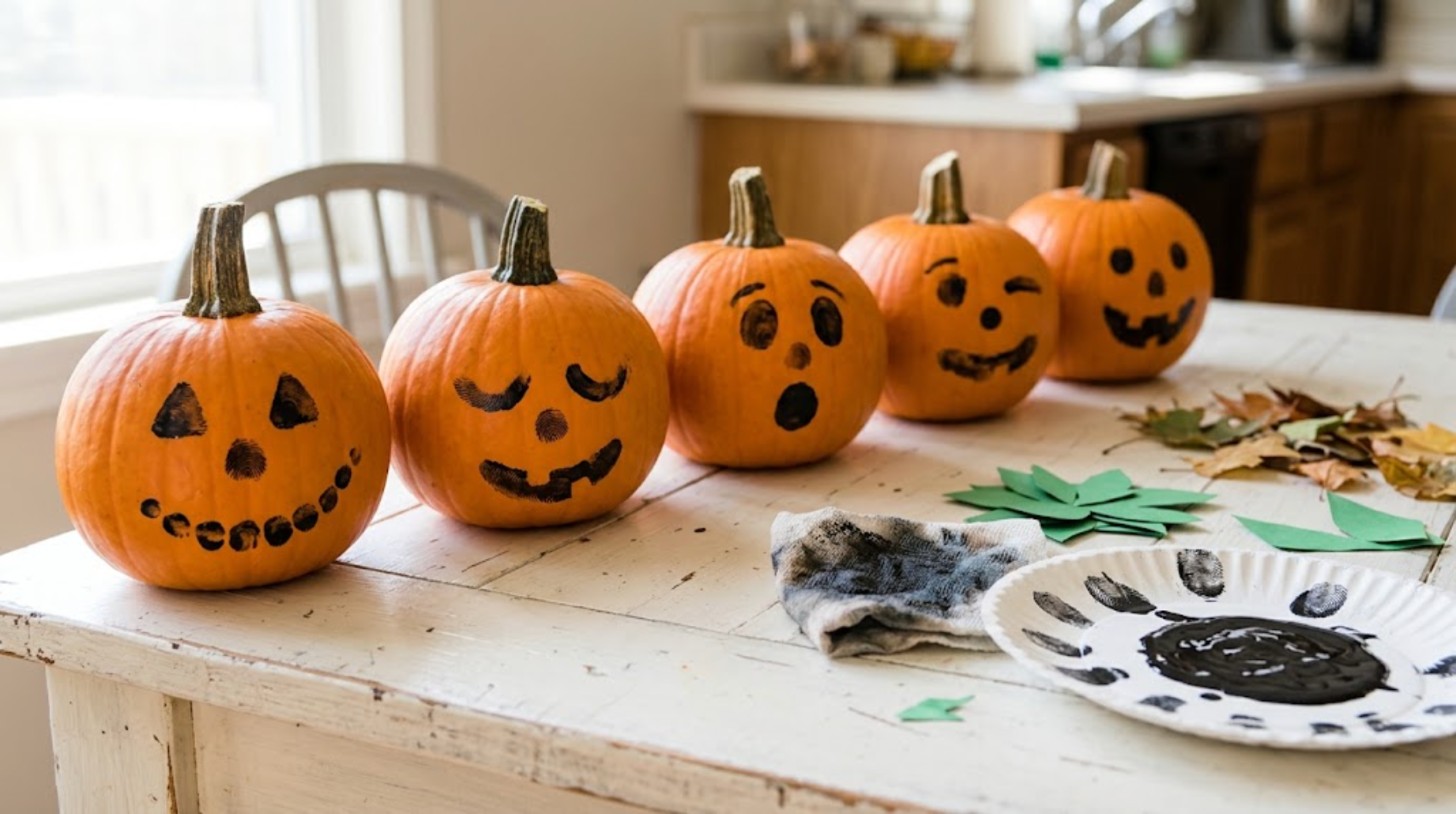
Of all the no-carve pumpkin ideas here, this is the one that gets the whole family involved, even toddlers. Instead of a brush, everyone uses their fingers. A thumbprint makes a perfect eye, a fingertip makes a nose, and a row of little dots turns into a goofy grin. Every face comes out different, and that is the best part. Write the date on the bottom and these little pumpkins become a sweet keepsake photo every October. Use washable paint so cleanup is just a quick wipe. Whose thumbprint face will be the silliest?
You will need: Small pie pumpkins, black washable paint, a paper plate, baby wipes or a damp cloth, a paint pen for the date.
How to make it: 1. Pour a little paint onto a paper plate. 2. Press a thumb into the paint and stamp two eyes. 3. Add a fingertip nose and a dotted smile. 4. Let it dry for an hour, then write the name and year on the bottom.
Silly Painted Face Pumpkins
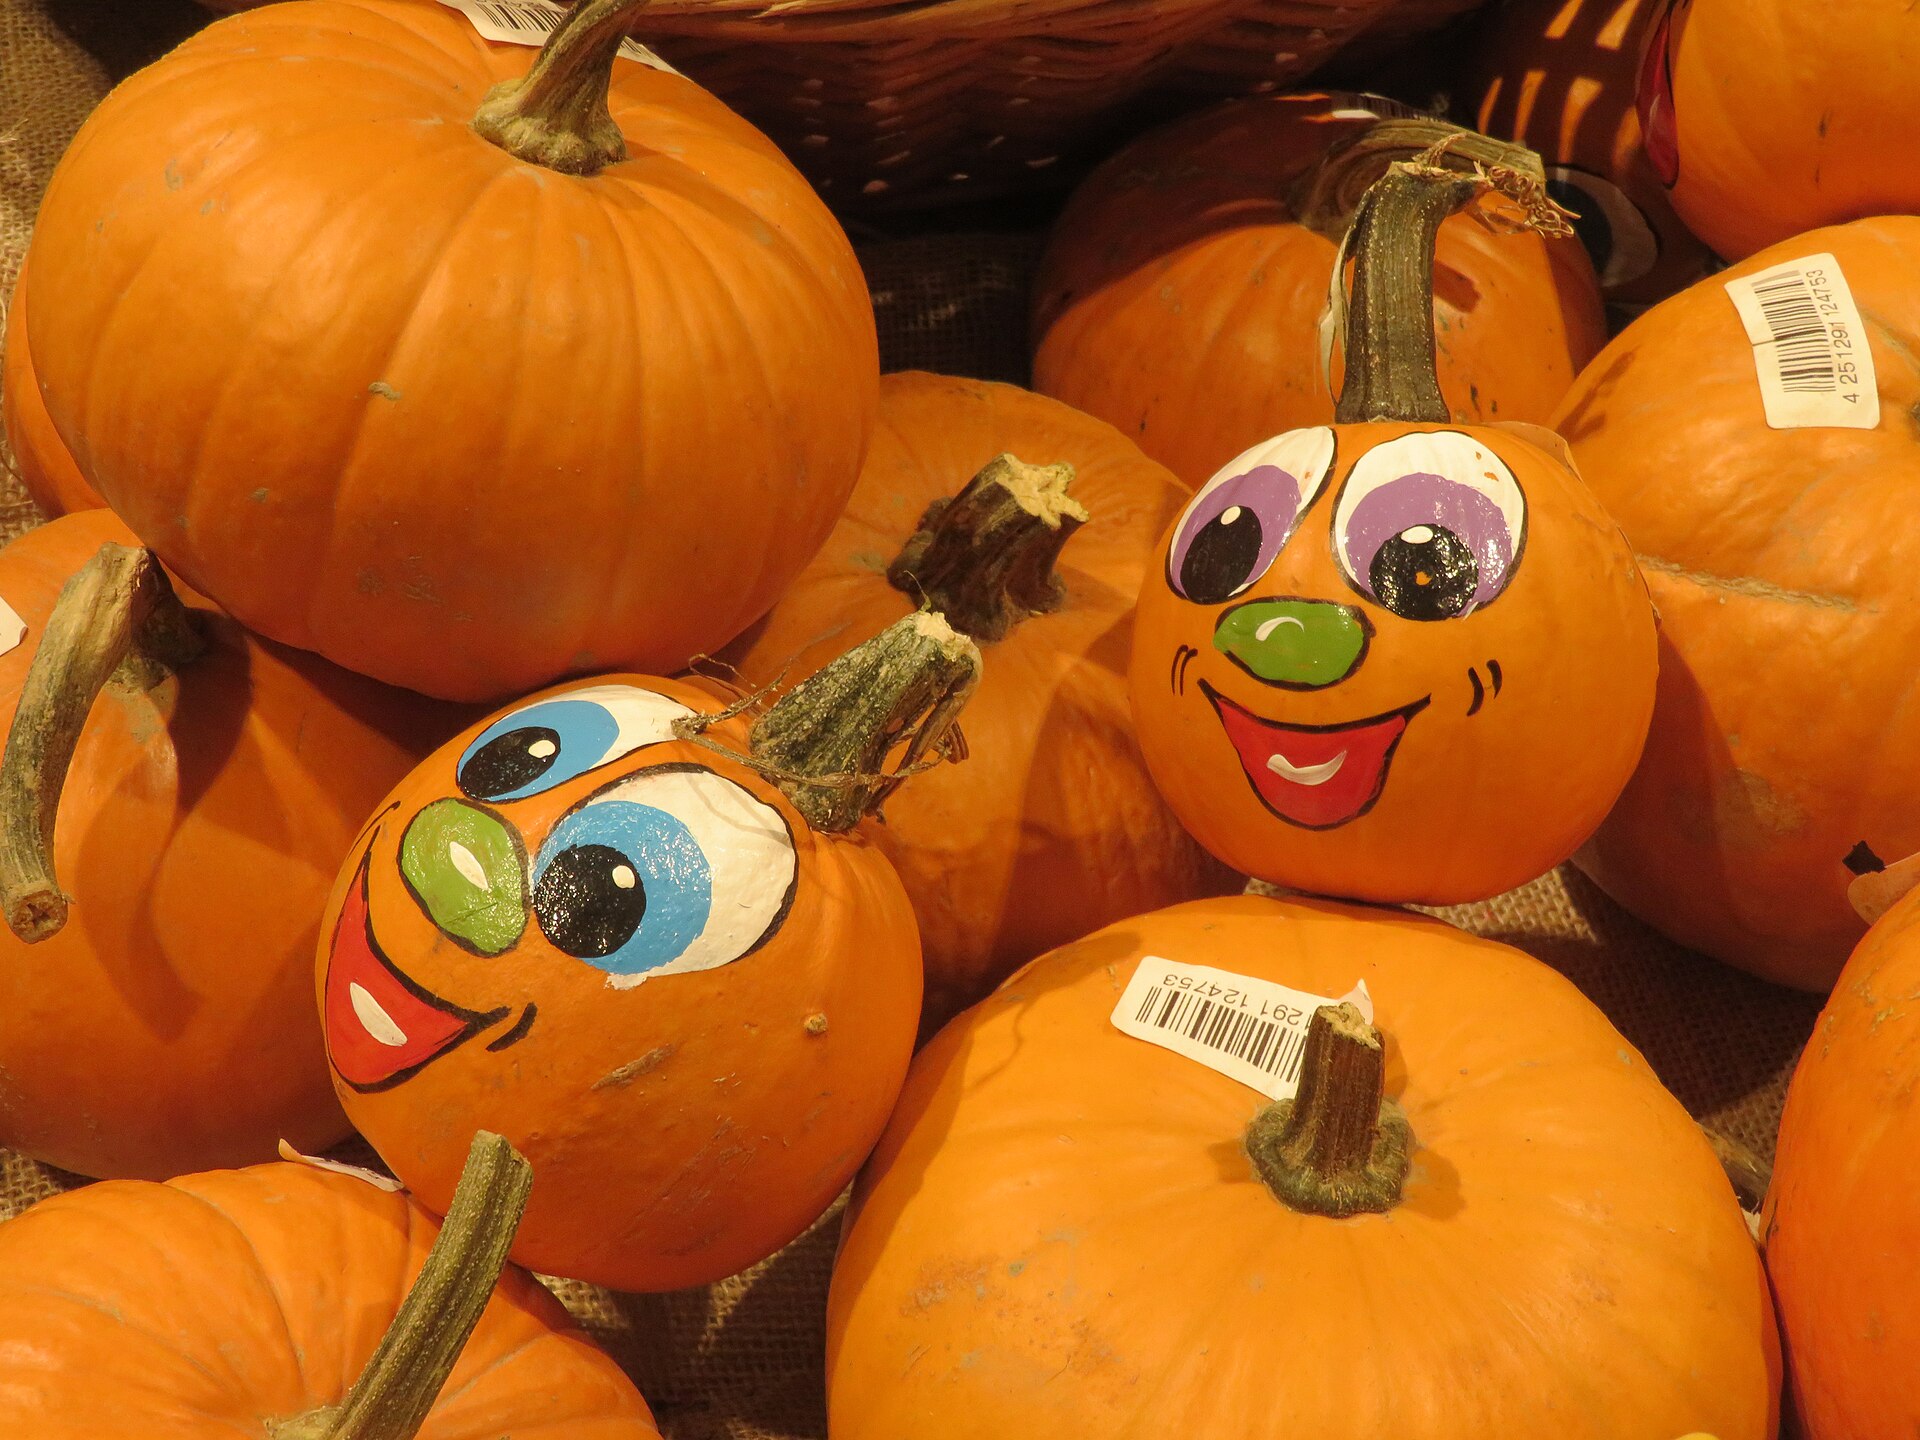
Sometimes the happiest pumpkins are the goofy ones. Rolling eyes, rosy cheeks and big toothy grins turn plain orange pumpkins into a crowd of cartoon characters. Paint pens make this easy because they work like markers, so there is no dripping and no brush to wash. Set out a pile of mini pumpkins at a party and let every guest paint one to take home. It is cheaper than a craft kit and far more fun. How many different faces can your family invent in one afternoon?
You will need: Mini pumpkins, white, black and pink paint pens, acrylic paint in a few colors, a small brush.
How to make it: 1. Paint big white circles for the eyes and let them dry. 2. Add black pupils looking in different directions. 3. Draw a wide mouth, eyebrows and pink cheeks with paint pens. 4. Add a white dot in each eye to make them sparkle.
Pastel Unicorn Pumpkins
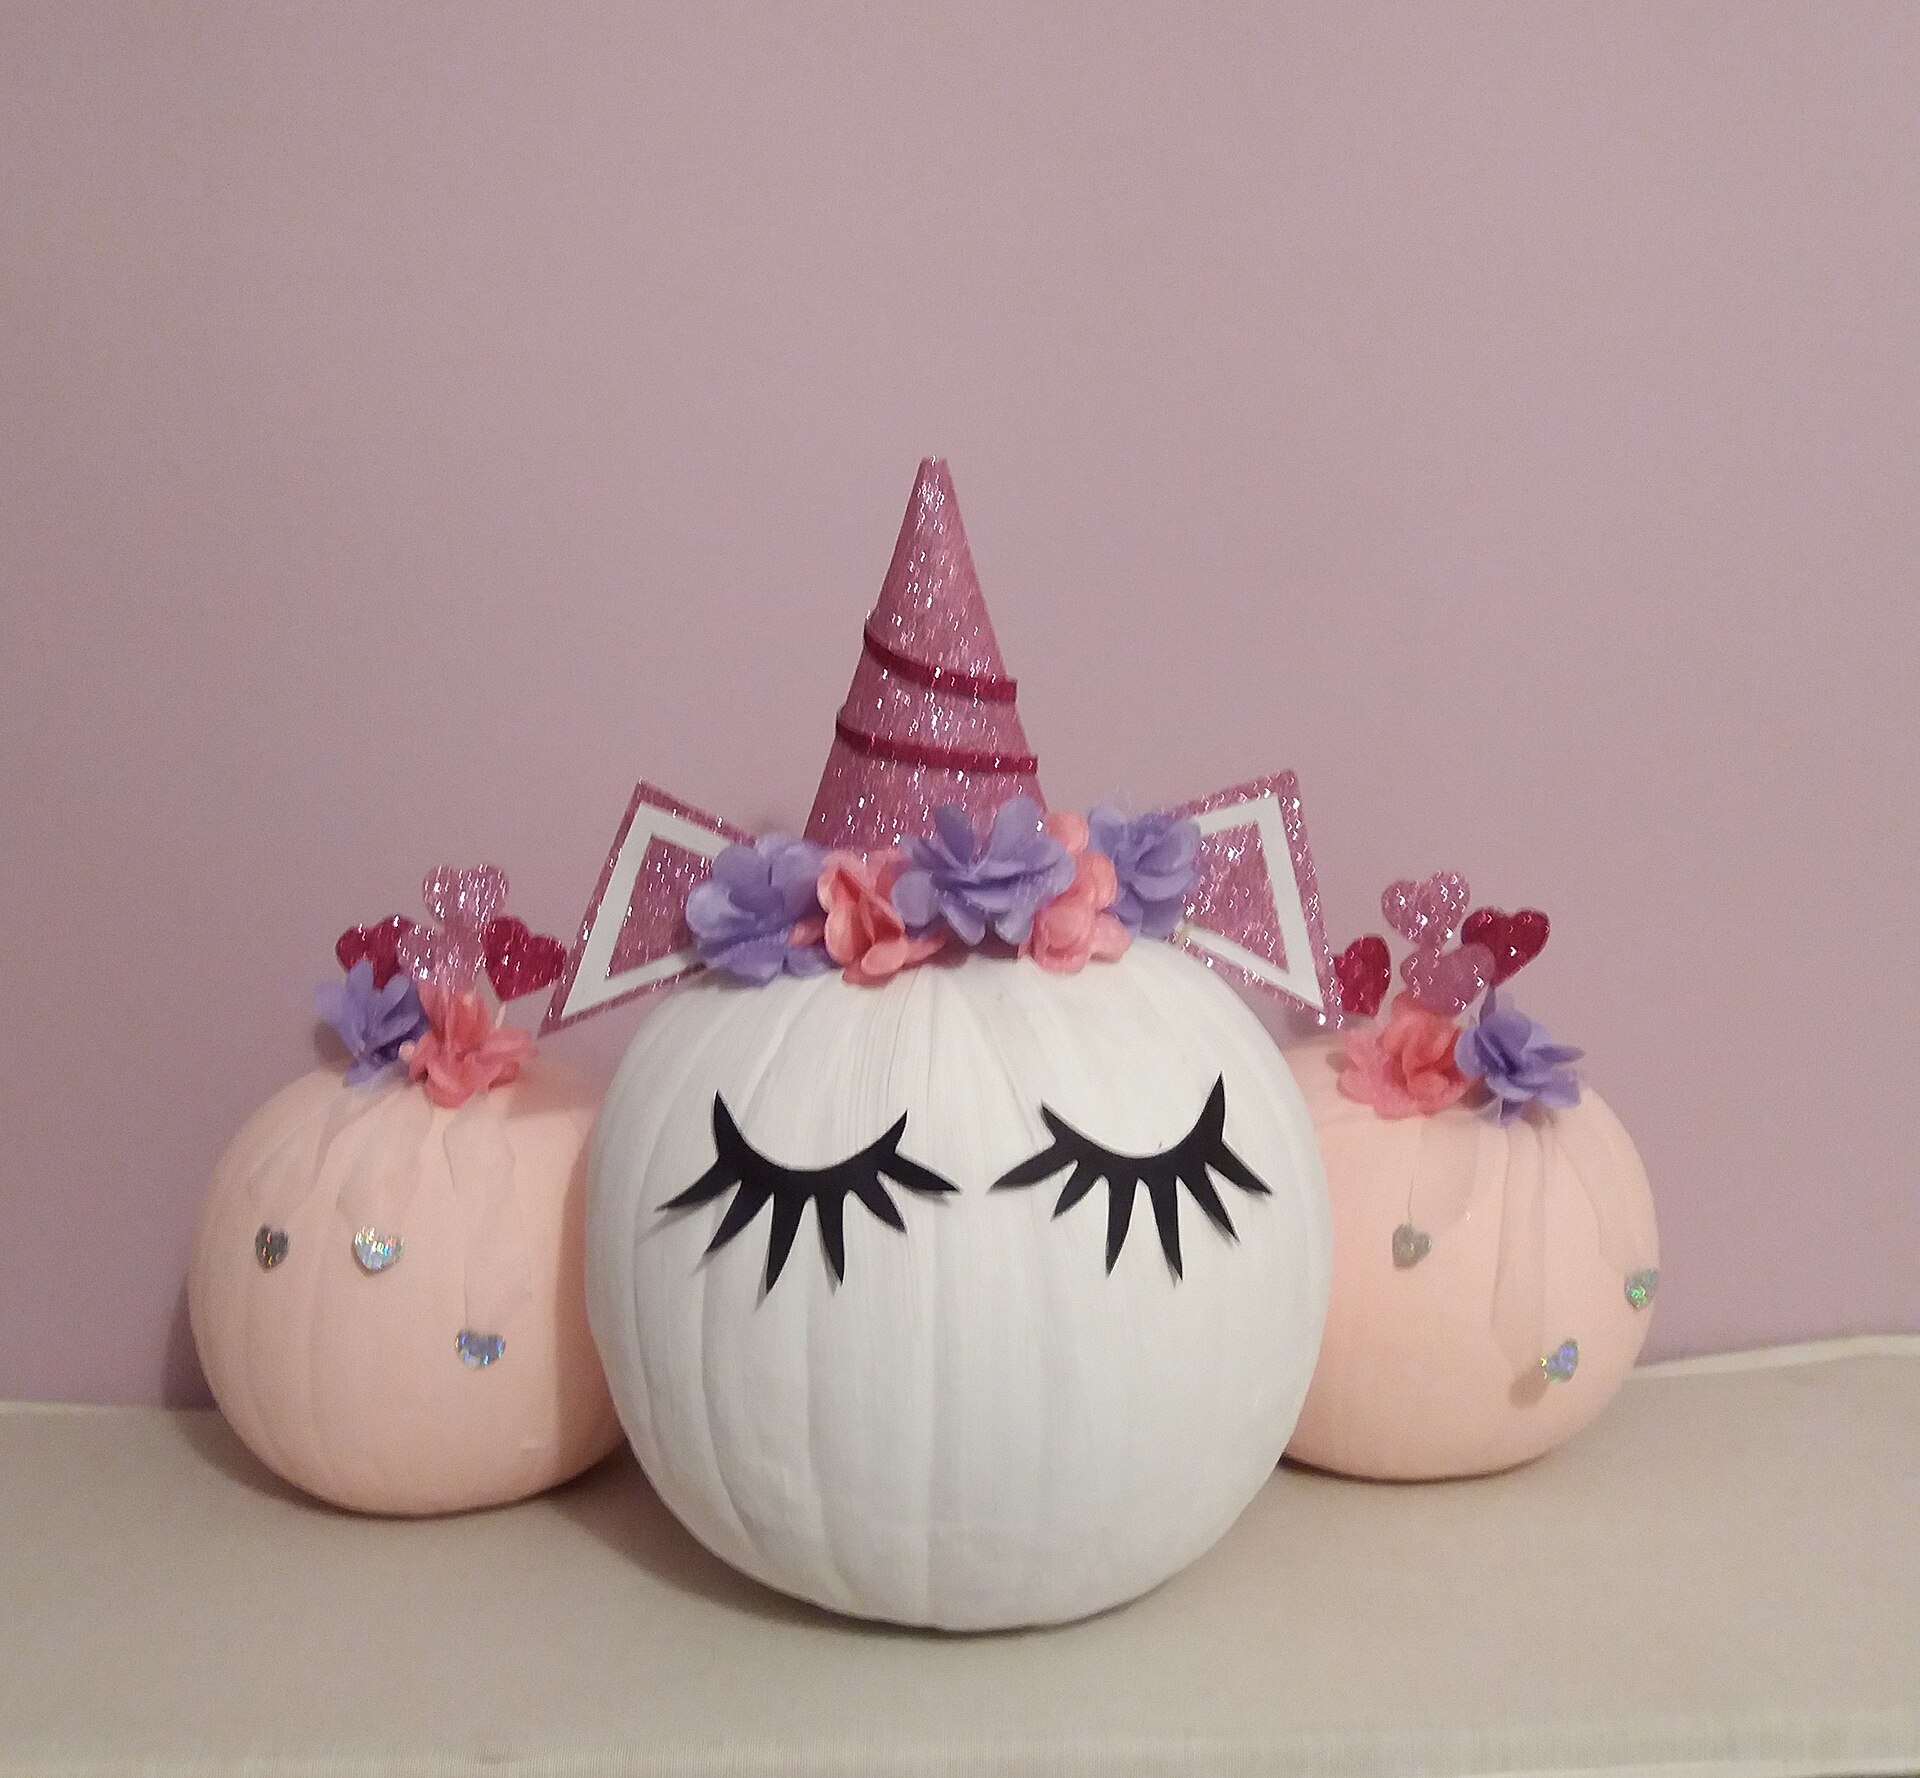
Not every Halloween pumpkin needs to be spooky, and the best no-carve pumpkin ideas leave room for cute. These dreamy unicorn pumpkins are pure magic for kids who love pink and sparkle. A white pumpkin gets sleepy painted lashes, a glittery horn and a crown of faux flowers. Pink mini pumpkins with matching ears sit beside it like little babies. They look sweet from October right through a fall birthday party. If you have a little one who wants a cute Halloween instead of a creepy one, this is the project to make together. Pink or purple flowers for yours?
You will need: White and pink pumpkins, black paint pen, a foam or paper cone, gold or pink glitter, faux flowers, craft glue, felt for ears.
How to make it: 1. Draw closed eyes with long lashes using the paint pen. 2. Cover the cone in glue and glitter for the horn. 3. Adult help: glue the horn and flowers to the top with low temp hot glue. 4. Add felt ears on both sides.
Glowing Mummy, One of the Coziest No-Carve Pumpkin Ideas
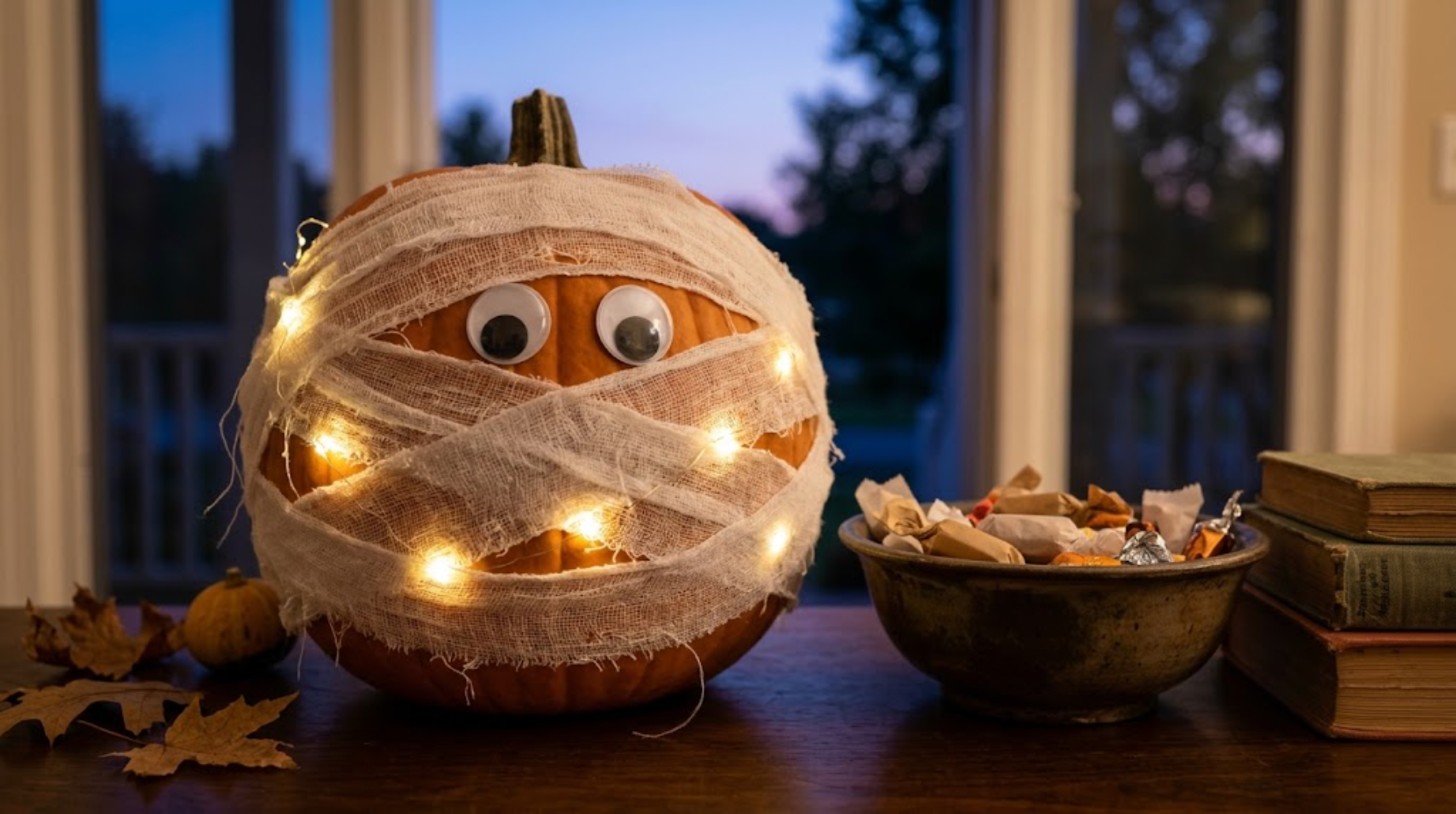
This mummy pumpkin is cute in the daytime and magical at night. Loose strips of cheesecloth wrap around the pumpkin, two googly eyes peek out from the gaps, and a strand of battery fairy lights tucked into the wrapping makes it glow. There is no flame anywhere, so it is safe on a table, a porch or a child’s bedroom shelf. Cheesecloth costs about two dollars, and one pack wraps several pumpkins. Turn off the lights and watch how everyone smiles when they see it glowing. Where will your mummy stand guard?
You will need: 1 pumpkin, a pack of cheesecloth, 2 large googly eyes, craft glue, a strand of battery LED fairy lights, tape.
How to make it: 1. Tear the cheesecloth into long strips. 2. Tape the battery pack to the back and wind the lights loosely around the pumpkin. 3. Wrap the strips over the lights, tucking the ends under. 4. Glue the googly eyes into a gap near the top.
Gold Painted Pumpkin
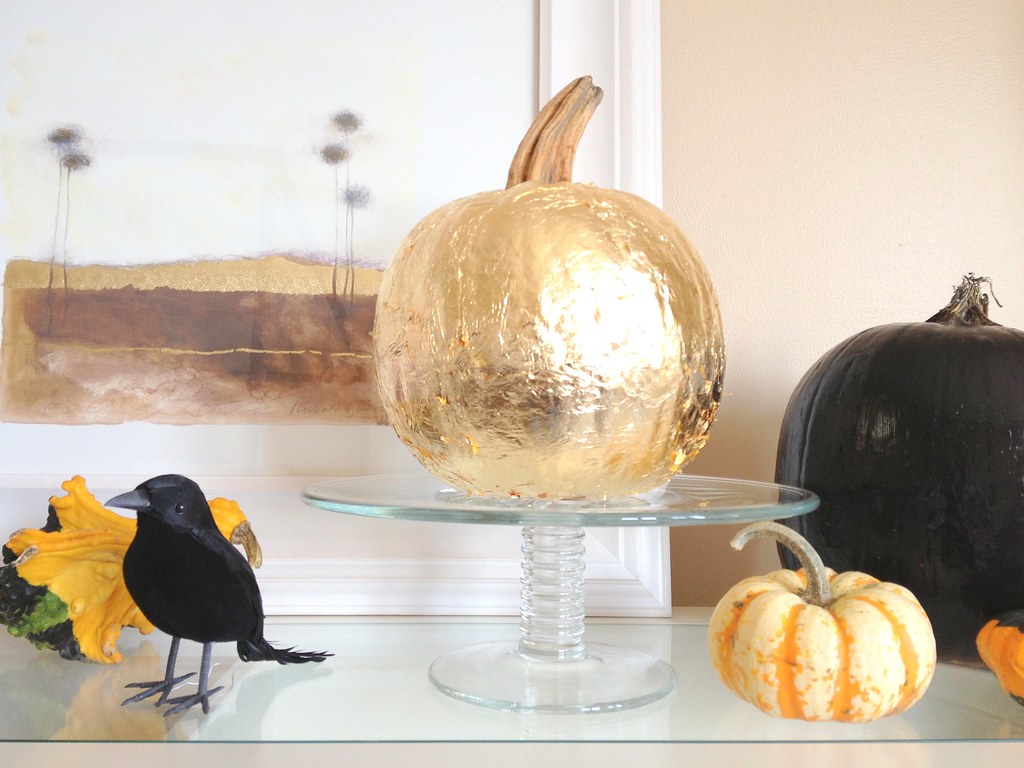
Want a pumpkin that looks like it came from a fancy home store? Paint it gold, one of the easiest no-carve pumpkin ideas for grown up decor. A shiny metallic coat turns an ordinary pumpkin into an elegant centerpiece that works for Halloween and Thanksgiving. Set it on a cake stand next to a black pumpkin and a little crow, and your entry table instantly looks styled. Faux pumpkins work too, and you can keep those for years. The whole project takes about fifteen minutes plus drying time. Would you go bright gold, rose gold or soft champagne?
You will need: 1 real or faux pumpkin, metallic gold acrylic paint or gold spray paint, a foam brush, a cake stand for display.
How to make it: 1. Wipe the pumpkin clean and dry. 2. Brush on a thin coat of gold paint. 3. Let it dry for 30 minutes, then add a second coat. 4. Adult only: if using spray paint, spray outdoors in light coats.
Decoupage Napkin Pumpkins
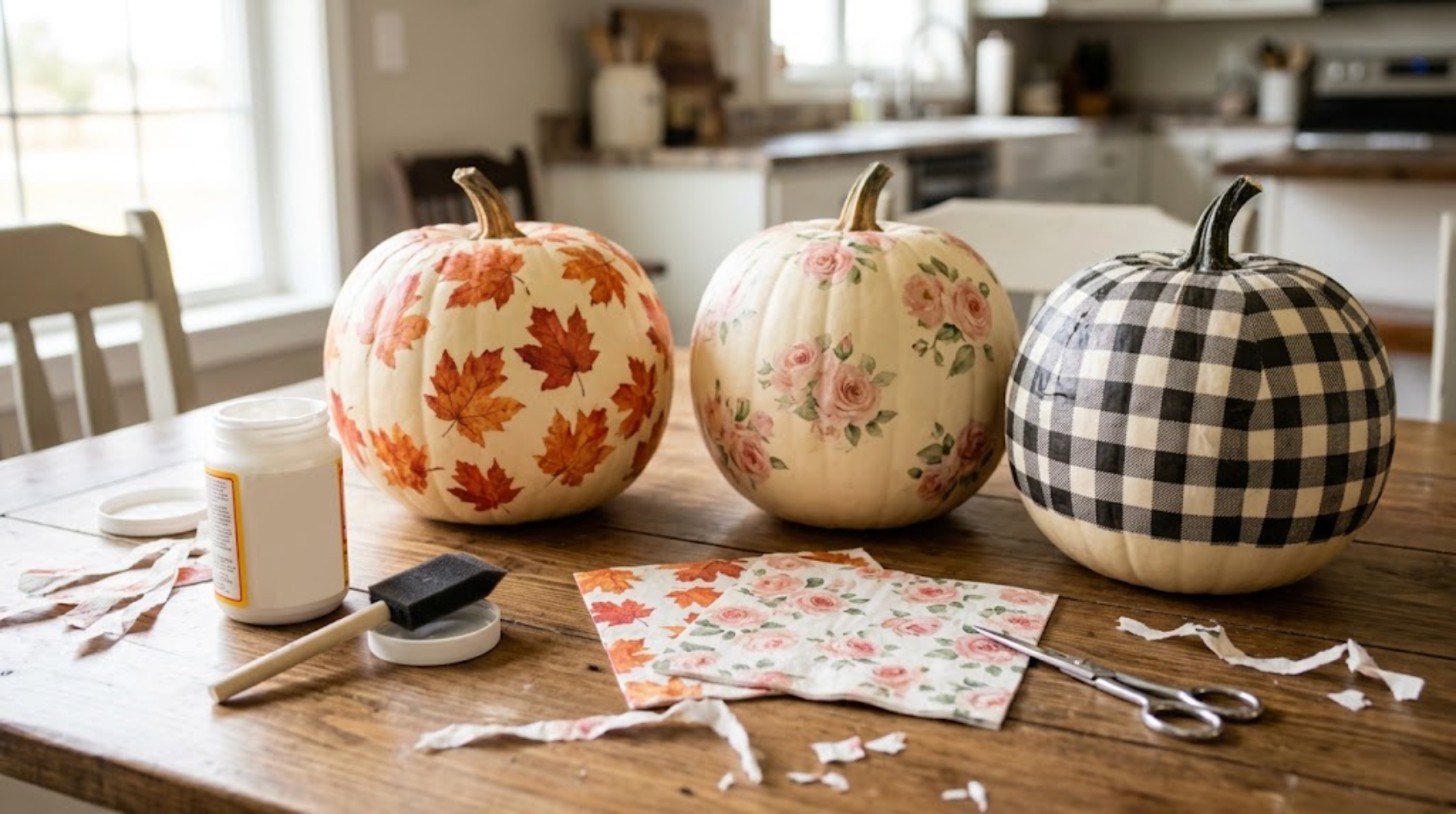
This is the crafty secret that makes pumpkins look hand painted when they are not. Pretty paper napkins with fall leaves, florals or gingham prints are glued onto a pumpkin with decoupage medium. The thin top layer of the napkin melts right into the surface, so it looks like it was painted on. It is an easy, mess free way to use leftover party napkins, and the finish lasts all season. Pick a napkin print that matches your kitchen and make a set of three. Which print would you choose first?
You will need: 1 smooth pumpkin, printed paper napkins, matte decoupage glue, a foam brush, scissors.
How to make it: 1. Peel the napkin layers apart and keep only the printed top layer. 2. Cut or tear out the designs you like. 3. Brush decoupage glue onto the pumpkin, lay the napkin on top and gently smooth it. 4. Brush another thin coat over the top and let it dry.
Succulent Crown, the Prettiest of All No-Carve Pumpkin Ideas
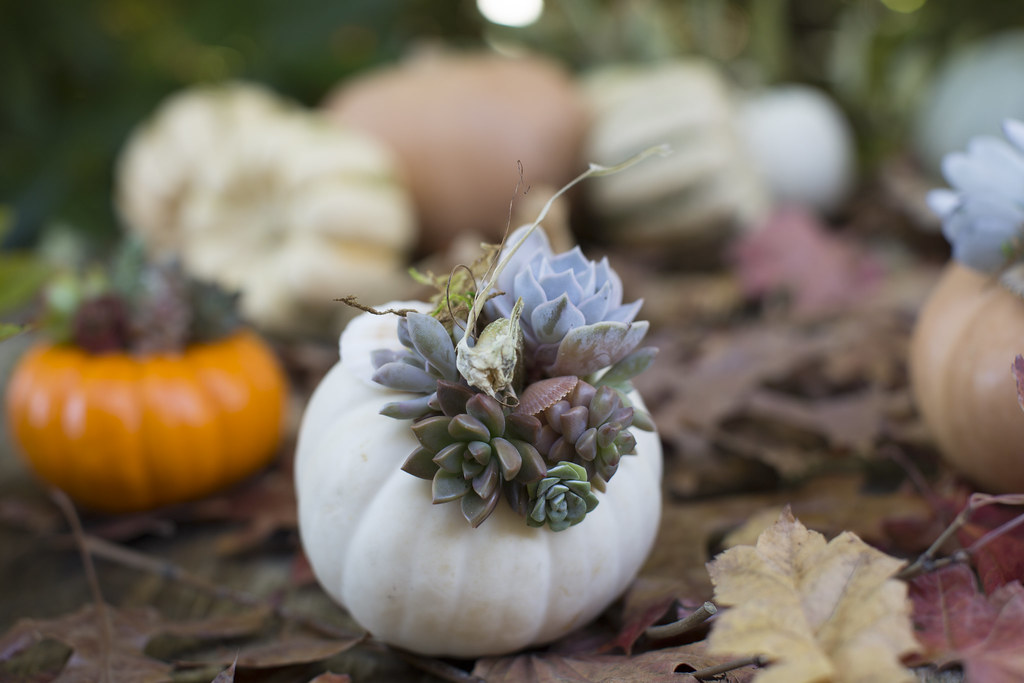
This living pumpkin centerpiece is a favorite with plant lovers. Instead of cutting the top, you glue a cushion of moss on top of the pumpkin and tuck little succulents into it. The result looks like a jeweled crown in soft green, pink and silver. Mist it once a week and it stays pretty for weeks. When the season ends, you can replant the succulents in a pot. It makes a lovely hostess gift for a fall dinner party too. Do you have a few succulents waiting on a windowsill?
You will need: 1 white or orange pumpkin, sheet moss, small succulent cuttings, spray adhesive or tacky glue, a spray bottle of water.
How to make it: 1. Spread glue over the top of the pumpkin around the stem. 2. Press a layer of moss onto the glue. 3. Dab glue on the end of each succulent and press it into the moss, largest first. 4. Fill gaps with tiny pieces and mist lightly.
Painted Pumpkin With a Flower Crown
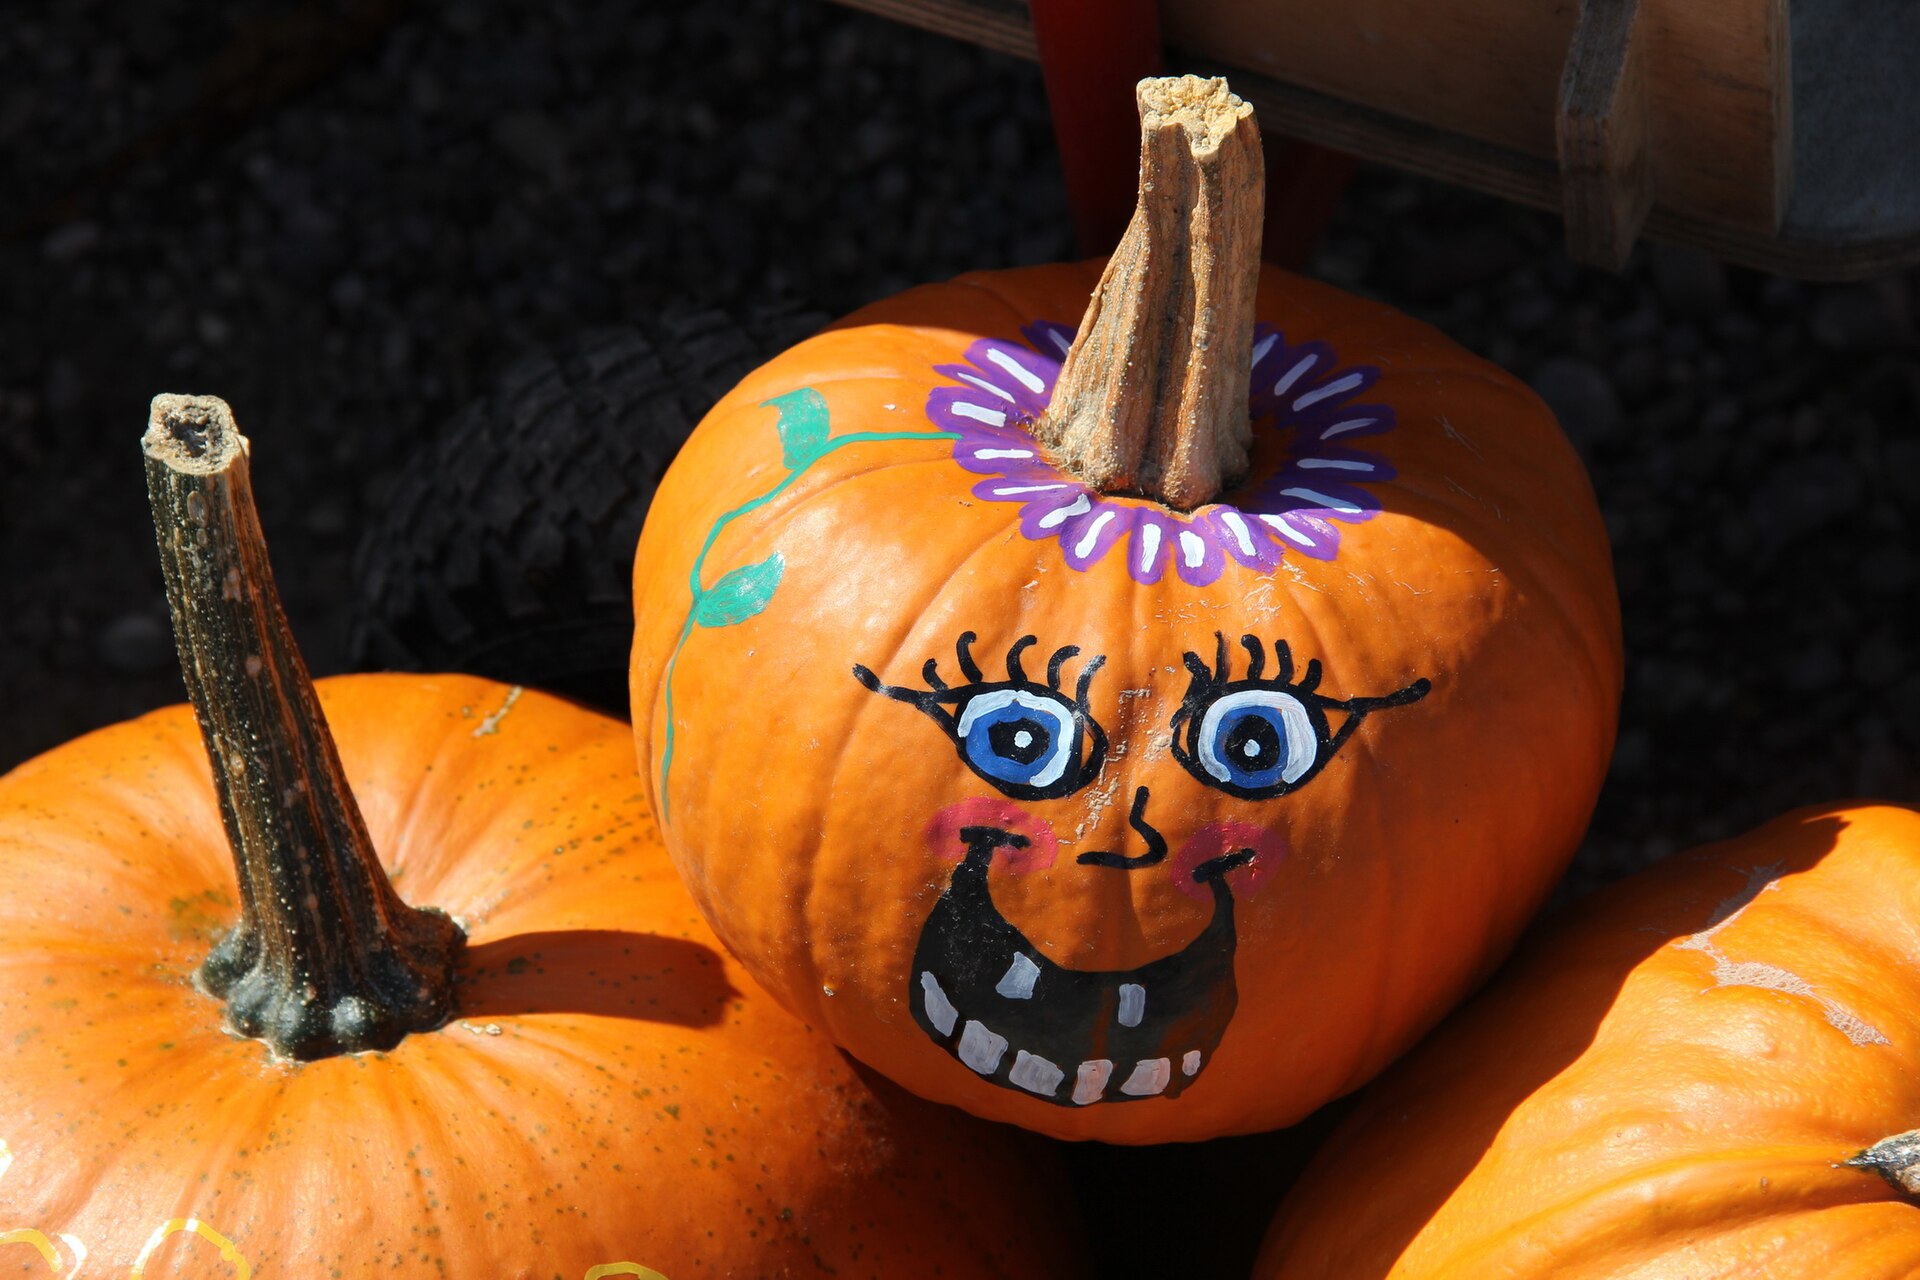
This happy little pumpkin proves a simple face plus a few flowers can steal the show. Paint big friendly eyes and a wide smile, then tuck a bunch of small purple flowers around the stem like a crown. It looks like a cheerful garden fairy sitting on your steps. Fresh flowers last a few days, while faux flowers last all season. It is a fun idea for a fall party table where each guest gets their own. Would you pick purple, yellow or orange flowers for your crown?
You will need: 1 pumpkin, white, black and red acrylic paint, small brushes, a handful of small fresh or faux flowers, a bit of floral tape.
How to make it: 1. Paint white eyes and let them dry. 2. Add black pupils, eyebrows and a big smile. 3. Wrap a few flower stems together with floral tape. 4. Tuck the bundle around the stem so it sits like a crown.
Glitter Dipped Pumpkin Tops
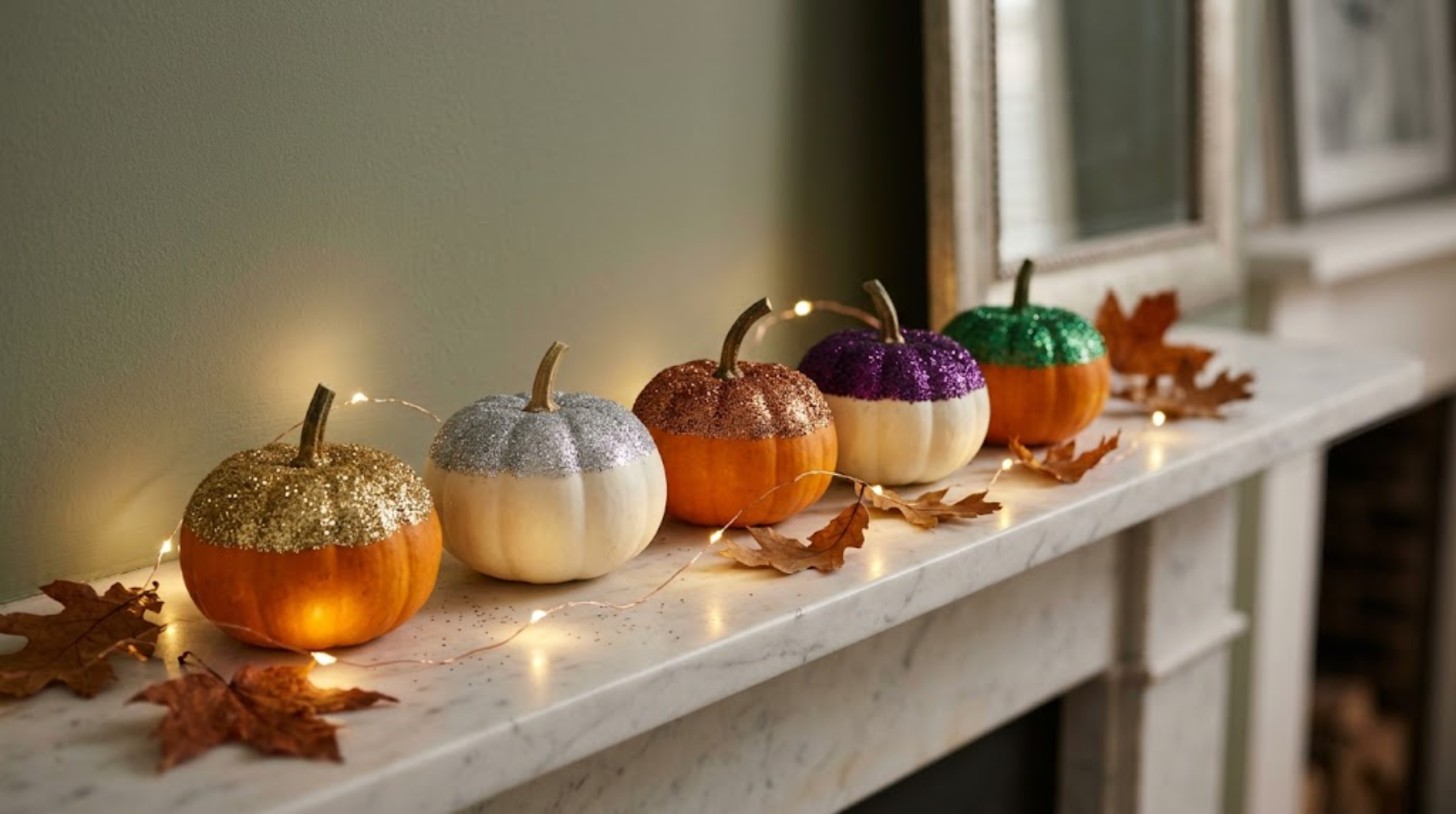
Here is the fastest way to make store bought pumpkins look party ready. Brush glue over just the top of the pumpkin around the stem, sprinkle on glitter, and you get a sparkly dipped look that catches the light beautifully. Gold, silver and copper look elegant, while purple and green feel fun and spooky. Do a whole row of mini pumpkins for a mantel or a dinner table runner. Work over a tray so the extra glitter is easy to save. Which color sparkle would match your home best?
You will need: Mini or medium pumpkins, craft glue or decoupage glue, a foam brush, fine glitter, a baking tray, clear sealer spray (adult use).
How to make it: 1. Set a pumpkin on the tray and brush glue over the top third. 2. Sprinkle glitter generously over the glue. 3. Tap off the extra and pour it back into the jar. 4. Adult only: once dry, mist with clear sealer outdoors.
Knit and Crochet Pumpkins
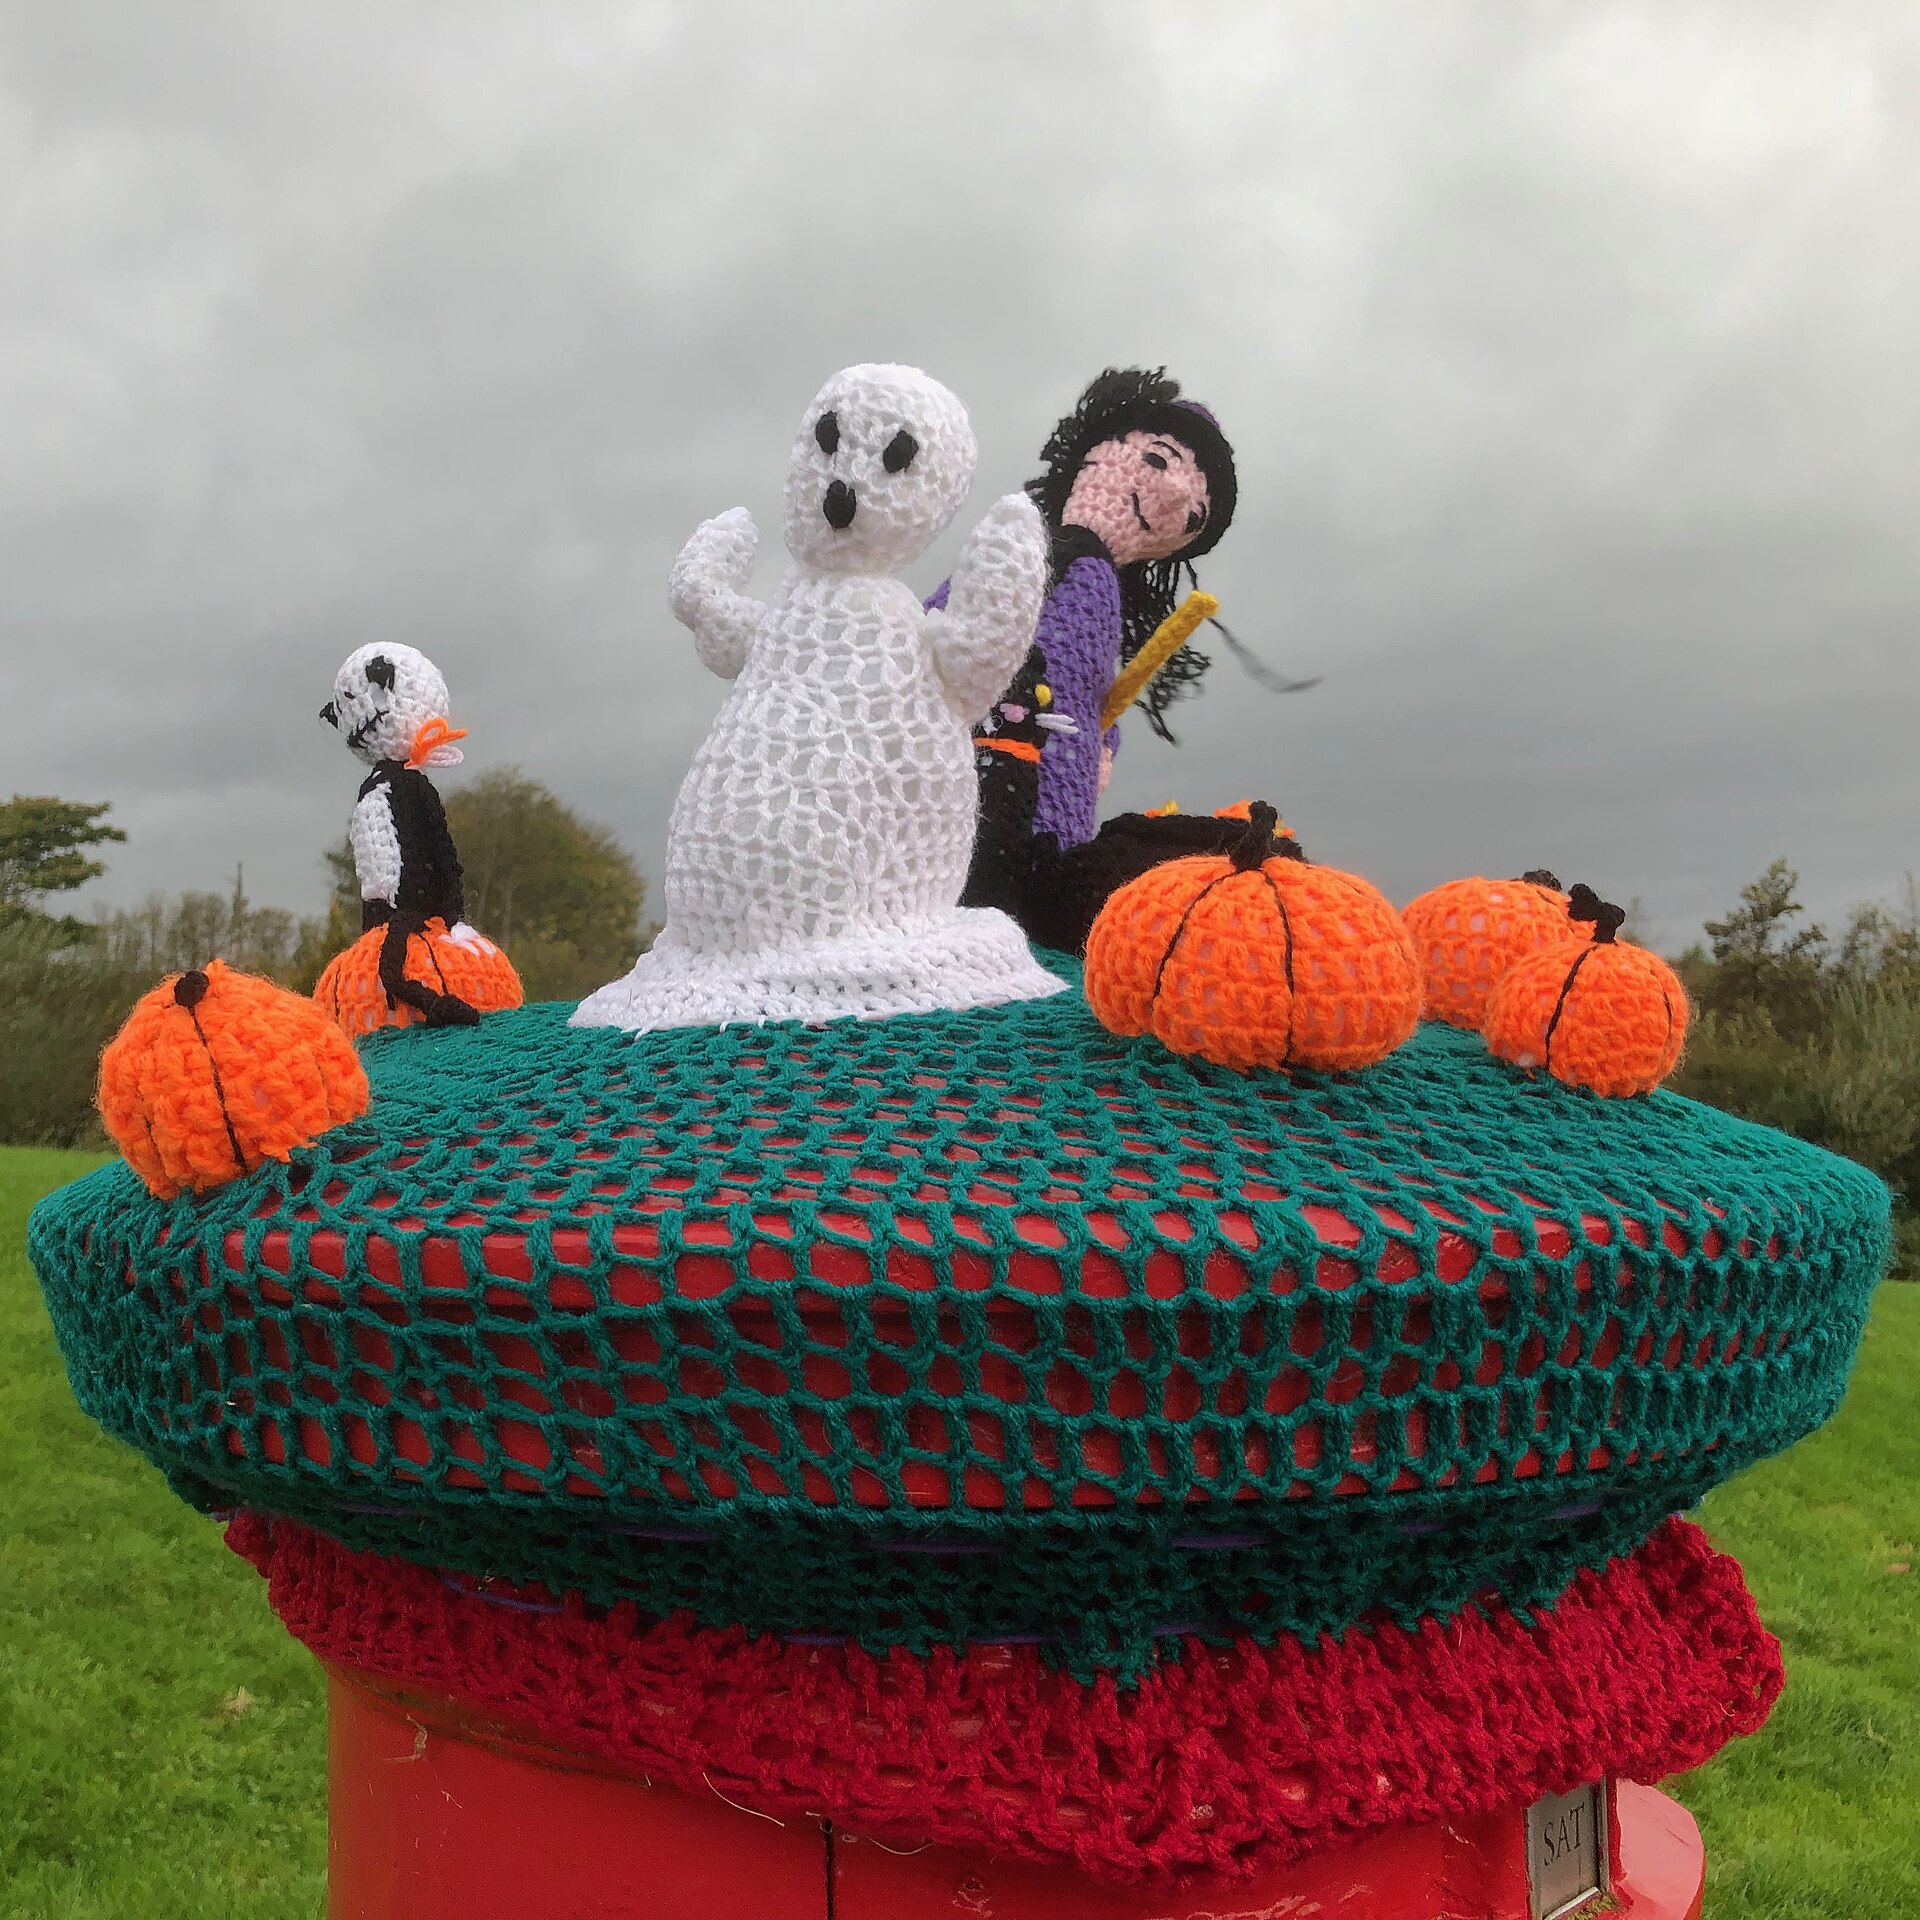
If you love yarn, these no-carve pumpkin ideas are a joy to make and they never rot. Little crochet pumpkins in bright orange look adorable piled in a bowl, lined along a shelf or added to a big yarn display like this cheerful one in Scotland, complete with a knitted ghost and witch. Beginners can try a no-sew version by wrapping a toilet paper roll in yarn and stuffing it with fabric. Kids can help with the stuffing part. Will you make one cozy pumpkin or a whole patch?
You will need: Orange and green yarn, a crochet hook or a toilet paper roll, scissors, polyester stuffing or fabric scraps, a cinnamon stick for the stem.
How to make it: 1. For the no-sew version, wrap yarn around and through a toilet paper roll until it is covered. 2. Push the yarn ends into the center. 3. Stuff the center with fabric scraps. 4. Pop a cinnamon stick in the top and add a little green yarn leaf.
Simple White Minis Round Out These No-Carve Pumpkin Ideas
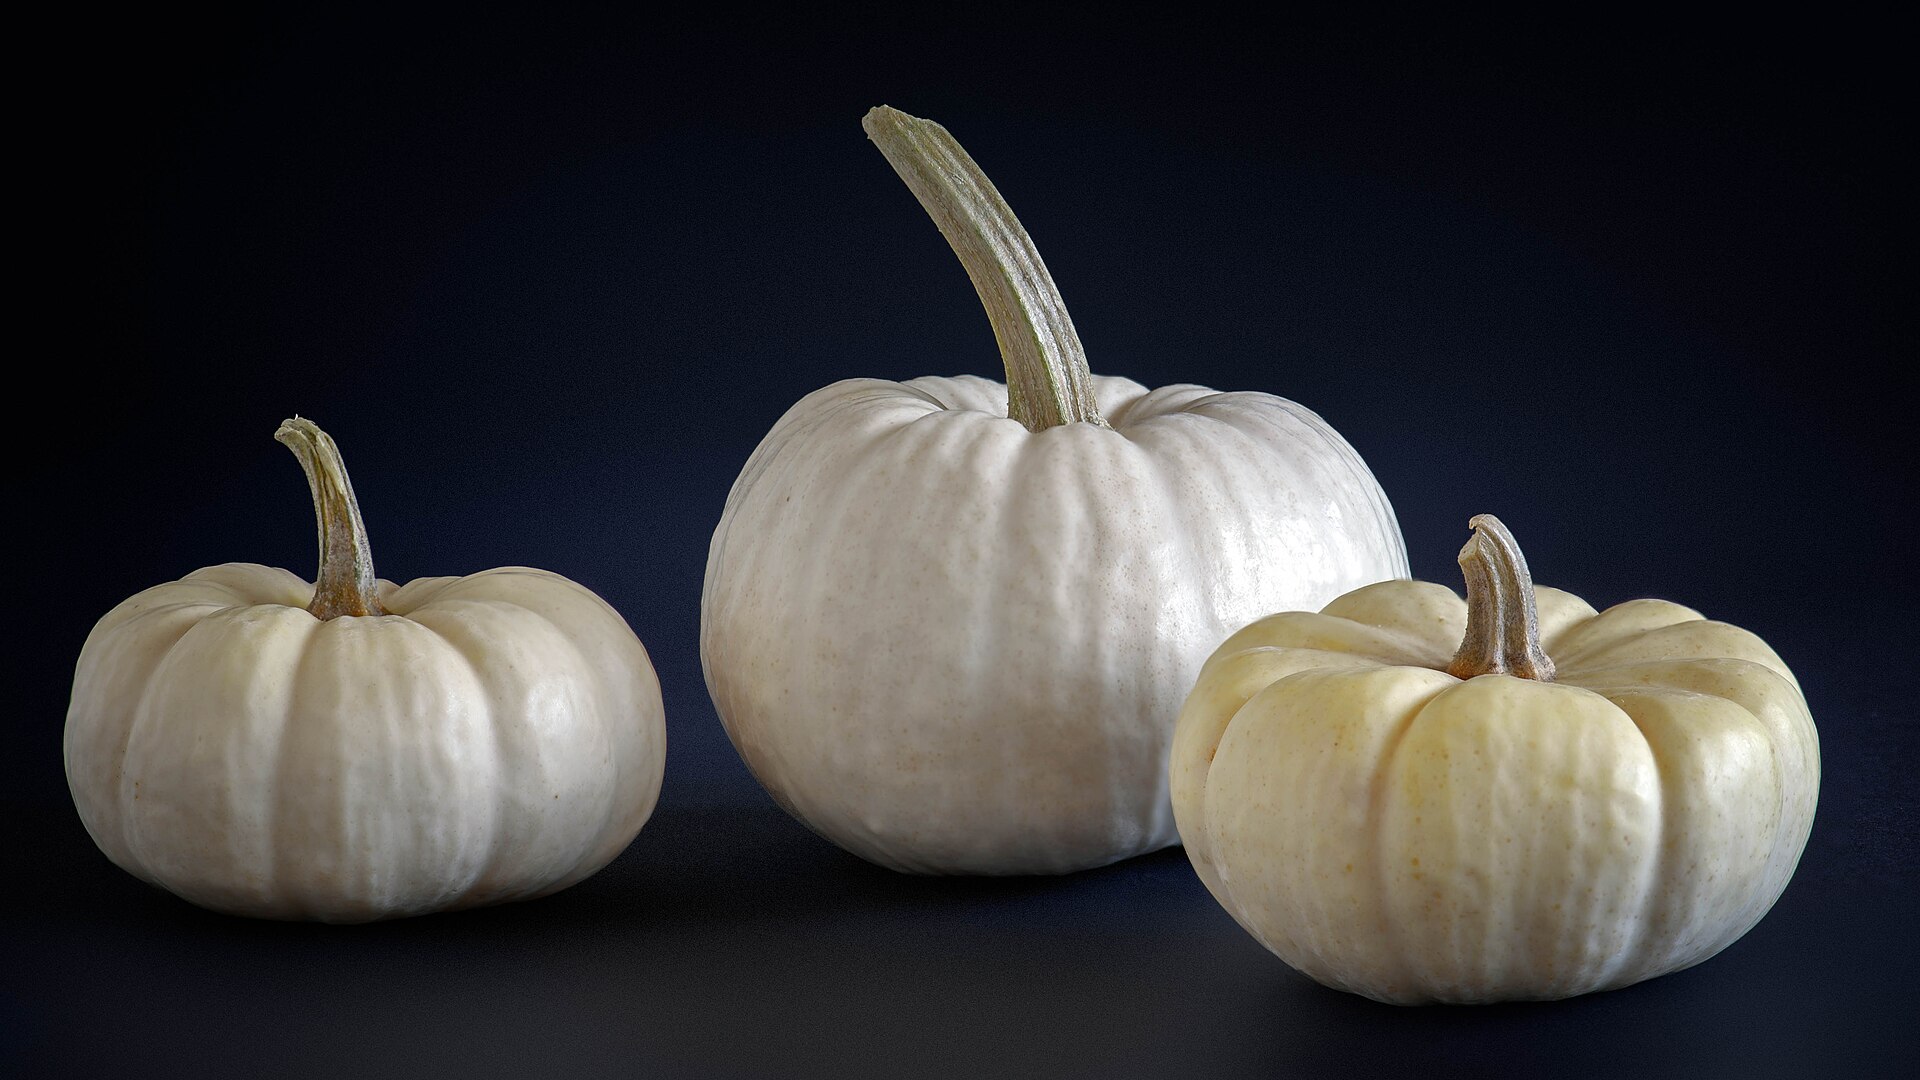
Sometimes the prettiest no-carve idea is the simplest one. White mini pumpkins with curly green stems look elegant all on their own. Group three of them on a dark tray, a wooden board or a black placemat and the contrast makes them glow. They are also the perfect blank canvas if you want to add a monogram, a tiny ghost face or gold dots later. Pick them up at any farm stand for a few dollars each. Love simple, pretty decor like this? Our mason jar crafts pair beautifully with it. Will you leave yours plain or add a little painted touch?
You will need: 3 white mini pumpkins, a dark tray or wooden board, a damp cloth, optional gold or black paint pen.
How to make it: 1. Wipe the pumpkins clean so the white looks bright. 2. Arrange them in a triangle with the tallest stem at the back. 3. Add a few dried leaves or a sprig of greenery. 4. Optional: draw dots or initials with a paint pen.