Placemat Crafts: 12 Clever Ways to Use the Mats You Never Set Out
Placemat crafts give the extra mats in your drawer a job beyond waiting for another dinner party. A soft cotton rectangle can become a catchall, a pencil roll, or a little place to keep your glasses. A flexible bamboo mat can disguise a plain planter or give a tissue box a quieter finish. The trick is matching the material to the project: fabric folds and stitches, while bamboo wraps around a separate supporting shape. Hometalk's placemat makeover video offers another example of taking these everyday materials beyond the table. The ideas here focus on useful home accessories and small gifts, with no lighting or electrical changes. Pick a sound, clean mat, check its size, and start with the object you would actually use..
Placemat Crafts Start With a Pinched-Corner Catchall
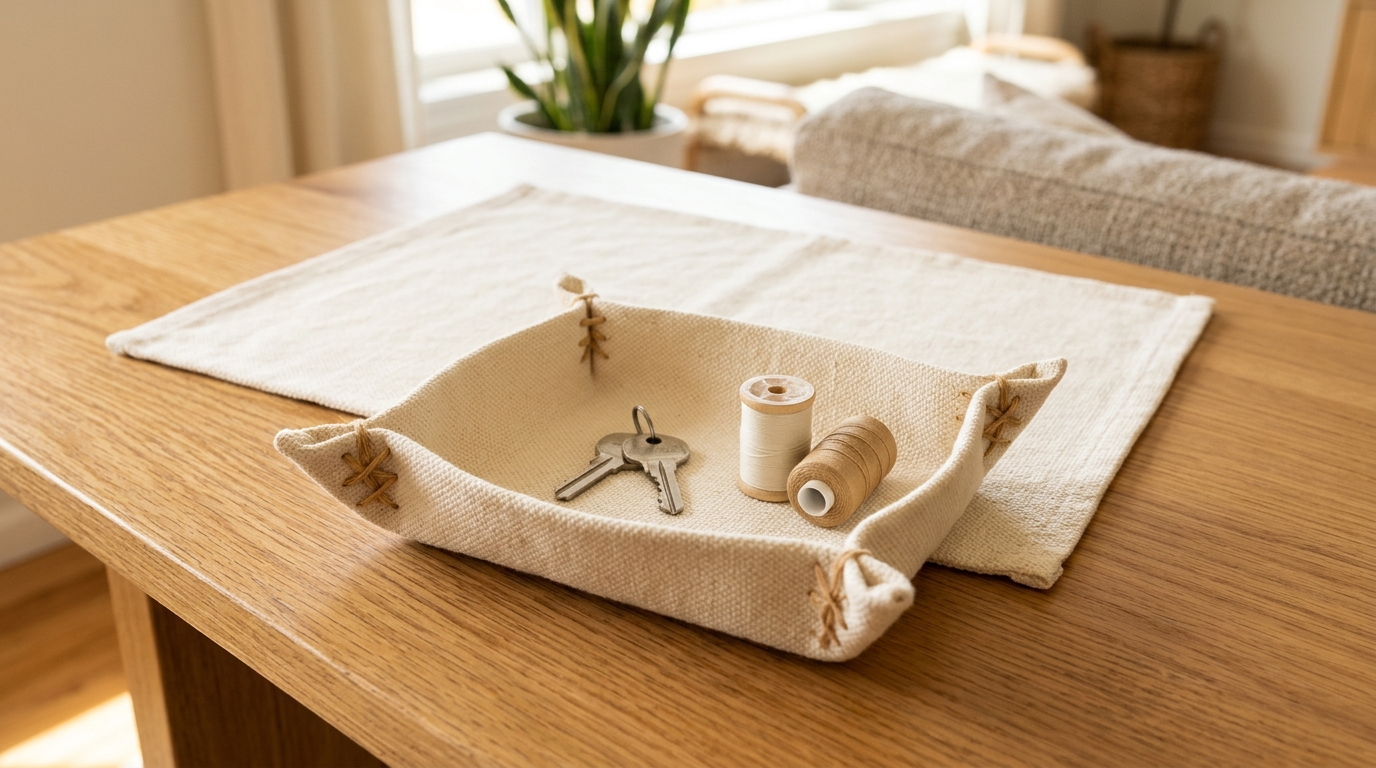
The little pile beside the front door rarely needs a bigger organizer. It needs a home with edges. A flexible cotton placemat becomes a shallow catchall when you pinch its four corners upward and stitch them in place. The placemat’s original woven surface stays visible, and the contrasting thread makes the construction part of the decoration. Set it on a console for keys or beside your sewing chair for thread spools. Start with a mat that bends easily and lies flat. Wouldn't this be nicer than searching beneath yesterday's mail?..
You will need: One flexible 13-by-19-inch cotton placemat, embroidery needle, tan floss, ruler, washable fabric marker, scissors.
How to make it: 1. Mark a point 2 inches inward from each corner along both adjoining edges. 2. Bring each pair of marks together, pinching a triangular flap outside the tray. 3. Stitch through each pinched corner several times; knot and tuck the thread ends. 4. Open the center flat and check all four corners before adding lightweight items.
A Bamboo Sleeve for a Plain Planter
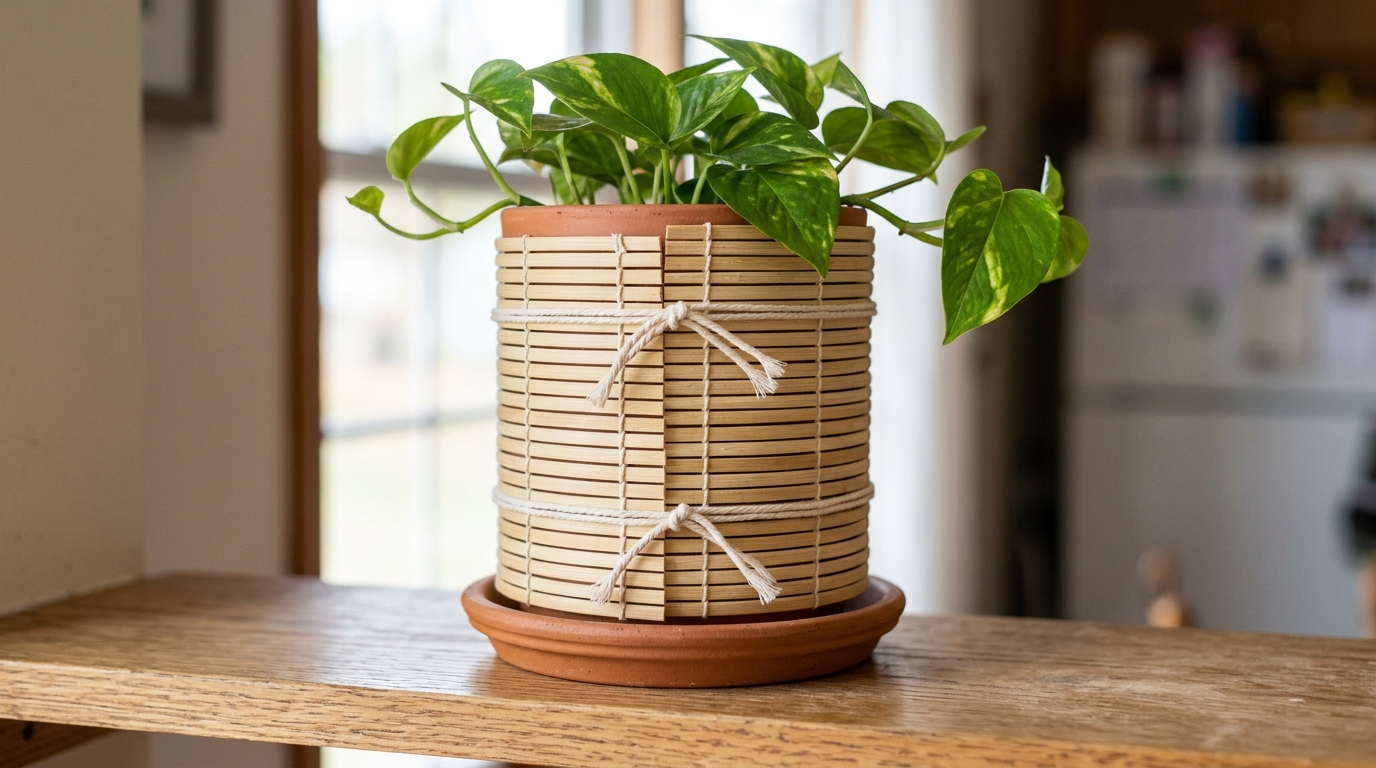
A perfectly useful planter can be the wrong color for every room you put it in. A removable bamboo sleeve changes the outside without changing the pot itself. Choose a roll-up mat whose slats run horizontally when wrapped around the outer planter, then hold the cylinder together with two simple cotton ties. The texture suits a bookshelf or sunny side table without adding another painted surface. Keep the plant in its original pot and saucer. The sleeve is decoration, not a waterproof container, and should come off whenever you water the plant.
You will need: One flexible bamboo mat tall enough for your outer planter, existing pot and saucer, two 30-inch cotton cords, ruler, scissors.
How to make it: 1. Wrap the mat around the empty outer planter, keeping the slats horizontal and the top below its rim. 2. Overlap the ends; keep the sleeve entirely above the pot's bottom and drainage openings. 3. Tie one cord near the top and one near the bottom, trimming loose ends. 4. Return the potted plant and saucer. Remove the sleeve before watering and replace only when dry.
A Small Tote for Lightweight Extras
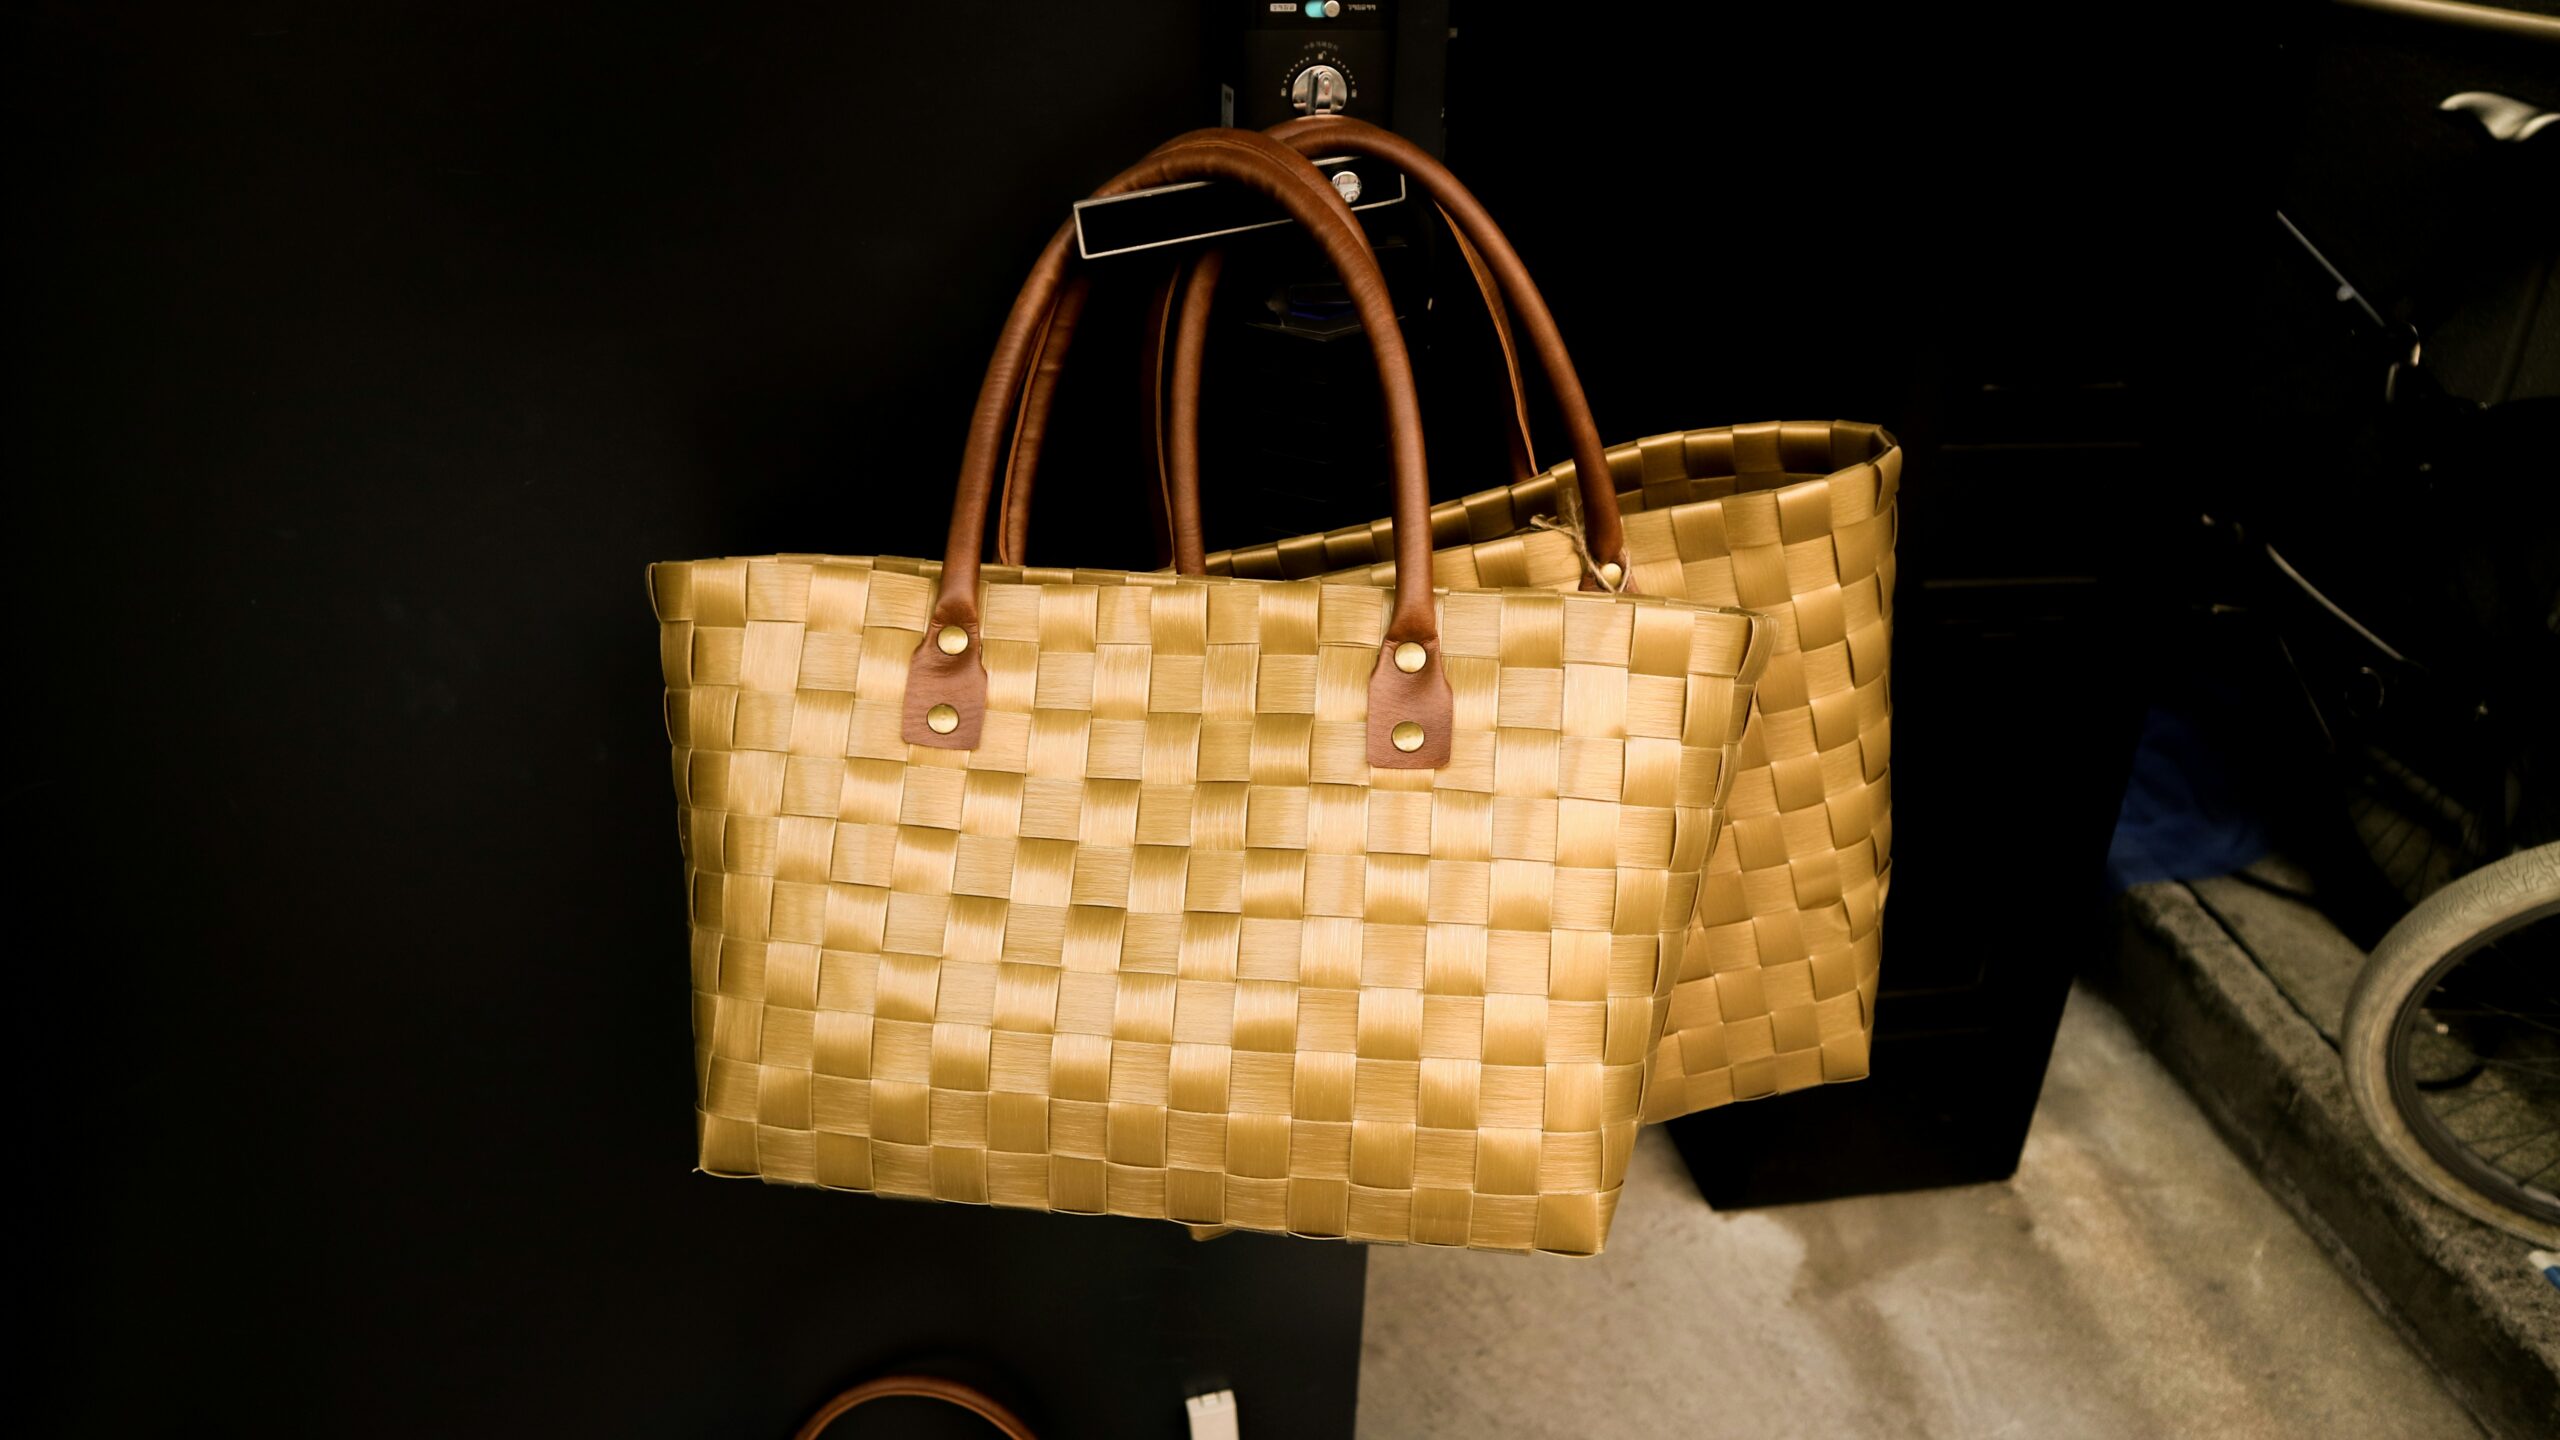
Those woven totes show how warm natural fibers look with simple handles. They are finished bags, not documented placemat projects, but their shape suggests a smaller take-home idea. Two soft woven placemats can make a flat tote for a scarf, yarn or another light extra. Choose mats you can comfortably pierce with a hand-sewing needle, and use handles made with sewing holes. Fabric patches behind the handle tabs help spread the pull. This version stays flat at the bottom, unlike the boxy bags pictured, and should carry only lightweight contents.
You will need: Two flexible woven placemats, each 12 by 18 inches; one pair of sew-on handles with prepunched holes; four 2-by-3-inch cotton reinforcement patches; strong thread; needle; clips; scissors.
How to make it: 1. Face the mats together, with the 18-inch edges across the top. Clip the sides and bottom. 2. Sew both sides and the bottom half an inch from the edges, leaving the top open. Turn gently right side out. 3. Center a handle on each side. Place a cotton patch inside behind each of the four handle tabs. 4. Stitch through every handle hole, the mat and its backing patch several times. Knot securely and use only for light items.
Placemat Crafts for Sorting the Mail
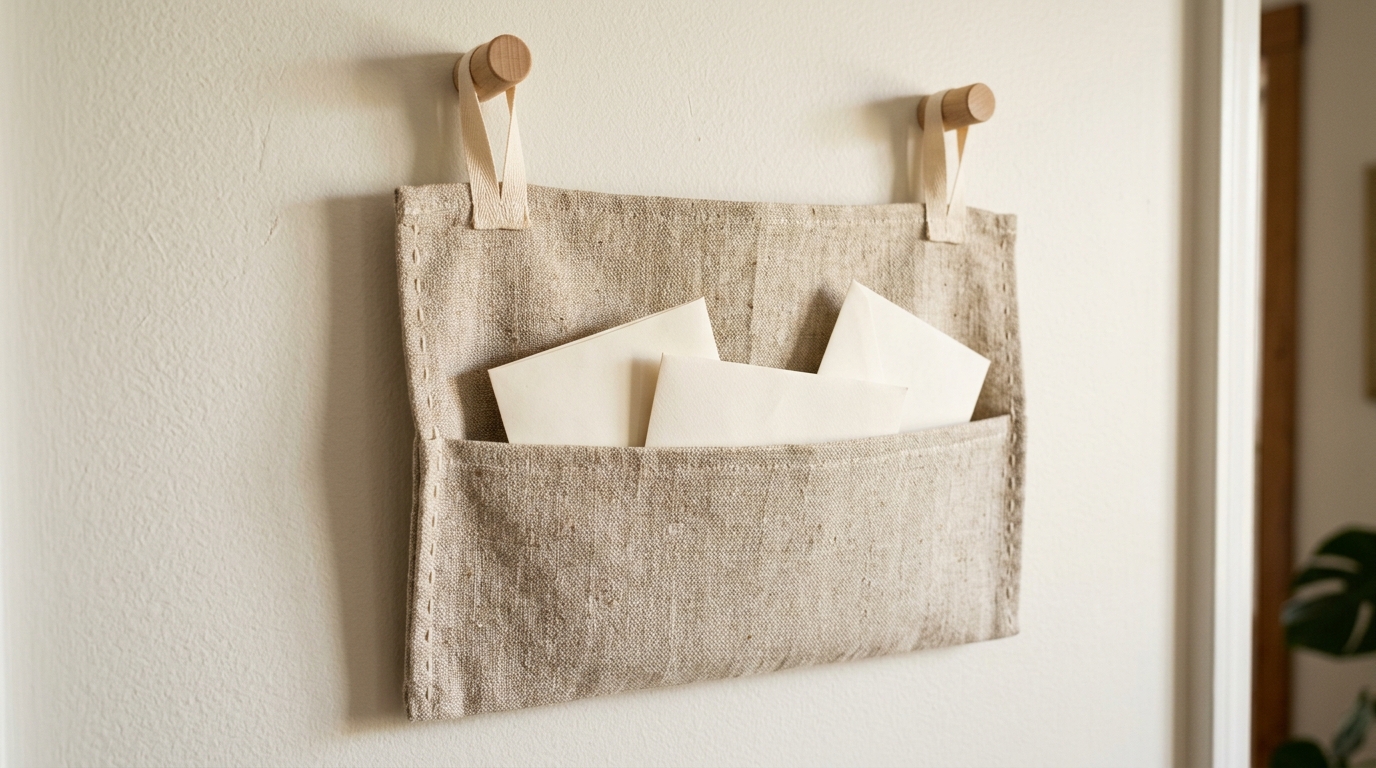
Mail has a way of spreading across a counter long before anyone has opened it. A hanging fabric pocket gives incoming envelopes a visible stopping place without claiming another drawer. Use a sturdy cotton placemat with an attractive finished edge, then turn the lower third into the pocket. Two ribbon loops keep the top level and make the construction easy to understand at a glance. Hang it where sorting actually happens, rather than across the room. Empty it regularly so an organizer doesn't become a new place to hide old paperwork.
You will need: One 12-by-18-inch cotton placemat, two 6-inch ribbons, needle, thread, scissors, two existing appropriately rated hooks.
How to make it: 1. Place the mat vertically and fold the bottom 6 inches upward. 2. Stitch the pocket's two sides, reinforcing the upper ends of both seams. 3. Fold each ribbon into a loop and stitch its ends firmly to a top corner. 4. Hang from suitable existing hooks, check their weight rating, and add only a few envelopes.
A Soft Sleeve for Reading Glasses
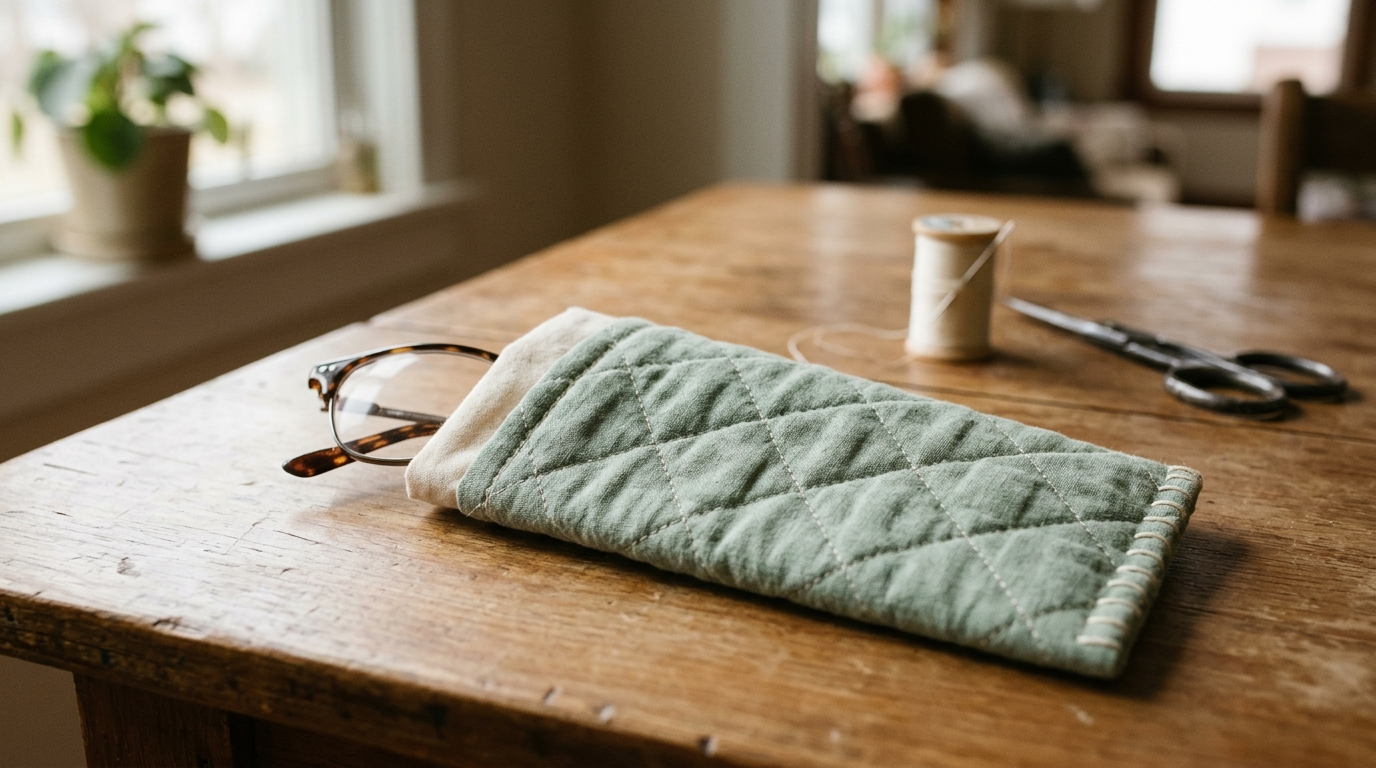
Reading glasses seem to collect scratches whenever they share a bag with keys. A soft lined sleeve gives them a separate place to land, and a quilted fabric placemat already supplies the padded outside. Choose a smooth lining without embroidery, beads, or rough seams against the lenses. The shape is deliberately simple: two rectangles joined into a narrow pouch with an open top. Check the measurements against your own folded frames before cutting. Oversized glasses may need a wider version, and this flexible sleeve offers cushioning rather than crush protection.
You will need: Two 4-by-8-inch quilted placemat pieces, two matching soft lining pieces, needle, thread, ruler, scissors.
How to make it: 1. Check the pieces fit your folded glasses with a quarter-inch seam allowance; enlarge if necessary. 2. Sew each matching pair with the pretty sides facing along sides and bottom, leaving a turning gap in the lining. 3. Turn the exterior pretty side out. Place it inside the lining with the pretty sides facing each other, then sew around the top. 4. Pull through the lining gap, stitch it closed, and tuck the lining inside.
A Roll-Up Home for Pencils
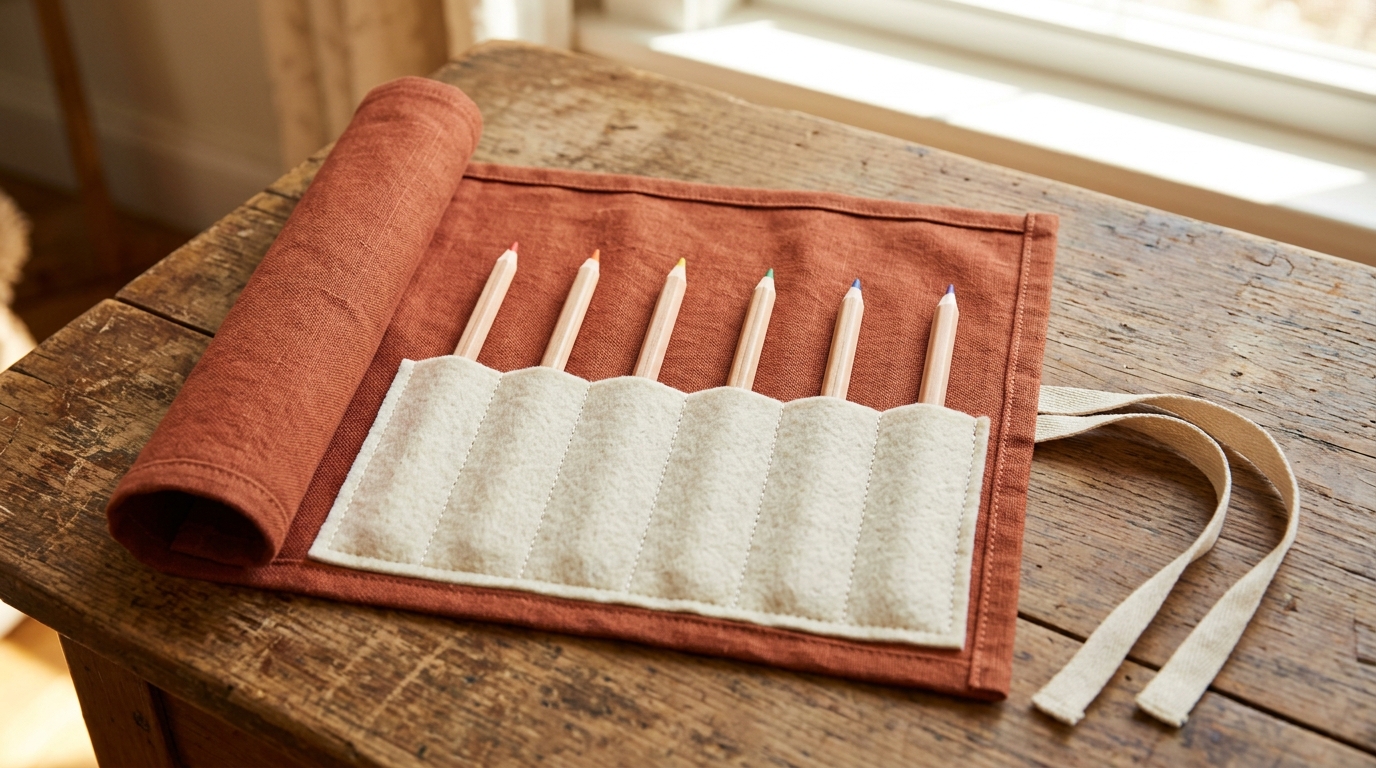
Loose pencils can turn a small craft drawer into a jumble, especially when different colors disappear beneath one another. A fabric roll lays them out in a row and bundles them away afterward. The placemat forms the outside, while a strip of felt creates individual channels inside. Leave a flap above the pencils to fold over their tips before rolling. It makes a thoughtful addition to a sketchbook gift without needing a complicated pattern. Fit the channels to the pencils you actually use, rather than squeezing everything into identical narrow spaces.
You will need: One 12-by-18-inch cotton placemat, 5-by-16-inch felt strip, two 12-inch ribbons, needle, thread, scissors, ruler.
How to make it: 1. Lay the mat horizontally. Position the felt across its bottom, leaving an inch at either side. 2. Stitch the felt's bottom and sides, then vertical channels spaced to fit your pencils. 3. Sew both ribbons to the outside at one short edge, keeping their free ends separate. 4. Insert pencils, fold the upper fabric over their tips, roll loosely, and tie.
A Bamboo Cover for the Tissue Box
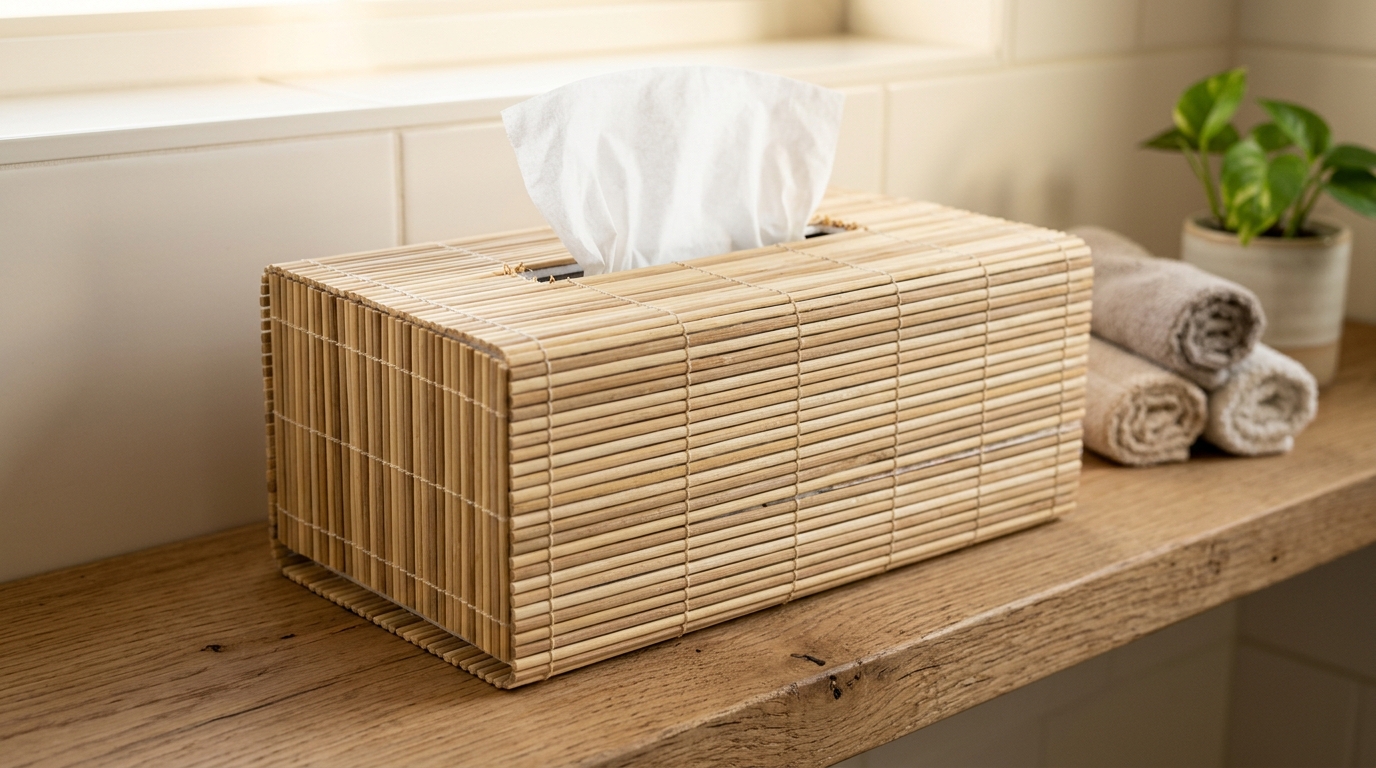
A bright cardboard tissue box can interrupt an otherwise quiet bedside table. A removable bamboo cover lets the tissues stay handy while the packaging disappears. This version uses a lightweight foamboard shell with an open bottom, so changing the box doesn't require pulling apart the finished cover. The bamboo provides the texture; the board provides the shape. Plan the opening around the box you normally buy, rather than assuming every brand is identical. Keep the slot generous enough that tissues pull through easily without lifting the cover off the table.
You will need: Five pre-cut quarter-inch foamboard panels fitted around your box, pre-cut top slot, bamboo mat, foamboard-compatible water-based adhesive, ruler, scissors.
How to make it: 1. Measure the box and dry-fit pre-cut panels with at least a quarter inch of interior clearance. Check the slot. 2. Bond the four side panels and top using foamboard-compatible adhesive; keep the bottom open. 3. Fit bamboo sections to each face, cutting only between slats. Glue them onto the shell. 4. Allow the adhesive's full labelled drying time before placing the cover over the box.
Placemat Crafts for a Favorite Journal
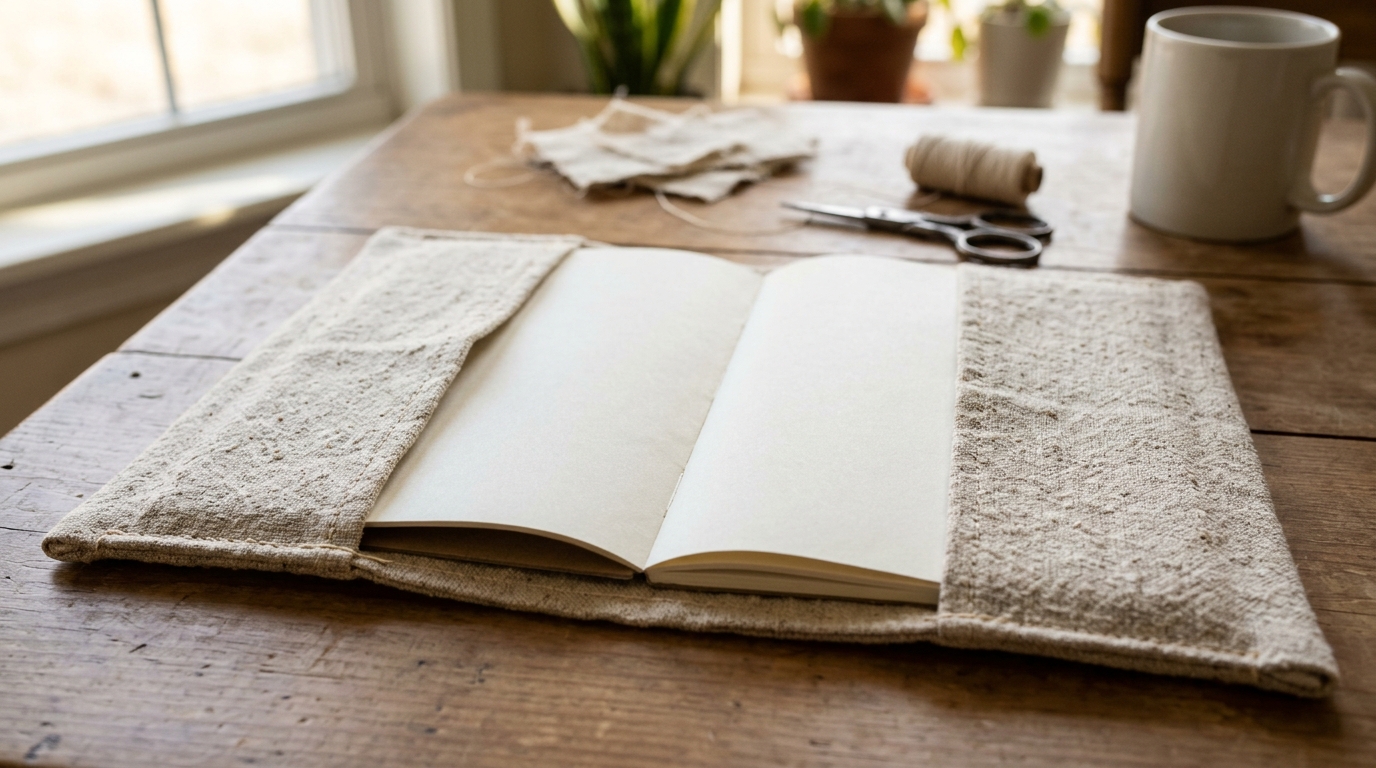
A journal doesn't need to be permanently altered to feel like a special gift. A removable fabric jacket can add color, protect the covers from everyday scuffs, and move to another notebook of the same size later. The ends fold inward to make pockets for the front and back covers, leaving the spine free to open. Start with a thin cotton placemat, because heavy quilting can make a small book awkward to close. Measure around the closed journal before sewing, and keep glue, needles, and pins away from its pages.
You will need: One thin cotton placemat, journal, ruler, needle, thread, scissors; allow 3 inches for each end flap.
How to make it: 1. Measure the closed journal around both covers and spine. Add 6 inches for flaps plus hemming allowance. 2. Cut the fabric and hem raw edges, leaving a finished height slightly greater than the book. 3. Fold both ends inward 3 inches; check the book closes comfortably, then remove it. 4. Sew the flaps along top and bottom only, then slide the journal covers into their pockets.
A Round Memo Board With Woven Texture
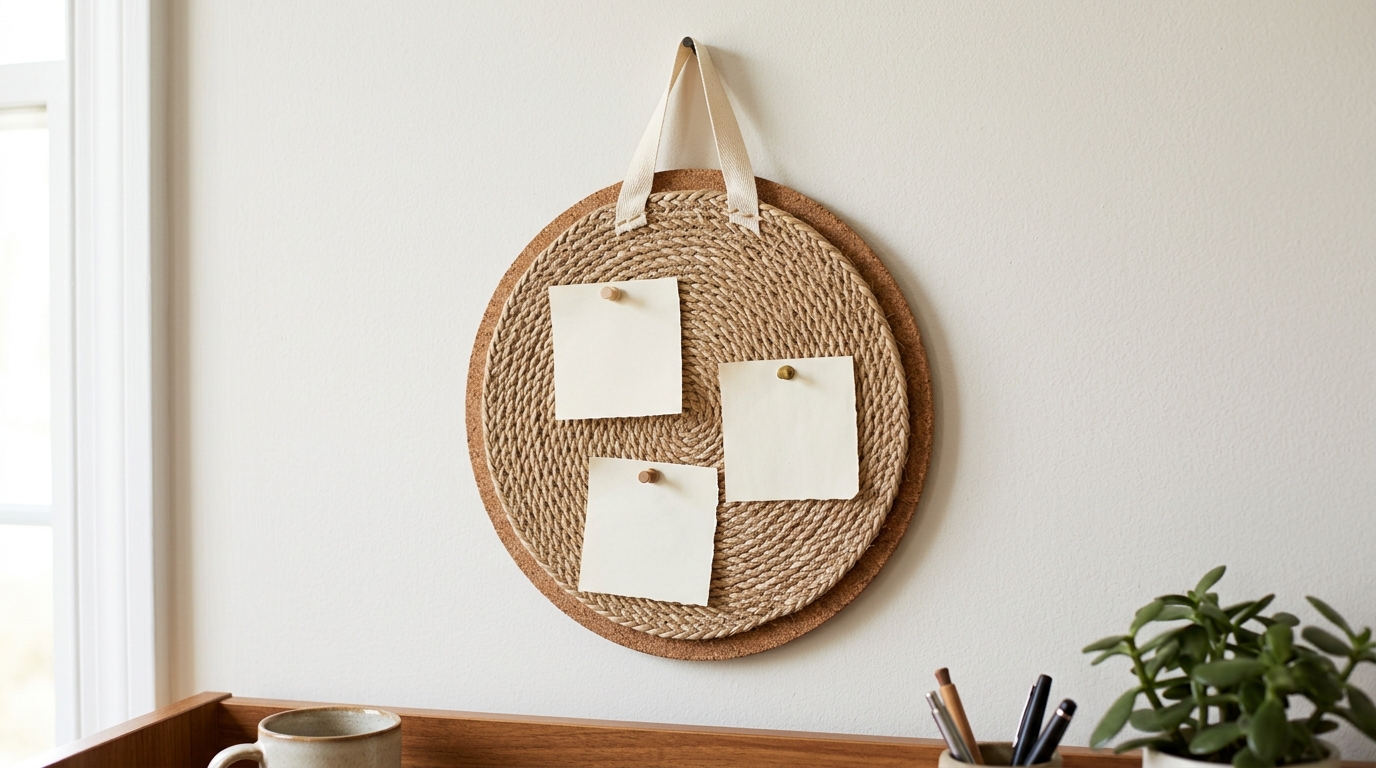
A round woven placemat makes a small memo board feel more like part of the room than office equipment. A cork backing gives short pins somewhere to stop, while the loose weave provides texture without needing a frame. Use it for a few appointment slips, fabric swatches, or a photograph beside your desk. Keep this version light and simple, with a sewn hanging loop rather than a collection of hooks. Before adding papers, check that the pins cannot reach through the back. A decorative surface should never leave sharp tips against the wall.
You will need: One 12-inch loosely woven mat, matching half-inch cork disc, short quarter-inch pins, compatible water-based adhesive, ribbon, needle, thread.
How to make it: 1. Test the adhesive on scraps, then bond the mat to the matching cork disc without filling the visible weave. 2. After drying fully, sew a ribbon loop through reinforced upper weave, using several passes. 3. Check short pins stop well inside the cork, even when pressed firmly. 4. Hang from a suitable existing hook and add lightweight paper pieces, keeping the board out of children's reach.
Simple Painted Fiber Wall Art
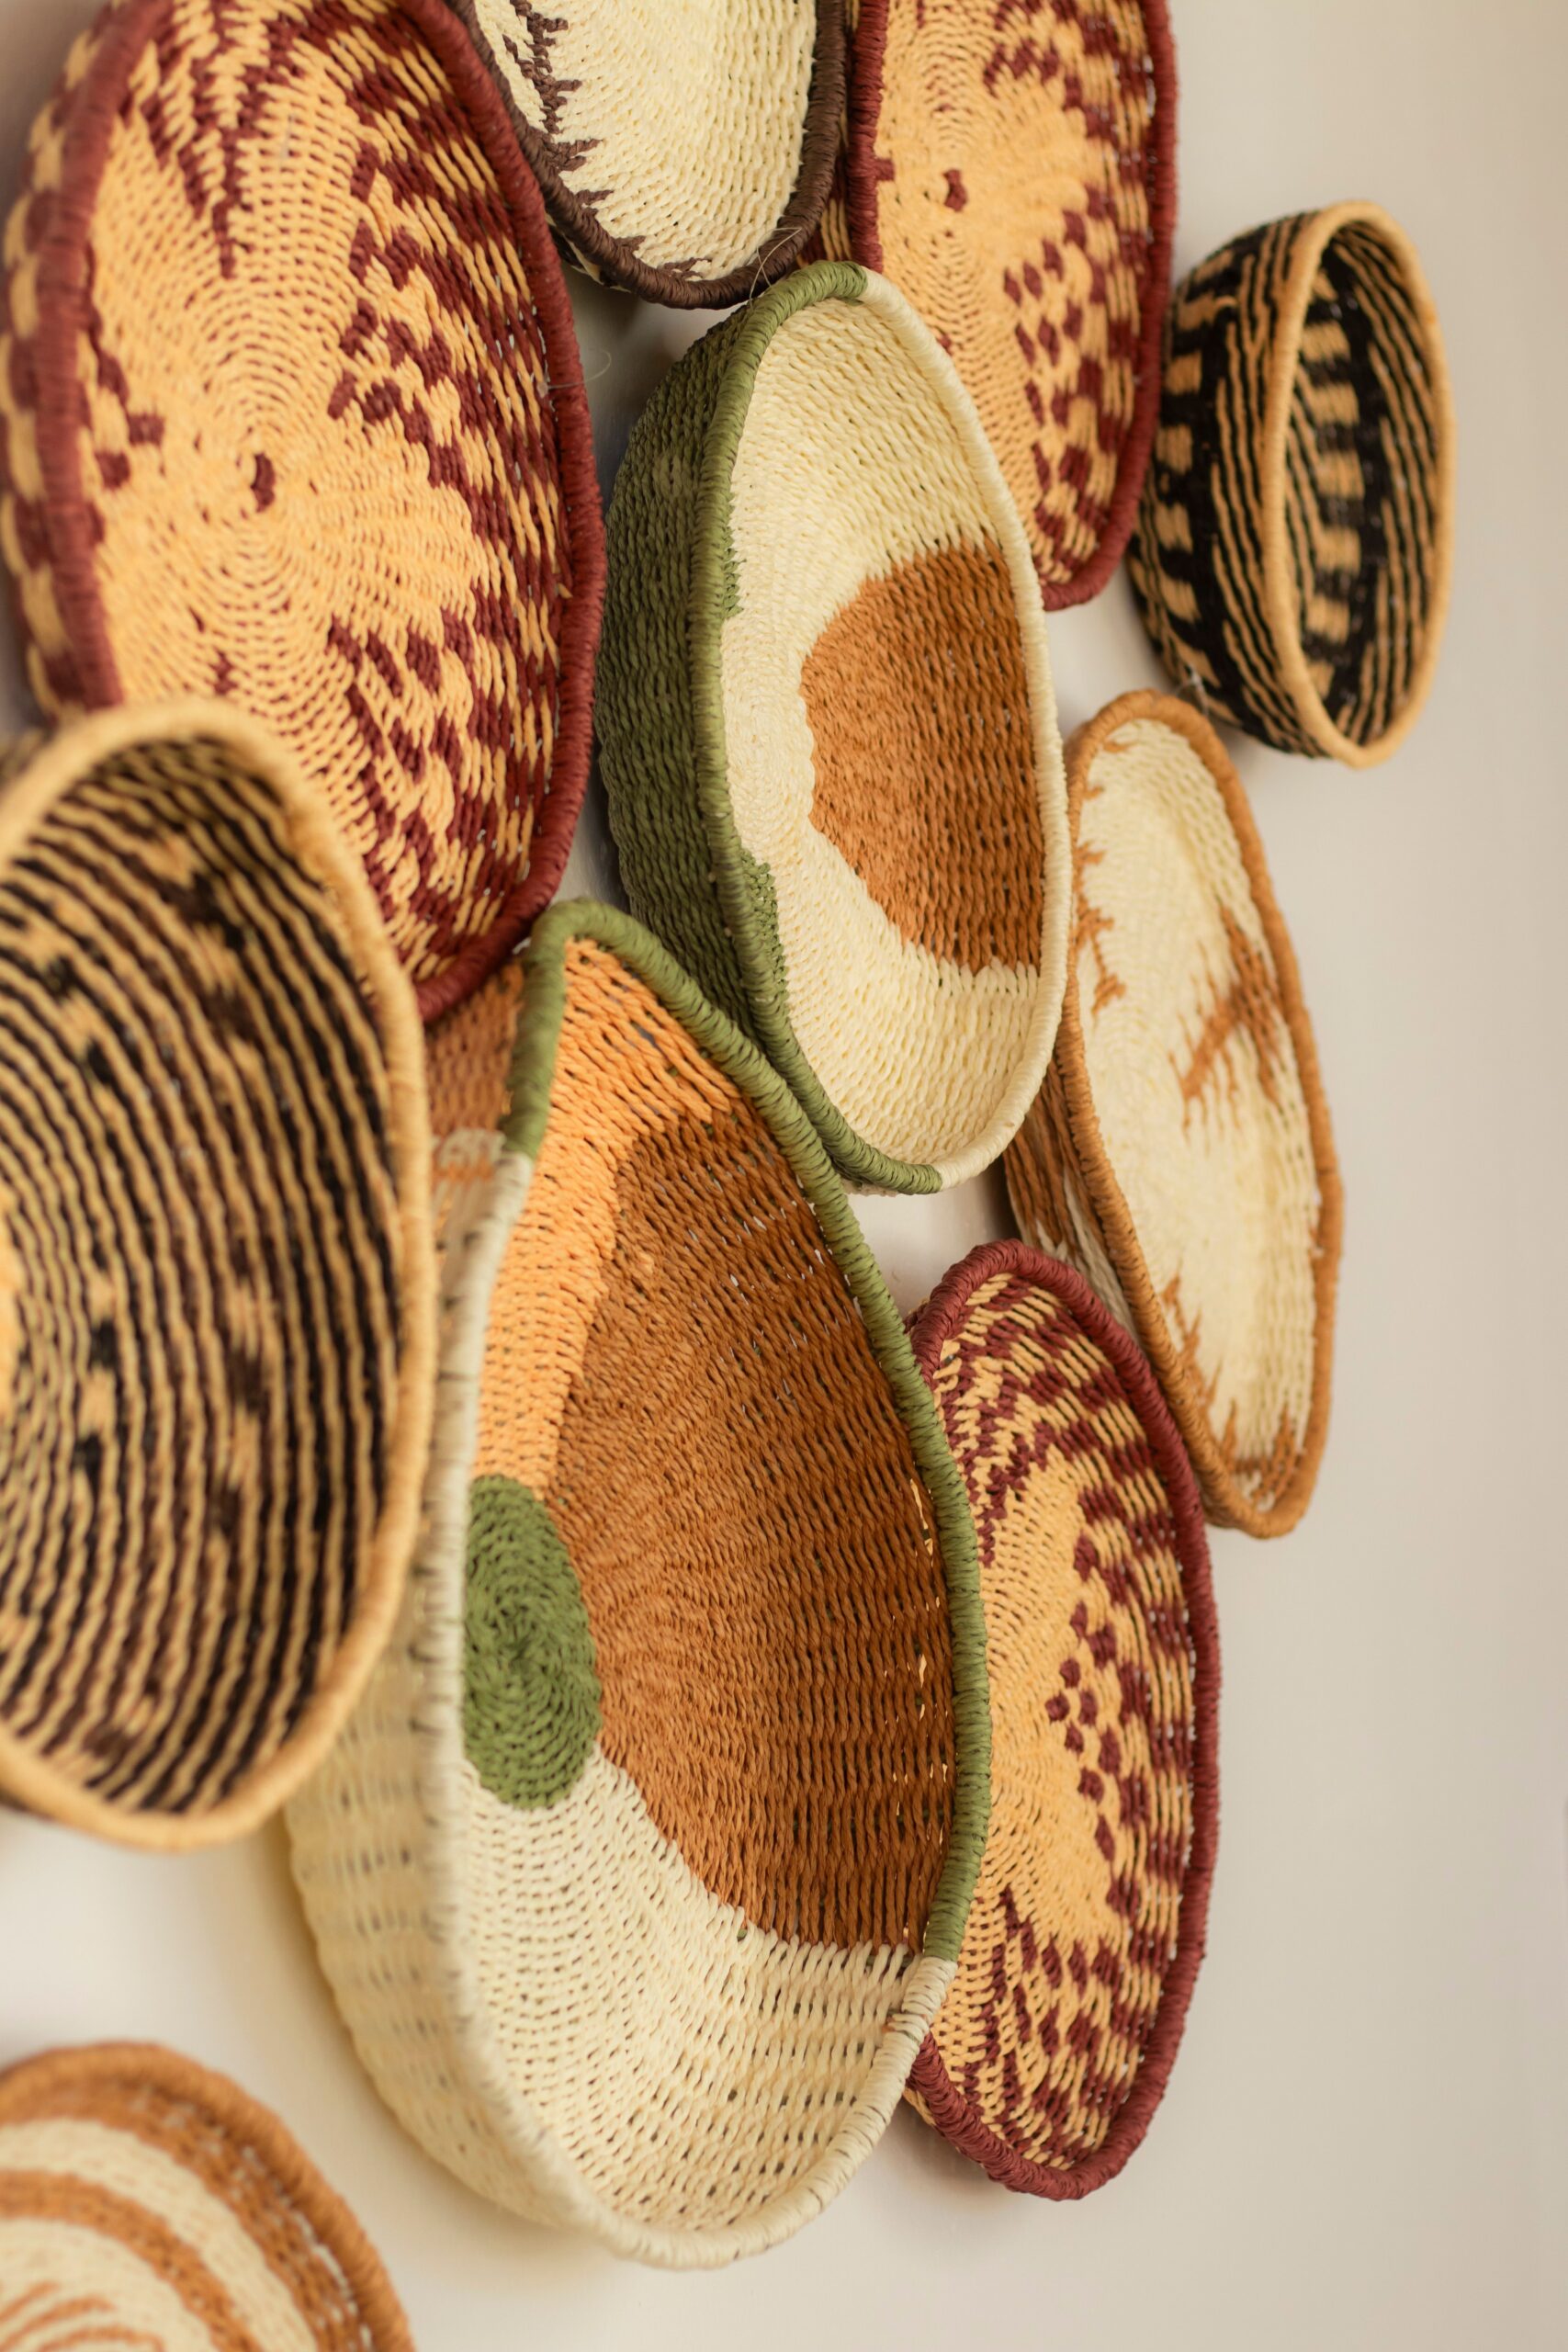
These woven baskets suggest a warm palette and a simple way to group round shapes on a wall. The photo shows baskets, not painted placemats. For a flatter version, start with a spare round mat and paint broad terracotta and cream curves that leave some natural fiber showing. Make your own loose arrangement instead of copying the pictured woven patterns. Hang one piece near a small shelf, or repeat the idea with mats you already own. For another inexpensive makeover approach, explore these napkin decoupage ideas.
You will need: One 12-inch round natural-fiber mat, 1 teaspoon each of terracotta and cream water-based craft paint, 1-inch brush, protective paper, 6-inch ribbon, needle, strong thread.
How to make it: 1. Lay the mat on protective paper and sketch a simple arrangement separately before painting. 2. Brush broad terracotta and cream shapes onto the fibers in thin layers, leaving natural areas exposed. 3. Let each coat dry according to the paint label; avoid flooding gaps in the weave. 4. Sew a ribbon loop securely through the upper edge and hang as a lightweight decorative piece.
Placemat Crafts for a Woven-Look Magazine File
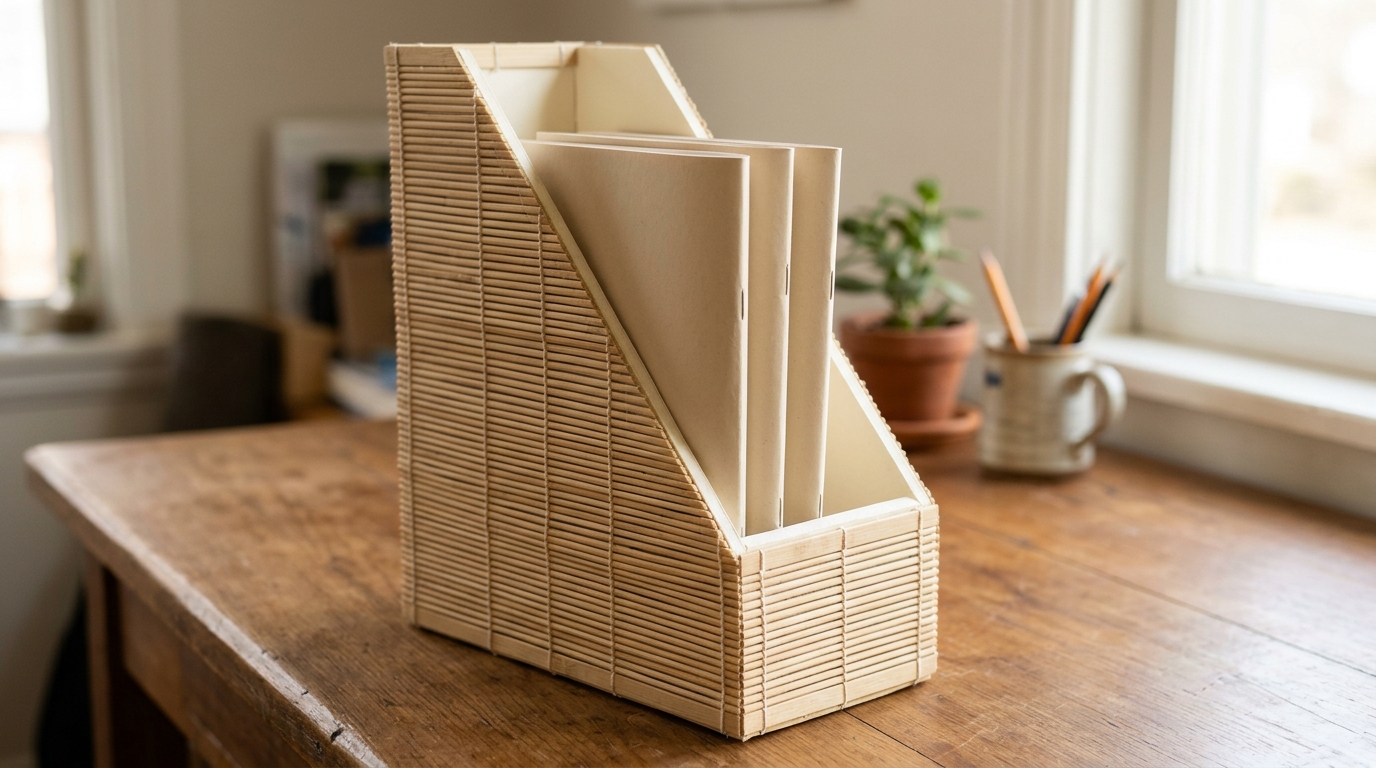
A magazine file can be useful without adding another glossy plastic shape to a shelf. Bamboo slats wrapped around a lightweight foamboard form give it a warmer finish, while the sloping front keeps favorite issues easy to reach. The plain interior stays uncovered to avoid catching paper edges. Make the file just wide enough for a small reading pile instead of letting it become a storage tower. This is a desktop organizer for a few magazines, not a heavy book bin. Keep it on a stable surface and lift it from underneath.
You will need: Pre-cut quarter-inch foamboard file panels, bamboo mat, foamboard-compatible water-based adhesive, ruler, scissors; finished size about 4 by 10 by 10 inches.
How to make it: 1. Dry-fit pre-cut panels into a file with a full-height back, short front, and two sloping sides. 2. Bond the base and sides with compatible adhesive, keeping the inside edges smooth. 3. Cut bamboo between slats to match each exterior face, then glue the pieces in place. 4. Let the adhesive dry fully. Set on a level shelf and add a few lightweight magazines.
An Armchair Caddy That Keeps the Remote Nearby
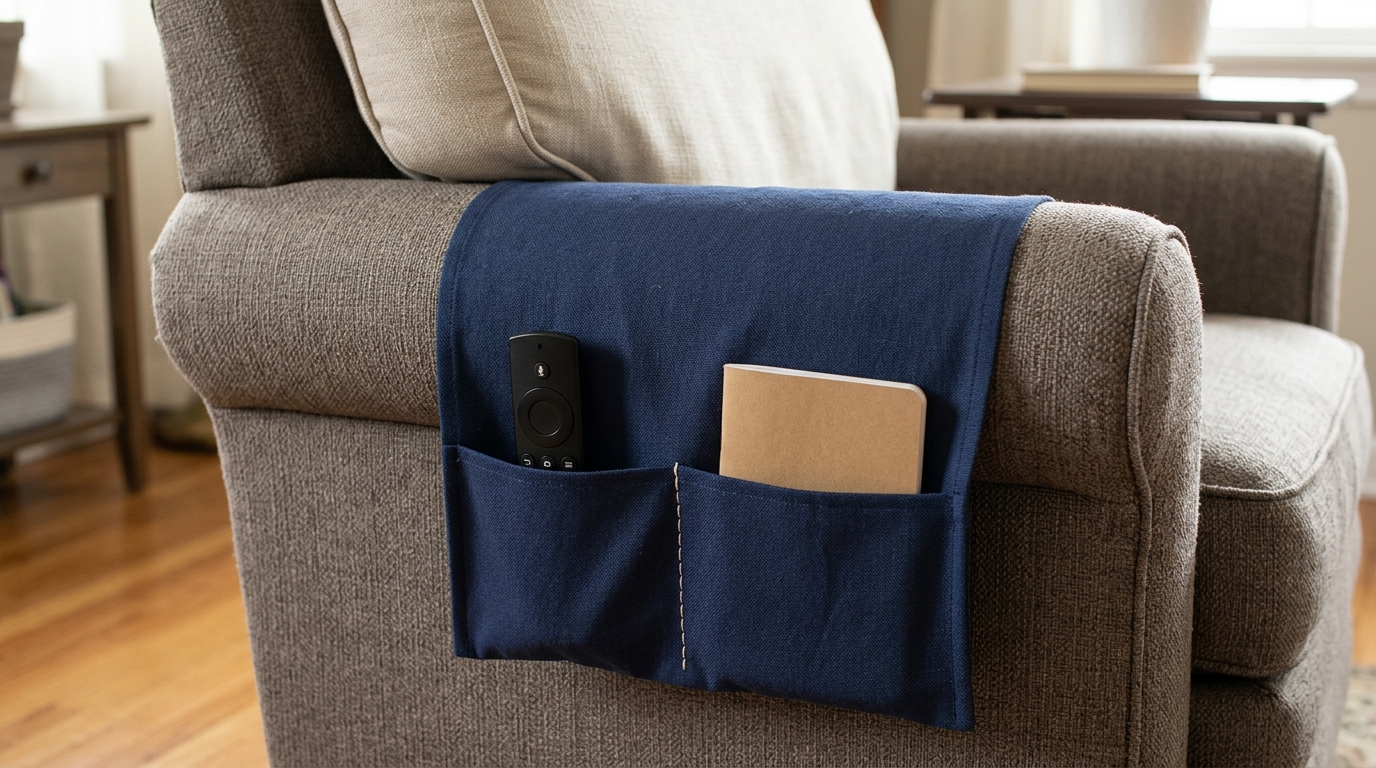
The remote is usually somewhere close, which somehow makes losing it more annoying. A fabric caddy draped over the arm of a chair keeps two everyday items visible without introducing another side table. The lower fold becomes divided pockets, while the long flat end tucks beneath a removable seat cushion. Choose a chair that allows that arrangement comfortably, and check the fit before sewing. A remote and reading glasses are plenty for this small organizer. Keep it away from recliner mechanisms, cords, and anything that moves when the chair opens.
You will need: One long fabric placemat, remote for measuring, ruler, needle, strong thread, scissors, optional soft felt lining. For another simple material makeover, try these napkin decoupage ideas.
How to make it: 1. Drape the mat over the chair arm. Reserve enough flat fabric to tuck securely beneath its removable cushion. 2. Fold the outside end upward to make pockets about 5 inches deep, adjusting to your remote. 3. Remove the mat and stitch both sides and a center divider, adding soft lining if wanted. 4. Replace it, secure the flat flap, and test with light contents away from moving chair parts.