Giant Christmas Presents: 14 Cheap DIY Porch Decorations That Make Your House Look Like a Toy Shop
Giant Christmas presents by the front door are the happiest decoration of the season, and you do not need a big budget to make them. Every December the porches that stop people on the sidewalk are not the ones with the most expensive lights. They are the ones with a tall, cheerful stack of oversized gifts, wrapped in bright paper, tied with huge bows and glowing softly after dark. This year the idea is everywhere online, because it is so easy: old storage bins, moving boxes, wooden crates and even a tomato cage from the garden shed become a toy shop window in one afternoon. Most of these projects cost less than a takeout dinner and pack flat after the holidays. Here are 14 ideas to turn your porch into the friendliest spot on the block..
Giant Christmas Presents Stacked by the Front Door
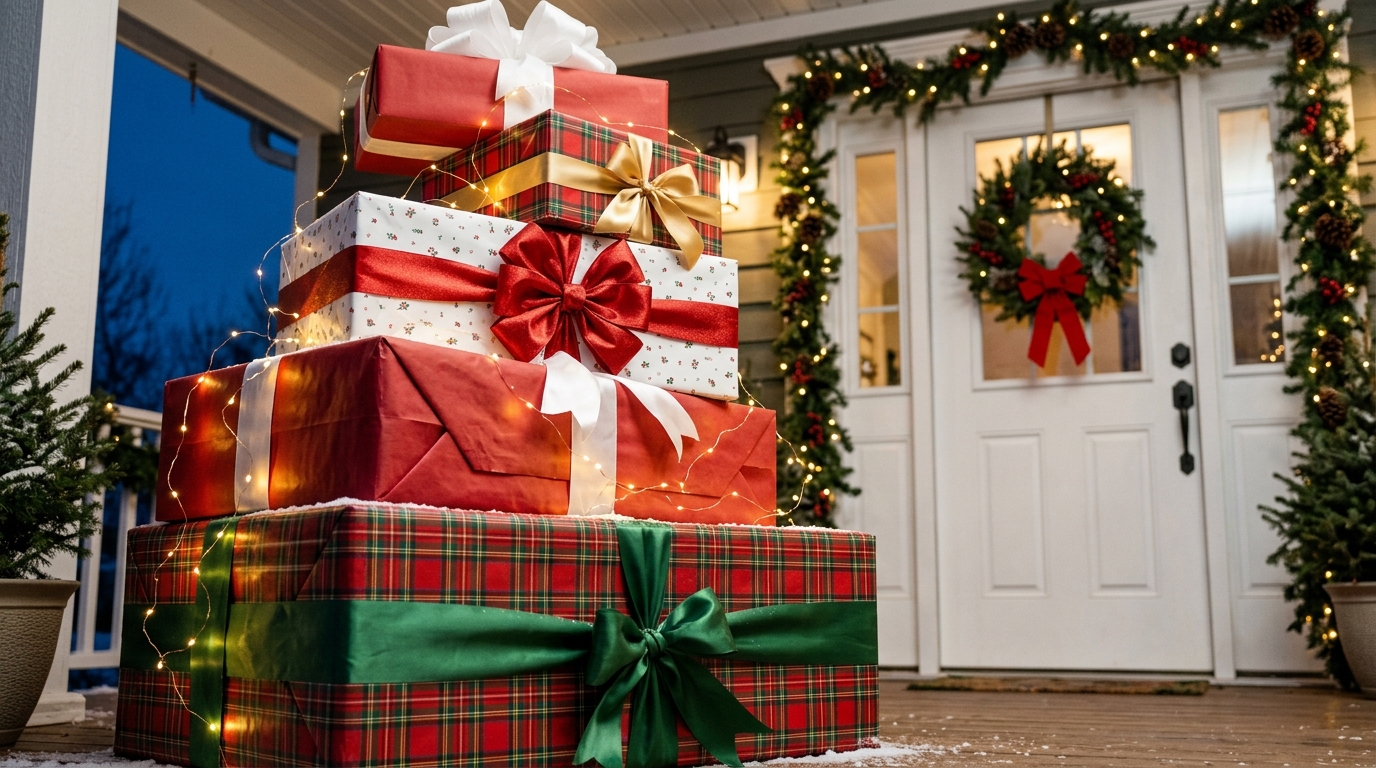
Start with the classic, because it is the look that started the whole trend. Three to five boxes in falling sizes, wrapped in red, white and plaid, then stacked into a little tower beside the door. A strand of battery fairy lights wound around the stack makes the giant Christmas presents glow when the porch light comes on, and a pair of potted mini pines frame the scene. Guests will feel like they are walking into a holiday card. Ready to build the first tower of the season..
You will need: 3 to 5 sturdy boxes in different sizes, wrapping paper in 2 or 3 patterns, packing tape, wide satin ribbon, a battery fairy light strand with a timer.
How to make it: 1. Tape every box shut and fill the bottom one with a bag of sand or a few bricks for weight. 2. Wrap each box, then tie a big ribbon cross and bow on top. 3. Stack largest to smallest, tape the layers together and wind the lights around the stack.
Storage Bins Wrapped as Glowing Gifts
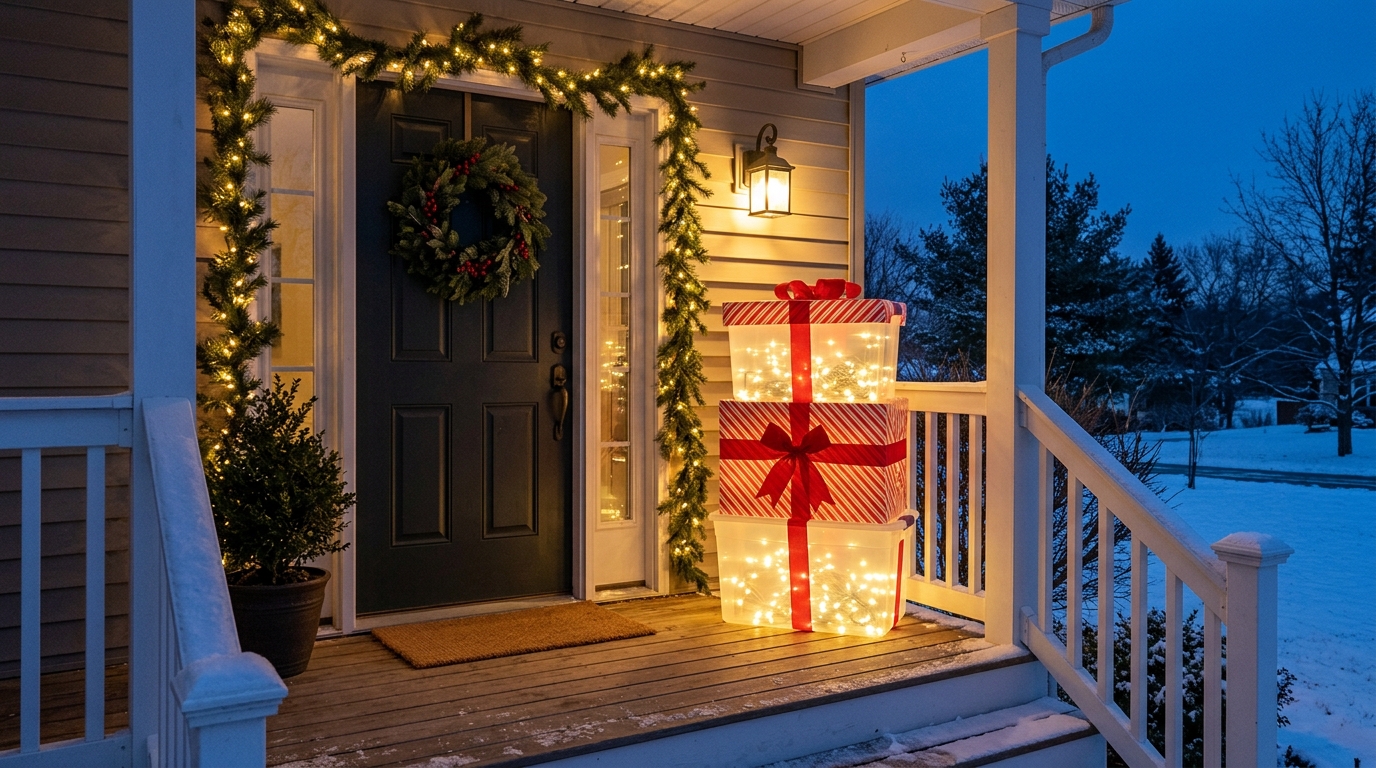
This is the version that went viral on Instagram this week, and it is genius. Plain plastic storage bins already have lids, handles and a waterproof body, so they make perfect weather proof gifts. Wrap the sides in striped paper or fabric, add a fat bow, and tuck a strand of battery lights inside so the whole box glows through. After Christmas, peel off the paper and the bins go right back to holding your decorations. Do you have a few spare bins in the garage?
You will need: 2 or 3 lidded plastic storage bins, wrapping paper or fabric, clear packing tape, wide ribbon, battery fairy lights.
How to make it: 1. Coil the battery lights inside each bin and snap on the lid. 2. Wrap the sides and lid like a gift, sealing seams with clear tape. 3. Stack the bins and finish each one with a ribbon cross and a big bow.
Giant Christmas Presents From a Cardboard Box Tower

Moving boxes are the cheapest way to make giant Christmas presents for inside the house. Pick three boxes that step down in size, wrap them in kraft paper and deep green, then crown each one with an oversized velvet bow. Set the tower beside the tree and it instantly looks like a department store display. Kraft paper is a smart choice because it costs very little, looks rustic and takes a stamped pattern if you want to dress it up. Which corner of your living room needs a little extra cheer?
You will need: 3 cardboard boxes in graduated sizes, kraft paper, dark green wrapping paper, red velvet ribbon, double sided tape, a hot glue gun (adult job).
How to make it: 1. Wrap the largest and smallest boxes in kraft paper and the middle box in green. 2. Glue the boxes together in a tower with a few dots of hot glue. 3. Tie velvet ribbon around each box and finish with a big bow on top.
Tomato Cage Present Lantern
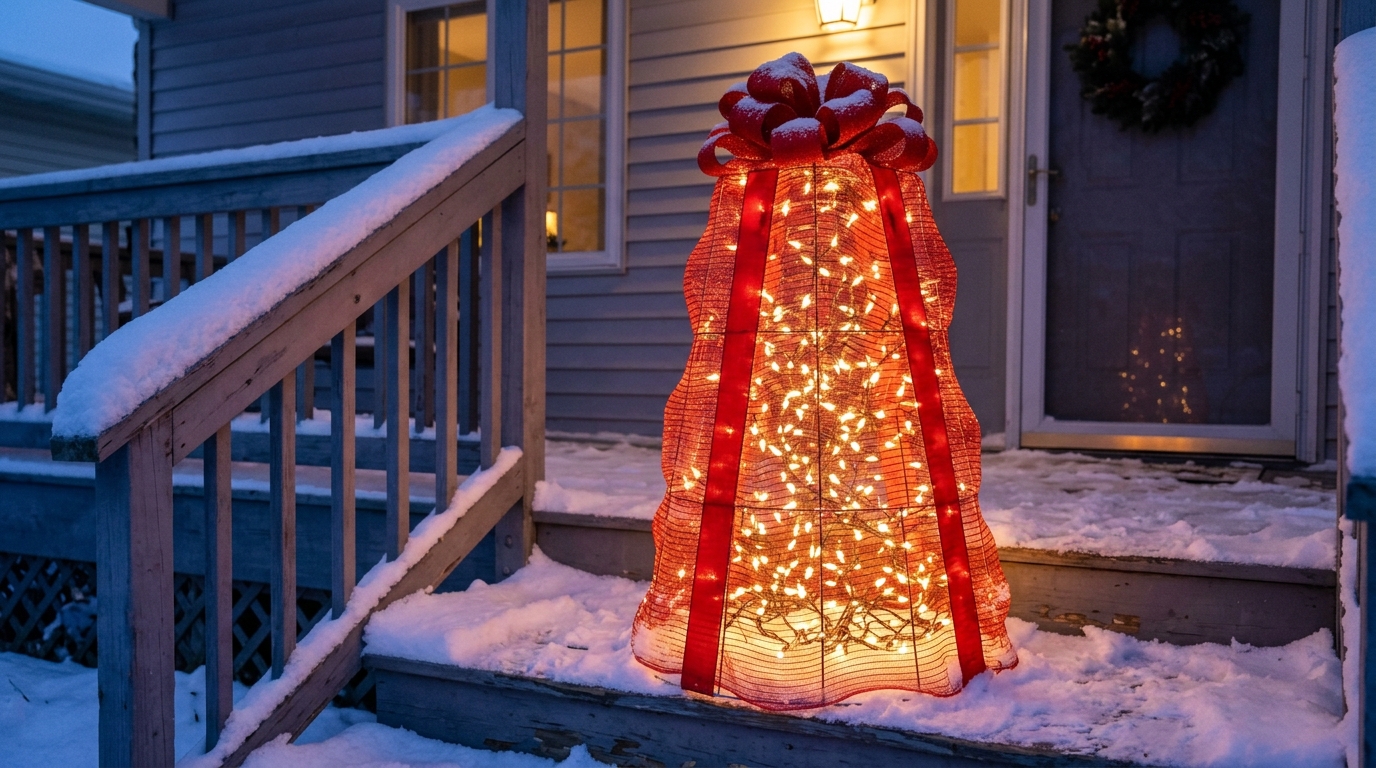
That rusty tomato cage in the shed has a second job in December. Flip it upside down, wrap the wires in sheer red mesh ribbon until it looks like a giant gift, then fill the center with warm fairy lights. In daylight it looks like a soft red present, and at night it glows like a lantern on the steps. Mesh ribbon is cheap at craft stores and shrugs off snow and rain. Have you ever seen a garden tool look this festive?
You will need: a wire tomato cage, 2 rolls of wide red deco mesh ribbon, zip ties, a battery fairy light strand, a ready made bow.
How to make it: 1. Turn the cage upside down and bend the top prongs together, then zip tie them. 2. Weave mesh ribbon around the frame, zip tying as you go. 3. Drop the fairy lights inside and add a big bow on top.
A Giant Ribbon Bow With a Pool Noodle Core
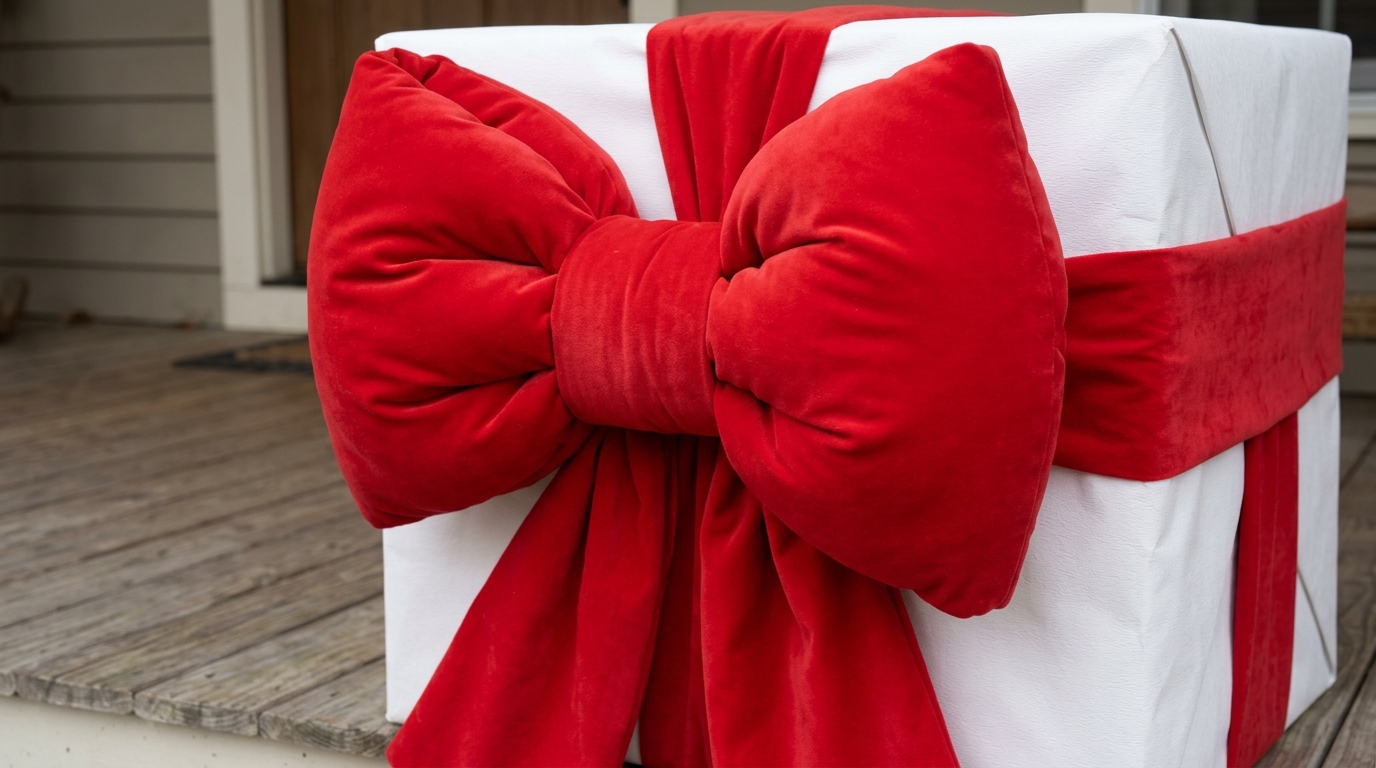
Big boxes need big bows, and a store bought bow that size can cost more than the whole project. The trick is a foam pool noodle. Cut it into loops, cover each loop with wide red fabric or velvet ribbon, and glue the loops into a plump bow that holds its shape in wind and rain. One noodle makes a bow almost three feet wide, so it reads from the street. Who knew a summer pool toy could be the star of the winter porch?
You will need: 1 foam pool noodle, 3 yards of wide red fabric or velvet ribbon, a serrated knife (adult job), hot glue, floral wire.
How to make it: 1. An adult cuts the noodle into 4 equal lengths and bends each into a loop, gluing the ends. 2. Wrap each loop in fabric and glue the seam underneath. 3. Wire the loops together, cover the center with a fabric knot and add two long tails.
Giant Christmas Presents That Light Up From Inside

For a magical night time look, make giant Christmas presents that glow through little holes. Punch stars and dots through the sides of white boxes with a craft punch or an awl, then hide a strand of battery lights inside each one. When the sun goes down, the porch fills with tiny twinkling shapes, almost like a snow globe. White boxes work best because they spread the light softly. Would your neighbors stop to look twice at this one?
You will need: white gift boxes or white painted cardboard boxes, a star hole punch or awl, battery fairy lights with a timer, red ribbon.
How to make it: 1. Mark a loose pattern of stars and dots on each side. 2. Punch or poke the holes, working on a cutting mat (an adult should handle the awl). 3. Put the lights inside, close the lid and tie on a ribbon.
Plaid and Burlap Farmhouse Present Stack
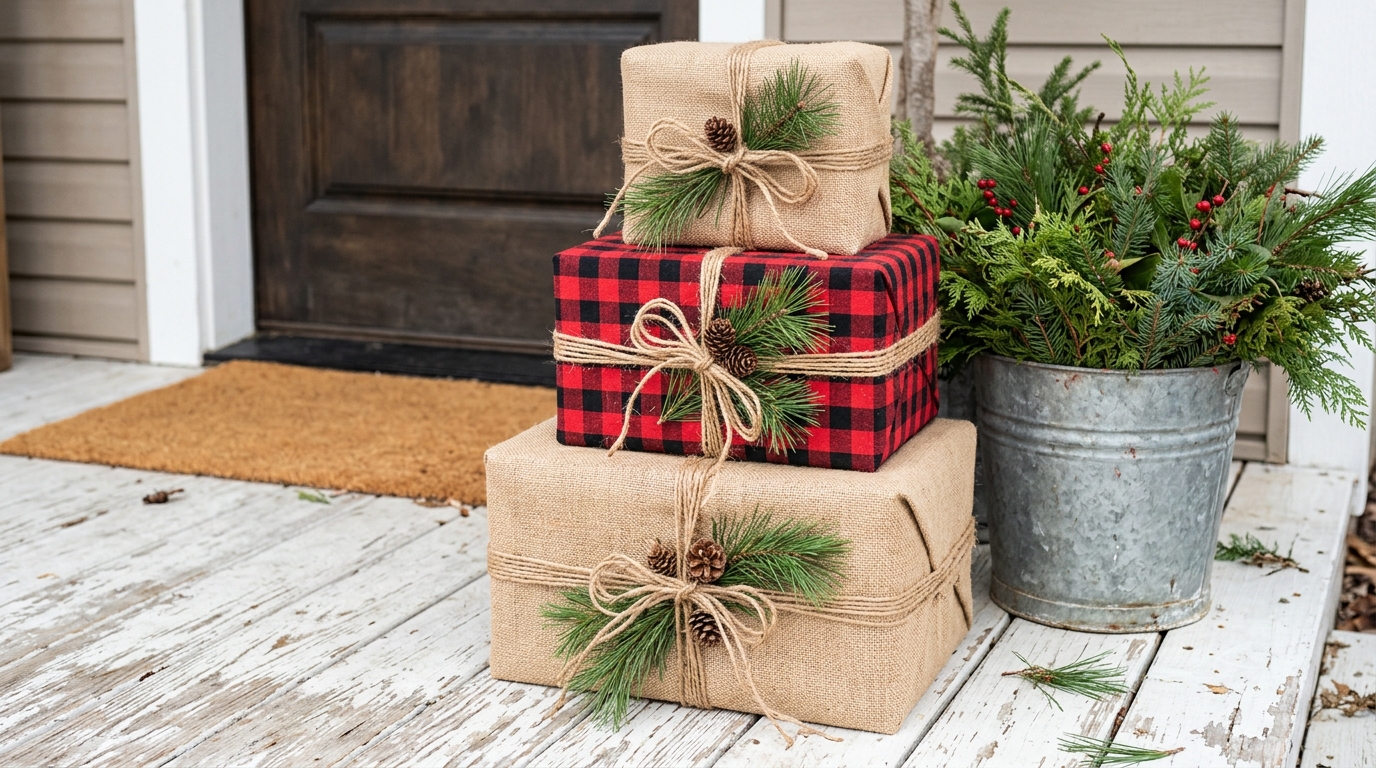
Farmhouse style is the most loved Christmas look on our site this season, and this stack nails it. Wrap boxes in red buffalo check fabric and natural burlap instead of paper, then tie them with jute twine and tuck a few fresh pine sprigs under each knot. Fabric survives damp porches far better than paper, and you can wash and reuse it next year. Pair it with a galvanized bucket of greenery for the full country look. Do you have an old flannel throw that could become a gift wrap?
You will need: boxes, red buffalo check fabric and burlap, spray adhesive or double sided tape, jute twine, fresh or faux pine sprigs.
How to make it: 1. Wrap each box in fabric like paper and secure the folds underneath. 2. Tie jute twine in a cross and finish with a loose bow. 3. Tuck pine sprigs under the twine and stack the boxes on the porch.
Gold and White Giant Christmas Presents for a Luxury Look
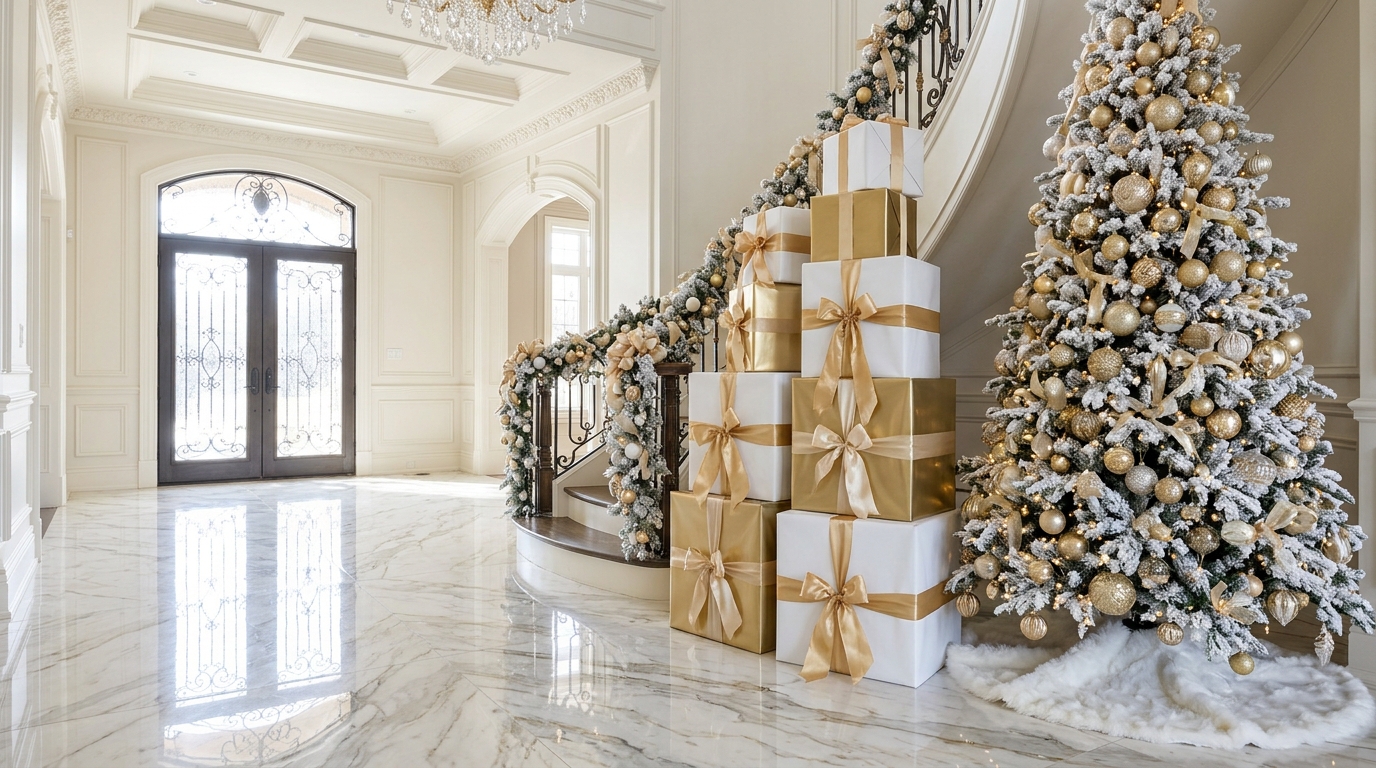
If you love a hotel lobby Christmas, try giant Christmas presents in white and gold. Matte white paper, a few metallic gold boxes and wide gold silk ribbon look expensive even when the boxes are free from the grocery store. Set them beside a flocked tree and the whole entry feels calm and glamorous. Keep the palette to just two colors and the stack always looks planned and polished. For more ideas in this style, our DIY Christmas gift boxes gallery has plenty. Which room would you give the luxury treatment?
You will need: boxes in 3 to 4 sizes, matte white and metallic gold wrapping paper, wide gold silk or satin ribbon, double sided tape.
How to make it: 1. Wrap two boxes in white and two in gold. 2. Alternate the colors as you stack, so no two gold boxes touch. 3. Tie a wide gold bow on the top box and let the tails fall down the stack.
Wooden Crate Presents Painted Red
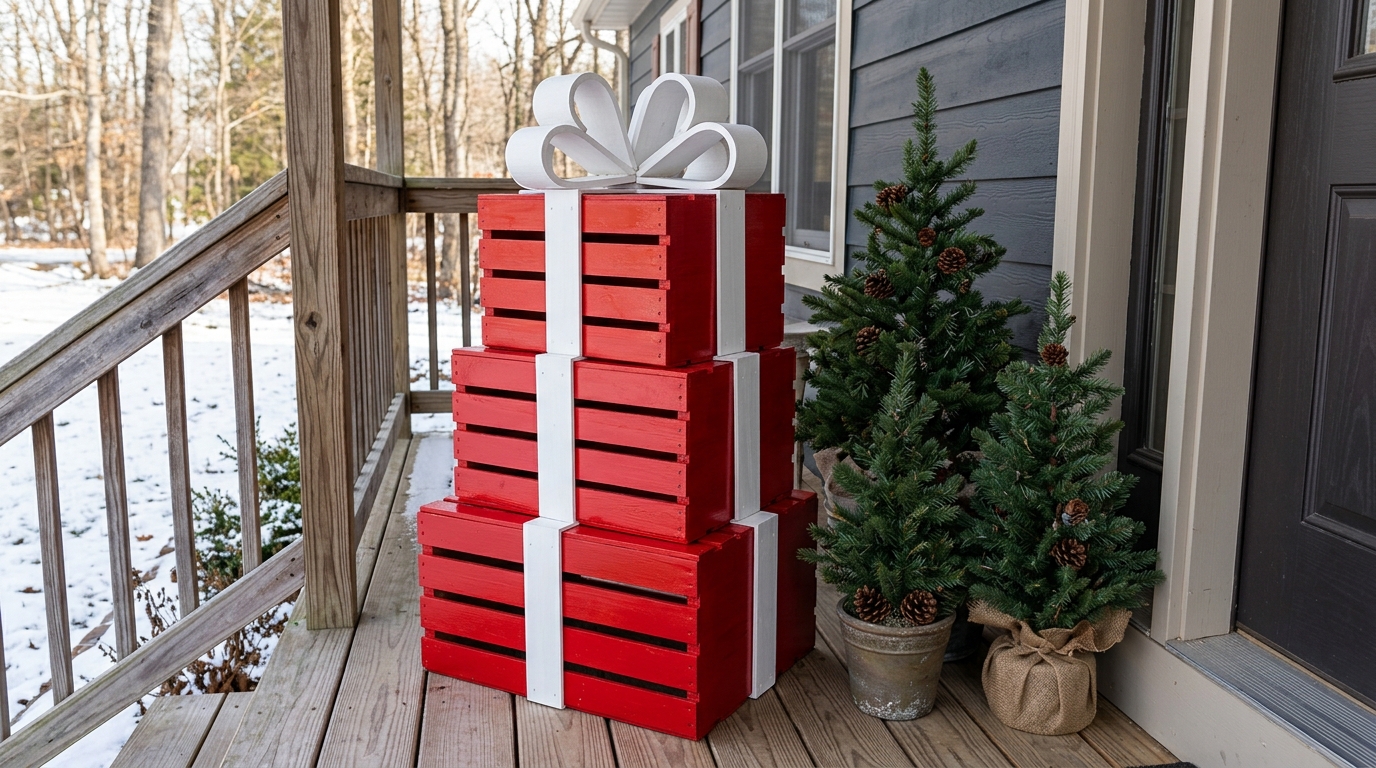
Wooden crates from the craft store turn into presents that last for years. Flip them upside down, paint them glossy red, then add a ribbon cross made from thin white painted wood strips. Because they are solid wood, they stand up to snow, wind and curious dogs, and they look charming even in daylight. In January they flip back over and become shelves or storage. Could your porch use a decoration that does double duty all year?
You will need: 3 wooden crates in different sizes, red outdoor paint, thin wood lattice strips, white paint, wood glue, a small saw (adult job), a large white bow.
How to make it: 1. Paint the crates red and let them dry. 2. An adult cuts the wood strips to length, then paint them white and glue them on as ribbons. 3. Stack the crates and finish with a weatherproof bow.
Present Stack Planter With a Live Evergreen
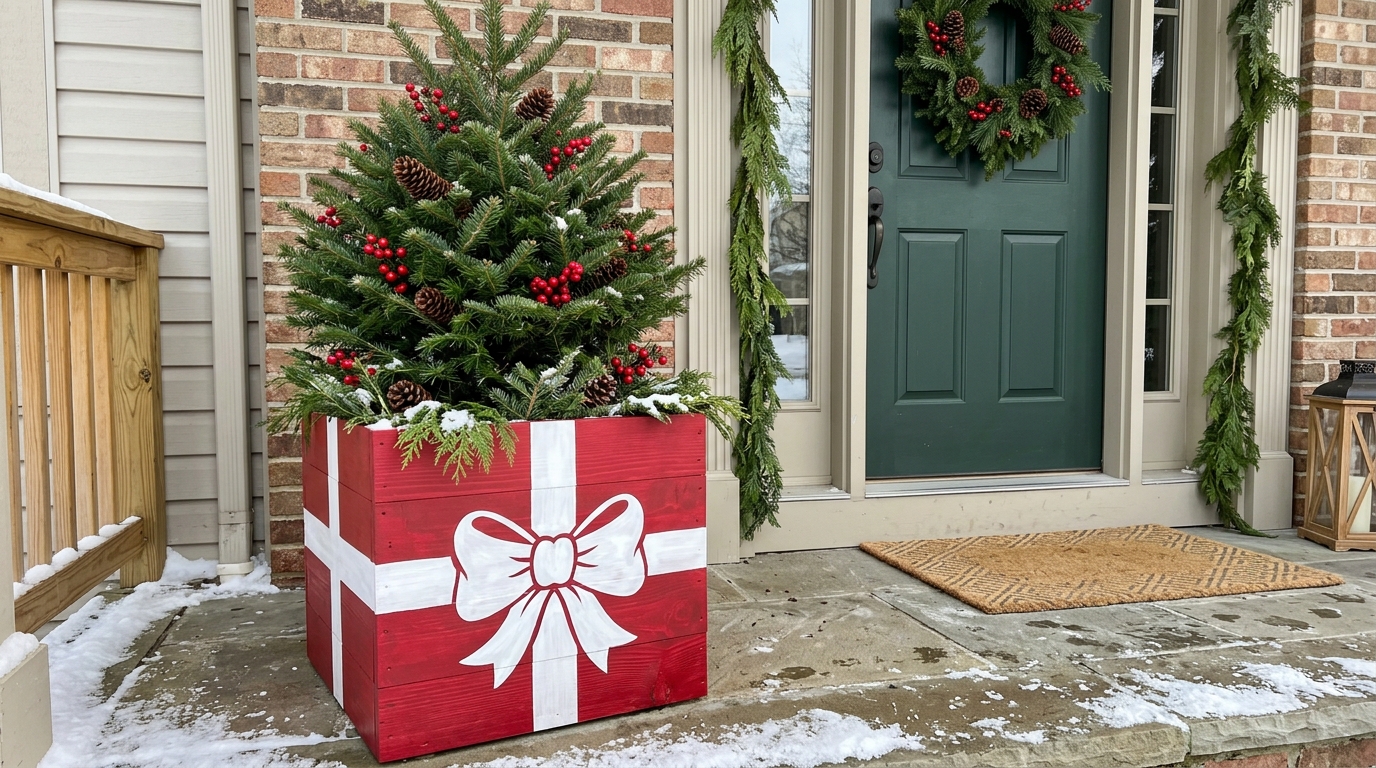
Here is a clever twist: a planter box painted like a giant present, with a real little tree growing out of the top. Paint a square wooden planter red, add a wide white ribbon and bow, then plant a dwarf spruce or boxwood and tuck in berries and pine cones. It looks like a gift that grew a tree. After the holidays, simply paint over the ribbon and enjoy the planter all spring. Would you rather buy a planter or make one this fun?
You will need: a square wooden planter box, red and white outdoor paint, painter’s tape, potting soil, a dwarf evergreen, faux berries and pine cones.
How to make it: 1. Paint the planter red, then tape off and paint a white ribbon cross. 2. Paint a simple bow shape at the top edge. 3. Plant the evergreen and add berries and cones around the base.
Giant Christmas Presents as a Photo Prop
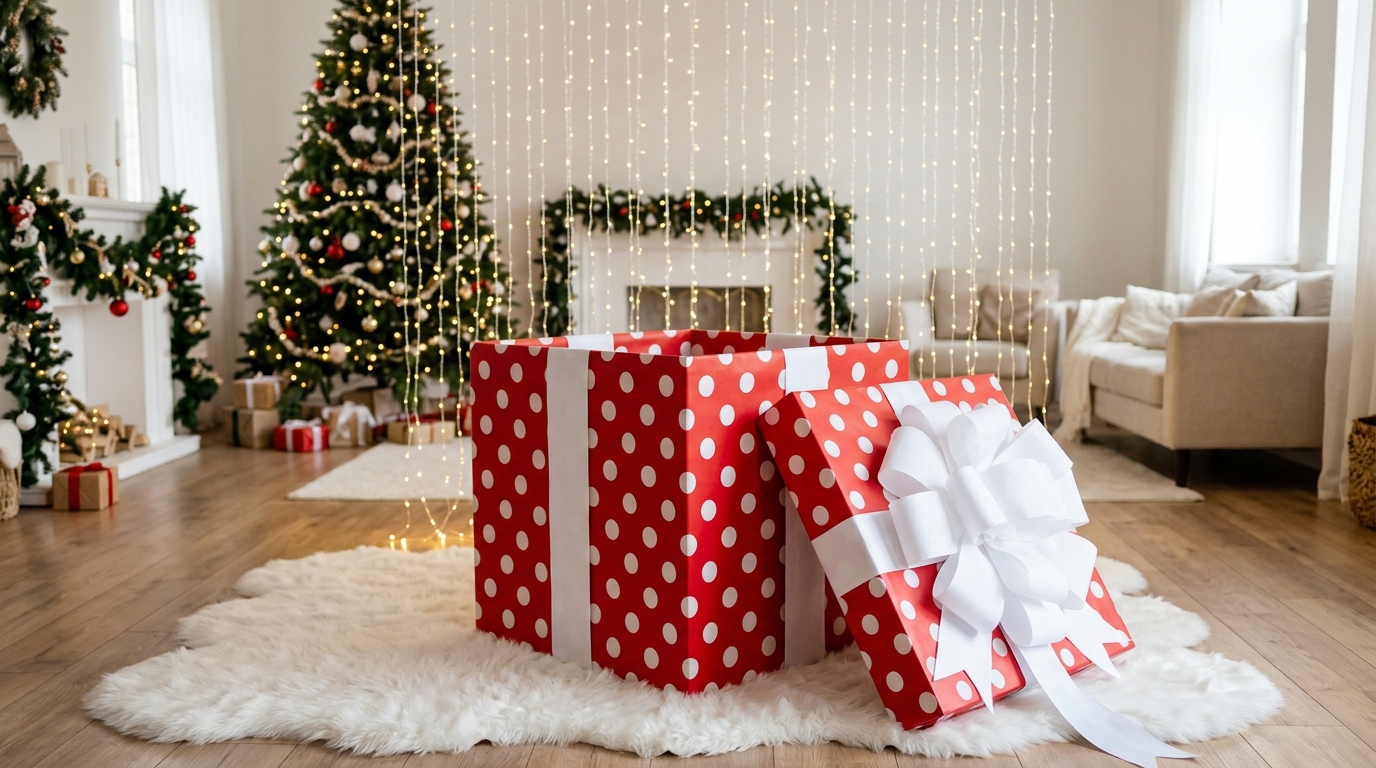
Want the most shared photo of your holiday? Make one of the giant Christmas presents big enough for a child or a pet to sit inside. A large appliance box, cut down and wrapped in polka dot paper, with the lid leaning beside it and a huge bow on top, makes an instant photo booth. Hang a curtain of fairy lights behind it and the pictures look professional. Kids will want to climb in again and again. Who in your family would pop out of the box first?
You will need: a large appliance box, a box cutter (adult job), polka dot wrapping paper, packing tape, a giant bow, a fairy light curtain.
How to make it: 1. An adult trims the box to about knee height and cuts a separate lid. 2. Reinforce the edges with tape and wrap the box and lid. 3. Lean the lid beside the box, add the bow and hang lights behind it.
Mantel Row From Tiny to Giant
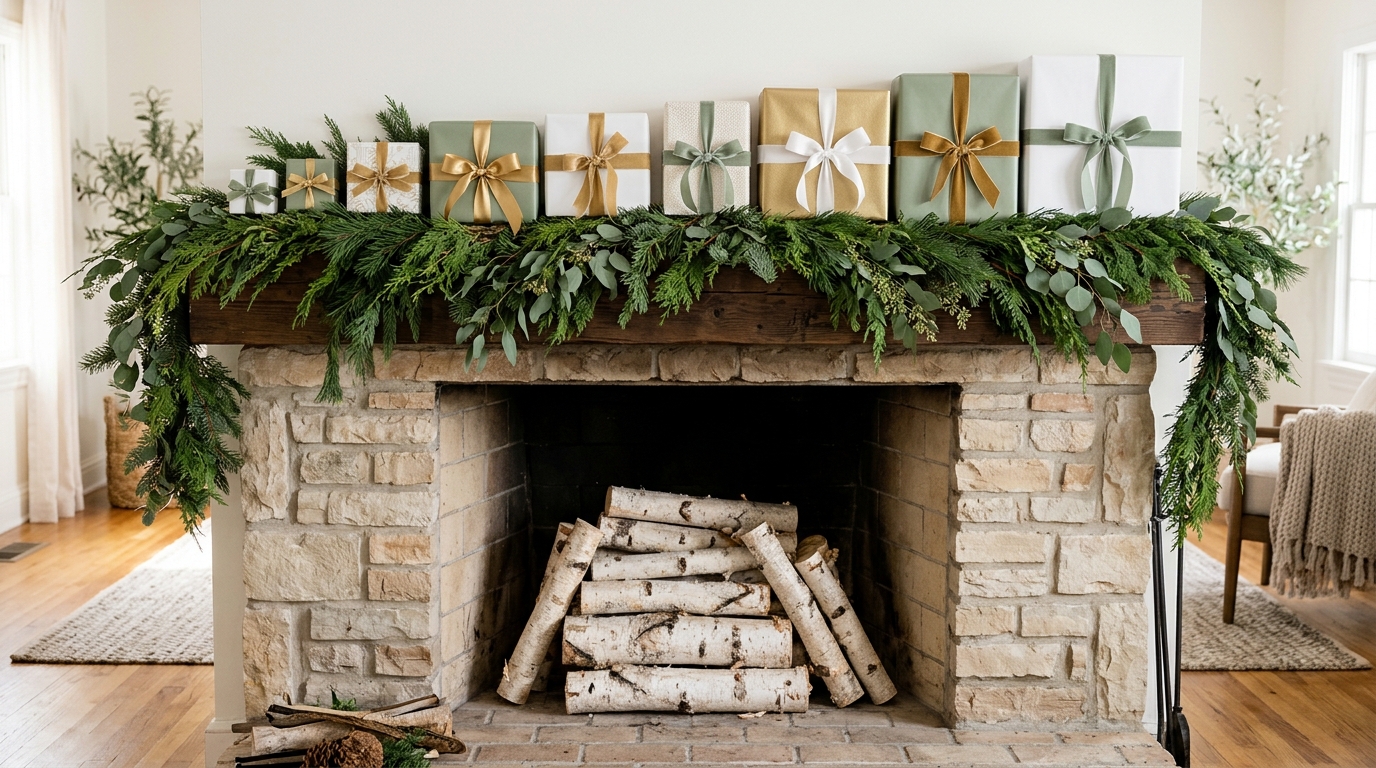
Bring the idea indoors with a row of wrapped boxes that grows from tiny to tall along the mantel. Use soft colors like white, sage green and gold so it feels calm, and weave a fresh garland behind them. Jewelry boxes, shoe boxes and cereal boxes all work, so this costs almost nothing. A neat trick is to fill the empty fireplace below with white birch logs for a cozy look with no fire needed. How many sizes of box can you find in your recycling bin?
You will need: 6 to 8 boxes from very small to large, wrapping paper in white, sage and gold, thin ribbon, a garland, birch logs.
How to make it: 1. Wrap the boxes in the three colors, mixing them evenly. 2. Line them up on the mantel from smallest to largest, or largest in the middle. 3. Lay the garland behind and fill the fireplace with birch logs.
Weatherproof Giant Christmas Presents With Vinyl Tablecloths
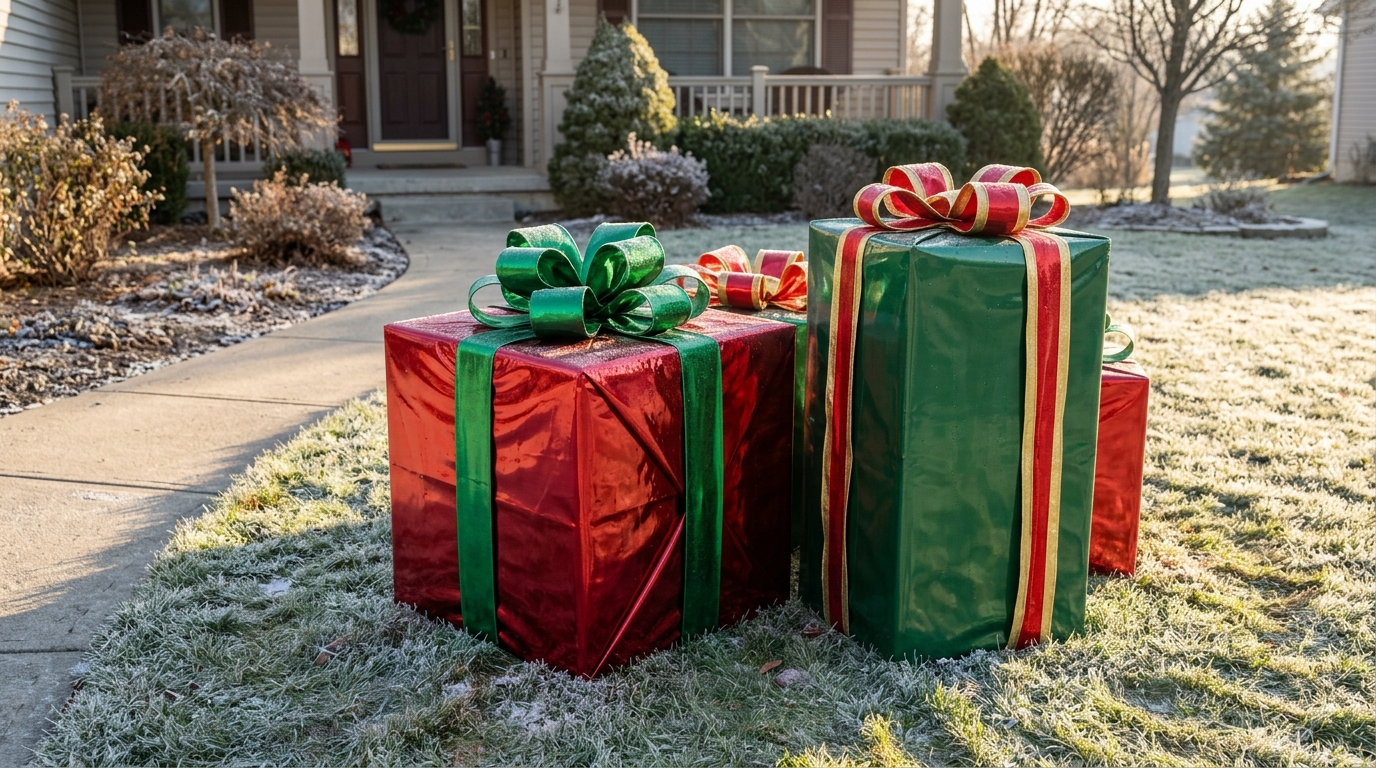
Paper melts in the first rain, which is why so many outdoor gift displays look sad by mid December. The fix costs a few dollars: wrap your giant Christmas presents in cheap vinyl tablecloths. They come in shiny reds, greens and plaids, wipe clean and keep the boxes inside bone dry. Outdoor ribbon with a wired edge finishes them, and they still look fresh on New Year’s Day. Is your porch fighting rain or snow this winter?
You will need: sturdy boxes or bins, vinyl tablecloths in holiday colors, clear outdoor tape, wired outdoor ribbon, sandbags for weight.
How to make it: 1. Weigh down each box with a sandbag and seal it shut. 2. Wrap it in vinyl like paper, taping every seam with clear outdoor tape. 3. Tie on wired ribbon and set the boxes on a dry mat or pallet.
A Family Name Present Stack
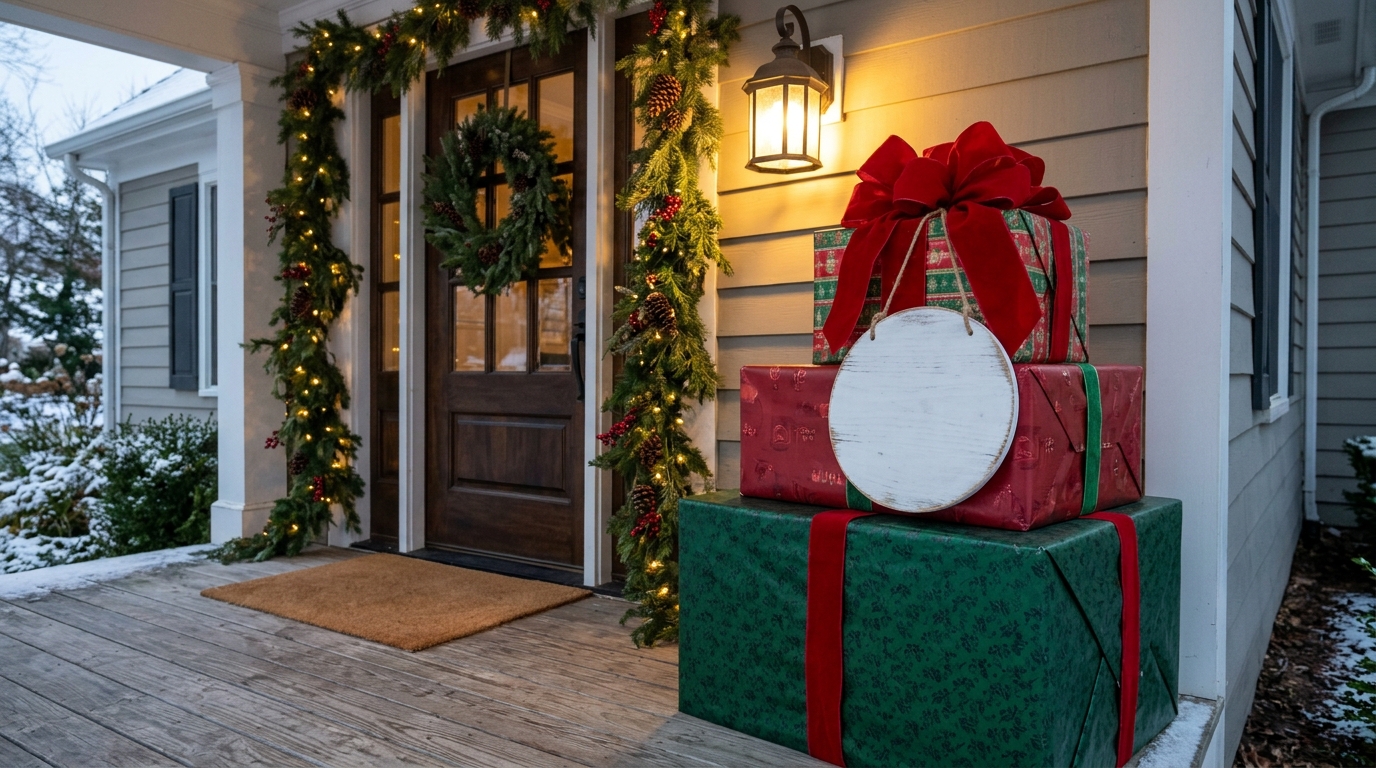
Finish with the most personal idea of all. Build a simple stack of three wrapped boxes, then hang a round wooden plaque from the top bow and paint your family name or the year on it. Visitors love it, and it makes a sweet backdrop for a yearly photo on the steps. Paint the plaque in white with red letters for a classic look, or use a stencil if your handwriting is shy. What name will go on your porch this year?
You will need: 3 boxes, red and green wrapping paper, ribbon, a round wooden plaque, white and red paint, a letter stencil, a small drill or screw eye (adult job).
How to make it: 1. Wrap and stack the boxes, taping the layers together. 2. Paint the plaque white, stencil your family name and let it dry. 3. An adult adds a screw eye, then hang the plaque from the top bow with ribbon.