Painted Wine Glasses: 13 Christmas Designs That Look Way More Expensive Than They Are
Painted wine glasses are the Christmas gift that makes people ask, “Where did you buy these?” The secret is that most of them start as plain glasses from the dollar store. A little glass paint, a steady hand and an evening at the kitchen table turn them into something that looks like it came from a pricey boutique. One crafter’s video showing a $1.25 glass that suddenly looked like a $10 one passed 900,000 views, and once you try it you will see why. These 13 designs go from easy dots to sweet little winter villages. Each one keeps paint well below the rim where lips touch, and every glass is meant for gentle hand washing. Set out your brushes, put on a holiday playlist and let’s paint..
Painted Wine Glasses Gift Set for Christmas
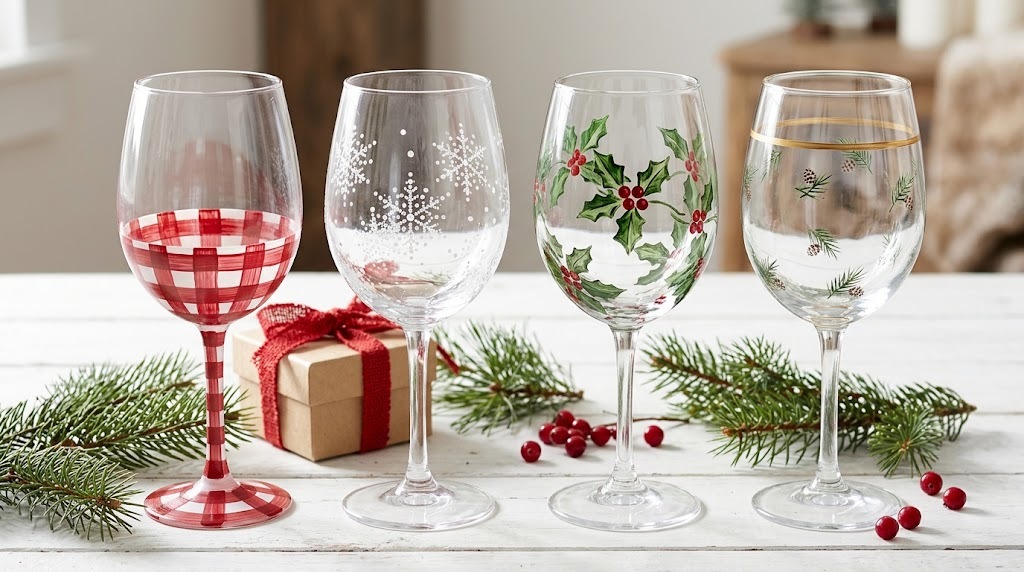
Start with the set that sells the whole idea: four glasses, four designs, one gorgeous gift. Buffalo plaid on one stem, snowflakes on another, holly on the third and a gold band on the fourth. Mixing designs makes a set look collected and expensive, and it lets every guest find their own glass at the party. If you want to see how the pros keep paint from chipping, this glass painting video is packed with tips. Ready to pick your four favorite designs..
You will need: Four plain stemmed wine glasses, glass enamel paint in red, white, green, black and gold, small round and liner brushes, rubbing alcohol, cotton pads.
How to make it: 1. Wash the glasses, then wipe each one with rubbing alcohol so the paint grips. 2. Paint one design per glass, keeping all paint at least an inch below the rim. 3. Let them dry and cure following the paint label before wrapping.
Snowflake Dot Art Glasses
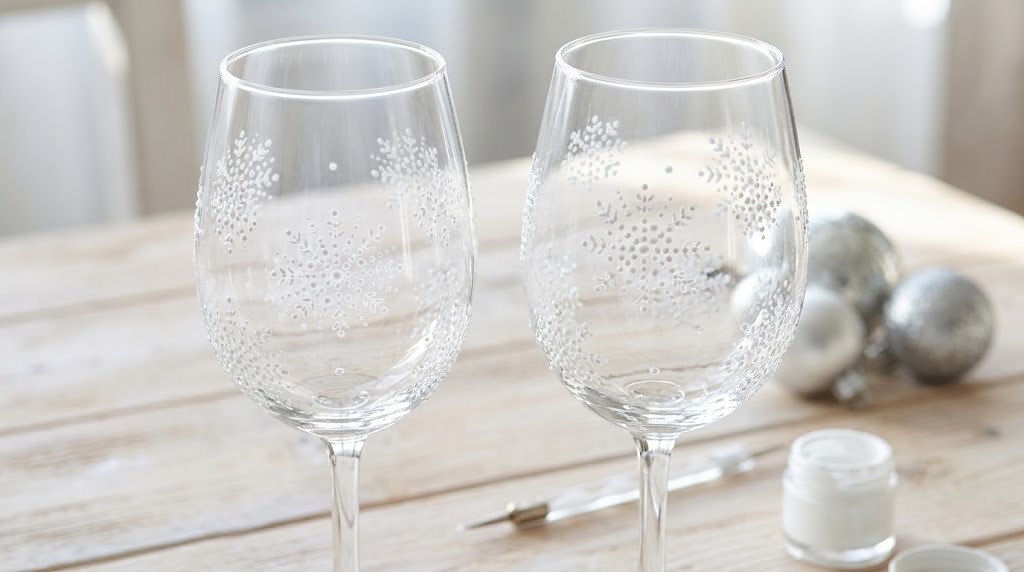
If you can make a dot, you can make these. Each snowflake is just a center dot with six little lines of smaller dots radiating out, and the tiny gaps make it look delicate and lacy. Use the back of a paintbrush for big dots and a toothpick for tiny ones. Vary the sizes across the glass so it looks like a real snowfall. They are elegant enough for a wedding gift and quick enough to make a dozen in one night. How many snowflakes will fit on yours?
You will need: Clear stemmed glasses, white glass enamel paint, a dotting tool or the end of a paintbrush, toothpicks, rubbing alcohol.
How to make it: 1. Clean the glass and dot a center point for each snowflake. 2. Add six lines of three dots around each center, getting smaller as you go out. 3. Fill empty spaces with single tiny dots for falling snow and let it cure.
Buffalo Plaid Painted Wine Glasses
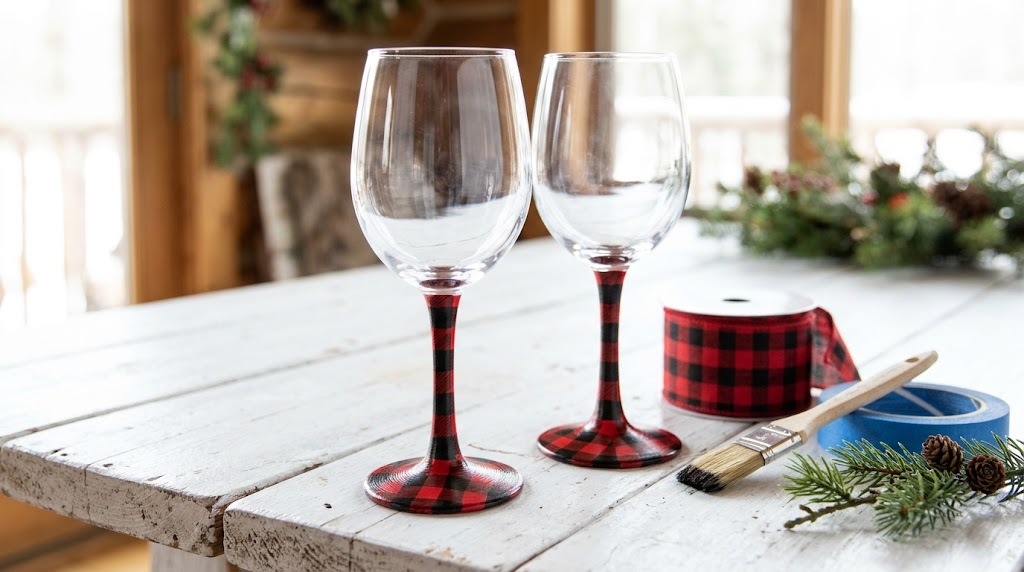
Buffalo plaid instantly says cozy cabin Christmas, and painting it on the stem keeps the bowl clear and pretty. The trick is layering: a solid red base coat, then black stripes one way, then black stripes the other way, letting the crossings go darker. Painter’s tape gives you crisp lines if you are nervous. These painted wine glasses look fantastic next to plaid napkins and pine. Would you try red and black, or the softer red and white?
You will need: Stemmed glasses, red and black glass enamel paint, a flat brush, thin painter’s tape, a craft knife for trimming tape.
How to make it: 1. Paint the stem and base solid red with two thin coats. 2. Tape off evenly spaced bands and paint them black, then remove the tape. 3. Paint thinner black lines crosswise to finish the check pattern.
Holly Leaves and Berries
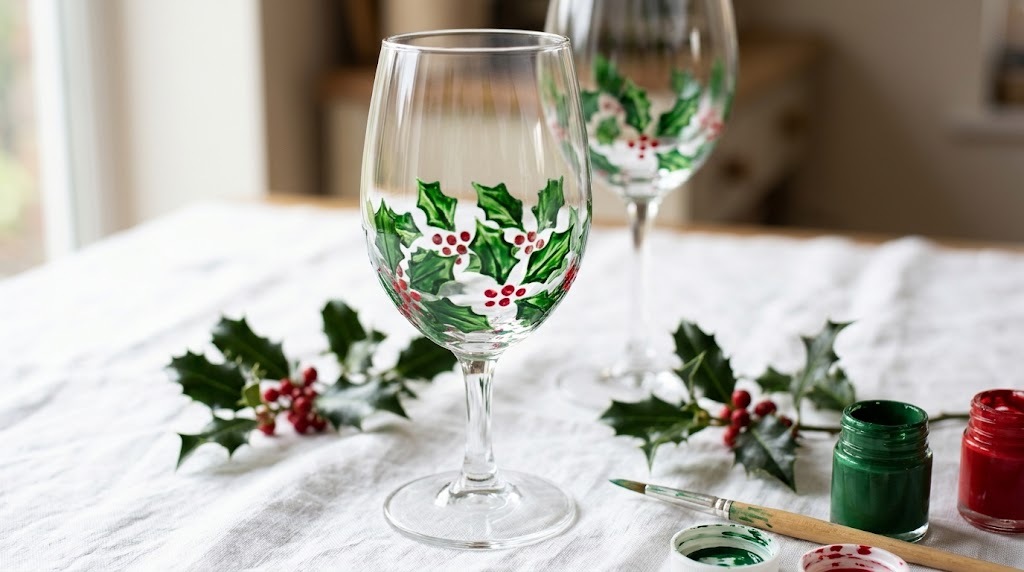
Holly is the classic for a reason: it is simple, bright and looks hand painted in the best way. Paint two pointed green leaves with a center vein, then tuck a cluster of three red berries where they meet. A tiny white dot on each berry makes it shine like the real thing. Wrap the design around the lower bowl so it peeks out from every angle. These look lovely on a holiday table and even better in a gift basket. Which friend would love a pair of these?
You will need: Clear glasses, green and red glass enamel paint, white paint for highlights, a small round brush and a liner brush.
How to make it: 1. Paint holly leaves in pairs around the lower bowl. 2. Add a darker green vein down each leaf with the liner brush. 3. Dot on red berries in threes and finish each with a tiny white highlight.
Painted Wine Glasses With a Gold Band and Pine Sprigs
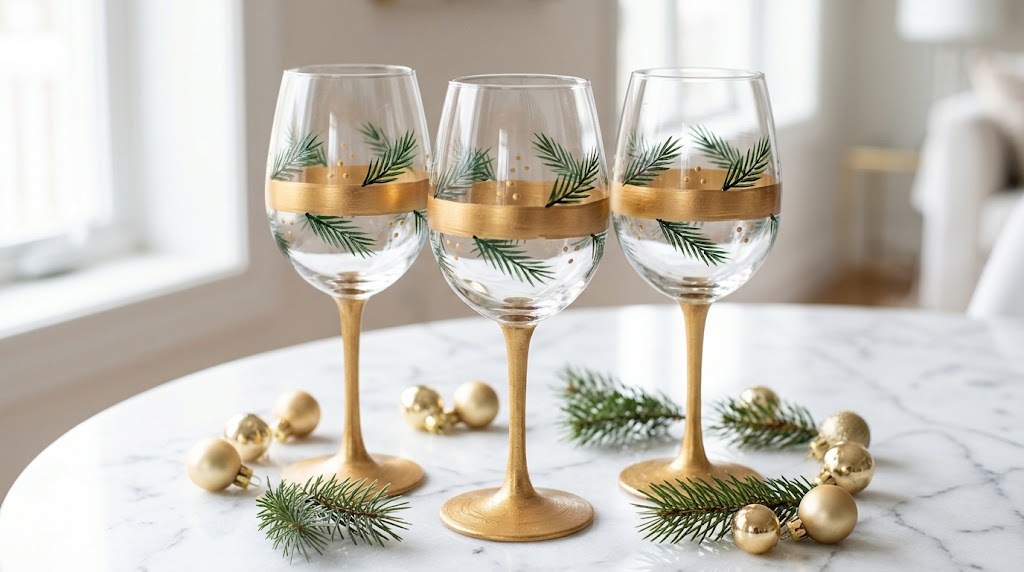
Gold makes everything look expensive, and this design proves it. A metallic gold band painted around the middle of the bowl, plus little dark green pine sprigs and gold dots, turns basic painted wine glasses into something you would see in a luxury catalog. Painting the stems gold too adds even more sparkle. Keep the band well below the rim, and use a lazy Susan to turn the glass while you paint a steady line. Who on your list loves a little glam?
You will need: Stemmed glasses, metallic gold glass paint, dark green glass paint, a flat brush, a liner brush, a lazy Susan or turntable, painter’s tape.
How to make it: 1. Wrap two strips of tape around the bowl to mark the band, then paint between them in gold. 2. Remove the tape and paint tiny pine sprigs above and below. 3. Add gold dots between the sprigs and paint the stem gold.
Candy Cane Striped Stems
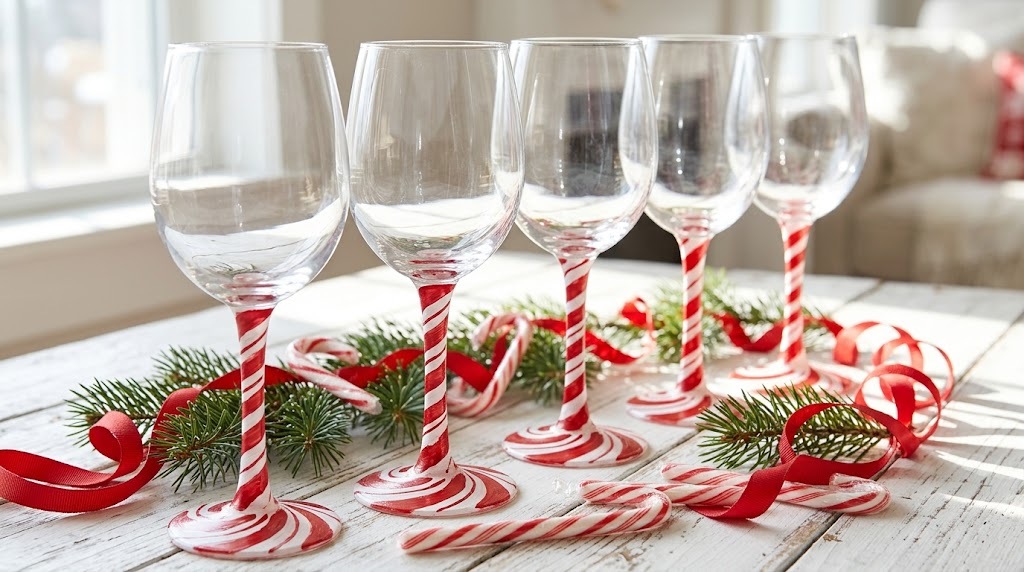
These are pure fun. Red and white stripes spiral down each stem like a candy cane, and they make even a sparkling cider toast feel festive. Paint the whole stem white first, then wrap a thin strip of tape around it in a spiral and paint red in the gaps. Peel it off and you have perfect stripes. Kids love helping with the white base coat. Pair them with a bowl of peppermints for an easy gift. Is there a candy cane fan in your family?
You will need: Stemmed glasses, white and red glass enamel paint, thin painter’s tape or washi tape, a small flat brush.
How to make it: 1. Paint the stem and base white and let it dry fully. 2. Wind tape around the stem in an even spiral. 3. Paint red between the tape lines, peel the tape while slightly damp and touch up any edges.
Frosted Glass With a Snow Scene
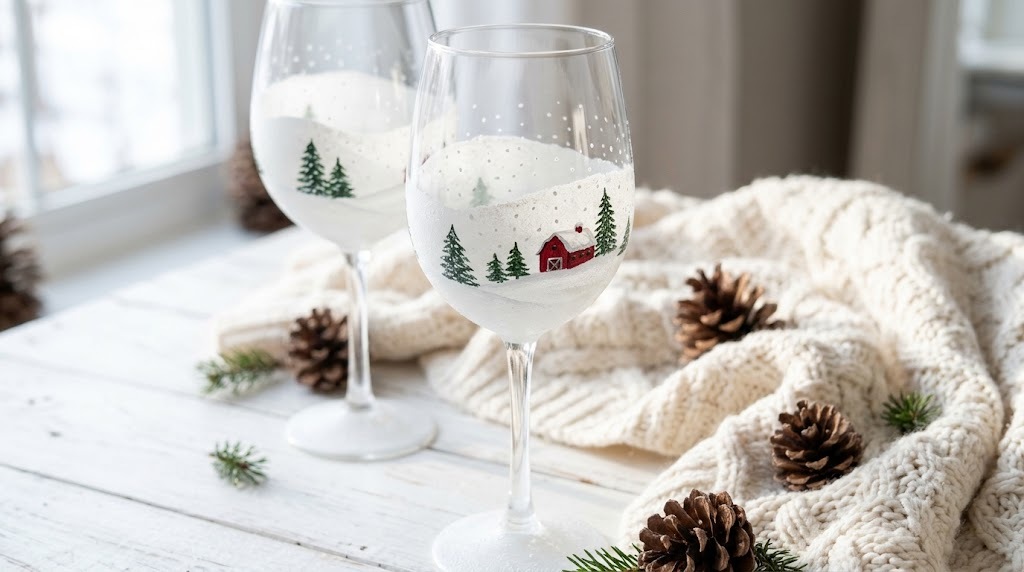
This one feels like a little snow globe you can hold. Frosted white paint across the lower bowl becomes a snowy hill, and a few dark green trees and a tiny red barn turn it into a scene. Falling snow dots above finish the story. It looks complicated, but each piece is just a simple shape. Make them as a set where the scene continues from glass to glass. Would you add a tiny cabin or a little sled?
You will need: Clear glasses, frosted white glass paint, green, red and brown glass paint, a sponge dabber, small round and liner brushes.
How to make it: 1. Sponge frosted white paint in a wavy hill across the lower bowl. 2. Paint triangle pine trees and a small red barn on the hill. 3. Dot white snow above the scene and let it cure completely.
Poinsettia Blooms
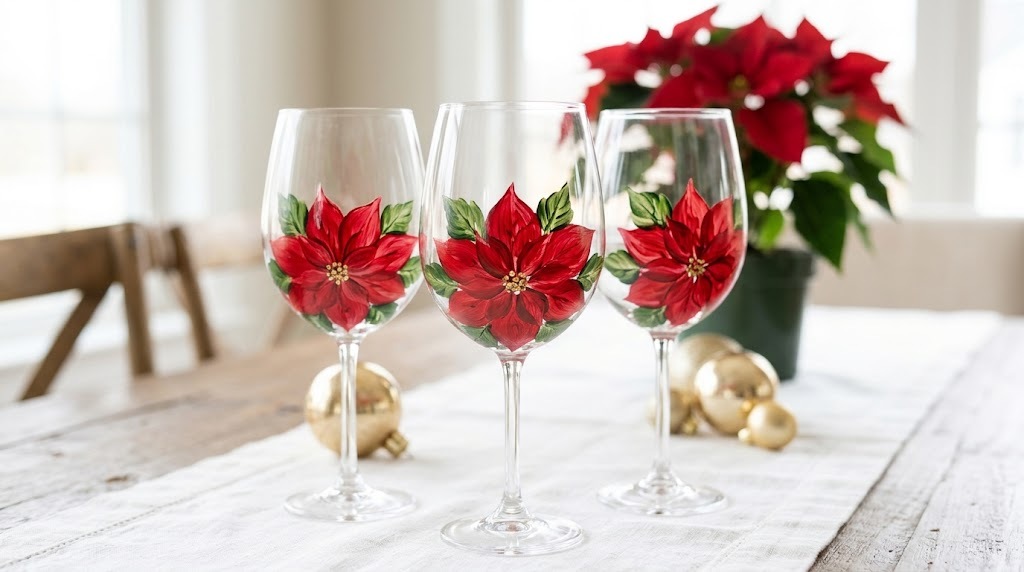
Poinsettias are bold, bright and very forgiving to paint. Each flower is just five to seven pointed red petals around a cluster of tiny gold dots, with a few green leaves peeking out behind. You do not have to be neat: slightly uneven petals look more natural. These painted wine glasses make a stunning centerpiece for a red and white table. Gift two with a potted poinsettia and you have a present that looks far more expensive than it is. Ready to try your first bloom?
You will need: Clear glasses, red, green and gold glass enamel paint, a medium round brush, a toothpick for dots.
How to make it: 1. Paint green leaves first so they sit behind the flower. 2. Paint red pointed petals in a star shape over them. 3. Dot a small cluster of gold in the center of each bloom.
Ornament Bauble Pattern
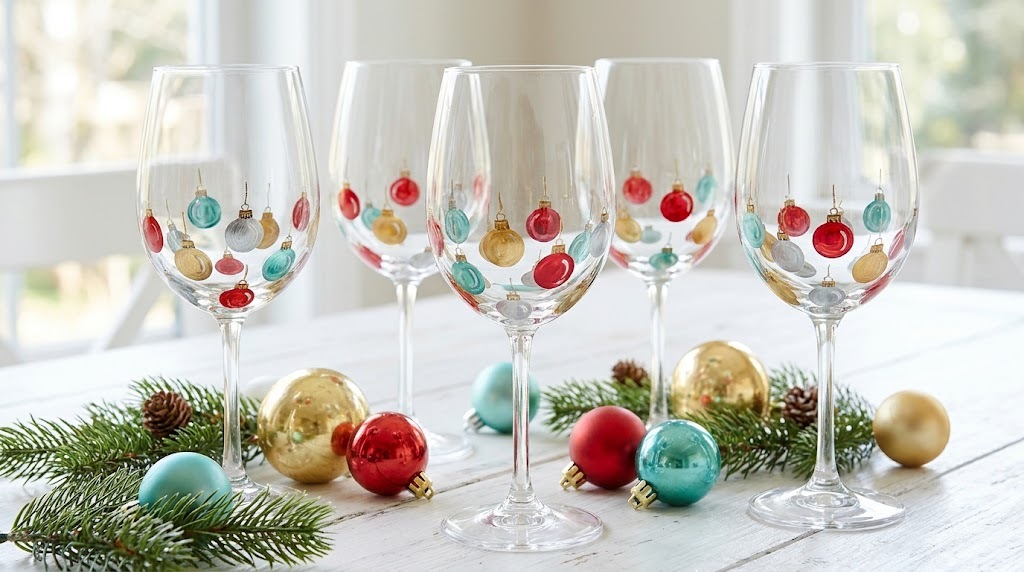
A scatter of little painted ornaments is cheerful and very easy to get right. Each bauble is a simple circle in red, gold, teal or silver, with a tiny cap and a thin hanging line. Space them randomly around the bowl like they are hanging from an invisible tree. Mix colors to match your own decorations. These painted wine glasses are great for a craft fair table because they are fast and look bright from across the room. What color will your first ornament be?
You will need: Clear glasses, glass enamel paint in four holiday colors, a round brush, a fine liner brush, a toothpick.
How to make it: 1. Paint filled circles in different colors and sizes around the lower bowl. 2. Add a small gold or silver cap on top of each. 3. Draw a fine line up from each cap and add a white dot highlight to every bauble.
Gingerbread Man Glasses
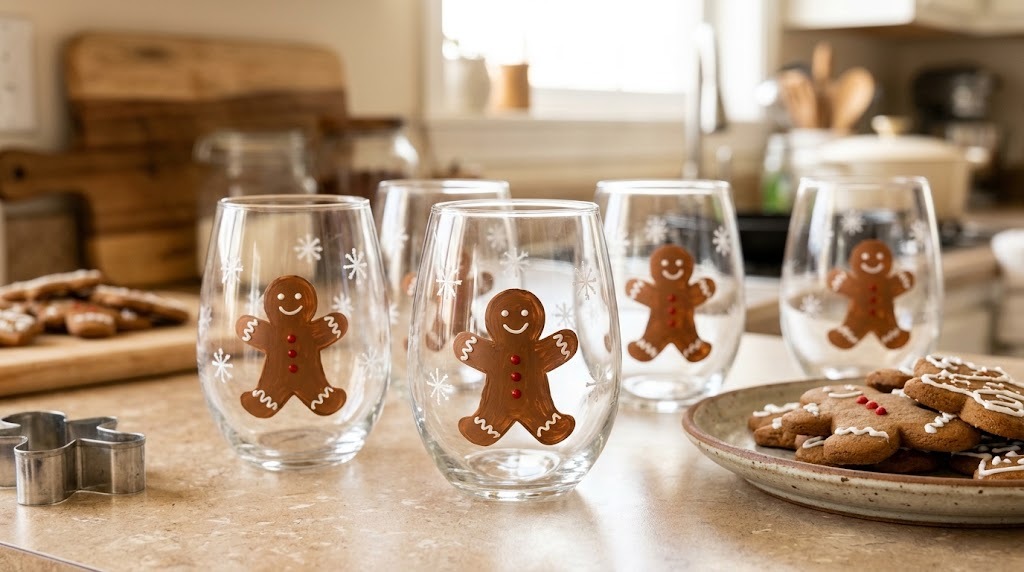
Who can resist a gingerbread man smiling up from their glass? Paint a simple brown cookie shape, then add white wavy icing lines on the arms and legs, red buttons and a little smile. These are perfect on stemless glasses for hot cider or cocoa at a cookie decorating party. Serve them next to a plate of real gingerbread cookies and watch everyone grin. They also make sweet teacher gifts. Will your gingerbread man get a bow tie?
You will need: Stemless glasses, brown, white and red glass enamel paint, a round brush, a fine liner brush, a gingerbread cookie cutter for a stencil.
How to make it: 1. Trace around the cookie cutter on the glass with a washable marker and fill it in brown. 2. Add white wavy icing lines and a smile with the liner brush. 3. Dot on red buttons and white snowflakes around him.
Winter Village Silhouette
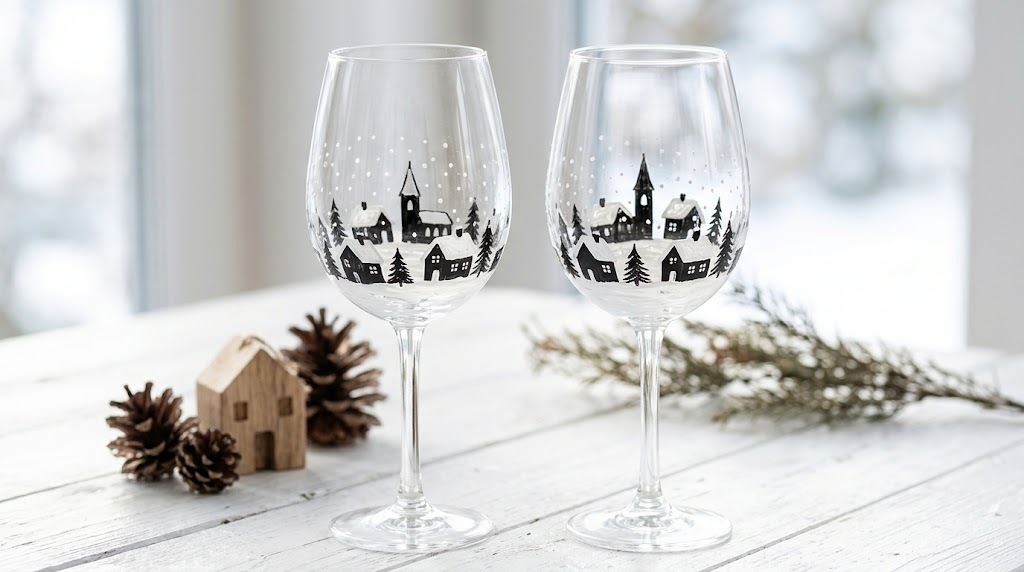
This design looks the most expensive of all, yet it is simply black shapes. Little houses with pointed roofs, a church steeple and pine trees line up around the lower bowl, then white paint on the rooftops makes them look freshly snowed on. Print a village silhouette, tape it inside the glass and trace it. The result looks like a Scandinavian boutique find. Pair them with a wooden house ornament for a lovely gift. Which house would be yours?
You will need: Clear glasses, black and white glass enamel paint, a printed village silhouette, tape, a small round brush and a liner brush.
How to make it: 1. Tape the printed silhouette inside the glass as a guide. 2. Fill in the shapes with black paint and let them dry. 3. Add white snow on the rooftops and tiny white dots falling above.
Hand Lettered Name Glasses for Dinner Guests
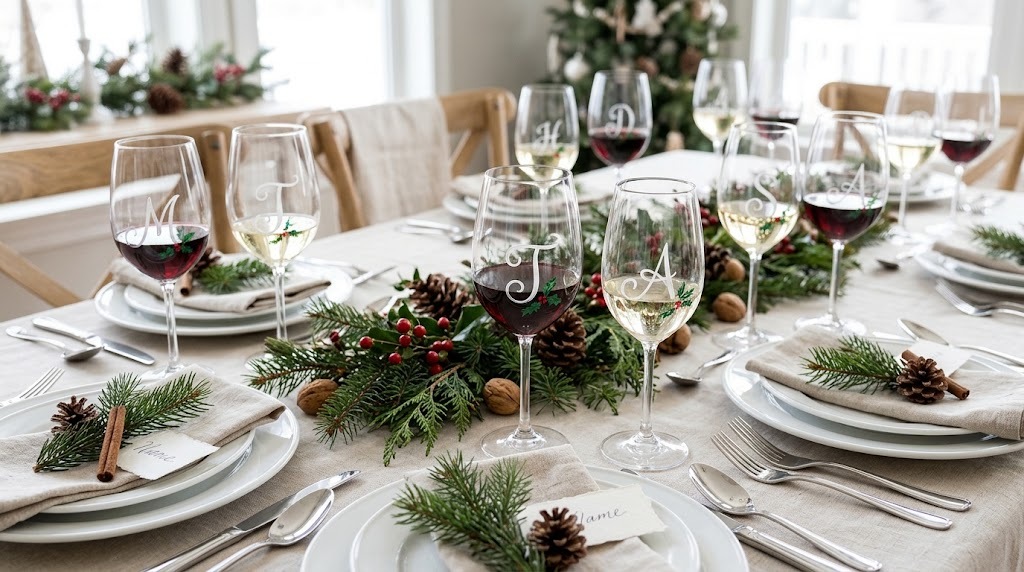
Monogram glasses solve the oldest party problem: whose glass is whose? Paint one swirly initial on each glass with a tiny holly sprig, and they double as place cards for Christmas dinner. Guests always take them home, so they become the party favor too. If your lettering feels shaky, print the letters in a script font and trace them from inside the glass. Painted wine glasses with a personal touch feel extra special. Who is coming to your table this year?
You will need: Clear glasses, white glass enamel paint, green and red paint for sprigs, printed letters in a script font, tape, a liner brush.
How to make it: 1. Tape a printed letter inside each glass. 2. Trace it with white paint, making the downstrokes slightly thicker. 3. Add a small green sprig and red berry beside the letter and let it cure.
Set of Four Painted Wine Glasses as a Boxed Hostess Gift
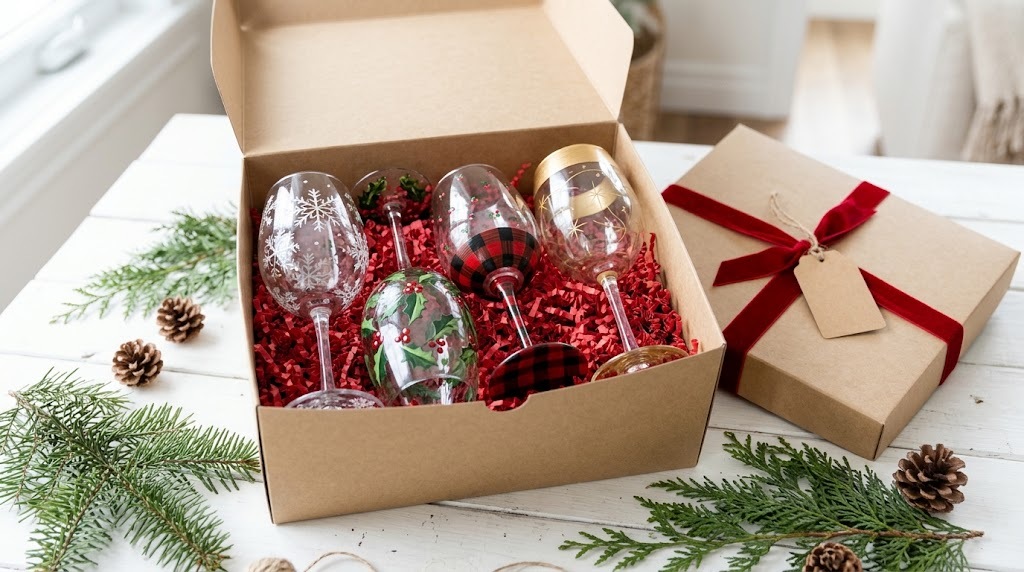
Presentation is what makes handmade feel high end. Nestle four painted wine glasses, each with a different design, in a kraft box filled with red paper shred, then tie the lid with a velvet ribbon and a plain tag. It looks like something from a department store gift shop. Tuck a card inside with care tips: hand wash only, no soaking. Bring it to the next holiday party and watch the host light up. For more gift ideas, see our Christmas wine bottle crafts. Who gets the first box?
You will need: Four finished painted glasses, a kraft gift box with lid, red crinkle paper shred, velvet ribbon, a kraft gift tag, a small care card.
How to make it: 1. Fill the box with a thick bed of paper shred. 2. Wrap each glass stem in a little tissue and nestle them in upright. 3. Close the lid, tie with velvet ribbon and add the tag and care card.