John Landis Mason: 15 Genius Christmas Crafts From the Jar Lids He Patented in 1858
John Landis Mason was a tinsmith from New Jersey, and on November 30, 1858 he received a patent for a glass jar with a threaded neck and a metal screw on lid. Many old jars still carry the line “Mason’s Patent Nov 30th 1858” pressed into the glass, according to Wikipedia. That simple idea made home canning easy and safe enough for almost every kitchen in America, and his name has been on our shelves ever since. Now look in your kitchen drawer. Chances are you have a small pile of spare lids and rings with nowhere to go. This Christmas, turn them into ornaments, wreaths, gifts and table decor that cost next to nothing. So pour a cup of cocoa, grab the glue and a little Mod Podge, and let us celebrate his patent anniversary with 15 cozy projects..
John Landis Mason Inspired Jar Ring Wreath
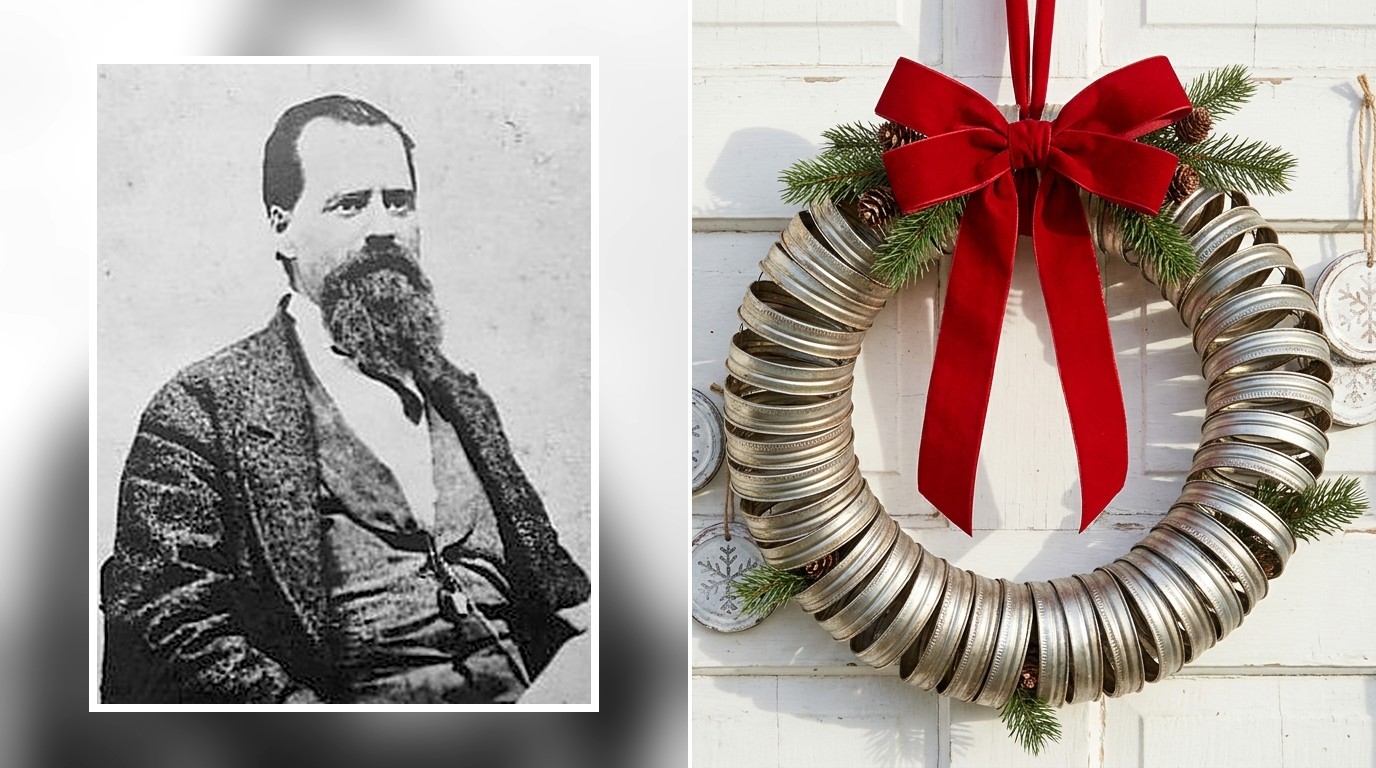
Start with the showstopper. This John Landis Mason inspired wreath uses about 40 to 50 plain metal jar rings, and it looks like something from a pricey farmhouse shop. Slide the rings onto a wire wreath form, or tie them together in a circle with sturdy floral wire, overlapping each one a little. Tuck in a few sprigs of pine and pinecones, then top it with a big red velvet bow. Hang it on the front door and every guest will ask where you bought it. How many rings do you have saved in your drawer right now..
You will need: 40 to 50 metal jar rings, a 12 inch wire wreath form or floral wire, wire cutters, pine sprigs, small pinecones, wide red velvet ribbon.
How to make it: 1. Slide or wire the rings around the form, overlapping them slightly. 2. Tuck pine sprigs and pinecones into the gaps and secure them with wire. 3. Tie a large red bow at the top and hang it with a ribbon loop.
Snowflake Jar Lid Ornaments
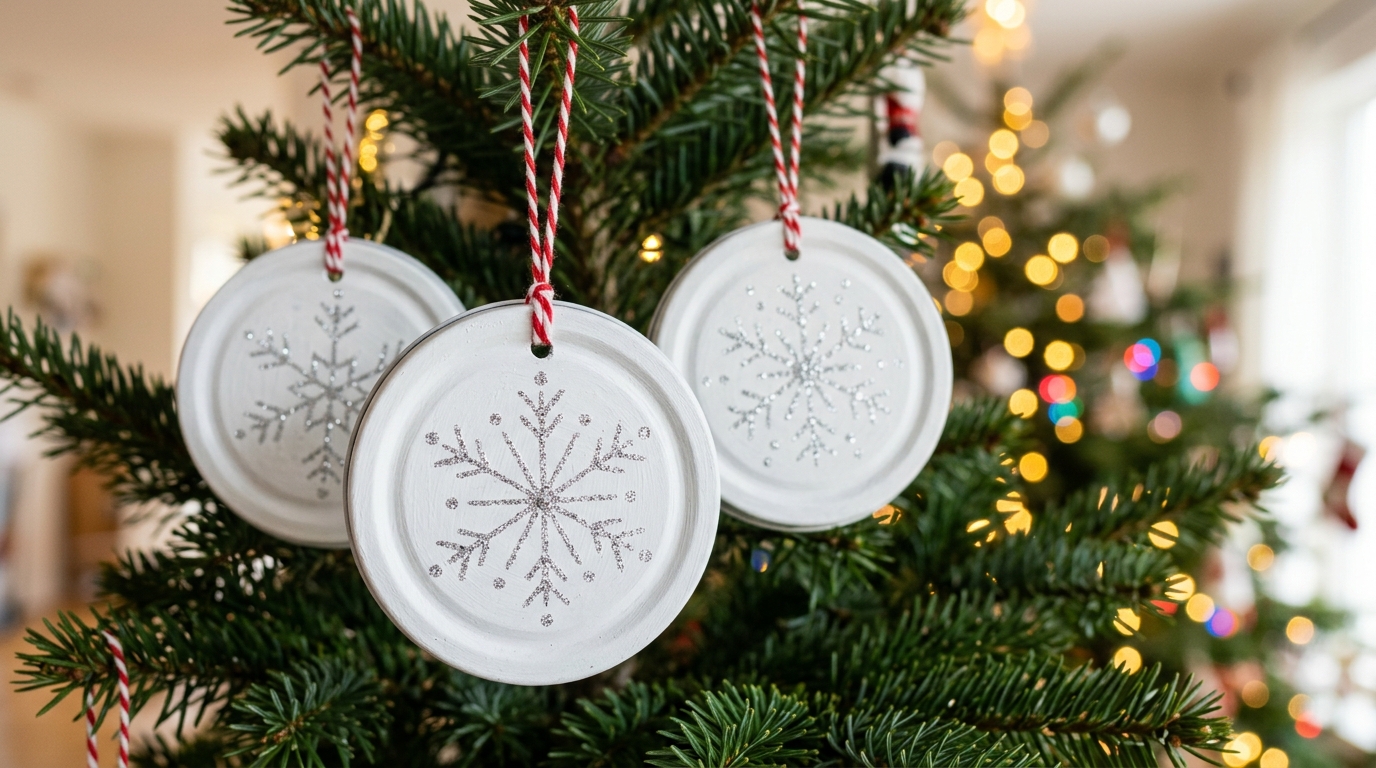
Flat jar lids are the perfect round blank for ornaments. Paint them white on both sides with acrylic or chalk paint, let them dry, then draw a simple snowflake with a white paint pen and dust it with fine silver glitter while it is wet. A coat of Mod Podge seals the glitter so it stays put. Ask an adult to poke a hole near the top with a nail and hammer, or simply glue a twine loop to the back. They look like frosty porcelain on the tree, and they pair nicely with our holiday jar crafts. Which design would you draw?
You will need: flat metal jar lids, white acrylic or chalk paint, a white paint pen, fine silver glitter, Mod Podge, red and white baker’s twine, a hot glue gun with adult help.
How to make it: 1. Paint both sides of each lid white and let them dry. 2. Draw a snowflake, sprinkle glitter on the wet lines and seal with Mod Podge. 3. Glue a twine loop to the back and hang.
John Landis Mason Jar Lid Photo Ornaments
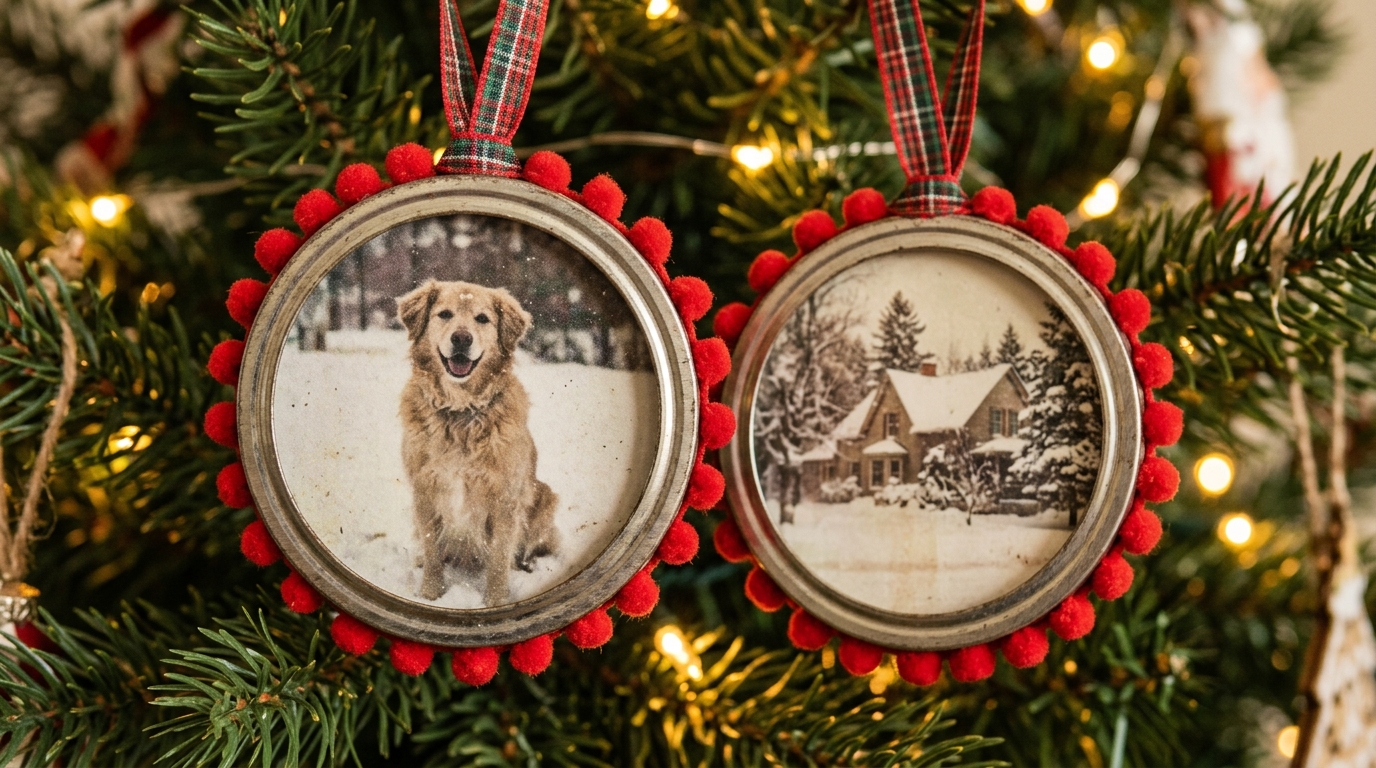
Here is a John Landis Mason craft that turns into a family keepsake. Use the ring and flat lid together like a tiny frame. Trace the flat lid on a printed photo, cut it out, glue it to the lid, and brush a thin layer of Mod Podge over the top. Screw the ring back on to frame it. Glue tiny red pom pom trim around the edge and add a plaid ribbon loop. Use pictures of the family pet, your home in the snow or a favorite holiday. Which photo would you choose first?
You will need: metal jar rings and flat lids, printed photos, scissors, Mod Podge, a foam brush, red pom pom trim, plaid ribbon, a hot glue gun with adult help.
How to make it: 1. Trace the lid on the photo, cut it out and glue it to the lid. 2. Brush a thin coat of Mod Podge over the photo and let it dry. 3. Screw on the ring, glue pom pom trim around it and add a ribbon loop.
Gold Jar Ring Star Tree Topper

A tree topper made from jar rings is light, sturdy and completely unique. Lay ten rings on the table in a five point star shape, with two rings forming each point, and wire them together where they touch. Add a center ring and spray paint the whole star gold outside, with an adult. Once it is dry, wire it to a short dowel or a cardboard cone that slips over the top branch. It shines beautifully when the tree lights are on. Gold, silver or copper for your tree?
You will need: about 11 metal jar rings, thin craft wire, wire cutters, gold spray paint used outdoors by an adult, a short dowel or cardboard cone.
How to make it: 1. Arrange the rings in a star shape and wire them where they touch. 2. Spray paint the star gold outdoors and let it dry fully. 3. Attach a dowel or cone at the back and slip it over the top branch.
John Landis Mason Christmas Coasters With Holiday Paper
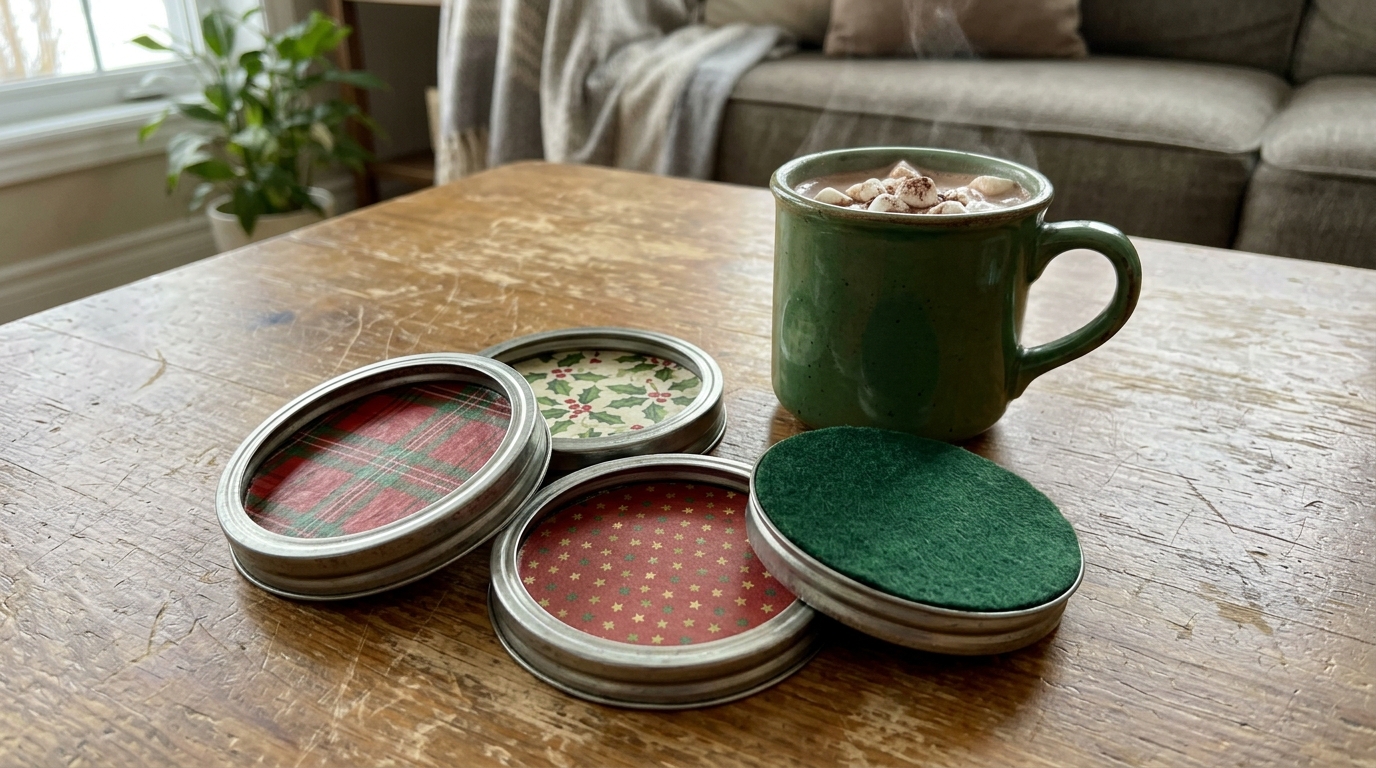
This John Landis Mason project is a Mod Podge classic. Trace a flat jar lid on pretty holiday paper, such as plaid, holly or tiny stars, and cut out the circles. Brush Mod Podge on the lid, press the paper down, smooth out any bubbles, and add two more coats on top. Glue a circle of felt to the bottom so it will not scratch the table. Set the lid inside its ring for a neat metal edge. A set of four tied with ribbon makes a lovely hostess gift. Which paper pattern do you love?
You will need: flat jar lids and rings, holiday scrapbook paper, scissors, Mod Podge, a foam brush, felt, craft glue.
How to make it: 1. Cut paper circles to fit the lids and glue them on with Mod Podge. 2. Add two more coats on top and let each dry. 3. Glue felt to the bottom and set each lid in its ring.
Mini Wreath Fridge Magnets
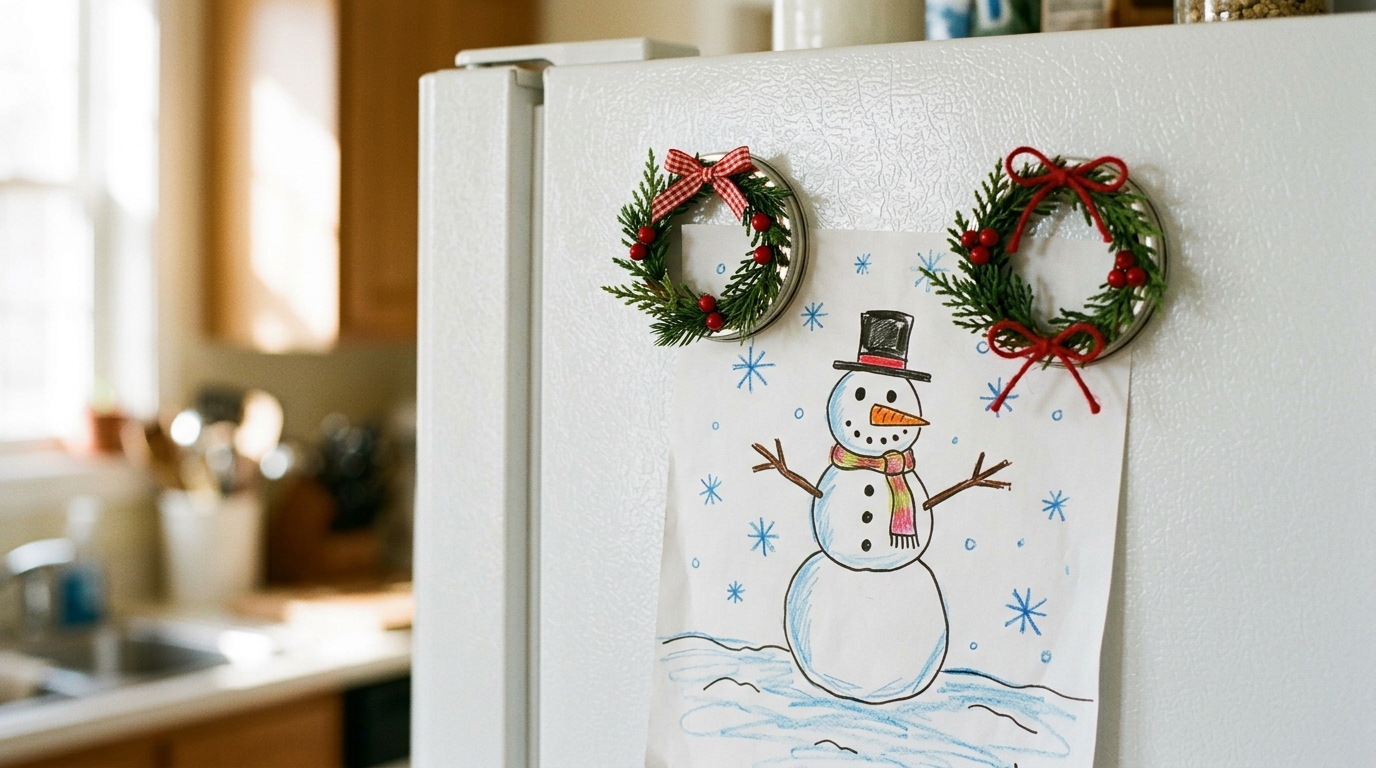
Small jar rings make adorable little wreaths for the fridge. Wrap each one with a strip of faux greenery garland, glue on two or three tiny red berries, and finish with a mini gingham bow. Glue a strong round magnet to the back. They hold up the kids’ Christmas drawings, party invitations and the holiday grocery list. Make a dozen in one evening while you watch a holiday movie and give a few away to neighbors. They also make sweet stocking stuffers. Whose drawing would you hang up first?
You will need: small metal jar rings, faux greenery garland, mini red berry picks, thin ribbon, strong round magnets, a hot glue gun with adult help.
How to make it: 1. Wrap greenery tightly around each ring and glue the ends. 2. Glue on berries and a tiny bow at the top. 3. Glue a magnet to the back and let it set.
Rustic Jar Ring Garland
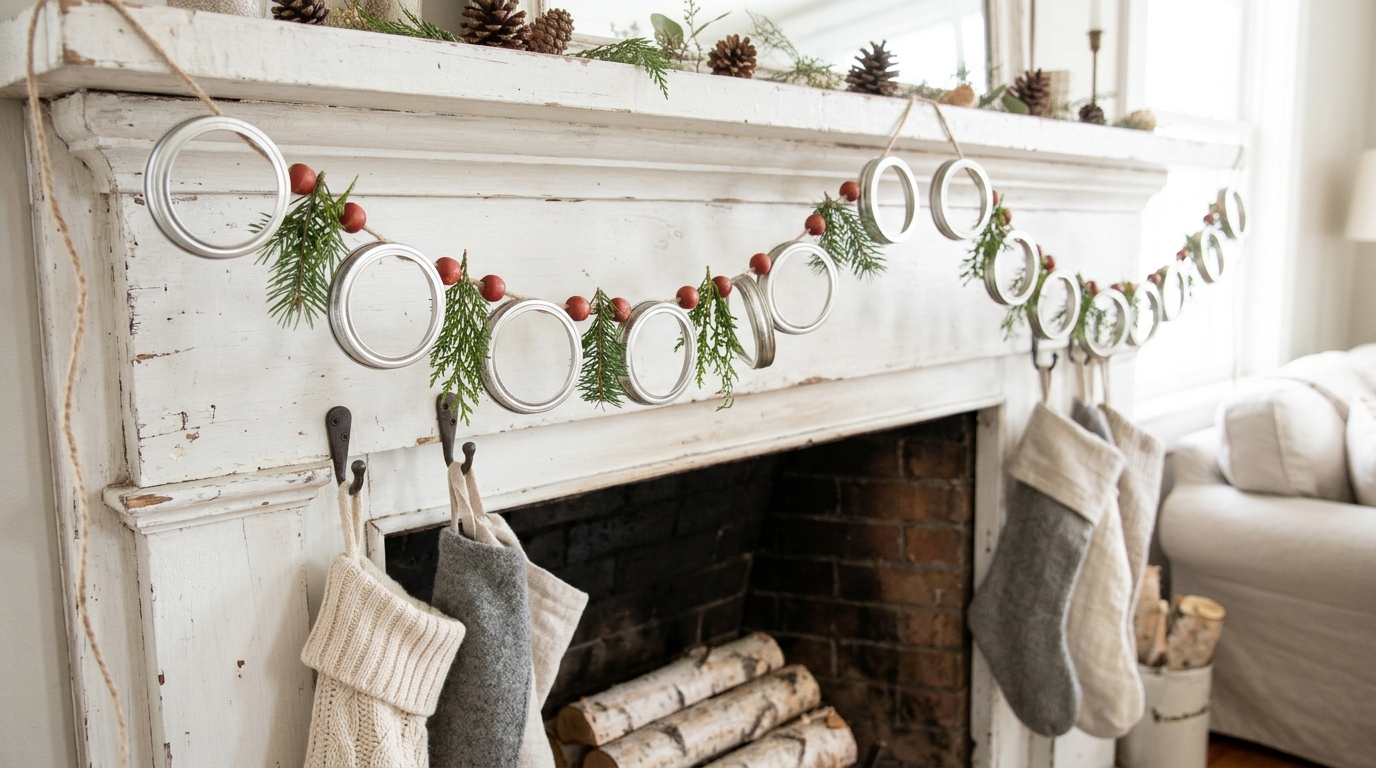
This rustic garland is one of the easiest projects here and looks great on a mantel, a staircase or a kitchen shelf. Tie each jar ring to a long piece of jute twine with a simple knot, spacing them about four inches apart. Thread two or three red wooden beads between the rings and tuck in small sprigs of real or faux greenery. The silver shine of the metal looks so pretty against white wood. Keep it far from any heater and use battery lights only. Where would you drape yours?
You will need: 15 to 25 metal jar rings, natural jute twine, red wooden beads, small greenery sprigs, scissors.
How to make it: 1. Cut twine about a foot longer than your mantel. 2. Knot the rings on, about four inches apart, adding beads between them. 3. Tuck in greenery sprigs and drape the garland in place.
John Landis Mason Decoupage Gift Tags

Turn simple kraft paper presents into something special with John Landis Mason gift tags. Cut circles from vintage style holiday napkins or wrapping paper and decoupage them onto flat jar lids with Mod Podge. Once dry, ask an adult to punch a small hole near the edge with a nail. Write the name on the back with a paint pen, then tie it on with twine. The best part is that the tag is a little gift too, because it can hang on the tree later. Who on your list gets the first one?
You will need: flat jar lids, holiday napkins or wrapping paper, Mod Podge, a foam brush, a nail and hammer with adult help, a paint pen, twine.
How to make it: 1. Decoupage a paper circle onto each lid with Mod Podge. 2. Let it dry, then have an adult punch a small hole near the edge. 3. Write the name on the back and tie it to the gift with twine.
Jar Lid Snowman Face Ornaments
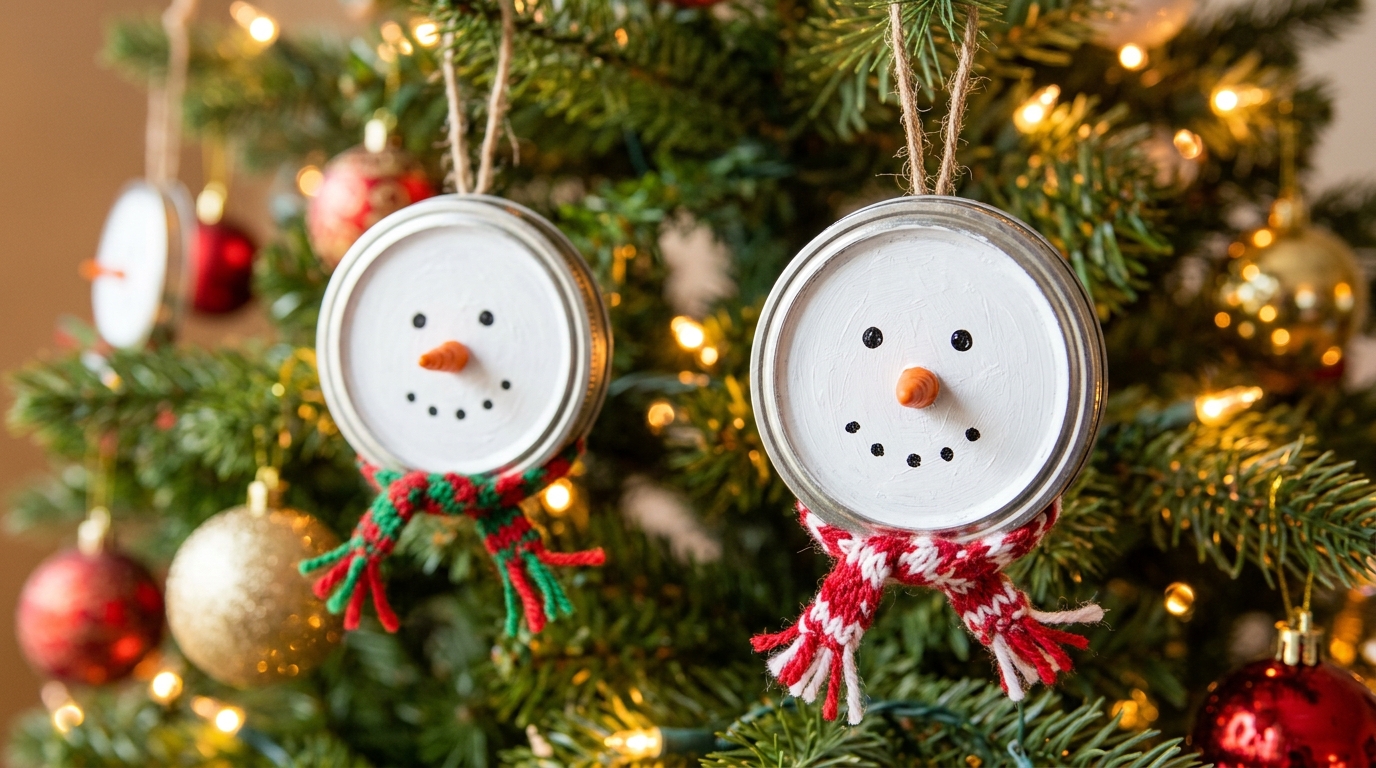
These cheerful snowmen are a fun project to make with the grandkids. Paint flat jar lids white, then add two black dot eyes and a smile with the end of a paintbrush. Shape a tiny carrot nose from orange clay, or simply paint one on. Cut a thin strip of an old sweater or striped fabric for a scarf and glue it under the face. Add a twine loop and they are ready for the tree. Each one comes out with its own little personality. What would you name your snowman?
You will need: flat jar lids, white and black acrylic paint, orange air dry clay or paint, scraps of striped fabric, twine, craft glue.
How to make it: 1. Paint the lids white and let them dry. 2. Dot on eyes and a smile, then add the carrot nose. 3. Glue on a fabric scarf and a twine hanging loop.
John Landis Mason Stacked Ring Christmas Tree
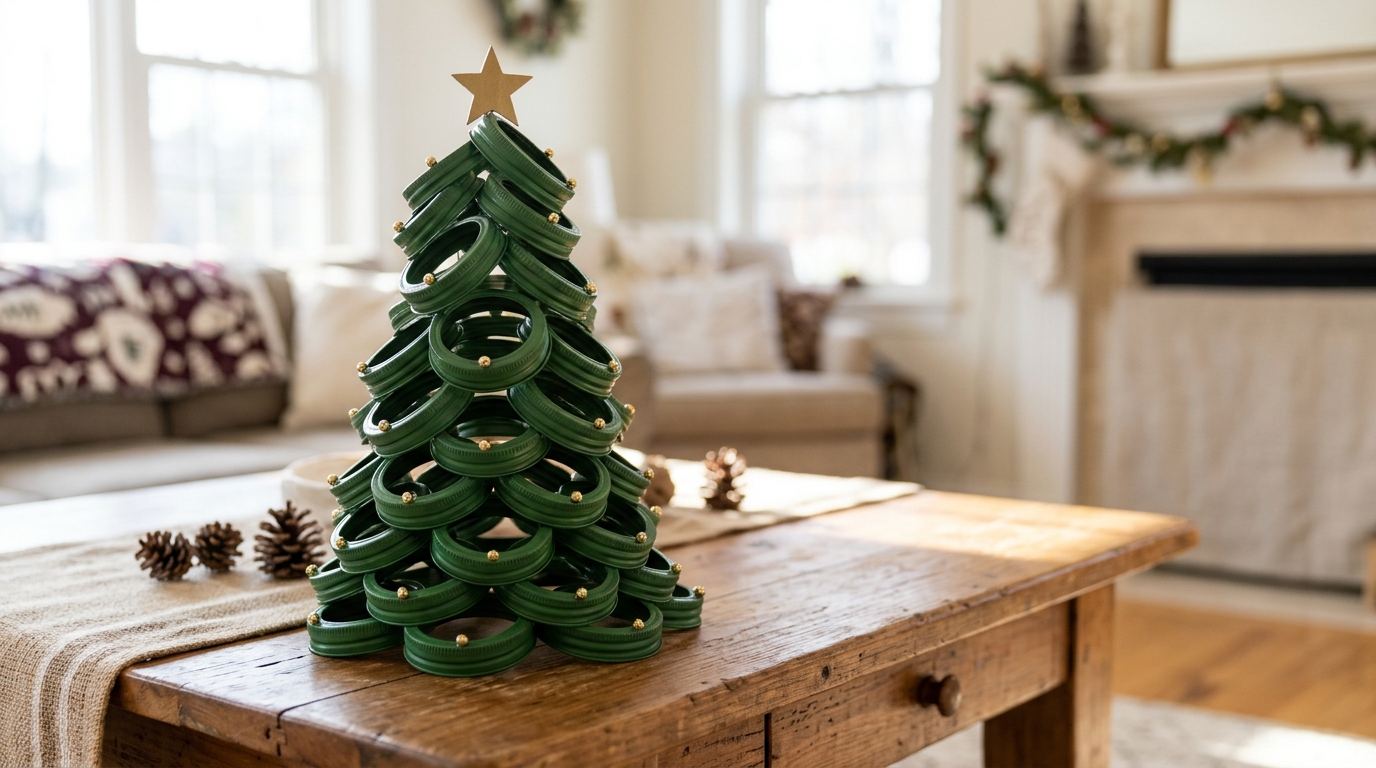
Stacking rings into a tree shape is a clever way to honor John Landis Mason and use up a big pile of rings at once. Start with a base row of rings glued in a circle, then build each new layer slightly smaller so the shape rises into a cone. Paint the finished tree forest green, dot on tiny gold beads as ornaments and glue a little star on top. It looks wonderful on a side table, a bookshelf or the kitchen counter. It is also strong enough to last for many years. How tall would you build yours?
You will need: 40 or more metal jar rings, strong craft glue or a hot glue gun with adult help, green spray or acrylic paint, small gold beads, a small wooden star.
How to make it: 1. Glue a base ring of jar rings in a circle on a flat surface. 2. Glue on smaller layers, one at a time, so they rise into a cone. 3. Paint it green, add gold beads and top it with a star.
Plaid Jar Lid Pincushion Gift
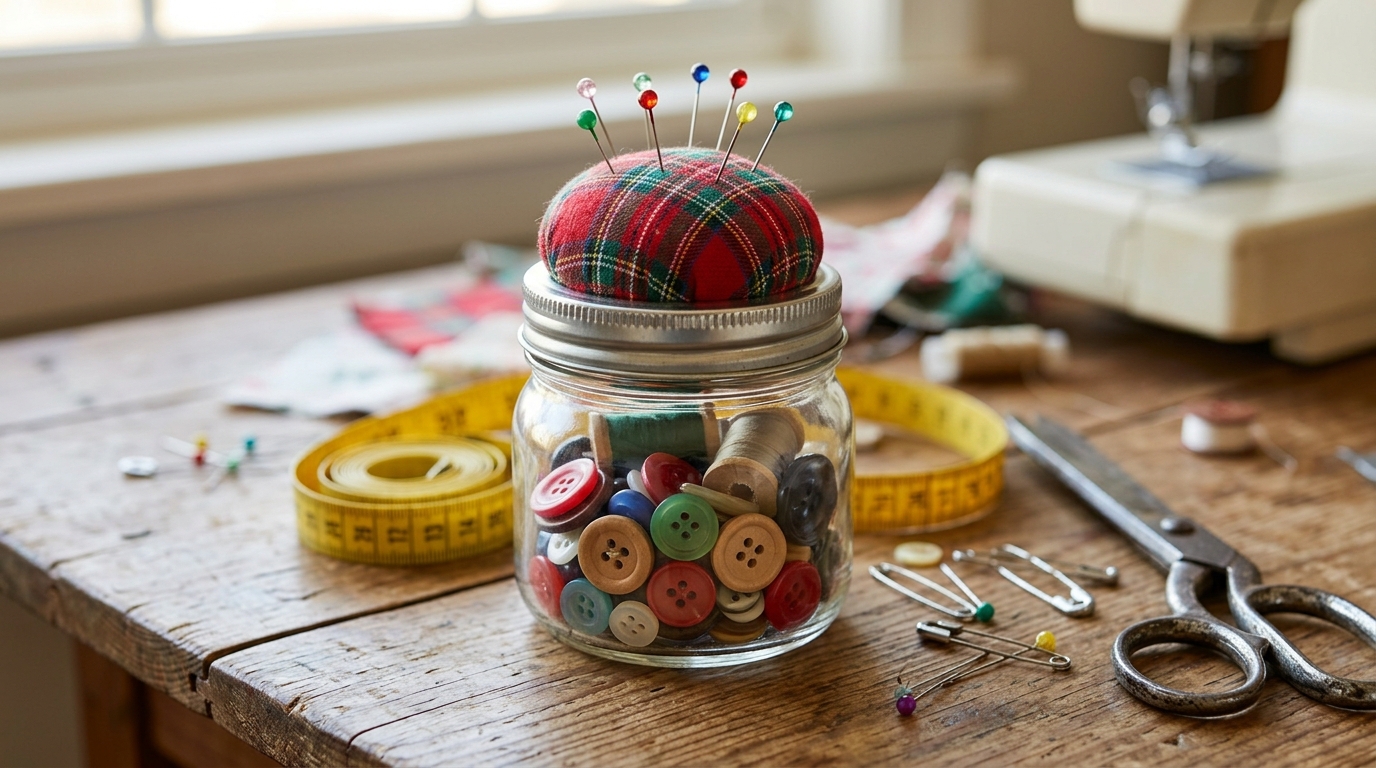
Know someone who loves to sew? This pincushion jar is a thoughtful gift that costs almost nothing. Cut a circle of plaid fabric about twice the size of the flat lid, place a ball of stuffing in the middle, and push it up through the ring so it puffs out on top. Glue the lid underneath to hold everything in place. Fill the jar with buttons, thread and a small measuring tape, then screw on the cushion top. It is useful, pretty and so cozy. Who in your family would love one?
You will need: a small glass jar with ring and flat lid, plaid fabric, polyester stuffing, scissors, craft glue or a hot glue gun with adult help, buttons and thread to fill.
How to make it: 1. Cut a fabric circle about twice the size of the lid. 2. Push the fabric and stuffing up through the ring and glue the flat lid underneath. 3. Fill the jar with sewing notions and screw on the top.
Chalkboard Jar Lid Place Cards
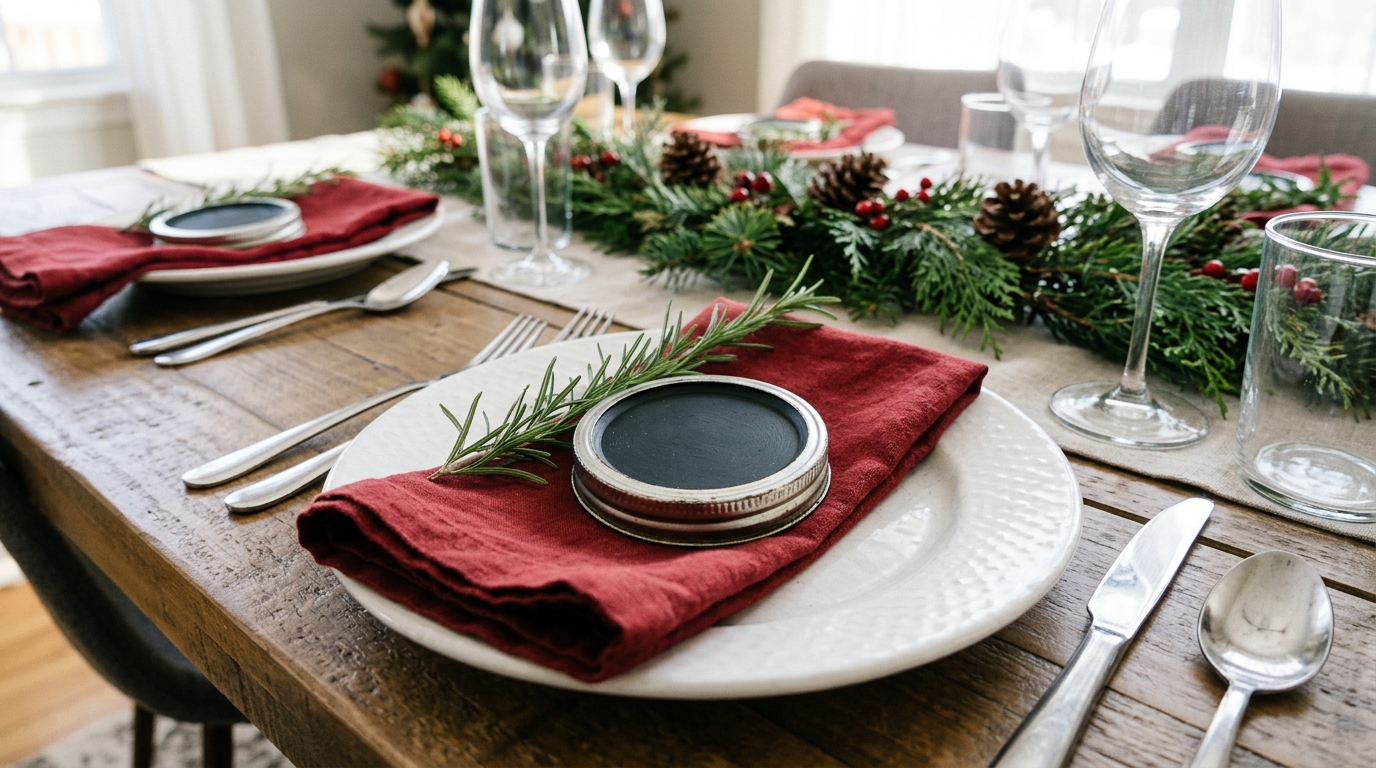
Make your holiday table feel thoughtful with chalkboard place cards. Paint flat jar lids with two coats of chalkboard paint and let them cure overnight. Set each one inside its ring so it has a neat silver rim. Write each guest’s name in white chalk marker and lay it on the plate with a sprig of rosemary and a folded red napkin. After dinner, guests can wipe them clean and take them home as a keepsake. They also work as food labels on a buffet. Who sits at the head of your table?
You will need: flat jar lids and rings, chalkboard paint, a foam brush, a white chalk marker, fresh rosemary sprigs.
How to make it: 1. Paint the lids with two coats of chalkboard paint and let them cure. 2. Set each lid inside its ring. 3. Write the names in chalk marker and place one on each plate.
John Landis Mason Jar Ring Advent Calendar
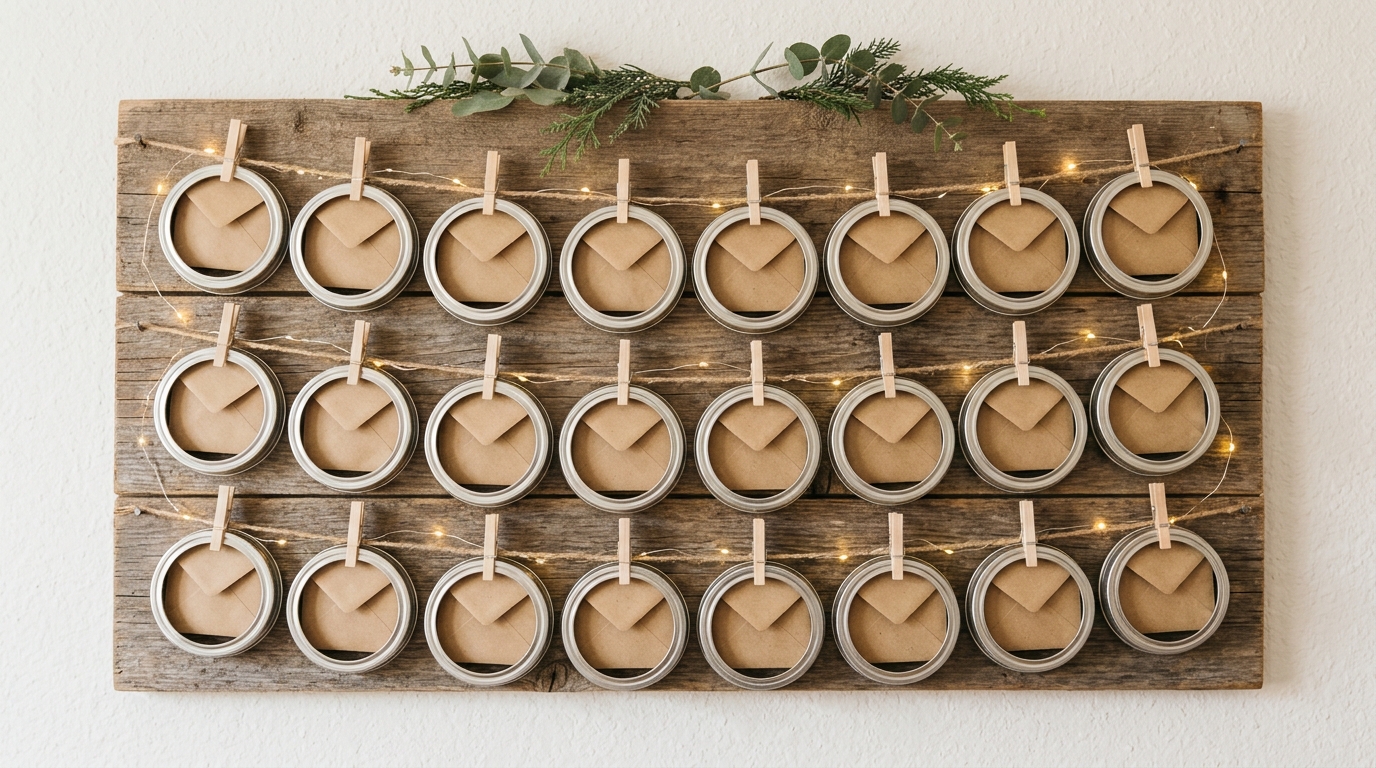
Count down to Christmas with a John Landis Mason advent calendar made from 24 jar rings. Screw small hooks or tap tiny nails into a rustic board in neat rows, with adult help, and hang one ring on each. Clip a little kraft paper envelope inside each ring with a mini clothespin and number them 1 to 24. Fill the envelopes with sweet notes, small treats or family activities like baking cookies or watching a movie. Add a strand of battery fairy lights for a warm glow. What would you tuck into day one?
You will need: 24 metal jar rings, a rustic wooden board, small hooks or nails with adult help, mini clothespins, small kraft envelopes, a pen, battery fairy lights.
How to make it: 1. Mark four rows of six on the board and add the hooks with adult help. 2. Hang a ring on each hook and clip an envelope inside. 3. Number the envelopes, fill them and add the battery lights.
Mini Winter Scene Shadow Box Ornament

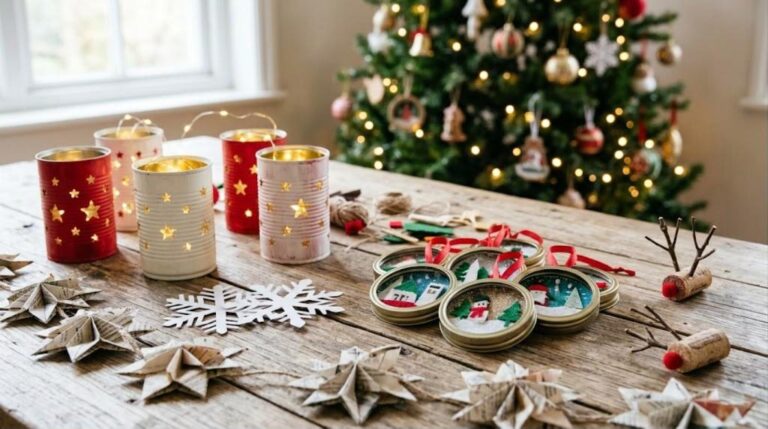
This tiny winter world might be the most charming ornament on the tree. Glue a circle of white cardstock to the back of a jar ring to make a shallow shadow box. Inside, glue two or three mini bottle brush trees and a little wooden house, then sprinkle fake snow along the bottom with a dab of glue. Add a clear plastic circle on the front if you want to keep it dust free. Finish with a twine loop. Make one for each family member with a different house color. Which color house would you pick?
You will need: a metal jar ring, white cardstock, mini bottle brush trees, a tiny wooden house, fake snow, craft glue, clear plastic sheet (optional), twine.
How to make it: 1. Glue cardstock to the back of the ring to make a little box. 2. Glue in the trees and house, then add fake snow. 3. Cover the front with clear plastic if you like and add a loop.
Stained Glass Jar Ring Sun Catchers
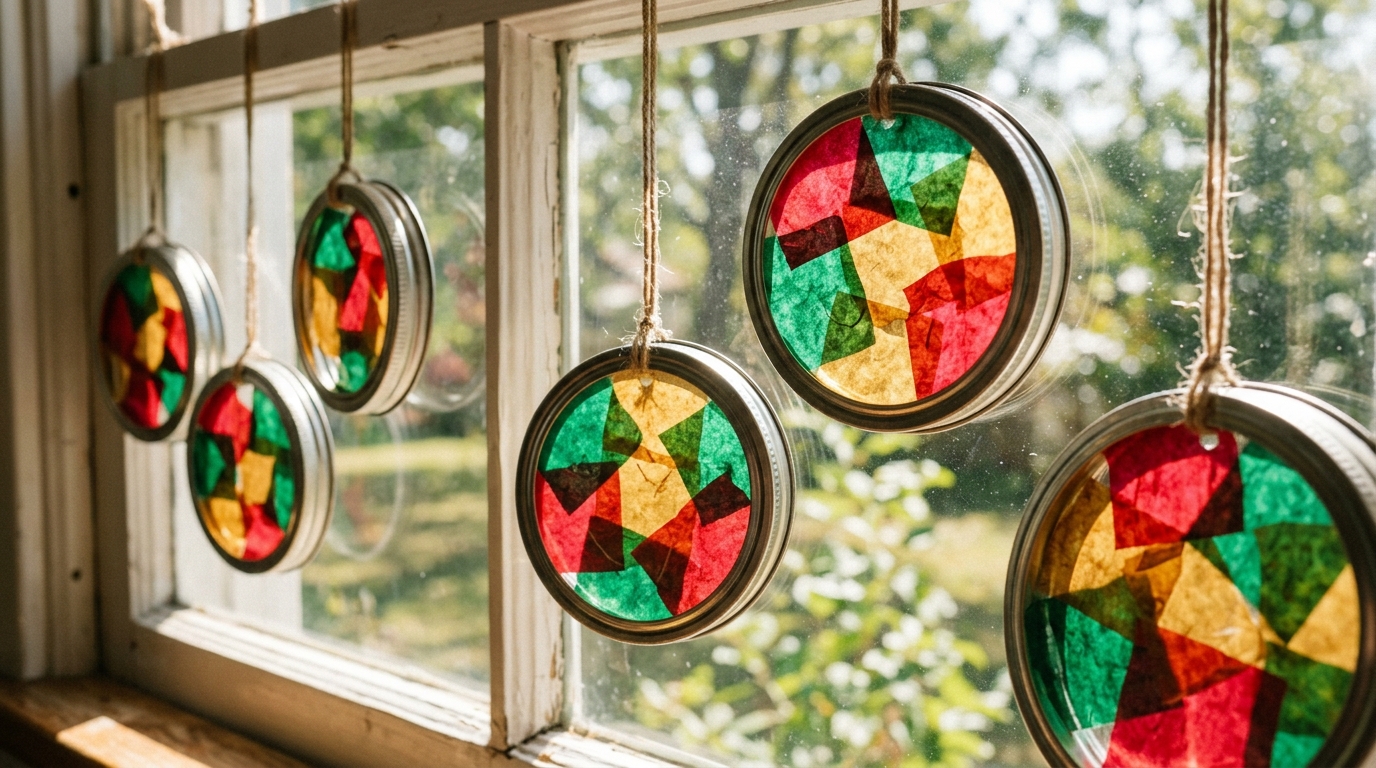
End with a project that glows. Cut a circle of clear contact paper the size of a jar ring, sticky side up, and press small torn pieces of red, green and gold tissue paper onto it. Cover it with a second piece of contact paper, trim the edges and glue it inside the ring. A thin coat of Mod Podge over the tissue gives a stained glass look. Hang a cluster in a sunny window and the light shines through like colored glass all winter long. Kids love helping with this one. Which window gets your morning sun?
You will need: metal jar rings, clear contact paper, red, green and gold tissue paper, scissors, Mod Podge, craft glue, twine.
How to make it: 1. Press torn tissue pieces onto a circle of sticky contact paper. 2. Seal with a second circle and trim to fit the ring. 3. Glue it inside the ring, brush on Mod Podge and hang in a window.