Retro Gas Pump Miniature: 14 Steps to the Tiny Vintage Build Nearly 9 Million People Watched
A retro gas pump miniature small enough to sit in the palm of your hand has quietly become one of the most watched miniature builds of the year. Made by a diorama maker from the Philippines out of wood, paper and wire, then aged until it looks decades old, the little red and yellow pump pulled in nearly 9 million views. Why does it grab people so hard? Maybe it is the nostalgia of old roadside stations, or the joy of watching tiny parts come together one tweezer move at a time. Below we walk through the build in 14 simple stages you can copy at your own table, then share a few easy retro minis to try next. Clear a little space, find your smallest brush and get ready to shrink the past..
Meet the Maker Behind the Retro Gas Pump Miniature
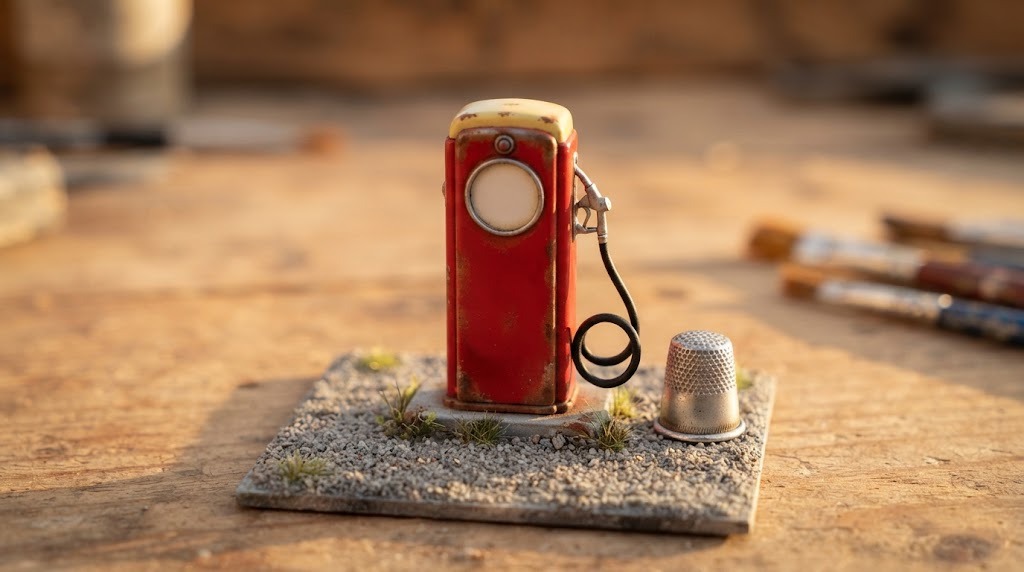
The build comes from Diorama PH, a miniature channel from the Philippines with about 325,000 subscribers, and the video credits artist Mark Sagum. Posted on March 25, 2026, the gas pump video has passed 8,989,128 views and more than 31,000 likes. There is no talking and no fancy studio, just patient hands, simple materials and a lot of tiny details. Watching it feels like a quiet trip back to a small town road decades ago. Let us see how a few scraps turn into this little time capsule..
You will need: A small block of soft wood, cardstock, thin wire, black rubber tubing, acrylic paints, craft glue and fine tweezers (the full kit for this build).
How to make it: 1. Watch the original video once without stopping to see the whole process. 2. Gather your materials in a small tray so nothing rolls away. 3. Sketch a simple side view of an old pump to use as your guide. 4. Set aside two or three evenings, since this is a slow and relaxing build.
Step 1: Cutting the Pump Body From Wood
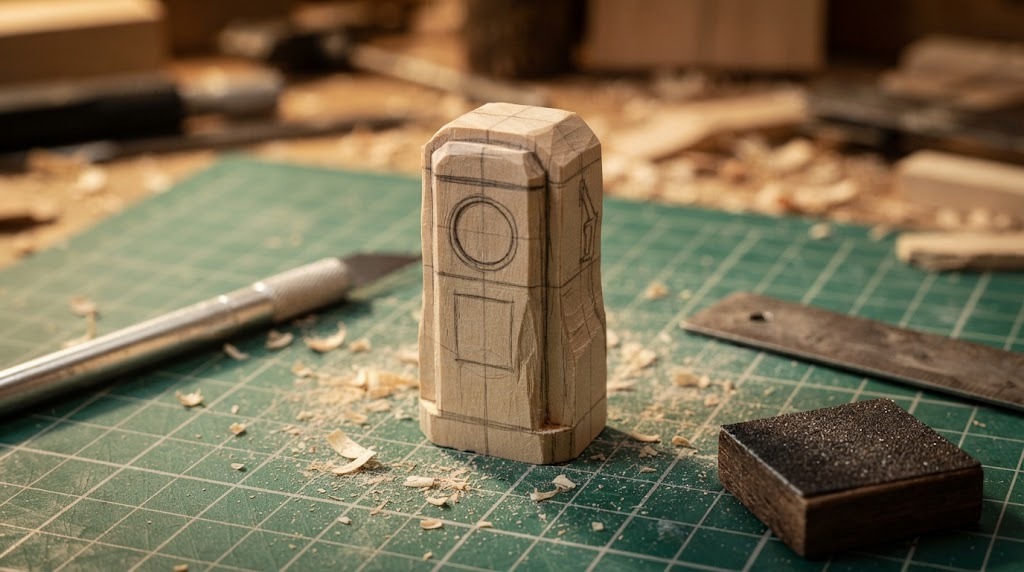
Every good retro gas pump miniature starts with a solid core. The pump body is a small block of soft wood, cut into a tall box with rounded shoulders, the classic shape of an old roadside pump. Soft woods like basswood or balsa are easy to shape with a craft knife and sandpaper, and they take paint beautifully. Take your time here, because a neat, square body makes every later step look sharper. Do you have a scrap of wood waiting in a drawer?
You will need: A small block of basswood or balsa (about 1 x 1.5 x 4 inches), a pencil, a craft knife (adult help), a metal ruler, fine sandpaper.
How to make it: 1. Draw the pump outline on two sides of the block. 2. With adult help, carve away the waste wood in small, shallow cuts. 3. Round the top corners with sandpaper. 4. Sand all sides smooth and wipe off the dust.
Step 2: Rolling Tiny Metal Tubes for Retro Gas Pump Miniature Details
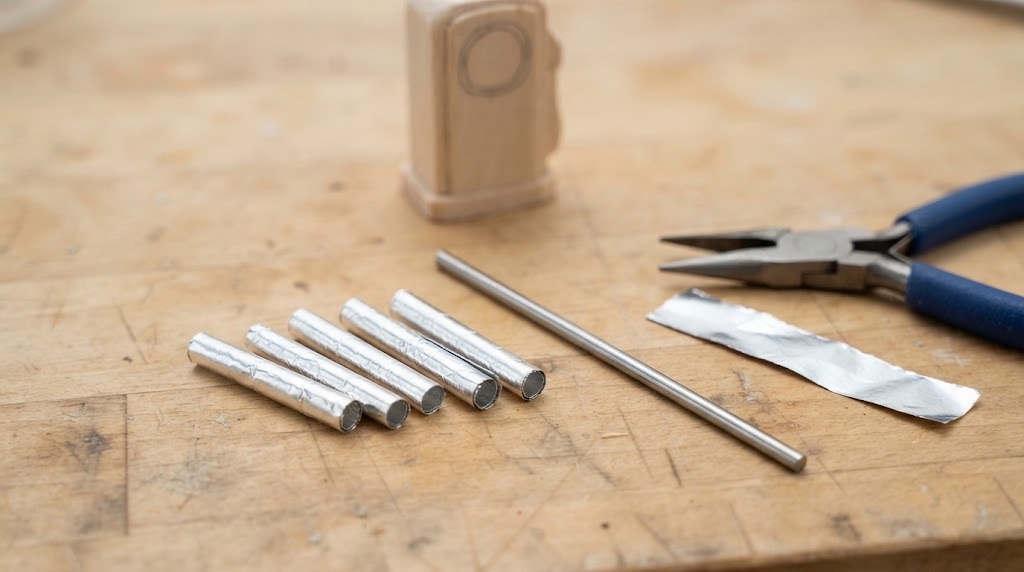
One of the most satisfying moments in the video is watching a thin strip of metal roll into a perfect little tube. On a retro gas pump miniature these tubes become pipes, trim and the holder for the nozzle. You can do the same with a strip cut from a clean aluminum tray or heavy foil, rolled tight around a thin rod or a toothpick. They add real metal shine that paint alone cannot fake. Who knew kitchen foil could look this convincing at tiny scale?
You will need: A clean aluminum food tray or heavy duty foil, scissors, a thin metal rod or toothpick, small flat pliers, craft glue.
How to make it: 1. Cut thin strips of aluminum about 1/2 inch wide. 2. Wrap each strip tightly around the rod. 3. Add a dot of glue at the seam and hold for a few seconds. 4. Slide the tube off and trim it to length with scissors.
Step 3: Making the Dial Window
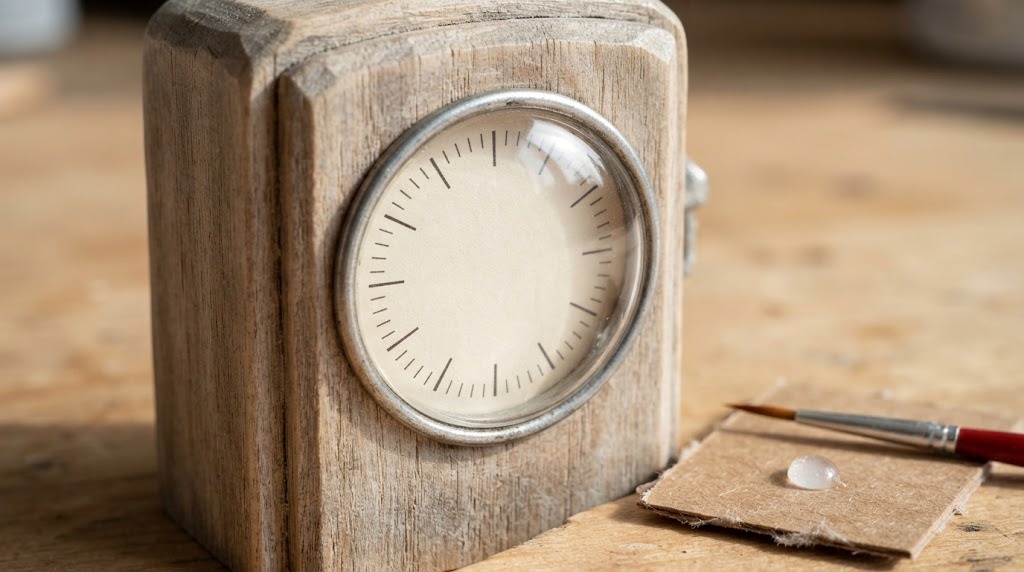
Old pumps had a big round dial face that showed the price and gallons, and it is the detail people notice first on any retro gas pump miniature. A small circle of clear plastic from product packaging makes a perfect window. Behind it goes a cream paper dial with tiny tick marks drawn in fine pen. A thin ring of silver paper or wire frames it all. When light hits the plastic, it really looks like glass. Will you draw your own little dial marks?
You will need: Clear plastic from packaging, a small round lid to trace, cream paper, a fine black pen, silver paper or thin wire, craft glue.
How to make it: 1. Trace and cut a small circle of cream paper and draw simple tick marks. 2. Cut a matching circle of clear plastic. 3. Glue the paper dial to the pump face and set the plastic on top. 4. Frame the edge with a ring of silver paper or wire.
Step 4: Tiny Paper Parts Placed With Tweezers
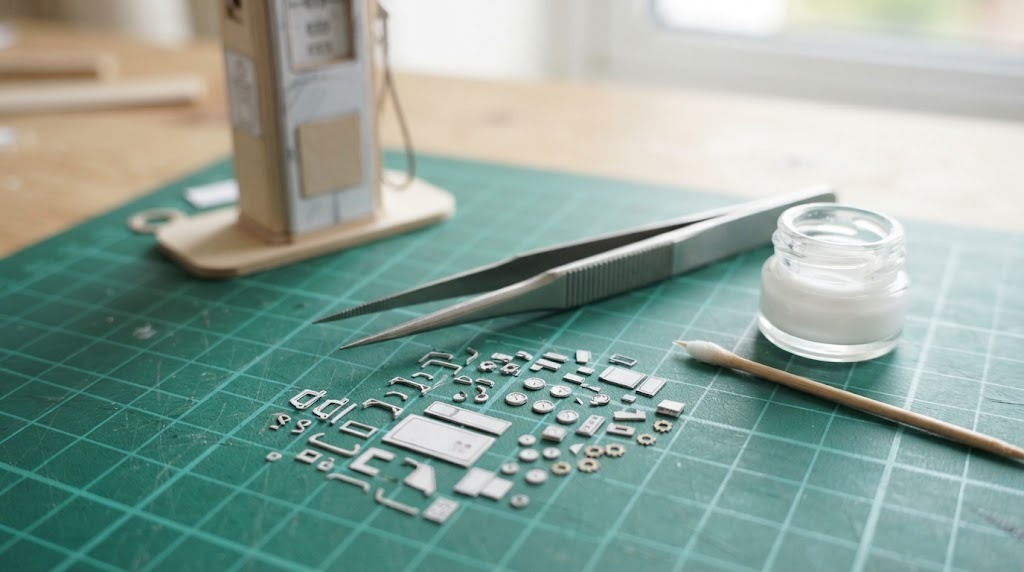
This is where patience pays off. The maker cuts tiny paper parts for the retro gas pump miniature, some barely bigger than a grain of rice, and places each one with tweezers. Paper is perfect for panels, brackets and trim because it is thin, easy to cut and stiff once glued and painted. The trick is to use very little glue on the tip of a toothpick. It is slow, calm work, almost like meditation. Could you handle the tweezer challenge?
You will need: Cardstock and printer paper, small sharp scissors, fine pointed tweezers, white craft glue, a toothpick.
How to make it: 1. Cut thin strips of cardstock for panel edges and trim. 2. Snip tiny rectangles for brackets and handles. 3. Dab glue on the pump with a toothpick, not on the part. 4. Pick up each piece with tweezers and press it into place.
Step 5: Painting the Retro Gas Pump Miniature Red and Yellow
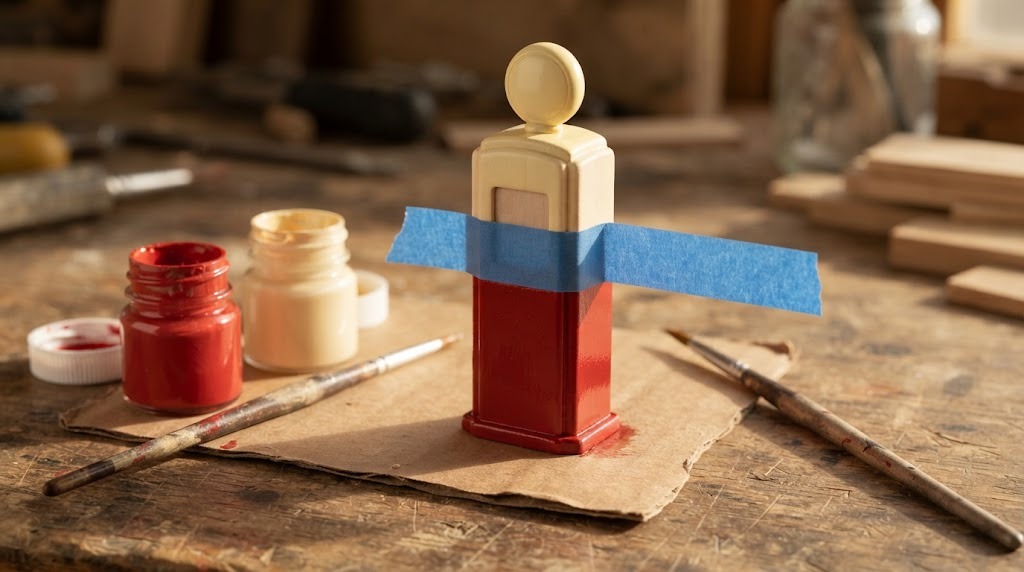
Color is what turns plain wood into a vintage icon. Bright red on the body and a creamy yellow top were classic roadside colors, and they pop even at this tiny size. Thin coats are better than thick ones, since heavy paint fills in your fine details. Painters tape helps keep the line between colors crisp. Let each coat dry fully before the next. Which color combo would you pick for your own pump?
You will need: Red and cream yellow acrylic paint, white primer or gesso, two fine brushes, painters tape, a cardboard scrap to work on.
How to make it: 1. Brush on a thin coat of primer and let it dry. 2. Tape off the top section. 3. Paint the body red in two thin coats. 4. Remove the tape, tape over the red and paint the top yellow.
Step 6: Building a Balsa Wood Base
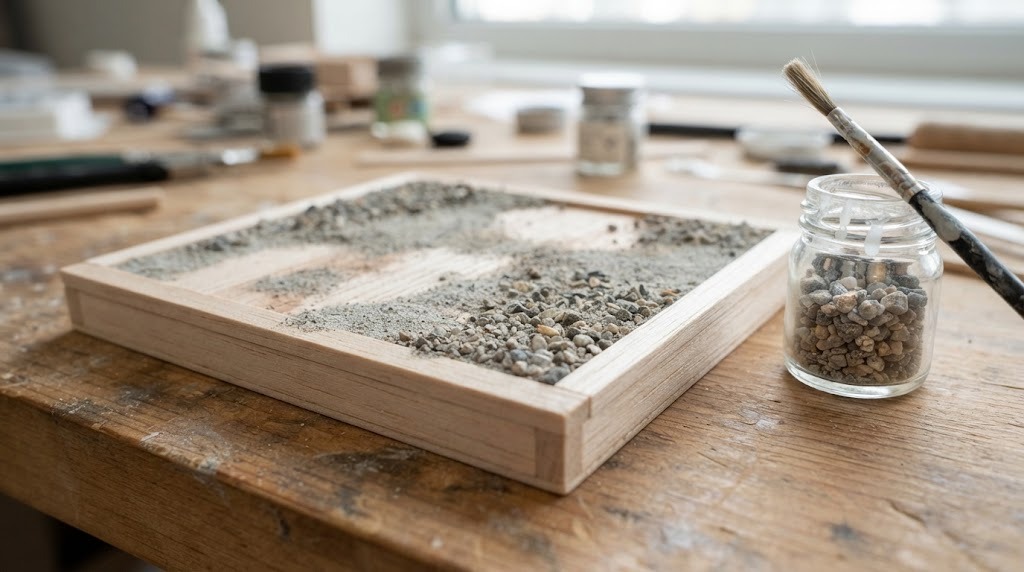
A retro gas pump miniature looks ten times more real when it stands on its own little piece of ground. A simple square of balsa wood with a thin raised curb becomes a slab of old pavement once you add fine sand and gravel. Brush on glue, sprinkle, tap off the extra and repeat. A few bits of dried moss or model grass at the edges make it feel like weeds poking through cracks. What kind of ground would your mini sit on?
You will need: A thin balsa sheet, balsa strips, craft glue, fine sand, small gravel or aquarium grit, a glue brush, dried moss (optional).
How to make it: 1. Cut a square base about 3 inches wide. 2. Glue thin strips around the edges as a curb. 3. Brush glue over the top and sprinkle on sand and gravel. 4. Let it dry, shake off the extra and add moss to the edges.
Step 7: Making the Hose From Wire and Tubing
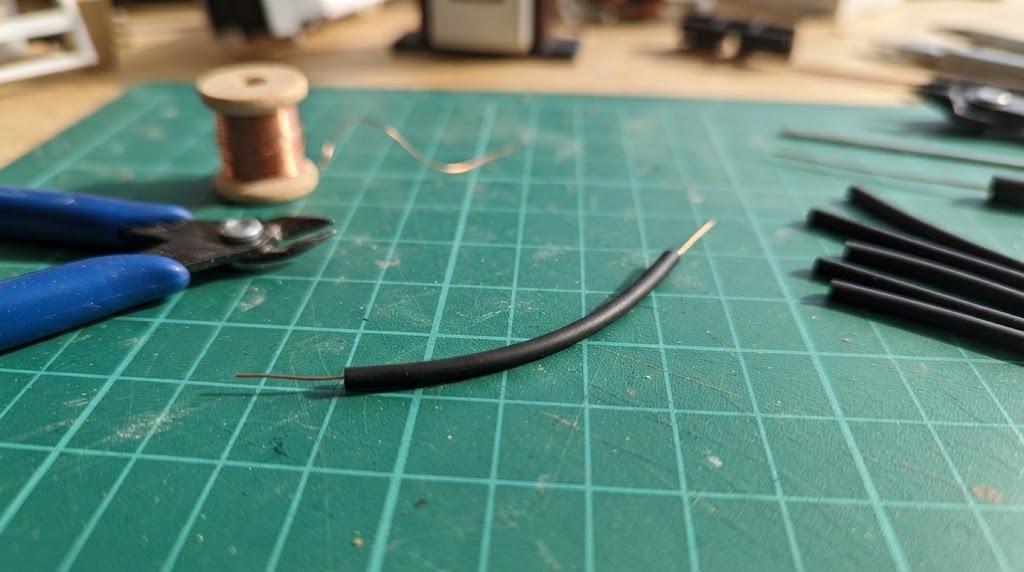
A real looking hose needs to curve and stay put, and the secret is wire hidden inside thin rubber tubing. The wire lets you bend the hose into a lazy loop that hangs just right, just like the one in the video. Thin black tubing from a craft or hobby store works well. Bend it gently a few times to find the most natural curve. Is it not amazing how such a small part brings the whole model to life?
You will need: Thin black rubber or silicone tubing, thin copper or craft wire, small wire cutters (adult help), craft glue.
How to make it: 1. Cut a piece of tubing about 4 inches long. 2. Thread a slightly longer piece of wire through it. 3. Glue one end into a small hole poked in the pump side. 4. Bend the hose into a soft loop toward the nozzle holder.
Step 8: The Little Nozzle and Holder
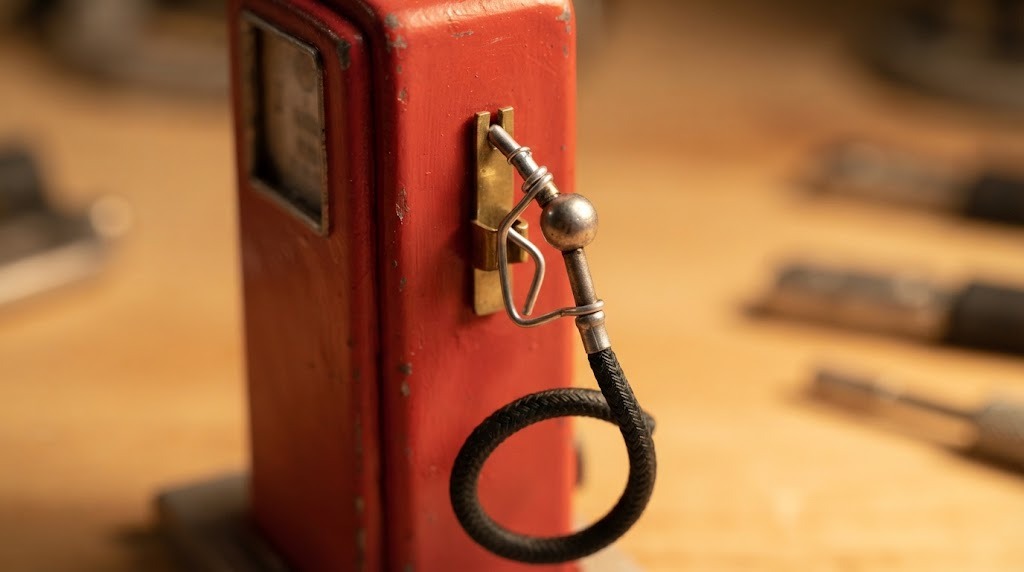
The nozzle is the cherry on top, and it is made from almost nothing. A bent bit of wire forms the handle, a small bead becomes the body, and a short rolled tube makes the spout. Painted silver, it looks just like the real thing. A tiny bracket on the side of the pump gives it a place to rest. This is the part kids love to point at when they see the finished retro gas pump miniature. What would you use for your own nozzle?
You will need: Thin wire, a small bead, one of your rolled metal tubes, silver paint, a fine brush, strong craft glue.
How to make it: 1. Bend wire into a small curved handle. 2. Glue the bead and a short tube onto the handle to form the nozzle. 3. Paint it silver and let it dry. 4. Glue a small paper bracket on the pump and rest the nozzle in it.
Step 9: Rust and Weathering on the Retro Gas Pump Miniature
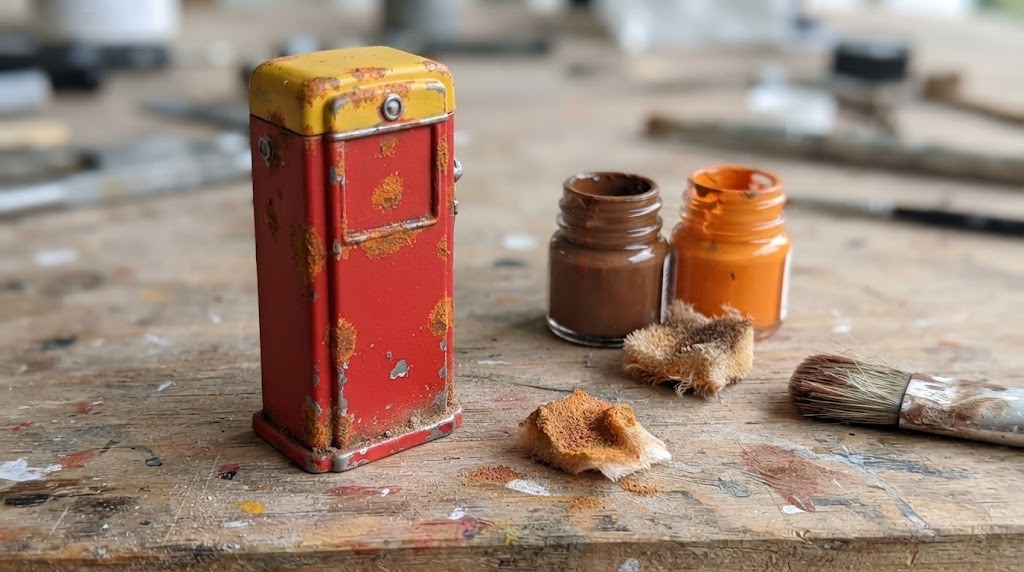
Here is where the magic happens. A shiny new model suddenly looks fifty years old once you add rust, chips and dust. Dab small patches of brown and orange paint on the edges with a torn bit of sponge, then dry brush a little gray and tan near the bottom where dirt would collect. Less is more, so build it up slowly. Step back often to see it from a distance. Are you brave enough to rough up your perfect paint job?
You will need: Brown, orange, black and tan acrylic paint, a small torn sponge, an old dry brush, a paper towel.
How to make it: 1. Dip the sponge in brown paint and blot most of it off. 2. Dab it lightly on edges, corners and around the base. 3. Add touches of orange over the brown for fresh rust. 4. Dry brush tan and gray dust along the bottom and the base.
The Payoff: A Retro Gas Pump Miniature That Fits in Your Palm
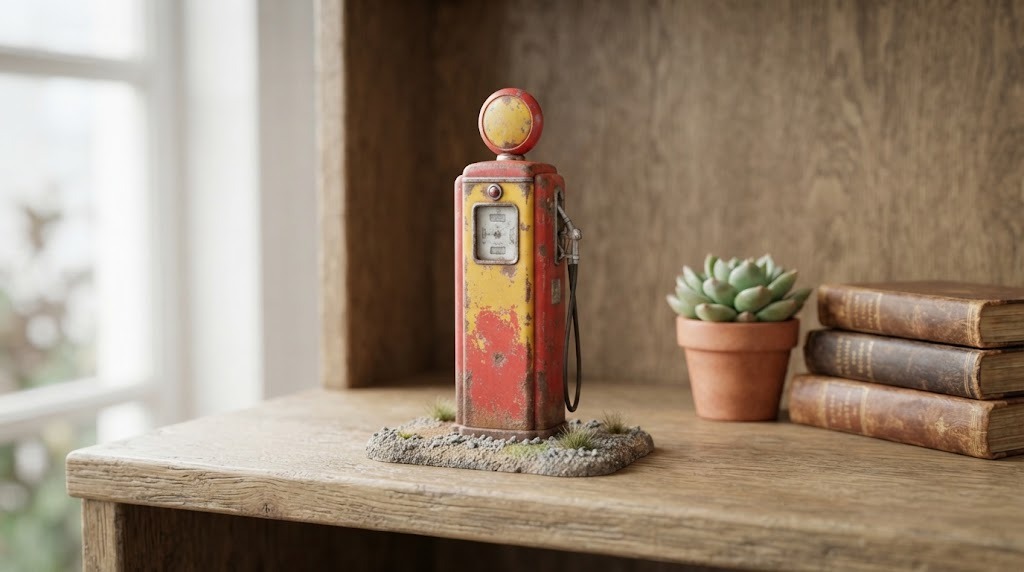
When it is done, the whole pump fits in the palm of your hand, yet every part looks real, from the round dial to the curled hose. That mix of tiny scale and big nostalgia is why nearly 9 million people stopped to watch. It looks wonderful on a bookshelf or desk, and it starts conversations with anyone who remembers old service stations. For more tiny builds that fool the eye, see these cardboard miniatures that look like the real thing. Where will yours go?
You will need: Your finished pump, brush on matte varnish, a small clear display box (optional), a soft brush for dusting.
How to make it: 1. Brush a thin coat of matte varnish over the whole model. 2. Let it cure overnight. 3. Place it on a shelf away from direct sun. 4. Dust it gently with a soft brush now and then.
Try It: Vintage Mailbox Miniature
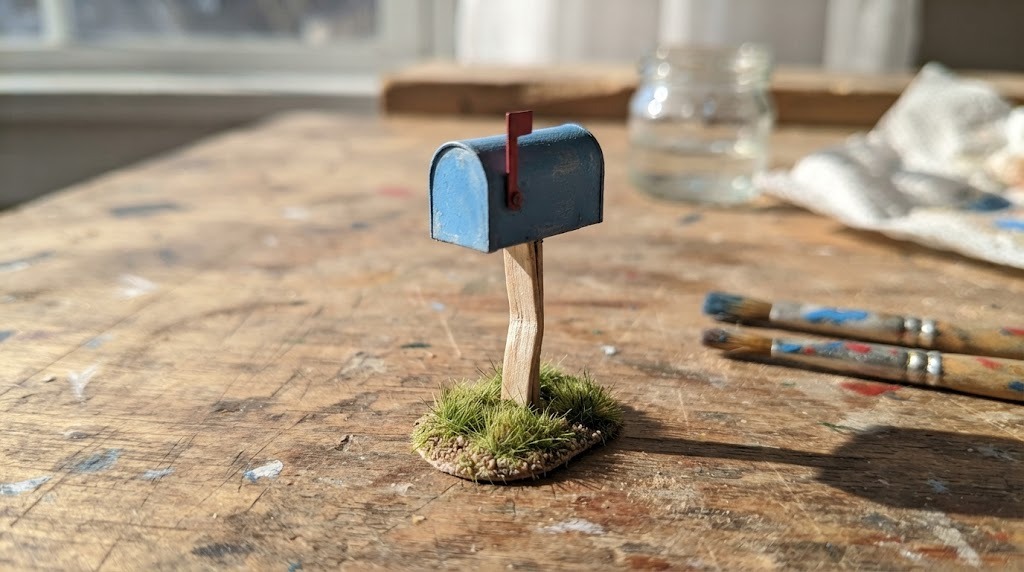
Loved the retro gas pump miniature but want a quicker project? A vintage rural mailbox is a great next step. The rounded top is just a strip of cardstock bent over a small box, and a craft stick makes the post. Paint it a faded color, add a tiny red flag, and weather it lightly with the same sponge trick. It pairs perfectly with your pump on the same shelf, like a little country road scene. What color was the mailbox you grew up with?
You will need: Cardstock, a craft stick, craft glue, blue and red acrylic paint, a small sponge, a bit of model grass or moss.
How to make it: 1. Fold cardstock into a small open box and glue a curved strip on top. 2. Glue the box onto a cut craft stick post. 3. Paint it, then add a tiny red paper flag. 4. Weather the edges and set the post into a patch of moss.
Try It: Retro Phone Booth From a Matchbox
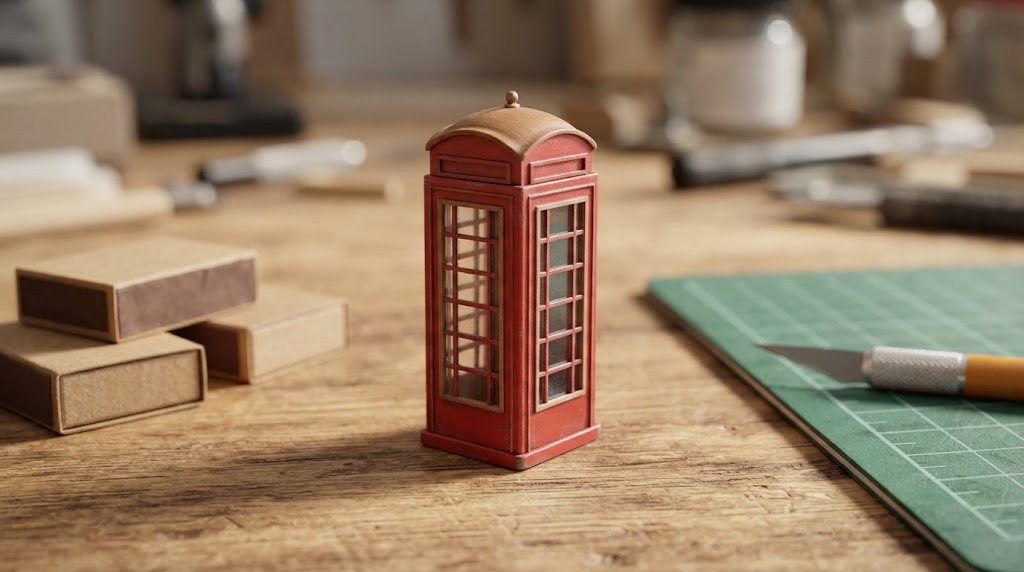
An empty matchbox has the perfect proportions for a tiny phone booth. Thin wood strips form the frame, clear plastic makes the windows and a curved card piece becomes the roof. Paint it bright red and you have a charming little piece of retro street life. Kids can help with the painting and gluing while an adult handles the cutting. It makes a sweet partner for your retro gas pump miniature, a cute desk piece or a gift for someone who loves old things. Remember when every corner had one of these?
You will need: An empty matchbox with the matches removed, thin wood strips or coffee stirrers, clear plastic from packaging, cardstock, red acrylic paint, craft glue.
How to make it: 1. Stand the matchbox drawer on end as the booth body. 2. Glue wood strips around it to make window frames. 3. Glue clear plastic behind the frames and a curved card roof on top. 4. Paint everything red and add light weathering.
Try It: Mini Garage Shelf for Toy Cars
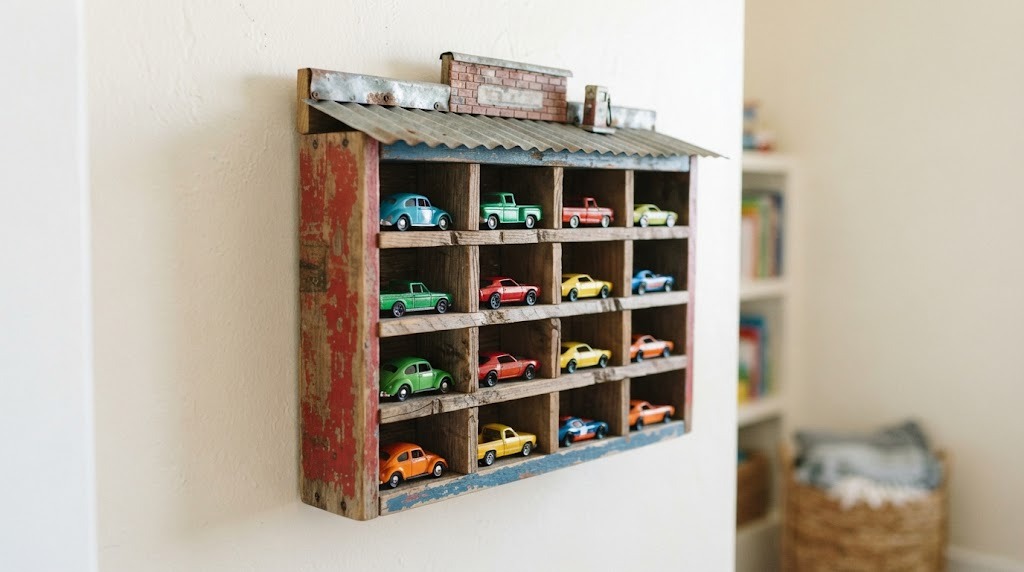
If you have a little car lover at home, this is the project that ties it all together. A shallow wooden shelf divided into cubbies, with a tiny tin roof and weathered paint, becomes a vintage garage where toy cars can park. Use the same aging tricks from the pump so it feels like part of one retro collection. You could even set your retro gas pump miniature on top as the finishing touch. It keeps toys off the floor and looks great on the wall. Which room would this brighten up?
You will need: A shallow wooden box or crate, thin wood strips, corrugated cardboard for the roof, wood glue, acrylic paints, a sponge, wall hanging hardware (adult help).
How to make it: 1. Glue wood strips inside the box to make even cubbies. 2. Glue a strip of corrugated cardboard along the top as a tin roof. 3. Paint the shelf and weather it with the sponge. 4. Have an adult mount it securely on the wall and park the cars.